YouTube Copyright Claim? How to Trim, Replace or Erase the Song — and When to Dispute
 CreatorPlaybook Team
- 29 Oct, 2026
A copyright claim on a video you worked hard on can feel like a punishment, even when you did nothing dishonest. In most cases it is not. A Content ID claim usually means YouTube matched part of your video, often a song, to material a rights holder has registered, and the rights holder chose what happens next. The video may stay up, it may be blocked in some places, or its advertising revenue may go to the claimant. Your first job is not to panic, dispute, or delete. Your first job is to read the claim exactly as Studio shows it, because the right fix depends on what was claimed, where, and for how long.
This guide walks through the checks and fixes in YouTube Studio in order. You will learn how to tell a claim from a strike, how to see the exact work, claimant, and territory, how the three Studio fixes differ, what to gather before you dispute, and how to choose between disputing, fixing, or leaving the claim alone. Read Studio’s warning on the edit screen before you save any change. This is general information, not legal advice. If a dispute could affect important income or a channel you depend on, consider professional advice.
Related reading: How to Protect Your Channel from Strikes, Copyright and Reused Content.
What You Will Learn
- How to tell a Content ID claim, a copyright strike, and a blocked or muted video apart.
- How to find the exact claimed work, claimant, and territory in Studio.
- What Trim out segment, Replace song, and Erase song each do, and what each costs.
- What evidence you need before a dispute is honest and safe to file.
- When to dispute, when to fix in Studio, and when to leave a claim alone.
- A calm seven-day plan for checking, deciding, and fixing one claimed video.
Step 1: Identify the Claim Type
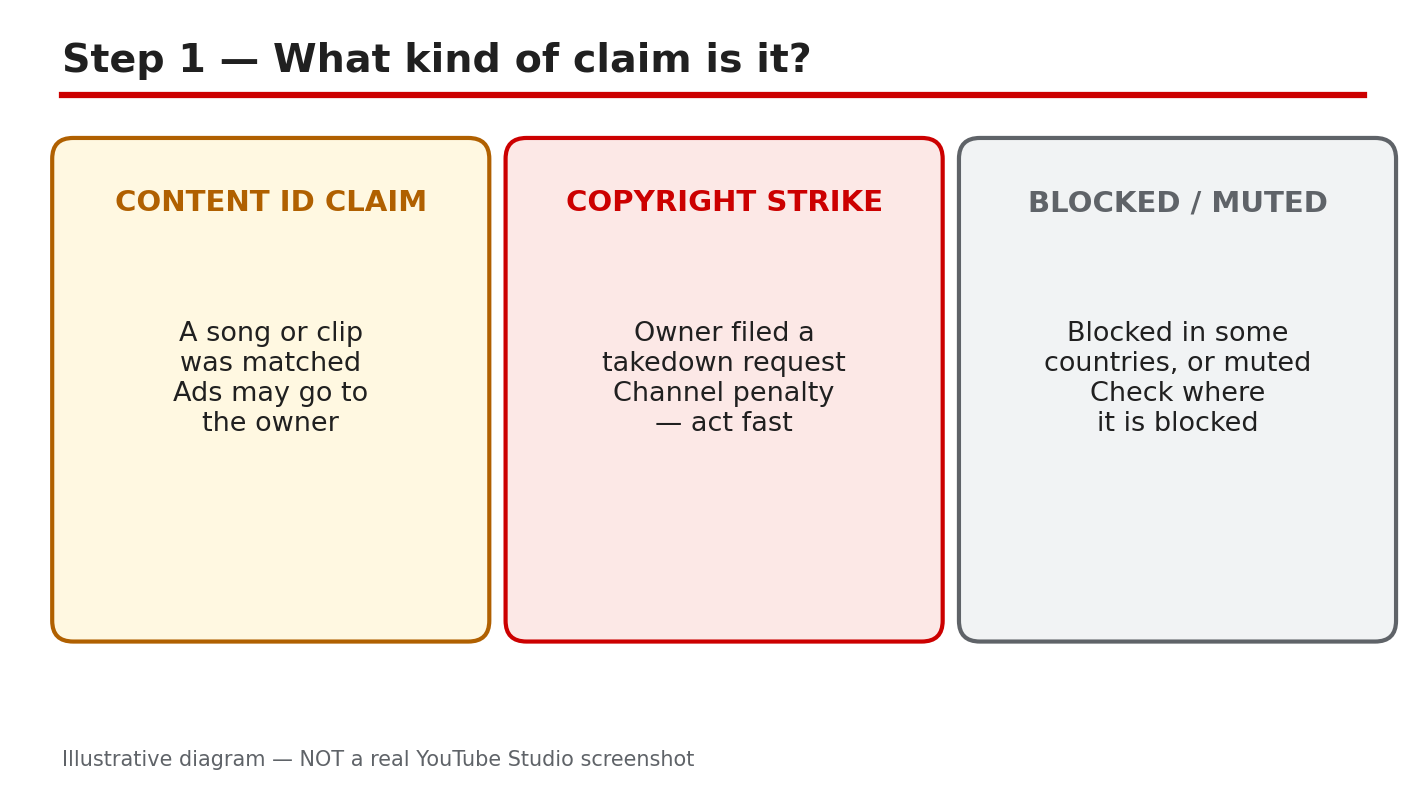
What to do: Before you touch the video, name the problem correctly. A Content ID claim, a copyright removal request that creates a strike, and a restriction such as a block or mute are different systems, with different consequences. YouTube says copyright claims are different from copyright strikes and usually do not impact your channel or account, while a strike comes from a formal takedown request and is more serious. A claim can block, monetize, or track a video, and any of those actions can be geography-specific, so a video can be monetized in one country and blocked in another. Do not treat every notice as a strike, and do not treat a strike as a minor claim.
Studio path: YouTube Studio > Content > Restrictions column. Hover over the entry for the video and read whether it says Claims, Copyright - Takedown, or another restriction. Click See details only after you have noted the label.
Example: A tutorial shows “Claims” in Restrictions, plays normally for you, but earns no revenue for you. That is most likely a Content ID claim, not a strike.
Common mistake: Deleting the video in a panic. Deletion removes your watch time and comments, and it does not teach you what caused the claim, so the next video can repeat it.
Illustrative diagram/mock-up comparing claim types. This is NOT a real YouTube Studio screenshot.
Step 2: Read the Exact Claim Details
What to do: Open the claim details and write down four facts before you decide anything: the exact work named, who claimed it, what action applies, and where it applies. A claim can cover only a short segment, and different claimants can claim different segments or different countries. You may also have more than one claim on one video. If you do not know the claimant, do not assume the claim is invalid. YouTube notes that a claimant you do not recognize may be a collecting society or another authorized representative, so an unfamiliar name alone is not proof of error.
Studio path: YouTube Studio > Content > Restrictions > click the claim > See details > Content used > See details. Read the Claimant, the content used, the policy, and the territory or territories shown.
Example: The details name a 22-second song segment from 1:04 to 1:26, claimed by a music publisher, with a monetize policy in most countries and a block in two countries. The rest of the video is not claimed.
Common mistake: Reading only the email subject or the first line in Studio. The email tells you a claim exists; only the details tell you whether a short trim will clear it or whether the whole audio track is involved.
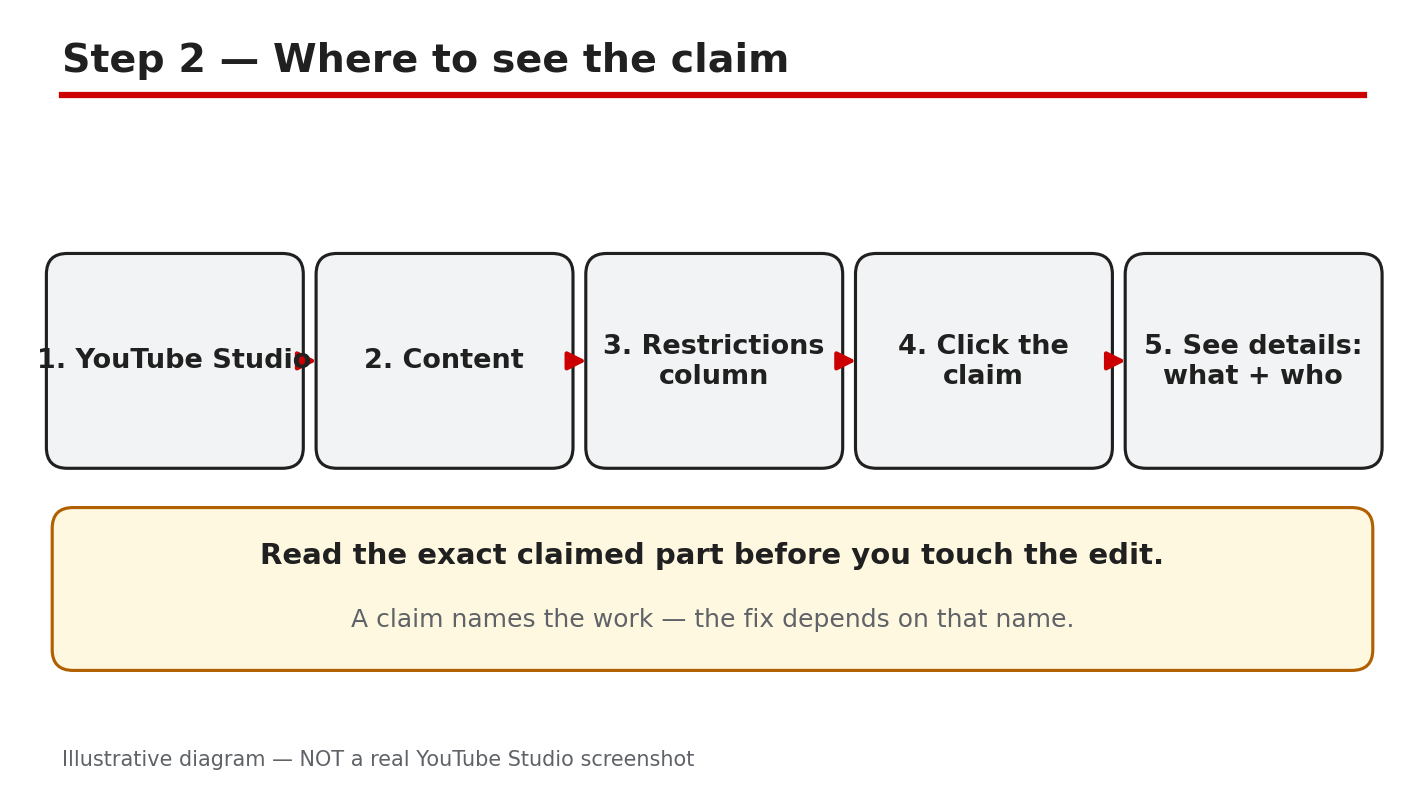
Illustrative diagram/mock-up of the five-step path to see a claim in Studio. This is NOT a real YouTube Studio screenshot.
Step 3: Compare Trim, Replace, and Erase
What to do: Once you know the claimed segment, compare the three Studio fixes by what they remove and what they leave behind. Trim out segment edits out just the claimed segment from your video, so both picture and sound in that part go. Replace song swaps claimed audio for other audio from the YouTube Audio Library, so the picture stays and new music plays instead. Erase song mutes the claimed audio; you can erase just the song, keeping dialogue and sound effects where possible, or mute all sound in the claimed segments. If done successfully, any of these options will automatically clear a copyright claim. Preview every edit before you save, and check that no claimed audio or picture remains, because a partial fix will not clear the claim.
Studio path: YouTube Studio > Content > click the notice on the video > View details > find the relevant claim > Take Action > Trim out segment, Replace song, or Erase song. Then preview, adjust the start and end times if offered, and click Save, then confirm Trim, Save, or Mute as Studio asks.
Example: A 22-second claimed song plays over a talking-head explanation. Trim would cut the explanation too, so Replace song is better: the explanation stays, with a quiet Audio Library track underneath, and the claim can clear.
Common mistake: Choosing Erase song for a video where the song and the voice are mixed together, then discovering the voice is hard to hear. Preview with headphones, and use Mute all sound in the claimed segments only when losing all sound there is acceptable.
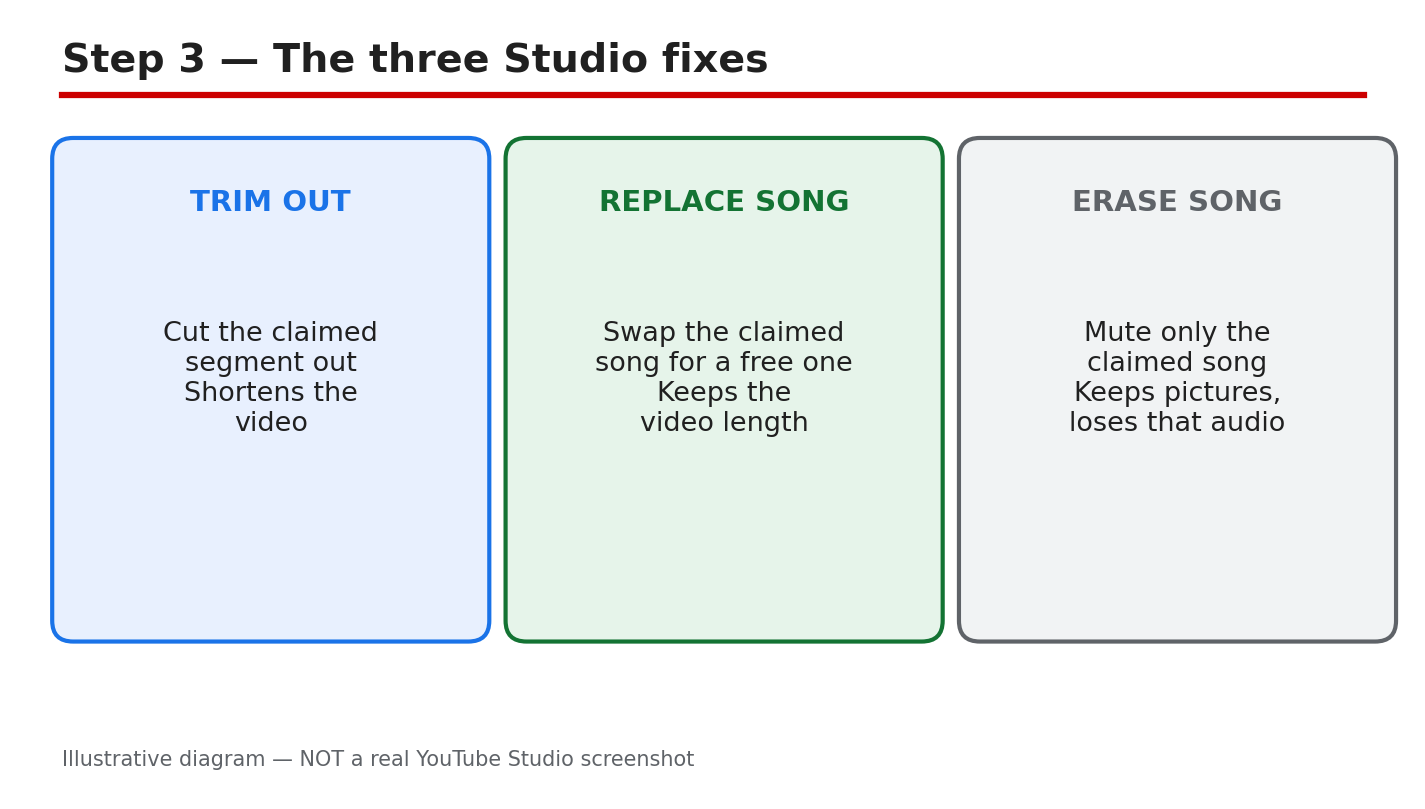
Illustrative diagram/mock-up comparing Trim out segment, Replace song, and Erase song. This is NOT a real YouTube Studio screenshot.
Step 4: Gather Evidence Before You Dispute
What to do: A dispute is a statement that you have a right to use the material, or that the claim is wrong. Do not file one because you are annoyed, because the song is short, or because you gave credit. Credit alone does not replace permission. Gather real evidence first: your licence or written permission, with the track name, licensor, dates, and territory; proof that the work is yours, such as project files or an original recording; or a clear, specific fair-use explanation, such as commentary, criticism, or teaching that transforms the material, with timestamps showing what you added. Save screenshots and emails in one folder, and note the exact claim you are disputing. If you cannot point to ownership, a licence, or genuine fair-use grounds, do not dispute yet.
Studio path: YouTube Studio > Content > Restrictions > See details > Content used > See details. Keep this page open while you check your licence file, so the work, claimant, and segment you are checking match the evidence in your hand.
Example: A creator finds a licence email for a track, dated before publication, covering YouTube worldwide. That is evidence worth attaching or quoting accurately in a dispute. A screenshot of a download page with no licence terms is not.
Common mistake: Disputing with “I found it on the internet” or “everyone uses it.” Those are not grounds, and a weak dispute can waste time and damage your credibility with the claimant and with YouTube.
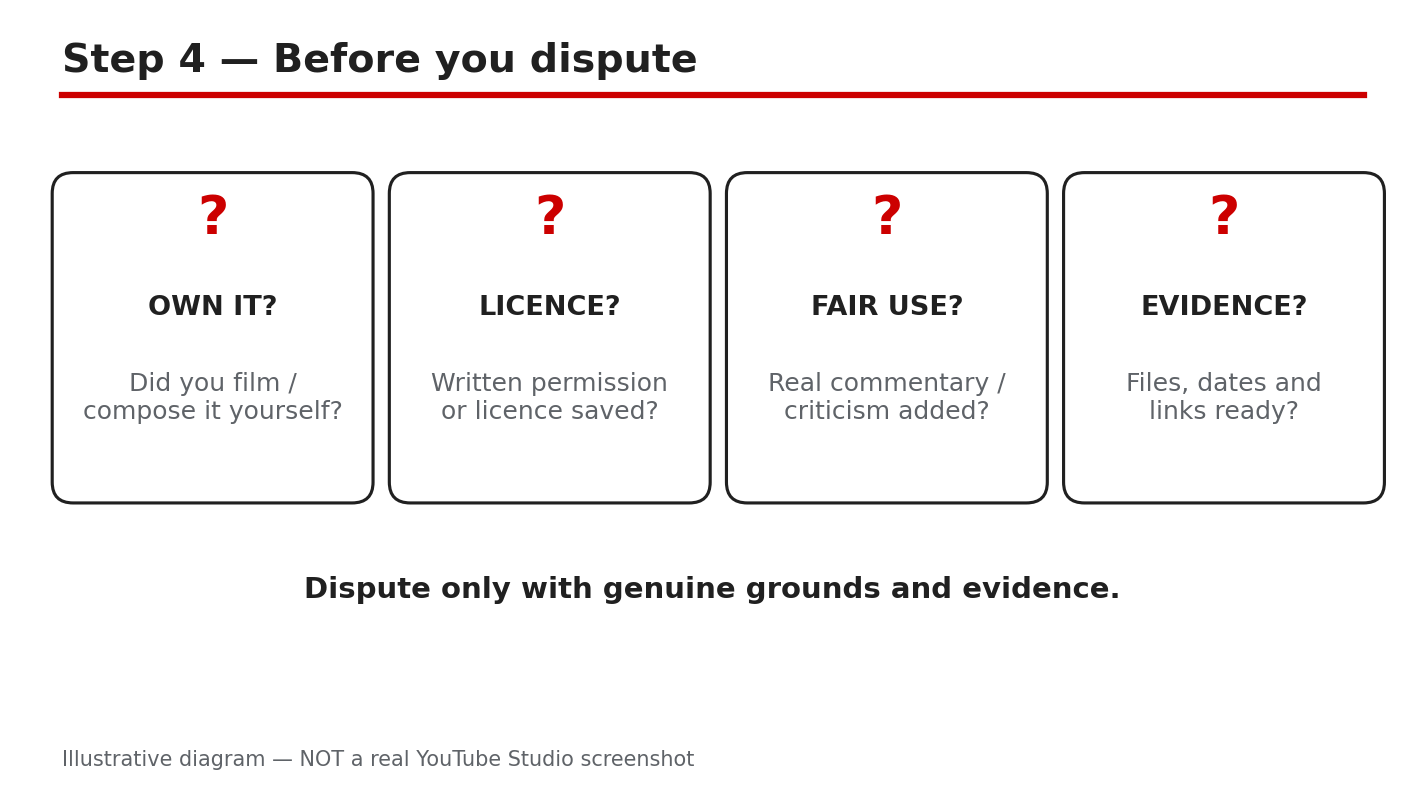
Illustrative diagram/mock-up of the four questions to check before disputing a claim. This is NOT a real YouTube Studio screenshot.
Step 5: Decide — Dispute, Fix, or Leave It
What to do: Use a simple decision rule. Dispute only when you have genuine grounds and evidence from Step 4, and you can state them accurately. Fix in Studio when the claimed material is not essential, when a trim, replacement, or erase will leave a video you are still proud to publish, or when the claim blocks viewers you care about. Leave the claim and move on when the video stays viewable where your audience is, the revenue at stake is small, and a fix would damage the video more than the claim does. Leaving a claim is not ignoring it: note the claimant, segment, and decision, and change the music or clip source for your next video. Whatever you choose, read Studio’s warning on the edit screen before saving. YouTube Help states that, starting in June 2025, once you save your edited video, you will not be able to revert the changes, and that as of June 2025 you are not able to undo changes made with the YouTube Studio Editor after saving. Keep a copy of the original video before you edit, if you may need it later.
Studio path: YouTube Studio > Content > Restrictions > See details. For a fix, continue to Take Action > Trim out segment, Replace song, or Erase song > Preview > Save and confirm. For a dispute, use the dispute option shown for that claim, and enter only grounds and evidence you can support.
Example: A creator with a licence disputes a song claim and keeps the video intact. The same creator leaves a different claim alone on an old video with 40 views, because replacing its music would take longer than the video is worth.
Common mistake: Saving a Studio edit before previewing it, then finding the trim cut a key sentence. Preview first, because the saved edit cannot be reverted in Studio Editor.
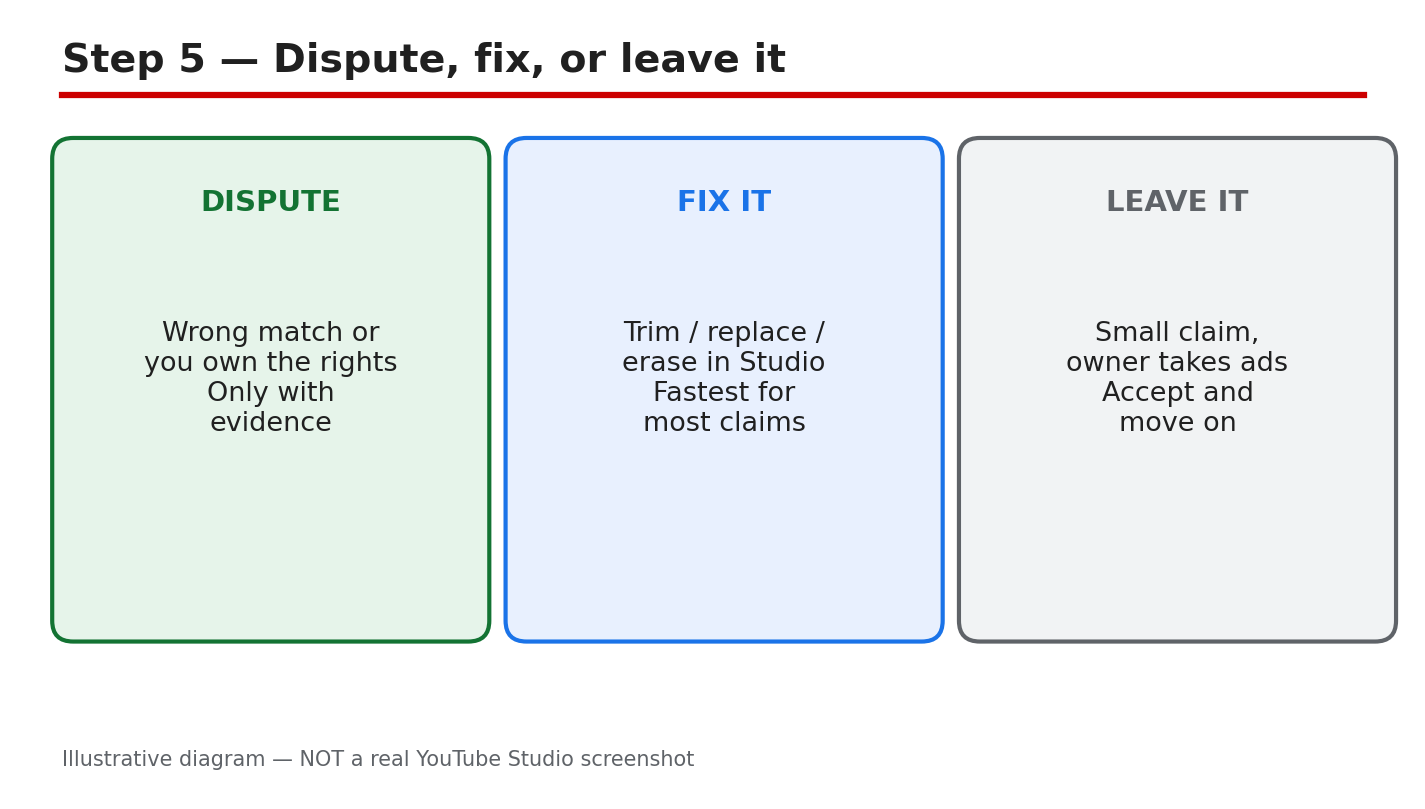
Illustrative diagram/mock-up comparing dispute, fix, and leave-it choices for a claim. This is NOT a real YouTube Studio screenshot.
Step 6: Follow a Seven-Day Fix Plan
What to do: Give the claim a short, dated plan so it does not drift. Day 1: record the claim type, work, claimant, segment, policy, and territory from Step 2. Day 2: check licences, permissions, and project files, and decide whether a dispute has genuine grounds. Day 3: choose dispute, fix, or leave, using Step 5, and write down why. Day 4: if fixing, preview the trim, replacement, or erase in Studio, and save a copy of the original first. Day 5: save the chosen fix, then wait for processing to finish; do not make other edits while the video is processing. Day 6: reload Studio, confirm the claim is gone or changed, and play the edited segment. Day 7: fix the cause for future videos, such as switching music libraries, shortening borrowed clips, or adding real commentary, and file your notes and licences together.
Studio path: YouTube Studio > Content > Restrictions for the daily check; then Content > the video > View details > Take Action for the fix; then Content > Restrictions again on Day 6 to confirm the result.
Example: On Day 4 a creator previews a replacement track, notices it starts too loudly, lowers it, previews again, and only then saves. On Day 6 the claim is gone and the explanation is intact.
Common mistake: Making a second edit while the first is still processing, or judging the result before processing finishes. Wait, reload, and check the edited segment itself.
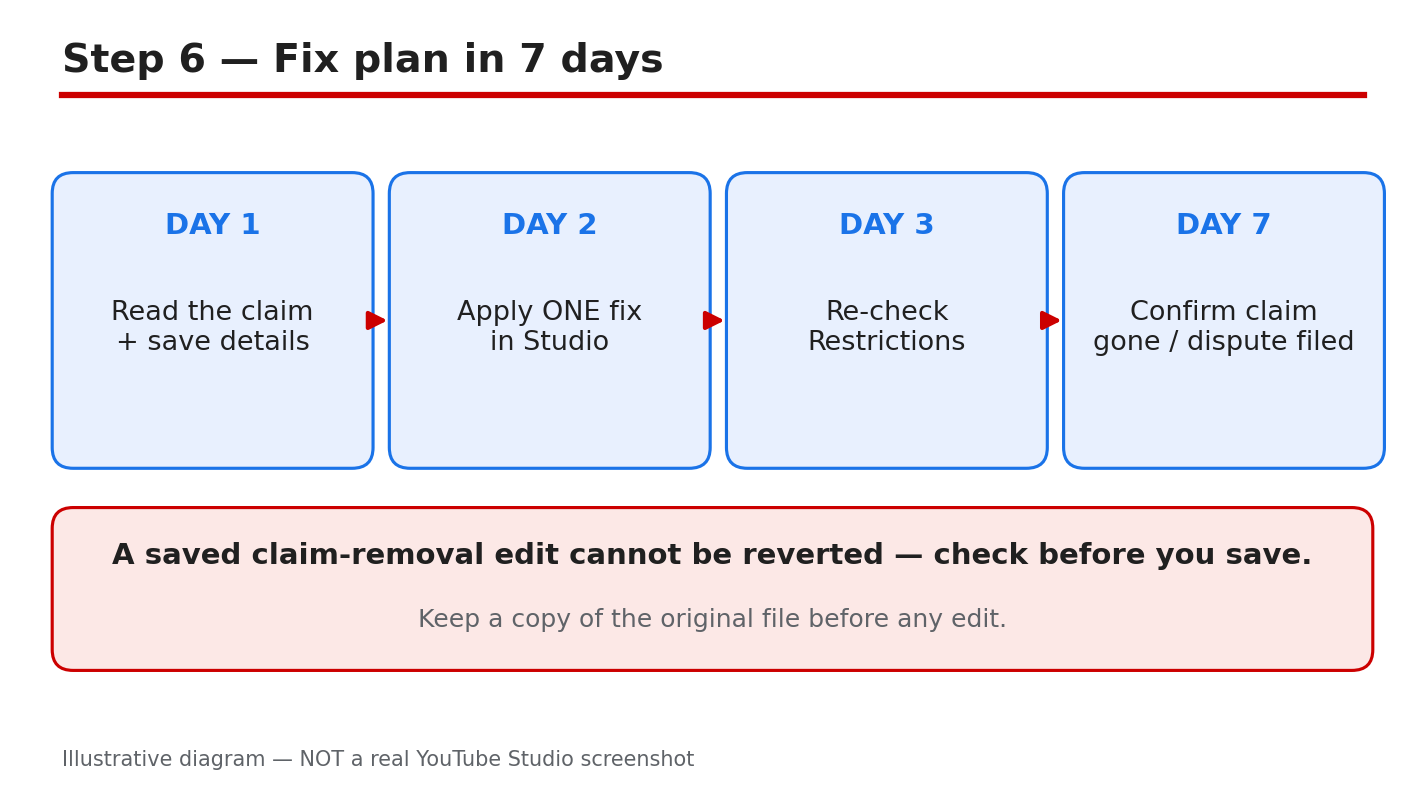
Illustrative diagram/mock-up of the seven-day fix plan for a claim. This is NOT a real YouTube Studio screenshot.
Checklist: Before You Save or Dispute
- Claim type named: Content ID claim, takedown, or another restriction.
- Exact work, claimant, segment times, policy, and territory written down.
- Fix compared: trim, replace, or erase, with the preview watched.
- Dispute evidence ready, or a clear decision not to dispute.
- Studio warning read, original video copied, and no other edit in progress.
- Result re-checked after processing, and the cause fixed for future videos.
Frequently Asked Questions
Does a copyright claim give my channel a strike? Not by itself. YouTube says copyright claims are different from copyright strikes and usually do not impact your channel or account. A strike follows a formal copyright removal request, which is a different process, so read the Restrictions label carefully.
Can I use a song if I only use a few seconds? Short does not mean safe. Content ID can match a short segment, and a licence or genuine fair-use ground matters more than length. If you have no licence, replace the music or keep the segment out.
Will trimming, replacing, or erasing always clear the claim? If done successfully, YouTube says any of these options will automatically clear a copyright claim. If claimed material remains, the claim will not clear, so preview the whole claimed segment and re-check after processing.
Should I dispute if I gave credit to the owner? No, not on credit alone. Credit does not replace permission or a licence. Dispute only with ownership, a licence, or another genuine ground, with evidence you can show.
Can I undo a Studio edit after I save it? YouTube Help states that, starting in June 2025, once you save your edited video, you will not be able to revert the changes, and you cannot undo Studio Editor changes after saving. Preview carefully and keep a copy of the original before you save.
Sources — Check It Yourself
These official YouTube Help pages were opened and verified live while this guide was prepared. Check the current wording in Studio and in these pages before you act, because policies and Studio screens can change.
- Learn about copyright claims — YouTube Help
- Remove copyright-claimed content from videos — YouTube Help
No official YouTube video is embedded in this post. No exact official video URL was verified live during preparation, so none was embedded rather than guessing one. This guide is general information, not legal advice.