Showing Posts From
Monetization
 CreatorPlaybook Team
- 31 Oct, 2026
YouTube Premium Revenue Explained: How You Earn From Premium Viewers
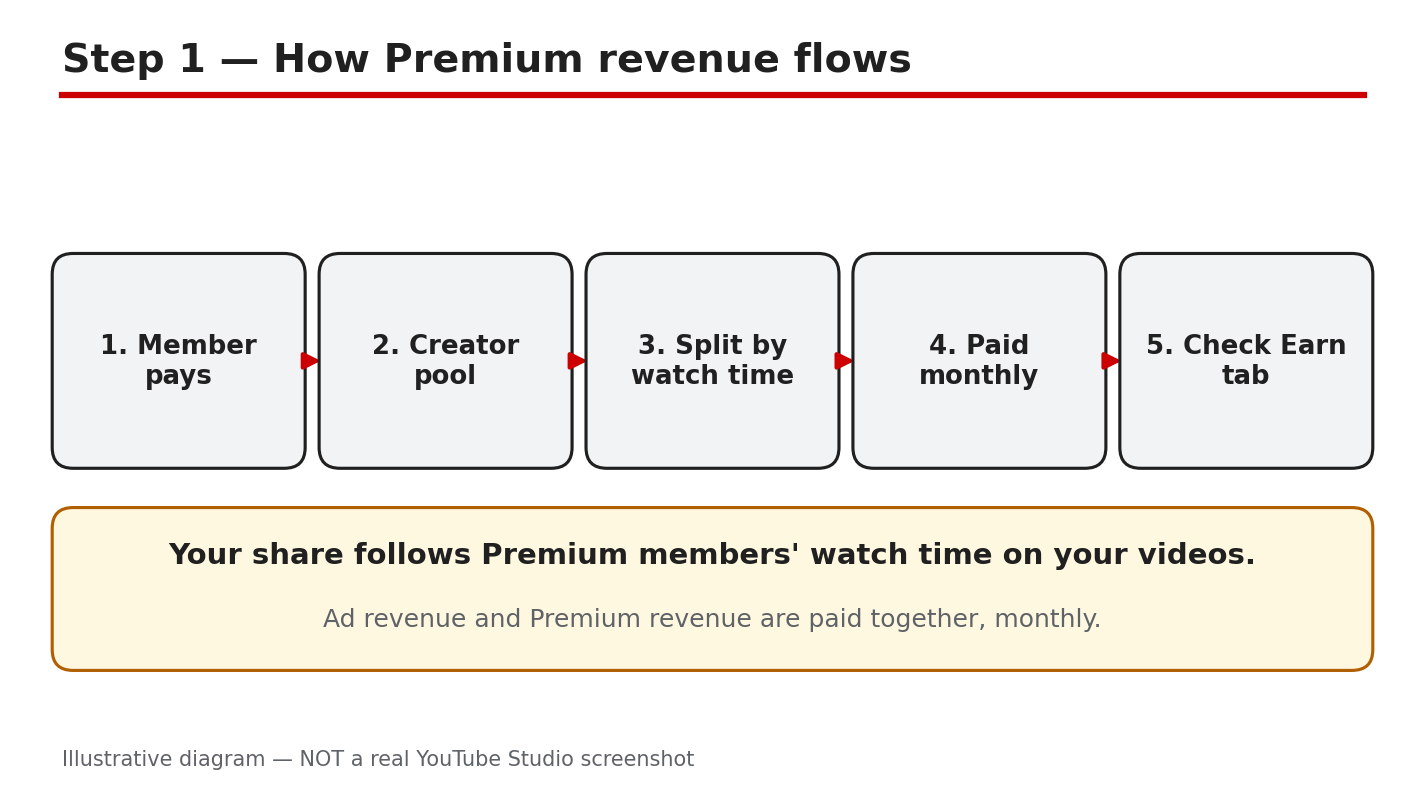
When a YouTube Premium member watches your video, you still earn money — even though no ad is shown. Many new creators assume ad-free viewing means free viewing — it does not. YouTube shares part of every Premium subscription with the creators those members watch, based on member watch time. For a Partner Program channel, this is a second income stream next to ad revenue. This guide explains how it works, where to see it in Studio, and how to grow it. What you will learnHow Premium revenue is calculated from member watch time Whether your channel is eligible to earn Premium revenue Where to find your Premium earnings in Studio and Analytics How Premium revenue differs from ad revenue and how to grow itStep 1: Understand how Premium revenue works What to do: Learn the basic mechanism first: Premium pays you for watch time, not for ads. How to do it: YouTube puts a share of subscription fees into a creator pool, split by how much Premium members watched each creator's content. Your share depends on your slice of total Premium watch time, not on views or subscribers. YouTube Help confirms fees are distributed by member watch time, with the majority going to partners. As reported, from 2027 the pools are 30% of net Premium and 60% of net Premium Lite revenue, paying 55% for long-form and 45% for Shorts. Example: Two channels each get 10,000 views. Channel A gets 8,000 minutes of Premium watch time; Channel B gets 2,000. A earns the bigger share. Common mistake: Treating Premium revenue like a fixed payment per Premium view. There is no fixed per-view rate.Illustrative diagram (mock-up) of how Premium revenue reaches creators — not a real Studio screenshot. Step 2: Check that your channel is eligible What to do: Confirm your channel can receive Premium revenue — not every monetized-looking channel can. How to do it: Premium revenue is a Partner Program benefit. YouTube Help states that for long-form videos you must accept the Watch Page Module and turn on Watch Page ads. For Shorts you must accept the Shorts Feed Module. In Studio, check the Earn tab for your accepted modules and whether Watch Page ads are on. If a module is not accepted, those Premium views earn you nothing. As reported, from 1 February 2027 new creators need 8,000 watch hours or 20 million Shorts views, plus 1,000 subscribers. Example: A creator accepted the Watch Page module but never turned on Watch Page ads, so her Premium earnings stayed at zero. Common mistake: Assuming that joining the Partner Program turns on every earning feature. Each module must be accepted separately.Illustrative diagram (mock-up) of the eligibility checks for Premium revenue — not a real Studio screenshot. Step 3: Find your Premium earnings in Studio What to do: Locate the exact numbers so you can see what Premium is worth to your channel. How to do it: In Studio, open the Earn tab for an overview of estimated revenue by source. Then open Analytics, go to Revenue, and check the breakdown by revenue type. YouTube Help reports that Watch Page and Shorts Feed ad revenue both include Premium, so Premium sits inside those rows, not as a separate headline number. As reported, revenue takes about two days to show, and Premium payments arrive at the start of each month, with ad revenue. Example: One 15-minute guide brings a creator more Premium revenue than her five most-viewed Shorts combined. Common mistake: Checking the Earn tab the day after a big video and concluding Premium pays nothing. Revenue data lags — check after a few days.Illustrative diagram (mock-up) showing where to find Premium earnings in Studio — not a real Studio screenshot. Step 4: Compare Premium earnings with ad earnings What to do: Understand why Premium money behaves differently from ad money. How to do it: Ad revenue depends on advertisers and CPMs, which change by topic, country, and season. Premium revenue depends only on how much members watch you, so it is steadier and unaffected by ad blockers or seasonal demand. As reported, YouTube says partners on average earn more from a Premium subscriber than from the same user watching ads. Check your Revenue breakdown over three months: if Premium grows while ads stay flat, your audience is shifting toward members. Example: A finance channel earns a high CPM but has few Premium viewers, so Premium is a small slice. A music-learning channel has many Premium members, so it is a large slice. Common mistake: Comparing your Premium earnings with another creator's. The split depends on your audience, not your effort alone.Illustrative diagram (mock-up) comparing Premium revenue with ad revenue — not a real Studio screenshot. Step 5: Grow your Premium watch time What to do: Increase the one thing Premium pays for — minutes watched by Premium members. How to do it: Focus on retention first. In Analytics, find your highest average view duration videos from members, and make more like them. Build series and playlists so one view becomes a session of three or four. Keep intros short and answer early — a member who leaves in 30 seconds adds almost nothing. YouTube Help confirms downloaded watch time and background play both count. So long videos that work as audio can keep earning while a member does something else. Example: A creator turns one 10-minute tutorial into a three-part series. Members who watched one video now watch all three, and her Premium watch time nearly doubles. Common mistake: Making videos longer just to chase watch time. Padding drives viewers away — YouTube Help says the key factor is enjoyable videos.Illustrative diagram (mock-up) of the ways to grow Premium watch time — not a real Studio screenshot. Step 6: Protect and plan your Premium income What to do: Treat Premium revenue as a real income line: review it monthly and never chase shortcuts. How to do it: Each month, check the Earn tab and Revenue report and note your Premium earnings, watch time, and top videos. Watch for Partner Program updates — as reported, the 2027 update changes entry thresholds and Shorts pool rules, so accept the updated modules in Studio to keep earning. Never buy views or watch time: fake watch time is invalid traffic, it can get monetization paused, and it cannot increase your share of the pool. Example: A creator notices one old tutorial earns more Premium revenue than her new uploads. She makes an updated version and links it in the old video's description. Common mistake: Ignoring Premium revenue because it looks small at first. For many channels it grows into a meaningful, stable part of monthly income.Illustrative diagram (mock-up) of the monthly Premium income routine — not a real Studio screenshot. Checklist☐ Premium pays for watch time, not per view ☐ Partner Program membership and modules confirmed ☐ Watch Page ads on for long-form videos ☐ Premium earnings found in Earn tab ☐ Premium vs ad earnings compared ☐ Videos planned to keep members watchingFrequently asked questions Do creators earn money when a Premium member watches their video? Yes. Premium members see no ads, but YouTube shares part of the subscription fee with creators based on member watch time. It is a second revenue stream alongside ads. How much do creators earn per Premium view? There is no fixed per-view rate. Earnings depend on your share of Premium member watch time, so a long video watched to the end earns far more than a short one viewers abandon. Do downloaded videos and background play count? Yes, as reported in YouTube Help. Downloaded watch time is recorded when the member next signs in online, and background play counts too. Do I need the YouTube Partner Program to earn Premium revenue? Yes. You also need the Watch Page Module with Watch Page ads on, or the Shorts Feed Module for Shorts. Confirm the requirements in Studio. Will Premium revenue replace my ad revenue? No. Premium is an extra stream for subscribers, paid in the same monthly payment as ad revenue. SourcesYouTube Help, Your content & YouTube Premium: https://support.google.com/youtube/answer/6306276 (verified live 31 Oct 2026) CreatorPlaybook, Monetization Paused vs Disabled vs Rejected: </blog/youtube-monetization-paused-vs-disabled> (verified live 31 Oct 2026) CreatorPlaybook, How to Earn Money on YouTube: </blog/how-to-earn-money-on-youtube> (verified live 31 Oct 2026)
- CreatorPlaybook Team
- 31 Oct, 2026
YouTube Monetization Paused vs Disabled vs Rejected: What Each Means and What to Do
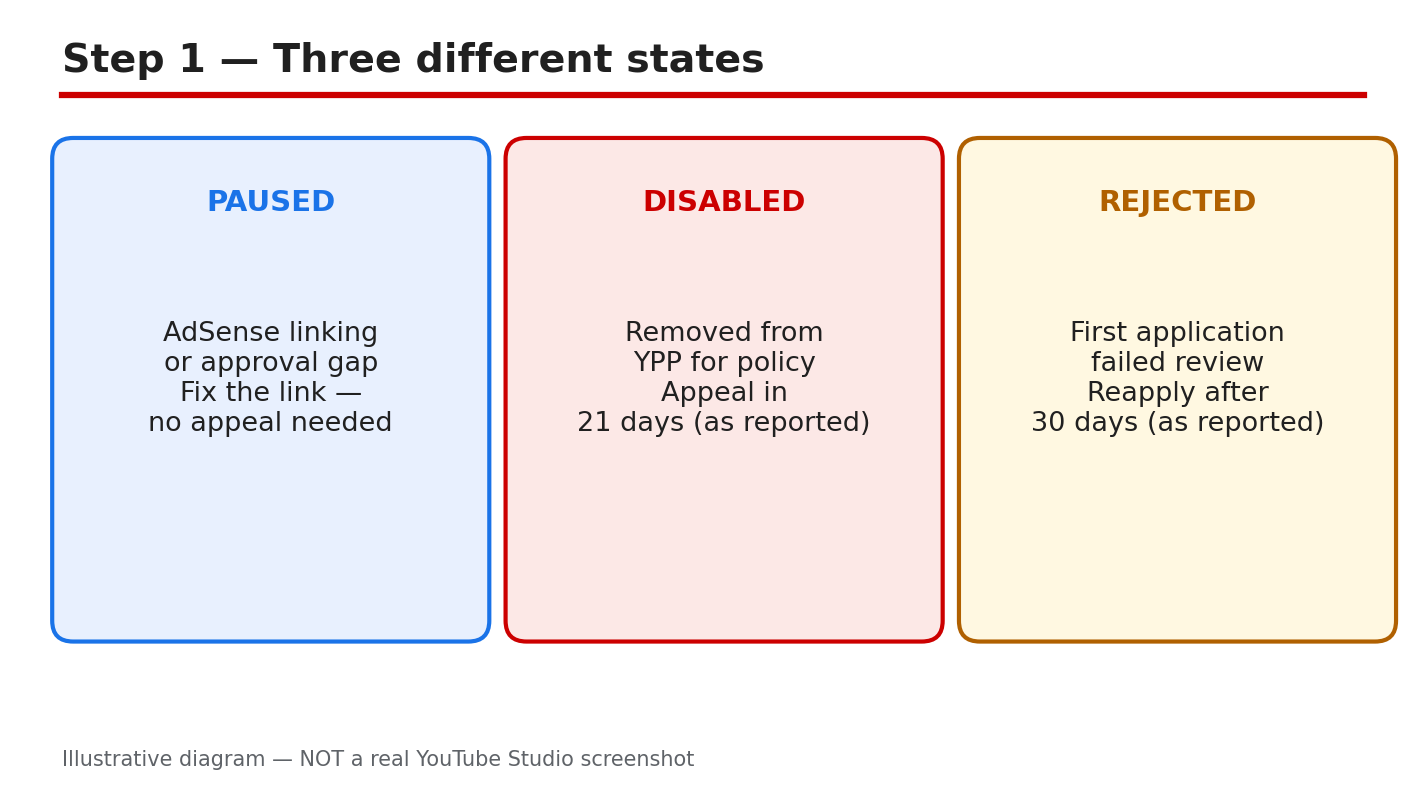
One morning you open YouTube Studio and the Earn tab says something changed. Your monetization is paused, disabled, or your application was rejected. Three different words, three different problems, and treating them as the same thing wastes weeks. As reported, the exact wording in the Earn tab governs what happens next: a pause can often be fixed quickly, a suspension has an appeal window, and a rejection has a waiting period before you can apply again. This guide explains each state, the timelines as reported, and the exact steps to fix the cause and get back to earning. What You Will Learn In this guide you will learn how to tell paused, disabled, and rejected apart, what each state means for your channel, the appeal and reapplication windows as reported, how to fix the most common causes, and how to keep your monetization from stopping again. Step 1 - Read the Exact Wording in the Earn Tab What to do: Open YouTube Studio, go to the Earn tab, and read the exact message before you do anything else. How: The Earn tab shows your current status in plain words: paused, suspended, or an application decision. Screenshot or copy the message, and check the email YouTube sent you, because it names the reason and the deadline. Do not rely on what a creator forum says your state means. As reported, the wording on your own account governs: the same word can mean different things on different channels, and the instructions in your email are the ones that apply to you. Example: A creator saw 'monetization paused' and assumed she was suspended. The Earn tab said her payment details were incomplete, and updating them fixed it the same day. Common mistake: Guessing your status from a thumbnail or a video title. Read the Earn tab and your email, not a stranger's post.Illustrative diagram (mock-up, not a real YouTube Studio screenshot): paused, disabled, and rejected are three different states. Step 2 - Paused: What It Means and How to Fix It What to do: If monetization is paused, look for the reason listed in the Earn tab and fix that one thing first. How: A pause is usually temporary. As reported, common reasons include a pending identity or payment verification, a temporary hold while YouTube reviews your account, or a setting that needs your attention. The Earn tab usually tells you what is missing. Complete the verification, update the payment details, or confirm the setting, then check the tab again. If nothing is listed, check your email for a message from YouTube that names the next step. Example: A creator's monetization paused during a payment review. She updated her tax information, and monetization resumed within a few days. Common mistake: Waiting for the pause to lift on its own. A pause usually needs an action from you, and it will not clear until you take it.Illustrative diagram (mock-up, not a real YouTube Studio screenshot): a pause usually has a fix you can complete. Step 3 - Disabled: Suspension and the 21-Day Appeal What to do: If your channel is suspended from the Partner Program, appeal within 21 days of the suspension. How: As reported, YouTube Help says you can appeal a suspension within 21 days, and you should receive a response within 14 days. Open the appeal form linked in the Earn tab or your email, explain what happened, and show what you changed. If the suspension was scheduled in advance, as reported, you can appeal within 7 days before the scheduled date. Do not wait: after the window closes, the appeal option is gone. If your appeal succeeds, as reported, you may be re-approved or re-admitted within 30 days. Example: A channel was suspended for reused content. The creator appealed within a week, showed the new original videos, and the appeal was accepted. Common mistake: Appealing with no changes. An appeal needs evidence that the cause is fixed, not just a request to be reinstated.Illustrative diagram (mock-up, not a real YouTube Studio screenshot): appeal a suspension within 21 days, as reported. Step 4 - Rejected: The Application Was Turned Down What to do: If your first application is rejected, check whether to appeal within 21 days or reapply after 30 days, as reported. How: As reported, a first unsuccessful application can be appealed within 21 days, or you can re-apply after a 30-day period. If the rejection is not your first, or you have already reapplied once, as reported, the waiting period is 90 days. Do not apply again before the period ends, because an early application can be rejected again. Use the wait to fix the reason named in the decision, usually reused or inauthentic content, and rebuild the channel with original videos. Example: A creator was rejected for reused content on her first application. She replaced the reused clips with her own recorded segments, waited 30 days, and was accepted on her next application. Common mistake: Reapplying the next day with nothing changed. The same videos will get the same result, and the wait starts over.Illustrative diagram (mock-up, not a real YouTube Studio screenshot): first rejection means 30 days, a repeat means 90, as reported. Step 5 - Fix the Cause Before You Appeal or Reapply What to do: Find the reason named in your message, and fix it in the channel before you send an appeal or a new application. How: The most common reasons are reused content, inauthentic or mass-produced content, and invalid traffic. Delete or re-record videos that reuse other creators' work without your own value added, and stop using content that is copied or mass-produced. Check your traffic sources for bought views, revoke access for shady third-party apps, and secure your account. Our guide on how to fix a rejected monetization application walks through the reused-content fixes step by step. Example: A creator's channel was full of clips taken from other videos. He deleted the clips, recorded his own commentary, and published five original videos before reapplying. Common mistake: Fixing one video and leaving ten others the same. Reviewers look at the whole channel, so every video that breaks the rules counts.Illustrative diagram (mock-up, not a real YouTube Studio screenshot): fix the cause in every video, not just one. Step 6 - Reapply and Keep Monetization Safe What to do: When the waiting period ends, reapply with a clean channel, then keep it that way with a monthly check. How: Apply only when the cause is fixed and you have published original videos that show it. After you are accepted, keep your channel safe: publish original work, do not buy views or subscribers, and check the Earn tab and your email every month. Our guide on how to get monetized on YouTube explains the eligibility steps and what reviewers look for. Example: A creator reapplied after fixing her reused-content videos, was accepted, and now reviews her Earn tab on the first day of every month. Common mistake: Going back to the same habits after acceptance. Monetization can be paused or disabled again, and a second suspension has a longer path back.Illustrative diagram (mock-up, not a real YouTube Studio screenshot): reapply clean, then protect your monetization every month. Your Monetization Status ChecklistEarn tab message and email read before acting. State identified: paused, disabled, or rejected. Appeal sent within 21 days, if a suspension. Waiting period respected: 30 days first, 90 days repeat, as reported. Cause fixed across the whole channel.Frequently Asked Questions What does it mean when YouTube monetization is paused? It usually means YouTube needs something from you, such as a verification or updated payment details. Check the Earn tab for the exact reason. How long do I have to appeal a suspension? As reported, you have 21 days from the suspension, and you should receive a response within 14 days. How long must I wait after a rejected application? As reported, 30 days after a first rejection, and 90 days after a suspension or a repeat rejection. Check the exact window in the Earn tab or your email. Can I appeal if my suspension was announced in advance? As reported, you can appeal within 7 days before the scheduled suspension date. Check the exact window in the Earn tab or your email. SourcesYouTube Help, Appeal a YouTube Partner Program suspension or rejection: support.google.com/youtube/answer/9564590 (verified live 31 October 2026). CreatorPlaybook, YouTube Monetization Rejected? How to Fix Reused Content and Appeal the Right Way: creatorplaybook.blogspot.com/2026/10/youtube-monetization-rejected-how-to.html CreatorPlaybook, How to Get Monetized on YouTube in India: Approval Steps That Actually Work: creatorplaybook.blogspot.com/2026/10/how-to-get-monetized-on-youtube-in.html
- CreatorPlaybook Team
- 29 Oct, 2026
Earn Tab Features Missing? Super Thanks, Memberships and Shopping Not Showing
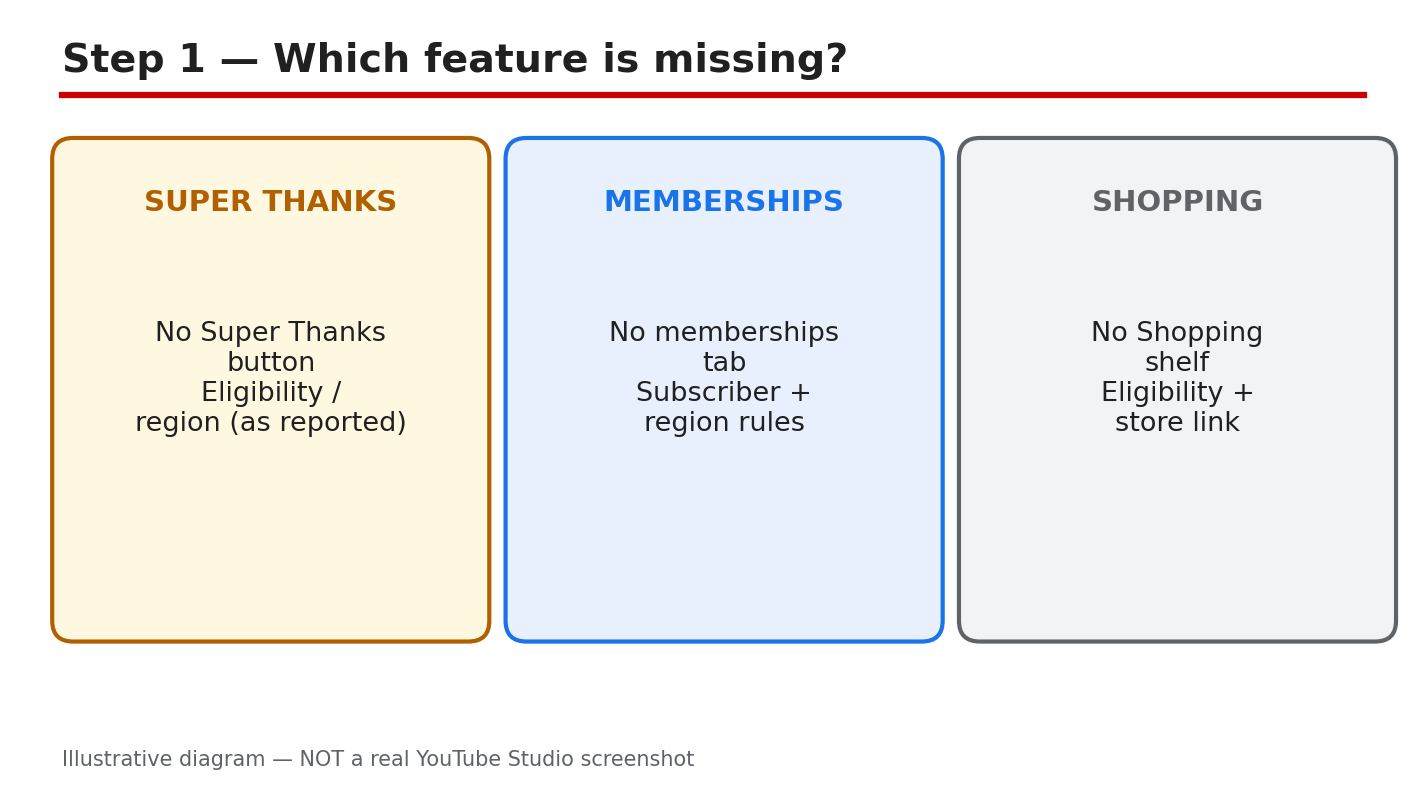
A missing feature can feel like a broken promise. You open the Earn tab, look for Super Thanks, memberships, or the Shopping shelf, and the card is not there, or it says you are not eligible. The reason is often simple: a requirement is not met, the feature is not live where you live, or the card needs one more setup step. This guide helps you name the missing feature, find the exact reason on its Earn tab card, and check the requirements against the official Help page and your own channel. Write down the exact reason the card shows, work through the checks in order, and do not promise a feature in a video before it appears on your channel. What You Will Learn By the end, you will be able to:Name the feature that is missing. Find its card and read the eligibility reason. Check the subscriber, watch-hour, and view requirements. Check whether the feature is available where you live. Turn a feature on and test it on your own video. Plan a rollout without promising a feature too early.Step 1: Name the feature that is missing What to do: Name one feature, not all of them. Super Thanks, memberships, and Shopping each have a separate card and separate requirements, so a fix for one does not unlock another. Check only that card first, and finish its checks before you move to the next feature. Studio path: YouTube Studio > Earn. Look at the feature cards on the page and note which card is present, which card is missing, and what each card says. Example: Ana wants memberships but keeps checking the Super Thanks card. Once she looks at the memberships card, she sees the reason that applies to memberships only. Common mistake: Treating every missing card as the same problem. A Shopping problem is not a Super Thanks problem.Illustrative diagram, not a real screenshot: Super Thanks, memberships, and Shopping compared. Step 2: Find the card and read its reason What to do: Open the Earn tab and read the card for your feature word by word. The card lists the requirements and, when you are not eligible, the reason it is hidden. Do not guess from a friend's channel: the card on your own channel is the only reason that counts for you. Write the reason down exactly. If the card shows no reason, check again after signing in with only the channel account. Studio path: YouTube Studio > Earn. Find the card for Super Thanks, memberships, or Shopping, and read the requirements and the eligibility message on that card. Example: Ben's memberships card says he needs more subscribers. He stops searching for a hidden setting and starts working on the number the card actually names. Common mistake: Skipping the card and changing settings at random. If you do not read the reason, you can change the wrong thing and still see no card.Illustrative diagram, not a real screenshot: Earn tab feature cards and eligibility reasons. Step 3: Why features stay hidden What to do: Compare your channel with the requirements the Help page reports, and check the same numbers on your Earn tab card. The Help page reports that channel memberships need 500 subscribers, 3 public uploads in the last 90 days, and either 3,000 qualified watch hours in the last 365 days or 3 million qualified Shorts views in the last 90 days. Super Thanks needs age 18 or older and availability in your country or region. Shopping has its own subscriber rule and is not for Made for Kids content. Availability differs by country or region, so check the Help page and your card. Studio path: YouTube Studio > Earn for your card, and the Help page in Sources for the full, current requirements. Example: Carla has 420 subscribers and wants memberships. The reported 500-subscriber requirement explains why her card is hidden. Common mistake: Copying a threshold from an old video. Check the current Help page and your own card instead.Illustrative diagram, not a real screenshot: thresholds, countries, and availability compared. Step 4: Run the eligibility checks What to do: Check four things: Partner Program membership in good standing, the feature available in your country or region, the numbers on the card met, and no active strike blocking the feature. If one check fails, that check is your next task. Note which one failed. Studio path: YouTube Studio > Earn for the card, and YouTube Studio > Content for any strike or restriction notice on your videos. Example: Dev meets the subscriber number, but his card still hides memberships. A strike notice in Content explains the block, so he fixes that first. Common mistake: Checking only subscribers. A strike, a country limit, or a Partner Program problem can hide a card even when the numbers look right.Illustrative diagram, not a real screenshot: four eligibility checks in order. Step 5: Turn the feature on What to do: On the feature card, accept the module or terms for that feature, then finish its setup. For Shopping, link your store; for memberships, set prices and perks. The feature should appear after setup is complete. Then test it yourself: open one of your own videos and check that the feature shows where viewers will see it. If the feature still does not show, re-open the card and check for an unfinished step. Studio path: YouTube Studio > Earn > the feature card. Accept the module or terms, finish setup, then check one of your videos as a viewer would. Example: Lina accepts the memberships module, sets one perk and a price, and then checks her own video. The Join button appears only after setup is finished. Common mistake: Accepting the terms but skipping setup. An unfinished store link, price, or perk can leave the feature hidden even after you accept.Illustrative diagram, not a real screenshot: accept terms, finish setup, test the feature. Step 6: Roll the feature out slowly What to do: Announce the feature only after it is live on your channel and tested on your own video. Start with one video, tell viewers exactly what the feature does, and watch for questions before you mention it in every video. If a viewer says they cannot see it, ask which country they are in and which device they use. Keep the first announcement short and clear. Studio path: YouTube Studio > Earn to confirm the card is live, then one published video to test what viewers see. Example: Omar tests memberships on one video, answers three viewer questions, and only then adds the Join mention to his next video. Common mistake: Promising Super Thanks or memberships in a video before the feature is live. Viewers look for it, cannot find it, and trust drops.Illustrative diagram, not a real screenshot: test one video, then tell viewers. Checklist: Before you announce a feature Tick each item before you tell viewers a feature is coming.I have named the one missing feature. I have read the reason on its Earn tab card. I have checked the Help page requirements for that feature. I have checked country availability and my numbers. I have finished setup and tested the feature myself. I have not promised the feature before it is live.Frequently Asked Questions Why is Super Thanks missing when my channel is monetized? Monetization and Super Thanks are separate features. Super Thanks needs its own eligibility, including age 18 or older, availability in your country or region, and the Commerce Product Module, so check its own card and the Help page. Can I turn on memberships with fewer than 500 subscribers? No, not on the reported requirements. The Help page reports 500 subscribers, 3 public uploads in the last 90 days, and the watch-hour or Shorts-view requirement. Grow to those numbers, then check the card again. Why can a friend see Shopping but I cannot? Shopping availability and requirements differ by channel and country or region. Check your own Earn tab card and the Help page instead of comparing channels, and finish any setup the card asks for. I accepted the terms. Why is the feature still hidden? Accepting terms is only one step. Finish the setup the card asks for, such as linking a store or setting prices and perks, then test the feature on your own video. Should I tell viewers a feature is coming soon? No. Wait until the feature is live on your channel and tested on your own video. Promising it early sends viewers looking for something they cannot find yet. Sources — Check It Yourself Check the official page below, and re-read your own Earn tab card before you act. Requirements can change, so check the page again if your card changes. No official YouTube video is embedded in this post, because no exact official video was verified live in this run.How to Earn Money on YouTube: the blog's earn-money guide How to earn money on YouTube
- CreatorPlaybook Team
- 29 Oct, 2026
YouTube Yellow Dollar Icon? How to Fix Limited Ads and Request a Review
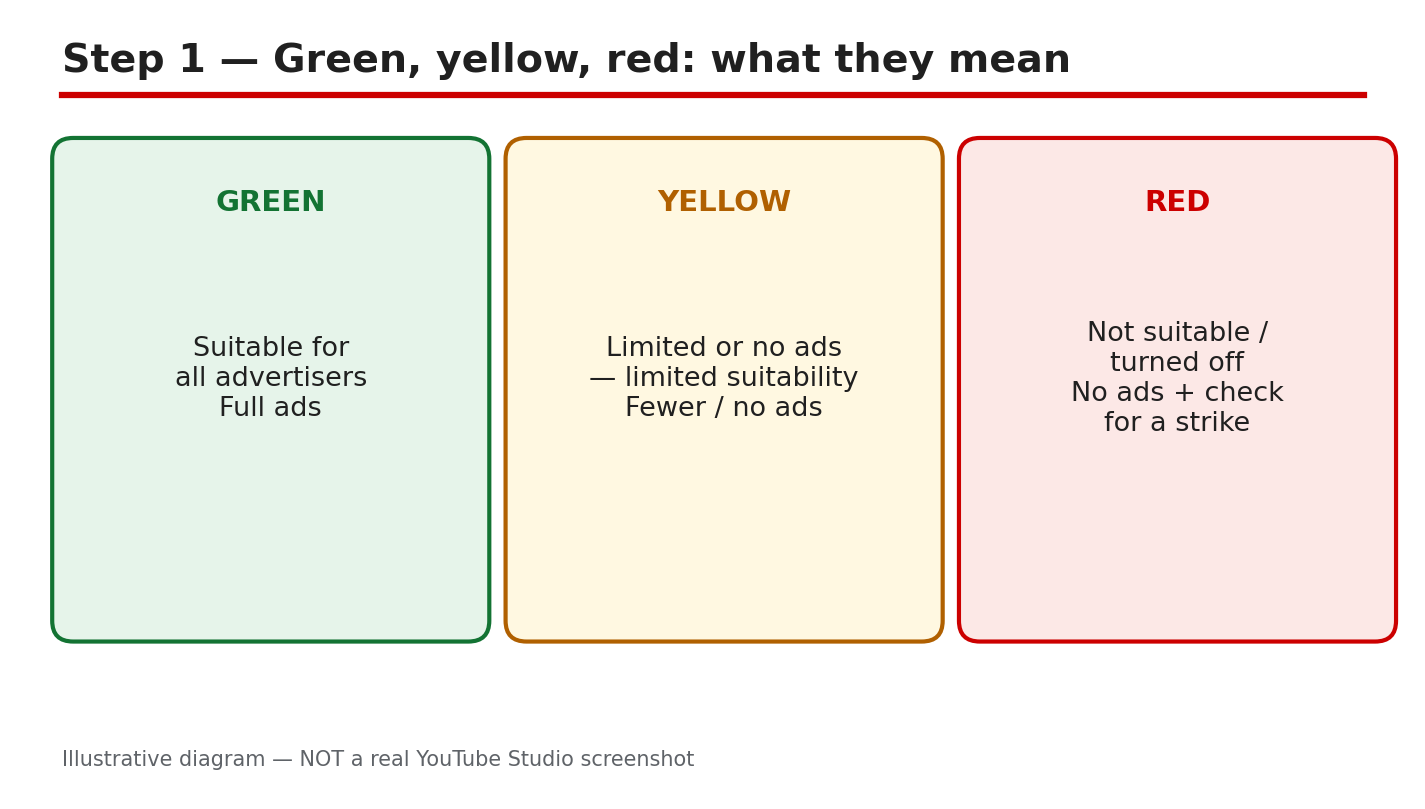
A yellow dollar icon can feel like a punishment, but it is a rating, not a penalty on the whole channel. It means YouTube found the video suitable only for limited advertising, or for no ads at all. The video stays public, and the rest of the channel is not automatically affected. The fix is specific: find the reason, change only what caused it, and request a human review if the rating looks wrong. Related reading: YouTube Shorts Not Monetized? 7 Reasons and How to Fix Each One. A yellow icon and a Short with no monetization often share a cause, so check both guides before changing a video. Below, each step gives what to do, the exact Studio path, a short example, and a common mistake. Check the official Help pages at the end, because wording and review options can change. What You Will LearnGreen, yellow, and red icons, explained. Where to find the reason for a rating. Common triggers in the advertiser-friendly guidelines. Fixes to make before requesting a review. How to request a human review in Studio. A prevention plan for future uploads.Step 1: Read the Dollar Icon Correctly What to do: Check the icon before changing anything. Green means the video is suitable for full ads. Yellow means limited or no ads, because part of the content may not suit all advertisers. Red means the video is not suitable for ads. The icon is a rating for one video, not a strike and not a channel penalty. Studio path: YouTube Studio > Content > Monetisation column. The icon sits beside the video title, with the reason shown when you click it. Also check Studio > Content > Notices for appeal steps. Example: A creator sees yellow on one cooking video, while ten others stay green. Only that video needs a fix, so the creator leaves the rest alone. Common mistake: Deleting the video, or changing the title on every video. A rating affects one video, so a channel-wide change wastes work.Illustrative diagram/mock-up — NOT a real YouTube Studio screenshot: green, yellow, and red icon meanings. Step 2: Find Where the Rating Lives What to do: Open the video in Studio and read the exact reason category. Do not guess from the thumbnail or title alone. The reason tells you whether the problem is language, imagery, or topic, and that decides the fix. Note the category word for word before editing. Studio path: YouTube Studio > Content > Monetisation column > click the dollar icon. For appeals, follow the official appeal page: Studio > Content > Notices column, hover over the notice, and use the Action button. Example: A creator clicks the yellow icon and reads a category about strong language. The fix is the audio, not the thumbnail, so editing starts there. Common mistake: Requesting a review before reading the reason. Reviewers see the same content, so an unchanged video gets the same rating.Illustrative diagram/mock-up — NOT a real YouTube Studio screenshot: where the rating lives in Studio. Step 3: Check the Common Triggers What to do: Compare the video with the Advertiser-Friendly Guidelines categories. Strong profanity, especially in the first 30 seconds, is a common trigger. Graphic or shocking imagery, violent or distressing scenes, and sensitive topics such as tragedy or conflict can also limit ads. A single strong moment can affect the rating, even in a long video. Studio path: YouTube Studio > Content > click the icon for the reason category, then compare that category with the official Advertiser-Friendly Guidelines page. Example: A creator finds strong language in the opening 20 seconds. The rest of the video is calm, but the early language alone explains the yellow icon. Common mistake: Assuming the whole topic is banned. Many topics are allowed with care; the trigger is usually one moment, word, or image.Illustrative diagram/mock-up — NOT a real YouTube Studio screenshot: common triggers. Step 4: Fix the Video Before a Review What to do: Edit or blur the offending part, and clean the first 30 seconds first, because early content weighs heavily. Fix any mismatch between the title, thumbnail, and actual video, so the video delivers what it promises. Confirm that only this video is affected, and keep a note of each change made. Studio path: YouTube Studio > Content > video > Details > Editor for cuts and blurs; then Details > Title and description, and the thumbnail picker, for the title and thumbnail. Example: A creator blurs a graphic image, trims one strong phrase, and changes a misleading thumbnail. The video now matches its title and opening. Common mistake: Changing only the title. If the audio or imagery still triggers the rating, the icon will not change.Illustrative diagram/mock-up — NOT a real YouTube Studio screenshot: before requesting a review. Step 5: Request a Human Review What to do: Request a human review only after the fix, using one request for the video. Follow the appeal steps on the official page, and give the exact reason category if asked. As reported, a decision can take up to 7 days, and the specialist decision is reported to be final, so check the current Help page for the latest wording. Creators in the EU are reported to have extra options, so check the page for any local route. Studio path: YouTube Studio > Content > Notices column > hover over the notice > Action > request review, as described on the official appeal page. Also check the Monetisation column for the icon and reason. Example: A creator fixes the opening, requests one review, and waits. The icon stays yellow while the review is pending, so no second request is sent. Common mistake: Sending several requests for the same video. Repeated requests do not speed a review, and they can confuse the record.Illustrative diagram/mock-up — NOT a real YouTube Studio screenshot: review and re-check. Step 6: Prevent the Next Yellow Icon What to do: Build a short pre-upload check. Review the first 30 seconds for strong language and shocking imagery, and check that the title and thumbnail match the video. Keep a list of past reason categories, so the same trigger is not repeated. Review new videos a day after upload, when ratings can settle. Studio path: YouTube Studio > Content > Monetisation column after upload, and Content > video > Details before upload, for title, thumbnail, and audience checks. Example: A creator checks the opening before upload, removes one strong word, and the next three videos stay green. The check takes five minutes. Common mistake: Copying a viral title that overpromises. A mismatch can draw a closer look, even when the video itself is calm.Illustrative diagram/mock-up — NOT a real YouTube Studio screenshot: prevention plan. Checklist: Fix the Icon, in OrderIcon and reason category noted. Trigger found: language, imagery, or topic. First 30 seconds cleaned. Title and thumbnail match the video. Only the affected video changed. One human review requested, after the fix. Pre-upload check added for next time.Frequently Asked Questions Does a yellow icon affect my whole channel? No, as a rule. The rating applies to one video. Other videos keep their own ratings, and the channel is not penalised by one yellow icon alone. Fix the single video, and leave green videos unchanged. Can I request a review more than once? Request one review per video, after fixing the cause. As reported, the specialist decision is final, so a second request for the same unchanged video is unlikely to help. Check the official appeal page for current options before trying again. How long does a human review take? As reported, allow up to 7 days, and check Studio for the outcome. Times can vary, and no exact time can be promised here. Do not send duplicates while waiting; check the Help page for the latest wording. Should I delete a yellow-icon video? Usually no. First read the reason, fix the trigger, and request a review if the rating looks wrong. Deleting loses views, comments, and watch time, and the same mistake can return in the next upload. What if every new video gets a yellow icon? Look for a repeated trigger across videos, such as strong language in every opening, or thumbnails that overpromise. Fix the pattern, not one video at a time. If the pattern is unclear, compare each reason category with the official guidelines page. Sources — Check It Yourself Official pages opened and verified live on 29 October 2026. Check current wording before acting.Advertiser-friendly content guidelines — YouTube Help Submit an appeal for videos with 'Limited ad earnings' or 'No ad earnings' — YouTube HelpNo official YouTube video is embedded here. No exact official video URL was verified live.
- CreatorPlaybook Team
- 29 Oct, 2026
YouTube Shorts Bonus Program Explained: Invitation Only, No Application
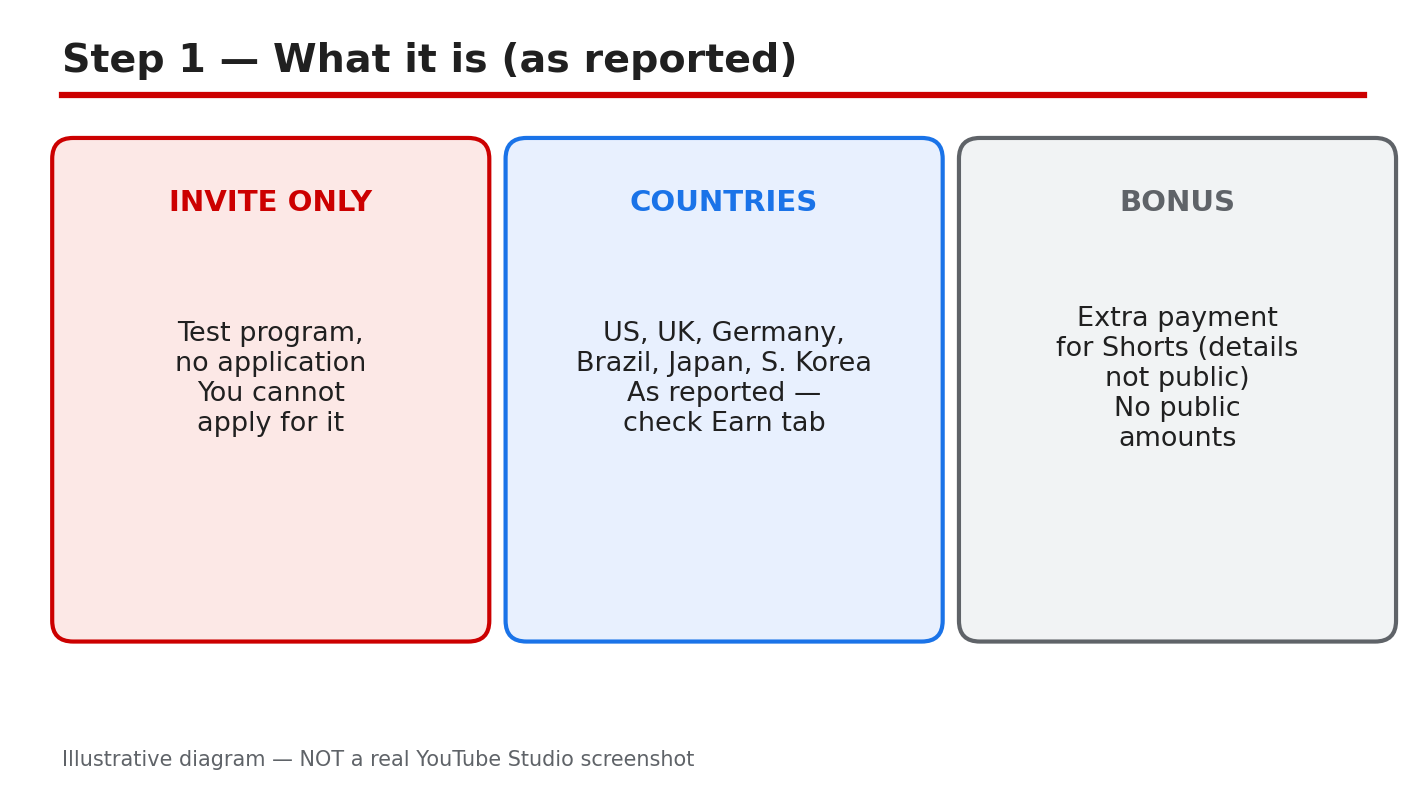
A bonus for Shorts sounds like free money, and that is exactly why it attracts rumours. Screenshots of large payments, paid courses, and forms that promise entry all circulate online. Most of them have nothing to do with YouTube. This guide separates what was reported about the Shorts bonus program from what is not known, and shows you the one safe way to check whether you have an invite. The short version is this: as reported, the program is invitation only, there is no application, and the details are not public. If you cannot find an invite inside your own YouTube Studio account, you are not in the test. The rest of this guide follows from that. What You Will LearnWhat the bonus program is, as reported, and what is not public. Where an invite would appear in your own Studio account. What to check before you accept any invite. What to do if no invite appears, without paying anyone. A monthly check you can run in a few minutes.Related reading: YouTube Shorts Not Monetized? 7 Reasons and How to Fix Each OneDiagram: the invite-only test as reported, with no application and no public details. This is an illustrative diagram and mock-up, not a real YouTube Studio screenshot. Step 1: Understand What the Program Is, as Reported As reported, the Shorts bonus program is a limited, invitation-only test. Creators in the United States, the United Kingdom, Germany, Brazil, Japan, and South Korea were reported to be included, and there is no application form and no way to ask to join. The amounts, the entry criteria, and the end date were not made public. Treat all of that as reported, not as a promise. Example: a creator sees a post claiming a fixed bonus for every 1,000 Shorts views. No such amount was verified, so the claim should be treated as a rumour, not as a rate to plan around. Common mistake: repeating a bonus amount seen in a video or a comment as if YouTube had stated it. A repeated rumour does not become an official figure.Diagram: where an invite would show, in the Earn tab, bonuses, and notifications. This is an illustrative diagram and mock-up, not a real YouTube Studio screenshot. Step 2: Check Where an Invite Would Show An invite would appear inside the creator's own account, so that is the only place to look. Open YouTube Studio, check the Earn tab, look for a bonuses section, and read your notifications, including the Studio inbox. The official Help page states that creators are told by email and by a notification in the YouTube Studio dashboard and inbox, and that acceptance takes place in YouTube Studio. If nothing appears in any of those places, you have no invite. Do not trust someone else's screenshot, and never pay for entry. Exact path: YouTube Studio > Earn tab > bonuses / notifications > Studio inbox. Example: the Earn tab shows only the usual revenue sections, and no bonus offer appears in notifications or the inbox. That means no invite, and no further action is needed. Common mistake: clicking a link in an email or a message that claims to be the invite. Open Studio directly instead, and look for the offer inside your own account.Diagram: what is not public, including amounts, entry criteria, and the end date. This is an illustrative diagram and mock-up, not a real YouTube Studio screenshot. Step 3: Know What Is Not Public Three things about the program are not public, as far as could be verified here: how much a bonus pays, how creators are chosen, and when the test ends or expands. Invented figures circulate freely, and a post, a video, or a comment that states a payment per view, an entry threshold, or a country list beyond the reported one is guessing, unless it shows the same terms inside a Studio account. Example: two videos quote different bonus rates for the same country. Neither rate was verified, so neither one can be used to plan earnings. The only figure that matters is the one inside your own account. Common mistake: treating a blog's bonus-rate table as a price list. A table built from rumours is still a rumour, even when it looks tidy.Diagram: if you get an invite, read the terms shown in your own account first. This is an illustrative diagram and mock-up, not a real YouTube Studio screenshot. Step 4: If You Get an Invite, Read It First Before you accept anything, read every line of the invite shown inside Studio. Note the country it applies to, the exact terms, the date by which you must accept, and the payment details. The official Help page states that acceptance by the 15th of the month is needed for that month's activity to count, and that the deadline shown in Studio applies. Accept only the invite shown inside your own account and Studio. Never accept through a link or a shared login. Example: an invite shows an accept-by date of the 15th and a country that matches your channel. You accept inside Studio before that date, and you keep a note of the terms you agreed to. Common mistake: accepting first and reading later. Once you accept, the terms you skipped are the terms that apply to you.Diagram: if you do not get an invite, Shorts revenue through the Partner Program continues. This is an illustrative diagram and mock-up, not a real YouTube Studio screenshot. Step 5: If You Do Not Get an Invite If no invite appears, nothing is broken, and no form will fix it. Shorts revenue through the YouTube Partner Program continues as before, because the bonus is separate from Partner Program earnings. There is no application, no waiting list, and no paid route into the test. Anyone who offers to add you for a fee, sells an account that claims to be included, or asks for your login is offering a way to lose money, or the channel itself. Example: a channel with no invite keeps earning through the Partner Program, while its owner keeps waiting for a bonus that never arrives. The Partner Program income was the real income all along, and the waiting changed nothing. Common mistake: paying for a course, a form, or an account that promises bonus entry. None of those can add you to an invitation-only test, and the payment is gone either way.Diagram: the monthly check routine, run on the same day each month. This is an illustrative diagram and mock-up, not a real YouTube Studio screenshot. Step 6: Run a Monthly Check Once a month, on the same day, open Studio and run the same short check. Look at the Earn tab, the bonuses section, and your notifications, and note whether anything new appeared. Read any new item in full before you act on it, and ignore offers that arrive outside your account. If nothing new appears, close Studio and carry on; the check took a few minutes, and no further action is needed until next month. Example: on the first of each month, you check the Earn tab and the Studio inbox. In March nothing appears, so you close Studio and keep posting. In April an invite appears, and you read it before accepting. Common mistake: checking every day and treating every rumour as news. A monthly check is enough, because an invite would wait for you inside your account, not in a stranger's post. Quick ChecklistInvite checked inside your own Studio account only. Earn tab, bonuses, and notifications all checked. No amount, criterion, or date quoted without Studio terms. No payment made for entry, an account, or a screenshot. Accept-by date and country read before any acceptance. Partner Program Shorts revenue kept separate from any bonus. Monthly check noted, same day each month. Rumours ignored unless the same terms appear in Studio.Frequently Asked Questions Can I apply for the YouTube Shorts bonus program? No. As reported, there is no application and no way to ask to join. The program is invitation only, and an invite would appear inside your own Studio account. Which countries are included in the test? As reported, the United States, the United Kingdom, Germany, Brazil, Japan, and South Korea were included. Treat that list as reported, and check the terms shown in your own account for the country that applies to you. How much does the bonus pay? That was not made public, as far as could be verified here. Do not use a figure from a blog, a video, or a comment. Use only the terms in your own Studio account. I saw a form that promises bonus entry. Should I fill it in? No. There is no application form, and no form can add you to the test. Do not enter your login, payment details, or personal information into a page that promises entry, and check only inside your own Studio account. Sources — Check It Yourself Check the official pages below for the current monetization rules. The bonus program page was verified live in this run, and its text states the program is invite-only with no application process. No official YouTube video was embedded in this post: no exact official video was verified live in this run, so none is shown here. YouTube Help: Learn about the Shorts bonus program YouTube Help: YouTube Shorts monetization policies
- CreatorPlaybook Team
- 29 Oct, 2026
YouTube Shorts Not Monetized? 7 Reasons and How to Fix Each One
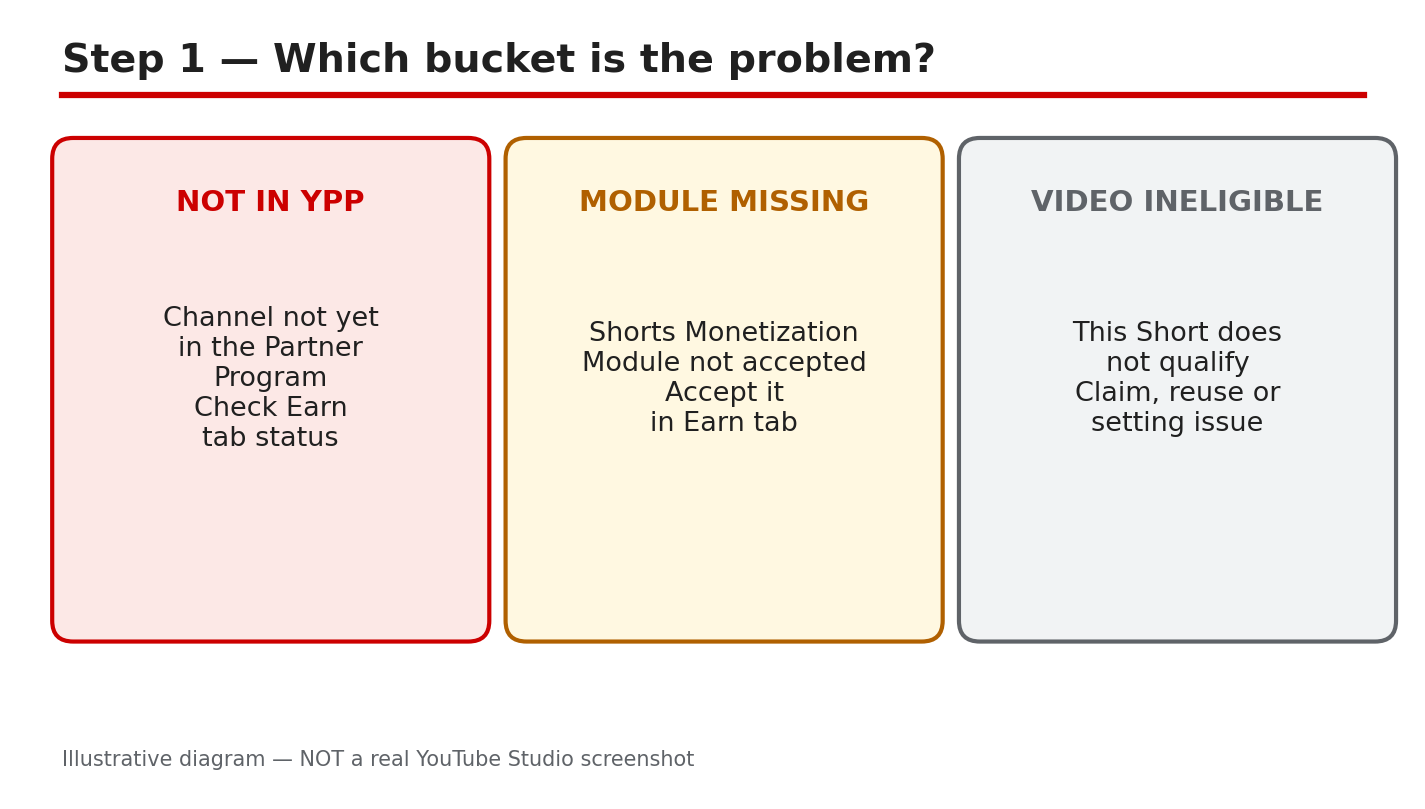
Your Short is getting views, but the earnings stay at zero. That gap is frustrating, and it is also common, because views and earnings are not the same thing. For Shorts, YouTube pays on engaged views , not on every public view. A Short can collect thousands of public views and still earn nothing if the views are not eligible, if your account is not set up to earn, or if that Short itself is ineligible. This guide sorts the cause into three buckets, checks the Earn tab in order, and fixes each reason one at a time. The key fact first: Shorts revenue uses engaged views, and a Short can have public views without earning. Engaged views exclude views YouTube counts as ineligible, such as views on non-original Shorts and artificial or fake views. So a rising view count never proves a Short is monetized. The checks below start with your account, then the Short, then the settings, so you fix the cause instead of guessing. Related reading: YouTube Shorts Monetization and RPM Explained. What You Will LearnHow to sort a non-earning Short into one of three buckets in two minutes. How to check your Partner Program status, the Shorts Monetization Module, and AdSense in the Earn tab. Why reused content, inauthentic or template content, and music claims stop a Short from earning. How age restriction and Made for Kids settings change whether a Short can earn. What engaged views are, and why public views alone never prove earnings. A 14-day fix-and-recheck plan that starts with the Earn tab.Step 1: Sort the Cause into Three Buckets What to do: Before you change anything, name the bucket. Bucket A is account setup: you are not in the YouTube Partner Program, the Shorts Monetization Module is not accepted, or AdSense is not linked. Bucket B is the Short itself: reused content, inauthentic or template content, or a music claim. Bucket C is settings and eligibility: an age restriction, a Made for Kids setting, or views that are public but not engaged. The seven reasons in this guide sit inside these buckets: (1) not in the Partner Program, (2) the Shorts module not accepted, (3) an AdSense or payment problem, (4) reused content, (5) inauthentic content, (6) music or claimed content, and (7) a setting or ineligible views. Write down which bucket your case fits before you move on. Studio path: YouTube Studio > Earn. Read the status at the top of the tab first, then open one Short in YouTube Studio > Content and check its restrictions and details. Example: A creator sees 40,000 views and zero earnings on a Short made from a viral clip. The Earn tab shows the channel is in the Partner Program with the Shorts module accepted, so the cause is Bucket B, not setup. The fix is content, not settings. Common mistake: Re-uploading the same Short, changing the title, or deleting and reposting it. None of these fix an account or eligibility problem, and re-uploads can create a reused-content problem of their own.Illustrative diagram/mock-up of the three problem buckets: not in the Partner Program, the Shorts module missing, and the Short itself ineligible. This is NOT a real YouTube Studio screenshot. Step 2: Run the Earn Tab Check What to do: Open the Earn tab and answer three questions in order. First, does the tab show you are in the YouTube Partner Program? Second, does it show the Shorts Monetization Module as accepted? Only partners who have accepted that module can earn Shorts ad revenue from the Creator Pool. Third, is an AdSense account linked and showing as active? If any answer is no, stop here: no fix to a single Short can make it earn until the account side is right. Note the exact status wording for each item, because the wording tells you what to fix next. Studio path: YouTube Studio > Earn. Read the Partner Program status, the Shorts Monetization Module status, and the AdSense and payment section on the same tab. Example: A new partner sees Shorts views growing but no revenue. The Earn tab shows the Watch Page module accepted and the Shorts module still awaiting acceptance. Accepting the Shorts module, then reloading the tab to confirm it shows as accepted, is the whole fix. Common mistake: Assuming that joining the Partner Program turns on every kind of earning at once. Each module is separate, so Shorts earnings need the Shorts module accepted on its own.Illustrative diagram/mock-up of the five-step Earn tab check: Studio, Earn tab, status, Shorts module, and AdSense. This is NOT a real YouTube Studio screenshot. Step 3: Fix the Content Reasons What to do: If the Earn tab is in order, the Short itself is the next suspect. YouTube's Shorts monetization policies list non-original Shorts as ineligible for payments, including unedited clips from other people's movies or TV shows and re-uploads of other creators' content without original content added. Separately, the channel monetization policies treat repetitive or mass-produced content as "inauthentic content," renamed from "repetitious content" in a July 2025 update, and say it has always been ineligible for monetization. The third content reason is music: a Short that uses claimed music can have its revenue shared with or taken by rights holders, and Shorts over one minute that contain claimed content can be blocked from monetization. Check each Short against all three, and be honest about how much of it is truly yours. Studio path: YouTube Studio > Content > click the Short > Restrictions. Then open YouTube Studio > Content > click the Short > Details and review what the Short contains and which audio it uses. Example: A creator posts daily clips from a TV show with a caption added. The Shorts earn views but nothing else. The clips are non-original, so the views are ineligible. The fix is to publish Shorts built around the creator's own footage, commentary, or editing, and to leave the re-uploads behind. Common mistake: Adding a filter, a caption, or a few seconds of reaction to someone else's clip and calling it original. Small changes to another creator's work do not make a Short original, and templates used with no added value fall under the inauthentic-content policy.Illustrative diagram/mock-up of the three content reasons: reused content, inauthentic or template content, and a music claim. This is NOT a real YouTube Studio screenshot. Step 4: Re-check Membership, Module, AdSense, and Strikes What to do: Go back to the Earn tab and re-check four things as a set: Partner Program membership is active, the Shorts Monetization Module shows as accepted, AdSense is linked and in good standing, and no active strike or enforcement action is blocking monetization. A strike or a monetization suspension can stop earnings even when the module shows as accepted, so do not skip this check. If the Earn tab shows a message or a warning, read it in full and follow the action it names, whether that is an AdSense step, a review, or an appeal. Record the date you checked, so the 14-day re-check in Step 6 has a clear starting point. Studio path: YouTube Studio > Earn for membership, module, and AdSense status. Then YouTube Studio > Content > Restrictions, and the channel status shown in YouTube Studio > Settings > Channel, for strikes and standing. Example: A creator accepts the Shorts module but earnings stay at zero. The Earn tab shows AdSense as needing action because the payment account was never fully set up. Completing the AdSense setup, then confirming the tab shows it as active, restarts the chain. Common mistake: Checking only the module and ignoring AdSense. Earnings cannot be paid without a linked AdSense account in good standing, so a green module with a broken payment link still earns nothing.Illustrative diagram/mock-up of the four Earn-tab checks: membership, module, AdSense, and strikes. This is NOT a real YouTube Studio screenshot. Step 5: Check the Settings Reasons What to do: Two settings can quietly stop a Short from earning. An age restriction limits who can watch and can remove a Short from ad eligibility, and a Made for Kids setting changes the features and ads available on a Short. Check both on the Short itself, and set them correctly for what the Short actually is: do not mark adult content as Made for Kids, and do not leave an age restriction on a Short that does not need one. Then remember the views rule: only eligible engaged views count toward Shorts payments. Views that are fake, automated, or on ineligible content do not count, even if the public counter keeps rising. A Short with 100,000 public views and almost no engaged views will show little or no revenue, and that is the system working as designed, not a bug. Studio path: YouTube Studio > Content > click the Short > Details > Audience, for the Made for Kids setting; and the same Details page and the Restrictions column, for the age restriction. For views, open YouTube Studio > Analytics > the Short, and compare the public view count with the revenue shown in YouTube Studio > Analytics > Revenue. Example: A creator's Short shows 80,000 views and no earnings. Its details show it was wrongly marked Made for Kids, which limited its ads. Correcting the audience setting on future Shorts, and checking the current one, explains the gap without any change to the video itself. Common mistake: Judging monetization from the public view count alone. Public views include views that never count as engaged views, so the counter can climb while revenue stays at zero.Illustrative diagram/mock-up of the settings reasons: age restriction, Made for Kids, and public versus engaged views. This is NOT a real YouTube Studio screenshot. Step 6: Follow the 14-Day Fix-and-Recheck Plan What to do: Fix in order, then wait and re-check. Days 1 to 2: fix the Earn tab first — membership, Shorts module, AdSense, and any strike message. Days 3 to 7: publish only original Shorts, with your own footage, voice, or editing, and with music you have the right to use. Days 8 to 14: leave the new Shorts alone and let the data arrive. On day 14, open the Earn tab and the Revenue report in Analytics, and compare the new Shorts with the old ones. If new original Shorts show revenue and old ones do not, the cause was the content. If nothing shows revenue, repeat Steps 2 and 4 and read every message on the Earn tab before changing anything else. Studio path: YouTube Studio > Earn on day 1 and day 14; YouTube Studio > Content to publish; YouTube Studio > Analytics > Revenue on day 14 to compare Shorts. Example: A creator fixes an unlinked AdSense account on day 1, publishes four original Shorts in the next week, and on day 14 sees the new Shorts earning while the old re-uploads still show zero. The plan proved the cause and the fix in one cycle. Common mistake: Changing five things at once and checking after one day. Revenue data lags, and changing everything together hides which fix worked. One ordered cycle of 14 days gives a clean answer.Illustrative diagram/mock-up of the 14-day fix-and-recheck plan: fix the Earn tab, publish original Shorts, and re-check on day 14. This is NOT a real YouTube Studio screenshot. Checklist: Before You RecheckPartner Program membership shows as active in the Earn tab. Shorts Monetization Module shows as accepted. AdSense is linked and showing as active. No active strike or monetization message is waiting in the Earn tab. The Short is original, not a re-upload or a bare template. Audience and age-restriction settings are correct for the Short. 14 days have passed since the fix, and the Revenue report has been checked.Frequently Asked Questions Why does my Short have views but no revenue? Because Shorts pay on engaged views, not public views. Views on ineligible, non-original, or artificially boosted Shorts do not count, and earnings also need Partner Program membership, the accepted Shorts module, and linked AdSense. I am in the Partner Program. Why are my Shorts still not earning? Check the Shorts Monetization Module separately in the Earn tab. Joining the program does not accept every module, and Shorts revenue needs that module accepted, plus AdSense linked and no blocking strike or message. Can a music claim take all of a Short's revenue? A Short with claimed music can have its associated revenue shared with rights holders, and longer Shorts with claimed content can be blocked from monetization. Check the Restrictions column on the Short, and use music you have the right to use. Does marking a Short Made for Kids stop it earning? It changes the ads and features available, which can reduce or remove earnings on that Short. Mark the audience setting honestly for each Short, and check it in the Details page if revenue looks wrong. How long should I wait after a fix before judging it? Give it 14 days, then check the Earn tab and the Revenue report in Analytics. Revenue data lags, and one day is too soon to tell whether an account fix or a content change worked. Sources — Check It Yourself These official YouTube Help pages were opened and verified live while this guide was prepared. The Shorts page explains engaged views, ineligible Shorts views, and the Shorts Monetization Module. The monetization policies page covers reused and inauthentic content and the July 2025 rename of the repetitious-content policy to inauthentic content. Check the current wording before you act.YouTube Shorts monetization policies — YouTube Help YouTube channel monetization policies — YouTube HelpNo official YouTube video is embedded in this post. No exact official video URL was verified live during preparation, so none was embedded rather than guessing one.
- CreatorPlaybook Team
- 29 Oct, 2026
YouTube Partner Program 2027 Terms: What to Accept by 31 January 2027
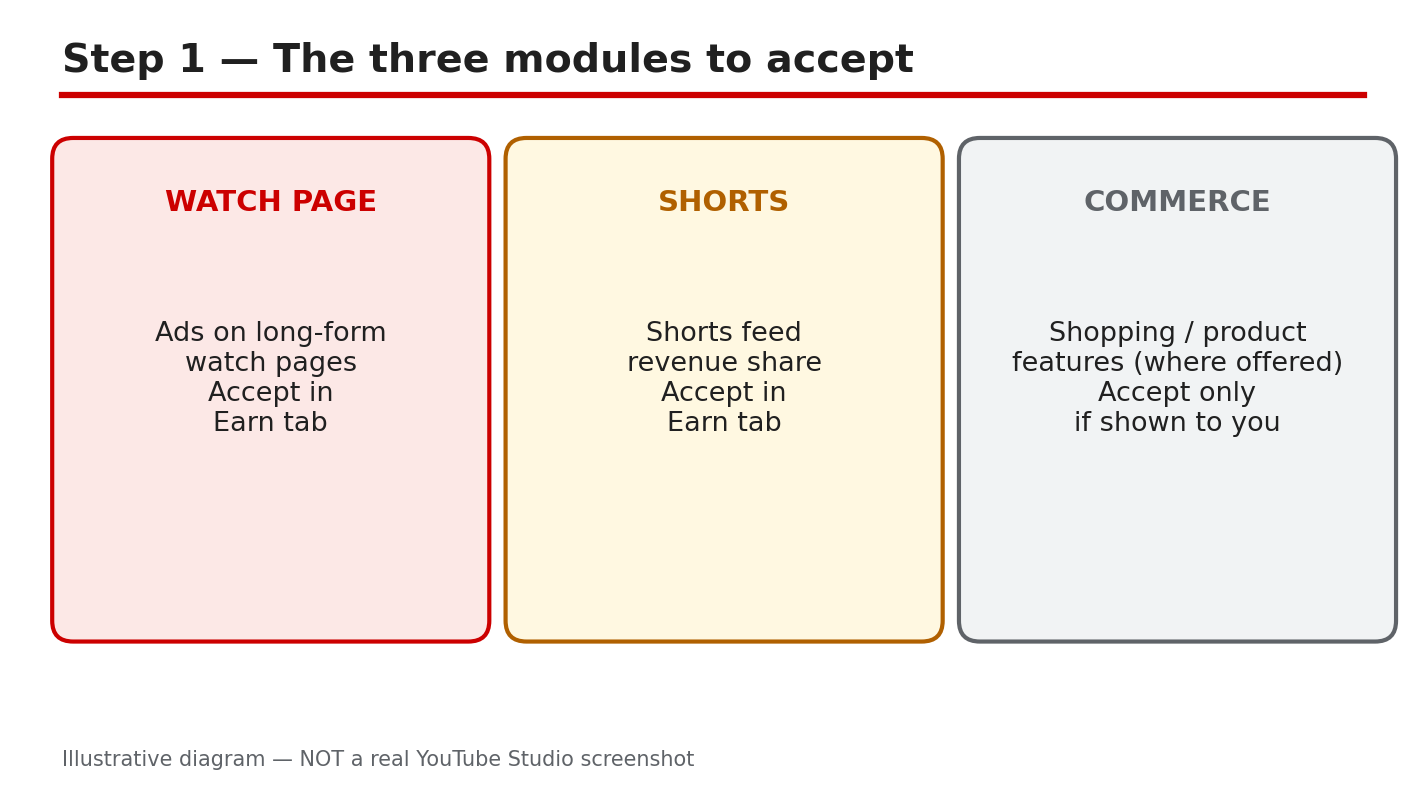
If you earn from YouTube, or plan to, a set of new Partner Program terms is coming, and the date to know is 31 January 2027. Reports say YouTube is asking creators to review and accept updated monetization terms, split into separate modules, and that earnings from any module you have not accepted could stop from 1 February 2027. This guide explains what to check in your own Earn tab, what the reported changes mean, and what to do before you tap accept. Do not rely on a screenshot or a summary alone: the deadline and the modules shown in YOUR Earn tab are the ones that apply to you. The important caution first. The new entry figures in Step 3 are reported by secondary sources, not verified from YouTube's official announcement during this guide's preparation. The official YouTube Help pages checked while preparing this guide showed a notice that Partner Program updates start on 1 February 2027, while the eligibility wording then visible still listed the older thresholds. Treat every new figure here as reported, and confirm it in your Earn tab and in the official terms before you act on it. Related reading: YouTube Monetization and the Partner Program Explained. What You Will LearnThe three monetization modules YouTube shows in Studio, and what each one covers. How to review and accept each module in the Earn tab, and where your deadline is shown. The reported new entry bar for new applicants, and why it is still unconfirmed here. What to check before you accept: terms, modules, country eligibility, and AdSense. What reports say happens if a module stays unsigned after 1 February 2027. A simple December-to-January plan for reading, accepting, and confirming.Step 1: Know the Three Modules What to do: Open YouTube Studio and look at the Earn tab as a set of separate agreements, not one switch. The official Help pages and reports describe three modules: Watch Page Monetization, which covers ads on watch pages and related revenue; Shorts Monetization, which covers Shorts feed ads and the Creator Pool revenue share; and Commerce Product, where shown, which covers shopping and product features. Not every channel sees every module, and the list you see depends on your country and your current status. Your job in this step is only to list what YOUR Earn tab shows, module by module, before you accept anything. Studio path: YouTube Studio > Earn. Read each module card or section shown. Note the module name, its status, and any date shown beside it. Example: A channel in the Partner Program sees Watch Page Monetization and Shorts Monetization as accepted, and no Commerce Product module, because that feature is not available in its country. The creator notes all three facts instead of assuming the missing module is a problem. Common mistake: Assuming one accept button covers everything. Each module is a separate agreement, so accepting one does not accept the others. Check each one.Illustrative diagram/mock-up of the three modules: Watch Page Monetization, Shorts Monetization, and Commerce Product. This is NOT a real YouTube Studio screenshot. Step 2: Review and Accept Each Module What to do: For each module shown, open its terms, read them, and accept only when you understand what you are agreeing to. The Earn tab shows the deadline that applies to your account, and that is the date that matters, not a date in a video or a post. Accept each module separately, and after each acceptance, reload the Earn tab and check that the module's status changed to accepted. Take a screenshot or write down the date and time of each acceptance, so you have your own record if a status ever looks wrong later. Studio path: YouTube Studio > Earn > click a module > review the terms > Accept. Repeat for each module shown. Then reload YouTube Studio > Earn and confirm each status. Example: A creator accepts Watch Page Monetization on 12 January, reloads the Earn tab, and sees its status change to accepted, while Shorts Monetization still shows as awaiting acceptance. The creator accepts that module too, rather than assuming the first acceptance covered both. Common mistake: Accepting in a hurry on a phone without reading, then discovering later that a module's terms changed how a revenue stream works. Read first, accept second, and confirm the status after.Illustrative diagram/mock-up of the five-step path to accept the terms in the Earn tab. This is NOT a real YouTube Studio screenshot. Step 3: Understand the Reported New Entry Bar What to do: This step is only about NEW applicants, and every figure in it is reported, not verified from the official announcement. According to secondary reports, new applicants would need 1,000 subscribers plus either 8,000 qualified watch hours in 365 days or 20 million qualified Shorts views in 90 days. That would double the older bar of 4,000 watch hours in 12 months or 10 million Shorts views in 90 days, which was the wording still visible on the official Help page checked during preparation. If you are already in the Partner Program, reports say you are grandfathered on entry, meaning you would not need to meet the new bar to stay in, but you must still accept the new terms. If you are applying for the first time, do not plan around these figures until you confirm them in your Earn tab and in the official terms. Studio path: YouTube Studio > Earn. Read the eligibility wording shown for YOUR account. Compare it with the terms text itself, not with a summary. Example: A channel with 1,000 subscribers and 5,000 watch hours reads a report saying the bar is now 8,000 hours. Instead of giving up, the creator opens the Earn tab, reads the eligibility wording shown there, and plans from that, because the reported figure is unconfirmed. Common mistake: Quoting the reported 8,000 hours or 20 million views as official fact, or telling other creators the old bar is gone. Until the terms in your Earn tab say so, call these figures reported.Illustrative diagram/mock-up of the reported new entry bar for new applicants, compared with the older bar. Figures are reported, not official. This is NOT a real YouTube Studio screenshot. Step 4: Check Four Things Before You Accept What to do: Before you accept any module, run four checks. First, read the terms themselves, including any section about revenue share, content rules, and how YouTube can change the terms. Second, check that every module shown in your Earn tab is listed, so you do not miss one. Third, confirm your country is eligible for each module you want, because availability varies by country. Fourth, confirm your AdSense account is linked and in good standing, because earnings cannot be paid without it. If any check fails, fix it before you accept, rather than accepting and hoping it sorts itself out. Studio path: YouTube Studio > Earn for the modules, the deadline, and the AdSense and payment section shown there. Read each module and the payment information on the same tab. Example: A creator reads the terms, finds the Shorts module shown but no Commerce Product module, confirms the channel's country is eligible for the first two, and checks that AdSense shows as linked. Only then does the creator accept, one module at a time. Common mistake: Accepting with an unlinked or troubled AdSense account, then wondering why earnings do not arrive. The terms and the payment link are both part of being ready.Illustrative diagram/mock-up of the four checks before you accept: read the terms, check all modules shown, confirm country eligibility, and confirm AdSense is linked. This is NOT a real YouTube Studio screenshot. Step 5: Know What Happens If You Do Not Accept What to do: Reports say the consequence of not accepting is simple and costly: from 1 February 2027, you would earn nothing from any module you have not signed. That means a channel that accepts Watch Page Monetization but not Shorts Monetization would, on the reported reading, keep watch-page earnings but earn nothing from Shorts. Reports also say Shorts Creator Pool revenue needs 10 million qualified Shorts views in the previous 90 days, which is a separate condition from accepting the module. Both points are reported, not verified from the official announcement, so confirm them in your Earn tab and in the official terms. Do not assume a grace period exists unless your own Earn tab says so. Studio path: YouTube Studio > Earn. Read the deadline and the consequence wording shown for each unsigned module. To see where you stand on Shorts views, check YouTube Studio > Analytics. Example: A creator accepts the Watch Page module in January but leaves the Shorts module unsigned, thinking it can wait. On the reported reading, Shorts earnings would stop from 1 February, even though watch-page earnings continue. The fix is to accept the Shorts module before the deadline shown in the Earn tab. Common mistake: Assuming earnings pause only briefly, or that old terms keep paying you. On the reported reading, unsigned means unpaid for that module, so treat the deadline as real.Illustrative diagram/mock-up of the reported consequences of not accepting: no earnings from unsigned modules, the Shorts Creator Pool condition, and checking the Earn tab. This is NOT a real YouTube Studio screenshot. Step 6: Follow the December-to-January Plan What to do: Use a short December-to-January plan. In December, read the terms for each module shown in your Earn tab, run the four checks from Step 4, and note the deadline shown in your Earn tab. In early January, accept each module, one at a time, and record the date of each acceptance. In late January, reload the Earn tab and confirm every module you need shows as accepted, and that your AdSense link still shows as active. If a module still shows as awaiting acceptance, do not leave it: re-open it, read any new message, and complete it before the deadline in your Earn tab. Studio path: YouTube Studio > Earn in December to read; the same tab in January to accept; and again in late January to confirm. Keep your own notes beside each check. Example: A creator reads the terms on 15 December, accepts both modules on 8 January, and checks the Earn tab on 28 January. Both show as accepted, so the creator starts February with nothing unsigned. Common mistake: Leaving acceptance to 31 January and hitting a problem, such as an AdSense check that needs days to resolve. Start in December so January has room for fixes.Illustrative diagram/mock-up of the December-to-January acceptance plan: read in December, accept in January, and confirm the accepted status. This is NOT a real YouTube Studio screenshot. Checklist: Before You AcceptEvery module shown in my Earn tab is listed, with its status noted. The deadline shown in MY Earn tab is written down. Terms read for each module I plan to accept. Country eligibility checked for each module. AdSense linked and showing as active. Each acceptance confirmed in the Earn tab after accepting.Frequently Asked Questions Do I need to accept the new terms if I am already in the Partner Program? Reports say yes. Existing partners are reported to be grandfathered on the entry bar, but they must still accept the new modules. Confirm the wording in your Earn tab. Is the new entry bar really 8,000 watch hours or 20 million Shorts views? That is the reported figure from secondary sources, not verified from YouTube's official announcement during this guide's preparation. The official Help page checked still showed the older 4,000-hour and 10-million-view wording. Confirm the current figures in your Earn tab and in the official terms. What happens if I accept one module but not another? On the reported reading, you would earn from the modules you accepted and nothing from the ones you did not, from 1 February 2027. Check the consequence wording in your Earn tab. I do not see the Commerce Product module. Is something wrong? Not necessarily. The modules shown depend on your country and status. If a module is not shown in your Earn tab, it may not be available to you. Do not try to accept a module you cannot see; work from what your Earn tab lists. Where do I confirm the real deadline? In your own Earn tab in YouTube Studio. That deadline, and the terms text shown there, override any date in a video, a post, or a report, including this one. Sources — Check It Yourself These official YouTube Help pages were opened and verified live while this guide was prepared. The Partner Program page showed a notice that updates start on 1 February 2027, while its eligibility wording then visible still listed the older thresholds, which is why new figures in this guide are presented as reported. Check the current wording in your Earn tab and in these pages before you act.YouTube channel monetization policies — YouTube Help YouTube Partner Program overview and eligibility — YouTube HelpNo official YouTube video is embedded in this post. No exact official video URL was verified live during preparation, so none was embedded rather than guessing one.
- CreatorPlaybook Team
- 28 Oct, 2026
YouTube Monetization Rejected? How to Fix Reused Content and Appeal the Right Way
A monetization rejection feels final, but it is a decision about your channel's content measured against YouTube's monetization policies — not a ban on your channel, and not a judgment on every video you will ever make. The way back is orderly: read the exact reason, clean up the content that caused it, and then appeal or reapply the right way, with original work to show. This guide works through six steps in order. Do them in order: the reason decides what to fix, the Earn tab shows whether you can appeal and by when, and the clean-up has to happen before you appeal — not after. What You Will LearnHow to read the exact rejection reason word-for-word — reused content, inauthentic content, or another policy. Where to find your status, the appeal or reapply option, and the exact deadline in the Studio Earn tab. How to clean up before you appeal: remove or unlist template and borrowed clips, and publish original videos. How to make an appeal video that shows your original work and explains how your videos were made. Which reapply waiting window applies to your case, and how to use the wait to rebuild.Step 1 — Read the Exact Reason Word-for-Word What to do. Open the rejection email YouTube sent and the notice in YouTube Studio, and read the reason exactly as written. Copy the words down. The reason is usually “reused content” or “inauthentic content,” but it can name another policy instead — and each reason points at a different fix. Do not guess from the subject line or from what happened to another creator. Note that YouTube renamed its “repetitious content” policy to “inauthentic content” in July 2025; the reused-content policy itself did not change. Studio menu path. Your rejection email, then YouTube Studio > Earn tab > read the status and reason shown for your channel. Example. An email says the channel was rejected for “reused content.” The creator lists the videos that are re-uploaded clips with no added commentary — those are the videos to deal with in Step 3, not the original videos. Common mistake. Appealing with a general message such as “please monetize my channel” without naming the reason or fixing anything. Reviewers decide against the policy named in the rejection, so a general plea gives them nothing new to review. Diagram 1: The exact rejection reason — reused content, inauthentic content, or another policy — read word-for-word before you act. Illustrative diagram/mock-up, NOT a real YouTube Studio screenshot.Quick ChecklistRead the exact rejection reason word-for-word. Check the Earn tab: status, appeal or reapply option, and exact deadline. Clean up before appealing: remove or unlist violating videos, and publish original videos. Make an appeal video that shows your original work, explains how your videos were made, and stays calm and factual. If the appeal fails, use only your case's reapply window — 30 days after a first rejection, 90 days if it is not your first rejected application or you previously re-applied — and check the exact window in the Earn tab. Rebuild with original videos on a schedule, then reapply when the window opens.Frequently Asked Questions What does "reused content" mean? YouTube's monetization policies require content to be original and authentic. Reused content means videos taken from elsewhere with little or nothing original added. In July 2025, YouTube renamed the "repetitious content" policy to "inauthentic content"; the reused-content policy itself did not change. How long do I have to appeal? Appeal within 21 days where the Earn tab offers an appeal. Check the exact deadline shown in the Earn tab for your channel. What if my appeal fails? Use the reapply window for your case: 30 days after a first rejection, or 90 days if it is not your first rejected application or you previously re-applied. Check the exact window in the Earn tab, and use the wait to publish original videos. Should I delete all my videos? No. Remove or unlist only the videos that break the policy named in the rejection, and add original videos that show your own work. Will I be monetized again if I reapply? There is no guarantee. Reapplying after the clean-up gives YouTube new original content to review; the decision is YouTube's. Sources — Check It YourselfYouTube channel monetization policies YouTube Partner Program overview & eligibility My channel was rejected for monetization FAQs Manage restrictions on your content Get started with YouTube Analytics No official video is embedded in this post: no official YouTube Creators or Creator Insider video matching this exact monetization-appeal topic was verified, so none was embedded rather than guessing at a link. All diagrams in this post are illustrative diagrams/mock-ups, NOT real YouTube Studio screenshots. Step 6 — Follow a Rebuild-Then-Reapply Plan What to do. Work in order over several weeks. First, finish the clean-up from Step 3. Then publish original videos on a regular schedule — videos you made yourself, showing your own work. Before each video goes up, check it against the monetization policies linked in the Sources section: is it original, and does it add something of your own? When your reapply window from Step 5 opens, check the Earn tab, confirm the channel shows original work, and only then reapply. Studio menu path. YouTube Studio > Content (publish original videos on a schedule) > Earn tab (check status and reapply when the window opens). Example. A creator publishes one original video a week for a month, reviews each one against the monetization policies, checks the Earn tab when the 30-day window opens, and reapplies only when the channel clearly shows original work. Common mistake. Reapplying on the first day the window opens with the same reused clips still public, or publishing nothing new during the wait. The window alone does not change the decision — the channel's content does. Diagram 6: Rebuild-then-reapply plan — publish original videos over several weeks, then reapply when the window opens. Illustrative diagram/mock-up, NOT a real YouTube Studio screenshot. Step 5 — If the Appeal Fails, Use the Reapply Window for Your Case What to do. Do not re-appeal the same way with the same channel. Read what the Earn tab shows for your case, and use only the reapply window that applies to you. YouTube's official guidance says: if this was your first application rejected, you can re-apply after a 30-day period; if it is not your first application to be rejected, or you have previously re-applied, you can try again after a 90-day period. Check the exact window and date in the Earn tab for your channel — that date is the one that counts. Use the waiting time to publish original videos, so the next review sees new original content. Studio menu path. YouTube Studio > Earn tab > status and reapply option > the exact reapply date shown for your channel. Example. A creator whose first application was rejected sees a 30-day window, spends the wait publishing original videos, and reapplies only after that window opens. A creator on a second rejection sees a 90-day window instead — the two cases are not the same number. Common mistake. Merging the two windows into one number — for example, telling every creator to wait 30 days — or reapplying immediately with the same reused clips still public. Both waste the next review. Diagram 5: Reapply waiting rule — the 30-day and 90-day windows are separate cases; use only the window the Earn tab shows for your channel. Illustrative diagram/mock-up, NOT a real YouTube Studio screenshot. Step 4 — Make an Appeal Video That Shows Your Original Work What to do. If the Earn tab offers an appeal, record a video that shows your original work and explains how your videos are made. Show yourself on camera, show your editing process or raw files, and explain in plain words what you create and how. Answer exactly what the appeal screen asks for, and keep the tone calm and factual. Upload or link the video exactly as the appeal screen instructs. Studio menu path. YouTube Studio > Earn tab > appeal option > follow the appeal screen's instructions for the appeal video. Example. A creator records a short video showing their editing timeline, the raw clips they filmed, and themselves explaining how each video is made — then submits it through the appeal screen. Common mistake. Sending an angry video with no evidence, or a long video that never shows the work itself. Reviewers need to see the original work, not hear a complaint about the decision. Diagram 4: Appeal video checklist — show your original work, explain how your videos were made, and include evidence. Illustrative diagram/mock-up, NOT a real YouTube Studio screenshot. Step 3 — Clean Up Before You Appeal What to do. Do the clean-up before you send any appeal. Go through your channel and remove or unlist the videos that match the reason in Step 1: template compilations, re-uploaded clips with nothing original added, and any other videos that break the policy named in the rejection. Then publish new, original videos that show your own work — your own recording, commentary, editing, or teaching. Appeal only after the channel itself shows the fix, because reviewers look at the channel as it is when they review it. Studio menu path. YouTube Studio > Content > select the videos > Visibility: Unlisted, or remove the video; then Content > Upload to publish original videos. Example. A channel rejected for reused content unlists five template compilation videos and publishes three original videos — the creator on camera, explaining each topic in their own words — before appealing. Common mistake. Appealing first and promising to clean up later, or leaving the violating videos public while appealing. The review is based on what the channel shows at review time, so an unchanged channel gives the reviewer the same answer. Diagram 3: Clean up before appealing — remove or unlist template and borrowed clips, and publish original videos first. The counts in the diagram are illustrative examples, not a required number. Illustrative diagram/mock-up, NOT a real YouTube Studio screenshot. Step 2 — Check the Earn Tab: Status, Appeal Option, and Deadline What to do. Open YouTube Studio and go to the Earn tab. Read three things: the monetization status shown for your channel, whether an appeal or reapply option is offered, and the exact deadline shown. Write the deadline down with the date. If an appeal is offered, you can normally appeal within 21 days of the decision — but the date shown in the Earn tab for your channel is the one that counts, so follow that date, not a date you read elsewhere. Studio menu path. YouTube Studio > Earn tab > monetization status > appeal or reapply option and the deadline shown. Example. The Earn tab shows the channel as not approved, with an appeal button and a deadline 21 days out. The creator notes the date, finishes the clean-up in Step 3, and appeals with five days to spare. Common mistake. Missing the deadline because the appeal was left until later, or hunting for an appeal form when the Earn tab offers no appeal. If no appeal is offered, use the reapply route in Step 5 instead of looking for a hidden appeal form. Diagram 2: The Earn tab — status, appeal or reapply option, and the exact deadline shown. Appeal within 21 days where the Earn tab offers an appeal. Illustrative diagram/mock-up, NOT a real YouTube Studio screenshot.

- CreatorPlaybook Team
- 25 Oct, 2026
How to Earn Money on YouTube
Earning money on YouTube is possible for far more creators than most beginners believe, but it rarely happens the way viral stories suggest. You do not need a million subscribers, a studio, or a lucky video to earn your first income. You need a clear topic, videos people search for or return to, and one or two income routes that fit your channel size. Many creators earn their first money not from advertisements alone, but from a helpful recommendation, a small sponsorship, or a loyal viewer who chooses to support the channel. This guide explains how to earn money on YouTube in a realistic, step-by-step way. It covers the main income routes, the requirements that matter, and the habits that turn a small channel into a steady, trustworthy source of income. You will learn what to focus on first, what to avoid, and how to grow your income slowly without harming the trust that makes earning possible in the first place. Related guides: Monetization Beyond AdSense: Affiliate, Sponsorship, Membership, How to Get Brand Deals as a Small Creator, and How to Make Educational Videos That Rank. Official source: YouTube Partner Program overview & eligibility What You Will LearnHow YouTube advertising income actually works How affiliates, sponsorships, and memberships compare What eligibility and audience you need before each route How to choose your first income stream How to disclose paid links and sponsorships honestly How to grow income without damaging viewer trustStep 1: Understand the Main Ways Creators Earn What to do: Learn the main income routes before you chase any one of them. YouTube advertising pays you a share of ad revenue on eligible videos. Affiliate income pays a commission when a viewer buys through your link. Sponsorships pay a fee for featuring a product. Memberships, Super Thanks, and channel support let viewers pay you directly. Selling your own products, courses, or services is another route, but it usually works best after you have built trust. How to do it in simple steps:List every route and note whether it needs an audience, a product, or a brand partner. Mark which routes fit a channel of your current size. Choose one route to start with, not five at once. Write down what success would look like in the first three months, in plain numbers.Practical example: A beginner cooking creator starts with affiliate links for the pan and knife used in videos. Those links cost nothing to set up, fit every tutorial naturally, and earn small commissions while the channel grows toward advertising eligibility. Common mistake to avoid: Chasing every income route at once. A channel with affiliate links, sponsorships, merchandise, memberships, and courses in the same month usually confuses viewers and delivers none of them well. Illustrative image: Compare income routes before you choose your first one. This is an illustrative image, not a screenshot of your channel or another creator's work. Step 2: Build the Audience and Watch Time That Income Depends On What to do: Focus on watch time, returning viewers, and a clear topic, because almost every income route rewards those things. Advertisers pay for attention, brands pay for trusted audiences, and viewers support creators they return to. A channel that publishes useful videos on a consistent schedule, answers real questions, and keeps viewers watching will qualify for more opportunities than a channel that chases trends without a topic. How to do it in simple steps:Choose one topic and make a series of videos that answer its most common questions. Publish on a schedule you can keep, even if that is once every two weeks. Improve titles and openings so viewers stay past the first minute. Reply to comments and ask viewers what problem to solve next.Practical example: A home-studio creator publishes one lighting tutorial each week for three months. Average views rise slowly, but returning viewers grow steadily, and brands in lighting later notice a focused, engaged audience rather than one viral video. Common mistake to avoid: Buying views or subscribers, or using misleading titles to inflate numbers. Fake growth can harm your channel, break platform rules, and scare away the brands and viewers who would otherwise pay you. Illustrative image: Steady, returning viewers are the foundation of creator income. This is an illustrative image, not a screenshot of your channel or another creator's work. Step 3: Qualify for Advertising the Right Way What to do: Work toward the YouTube Partner Program requirements by growing eligible watch time and subscribers, and by following YouTube's policies on original, advertiser-friendly content. Check the current requirements in YouTube Studio, because thresholds and rules can change, and do not rely on old advice from other creators. Keep your content original, avoid reused or copied material, and make sure music and clips are licensed. How to do it in simple steps:Check your eligibility progress in YouTube Studio regularly. Make longer, useful videos that viewers watch to the end, where that fits your topic. Use only licensed music and original footage or properly licensed clips. Review YouTube's monetization policies before applying, not after a rejection.Practical example: A tutorial creator reaches the watch-time threshold with twenty detailed guides rather than fifty short, shallow uploads. The longer videos also attract more affiliate clicks, so income starts before advertising does. Common mistake to avoid: Applying with reused content, such as re-uploaded clips with little added value, and then being surprised by a rejection. Original teaching, commentary, and demonstration are what make a channel eligible and sustainable. Illustrative image: Check eligibility in YouTube Studio and build original, watchable videos. This is an illustrative image, not a screenshot of your channel or another creator's work. Step 4: Start With Affiliate Income You Can Earn Early What to do: Recommend products you already use and trust, and add affiliate links in your video descriptions. Affiliate income is often the first realistic route for small creators because it does not require a large audience or a brand deal. It works when the product is a natural part of the video, when you show it in use, and when viewers believe your recommendation is honest. How to do it in simple steps:List the tools, books, or software you genuinely use for your topic. Join affiliate programmes for retailers that sell those items. Demonstrate the product in the video and mention one drawback honestly. Add a clear disclosure that links may earn you a commission.Practical example: A beginner filming creator links to a budget microphone used in every tutorial, plays a before-and-after audio sample, and notes that it is not ideal in noisy rooms. Viewers trust the advice, buy the microphone they wanted, and the creator earns a small commission on each sale. Common mistake to avoid: Recommending expensive products you have never used, simply because the commission is high. Viewers notice quickly, returns rise, and future recommendations stop working. Illustrative image: Affiliate income works best for products you actually use and show. This is an illustrative image, not a screenshot of your channel or another creator's work. Step 5: Add Sponsorships and Viewer Support When You Are Ready What to do: When your audience is focused and engaged, approach small brands that fit your topic, and offer loyal viewers a simple way to support you. A sponsorship should feel like a useful part of the video, not an interruption. Viewer support, through memberships or tips where available, should offer simple, sustainable perks such as early access or a monthly question-and-answer video, not a long list of promises you cannot keep. How to do it in simple steps:Make a list of brands your viewers already ask about. Pitch one clear deliverable, such as a short integration in a tutorial. Agree the price, message, and disclosure in writing before filming. Keep most content free, and offer membership perks you can deliver every month.Practical example: A channel with a few thousand subscribers partners with a small lighting brand for a 60-second integration inside a tutorial. The video remains useful, the brand reaches exactly the right viewers, and the creator is invited back for a second video. Common mistake to avoid: Accepting any sponsor that pays, even when the product does not fit your channel. One bad sponsorship can cost more trust than it earns in money, especially for a small creator. Illustrative image: Small, well-matched sponsorships can beat large, irrelevant ones. This is an illustrative image, not a screenshot of your channel or another creator's work. Step 6: Track Income, Taxes, and Trust Together What to do: Keep a simple record of every income source, the time it takes, and how viewers respond. Income that takes a great deal of time for very little return may not be worth keeping. Also keep records for tax purposes, set aside money for tax where your country requires it, and check the rules that apply to you, since tax rules vary by country and by income type. Finally, review your income every month and ask one question: did this route help viewers, or only extract money from them? How to do it in simple steps:Record each source, payment, and the hours spent on it. Set aside a portion of earnings for tax, following your local rules. Drop routes that harm trust or take too much time for too little return. Reinvest a small part of earnings in better audio, lighting, or editing only when it helps viewers.Practical example: A creator reviews three months of income and finds affiliate links earn steadily, a membership with heavy perks earns little and causes burnout, and one sponsorship earns well. They simplify the membership, keep the affiliates, and focus sponsorship pitches on similar brands. Common mistake to avoid: Spending the first payments without keeping records, then facing tax or accounting problems later. A simple spreadsheet from the start prevents most of that stress. Illustrative image: Track income, time, and viewer trust together each month. This is an illustrative image, not a screenshot of your channel or another creator's work. Checklist for Earning Money on YouTubeMain income routes understood and one chosen to start Clear topic and consistent schedule in place Original, licensed content that meets monetization policies Affiliate products chosen from tools you actually use Disclosure clear in video and description Sponsorships matched to your audience, agreed in writing Income and time tracked monthly, with tax records keptFrequently Asked Questions How many subscribers do I need to earn money? It depends on the route. Affiliate income has no subscriber minimum in most programmes, while advertising requires meeting YouTube's Partner Program thresholds. Sponsorships depend on audience fit and engagement, not a fixed number. Is advertising the best income for beginners? Usually not at first. Advertising income is often slow for small channels, while affiliate links and small sponsorships can earn earlier, especially in topics where viewers buy tools or courses. Do I need to disclose affiliate links? Yes. Say clearly, in the video and in the description, when a link earns you a commission. Disclosure is required in many countries and builds trust everywhere. Can I earn from Shorts? Shorts can earn through the Shorts revenue system and through affiliate links or sponsorships, but rates and rules differ from long videos. Treat Shorts as one part of a mix, not the whole income plan. What if my first income is very small? That is normal. Most creators start with small commissions and grow income as their audience, trust, and catalogue grow. A small, honest start beats a large, misleading one that damages your channel. Earning money on YouTube is a long game built on helpful videos, a focused audience, and honest recommendations. Start with one route, serve viewers first, and let income grow with trust.
- CreatorPlaybook Team
- 25 Oct, 2026
How to Get Brand Deals as a Small Creator
Brand deals are not reserved for channels with hundreds of thousands of subscribers. Brands pay for trust and relevance, and a small creator with a focused audience can be more valuable than a large creator whose viewers are scattered. Getting brand deals as a small creator is a skill: package your value clearly, pitch the right brands, and deliver work that makes them want to return. Related guides: How to Script a YouTube Video, Lighting Setup on a Budget for YouTube Videos, and How to Repurpose One Video into Shorts, Reels and Posts. What You Will LearnHow to make your channel attractive to brands How to build a simple media kit How to find and pitch the right brands How to price a deal fairly as a small creator How to deliver a sponsored video professionally How to turn one deal into repeat workStep 1: Make Your Channel Easy for Brands to Understand What to do: Before pitching, make it obvious who you help, what you make, and why viewers trust you. Brands decide in minutes, based on your recent videos, your niche, and your comments. How to do it in simple steps:Write a clear channel description: topic, audience, and upload schedule. Keep your recent videos consistent in topic and quality. Show real engagement: helpful comments, questions, and returning viewers. Remove or update old videos that no longer represent your channel.Practical example: A beginner filming channel states, "Weekly tutorials for new creators setting up a home studio." A lighting brand instantly understands the fit, without guessing what the channel is about. Common mistake to avoid: A channel that mixes unrelated topics with no clear audience. Brands cannot tell who they would reach, so they choose a clearer channel instead. Illustrative image: A clear niche makes your channel easy for brands to understand. This is an illustrative image, not a screenshot of your channel or another creator's work. Step 2: Build a Simple One-Page Media Kit What to do: Create a one-page media kit with your audience, your best videos, and what you offer. A media kit answers a brand's questions before they ask, and it makes a small channel look professional. How to do it in simple steps:Include your niche, audience, and average views for recent videos. Add two or three of your best videos as examples. List what you offer: dedicated video, integration, or Short. Add your contact email and a short note about why you fit the brand.Practical example: A media kit shows 4,000 subscribers, 8,000 average views, and viewers who are mostly beginner creators. A brand selling beginner microphones sees a perfect match, despite the modest subscriber count. Common mistake to avoid: Hiding weak numbers behind vague claims, or inflating them. Brands check, and honesty builds the trust that leads to repeat deals. Illustrative image: A one-page media kit answers a brand's questions quickly. This is an illustrative image, not a screenshot of your channel or another creator's work. Step 3: Pitch Brands That Already Fit Your Videos What to do: Pitch brands whose products you already mention, use, or that your viewers ask about. A pitch that shows genuine familiarity stands out from generic mass emails. How to do it in simple steps:Make a list of 20 brands that fit your niche. Find the right contact: marketing, partnerships, or creator relations. Write a short, personal email: one line about their product, one about your audience, one video idea. Attach your media kit and suggest a simple next step, such as a short call.Practical example: A creator emails a tripod brand, "Your viewers often ask about my tripod in tutorials. Here is a video idea featuring it in a beginner setup guide." The brand replies because the idea is specific, not generic. Common mistake to avoid: Sending the same long, generic pitch to 100 brands. Personal, relevant pitches get replies; mass pitches get ignored. Illustrative image: Pitch brands you already use and understand. This is an illustrative image, not a screenshot of your channel or another creator's work. Step 4: Price Fairly, and Start With a Clear Offer What to do: Price based on the value you deliver, not only on subscribers. For a first deal, a clear, modest price with one deliverable is better than a vague, expensive proposal. How to do it in simple steps:Base your price on average views, audience fit, and the work involved. Offer one package first: for example, one integration plus one Short. State what is included: filming, editing, usage rights, and revisions. Ask for payment terms in writing before you film.Practical example: A small creator charges a modest fee for a 60-second integration, with one revision included. The brand accepts quickly, the work is clear, and both sides are happy to work again. Common mistake to avoid: Working for free "for exposure" repeatedly, or pricing so high that no small brand can say yes. Fair pricing respects both your time and the brand's budget. Illustrative image: A clear, fair offer makes it easy for a brand to say yes. This is an illustrative image, not a screenshot of your channel or another creator's work. Step 5: Deliver a Sponsored Video That Still Helps Viewers What to do: Make the sponsored video useful first, and promotional second. Viewers accept sponsorship when the video still teaches, entertains, or solves a problem. How to do it in simple steps:Disclose the sponsorship clearly at the start of the segment. Show the product in a real use case, not only in a scripted claim. Keep the sponsored part focused and honest, including limits. Deliver on time, and send the brand the link and basic results.Practical example: A creator integrates a microphone into a tutorial, demonstrates it, notes it is not ideal for noisy rooms, and still teaches the full lesson. Viewers learn, and the brand gets an honest, credible mention. Common mistake to avoid: Turning the whole video into an advertisement with no value. Viewers leave, and the brand's message reaches fewer people, not more. Illustrative image: A sponsored video should still be useful on its own. This is an illustrative image, not a screenshot of your channel or another creator's work. Step 6: Follow Up and Turn One Deal Into Repeat Work What to do: After a deal, follow up with results, thank the brand, and suggest a next idea. Repeat deals are easier than new pitches, because the brand already knows your work. How to do it in simple steps:Send a short report: views, comments, and any clicks or sales you can see. Thank the contact by name, and note what worked well. Suggest one follow-up idea, such as a second video or a series. Keep the relationship warm, even if the next deal is months away.Practical example: After a successful integration, a creator sends results and proposes a three-video series for the next quarter. The brand agrees, and the creator gains steady, predictable income. Common mistake to avoid: Disappearing after payment. Brands remember creators who communicate well, and they return to them first. Illustrative image: A good follow-up turns one deal into repeat work. This is an illustrative image, not a screenshot of your channel or another creator's work. Checklist for Getting Brand DealsChannel niche and audience clearly stated One-page media kit ready List of fitting brands, pitched personally Clear offer and fair price agreed in writing Sponsored video useful, honest, and disclosed Results sent and follow-up idea proposedFrequently Asked Questions How small is too small for brand deals? There is no fixed minimum. A focused audience of a few thousand engaged viewers can be valuable to the right brand. Should I accept free products instead of payment? Occasionally, if the product is valuable and you would buy it anyway. For most work, however, your time deserves payment, not only a product. What if a brand wants me to say something untrue? Decline that part of the deal. Your credibility is worth more than one payment, and brands respect creators who protect it. How do I find brand contacts? Check brand websites for partnership or press contacts, and look for creator or influencer pages. A short, respectful email is usually enough to start. Do I need a manager? No, not as a small creator. Direct, professional communication works well, and it keeps you in control of your channel. Start with fit, not size. Show brands a clear audience, pitch personally, price fairly, and deliver work viewers still enjoy. That is how small creators earn repeat brand deals.

- CreatorPlaybook Team
- 25 Oct, 2026
Monetization Beyond AdSense: Affiliate, Sponsorship, Membership
AdSense is only the first way many creators earn, and for small channels it is often the slowest. Monetization beyond AdSense, through affiliate links, sponsorships, and memberships, can bring income earlier, and it usually grows from trust, not just views. This guide explains each route honestly, so you can choose one that fits your channel size and your values. Related guides: How to Script a YouTube Video, Voiceover Tips for Clear Audio, and Lighting Setup on a Budget for YouTube Videos. Official source: YouTube channel monetization policies What You Will LearnHow affiliate income works for small creators How to recommend products honestly How sponsorships work before you are large How memberships and channel support work How to disclose paid links and sponsorships clearly How to combine income streams without confusing viewersStep 1: Start With Affiliate Links for Products You Already Use What to do: Recommend products you genuinely use, and earn a small commission when viewers buy through your link. Affiliate income works best when the product is a natural part of the video, not a forced advertisement. How to do it in simple steps:List the tools you already use: camera, mic, lights, software, or books. Join an affiliate programme for a retailer that sells those tools. Add links in the description, with a clear note that they are affiliate links. Mention the product only when it helps the video's topic.Practical example: A creator's lighting tutorial links to the exact lamp and diffuser they use. Viewers who want the same setup buy through the link, and the creator earns a small commission without making a separate sales video. Common mistake to avoid: Promoting expensive products you have never used, just because the commission is high. Viewers notice, trust falls, and future recommendations stop working. Illustrative image: Affiliate links work best for products you actually use. This is an illustrative image, not a screenshot of your channel or another creator's work. Step 2: Show the Product in Action, Not Just in a Link What to do: Demonstrate the product, explain its limits, and show who it suits. A demonstration builds far more trust, and sales, than a link alone. How to do it in simple steps:Show the product solving a real problem in your video. Mention one drawback, so the recommendation feels honest. Explain who should not buy it, as well as who should. Put the link where viewers can find it easily, in the description.Practical example: A creator shows a budget microphone, plays a before-and-after audio clip, and notes it is not ideal for noisy rooms. Viewers trust the review and are more likely to buy, even with the drawback mentioned. Common mistake to avoid: Reading a product description aloud as a review. Viewers can read that themselves; they watch you for real experience and honest judgement. Illustrative image: A real demonstration beats a read-out product description. This is an illustrative image, not a screenshot of your channel or another creator's work. Step 3: Approach Small Sponsorships With a Simple Offer What to do: Sponsorships are not only for large channels. Small, trusted channels can work with small brands, especially when the brand's audience matches yours closely. How to do it in simple steps:List brands whose products your viewers already ask about. Send a short email: who you are, your audience, and one video idea. Offer one clear deliverable, such as a 60-second mention in a tutorial. Agree the price, the message, and the disclosure before filming.Practical example: A channel with 3,000 subscribers focused on beginner filming partners with a small lighting brand. The brand gets a highly relevant audience, and the creator gets paid work that fits their content. Common mistake to avoid: Accepting any sponsor that pays, even if the product does not fit your channel. One bad sponsor can damage trust built over many videos. Illustrative image: A small, well-matched sponsor can be better than a large, irrelevant one. This is an illustrative image, not a screenshot of your channel or another creator's work. Step 4: Offer Memberships That Give Real Value What to do: Memberships let loyal viewers support you regularly, in exchange for extra value such as early videos, behind-the-scenes content, or a members-only community. How to do it in simple steps:Choose one or two perks you can deliver every month without burning out. Keep most content free, so membership feels like a bonus, not a paywall. Price memberships modestly at first, and raise them only with added value. Thank members by name or in a regular update, if they are comfortable with it.Practical example: A creator offers members early access to tutorials and a monthly question-and-answer video. Twenty members at a modest price provide steadier income than ad revenue alone. Common mistake to avoid: Promising many perks you cannot sustain, such as weekly exclusive videos on top of regular uploads. Members leave when perks stop arriving. Illustrative image: Memberships work when perks are simple and sustainable. This is an illustrative image, not a screenshot of your channel or another creator's work. Step 5: Disclose Clearly, Every Time What to do: Tell viewers clearly when a link earns you commission or a video is sponsored. Disclosure is required in many places, and it also builds trust: viewers respect honesty more than hidden promotion. How to do it in simple steps:Say in the video, in plain words, "This video includes a sponsored message" or "These are affiliate links." Add the same disclosure in the description. Use YouTube's paid promotion label when a video is sponsored. Never claim an opinion is independent when a brand paid for it.Practical example: A creator says at the start of a segment, "This part is sponsored, and here is my honest experience with the product." Viewers still watch, because the honesty is clear. Common mistake to avoid: Hiding disclosure in tiny text at the end of a long description. If viewers discover promotion later, they feel misled, even if the product was good. Illustrative image: Clear disclosure protects viewers and your reputation. This is an illustrative image, not a screenshot of your channel or another creator's work. Step 6: Combine Streams Slowly, and Track What Works What to do: Add one income stream at a time, track it for a month, and only then add another. A channel with several small, steady streams is more stable than one that depends on a single source. How to do it in simple steps:Start with affiliate links, which need no negotiation. After a month, review which links were clicked and bought. Add sponsorships or memberships only when you can deliver them well. Keep a simple record: source, income, time spent, and viewer reaction.Practical example: A creator finds affiliate links for lighting gear earn steadily, while a membership with heavy perks takes too much time. They simplify membership perks and keep affiliate income as the main extra stream. Common mistake to avoid: Launching affiliate links, sponsorships, merchandise, and memberships in the same month. Too many offers confuse viewers and overwhelm the creator. Illustrative image: Add one income stream at a time and track it honestly. This is an illustrative image, not a screenshot of your channel or another creator's work. Checklist for Monetization Beyond AdSenseAffiliate products chosen from tools you actually use Products demonstrated, with honest drawbacks Small sponsorships matched to your audience Membership perks simple and sustainable Disclosure clear in video and description Income streams added one at a time and trackedFrequently Asked Questions Can small channels earn from affiliates? Yes. Affiliate income depends on trust and relevance, not only on size. A small, focused audience often buys more than a large, general one. How many subscribers do I need for sponsorships? There is no fixed number. Brands care about audience fit, engagement, and professionalism, so small channels with a clear niche can attract sponsors. Do I need to disclose affiliate links? Yes, in most countries, and it is good practice everywhere. A short, clear note protects you and your viewers. Should I stop AdSense if I earn elsewhere? No. AdSense can continue alongside other income. The goal is several steady streams, not replacing one with another. What if a product I recommend disappoints viewers? Acknowledge it, explain what you learned, and update the recommendation. Honest correction often strengthens trust. Earn by helping first. Recommend what you use, partner with brands that fit, offer simple membership value, and disclose clearly. Trust is the income stream that makes the others possible.