Showing Posts From
Youtube growth
 CreatorPlaybook Team
- 14 Nov, 2026
YouTube Analytics Traffic Sources — Where Your Views Actually Come From
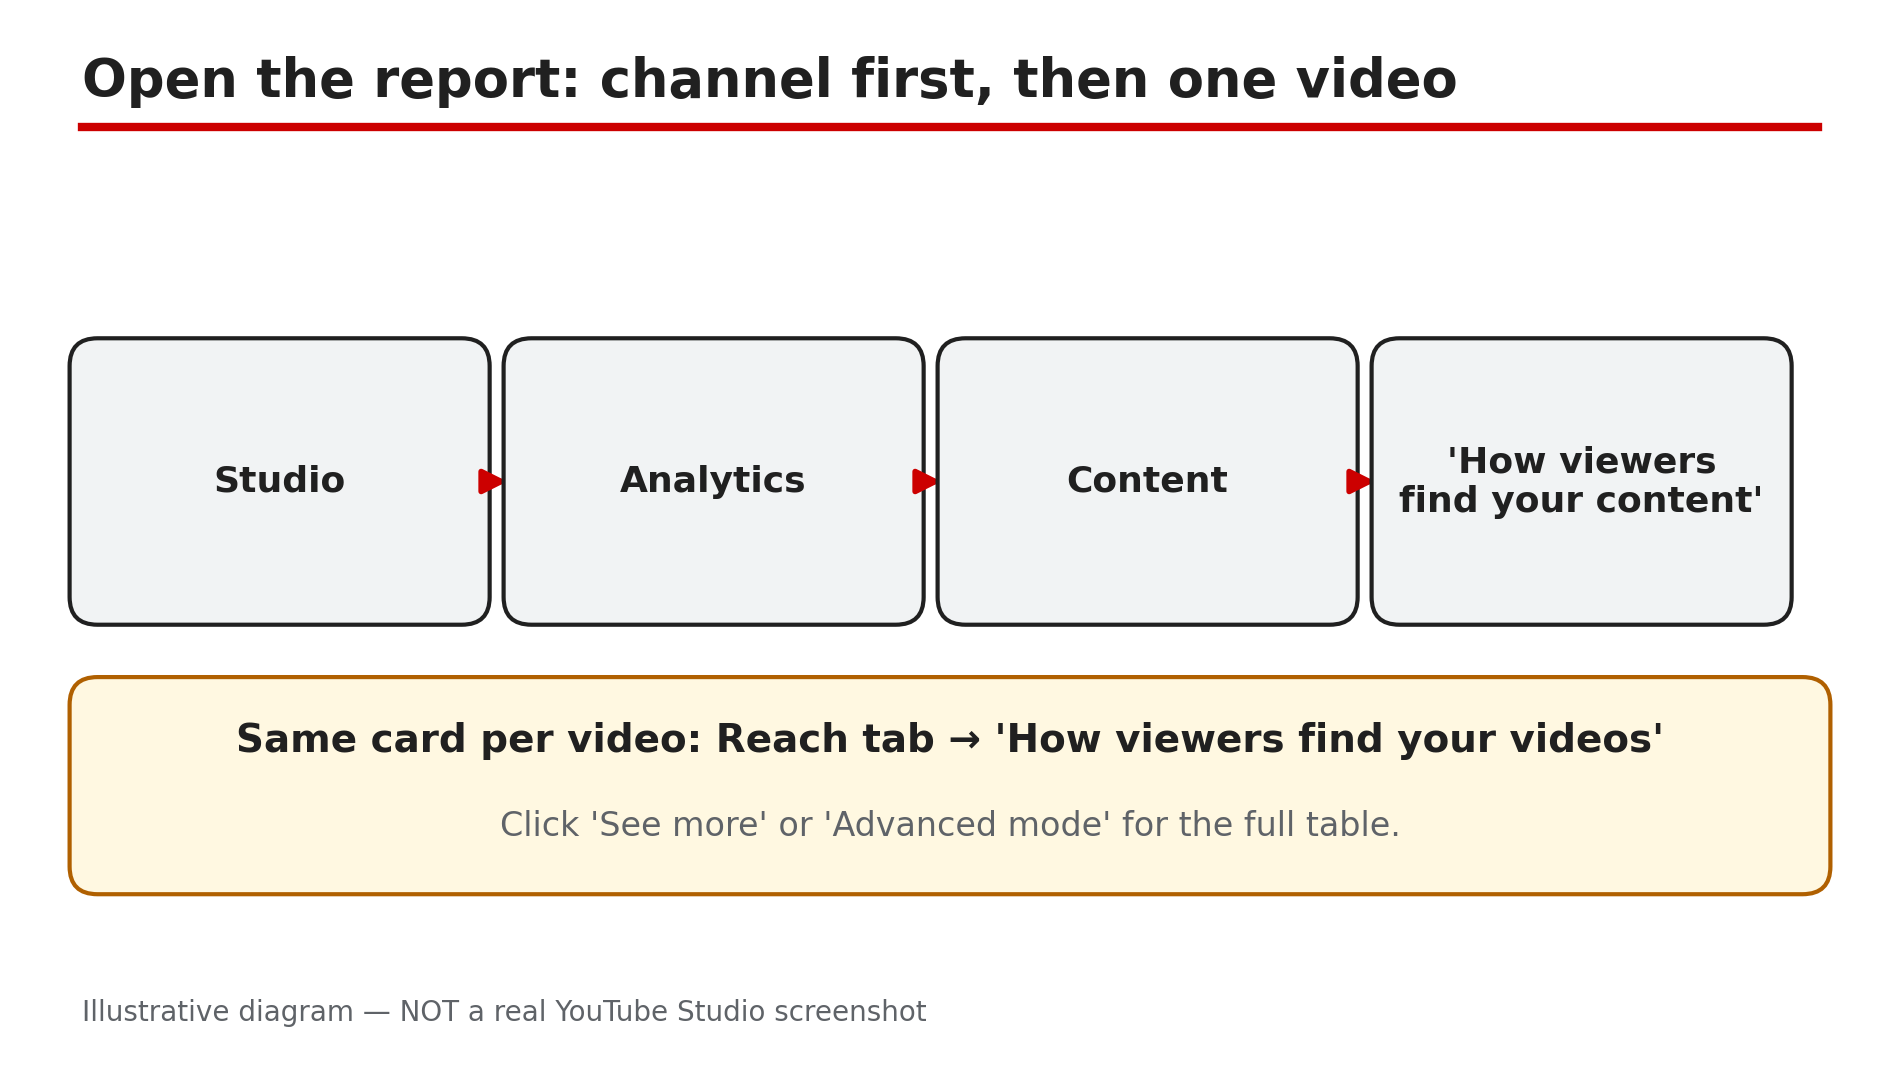
Intro Your view count tells you how many people watched — never how they found you, and that decides what to fix next. The traffic-source report splits every view into the place it came from: Browse features, Suggested videos, YouTube search, the Shorts feed, External sites, Playlists, Channel pages, and more. Read it as a diagnosis, not a definition list: strong Search with near-zero Browse differs from a video riding Suggested. This guide shows where the report lives, what each source means, and what to change when a source is missing or dominant. Views vs unique viewers is a separate post. What You Will LearnWhere the report lives, at channel level and per video What Browse, Suggested and Search mean — and what each diagnoses What the smaller sources tell you: Shorts, External, Playlists, Channel pages, Notifications How to compare two videos or two periods to find what changed What to fix when a source is missing or dominates The checks that stop you blaming a working reportStep 1 — Open the right report: channel first, then one video What to do: Open the report twice: once for the whole channel, once for a single video. How: In YouTube Studio, open Analytics, then Content. The Help page opened live for this post says the Content tab "gives you an overview of how your audience finds your content" — channel level only. Scroll to "How viewers find your content". For one video, use the Reach tab card "How viewers find your videos". Click "See more" or "Advanced mode" for the full table. Example: A creator sees Browse at 45% channel-wide, but her newest video shows 4% — the average hid a video the home feed never picked up. Common mistake: Judging a video from the channel report alone — the channel mix is an average, and one video's problem disappears inside it.Illustrative diagram: the path to the traffic-source report in YouTube Studio, channel level first, then one video. Step 2 — Read the big three: Browse, Suggested and Search What to do: Read Browse, Suggested and Search first — for most channels these three carry the bulk of views, and each points at a different fix. How: YouTube's Help page defines them plainly, as read live on 14 November 2026. Browse features is "traffic from the Home, subscriptions, Watch Later, Trending/Explore and other browsing features" — YouTube itself choosing to show your video. Suggested videos is "traffic from suggestions that appear next to or after other videos" — viewers arriving from another video's audience. YouTube search is "traffic from YouTube search results"; the exact search terms sit on the "Traffic source: YouTube Search" card. Example: Two videos, 10,000 views each: one got 7,000 from Search, the other 7,000 from Browse. Common mistake: Treating all views as equal — a Search-heavy video and a Browse-heavy video need opposite fixes.Illustrative diagram: the big three traffic sources — Browse features, Suggested videos and YouTube search — and what each one means. Step 3 — Read the smaller sources What to do: Scroll past the big three — a small source that suddenly grows is often the most useful line. How: The Help page lists them all. Shorts is "traffic from the Shorts vertical viewing experience" — the swipe feed, which swings wildly. External is "traffic from websites and apps that have your YouTube video embedded or linked to" — the sites sit on the "Traffic source: External" card. Playlists is "traffic from any playlist that included one of your videos" — yours, another creator's, or a viewer's Liked videos. Channel pages is traffic from channel pages, Notifications from subscriber notifications, Direct or unknown is "traffic from direct URL entry, bookmarks, signed out viewers, and unidentified apps". A source at 2% is background noise; at 20% it is a story. Example: A tutorial jumps from 200 to 3,000 views a day, and External is suddenly 60%. One blog embedded the video — one embed, not a channel-wide breakthrough. Common mistake: Ignoring the small rows. The cause of a spike or slump is usually sitting in a row you never scrolled to.Illustrative diagram: six smaller traffic sources — Shorts feed, External, Playlists, Channel pages, Notifications and Direct or unknown. Step 4 — Compare two videos or two periods What to do: Never read one report in isolation — compare the video with another video, or with its own earlier period, in Advanced mode. How: In Advanced mode, compare with a second video, or the same video over a previous 28 days. Look for the source that moved, not the total. If views fell but Search stayed flat while Browse dropped by half, the video stopped being pushed on the home feed while searchers kept finding it. Pair this with the retention graph: strong Suggested traffic with viewers leaving in the first 30 seconds will stop being suggested, as our retention-graph guide explains. Traffic tells you where viewers came from; retention tells you whether they stayed. Example: Two videos with 8,000 views each: one is 70% Suggested, the other 70% Search. The first depends on other videos' audiences; the second on a question people keep typing. Common mistake: Comparing view totals instead of source mixes — two videos with identical totals can have opposite problems.Illustrative diagram: two videos with the same views but different traffic sources — one 70% Suggested, one 70% Search. Step 5 — Fix the missing or dominant source What to do: Turn the diagnosis into one fix per source — change what that source depends on. How: Browse near zero with strong Search: the thumbnail and title are not winning the home feed — test a clearer thumbnail and a sharper title. Strong Suggested: the video rides other videos' audiences — make the next video on a closely related topic. Weak Search: the title and description do not match the words people type — check the exact terms on the "Traffic source: YouTube Search" card. External spike? Open the External card and find the one site or share behind it — a single embed can vanish as fast as it appeared. If the Shorts feed dominates a Short, judge by the pattern across several uploads, not one video. Example: A channel's how-to videos get 60% of views from Search. The creator titles the next five videos around the exact questions in her Search terms report — and Search grows further. Common mistake: Fixing the wrong source. Rewriting titles will not help a Browse problem, and a new thumbnail will not help a video nobody searches for.Illustrative diagram: one source, one fix — Browse near zero, Search strong, or an External spike. Step 6 — Rule out the false alarm first What to do: If a traffic source is missing or the report looks empty, check the video itself before concluding Analytics is broken. How: First, check visibility in Studio: a private or unlisted video is not publicly discoverable, so as reported it collects no Browse, Suggested or Search traffic — viewers arrive only via the direct link. YouTube's limited-data Help page, checked during research, says private or unlisted videos show no demographics or geography data, and one-off search terms may not appear on the traffic-source report. Second, confirm the video has finished processing and has no age restriction — as reported, either limits where it is shown. Third, Analytics data can be delayed: wait and re-check — see our post on Analytics missing or delayed for the full checks. Only then treat a missing source as a real problem. Example: A creator panics over zero Suggested traffic — then finds the video is still unlisted, shared with a friend for a preview. Once Public, Browse and Suggested appear over the next day. Common mistake: Re-uploading over an empty report — a private, unlisted, restricted or still-processing video explains it more often than any Analytics fault.Illustrative diagram: four false alarms to check before blaming the report — private or unlisted, still processing, age-restricted, delayed data. Checklist — Read traffic sources like a diagnosis☐ Channel report: Studio → Analytics → Content → "How viewers find your content" ☐ Same report for one video: Reach tab → "How viewers find your videos" ☐ Read Browse, Suggested, Search; noted which carries the video ☐ Checked the smaller sources — Shorts, External, Playlists, Channel pages, Notifications, Direct/unknown ☐ Compared with another video or earlier period in Advanced mode ☐ Fix matched to the source: Browse → thumbnail/title, Search → terms, Suggested → related topics, External → one embed ☐ Checked visibility, processing, restrictions before blaming the report ☐ Paired traffic source with retention graph before concludingFAQs 1. Where do I find traffic sources in YouTube Analytics? In YouTube Studio, open Analytics, then Content, and look for "How viewers find your content". For one video, use the Reach tab card "How viewers find your videos". 2. What is the difference between Browse features and Suggested videos? Browse features is traffic from the Home page, subscriptions, Watch Later and other browsing features. Suggested videos is traffic from suggestions next to or after other videos — both definitions from the Help page opened live for this post. 3. Why is my Browse traffic near zero when Search is strong? As reported, it usually means the video is findable but not winning the home feed: searchers click it, Home scrollers pass it by. Test a clearer thumbnail and a more specific title. 4. Why did my External traffic suddenly spike? Open the "Traffic source: External" card — as reported, a spike usually traces to one site that embedded or linked the video. Find it before treating the spike as growth. 5. Why is a traffic source missing from my video's report? Check the video first: as reported, a private or unlisted video gets no Browse, Suggested or Search traffic, and a video still processing or age-restricted may show limited data. Analytics can also be delayed. SourcesYouTube Help — "Understand your YouTube content performance" (official Help page, opened live 14 Nov 2026): https://support.google.com/youtube/answer/12220281?hl=en CreatorPlaybook — "Views vs Unique Viewers vs Impressions on YouTube — What Each Number Really Means" (internal link): </blog/views-vs-unique-viewers-vs-impressions> CreatorPlaybook — "YouTube Studio Analytics Missing or Delayed? What to Check First" (internal link): </blog/youtube-studio-analytics-missing-or>
- CreatorPlaybook Team
- 08 Nov, 2026
YouTube Shorts Getting Views but No Subscribers? Why and How to Fix It
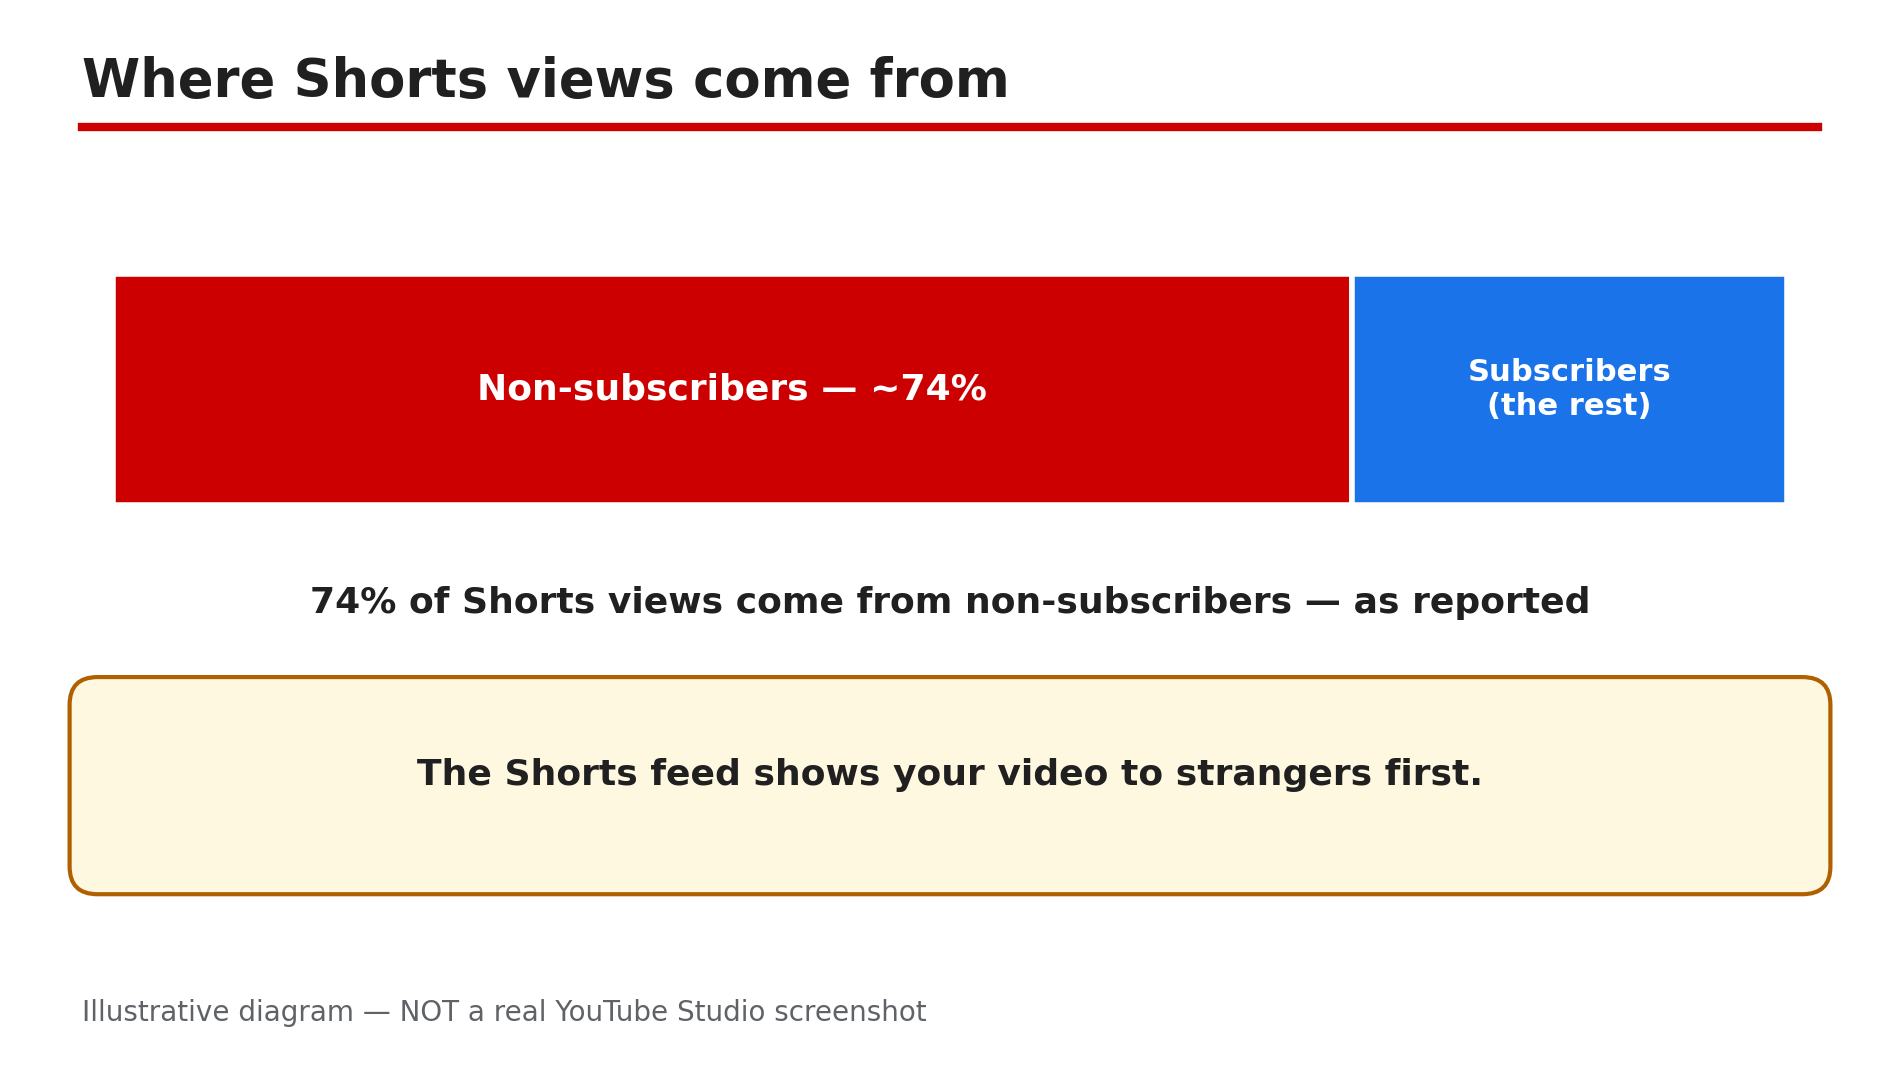
Your Short gets 10,000 views, 50,000 views, maybe even a million — and your subscriber count barely moves. It feels broken. It is not. In most cases, views without subscribers is not a glitch. It is how Shorts are designed to work. Shorts and long-form videos run on separate recommendation systems, and the Shorts feed shows your video to strangers. As reported in a Loopex Digital Q1 2026 report, around 74% of Shorts views come from non-subscribers. The feed rewards a fast swipe — completion, likes, comments, shares, and the newer Save rate added in July 2026 — and none of those is tied to subscribing. At around 16 seconds of average watch time, as reported, that is rarely enough for a stranger to decide to follow you. The fix is not "get more views". It is to give each viewer a reason to come back — here are six fixes that do that. What You Will LearnWhy Shorts views rarely become subscribers What the reported numbers mean How to add a subscribe trigger to every Short How a series earns the next subscribe How your channel page backs the promise How to bridge viewers to long-form videoStep 1 — Read your numbers before fixing anything What to do: Check in YouTube Studio where your Shorts views come from and how many subscribers they produce, so you fix the real gap. How: In Studio, open a Short's Reach tab under Analytics. Most views will show under the Shorts feed — strangers swiping past, not subscribers. Then check the Subscribers report for the same video. As reported by industry analyses, the platform average is around 16.9 new subscribers per 10,000 Shorts views, roughly 1.7%, while strong channels report 2–3%. Treat those as reported ranges, not YouTube's own figures — confirm your own numbers in Studio. Example: A cooking creator's Short has 80,000 views and 90 new subscribers; Studio shows 78% came from the Shorts feed. Nothing is broken — the audience was almost entirely strangers. Common mistake: Judging a Short by views alone. Views measure reach; subscribers measure a decision, and the two need different fixes.Illustrative diagram: most Shorts views come from non-subscribers, so low conversion is the default, not a glitch. Step 2 — Give every Short one reason to subscribe What to do: Attach a specific subscribe trigger to the Short just watched — a promise about what comes next. How: Before you record, finish this sentence: "If you liked this Short, subscribe because tomorrow I will show you ___." Put that promise in the last two or three seconds — not as a generic "please subscribe". The trigger must match the Short: a leaking-tap Short earns "one home fix every day", not "more videos". A specific next video gives them a reason to come back. Example: A fitness creator ends a home workout Short with "Part 2 — the version for bad knees — is tomorrow. Subscribe so you don't miss it." Viewers who want Part 2 now have a concrete reason to subscribe. Common mistake: Saying "like and subscribe" in every Short. Viewers swipe past a generic ask; they act on a specific next step.Illustrative diagram: average Shorts watch time is too short for a stranger to decide to subscribe. Step 3 — Build a series viewers can recognise What to do: Turn one-off Shorts into a series with the same format, opening line, and rhythm, so viewers subscribe for the next episode. How: Pick one format you can repeat at least ten times — "One mistake a day", "60-second fix" — and keep the opening three seconds identical: same phrase, same framing, same on-screen episode number. Publish on a predictable rhythm. A series turns a single view into an expectation, and subscribing becomes the way to keep it. Example: A creator posts "One Excel trick a day" every morning, always opening with "Excel trick number 12". By episode 15, viewers subscribe because they know what tomorrow's trick will be. Common mistake: Posting a different topic and format every day. Each Short then starts from zero, and no viewer ever learns what your channel is for.Illustrative diagram: a specific subscribe promise tied to the Short converts better than a generic ask. Step 4 — Make your channel page back the promise What to do: Make your channel page prove, in five seconds, that subscribing is worth it. How: Open your channel page as a stranger would. Your banner, profile picture, and About section should say the same thing your Shorts promise: who the channel is for and what they get. Group your Shorts into playlists by series, so a visitor who liked one Short sees ten more like it. If the page looks like a different channel from the Short that brought them there, fix the page first. Example: A travel creator's Short about cheap train tickets goes viral, but her channel page shows random vlogs and gaming clips. After she groups her travel Shorts into a "Cheap travel" section and rewrites her banner, the same kind of Short starts converting. Common mistake: Ignoring the channel page. The subscribe button lives there, so the page has to sell it.Illustrative diagram: a repeatable series with the same opening makes subscribing the way to keep watching. Step 5 — Bridge Shorts viewers to a long-form video What to do: Use each Short as a doorway to a longer video on the same topic. How: For each Short, pick one related long-form video, link it in a pinned comment, and mention it: "The full 10-minute version is linked in the pinned comment." As reported by one guide, this bridge can lift watch time by around 20% — present that as reported, and confirm in Studio whether your own pinned-comment links get clicked. A viewer who watches eight minutes of your long video has learned enough to decide it is worth following; a sixteen-second swiper has not. Example: A gardening creator's 40-second Short shows a tomato trick and pins: "Full video — how I grew 40 kg of tomatoes on a balcony — linked below." Viewers who click watch the long video, and some subscribe from its end screen. Common mistake: Linking a random popular video, or hiding the link in the description where Shorts viewers never look.Illustrative mock-up: the channel page must match the Short that brought the visitor there. Step 6 — Test, measure, and repeat what converts What to do: Compare your Shorts by subscribers per 1,000 views, keep the formats that convert, and drop the ones that only collect empty views. How: In Studio, divide subscribers gained by views for each recent Short. Note which formats and triggers sit at the top. Also watch the Save rate, added as a feed signal in July 2026, as reported: a saved Short is one people return to. Change one thing at a time; give each change five Shorts before judging it. One viral Short tells you nothing; a pattern across ten tells you everything. Example: A creator finds her "mistake to avoid" Shorts gain three subscribers per 1,000 views while her trending-audio Shorts gain almost none. She doubles the mistake format, and her subscriber growth rises even as total views fall. Common mistake: Chasing the next viral Short instead of repeating the format that converts. More views of the wrong kind will not fix a conversion problem.Illustrative diagram: a pinned comment bridges a Short to a related long-form video that earns the subscribe. Checklist — Turn Shorts views into subscribers☐ Checked Studio: feed share and subscribers per Short ☐ Compared my rate with the reported range ☐ One specific subscribe trigger in every Short ☐ A repeatable series with the same opening and rhythm ☐ Channel page matches the Shorts' promise, series grouped ☐ Pinned comment links a related long-form video ☐ Measured subscribers per 1,000 views ☐ Kept the converting format, dropped the restFAQs 1. Is it normal for Shorts to get views but almost no subscribers? Yes. As reported, around 74% of Shorts views come from non-subscribers, and the reported average is about 16.9 new subscribers per 10,000 views. Low conversion is the default — Steps 2 to 5 are how you beat it. 2. How long before these fixes show results? Give it two to three weeks and ten or more Shorts. One Short proves nothing — check whether subscribers per 1,000 views are rising across the batch. 3. Should I ask viewers to subscribe in every Short? Yes, but only with a specific promise tied to that Short — the next episode, the full version, the next tip. A generic ask trains viewers to ignore it; a specific reason gives them something to act on. 4. Will one viral Short fix my subscriber problem? No. A viral Short brings strangers who watched for a few seconds and will never return. Steady conversion comes from a series, a clear channel page, and a bridge to long-form video — not one lucky video. 5. How is this different from a channel that is not growing at all? This guide is about Shorts that get views but no subscribers. If your whole channel is stuck with low views, the diagnosis is different — see our guide linked in Sources. SourcesYouTube Help — "Create YouTube Shorts" (official page, opened live 8 Nov 2026): https://support.google.com/youtube/answer/10343433?hl=en CreatorPlaybook — "YouTube Channel Not Growing? Diagnose the 4 Real Reasons" (internal link, live-verified published post): </blog/youtube-channel-not-growing-diagnose-4> CreatorPlaybook — "Shorts vs Long-Form Earning: How Many Views to Earn?" (internal link, live-verified published post): </blog/shorts-vs-long-form-earning-how-many>
- CreatorPlaybook Team
- 31 Oct, 2026
YouTube Channel Not Growing? Diagnose the 4-Stage Analytics Bottleneck in Order
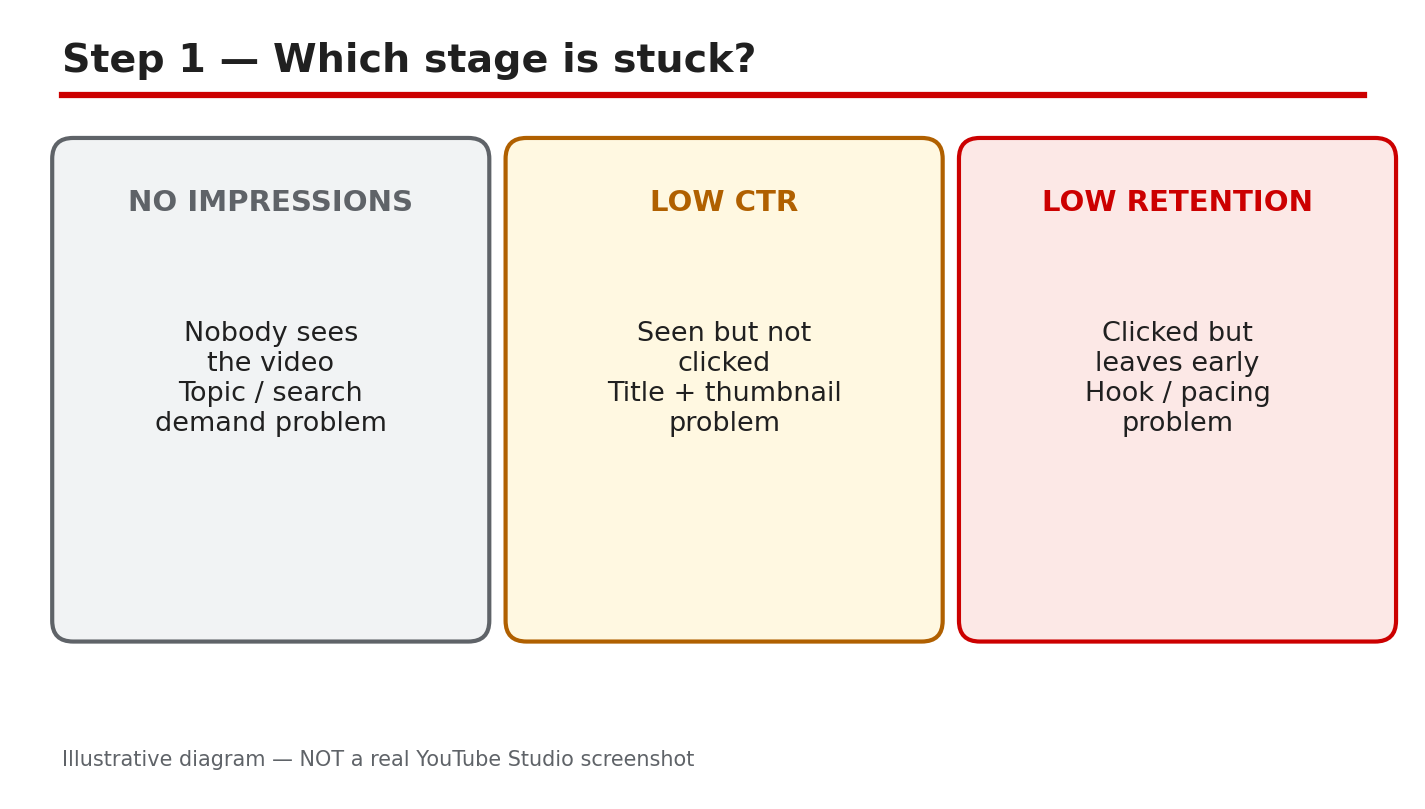
Your channel is not growing, but the views graph does not tell you why. A channel can stall at four different stages, and each stage needs a different fix. YouTube Analytics shows the chain in order: impressions, click-through rate, retention, then subscribers. If nobody sees your video, the thumbnail is not the problem. If people see it but do not click, the title and thumbnail are. If they click but leave in ten seconds, the opening is. If they watch but never subscribe, the channel is giving them no reason to return. This guide walks the chain in order, so you fix the stage that is actually broken. What You Will Learn In this guide you will learn how to find the stage where your channel stalls, how to read impressions, click-through rate, retention, and subscriber data in Analytics, and how to fix one stage at a time and measure the result over seven days. Step 1 - Check Impressions First What to do: Open YouTube Studio, go to Analytics, open the Reach tab, and look at impressions for your last five videos. Compare them with your best recent video, not with a large channel. How: Impressions count how often YouTube shows your thumbnail to viewers. As reported, YouTube Help describes impressions as the number of times a thumbnail is shown, so a low number means YouTube is showing the video to few people. Compare impressions per video, not the channel total. For more, see how to read YouTube Analytics. Example: A creator's new video had only 300 impressions in a week while her older videos had 4,000 each. She checked the topic and found almost nobody was searching for it, so she remade the idea around a question people ask. Common mistake: Blaming the thumbnail when impressions are near zero. A thumbnail cannot earn clicks YouTube never shows. Fix the topic and the search demand first.Illustrative diagram (mock-up, not a real YouTube Studio screenshot): the four-stage bottleneck chain in order. Step 2 - Fix the Click-Through Rate What to do: Pick the video with high impressions and low clicks, then test a new thumbnail and title on a fresh upload. Change one thing at a time so you know what worked. How: Click-through rate is the share of impressions that turn into clicks. As reported, YouTube Help explains that it shows how often viewers watched a video after seeing its thumbnail. A rate below your channel average means the thumbnail is not promising the video well. Make the thumbnail readable at small size, with a title that promises the benefit. For more, see this guide to how to improve your click-through rate. Example: A creator had 20,000 impressions and a 2% click-through rate. She rewrote the title to promise the benefit, and the rate rose to 4% on the next video about the same topic. Common mistake: Changing the thumbnail and the title and the topic all at once. You will never know which change fixed the clicks.Illustrative diagram (mock-up, not a real YouTube Studio screenshot): a clear title and thumbnail earn the click. Step 3 - Hold Viewers Past the First 30 Seconds What to do: Open the retention graph for your last three videos and find where most viewers leave. Rewrite the opening so the promise of the video lands in the first ten seconds. How: Retention is the share of a video your viewers actually watch, shown moment by moment in Analytics. As reported, YouTube counts a view the moment a video starts to play, so the early seconds decide everything. Start with the outcome, cut the long intro, and promise the result in one sentence. Example: A creator lost 60% of viewers in the first thirty seconds. She cut a 40-second channel intro, started with the result, and her average view duration doubled on the next video. Common mistake: Asking for likes and subscriptions before the video has delivered anything. Earn the first minute, then ask.Illustrative diagram (mock-up, not a real YouTube Studio screenshot): most viewers decide in the first thirty seconds. Step 4 - Turn Watchers into Subscribers What to do: Check which videos bring subscribers in Analytics, then compare them with videos that get views but no subscribers. Make more of the first kind and give viewers a clear next video to watch. How: Subscribers come from viewers who expect more of the same value, not from one viral video. Viewers subscribe when the channel has a clear topic, a regular pattern, and a next video they already want. Add an end screen that points to a related video, and say at the end of the video what the next one covers. Example: A creator got 50,000 views on a viral video but only 40 subscribers, because the video had nothing to do with the rest of the channel. Her next series on one topic brought 400 subscribers from 8,000 views. Common mistake: Chasing viral topics that do not match the channel. Random viewers leave, and the subscribers you gain do not watch the next video.Illustrative diagram (mock-up, not a real YouTube Studio screenshot): subscribers come from viewers who want the next video. Step 5 - Fix One Stage at a Time What to do: Write down which stage is broken, change only the part that controls it, and publish the next video with that one change. Do not redesign the channel while you are testing. How: The chain runs in order, so a fix at the wrong stage wastes the effort. If impressions are low, a better thumbnail changes nothing. If retention is low, more impressions only bring more people who leave early. Work the bottleneck first, and keep a note of what you changed so you can trace any change in the numbers back to it. Example: A creator changed her thumbnail, title, opening, and upload time in the same week. Views rose, but she had no idea which change did it, so she could not repeat it. Common mistake: Fixing the stage you enjoy fixing, not the stage the numbers show is broken. Check the chain before you choose.Illustrative diagram (mock-up, not a real YouTube Studio screenshot): fix one stage at a time, then check the next stage. Step 6 - Measure for Seven Days, Then Repeat What to do: Wait seven days after the change, then compare the stage number with the same number from before the change. Use the same video length and topic type for a fair comparison. How: Seven days is enough for YouTube to show the video to its usual audience. Compare the same stage on the same kind of video, not a new video against a viral one. If the stage number moved the right way, keep the change and move to the next stage. If it did not move, change one thing again. Example: A creator rewrote only her titles and waited a week. Click-through rate rose from 3% to 5%, so she kept the new title style and moved on to fixing retention. Common mistake: Judging a change after one day, when YouTube has barely shown the video. Wait the full seven days before you decide.Illustrative diagram (mock-up, not a real YouTube Studio screenshot): measure seven days, then repeat the check. Your Channel Growth ChecklistBottleneck stage found in Analytics, in order: impressions, CTR, retention, subscribers. Only the broken stage was changed, one thing at a time. Click-through rate checked against the channel average. Opening rewritten so the promise lands in ten seconds. Seven days waited before judging the fix.Frequently Asked Questions Why is my channel not growing even though I upload every week? Uploading more does not fix a broken stage. Check the chain in order — impressions, click-through rate, retention, subscribers — and fix the first stage that is weak. What is a good click-through rate on YouTube? It depends on the channel and the topic, so compare a video with your own average, not with another channel. If the rate is below your average, the thumbnail or title is the stage to fix. How long should I wait before judging a change? Seven days, as this guide recommends. YouTube needs time to show the video to its usual audience, and one day of data is too noisy to trust. Should I fix impressions or retention first? Fix whichever comes first in the chain. Impressions come before clicks, and clicks come before retention, so work the earliest weak stage first. SourcesYouTube Help, How to understand your video reach: support.google.com/youtube/answer/9314355 (verified live 31 October 2026). CreatorPlaybook, Understanding YouTube Analytics: creatorplaybook.blogspot.com/2026/10/understanding-youtube-analytics.html CreatorPlaybook, How to Improve Click-Through Rate: creatorplaybook.blogspot.com/2026/10/how-to-improve-click-through-rate.html
- CreatorPlaybook Team
- 31 Oct, 2026
YouTube Monetization Paused vs Disabled vs Rejected: What Each Means and What to Do
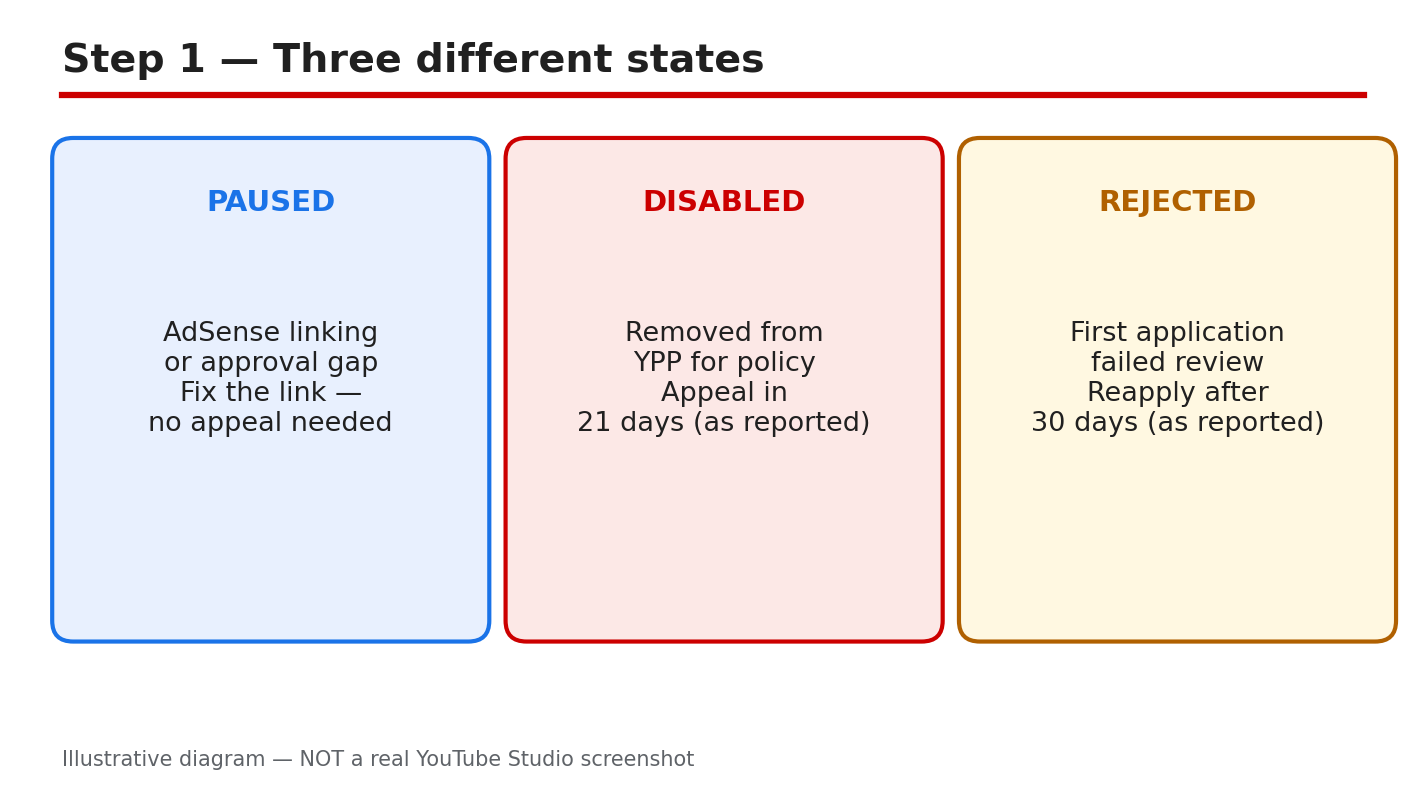
One morning you open YouTube Studio and the Earn tab says something changed. Your monetization is paused, disabled, or your application was rejected. Three different words, three different problems, and treating them as the same thing wastes weeks. As reported, the exact wording in the Earn tab governs what happens next: a pause can often be fixed quickly, a suspension has an appeal window, and a rejection has a waiting period before you can apply again. This guide explains each state, the timelines as reported, and the exact steps to fix the cause and get back to earning. What You Will Learn In this guide you will learn how to tell paused, disabled, and rejected apart, what each state means for your channel, the appeal and reapplication windows as reported, how to fix the most common causes, and how to keep your monetization from stopping again. Step 1 - Read the Exact Wording in the Earn Tab What to do: Open YouTube Studio, go to the Earn tab, and read the exact message before you do anything else. How: The Earn tab shows your current status in plain words: paused, suspended, or an application decision. Screenshot or copy the message, and check the email YouTube sent you, because it names the reason and the deadline. Do not rely on what a creator forum says your state means. As reported, the wording on your own account governs: the same word can mean different things on different channels, and the instructions in your email are the ones that apply to you. Example: A creator saw 'monetization paused' and assumed she was suspended. The Earn tab said her payment details were incomplete, and updating them fixed it the same day. Common mistake: Guessing your status from a thumbnail or a video title. Read the Earn tab and your email, not a stranger's post.Illustrative diagram (mock-up, not a real YouTube Studio screenshot): paused, disabled, and rejected are three different states. Step 2 - Paused: What It Means and How to Fix It What to do: If monetization is paused, look for the reason listed in the Earn tab and fix that one thing first. How: A pause is usually temporary. As reported, common reasons include a pending identity or payment verification, a temporary hold while YouTube reviews your account, or a setting that needs your attention. The Earn tab usually tells you what is missing. Complete the verification, update the payment details, or confirm the setting, then check the tab again. If nothing is listed, check your email for a message from YouTube that names the next step. Example: A creator's monetization paused during a payment review. She updated her tax information, and monetization resumed within a few days. Common mistake: Waiting for the pause to lift on its own. A pause usually needs an action from you, and it will not clear until you take it.Illustrative diagram (mock-up, not a real YouTube Studio screenshot): a pause usually has a fix you can complete. Step 3 - Disabled: Suspension and the 21-Day Appeal What to do: If your channel is suspended from the Partner Program, appeal within 21 days of the suspension. How: As reported, YouTube Help says you can appeal a suspension within 21 days, and you should receive a response within 14 days. Open the appeal form linked in the Earn tab or your email, explain what happened, and show what you changed. If the suspension was scheduled in advance, as reported, you can appeal within 7 days before the scheduled date. Do not wait: after the window closes, the appeal option is gone. If your appeal succeeds, as reported, you may be re-approved or re-admitted within 30 days. Example: A channel was suspended for reused content. The creator appealed within a week, showed the new original videos, and the appeal was accepted. Common mistake: Appealing with no changes. An appeal needs evidence that the cause is fixed, not just a request to be reinstated.Illustrative diagram (mock-up, not a real YouTube Studio screenshot): appeal a suspension within 21 days, as reported. Step 4 - Rejected: The Application Was Turned Down What to do: If your first application is rejected, check whether to appeal within 21 days or reapply after 30 days, as reported. How: As reported, a first unsuccessful application can be appealed within 21 days, or you can re-apply after a 30-day period. If the rejection is not your first, or you have already reapplied once, as reported, the waiting period is 90 days. Do not apply again before the period ends, because an early application can be rejected again. Use the wait to fix the reason named in the decision, usually reused or inauthentic content, and rebuild the channel with original videos. Example: A creator was rejected for reused content on her first application. She replaced the reused clips with her own recorded segments, waited 30 days, and was accepted on her next application. Common mistake: Reapplying the next day with nothing changed. The same videos will get the same result, and the wait starts over.Illustrative diagram (mock-up, not a real YouTube Studio screenshot): first rejection means 30 days, a repeat means 90, as reported. Step 5 - Fix the Cause Before You Appeal or Reapply What to do: Find the reason named in your message, and fix it in the channel before you send an appeal or a new application. How: The most common reasons are reused content, inauthentic or mass-produced content, and invalid traffic. Delete or re-record videos that reuse other creators' work without your own value added, and stop using content that is copied or mass-produced. Check your traffic sources for bought views, revoke access for shady third-party apps, and secure your account. Our guide on how to fix a rejected monetization application walks through the reused-content fixes step by step. Example: A creator's channel was full of clips taken from other videos. He deleted the clips, recorded his own commentary, and published five original videos before reapplying. Common mistake: Fixing one video and leaving ten others the same. Reviewers look at the whole channel, so every video that breaks the rules counts.Illustrative diagram (mock-up, not a real YouTube Studio screenshot): fix the cause in every video, not just one. Step 6 - Reapply and Keep Monetization Safe What to do: When the waiting period ends, reapply with a clean channel, then keep it that way with a monthly check. How: Apply only when the cause is fixed and you have published original videos that show it. After you are accepted, keep your channel safe: publish original work, do not buy views or subscribers, and check the Earn tab and your email every month. Our guide on how to get monetized on YouTube explains the eligibility steps and what reviewers look for. Example: A creator reapplied after fixing her reused-content videos, was accepted, and now reviews her Earn tab on the first day of every month. Common mistake: Going back to the same habits after acceptance. Monetization can be paused or disabled again, and a second suspension has a longer path back.Illustrative diagram (mock-up, not a real YouTube Studio screenshot): reapply clean, then protect your monetization every month. Your Monetization Status ChecklistEarn tab message and email read before acting. State identified: paused, disabled, or rejected. Appeal sent within 21 days, if a suspension. Waiting period respected: 30 days first, 90 days repeat, as reported. Cause fixed across the whole channel.Frequently Asked Questions What does it mean when YouTube monetization is paused? It usually means YouTube needs something from you, such as a verification or updated payment details. Check the Earn tab for the exact reason. How long do I have to appeal a suspension? As reported, you have 21 days from the suspension, and you should receive a response within 14 days. How long must I wait after a rejected application? As reported, 30 days after a first rejection, and 90 days after a suspension or a repeat rejection. Check the exact window in the Earn tab or your email. Can I appeal if my suspension was announced in advance? As reported, you can appeal within 7 days before the scheduled suspension date. Check the exact window in the Earn tab or your email. SourcesYouTube Help, Appeal a YouTube Partner Program suspension or rejection: support.google.com/youtube/answer/9564590 (verified live 31 October 2026). CreatorPlaybook, YouTube Monetization Rejected? How to Fix Reused Content and Appeal the Right Way: creatorplaybook.blogspot.com/2026/10/youtube-monetization-rejected-how-to.html CreatorPlaybook, How to Get Monetized on YouTube in India: Approval Steps That Actually Work: creatorplaybook.blogspot.com/2026/10/how-to-get-monetized-on-youtube-in.html
- CreatorPlaybook Team
- 31 Oct, 2026
Delete and Re-Upload a YouTube Video? Why It Hurts and What to Do Instead
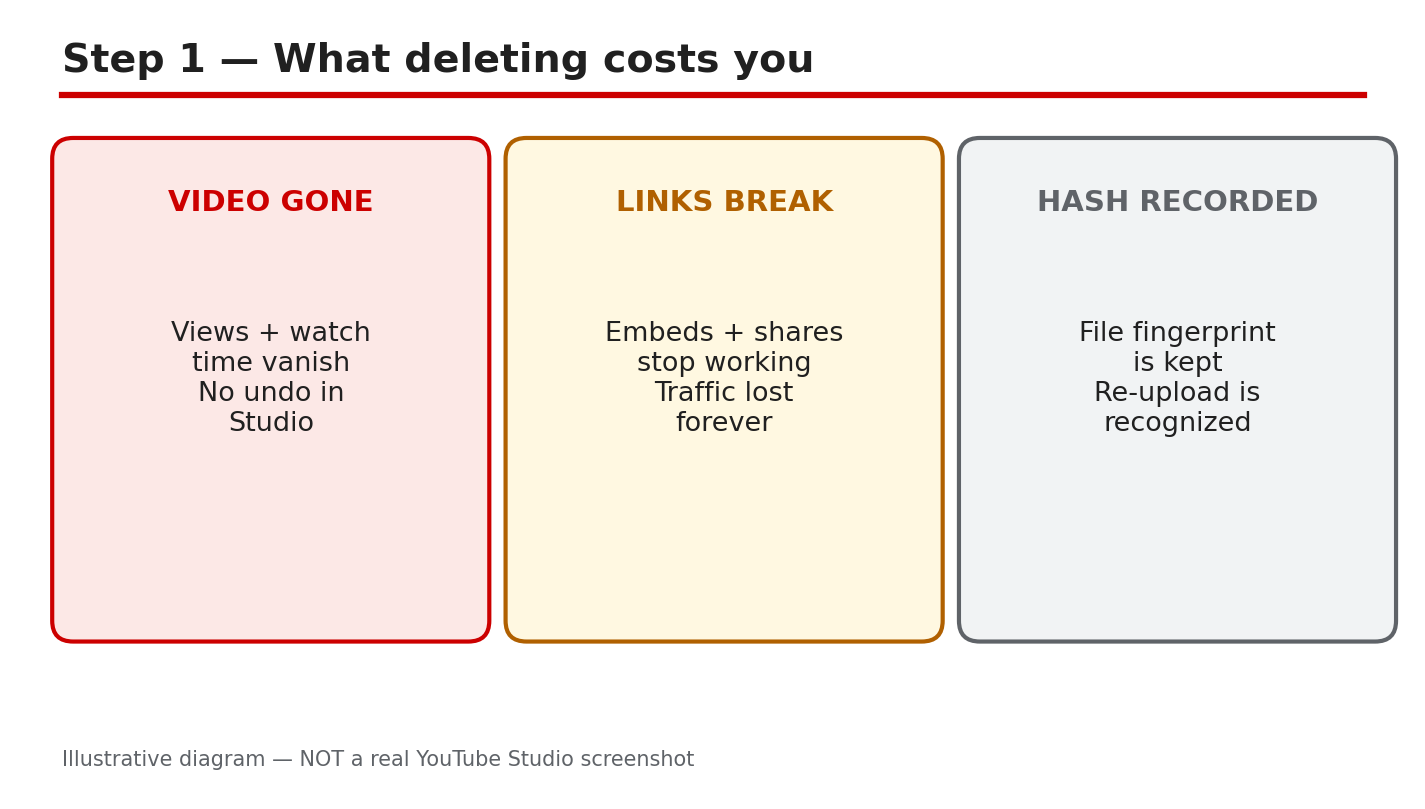
Your video has a mistake. A wrong date in the first ten seconds, a clip you no longer have the rights to, or a typo in the title. Deleting the video and uploading it again feels like the obvious fix. It is not. As reported, a re-upload is treated as a brand-new video, and the original's watch time, comments, ranking, and links do not move with it. YouTube Help is clear on one point: you cannot replace a video, because any new upload gets a new URL. Worse, as reported, deleting and re-uploading the same file can trigger spam signals, because the system may recognize the file it already saw. This guide explains what deleting really costs, what to do instead, and the rare cases where a fresh upload is the right call. What You Will Learn In this guide you will learn what you lose when you delete a video, why re-uploading the same file can look like spam as reported, how to unlist a video instead, how to trim and fix a video in the YouTube Studio Editor, when a new version is worth making, and how to re-upload correctly with real changes. Step 1 - Learn What Deleting a Video Actually Costs What to do: Before you delete anything, write down what the video has earned: watch time, comments, search ranking, and every link pointing to it. How: Open YouTube Studio, check the video's Analytics, and note its watch time, traffic sources, and search terms. Then check where the video is linked: your blog, your other videos' cards and end screens, playlists, and social posts. Deleting the video removes it from all of those places at once. YouTube Help says that after a video is deleted, its URL and title are no longer visible or searchable in YouTube Analytics. The watch time it earned is gone from your channel's totals, and the comments disappear too. Example: A creator deleted a tutorial with 40,000 views over one wrong date. The replacement started from zero, and the blog post linking to it broke. Common mistake: Deleting first and checking the cost later. Once a video is deleted, there is no undo. Check the numbers before you touch the delete button, not after.Illustrative diagram (mock-up, not a real YouTube Studio screenshot): deleting a video removes its watch time, comments, ranking, and links. Step 2 - Understand Why the Same File Can Look Like Spam What to do: Assume YouTube can recognize a file it has seen before, and treat a re-upload of the same file as a risk, not a fresh start. How: As reported, YouTube checks uploaded files against content it has already processed, using file hashes and fingerprints that identify a video even when its title or description changes. A creator who deletes a video and uploads the identical file again is, as reported, sending the system a file it may already know, which can read as an attempt to dodge a removal or reset a bad metric. The safe rule is simple: if the file is unchanged, do not delete and re-upload it. Example: A channel deleted a video with a copyright claim on its audio, then re-uploaded the same file with only the title changed. The claim returned within hours. Common mistake: Changing the title and description and expecting a different result. As reported, the system matches the file, not the words around it.Illustrative diagram (mock-up, not a real YouTube Studio screenshot): a re-uploaded file can be matched to the original by its hash. Step 3 - Unlist the Video Instead of Deleting It What to do: If a video has a problem but is not harmful, change its visibility to Unlisted. It stops appearing in search and recommendations, but keeps its watch time, comments, and links. How: In YouTube Studio, open the video, click Visibility, and choose Unlisted. The video leaves public search and your channel page, but anyone with the link can still watch it, and its record in Analytics stays intact. If the video contains something that violates YouTube's policies or could harm viewers, deleting is the right choice, because an unlisted video still exists on your channel. Example: A creator found an outdated price in a tutorial. She unlisted the video, recorded a corrected version, and later set the old one back to public with a pinned comment pointing to the update. Common mistake: Deleting a video that only needed to be hidden for a week. Unlisted is reversible. Deletion is not.Illustrative diagram (mock-up, not a real YouTube Studio screenshot): unlisting hides a video while keeping its watch time and links. Step 4 - Trim and Fix the Video in the Studio Editor What to do: Fix small mistakes with YouTube Studio's Editor instead of re-uploading. You can trim the start, end, and middle, and blur or replace audio. How: Open the video in YouTube Studio, click Editor, and use Trim to cut out the mistake. You can also blur faces or objects, and, if the problem is music, replace or erase the song. YouTube Help says you can edit a video's title and description, make enhancements, and add a card, and the video keeps its URL, its watch time, and its comments. Keep the edit small: trimming a few seconds is safe. Our guide on how to trim a video after a copyright claim walks through the exact steps. Example: A creator's video opened with a wrong logo for three seconds. She trimmed those three seconds in the Editor, kept the video's 12,000 views, Common mistake: Trimming after the video has a warning or strike and assuming the problem is gone. Trimming removes the segment, but any notice you received still stands. Check the email and the Earn tab.Illustrative diagram (mock-up, not a real YouTube Studio screenshot): trimming a mistake in the Studio Editor keeps the video's URL. Step 5 - Decide When a New Version Is Actually Worth Making What to do: Re-upload only when the video genuinely needs to be a different video: a major re-edit, a new structure, or new information throughout. How: Ask whether an unlisted fix or an Editor trim can solve it. If the answer is no, plan the new version as a new video: rewrite the script, re-record the core sections, and give it a title and description that fit the new content. Then unlist the old video rather than deleting it, and link the new one from the old video's description and a pinned comment. Example: A creator's 2024 guide was fully outdated. She recorded a fresh 2026 version, unlisted the old one, and added a card pointing to the new upload. Common mistake: Re-uploading a slightly different version and keeping the old one public too. Two near-identical videos split the audience and can confuse search. Unlist the old one.Illustrative diagram (mock-up, not a real YouTube Studio screenshot): a new version is worth it only when the video truly changes. Step 6 - Re-Upload Properly and Keep the Old Links Working What to do: If you re-upload, treat it as a new video: new title, new description, new thumbnail, and a plan for the old links. How: Upload the new file with a title and description that describe the new version, and add a thumbnail that shows the change. In the old video's description and pinned comment, link to the new video. Update the links on your blog and in your cards and end screens. Remember that a new upload gets a new URL, so every old link needs updating, or it will break. Our guide on why a video is not showing in search explains why a fresh upload takes time to rank again. Example: A creator re-uploaded a course video with a new structure and updated every link in the course page the same day. Nobody complained about a broken link. Common mistake: Re-uploading and forgetting the old links. A new URL means every card, end screen, playlist, blog post, and social post that pointed to the old video now points nowhere.Illustrative diagram (mock-up, not a real YouTube Studio screenshot): a re-upload gets a new URL, so old links must be updated. Your Delete and Re-Upload ChecklistWatch time, ranking, and links checked before any delete. Harmful content deleted; fixable videos unlisted instead. Small mistakes fixed in the Studio Editor. Old video unlisted, not deleted, when a new version is made. New video linked from the old video's description and comments.Frequently Asked Questions Can I delete a video and re-upload it? You can, but you lose the original's watch time, ranking, comments, and links, and the same file may be flagged again as reported. Does unlisting a video keep its watch time? Yes. An unlisted video keeps its watch time and comments, and it stops appearing in search and recommendations. Can I replace a video without changing its URL? No. YouTube Help says you cannot replace a video, because any new upload gets a new URL. What should I do about a copyright claim on my audio? Try trimming the claimed audio or replacing the song in the Studio Editor before you consider deleting the video. SourcesYouTube Help, Replace or delete your video: support.google.com/youtube/answer/55770 (verified live 31 October 2026). CreatorPlaybook, YouTube Copyright Claim? How to Trim, Replace or Erase the Song: creatorplaybook.blogspot.com/2026/10/youtube-copyright-claim-how-to-trim.html CreatorPlaybook, YouTube Video Not Showing in Search Results: How to Fix It: creatorplaybook.blogspot.com/2026/10/youtube-video-not-showing-in-search.html
- CreatorPlaybook Team
- 31 Oct, 2026
AI Mass-Produced YouTube Videos: The 2026 Demonetization Risk and How to Use AI Safely
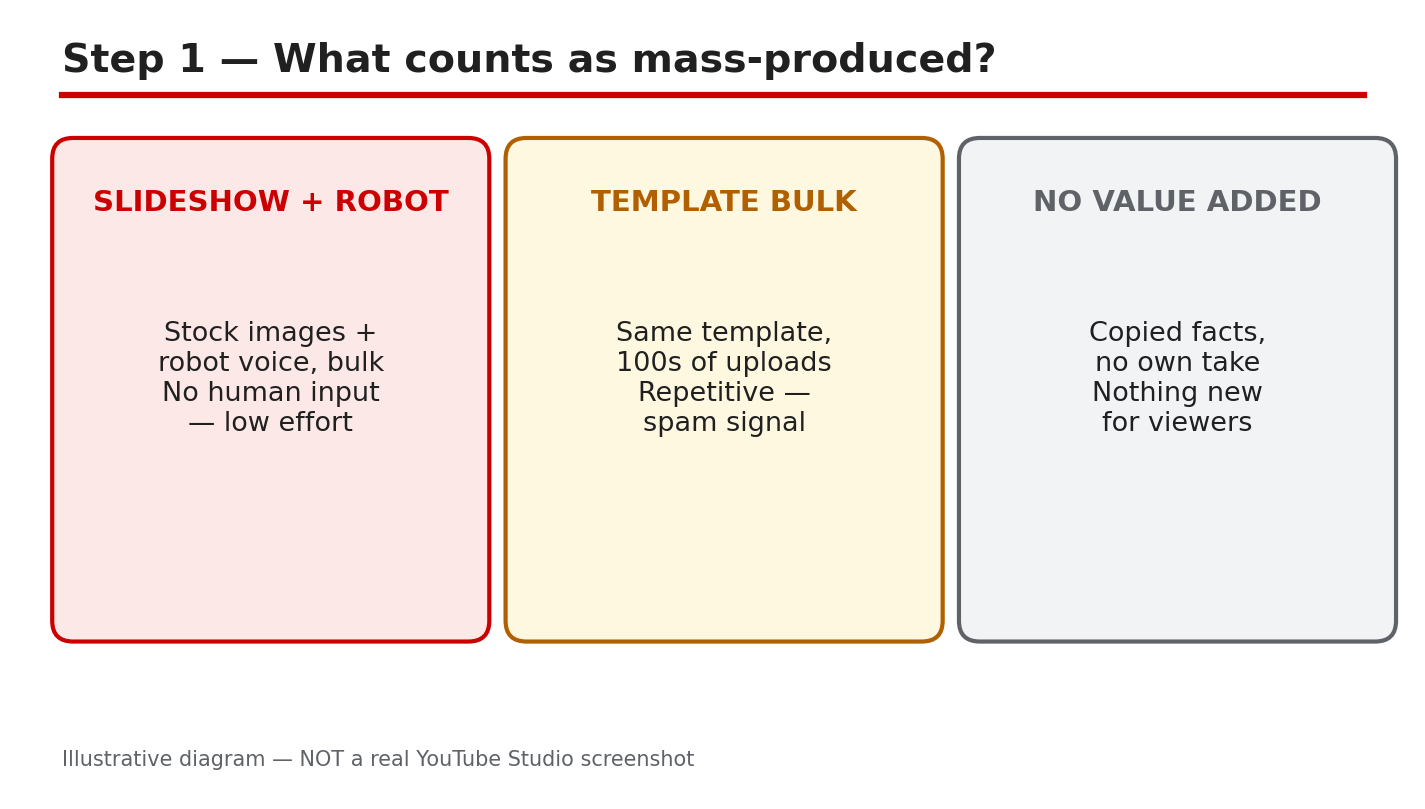
AI tools can now write a script and generate a voice in minutes. It is tempting to publish twenty videos a week. But creators who did exactly that have been reporting lost monetization in 2026, and YouTube's own rules explain why. In a 15 July 2025 update, YouTube's monetization policies clarified that 'repetitious content' means 'inauthentic content', including mass-produced content. Monetized content must be original and authentic, not mass-produced, generic, repetitive, or manipulative. AI itself is not banned. The problem is volume without value. This guide shows you where the line is, how to check your own uploads, and how to keep using AI without risking your earnings. What You Will Learn In this guide you will learn what YouTube counts as mass-produced content, how to audit your own channel, how to add genuine human value to AI-assisted videos, when to disclose AI use, how to fix risky uploads, and how to set a pace you can sustain. Step 1 - Learn What Counts as Mass-Produced Content What to do: Read YouTube's monetization policies definition of inauthentic content before you change anything, so you judge your videos against YouTube's words rather than rumors. How: YouTube Help says monetized content must be original and authentic, not mass-produced, generic, repetitive, or manipulative. The July 2025 update replaced the older label 'repetitious content' with 'inauthentic content'. A video counts as mass-produced when it is made at volume from a template: the same script structure, the same AI voice, the same stock clips, only the topic swapped. The tool is not the test. A single AI-assisted video with a real script and real information can be fine. A hundred near-identical videos are not. Example: A channel publishes 30 videos in a week, all with the same formula, the same AI voice, and the same slideshow. A reviewer can watch any two and guess the third. Common mistake: Assuming the rule only applies to videos made entirely by AI. A channel that uses AI for everything but adds one human sentence at the end is still mass-producing.Illustrative diagram (mock-up, not a real YouTube Studio screenshot): mass-produced videos follow one repeated template, while authentic videos each add something new. Step 2 - Audit Your Channel for the Warning Signs What to do: Review your last 20 uploads and score each one honestly. If you cannot tell two videos apart without reading the title, your channel has a problem. How: Open your channel's Videos page and list what repeats: the same intro, the same voice, the same background clips, and the same upload schedule of several videos a day. Then check the results. As reported, mass-produced channels often see low average view duration, few comments, and few returning viewers, because viewers have no reason to come back for another copy of the same video. Compare those numbers with a video you made with real effort. Example: A creator checked 20 uploads and found 18 used the same AI voice, the same three background clips, and the same structure. The two with a scripted personal story had three times the watch time. Common mistake: Judging a video only by its view count. A mass-produced video can spike from search traffic and still damage the channel, because low retention tells YouTube it is not worth recommending.Illustrative diagram (mock-up, not a real YouTube Studio screenshot): an audit checklist for spotting repeated templates and low retention. Step 3 - Add Real Human Value to Every AI-Assisted Video What to do: Make AI the assistant, not the author. For every video, add something only you can add: your own script, your own experience, or your own opinion. How: Write the script yourself, or rewrite the AI draft in your own words and add a real example from your own channel or work. Record your own voice, or edit the AI voiceover so the pacing matches how you actually speak. Add footage or screenshots you captured yourself. If the video could have been made by anyone with the same prompt, it is not ready. If a viewer can learn something only from your experience, it is. See our guide on how to use AI for YouTube videos. Example: A creator who reviewed budgeting apps stopped using AI scripts word for word. She recorded her own voice and showed her own spreadsheet. Common mistake: Believing a better AI voice or a better thumbnail fixes the policy issue. The policy is about the content, not the polish.Illustrative diagram (mock-up, not a real YouTube Studio screenshot): human script, voice, and editing turn an AI draft into original content. Step 4 - Disclose AI Use Where YouTube Asks You To What to do: Turn on the AI disclosure setting for videos where YouTube asks for it, and do it before you publish. How: YouTube Help says creators must disclose AI-generated or altered content that seems realistic. That includes a real person appearing to say or do something they did not, altered footage of a real event or place, a realistic scene that did not occur, and music where the audio is the main focus. You disclose it in YouTube Studio through the 'AI use' setting under Details, then Attributes. Disclosing alone will not limit your audience or affect your eligibility to earn money, according to YouTube Help. Check the labelling rules in your region too, because, as reported, EU rules add their own requirements, and our guide to AI content and EU labelling explains what to check. Example: A creator used an AI voice to narrate a realistic scene that never happened. Turning on the AI disclosure before publishing took ten seconds, and the video kept its audience and monetization. Common mistake: Disclosing everything, including obvious animation, or disclosing nothing at all. Disclosure is for content that seems realistic.Illustrative diagram (mock-up, not a real YouTube Studio screenshot): turning on the AI use disclosure before publishing. Step 5 - Fix or Remove the Riskiest Uploads What to do: Work through your riskiest uploads and decide, for each one, whether to rework it, unlist it, or leave it alone. How: Start with the videos that look most like a template: same voice, same structure, no original material. Rework the ones worth saving with a new script, your own voice, and real examples; then update the title and description to match. Unlist the ones you cannot rework yet, so they stop shaping how YouTube judges your channel. Leave alone only videos that already carry real human value. Do not delete your whole library in a panic: as reported, deleting videos removes their watch time and links. Fix the worst first. Example: A creator had 40 template videos. She reworked the 10 with the most views, unlisted the rest, and added two new human-scripted videos a week. Common mistake: Re-uploading the same video with a new title and hoping the problem disappears. As reported, a re-upload carries the same content, so the same questions apply.Illustrative diagram (mock-up, not a real YouTube Studio screenshot): rework, unlist, or keep each risky upload. Step 6 - Set a Production Standard You Can Keep What to do: Decide a weekly upload limit and a quality checklist, and do not publish anything that fails it. How: Pick a number you can sustain with real effort. For most beginners that is one or two videos a week. Write the standard down: original script, your own voice or edit, at least one real example, disclosure checked, and a title that matches the video. Review it before every upload. If a video takes less than an hour from idea to publish, ask yourself what value you added. Example: A channel set a limit of two videos a week and a five-point checklist. Within six weeks, subscriber growth returned, and the creator spent less time publishing. Common mistake: Treating the checklist as a one-time cleanup. Mass production creeps back when you are busy, so review your last ten uploads every month.Illustrative diagram (mock-up, not a real YouTube Studio screenshot): a weekly checklist keeps AI-assisted production sustainable. Your AI Mass-Production Safety ChecklistEvery video has an original script or a rewritten AI draft. Your own voice, edit, or footage appears in each video. No two uploads share the same template and structure. Realistic AI content has the AI use disclosure turned on. Riskiest uploads have been reworked or unlisted. A weekly upload limit and quality checklist are written down. Your last ten uploads are reviewed every month.Frequently Asked Questions Is using AI for YouTube videos against the rules? No. YouTube does not ban AI tools. Its monetization policies object to content that is mass-produced, generic, repetitive, or manipulative, not to AI use itself. How many AI videos are too many? There is no published number. The test is whether each video adds original value. As reported, a flood of near-identical uploads is the pattern that draws attention. Do I need to disclose AI voiceovers? Disclose AI-generated or altered content that seems realistic, using the AI use setting in YouTube Studio. Disclosing alone does not limit your audience or affect earnings. Can I fix a channel that already publishes mass-produced videos? Yes. Rework or unlist the riskiest uploads, add real human value to new videos, and set a sustainable pace. Earnings recover only after the content changes. SourcesYouTube Help, Monetization policies: support.google.com/youtube/answer/1311392 (verified live 31 October 2026). CreatorPlaybook, How to Use AI for YouTube Videos: creatorplaybook.blogspot.com/2026/10/how-to-use-ai-for-youtube-videos.html CreatorPlaybook, AI Content on YouTube: EU Labelling: creatorplaybook.blogspot.com/2026/10/ai-content-on-youtube-eu-labelling.html

- CreatorPlaybook Team
- 31 Oct, 2026
Bought YouTube Views or Subscribers? How Invalid Traffic Triggers Demonetization and How to Fix It
Your views jumped overnight. A video that usually gets 200 views suddenly has 12,000, your subscriber count climbed by 500 in a day, and for a moment it feels like the channel finally broke through. Then the numbers start falling back on their own, your estimated revenue drops, and an email arrives saying your monetization is limited or your AdSense for YouTube account is under review. If you ever bought views, subscribers, watch time, or likes, or paid a growth service that promised fast results, this is very likely what happened: YouTube's systems flagged the activity as invalid traffic. Invalid traffic is any activity that does not come from a real user with genuine interest, and YouTube says it can include fraudulent, artificial, or even unintentional ways of boosting ad revenue. The good news is that the situation is usually fixable if you stop the cause, clean up your account, and follow the proper appeal path. This guide walks you through exactly that, step by step. What You Will Learn In this guide you will learn what invalid traffic is and why bought views and subscribers trigger it, how to spot the warning signs in YouTube Analytics traffic sources, how to stop the damage by cutting off the source and securing your account, what YouTube says happens to your earnings, and how to appeal if you believe the decision was wrong. You will also get a cleanup checklist you can finish today. Step 1 - Learn What Counts as Invalid Traffic What to do: Read YouTube's own definition of invalid traffic before changing anything, so you fix the real cause instead of guessing. How: YouTube Help says invalid traffic is any activity on your channel that does not come from a real user or a user with genuine interest, and it can include fraudulent, artificial, or even unintentional ways to boost ad revenue. Named examples include automated or incentivized traffic from third parties, including so-called traffic boosting services, and telling viewers to watch or click ads on certain videos to inflate revenue. Example: A creator pays a seller for 5,000 views. The views arrive from bots and click farms in a few hours. YouTube's systems detect the pattern, filter the views out, and may temporarily limit ads on the channel. Common mistake: Assuming the problem is the video or the thumbnail. If the spike came from a paid service, no amount of editing will fix it until the paid traffic stops.Illustrative diagram (mock-up, not a real YouTube Studio screenshot): paid traffic being flagged as invalid traffic. Step 2 - Spot the Warning Signs in Analytics Traffic Sources What to do: Open YouTube Studio, go to Analytics, and check where the suspicious views came from. How: Open Analytics, then the Reach tab, then the traffic source types report. Compare the last 28 days with the previous period. Look for a sudden spike from External or unknown sources, a single video jumping far above your normal range, or views rising while watch time, likes, and comments stay flat. As reported by creators, a views spike with almost no average view duration is a classic sign of artificial traffic, so confirm what you see in Studio before acting. Our guide on how YouTube counts views in 2026 explains which views YouTube treats as real. Example: A cooking channel normally gets 80 percent of traffic from Browse and Search. One week a new video gets 70 percent from an unknown external site and average view duration drops to nine seconds. That is the pattern to investigate. Common mistake: Only watching the headline view count. The traffic source breakdown tells you what happened; the total only tells you that something happened.Illustrative diagram (mock-up, not a real YouTube Studio screenshot): a traffic sources report with an unusual spike. Step 3 - Stop Buying Views and Cut Off the Source Immediately What to do: Cancel every paid promotion that sends artificial views, subscribers, or engagement, and stop asking viewers to click ads. How: Log in to every panel, seller, or freelancer you used, cancel the order, and remove any auto-renew. Stop all view boosting and subscriber services, Never tell viewers to click ads or to watch a video on repeat to boost revenue. YouTube's invalid-traffic page lists both practices as examples of invalid traffic. Example: A creator had two active orders from a growth site. Cancelling both stopped new artificial views within a day, and the channel's daily views returned to their normal range. Common mistake: Pausing the service instead of cancelling it. An order that restarts by itself can undo a whole week of cleanup.Illustrative diagram (mock-up, not a real YouTube Studio screenshot): cancelling paid view and subscriber services. Step 4 - Revoke Shady Third-Party Apps and Secure the Account What to do: Remove any third-party app or service that has access to your Google account or YouTube channel, then lock the account down. How: Open your Google Account security settings, review third-party access, and revoke anything you do not recognize or no longer trust, especially tools that promised views or subscribers. Change your password, turn on two-step verification, and check that no unknown recovery email or phone number was added. Then open YouTube Studio and check the channel's permissions for extra managers you did not add. Example: A creator found an old free subscriber tool still connected to the channel a year after using it once. Revoking it stopped background activity the creator did not know was happening. Common mistake: Changing the password but leaving the app connected. A connected app can keep acting on the channel even after a password change.Illustrative diagram (mock-up, not a real YouTube Studio screenshot): securing the account and revoking app access. Step 5 - Understand What Happens to Earnings and Keep Every Notice What to do: Expect adjustments, not instant recovery, and keep every message YouTube sends about the issue. How: YouTube Help says that when invalid traffic is detected, advertisers are not charged, and earnings tied to invalid activity can be adjusted out. Ad serving may be limited for a while until the systems see the risk has reduced, and significant violations can lead to suspension of the linked AdSense for YouTube account or demonetization under the channel monetization policies. Payments may also be delayed while traffic is investigated. Save every email and Earn-tab notice, including dates, because the appeal window is tied to them. Example: A channel's estimated revenue dropped for two weeks after the invalid views were removed, even though public views looked normal again. Common mistake: Spending the estimated revenue before it is finalized. Estimated earnings are not a promise, and invalid-traffic adjustments can reduce them.Illustrative diagram (mock-up, not a real YouTube Studio screenshot): earnings adjustments after invalid traffic. Step 6 - Appeal If the Decision Was Wrong, Then Rebuild With Real Traffic What to do: If your account was disabled for invalid traffic and you believe that was an error, submit an invalid activity appeal through the official route, and keep the channel clean while you wait. How: YouTube Help says that if your account was disabled for invalid traffic but you feel the decision was made in error, you can submit an invalid activity appeal. Follow the link in the notice or email, explain briefly what you stopped and what you changed, and include the cancellation dates if you have them. Rebuild with real sources such as search and suggested videos, and confirm in Studio that traffic sources look normal again. If your subscriber count also fell, read our guide on why subscribers drop or get stuck before assuming the worst. Example: A creator appealed after cancelling a growth service and revoking app access, and included the cancellation dates. The appeal was reviewed, and the channel was later able to apply for monetization again once eligible in YouTube Studio. Common mistake: Appealing before cleaning up. If the service is still running, the same signal that caused the problem is still present when the appeal is reviewed.Illustrative diagram (mock-up, not a real YouTube Studio screenshot): appealing and rebuilding with real traffic. Your Invalid Traffic Cleanup ChecklistAll paid view, subscriber, and engagement orders cancelled, not just paused. Nobody has been asked to click ads or loop videos for revenue. Third-party access reviewed, and unknown or shady apps revoked. Password changed and two-step verification turned on. Suspicious traffic sources checked in the Analytics Reach tab. Every YouTube email and Earn-tab notice saved with its date. Appeal submitted only through the official link, once, with the cleanup dates included.Frequently Asked Questions Will YouTube remove the bought views? As reported, YouTube's systems filter out invalid views, so the views may drop in Analytics and earnings tied to them can be adjusted out. The channel itself can also face limits on ads. Can I get monetization back after invalid traffic? YouTube Help says significant violations may lead to demonetization, and if a violation is overturned you can apply for monetization once eligible in Studio. Confirm your exact status in the Earn tab. Does embedding a video or using the Promotions tab cause invalid traffic? YouTube's FAQ says embedding and legitimate promotion do not by themselves cause invalid traffic. Check the official FAQ for the full list of cases. Will my videos still be recommended? YouTube's FAQ addresses recommendations after invalid traffic, so check the article for the current wording. Real watch time and audience signals still matter, so keep publishing normally and read the Reach tab. How long do invalid-traffic reviews take? YouTube Help says payments may be delayed up to 90 days while traffic is investigated. Keep the channel clean and watch the Earn tab for updates. SourcesYouTube Help, Invalid traffic on your videos: support.google.com/youtube/answer/10285842 (verified live 31 October 2026). CreatorPlaybook, How YouTube Counts Views in 2026: creatorplaybook.blogspot.com/2026/10/how-youtube-counts-views-in-2026-public.html CreatorPlaybook, YouTube Subscribers Dropping or Stuck?: creatorplaybook.blogspot.com/2026/10/youtube-subscribers-dropping-or-stuck.html
- CreatorPlaybook Team
- 30 Oct, 2026
YouTube Scheduled Video or Premiere Not Publishing? Why It Misses the Start Time
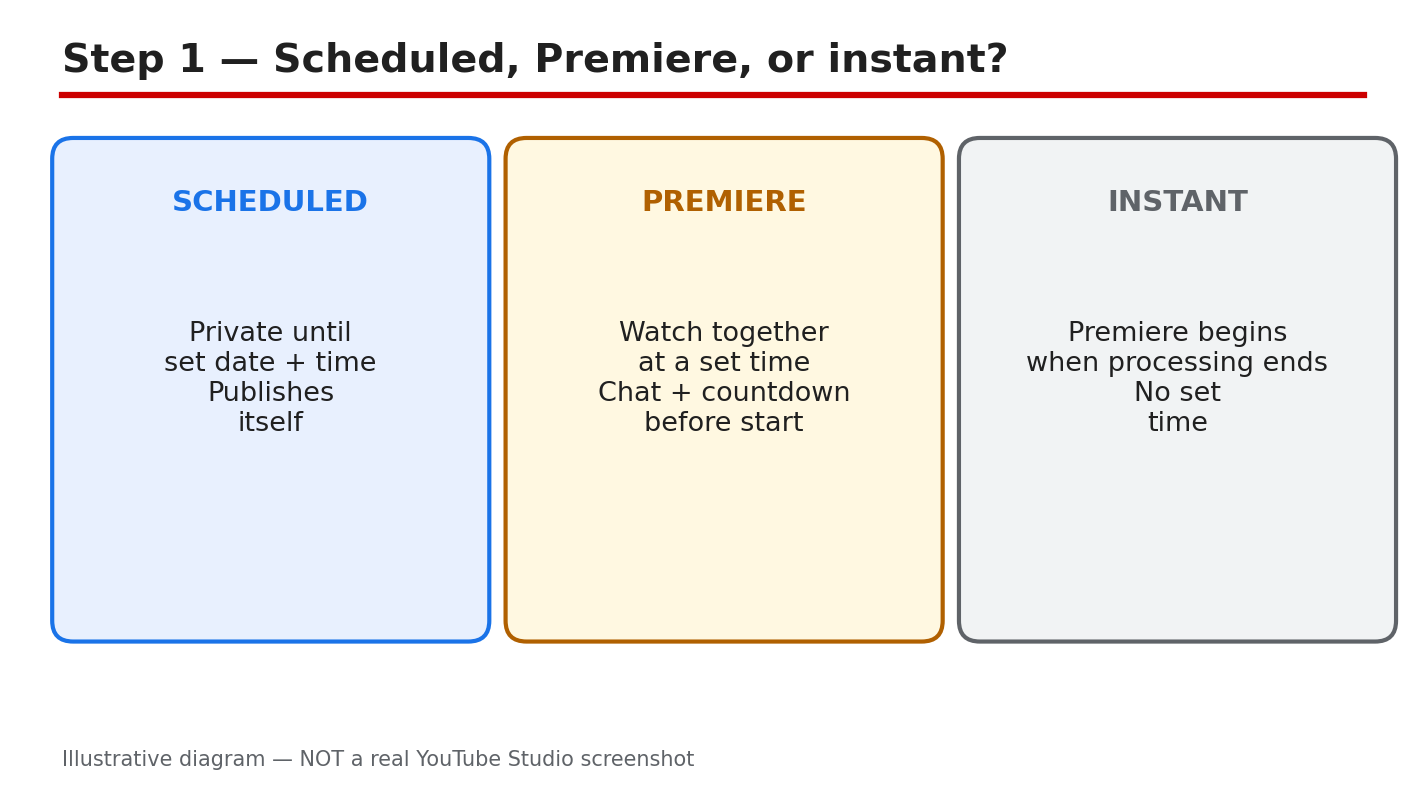
You set the time, told your viewers, and counted down, but when the hour came, nothing happened. A scheduled video or a Premiere can miss its start for a few simple reasons, and most of them are easy to prevent once you know where to look. Most misses come from three causes, and all three are easy to check. This guide explains the difference between a scheduled video, a Premiere, and an instant Premiere, shows you the checks to run the day before, and gives you a plan for the day itself. Work through the six steps, and your next video will start on time. What You Will LearnHow a scheduled video, a Premiere, and an instant Premiere differ. The checks to run the day before, not five minutes before. Why processing, time zones, and format limits delay a start. What to do when a Premiere is stuck at start time. A Premiere-day plan you can reuse for every launch.Step 1: Tell the Three Release Types Apart A scheduled video is a normal upload with a date and time attached. You upload it, set it to go Public at the chosen time, and it stays Private until then. A Premiere is different: your viewers watch together at a set time, with a countdown, a live chat, and a shared watch page. An instant Premiere is the third type: it begins as soon as processing finishes, instead of at a set date and time. If you only want the video to go live at a set time, a scheduled upload is enough, and there is no countdown for viewers to join. Example: you schedule a tutorial for Friday 6 p.m. and it goes Public on its own. For a countdown and live chat, set it as a Premiere instead. Common mistake: calling every scheduled upload a Premiere. Figure 1: Illustrative diagram comparing a scheduled video, a Premiere, and an instant Premiere. This is a mock-up, not a real YouTube Studio screenshot. Step 2: Check Everything Before Start Time Run these checks the day before, not five minutes before the start. In YouTube Studio, go to Content, open the video row, and check the upload and processing status. On the watch page, open Settings, then Quality, to confirm HD is ready. Then re-read the scheduled date, time, and time zone. Finally, confirm the video is eligible for a Premiere: Shorts are not supported, neither are 360 or VR180 videos, and neither is output over 1080p. Also check that the video is not still uploading, because a schedule cannot start a file that has not finished uploading. Example: on Thursday, confirm HD is ready and the time reads Friday 6 p.m. in your own time zone. Common mistake: checking the schedule while travelling and reading the time in the wrong zone. Figure 2: Illustrative diagram of the pre-start checks: processing status, date, time, time zone, and eligibility. This is a mock-up, not a real YouTube Studio screenshot. Step 3: Learn Why It Misses the Time The most common cause is unfinished processing. YouTube publishes the low-quality version first and adds HD later, so a video can be live but not finished. A 60-minute 4K video at 30 frames per second can take up to 4 hours to finish high-resolution processing, and 60 frames per second takes longer. A longer video, a higher resolution, and a higher frame rate all add processing time, and busy traffic on YouTube can slow it further. The second cause is the wrong time zone: the video is fine, but the clock was set for another zone. The third cause is format: Shorts, 360 and VR180 videos, and output over 1080p are not supported for Premieres, as YouTube Help states. Example: you upload a 4K video at 5 p.m. and schedule the Premiere for 7 p.m., but the video is still processing at 7 p.m. Common mistake: uploading an hour before a Premiere and assuming the schedule guarantees a start. Upload hours early instead. Figure 3: Illustrative diagram of the three delay causes: processing, time zone, and unsupported format. This is a mock-up, not a real YouTube Studio screenshot. Step 4: Run the Pre-Premiere Checks Run this list the day before, and again three hours before the start. First, confirm processing has finished and HD is available in the Quality menu. Second, re-read the date, time, and time zone, and compare them with the time you announced to your viewers. Third, confirm the format is supported: a regular video at 1080p or lower, not a Short, and not a 360 or VR180 video. Fourth, check for anything that can block publishing, such as a Community Guidelines strike. YouTube Help says a strike can stop a Premiere from publishing during the penalty period. If anything on the list fails, move the start time and tell your viewers before the countdown begins. Example: three hours before the start, the quality menu tops out at 360p, so you move the Premiere later and tell viewers in a Community post. Common mistake: skipping the three-hour check because the video looked fine yesterday. Figure 4: Illustrative diagram of the pre-Premiere checklist: processed, time correct, format supported, no block. This is a mock-up, not a real YouTube Studio screenshot. Step 5: What to Do If It Is Stuck Check the processing status before you panic. Processing may finish late, and a Premiere can begin once the video is ready. Do not delete the video, and do not upload a second copy in a rush. If the delay is long, re-schedule the Premiere and tell your viewers in a Community post and on the watch page. If the audience is waiting and the wait is urgent, start a normal live stream instead and play the video there. Tell viewers what happened and when the new start time is, so they come back instead of leaving. Example: the countdown ends but the video does not play, so you post an update, move the Premiere by one hour, and your viewers return. Common mistake: re-uploading the same video while the first copy is still processing, which splits the audience. Figure 5: Illustrative diagram of the stuck-Premiere options: wait, re-schedule and tell viewers, or go live instead. This is a mock-up, not a real YouTube Studio screenshot. Step 6: Follow a Premiere-Day Plan Upload the video the day before and keep it Private until the start. Confirm HD has finished three hours before the start. Open the watch page and check the date, time, and time zone one last time. Be in the chat five minutes early, pin a comment with your key links, and stay after the Premiere to reply to the first comments. After the Premiere ends, the video stays as a regular upload, and the chat replay is available. Keep the schedule unchanged on the day itself, unless a check fails. Example: your Premiere is Saturday 6 p.m., so you upload on Friday, confirm HD on Saturday at 3 p.m., and join the chat at 5:55 p.m. Common mistake: leaving the chat empty until the video starts. The countdown is part of the event. Figure 6: Illustrative diagram of the Premiere-day plan: upload early, confirm HD, join chat early, pin the replay. This is a mock-up, not a real YouTube Studio screenshot. Quick ChecklistUploaded the video the day before, as Private. Confirmed HD is finished three hours before the start. Checked the date, time, and time zone twice. Confirmed the format is supported for Premieres. Checked for strikes or restrictions that can block publishing. Joined the chat five minutes early and pinned the replay.Frequently Asked Questions Why did my Premiere not start at the scheduled time? Unfinished processing is the most common reason. YouTube publishes the low-quality version first and adds HD later, and a 60-minute 4K video at 30 frames per second can take up to 4 hours to finish high-resolution processing. Upload hours early and confirm HD is ready before the start. Check the Quality menu on the watch page to see whether HD is ready. Can I Premiere a Short? No. Shorts are not supported for Premieres, and neither are 360 or VR180 videos, or output over 1080p. What is an instant Premiere? An instant Premiere begins as soon as processing finishes, instead of at a set date and time. My Premiere is stuck. Should I re-upload the video? No, not in a panic. Check the processing status first, then re-schedule and tell your viewers, or start a normal live stream if the wait is urgent. Can a strike stop my Premiere? Yes. YouTube Help says a Community Guidelines strike means the Premiere will not publish during the penalty period. Sources — Check It YourselfYouTube Help: Premiere a new video YouTube Help: Low video quality after upload Related on CreatorPlaybook: YouTube Live Streaming for Beginners
- CreatorPlaybook Team
- 30 Oct, 2026
YouTube Verification Explained: Phone Verification, Advanced Features, and the Grey Badge
Three different things on YouTube all use the word verification, and mixing them up wastes hours. Phone verification unlocks longer uploads, custom thumbnails, and live streaming. Advanced features unlock Content ID appeals, links in descriptions, and chapters. The grey badge only proves a channel is the real one, and it needs 100,000 subscribers. This guide separates the three, shows you exactly where to check each one in YouTube Studio, and walks you through the steps to apply, recover lost access, and avoid the scams that charge for a free badge. What You Will LearnHow phone verification, advanced features, and the grey badge differ. Where to check your status in Studio in under a minute. The exact rules for the grey badge, as YouTube Help states them. What to fix before you apply, so you are not rejected. How to recover advanced features if you lose them. Why no one can sell you a badge, and what to do instead.Step 1: Learn the Three Different Verifications Phone verification is free and proves you are a real person. You enter a phone number, YouTube sends a code by text or voice call, and you enter it back. Once verified, you can upload videos longer than 15 minutes, add custom thumbnails, live stream, and appeal copyright claims. Advanced features are the next level: after phone verification, you unlock them by verifying with an ID or a video, or by building up channel history. They add Content ID appeals, links in video descriptions, and chapters. The grey badge is different again: it is a check mark next to your channel name that proves you are the real creator, and it gives you no extra features at all. Example: a new creator phone-verifies on day one and can live stream the same week, but the grey badge stays out of reach until 100,000 subscribers. Common mistake: paying a stranger who promises a grey badge. Applications are free inside YouTube Studio, and no one outside YouTube can grant one. Figure 1: Illustrative diagram comparing the three verifications: phone, advanced features, and the grey badge. This is a mock-up, not a real YouTube Studio screenshot. Step 2: Check Your Status in YouTube Studio Sign in to YouTube Studio on your computer, then go to Settings, then Channel, then Feature eligibility. That page shows three groups: standard features, intermediate features, and advanced features, with your current status for each. For the grey badge, the path is different: go to Settings, then Channel, then Verified badge, and you will see Apply only if you are eligible. If the Verified badge tab does not appear, YouTube says you are not yet eligible to apply. Example: you open Feature eligibility and see advanced features marked as not available, with a button to verify with an ID or a video. Common mistake: asking a manager or editor to complete phone verification for you. YouTube Help says that for a channel without a brand account, only the channel owner can phone-verify it, so the owner must do this step personally. Figure 2: Illustrative diagram of the Studio path: Settings, Channel, Feature eligibility, and the Verified badge tab. This is a mock-up, not a real YouTube Studio screenshot. Step 3: Know the Grey Badge Rules YouTube Help lists three requirements to submit a request for channel verification. You must have 100,000 subscribers. Your Google account must have 2-step verification turned on. And you must have a complete profile, including a banner image, profile picture, description, and at least one public video. Only the channel owners or the managers of a channel can submit the application. There is no workaround at the standard tier: a smaller channel cannot buy, request, or unlock the badge early, although YouTube says it sometimes proactively verifies well-known channels with fewer than 100,000 subscribers. Example: a channel with 120,000 subscribers but no 2-step verification will see a prompt to turn it on instead of an Apply button. Common mistake: changing your channel name after getting verified. YouTube says a verified channel stays verified unless you change your channel name, which removes the badge. Changing your handle, on the other hand, does not remove it. Figure 3: Illustrative diagram of the grey badge rules: 100,000 subscribers, 2-step verification, and a complete profile. This is a mock-up, not a real YouTube Studio screenshot. Step 4: Get Ready Before You Apply Work through four checks before you open the application. First, confirm your subscriber count is at or above 100,000, and remember that YouTube's systems can take a few days to update after you pass the mark. Second, turn on 2-step verification on the Google account that owns the channel. Third, complete your profile: banner image, profile picture, description, and at least one public video. Fourth, check for active strikes, because YouTube reserves the right to revoke verification from channels that violate its Community Guidelines or Terms of Service. Example: you reach 100,000 subscribers on Monday, turn on 2-step verification on Tuesday, and the Apply button appears later that week. Common mistake: applying with an incomplete profile and getting stuck, then assuming the system is broken. Fix the missing piece first, then apply, and keep your record clean while you wait. Figure 4: Illustrative diagram of the pre-application checks: subscribers, 2-step verification, profile, and strikes. This is a mock-up, not a real YouTube Studio screenshot. Step 5: Recover Advanced Features You Lost If advanced features stop working, start with the simplest fix: verify your phone number again in Studio under Settings, then Channel, then Feature eligibility. If that does not restore access, YouTube offers two routes to advanced features: verification using an ID or a video, or building up sufficient channel history. Reported guidance puts ID or video verification review at about 24 hours, and channel history at about two months of clean activity. Treat both figures as reported estimates, not promises, and keep uploading normally while you wait. Example: a channel loses advanced features after a long break, re-verifies its phone number, and the features return the same day. Common mistake: paying a service that claims it can restore advanced access overnight. No service can do that for you, and sharing your account details with one can put the whole channel at risk. Figure 5: Illustrative diagram of the recovery routes: re-verify by phone, ID or video check, or channel history. This is a mock-up, not a real YouTube Studio screenshot. Step 6: Follow a Simple Verification Plan Do the steps in this order. Phone-verify your channel first, because every other step needs it. Then unlock advanced features with an ID or video check, or by building channel history. Grow your channel with regular uploads until you pass 100,000 subscribers, keep 2-step verification on, and keep your profile complete. When the Apply button appears under Settings, then Channel, then Verified badge, apply from inside Studio. The application is free, and anyone asking you to pay for a badge is running a scam. Example: a creator phone-verifies in week one, unlocks advanced features in month two, and applies for the badge the week the channel passes 100,000 subscribers. Common mistake: treating the grey badge as a goal that unlocks features. It does not. Phone verification and advanced features are what change what your channel can do. Figure 6: Illustrative diagram of the verification plan: phone first, advanced next, badge last. This is a mock-up, not a real YouTube Studio screenshot. Quick ChecklistPhone-verified the channel with the owner's phone number. Checked Feature eligibility in Studio for all three feature levels. Know which of the three verifications you still need. Turned on 2-step verification on the channel owner's Google account. Completed the profile: banner, picture, description, and one public video. Never paid anyone for a badge or for advanced access.Frequently Asked Questions Is phone verification the same as the grey badge? No. Phone verification is a free code check that unlocks longer uploads, thumbnails, live streaming, and copyright appeals. The grey badge only proves a channel is the real one, and it needs 100,000 subscribers. Who can phone-verify a channel? YouTube Help says that for a channel without a brand account, only the channel owner can phone-verify it. For a brand account channel, the owner and managers can do it. Does the grey badge give me extra features? No. YouTube Help states that verified channels do not get extra features on YouTube. The badge is about identity, not about unlocking tools. How long does advanced verification take? Reported guidance puts ID or video verification review at about 24 hours. Building channel history instead takes about two months of clean activity, as reported. Treat both as estimates, not guarantees. Can I buy a verification badge? No. Applications are free inside YouTube Studio, and no seller can grant a badge. Anyone asking for payment is running a scam, so report them and never share your password. Sources — Check It YourselfYouTube Help: Verify your YouTube account YouTube Help: Verification badges on channels Related on CreatorPlaybook: YouTube Handle Taken or Channel Name Wrong? How to Change Your Name and Handle
- CreatorPlaybook Team
- 30 Oct, 2026
YouTube Video Blurry After Upload? Why HD Is Stuck at 360p and How to Fix It
Your video looked sharp on your phone, but on YouTube it looks soft, blocky, and stuck at 360p. Before you delete it and upload it again, stop. In most cases, the video is not broken. YouTube publishes a low-quality version first and adds the high-definition versions later, while your own connection can also force the player down to 360p. This guide shows you how to tell which of the three causes is behind your blurry video, how to check the real processing status in YouTube Studio, and how to fix a video that stays soft after processing has finished. Follow the six steps in order. What You Will LearnHow to tell a connection problem, a processing delay, and a low-quality source file apart. Where to check HD processing status in YouTube Studio and on the watch page. Why 4K and 1080p videos take hours to finish processing. How to audit your original file, export settings, and bitrate. When to wait, when to re-export, and when to re-upload. A sharp-upload routine you can repeat for every new video.Step 1: Find Out Who Sees the Blur Open your video on fast Wi-Fi, then open it again on mobile data and on a second device, such as a laptop or a friend's phone. If the video looks sharp on one connection and blurry on another, the problem is your connection, not your upload. YouTube's Auto quality setting drops the resolution when the connection is slow, so a video can look like 360p on weak Wi-Fi and 1080p on a strong connection. Example: your edit looks crisp on your laptop at home, but blurry on your phone on the bus. That is a connection problem, and re-uploading will not fix it. Common mistake: deleting the video and uploading it again before checking another device. If everyone sees the same soft picture on fast connections, the cause is different: either HD is still processing, or your source file was already low quality. Ask two people to check. Figure 1: Illustrative diagram showing how to tell a blurry-for-you problem from a blurry-for-everyone problem. This is a mock-up, not a real YouTube Studio screenshot. Step 2: Check Whether HD Has Finished Processing In YouTube Studio, go to Content, find your video, and look at the row for it. Studio shows the processing status, and you can also open the video's watch page, click Settings, then Quality. If 1080p or 4K is missing from that menu, HD is still processing. YouTube processes the low-quality version first so the video can go live quickly, then adds the higher qualities in the background. Example: you publish at 6 p.m. and the quality menu tops out at 360p. By 10 p.m., 1080p appears without you touching anything. Common mistake: judging the video in the first hour and telling viewers it is broken. Give processing time to finish, and check the quality menu again after a few hours before you take any other step. Figure 2: Illustrative diagram of the Studio Content row and the watch-page Quality menu used to check HD processing. This is a mock-up, not a real YouTube Studio screenshot. Step 3: Understand Why HD Takes So Long Processing time depends on the video format, length, frame rate, quality, and traffic, according to YouTube Help. Higher-quality videos take longer to upload and to process. YouTube reports that a 4K video is four times larger than a 1080p video, so it can take four times longer for 4K quality to become available after the upload finishes. A 60-minute 4K video at 30fps can take up to 4 hours to finish high-resolution processing, and a 60fps 4K video will take longer. Example: a 45-minute 4K tutorial uploaded at noon may still show only 360p at 3 p.m. That is normal processing, not a failed upload. Common mistake: re-uploading the same file because the HD version is slow, which only restarts the whole queue. Upload long 4K videos early, and never promise viewers a sharp premiere in the first hours. Figure 3: Illustrative diagram of the factors that slow HD processing: length, 4K resolution, 60fps, and busy traffic. This is a mock-up, not a real YouTube Studio screenshot. Step 4: Audit Your Original File and Export Open the original file on your computer and check its resolution. If it is 720p or lower, YouTube cannot invent detail that was never there, and the video will stay soft even after processing finishes. A video sent through WhatsApp as a normal chat message is compressed to 720p or lower, so always ask the sender to send the original as a Document instead. Finally, check your export: use 1080p or higher, a high bitrate, and the same frame rate as your recording. Example: a friend sends you a clip on WhatsApp, you upload it, and it never goes past 720p. The fix is the original file, sent as a Document. Common mistake: raising the export resolution to 4K from a 720p source and expecting a sharper picture. Upscaling a soft file only makes a bigger soft file, so start from the sharpest original you have. Figure 4: Illustrative diagram of a quality audit: original resolution, WhatsApp compression, and export bitrate. This is a mock-up, not a real YouTube Studio screenshot. Step 5: Fix a Video That Stays Soft Wait until the quality menu shows that HD has finished before you decide the video is broken. If HD is done and the picture is still soft, the source is the problem, and no setting inside YouTube will sharpen it. Re-export the video at 1080p with a high bitrate from the sharpest original file, then upload the new version as Private first. Check the new upload on the watch page, and only replace the live video once the new one looks sharp. Example: a tutorial stays soft at 720p after a full day, so you re-export it at 1080p from the original project and upload it as Private. Once HD finishes, you swap it in. Common mistake: deleting the live video before the replacement is ready, which loses its views and watch time. Keep the live video up until the new one is ready to publish. Figure 5: Illustrative diagram of the fix: wait for HD, re-export at 1080p, upload as Private, then replace. This is a mock-up, not a real YouTube Studio screenshot. Step 6: Use a Sharp-Upload Routine Every Time Make every upload follow the same routine. Export at 1080p or higher with a high bitrate, then upload the video as Private or Unlisted. Wait until the quality menu shows 1080p or 4K, then switch the video to Public or let your scheduled time run. This removes the most common reason viewers see a blurry first impression. Example: you upload Friday's video as Private on Thursday night, confirm 1080p on Friday morning, then make it Public. Common mistake: publishing a 4K video the minute the upload bar hits 100 percent and sharing the link everywhere while it is still 360p. First impressions stick, so let HD finish before anyone watches. Figure 6: Illustrative diagram of the sharp-upload routine: export, upload Private, wait for HD, then publish. This is a mock-up, not a real YouTube Studio screenshot. Quick ChecklistChecked the video on Wi-Fi and on a second device. Opened the watch-page Quality menu to confirm HD is finished. Waited several hours for a long 4K upload to process. Confirmed the original file is 1080p or higher. Asked for the original file as a Document, not a WhatsApp chat video. Re-uploaded as Private first, and kept the live video until ready.Frequently Asked Questions Why is my YouTube video stuck at 360p? YouTube publishes the low-quality version first and adds HD later. A 60-minute 4K video at 30fps can take up to 4 hours to finish high-resolution processing, according to YouTube Help. Why does my video look blurry only on my phone? Your connection is the likely cause. YouTube's Auto setting lowers quality on slow connections, so test the same video on fast Wi-Fi and on another device before changing anything. Can I make a 720p video look like 1080p? No. YouTube cannot add detail that was never in the source file, so re-export from the sharpest original you have, at 1080p or higher with a high bitrate. Should I delete a blurry video and upload it again? Not right away. Wait for HD to finish, and if the video is still soft, upload the fixed version as Private first. Delete the live video only after the replacement is ready. Does verifying my account speed up processing? YouTube Help says verifying your account gives the best processing time, so it is worth doing. It does not turn a low-quality source file into HD, but it removes one avoidable delay. Sources — Check It YourselfYouTube Help: Low video quality after upload YouTube Help: Upload videos longer than 15 minutes Related on CreatorPlaybook: YouTube Video Stuck Uploading or Processing? How to Fix It Without Losing the Video
- CreatorPlaybook Team
- 30 Oct, 2026
YouTube Comments Not Showing? Held for Review, Spam Filter, or Disabled — Fix It
A viewer writes a thoughtful comment, and it never appears under your video. Another comment with a link vanishes too. Before you blame viewers, check your own settings: most missing comments are held for review, caught by a filter, or switched off by a setting you did not mean to change. This guide shows you how to tell the three cases apart, find the setting, fix the cause, and build a comments habit that keeps real discussion visible. Work in order, and test with a comment from a second account you control. What You Will LearnTell held, blocked, and disabled comments apart. Find comment settings for one video and the whole channel. Spot spam filters, blocked words, and a wrong Made for Kids label. Approve real comments and reply fast in the first hours. Build a daily and weekly comments habit.Step 1: Missing, Held, or Off? Three states look the same to a viewer but need different fixes. Held for review means the comment waits in a queue until you approve it. A blocked-words catch means your own word list stopped the comment. Comments disabled means the video or channel setting has comments off, so nobody can comment at all. Check the queue first, then the word list, then the switch itself. Guessing the cause and changing everything at once only hides the real one. Path: YouTube Studio > Community > Held for review, then Likely spam. Example: a creator found 40 kind comments held for review after switching on 'Hold all comments'. Changing it to 'Hold potentially inappropriate comments' let real comments through. Common mistake: turning comments off and on again, hoping old comments return, instead of checking the held queue first.Diagram: missing, held, or off — three states, three different fixes. Illustrative diagram, not a real Studio screenshot. Step 2: Find the Comment Setting There are two places to check. For one video, open YouTube Studio, go to Content, click the video, open Details, and scroll to Comments visibility. There you can allow all comments, hold some for review, or turn comments off. For the whole channel, go to Settings, then Community, then Defaults, and set the same choice for new uploads. The held queue lives under Community in the left menu, with tabs for Published, Held for review, and Likely spam. Path: YouTube Studio > Content > video > Details > Comments visibility, and Settings > Community > Defaults. Example: comments were on for old videos but off for new ones, because the channel default was set to Off. Changing Defaults fixed every future upload. Common mistake: fixing one video and forgetting the channel default, so the next upload has the same problem.Diagram: find the setting — video Details, channel Defaults, and the held queue. Illustrative diagram, not a real Studio screenshot. Step 3: Why Comments Vanish Three filters hide most comments. First, the spam filter catches comments with links, repeated text, or patterns that look automated. Second, your blocked-words list stops any comment that holds one of your words, even when the rest of the comment is friendly. A single broad word, like 'free', can hide hundreds of good comments. Third, a wrong Made for Kids label turns comments off by design. Videos set as Made for Kids do not allow comments, so an adult video with the wrong label loses every comment. Check the audience label before you blame the filter. Path: YouTube Studio > Content > video > Details > Audience, then check 'Made for Kids' is correct. Example: a gaming channel blocked the word 'link', and every comment asking for a game link vanished. Removing that one word restored the discussion. Common mistake: adding dozens of blocked words after one bad comment, which silences ordinary viewers too.Diagram: why comments vanish — spam filter, blocked words, wrong Made for Kids label. Illustrative diagram, not a real Studio screenshot. Step 4: Run the Comments Checks Work through four checks in order. First, open the video's Comments visibility and confirm it is set to allow comments. Second, open the held queue and count how many real comments wait there. Third, open Details, then Audience, and confirm the Made for Kids label matches the video. Fourth, open Settings, then Community, and read your blocked-words list line by line. Remove any word that is too broad. Finish by posting a test comment from a second account to confirm comments show. Path: YouTube Studio > Community > Held for review, then Published, to compare the two lists. Example: a check found 60 held comments, 12 blocked by one broad word, and a correct audience label. Approving the 60 fixed the video in ten minutes. Common mistake: approving spam along with real comments, which teaches the filter nothing and fills the thread with junk.Diagram: the comments checks — setting, held queue, audience label, blocked words. Illustrative diagram, not a real Studio screenshot. Step 5: Fix and Reply Approve the real comments first, starting with the oldest, then remove or report the spam. If one blocked word caused the problem, delete that word from the list and save. Then reply fast. Comments answered in the first hours draw more replies, and a lively thread signals YouTube that viewers care about the video. Ask a simple question at the end of your reply so the viewer has a reason to come back. Pin the best question to the top of the comments so new viewers see it first. Path: YouTube Studio > Community > Held for review > Approve, then reply from the Published tab. Example: a creator approved 30 held comments and replied to each one. The video gained 12 new comments the same day. Common mistake: replying only to praise and ignoring questions, which ends the conversation instead of growing it.Diagram: fix and reply — approve real comments, remove the blocking word, reply fast. Illustrative diagram, not a real Studio screenshot. Step 6: Build the Comments Habit Daily, open the held queue each morning and approve or remove every comment the same day. Weekly, read your blocked-words list and remove words that are too broad. Before you publish, set comments to the choice you want while the video is still unlisted, and pin a question that invites the first comment. Reply to the first ten comments on every new video yourself. A channel that answers becomes a place people return to, and returning viewers are the ones who comment again. Path: YouTube Studio > Settings > Community > Defaults, set before publishing, then Community > Held for review daily. Example: a channel cleared its queue every morning for a month. Comments per video doubled, and the community began answering new viewers first. Common mistake: clearing the queue once and never returning, so the same comments pile up again within a week.Diagram: the comments habit — daily queue, weekly block-list review, set before Public, pin a question. Illustrative diagram, not a real Studio screenshot. Quick ChecklistComments visibility set to allow comments on the video. Held queue empty, with real comments approved. Audience label correct for the video. Blocked-words list free of broad words. Channel default set before the video goes Public. First ten comments answered, best question pinned.Frequently Asked Questions Why did my comment disappear right after I posted it? It was likely held for review or caught by the spam filter. Check the Held for review tab in YouTube Studio > Community. Can viewers comment on Made for Kids videos? No. Comments are turned off on Made for Kids videos by design, so check the audience label if comments are missing. I turned comments off and on. Will old comments return? Check the held queue first — approvals there are the surest way to bring real comments back, and changing the on-off switch rarely helps. Should I use 'Hold all comments for review'? Only for a short time, such as after a sensitive video. For daily use, 'Hold potentially inappropriate comments' keeps real discussion visible with less work. How do I handle rude comments once they appear? Approve the fair ones, hide or report the abusive ones, and reply calmly to honest criticism. Our guide to negative comments explains the reply step in detail. Sources — Check It Yourself Check the facts in this guide against YouTube's own help pages.Learn about comment settings — YouTube Help How to Handle Negative Comments on YouTube
- CreatorPlaybook Team
- 30 Oct, 2026
YouTube Subscribers Dropping or Stuck? Why Your Count Falls and How to Stop It
Your subscriber count falls by ten overnight, then stalls for a week. No video was deleted, no settings changed, and the comments look normal. Before you panic, know this: small drops are normal on YouTube, and a flat count often means slow growth, not lost fans. This guide helps you tell a drop, a stall, and a display lag apart. Then you will find where the number lives, learn why counts fall, audit the videos that lost subscribers, and follow a 30-day plan to stop the leak. Work in order, and do not buy subscribers. This post uses YouTube's own help pages as its source. What You Will LearnTell a real drop, a stall, and a display lag apart. Find subscribers gained and lost in YouTube Analytics. Learn why closed and spam accounts are removed from counts. Audit which videos lost subscribers and why. Stop the leak with on-topic videos, early hooks, and one subscribe ask.Step 1: Drop, Stall, or Display Lag? Three patterns look alike but need different fixes. A drop means the number fell after YouTube removed closed or spam accounts, or after viewers unsubscribed. A stall means the count is flat because new subscribers roughly match the people leaving. A display lag means the public count is rounded and updates in steps, so it can look frozen while the real count moves. Check Studio before you react, because each pattern points to a different fix. Path: YouTube Studio > Dashboard, then check the real-time subscriber card. Example: a channel showed 1,240 subscribers for three days, then jumped to 1,260. The public count updates in steps, so the stall was only a display lag. Common mistake: announcing a 'subscriber crisis' to your audience after one bad day, which only pushes more people to unsubscribe.Diagram: drop vs stall vs display lag — three patterns, three different fixes. Illustrative diagram, not a real Studio screenshot. Step 2: Find Where the Number Lives Open YouTube Studio, go to Analytics, then the Audience tab. There you will see subscribers gained and lost, and which videos gained or lost them. Compare that line with your views trend. If views are steady but subscribers fall, the problem is who the videos reach, not how many watch. If views also fall, reach is the first problem to fix. Check the last 28 days, not a single day, so one viral video does not hide the trend. Path: YouTube Studio > Analytics > Audience > Subscribers gained and lost, by video. Example: one tutorial gained 90 subscribers while a reaction video lost 40. The channel kept the tutorials and dropped the reactions. Common mistake: reading only the public count on your channel page, which is rounded and hides small daily changes.Diagram: Studio, Analytics, Audience — where subscribers gained and lost live. Illustrative diagram, not a real Studio screenshot. Step 3: Why Counts Fall Counts fall for three usual reasons. First, YouTube removes closed accounts and spam subscribers in regular checks. YouTube reports that it verifies the legitimacy of accounts and actions on your channel, and removes subscribers gained through artificial means, such as buying them. Second, viewers unsubscribe after a video that breaks your promise. A sudden topic change, a misleading title, or a long break can all push loyal viewers away. Third, bought subscribers vanish in the same clean-ups. Buying subscribers breaks YouTube's rules and the numbers never stay, so never buy subscribers or views. The public count also hides small moves because YouTube shortens it: a channel with 1,234 subscribers shows 1.23K, and the display only moves after ten new subscribers. Path: YouTube Studio > Analytics > Audience, then sort videos by subscribers lost. Example: a channel changed from cooking to gaming overnight and lost subscribers for a month. Returning to cooking stopped the loss within two weeks. Common mistake: blaming every drop on YouTube while ignoring the video that caused the unsubscribes.Diagram: three reasons counts fall — removed accounts, viewers leaving, bought subscribers removed. Illustrative diagram, not a real Studio screenshot. Step 4: Run a Subscriber Audit List your last ten videos and write down subscribers gained and lost for each one. Mark the worst three and watch their first minute. Ask four questions. Which video lost the most subscribers? Are bell subscribers still getting notified? Were recent videos off-topic for your audience? Did anyone buy subscribers or views for the channel? Answer honestly, because a fix aimed at the wrong cause wastes weeks. Keep the audit to one page so you can repeat it every month. Path: YouTube Studio > Analytics > Audience > See more, then sort by subscribers lost. Example: an audit showed one rant video lost 60 subscribers while every tutorial gained some. The channel stopped making rants. Common mistake: auditing totals instead of videos, which hides the one video doing the damage.Diagram: the subscriber audit — worst videos, bell notices, topic fit, bought subs. Illustrative diagram, not a real Studio screenshot. Step 5: Stop the Leak Three habits keep subscribers. First, stay on-topic. Keep one niche per video cluster, so a new subscriber knows what the next video will be. Second, hook early. Say the value of the video in the first 30 seconds, before the viewer decides to leave. Third, make one clear subscribe ask per video, near the moment you deliver value. Never beg for subscribers in every minute, and never buy them. A clean channel that keeps its promise grows slower at first, then holds its audience. Path: YouTube Studio > Content > video > Details, then check the title and first line match the video's topic. Example: a channel added one subscribe ask right after its best tip. Subscribers gained per video rose without changing anything else. Common mistake: asking viewers to subscribe in the first five seconds, before you have given them a reason.Diagram: stop the leak — one niche, an early hook, one subscribe ask. Illustrative diagram, not a real Studio screenshot. Step 6: Follow the 30-Day Subscriber Plan Week 1: run the audit and list your three worst videos. Week 2: publish two on-topic videos with a hook in the first 30 seconds. Week 3: reply to comments daily and pin a question that invites viewers back. Week 4: compare subscribers gained and lost with Week 1, and keep the format that gained the most. Repeat the cycle with one change at a time, so you learn what works. Expect slow, steady growth, not a sudden jump, and check the count weekly instead of hourly. Write down one lesson each week so the next cycle starts smarter. Path: YouTube Studio > Analytics > Audience > Subscribers, reviewed on Day 30. Example: a small channel followed this plan for a month. Losses fell by half, and two tutorial formats gained subscribers every week. Common mistake: copying a big channel's upload schedule instead of fixing the leak in your own videos.Diagram: the 30-day subscriber plan — audit, publish, engage, compare, repeat. Illustrative diagram, not a real Studio screenshot. Quick ChecklistDrop, stall, or lag named before any fix is tried. Audience tab checked over the last 28 days. Worst three videos listed with subscribers lost. No bought subscribers or views on the channel. Videos on-topic, hook in the first 30 seconds. One subscribe ask per video, after value is delivered.Frequently Asked Questions Is a small subscriber drop normal? Yes. YouTube regularly removes closed and spam accounts, so small drops happen on healthy channels too. Why does my public count look frozen for days? The public count is shortened and updates in steps, so it can look flat while your real-time count in Studio keeps moving. A video made people unsubscribe. Should I delete it? Usually not. Learn from it, keep it unlisted only if it truly misleads viewers, and make the next video on-topic. Can buying subscribers fix a falling count? No. Bought subscribers are removed in YouTube's checks, and buying them breaks the rules. Earn subscribers with on-topic videos instead. How often should I check my subscriber count? Weekly. Daily checks show noise, while a weekly audit shows whether the 30-day plan is working. Sources — Check It Yourself Check the facts in this guide against YouTube's own help pages.Check your YouTube subscriber count — YouTube Help How to Get Your First 1,000 Subscribers

- CreatorPlaybook Team
- 30 Oct, 2026
YouTube Channel Not Showing in Search? Why Your Videos Don't Rank and How to Fix It
You upload a video, wait a day, then search its exact title on YouTube. Nothing appears. Not on page one, not on page ten, and not even when you add your channel name. Before you assume the worst, know this: most 'invisible' videos are not banned or hidden. They are new, mismatched to what people type, set to the wrong visibility, or weak on the signals YouTube uses to rank search results. This guide walks you through six steps. You will tell the three cases apart, run a five-minute check, find why search skips your video, audit your ranking signals, judge the 'shadowban' claim fairly, and follow a seven-day plan. What You Will LearnSpot which of the three not-found cases you have. Check visibility, restrictions, and your exact-title search in five minutes. Match your title to words viewers actually type. Audit keywords, captions, click-through rate, and first-30-seconds retention. Tell a real restriction apart from the shadowban story.Step 1: Tell the Three Cases Apart A video that does not appear in search usually falls into one of three groups, and each group needs a different fix. First, a new video may simply not be indexed yet. YouTube needs time to process and rank a fresh upload, so waiting 24 to 48 hours is normal. Second, the title may use words nobody types. If your title says 'My Big Day' but viewers search 'how to start a YouTube channel', search has no match to offer them. Third, the video may be Private or Unlisted by mistake, which keeps it out of search entirely. Path: YouTube Studio > Content > click your video > Visibility. Confirm it says Public. Example: a creator titled a video 'Episode 7' and found nothing. Renaming it 'How to Edit YouTube Videos for Beginners' matched real searches within days. Common mistake: changing the title, thumbnail, and description all at once, then not knowing which change helped.Diagram: three not-found cases — new video, keyword mismatch, or wrong visibility. Illustrative diagram, not a real Studio screenshot. Step 2: Run the 5-Minute Search Check Open a private browser window, sign out of YouTube, and search your exact title in quotes. If your video appears, search is working and your problem is ranking, not indexing. Next, in YouTube Studio, open Content, click the video, and confirm Visibility is Public and no restriction or claim shows under Restrictions. Then search your main keyword without quotes and look at the top five results. Note their titles, lengths, and thumbnails. Your video must earn its place among them. Path: YouTube Studio > Content > video > Details > Visibility and Restrictions. Example: a video ranked nowhere for 'vlog', but appeared on page one for 'morning routine vlog in Hindi' once its title matched the longer phrase. Common mistake: testing search while signed in, where your watch history pushes your own videos up and hides the real result.Diagram: the five-minute check — exact-title search, visibility, restrictions, keyword, and top results. Illustrative diagram, not a real Studio screenshot. Step 3: Why Search Skips Your Video Search shows videos it expects viewers to click and keep watching. Three gaps stop most small channels. First, no keyword in the title means no match for the query. Put the main phrase near the start of the title, not buried at the end. Second, weak retention in the first 30 seconds tells YouTube viewers leave early, so it stops showing the video. Say the promise of the video in the first sentence. Third, thin channel history slows trust. A channel with fewer than 10 to 20 uploads, or a long gap between videos, has little proof that viewers stay. Path: YouTube Studio > Content > video > Analytics > Reach, then check impressions and click-through rate. Example: a tutorial kept viewers for 12 seconds on average. Moving the answer to the opening line raised it to 45 seconds, and search traffic followed. Common mistake: stuffing the title with five keywords, which reads badly and matches none of them well.Diagram: three reasons search skips a video — no keyword, weak first-30-seconds retention, thin channel history. Illustrative diagram, not a real Studio screenshot. Step 4: Run a Simple Ranking Audit Open the four numbers that decide most search results. First, does the title hold the keyword people type? Second, are captions on and accurate, so YouTube can read what the video covers? Add or correct them in YouTube Studio > Content > video > Subtitles. Third, what is the click-through rate on search impressions? A low rate means the title or thumbnail is losing the click. Fourth, how long do viewers stay in the first minute? Fix the weakest of the four before you touch anything else. Path: YouTube Studio > Analytics > Reach > Traffic source: YouTube search, then Impressions click-through rate. Example: captions were auto-generated with the wrong key phrase. Fixing three captions lines made the video appear for its main keyword the next week. Common mistake: judging a video after two days. Search data needs a full week before you call a title a failure.Diagram: the ranking audit — keyword, captions, click-through rate, and retention in one check. Illustrative diagram, not a real Studio screenshot. Step 5: 'Shadowban' or Normal? YouTube has said it does not run a shadowban system that hides channels from search. That claim is reported here as YouTube states it; this guide does not claim a shadowban exists. When a video vanishes from results, the cause is usually ordinary: a restriction, a copyright claim, a visibility mistake, or weak ranking signals. Check each one before you blame a hidden penalty. Open YouTube Studio > Content, look at the Restrictions column, and open any claim or restriction to read what it says. Fix the cause, then wait a few days before judging the result. Path: YouTube Studio > Content > Restrictions column, then open the video to read the restriction or claim. Example: a creator feared a shadowban, then found a music claim on the video. Replacing the track restored the video in search within a week. Common mistake: re-uploading the same video three times, which splits views and restarts the ranking process from zero.Diagram: shadowban or normal — check restrictions, claims, visibility, and signals first. Illustrative diagram, not a real Studio screenshot. Step 6: Follow the 7-Day Search Plan Day 1: run the five-minute check and fix visibility. Day 2: rewrite the title around one main keyword and fix captions. Day 3: improve the first 30 seconds with a clear promise. Day 4: publish a short that points viewers to the video. Day 5: answer every comment to lift engagement. Day 6: compare the video with the top five results and adjust the thumbnail. Day 7: read the search traffic in Analytics and keep the change that worked, then repeat the plan on your next video. If the video is Public, has no restriction, and still does not appear after 72 hours, contact YouTube support through YouTube Studio > Help > Contact us. Path: YouTube Studio > Analytics > Reach > Traffic source: YouTube search, checked on Day 7. Example: one channel followed this plan on three videos. Two of them reached page one for their main keyword by Day 7. Common mistake: changing the plan every day, so no single fix gets enough time to show a result.Diagram: the seven-day search plan — one clear action each day, measured on Day 7. Illustrative diagram, not a real Studio screenshot. Quick ChecklistVisibility is Public, and no restriction or claim shows. Exact-title search in a private window finds the video, or explains why not. Main keyword sits near the start of the title. Captions are on, accurate, and mention the keyword. First 30 seconds state the video's promise clearly. Search traffic checked on Day 7 before the next change.Frequently Asked Questions How long should I wait before worrying about a new video? Wait 24 to 48 hours first. If the video is Public with no restriction after that time, start the ranking audit in Step 4. Can I pay YouTube to rank higher in search? No. YouTube states it does not accept payment for better placement in organic search results. Does changing my title hurt the video? A small keyword fix helps, but changing the title daily resets what search has already learned about the video. My video plays fine but never appears. Is my channel shadowbanned? YouTube says it has no shadowban system, so check restrictions, claims, visibility, and ranking signals first. When should I contact YouTube support? After 72 hours with Public visibility and no restriction, contact support from YouTube Studio > Help > Contact us. Sources — Check It Yourself Check the facts in this guide against YouTube's own help pages.How YouTube search works — YouTube Help 0 Views on YouTube? How to Diagnose No Impressions, Low CTR, or Low Retention in 6 Steps
- CreatorPlaybook Team
- 29 Oct, 2026
YouTube Live Stream Keeps Disconnecting? Stream Health Red? Fix It
A disconnect can empty a live chat in seconds. The picture freezes, the sound drops, or the stream ends, and viewers leave before you can explain. The cause is often the connection between your encoder and YouTube, not your video idea. A bitrate too high for your upload speed, unstable Wi-Fi, or an overloaded device can each break the stream. This guide helps you tell a disconnect, lag, and a red Stream Health panel apart, check the health panel and your upload speed, and set a bitrate your connection can carry. You will test before you go live, keep a safe copy of your stream key, and learn what to do when the stream drops without ending it early. Bitrates in this guide are the Help page's recommendations for the resolution and frame rate you choose, not fixed rules for every connection. If your upload speed cannot carry the recommended bitrate, use a lower resolution or frame rate first, and let stability beat sharpness. What You Will Learn By the end, you will be able to:Tell a disconnect, lag, and red Stream Health apart. Read the Stream Health panel and test your upload speed. Match your bitrate to the Help page recommendations and your upload. Run pre-stream checks, including a safe stream key. Act calmly during a disconnect without ending the stream early. Build a stable-stream plan and record locally too.Step 1: Name the problem you see What to do: Name what viewers see before you change any setting. A disconnect means the stream drops or ends. Lag or buffering means the picture stutters while the stream stays live, often because the bitrate is too high for the upload speed. A red Stream Health panel means YouTube is receiving no data or poor-quality data, even if your own screen looks fine. Studio path: YouTube Studio > Create > Go Live > Stream. Watch the Stream Health panel and your encoder together, so you can match the sign to the panel. Example: Nina's viewers see buffering, but her stream stays live. She treats it as lag from a high bitrate, not a disconnect, and lowers the bitrate instead of ending the stream. Common mistake: Ending the stream at the first freeze. A short freeze can be lag, and ending the stream loses the viewers who were still watching.Illustrative diagram, not a real screenshot: disconnect, lag, and Stream Health red. Step 2: Check Stream Health and your speed What to do: Open the Stream Health panel and read the bitrate and frame drops it shows. Then run a connection speed test on the same device and network you will stream from, and write down the upload speed. Compare the two: if the panel shows drops while the upload speed is low, the connection, not the content, is the first suspect. Studio path: YouTube Studio > Create > Go Live > Stream > Stream Health panel. Keep the panel open while you test, so you can see changes as you make them. Example: Omar's panel shows frame drops and his upload test reads 4 Mbps. He knows a high-resolution bitrate will not fit, so he plans a lower resolution before he goes live. Common mistake: Checking speed on your phone while streaming from a PC. Test the device and network you will actually use.Illustrative diagram, not a real screenshot: Stream Health panel and speed test. Step 3: Find the usual causes What to do: Compare your settings with the Help page's recommended bitrate ranges, and treat them as recommendations, not fixed rules. The page recommends, for H.264 video: 720p at 30 frames per second, minimum 3 Mbps and recommended 8 Mbps; 1080p at 30 frames per second, minimum 5 Mbps and recommended 14 Mbps; and 1080p at 60 frames per second, minimum 6 Mbps and recommended 17 Mbps. Higher resolutions need higher ranges. If your upload speed cannot carry the range for the resolution you chose, lower the resolution or frame rate. Also check for unstable Wi-Fi and an overloaded PC or phone. Studio path: Your encoder settings for bitrate, resolution, and frame rate, checked against the Help page linked in Sources and the Stream Health panel. Example: Lee streams at 1080p and 60 frames per second, but his upload speed is 8 Mbps. He drops to 720p at 30 frames per second and the drops stop. Common mistake: Choosing 4K because the camera can shoot it. The stream needs upload speed to match, not only a camera that can record 4K.Illustrative diagram, not a real screenshot: bitrate, Wi-Fi, and overloaded device. Step 4: Run the pre-stream checks What to do: Test before you go live, including audio and movement, as the Help page advises. Check your upload speed, set the bitrate to fit it, use wired ethernet or strong Wi-Fi close to the router, and close apps that load the PC or phone. Copy the stream key from the Stream tab and save it safely. Never share it in chat, on screen, or in a screenshot. Studio path: YouTube Studio > Create > Go Live > Stream. Copy the stream key, set the encoder to fit your upload speed, and run a short private test first. Example: Ana tests for five minutes with music and walking around the room. Her panel stays green, so she knows the settings fit before viewers arrive. Common mistake: Showing the stream key on screen while setting up. Cover the key, and never post a screenshot that shows it.Illustrative diagram, not a real screenshot: pre-stream checks and stream key safety. Step 5: What to do during a disconnect What to do: Stay calm and keep talking if your audio is still live. Let the encoder try to reconnect on its own, and do not end the stream early for a short drop. If your encoder lets you change settings live, lower the bitrate or resolution to a level your upload can carry. Stability beats sharpness: a steady, softer picture keeps viewers longer than a sharp picture that keeps freezing. Studio path: Your encoder and the Stream Health panel. Watch the panel while you lower the bitrate, and wait for it to turn green before you raise settings again. Example: Sam's picture freezes for ten seconds, but his audio stays live. He keeps talking, lowers his bitrate, and the picture returns without ending the stream. Common mistake: Ending and restarting the stream again and again. Each restart splits the audience and the chat, and the same bitrate problem returns.Illustrative diagram, not a real screenshot: keep talking, reconnect, lower bitrate. Step 6: Build a stable-stream plan What to do: Write down the settings that worked: resolution, frame rate, bitrate, connection type, and device. Use those settings as your starting point for the next stream, and change only one thing at a time when you test a higher quality. Record locally too, so a disconnect does not lose the whole show. Studio path: YouTube Studio > Create > Go Live > Stream for the next stream, with your written settings and a local recording running. Example: Mia writes down 720p, 30 frames per second, and wired ethernet. Her next stream uses the same settings, records locally, and stays stable. Common mistake: Raising every setting for a big event. A special stream is the worst time to test a bitrate your connection has never carried.Illustrative diagram, not a real screenshot: written settings and local recording. Checklist: Before you go live Tick each item before you press Go Live.I have named the problem: disconnect, lag, or Stream Health red. I have checked the Stream Health panel and my upload speed. My bitrate fits my upload speed for the resolution I chose. I use wired ethernet or strong Wi-Fi. My stream key is saved safely and never shared. I record locally too, in case the stream drops.Frequently Asked Questions Why does my stream disconnect at the same time each day? A pattern can point to a network cause, such as others using the same Wi-Fi at that time. Test at that time, check the panel, and try wired ethernet or a lower bitrate. What bitrate should I use for 1080p? The Help page recommends, for H.264 video, a minimum of 5 Mbps and a recommended 14 Mbps at 30 frames per second, and a minimum of 6 Mbps and a recommended 17 Mbps at 60 frames per second. If your upload cannot carry that range, use 720p instead. Is red Stream Health always my fault? Not always. A red panel means YouTube is receiving no data or poor-quality data, usually from the connection or encoder. Check your panel, speed, and encoder first. Should I end the stream when it disconnects? No, not for a short drop. Keep talking if audio is live, let the encoder reconnect, and lower the bitrate if you can. End the stream only if it will not reconnect and the panel stays red. Do I need to be 16 to live stream? The Help page says you must be at least 16 to live stream, with a verified channel and no live-streaming restrictions in the past 90 days. Sources — Check It Yourself Check the official pages below before your next stream. No official YouTube video is embedded in this post, because no exact official video was verified live in this run.Live streaming guide: YouTube Live Streaming for Beginners Choose live encoder settings, bitrates, and resolutions Get started with live streaming
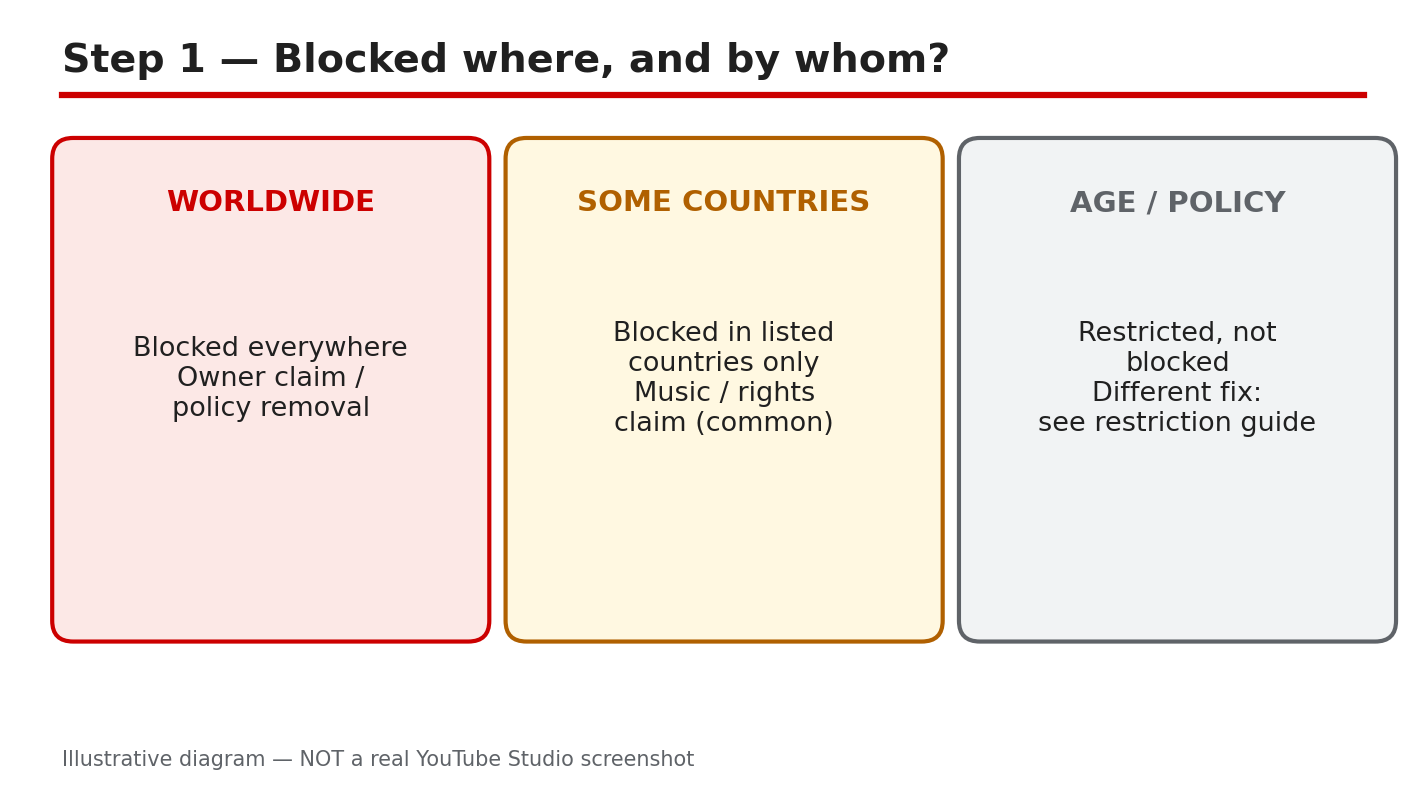
- CreatorPlaybook Team
- 29 Oct, 2026
YouTube Video Blocked in Some Countries or Worldwide? How to Fix It
A block can feel sudden and unfair. Your video plays for you, but viewers in some countries see that it is blocked, or the video is blocked everywhere and earns nothing. The fix depends on where it is blocked, who claimed it, and whether the block is a claim, a restriction, or a removal. Acting on the wrong reason, such as disputing a licence you do not have, can waste time and make the problem worse. This guide helps you find the exact block list in YouTube Studio, read which content and owner are named, and choose the fix that matches the evidence. You will check how many territories are affected, whether the video still earns elsewhere, and whether a licence truly covers the blocked countries before you dispute, replace, or erase anything. Work slowly, and keep the claim details in front of you. What You Will Learn By the end, you will be able to:Tell a country block, a worldwide block, and a restriction apart. Find the Blocked in list and the named owner. Explain why music and footage rights differ by country. Check territories, earnings, and licence cover before acting. Replace or erase claimed audio the right way. Build a block-proof plan for your next upload.Step 1: Name the block you have What to do: Name the block before you act. A worldwide block stops the video everywhere. A block in some countries stops it only in the listed territories, while it can still play and earn elsewhere. An age or policy restriction is different: the video may play only for signed-in adults. Each type has a different fix, so write down which one your video has. Studio path: YouTube Studio > Content > Restrictions. Read the restriction type shown for the video before you open the claim. Example: Ravi's video plays in India but is blocked in Germany and France. He treats it as a country block, not a worldwide block, and checks only those two territories. Common mistake: Calling every block a strike. A claim that blocks a video is not the same as a strike, and the fixes are different.Illustrative diagram, not a real screenshot: worldwide, some countries, and restriction compared. Step 2: See the block list and the owner What to do: Open Restrictions for the video and open the claim. Read the Blocked in list, the content that was matched, and the copyright owner named on the claim. Note every territory listed, and whether different owners are named for different countries. The Help page says different claimants in different countries or regions can mean multiple claims, so do not assume one owner controls the whole video. Studio path: YouTube Studio > Content > Restrictions > click the claim > Blocked in list. Read the matched content and the owner before you choose a fix. Example: Meera opens her claim and sees one song, one owner, and 12 blocked territories. She writes down the song and the owner before she acts. Common mistake: Reading only the first territory. A list with many territories needs a different decision from a list with one.Illustrative diagram, not a real screenshot: Blocked in list, content, and owner. Step 3: Why blocks happen What to do: Match the block to its likely rights cause. Music rights are often licensed in some countries only, so a song that is cleared in one country can still be blocked in another. Sports and film footage can have separate rights by region, with a different owner in each place. A local law or policy removal is different from a rights claim. Studio path: YouTube Studio > Content > Restrictions > the claim. Use the named content and owner to judge whether the cause is music, footage, or a policy notice. Example: Tom used a song cleared for the United States, but his video is blocked in Japan. His licence did not cover Japan. Common mistake: Assuming a licence covers the whole world. Many licences cover only named countries, and the Blocked in list shows where cover ends.Illustrative diagram, not a real screenshot: music, footage, and policy causes. Step 4: Check before you act What to do: Answer four questions before you choose a fix. How many territories are blocked? Is the video still earning in the countries where it plays? Is this a claim, with a Blocked in list, or a strike or removal? Does your licence, in writing, cover the blocked countries? If you cannot answer the licence question with evidence, do not dispute. A dispute without evidence can fail and leave the block in place. Studio path: YouTube Studio > Content > Restrictions for the block list, and your licence or purchase record for the cover question. Example: Sara's video is blocked in 3 territories but earns in 40 others. She checks her licence first, before she risks the 40. Common mistake: Disputing first and checking the licence later. A failed dispute does not prove the licence, and the block stays.Illustrative diagram, not a real screenshot: territories, earnings, claim, and licence. Step 5: Fix the block with the right tool What to do: Choose the fix that matches the evidence. If the audio is the problem, use Replace song or Erase song in Studio to remove or swap the claimed audio. If you hold a licence that truly covers the blocked countries, dispute the claim and give the evidence the dispute form asks for. The Help page says credit, owning a copy, and not monetizing are not legitimate dispute reasons, so do not use them. The claimant has 30 days to respond to a dispute. Studio path: YouTube Studio > Content > Restrictions > See details > Take action. Choose Replace song, Erase song, or Dispute, and follow only the option that matches your evidence. Example: Ben's claim names one song and no licence covers it. He uses Replace song with a track from the Audio Library, and removes the claimed audio. Common mistake: Disputing because you paid for the song once. A purchase can cover only named uses or countries, so read the licence terms first.Illustrative diagram, not a real screenshot: replace song, erase song, or dispute. Step 6: Make the next upload block-proof What to do: Build the check into every upload. Use music from the YouTube Audio Library or a licence that names the countries you need, and save the licence with the project file. Before you set a video to Public, open Content > Restrictions and check for claims. After publishing, re-check Restrictions in 24 hours. If a new claim appears, fix the audio before you promote the video. Studio path: YouTube Studio > Content > Restrictions, checked before Public and again 24 hours after publishing. Example: Priya saves her Audio Library licence, checks Restrictions before Public, and re-checks the next day. Her video stays live in the countries her licence covers. Common mistake: Promoting a video before the 24-hour re-check. A late claim can block the video just as viewers start to find it.Illustrative diagram, not a real screenshot: library music, licence saved, re-check. Checklist: Before you dispute or edit Tick each item before you change the video or file a dispute.I know the block type: worldwide, some countries, or restriction. I have read the Blocked in list, the content, and the owner. I know the blocked territories and whether the video earns elsewhere. I know whether this is a claim, a strike, or a removal. My licence, in writing, covers the blocked countries, or I will fix the audio. I have not disputed with credit, a copy, or no monetization as my reason.Frequently Asked Questions Can a video be blocked in one country and earn in another? Yes. A Content ID action can apply to some countries or regions only, so a video can be blocked in the listed territories and still play and earn elsewhere. Check the Blocked in list for the exact territories. Is a blocked video the same as a strike? No. A claim can block, monetize, or track a video, while a strike comes from a removal request and carries channel penalties. Check which one your video has. Should I dispute if I gave the owner credit? No. The Help page says giving credit is not a legitimate reason to dispute. Dispute only if you have a valid reason, such as holding all the necessary rights or a licence that covers the blocked countries. How long does a dispute take? The claimant has 30 days to respond to a dispute. Note the date you filed it, do not file the same dispute again while you wait, and check Restrictions for the result. Can I keep the video and only fix the song? Yes, when the claim is about audio. Use Replace song or Erase song in Studio to remove or swap the claimed audio, instead of deleting the whole video and losing its views and comments. Sources — Check It Yourself Check the official pages below, and re-read your own claim before you act. No official YouTube video is embedded in this post, because no exact official video was verified live in this run.Copyright claim guide: YouTube Copyright Claim? How to Trim, Replace or Erase the Song — and When to Dispute Learn about copyright claims Dispute a copyright claim
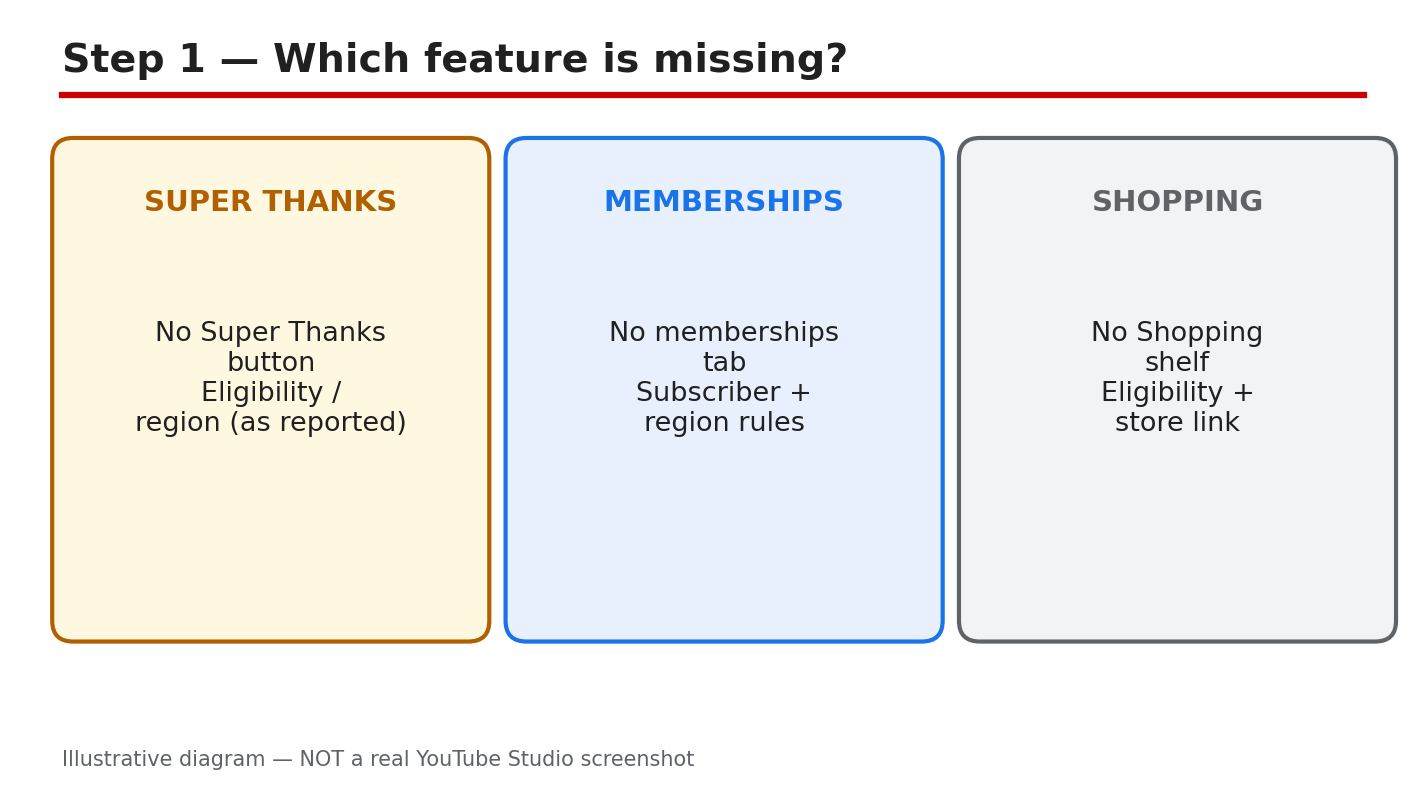
- CreatorPlaybook Team
- 29 Oct, 2026
Earn Tab Features Missing? Super Thanks, Memberships and Shopping Not Showing
A missing feature can feel like a broken promise. You open the Earn tab, look for Super Thanks, memberships, or the Shopping shelf, and the card is not there, or it says you are not eligible. The reason is often simple: a requirement is not met, the feature is not live where you live, or the card needs one more setup step. This guide helps you name the missing feature, find the exact reason on its Earn tab card, and check the requirements against the official Help page and your own channel. Write down the exact reason the card shows, work through the checks in order, and do not promise a feature in a video before it appears on your channel. What You Will Learn By the end, you will be able to:Name the feature that is missing. Find its card and read the eligibility reason. Check the subscriber, watch-hour, and view requirements. Check whether the feature is available where you live. Turn a feature on and test it on your own video. Plan a rollout without promising a feature too early.Step 1: Name the feature that is missing What to do: Name one feature, not all of them. Super Thanks, memberships, and Shopping each have a separate card and separate requirements, so a fix for one does not unlock another. Check only that card first, and finish its checks before you move to the next feature. Studio path: YouTube Studio > Earn. Look at the feature cards on the page and note which card is present, which card is missing, and what each card says. Example: Ana wants memberships but keeps checking the Super Thanks card. Once she looks at the memberships card, she sees the reason that applies to memberships only. Common mistake: Treating every missing card as the same problem. A Shopping problem is not a Super Thanks problem.Illustrative diagram, not a real screenshot: Super Thanks, memberships, and Shopping compared. Step 2: Find the card and read its reason What to do: Open the Earn tab and read the card for your feature word by word. The card lists the requirements and, when you are not eligible, the reason it is hidden. Do not guess from a friend's channel: the card on your own channel is the only reason that counts for you. Write the reason down exactly. If the card shows no reason, check again after signing in with only the channel account. Studio path: YouTube Studio > Earn. Find the card for Super Thanks, memberships, or Shopping, and read the requirements and the eligibility message on that card. Example: Ben's memberships card says he needs more subscribers. He stops searching for a hidden setting and starts working on the number the card actually names. Common mistake: Skipping the card and changing settings at random. If you do not read the reason, you can change the wrong thing and still see no card.Illustrative diagram, not a real screenshot: Earn tab feature cards and eligibility reasons. Step 3: Why features stay hidden What to do: Compare your channel with the requirements the Help page reports, and check the same numbers on your Earn tab card. The Help page reports that channel memberships need 500 subscribers, 3 public uploads in the last 90 days, and either 3,000 qualified watch hours in the last 365 days or 3 million qualified Shorts views in the last 90 days. Super Thanks needs age 18 or older and availability in your country or region. Shopping has its own subscriber rule and is not for Made for Kids content. Availability differs by country or region, so check the Help page and your card. Studio path: YouTube Studio > Earn for your card, and the Help page in Sources for the full, current requirements. Example: Carla has 420 subscribers and wants memberships. The reported 500-subscriber requirement explains why her card is hidden. Common mistake: Copying a threshold from an old video. Check the current Help page and your own card instead.Illustrative diagram, not a real screenshot: thresholds, countries, and availability compared. Step 4: Run the eligibility checks What to do: Check four things: Partner Program membership in good standing, the feature available in your country or region, the numbers on the card met, and no active strike blocking the feature. If one check fails, that check is your next task. Note which one failed. Studio path: YouTube Studio > Earn for the card, and YouTube Studio > Content for any strike or restriction notice on your videos. Example: Dev meets the subscriber number, but his card still hides memberships. A strike notice in Content explains the block, so he fixes that first. Common mistake: Checking only subscribers. A strike, a country limit, or a Partner Program problem can hide a card even when the numbers look right.Illustrative diagram, not a real screenshot: four eligibility checks in order. Step 5: Turn the feature on What to do: On the feature card, accept the module or terms for that feature, then finish its setup. For Shopping, link your store; for memberships, set prices and perks. The feature should appear after setup is complete. Then test it yourself: open one of your own videos and check that the feature shows where viewers will see it. If the feature still does not show, re-open the card and check for an unfinished step. Studio path: YouTube Studio > Earn > the feature card. Accept the module or terms, finish setup, then check one of your videos as a viewer would. Example: Lina accepts the memberships module, sets one perk and a price, and then checks her own video. The Join button appears only after setup is finished. Common mistake: Accepting the terms but skipping setup. An unfinished store link, price, or perk can leave the feature hidden even after you accept.Illustrative diagram, not a real screenshot: accept terms, finish setup, test the feature. Step 6: Roll the feature out slowly What to do: Announce the feature only after it is live on your channel and tested on your own video. Start with one video, tell viewers exactly what the feature does, and watch for questions before you mention it in every video. If a viewer says they cannot see it, ask which country they are in and which device they use. Keep the first announcement short and clear. Studio path: YouTube Studio > Earn to confirm the card is live, then one published video to test what viewers see. Example: Omar tests memberships on one video, answers three viewer questions, and only then adds the Join mention to his next video. Common mistake: Promising Super Thanks or memberships in a video before the feature is live. Viewers look for it, cannot find it, and trust drops.Illustrative diagram, not a real screenshot: test one video, then tell viewers. Checklist: Before you announce a feature Tick each item before you tell viewers a feature is coming.I have named the one missing feature. I have read the reason on its Earn tab card. I have checked the Help page requirements for that feature. I have checked country availability and my numbers. I have finished setup and tested the feature myself. I have not promised the feature before it is live.Frequently Asked Questions Why is Super Thanks missing when my channel is monetized? Monetization and Super Thanks are separate features. Super Thanks needs its own eligibility, including age 18 or older, availability in your country or region, and the Commerce Product Module, so check its own card and the Help page. Can I turn on memberships with fewer than 500 subscribers? No, not on the reported requirements. The Help page reports 500 subscribers, 3 public uploads in the last 90 days, and the watch-hour or Shorts-view requirement. Grow to those numbers, then check the card again. Why can a friend see Shopping but I cannot? Shopping availability and requirements differ by channel and country or region. Check your own Earn tab card and the Help page instead of comparing channels, and finish any setup the card asks for. I accepted the terms. Why is the feature still hidden? Accepting terms is only one step. Finish the setup the card asks for, such as linking a store or setting prices and perks, then test the feature on your own video. Should I tell viewers a feature is coming soon? No. Wait until the feature is live on your channel and tested on your own video. Promising it early sends viewers looking for something they cannot find yet. Sources — Check It Yourself Check the official page below, and re-read your own Earn tab card before you act. Requirements can change, so check the page again if your card changes. No official YouTube video is embedded in this post, because no exact official video was verified live in this run.How to Earn Money on YouTube: the blog's earn-money guide How to earn money on YouTube
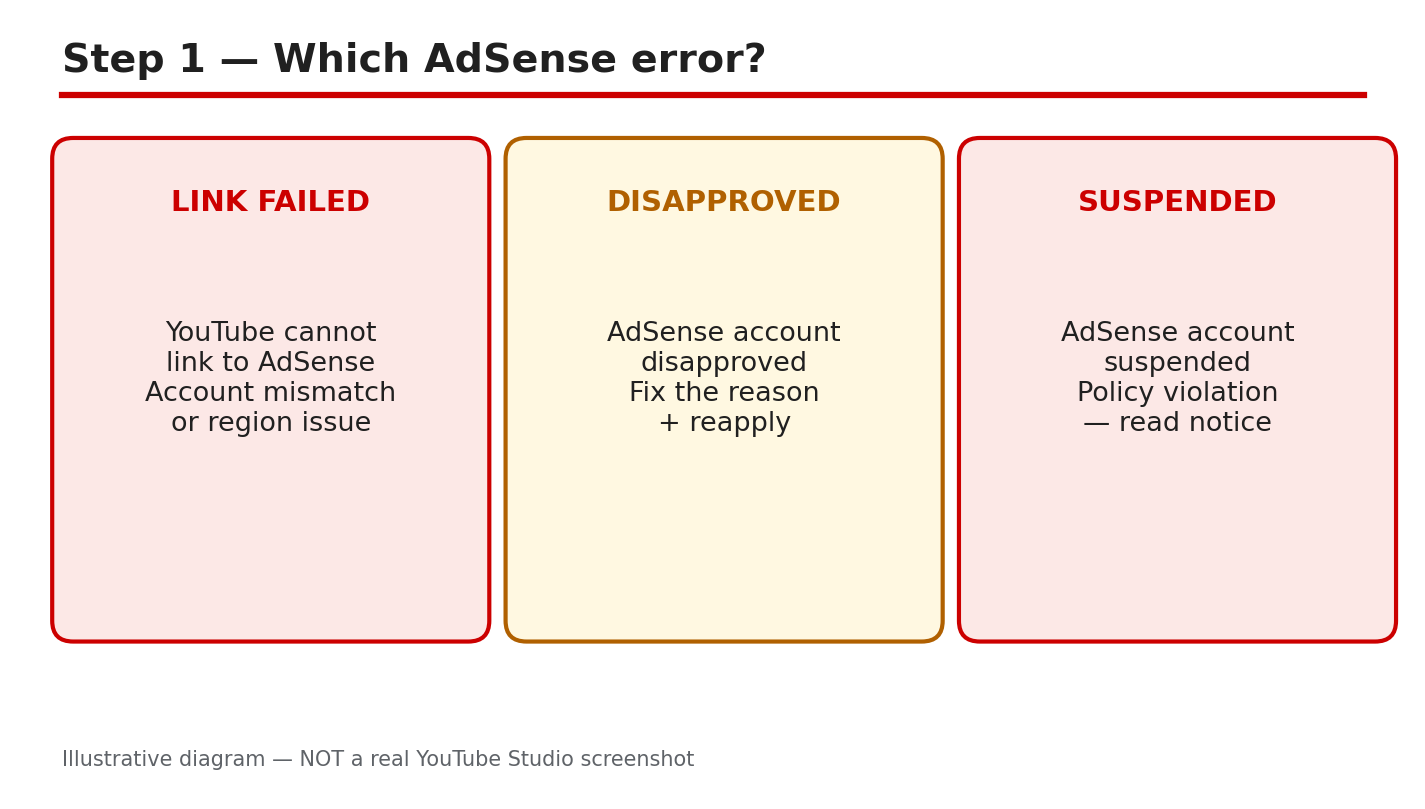
- CreatorPlaybook Team
- 29 Oct, 2026
AdSense for YouTube Linking Errors: Disapproved or Suspended Account? How to Fix It
A linking error can stop your YouTube earnings before they start. You open the Earn tab, try to link AdSense, and YouTube shows a failure, a disapproval, or a suspension notice instead of a linked account. Each message needs a different fix, and guessing can waste days or make the problem worse. This guide helps you read the exact message, check the account and details behind it, and retry in the right order. You will not need any account number, PIN, or payment detail, and you should never share those details in a comment, message, or form outside the official account pages. Work slowly, keep the exact error text in front of you, and stop if a message asks for a second account. One careful pass through the steps below is faster than repeated retries with the same mistake. What You Will Learn By the end, you will be able to:Tell a link failure, a disapproval, and a suspension apart. Find the linking card in YouTube Studio and check the account used. Spot the common causes of a failed link before you retry. Check that names, addresses, and logins match before retrying. Choose the right fix for disapproved and suspended accounts. Follow a calm fix plan and know when to wait.Step 1: Tell link failed, disapproved, and suspended apart What to do: Read the full message first and name the problem before you act. A link failure means the connection did not complete. A disapproval means the new account was not approved, often because another account already exists under the same payee name. A suspension or closure is a policy action, and it needs the policy notice, not a new link attempt. Studio path: No Studio path is needed yet. Start from the message itself, then open YouTube Studio only to confirm what the Earn tab shows. Example: Maya sees “already have an existing AdSense account.” She treats it as a duplicate-account disapproval, not a password problem. Common mistake: Creating a second account to get around the first message. That can lead to duplicate-account disapproval and loss of monetization.Illustrative diagram, not a real screenshot: link failed, disapproved, and suspended compared. Step 2: Where linking happens in YouTube Studio What to do: Use only the Studio route to create or link an AdSense for YouTube account. Google’s Help page says to create the account through YouTube Studio, not through the AdSense homepage, and warns that creating it elsewhere can lead to disapproval. Studio path: YouTube Studio > Earn > Sign-up for AdSense for YouTube card > START. Check the email shown at the top, and use “Use a different account” only if that email is wrong. Example: Arjun opens the Earn tab, clicks START, and checks that the email at the top is the one he wants for AdSense before he continues. Common mistake: Starting the sign-up on the AdSense homepage and entering a website address. Use the Studio card instead, and do not add a website for a YouTube link.Illustrative diagram, not a real screenshot: Studio Earn tab, AdSense card. Step 3: Common link failures and what they mean What to do: Match the failure to its likely cause before you change anything. The Help page lists a duplicate account, a wrong Google account, and an unrecognised email as common problems. The page also notes that you can change the linked account only once every 32 days, so a rushed change can lock in the wrong choice. Studio path: YouTube Studio > Earn. Read the card message, then check which Google account is signed in, using the account menu at the top right. Example: Priya is signed in with a family account in one tab and her channel account in another. The link fails because the wrong account is being used for AdSense. Common mistake: Retrying in a normal browser window with several Google accounts signed in. Close other tabs, or use a private window with only the right account signed in.Illustrative diagram, not a real screenshot: wrong account, duplicate account, unrecognised email. Step 4: Before retrying, check these details What to do: Confirm four things in one pass: the same login is used for Studio and the AdSense step, only one AdSense account exists under the payee name, the name and address match exactly, and you have read the full error text. Studio path: YouTube Studio > Earn. Verify the email, then open the AdSense step and verify the same email again before you submit any detail. Example: Sam’s address has a flat number in Studio but not in his form. He fixes the address to match exactly, then retries, instead of submitting the same mismatch again. Common mistake: Changing the linked account again immediately after a failed attempt. Remember the 32-day limit, and check the Help page before you change the association.Illustrative diagram, not a real screenshot: matching login, account, name, and address. Step 5: Disapproved or suspended — choose the right fix What to do: For a disapproval, find the stated reason, fix the underlying issue, and use the existing older account if the problem is a duplicate. For a closed or suspended account, read the policy notice, fix the policy problem if you can, and appeal only with real changes and full detail. Studio path: YouTube Studio > Earn for the account status, then the official Help and appeal pages linked in Sources. Do not start a new account from the AdSense homepage. Example: Noor’s new account is disapproved as a duplicate. She searches her email for the existing-account message, then uses Change Association to link the older account instead. Common mistake: Opening a new account after a policy closure or a denied appeal. Google’s Help page says publishers closed for policy reasons may not rejoin by opening a new account.Illustrative diagram, not a real screenshot: disapproved duplicate, suspended policy closure. Step 6: A calm linking fix plan What to do: Work the plan once, in order, and wait for the result. Day one is for reading and checking. Day two is for one clean retry with the right account and matching details. After that, wait for approval, and check the Earn tab and your email instead of retrying daily. Studio path: YouTube Studio > Earn each time you check. Note the date, the message, and the account used, so you do not repeat a step or change the link too soon. Example: Leo writes down the error, the date, and the email used. When the older-account message appears, he knows the next step is Change Association, not another new sign-up. Common mistake: Retrying every hour and changing accounts in between. Each change can add confusion, and the 32-day rule can keep the wrong link in place.Illustrative diagram, not a real screenshot: read, check, retry once, then wait. Checklist: Before you retry Tick each item before your next attempt.I have read the full error message. I know whether it is a failure, disapproval, or suspension. I am using the right Google account in Studio. Only one AdSense account exists under my payee name. Name and address match exactly on both sides. I have not created a second account to dodge the message.Frequently Asked Questions Can I have two AdSense accounts for one channel? No. Google’s Help page says you can have only one AdSense or AdSense for YouTube account under the same payee name. Duplicate accounts will not be approved, and monetization can be turned off. Why was my new account disapproved as a duplicate? An older account already exists under the same payee name. Search your email for the existing-account message, then use the older account through Change Association, or close the older account first if you plan to use the new one. Can I change the linked AdSense account again right away? No, not freely. The Help page says you can change the linked AdSense for YouTube account only once every 32 days, so check the account and the message carefully before you change it. What should I do if my account was closed for policy reasons? Read the closure notice, fix the policy issue if you can, and appeal through the official appeal form with full detail. Do not open a new account to rejoin after a denied appeal. Do I need to share my PIN or account number here? No. Never share a PIN, account number, or payment detail in a comment or message. Use only the official Studio and AdSense account pages, and keep the exact error text for your own check. Sources — Check It Yourself Check the official pages below, and re-read your own message before you act. No official YouTube video is embedded in this guide, because no exact official video was verified live in this run.AdSense PIN guide: AdSense PIN Not Arrived? How to Verify Your Address and Release Held Payments Set up an AdSense for YouTube account to get paid on YouTube AdSense account closed by Google for policy reasons
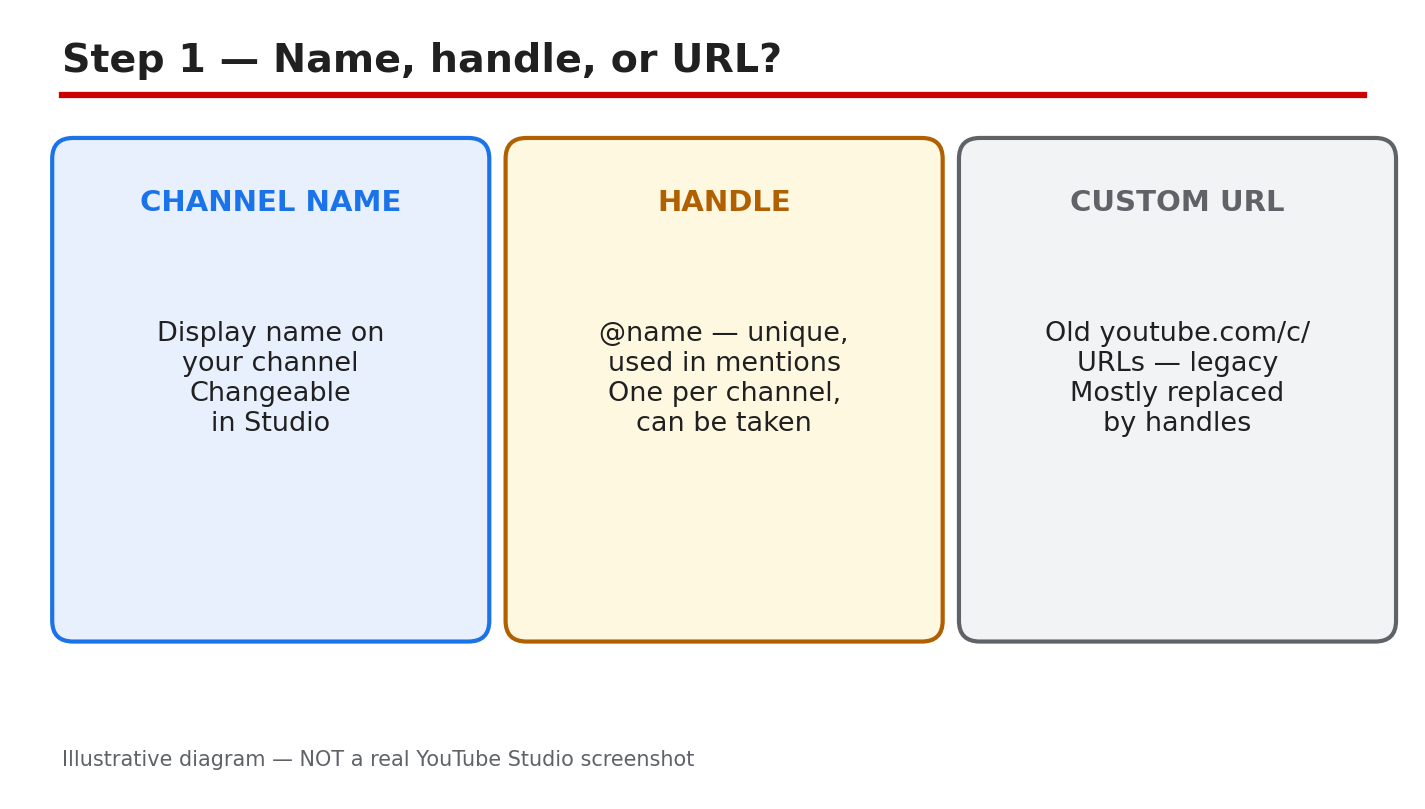
- CreatorPlaybook Team
- 29 Oct, 2026
YouTube Handle Taken or Channel Name Wrong? How to Change Your Name and Handle
Your channel name is what viewers read, and your handle is the @name they use to mention and find you. When the name feels wrong or the handle you want is taken, changing both again and again causes confusion: old mentions stop matching and viewers cannot find you. Learn what each label does, change it in the right place in Studio, and tell your viewers once, clearly. Work in order. First, tell the name, the handle, and any old custom URL apart. Next, check the rules and whether the handle is free. Then make one change, save it, and check the channel page. Do not copy a known creator. Related reading: How to Choose a Good YouTube Channel Name, which helps you pick a name worth keeping. What You Will LearnHow the channel name, handle, and old custom URL differ. Where to change them in Studio, and how to save. The handle rules, including length, characters, and change limits. What to check before you rename a channel. What to do when the handle you want is taken. How to roll out a rename so viewers still find you.Step 1: Tell the Channel Name, Handle, and Custom URL Apart What to do: The channel name is the display name viewers see on your videos, channel page, and comments. The handle is the short @name that identifies your channel in mentions and tags, and it must be unique. A legacy custom URL is an older personalized address, such as youtube.com/c/YourName, that some channels received years ago. The three can match, but they do not have to, and changing the name does not give you the matching handle. Studio path: YouTube Studio > Customization > Profile. Read the current name and handle shown there before you change anything. Example: A creator called “Maya Cooks” uses @maya-cooks-27 because @mayacooks was taken. Viewers find her by the handle, while the name stays readable. Common mistake: Telling viewers to use your old custom URL after a rename. Old links may still work, but viewers need the new name and handle.Illustrative diagram/mock-up — NOT a real YouTube Studio screenshot: channel name, handle, and custom URL compared. Step 2: Change the Name and Handle in the Right Place What to do: Open YouTube Studio, go to Customization, then Profile, and edit the name and handle fields. Type the new name, check the handle, and click PUBLISH to save. Do not look for them under Basic info: the name and handle live under Customization, then Profile, and PUBLISH saves them. After publishing, open your channel page and check the new name and handle. A new name can take a few days to appear everywhere. Studio path: YouTube Studio > Customization > Profile > enter new channel name and handle > PUBLISH. Check the channel page after saving. Example: A creator shortens “Maya Cooks Daily” to “Maya Cooks” under Customization > Profile, clicks PUBLISH, and sees the new name on her channel page. Common mistake: Editing the name under Basic info and clicking Save, then wondering why nothing changed. Use Customization > Profile, then PUBLISH.Illustrative diagram/mock-up — NOT a real YouTube Studio screenshot: Customization, Profile, and the PUBLISH button. Step 3: Check the Handle Rules Before You Choose What to do: A handle must be 3 to 30 characters long, and it can use letters, numbers, underscores, hyphens, periods, and Latin middle dots. Handles are not case-sensitive, so @MayaCooks and @mayacooks count as the same handle, and a handle cannot look like a web address or a phone number. It must not already be in use, and it must follow the Community Guidelines. YouTube can change, reclaim, or remove a handle that breaks the rules. You can change your handle twice within a 14-day period, and changing your channel name can remove a verification badge, so do not spend both changes on a guess. Studio path: YouTube Studio > Customization > Profile > Handle. Studio shows whether the handle is available before you publish. Example: A creator wants @mayacooks, finds it taken, and tries @maya.cooks, which Studio accepts. The periods keep the name readable. Common mistake: Adding a long string of numbers to a taken handle, such as @mayacooks847291. Nobody can remember it or say it aloud.Illustrative diagram/mock-up — NOT a real YouTube Studio screenshot: handle length, allowed characters, and availability checks. Step 4: Check Four Things Before You Rename What to do: First, say the name aloud and spell it. If a viewer cannot spell it after hearing it once, it will be hard to search. Second, check the same name on the other platforms you use, so viewers find one identity everywhere. Third, check the handle is free in Studio before you promise it anywhere. Fourth, check old links and mentions, and plan what still points to the old name. Rename once, with a name you can keep. Studio path: YouTube Studio > Customization > Profile. Type the new handle and watch for the availability message before you click PUBLISH. Example: A creator picks “Maya Cooks,” checks @maya.cooks is free in Studio, and only then tells viewers. The rename takes one change, not three. Common mistake: Announcing the new handle in a video before checking it in Studio. If it is taken, viewers reach someone else.Illustrative diagram/mock-up — NOT a real YouTube Studio screenshot: the four checks before renaming a channel. Step 5: If the Handle You Want Is Taken What to do: Add a readable variation, not a random one. A topic word, a city, or the word “official” keeps the handle clear: @mayacooks becomes @maya.cooks, @mayacooksrecipes, or @mayacooks.official. YouTube also suggests trying periods, numbers, or underscores when the exact handle is taken. Never copy a known creator's name or handle to ride on their audience: impersonation can lead to a strike, and viewers who arrive by mistake will leave. There is no waitlist for a taken handle, so keep creating and check again later. Studio path: YouTube Studio > Customization > Profile > Handle. Try each variation in the Handle field and read the availability message before publishing. Example: A creator finds @mayacooks taken and chooses @maya.cooks. The handle still reads as her name, and viewers can say it without spelling out numbers. Common mistake: Using a famous creator's name with one letter changed. Viewers feel tricked, and YouTube may treat it as impersonation.Illustrative diagram/mock-up — NOT a real YouTube Studio screenshot: readable handle variations when the first choice is taken. Step 6: Roll Out the Rename So Viewers Still Find You What to do: Change the name and handle in Studio first, then update the banner, the About text, and the links that point to the channel. Announce the change once: a short Community post and one mention in a video are enough. Say the old name, the new name, and the new handle, so viewers who search the old name still understand. Keep the old handle in the About text for a while, so old mentions still make sense. Give viewers time to learn the new name before you judge the change. Studio path: YouTube Studio > Customization > Profile > PUBLISH. Update the banner, About text, and links afterwards, from the same Customization area. Example: A creator posts: “Maya Cooks Daily is now Maya Cooks, @maya.cooks.” Viewers who search the old name still find her. Common mistake: Renaming the channel and saying nothing. Viewers think the channel vanished, and old mentions lead nowhere.Illustrative diagram/mock-up — NOT a real YouTube Studio screenshot: the rename rollout checklist for banner, About, and links. ChecklistName, handle, and old custom URL told apart. Change made under Customization > Profile, saved with PUBLISH. Handle checked: length, characters, and availability in Studio. Name easy to say, spell, and search. Same name checked on other platforms. Variation readable, not copied from a known creator. Banner, About, and links updated; change announced once.Frequently Asked Questions Can I change my handle more than once? Yes, but only twice within a 14-day period. Use each change carefully, and check the handle in Studio before you publish it. Why did my verification badge disappear after a rename? Changing your channel name removes the verification badge. Check the current rules before you rename, and do not rename for a small reason. What characters can a handle use? Letters, numbers, underscores, hyphens, periods, and Latin middle dots, 3 to 30 characters. Handles are not case-sensitive, and cannot look like a web address or a phone number. Is there a waitlist for a taken handle? No. A taken handle cannot be reserved or requested. Use a readable variation, keep creating, and check again later. Do old custom URLs still work after a rename? Legacy personalized URLs can keep working, but viewers need the new name and handle to find you reliably. Update your banner, About text, and links, and announce the change once. Change once, in the right place, and tell viewers where to find you. Sources — Check It Yourself Official pages opened and verified live on 29 October 2026. Check the current wording before acting. No official YouTube video is embedded here. No exact official video URL was verified live in this run.How to Choose a Good YouTube Channel Name — CreatorPlaybook Manage your YouTube channel's profile — YouTube Help Change, view, or hide your handle — YouTube Help
- CreatorPlaybook Team
- 29 Oct, 2026
YouTube Custom Thumbnail Rejected or Not Showing? How to Fix It
A thumbnail decides whether a viewer clicks or scrolls past. When YouTube rejects your custom thumbnail, or the new image will not show, the video loses its best chance to be seen. Most problems come from three causes: a file that breaks the size or format rules, an image that breaks a policy, or a delay before the change appears. Work in order. First, name the problem: rejected, not showing, or blurry. Next, check the file against the official rules. Then fix the image, re-upload it on the same video, and wait. Do not upload the video again, and do not keep re-uploading the same rejected image. Related reading: How to Make a YouTube Thumbnail That Gets Clicks, which explains what makes viewers click. What You Will LearnHow rejected, slow, and blurry thumbnails differ. The size, format, and ratio rules your file must meet. Which policy problems cause rejections, and how to avoid them. How to re-upload a thumbnail on the same video. What to check when the new thumbnail will not show. A simple habit for thumbnails that stay sharp and clickable.Step 1: Tell Rejected, Not Showing, and Blurry Apart What to do: Rejected means YouTube refused the upload, often with a message about the file or a policy. Not showing means the upload worked, but the old thumbnail still appears while YouTube updates every surface. Blurry means the image is low resolution or over-compressed, so text looks soft on a phone. Name the state first, because each one needs a different fix. Studio path: YouTube Studio > Content > video > Thumbnail. Look at the current thumbnail and any message shown there. Example: A creator uploads a new thumbnail and still sees the old one an hour later. The file was accepted, so this is a delay, not a rejection, and an incognito check settles it. Common mistake: Re-uploading the same rejected file again and again. If YouTube refused it once, the same file will fail again, so check the rules first.Illustrative diagram/mock-up — NOT a real YouTube Studio screenshot: rejected, not showing, and blurry thumbnails compared. Step 2: Check the Size, Format, and Verification Rules What to do: Check the file against the official Help page before you edit anything else. YouTube recommends 3840 by 2160 for videos, and 2160 by 3840 for Shorts, with a minimum width of 640 pixels, in JPG or PNG, at 16:9 for videos. Files must stay under 2 MB on mobile uploads for video thumbnails, while desktop uploads allow up to 50 MB. A 1280 by 720 export meets the minimum width and the 16:9 ratio, and staying under 2 MB is the safest size on every device. Custom thumbnails also need a verified account. Studio path: YouTube Studio > Content > video > Thumbnail > Upload file > SAVE. Check the account status in Studio before you upload. Example: A creator exports at 1280 by 720, under 2 MB, from a verified account. The thumbnail is accepted at once, because the file already meets the rules. Common mistake: Exporting a huge file, then shrinking it at very low quality. Heavy compression makes text soft, so export at the right size with readable text.Illustrative diagram/mock-up — NOT a real YouTube Studio screenshot: thumbnail size, format, ratio, and verification checks. Official YouTube video: How to Add Custom Thumbnails to Your YouTube Videos (YouTube Creators). Watch it for the Studio steps. Step 3: Fix Policy Rejections Before You Re-Upload What to do: A policy rejection means the image itself breaks a rule, not the file size. Misleading thumbnails promise something the video does not show, and YouTube treats that as deceptive. Graphic or sexual imagery, hate speech, violence, and harmful or dangerous content can also lead to rejection, and repeat offenses can remove custom-thumbnail privileges for 30 days or end the account. Keep text to three to five big words, readable on a phone, and show only what the video truly delivers. Studio path: YouTube Studio > Content > video > Thumbnail. Read any policy message, fix the image, then use Upload file > SAVE. Example: A creator uses a shocked face and a promise the video never keeps. Viewers feel tricked, and the thumbnail is rejected. A calmer image that matches the video is accepted. Common mistake: Adding more text and brighter arrows to a rejected thumbnail. Clutter is harder to read on a phone and does not fix the policy problem.Illustrative diagram/mock-up — NOT a real YouTube Studio screenshot: misleading, graphic, and unreadable thumbnail problems. Step 4: Check the Image Before You Re-Upload It What to do: Run four checks before the next upload. First, confirm the size, ratio, and format match the official rules. Second, confirm the image matches the video, with no promise the video cannot keep. Third, shrink the image to phone size and read every word. Fourth, confirm the account is verified. Fix one problem at a time, export once, and upload on the same video. Studio path: YouTube Studio > Content > video > Thumbnail > Upload file. Keep the same video open, and click SAVE after the new file loads. Example: A creator checks the file at phone size, finds the title unreadable, and shortens it to four big words. The new thumbnail stays clear on small screens. Common mistake: Re-uploading on a duplicate video instead of the original. The new video splits views and comments, while the original keeps the old thumbnail.Illustrative diagram/mock-up — NOT a real YouTube Studio screenshot: the four checks before re-uploading a thumbnail. Step 5: If the New Thumbnail Still Will Not Show What to do: Wait for the cache first. YouTube says it may take time for thumbnail changes to appear, so check the video in an incognito tab, where the old image is less likely to be stored. If the old thumbnail still shows after a reasonable wait, replace it again on the same video and save. As a temporary step, use an auto frame, so the video does not keep a broken image while you fix the custom file. Studio path: YouTube Studio > Content > video > Thumbnail > Upload file > SAVE. Then open the video in an incognito tab to check. Example: A creator replaces the thumbnail, saves, and still sees the old image. In an incognito tab the new image shows, which proves the change worked and the old view was cached. Common mistake: Deleting the video and uploading it again to force the change. A new upload loses views, comments, and watch time, and the same delay can happen again.Illustrative diagram/mock-up — NOT a real YouTube Studio screenshot: cache check, replace, and temporary auto frame. Step 6: Build a Thumbnail Habit and Track Clicks What to do: Use one repeatable habit. Make the thumbnail from a real frame that matches the video, add three to five big words, and check it at phone size before you upload. Keep one style for colors and text, so returning viewers spot your videos at once. After publishing, watch the click-through rate in Studio Analytics, and change only the thumbnail when a video underperforms. Studio path: YouTube Studio > Analytics > Content. Compare the click-through rate before and after a thumbnail change. Example: A creator keeps the same colors, tests one new thumbnail on an older video, and watches clicks rise over a week. The single change is easy to read. Common mistake: Changing the title, thumbnail, and description all at once. When clicks rise, you cannot tell which change caused it, so change one thing at a time.Illustrative diagram/mock-up — NOT a real YouTube Studio screenshot: a repeatable thumbnail habit and click tracking. ChecklistProblem named: rejected, not showing, or blurry. File checked: size, format, ratio, verification. Image matches the video, no misleading promise. Text readable at phone size, three to five words. Re-uploaded on the same video, then saved. Checked in an incognito tab after waiting. Click-through rate watched after the change.Frequently Asked Questions Why was my custom thumbnail rejected? Usually the file breaks a size or format rule, the account is not verified, or the image breaks a policy. Check the rules, fix the file or the image, and upload again on the same video. How long does a new thumbnail take to show? It can take time for the change to appear everywhere, so wait, then check in an incognito tab. If the old image still shows, replace the thumbnail again and save. What size should my thumbnail be? YouTube recommends 3840 by 2160 for videos and 2160 by 3840 for Shorts, minimum width 640 pixels, JPG or PNG, 16:9 for videos. A 1280 by 720 export under 2 MB meets the practical rules. Can I use any image as a thumbnail? No. The image must follow the Community Guidelines, match the video, and avoid misleading promises and graphic, hateful, violent, or harmful content. A rejected image must be changed, not re-uploaded as it is. Should I delete the video if the thumbnail will not change? No. Deleting loses views, comments, and watch time. Wait for the cache, check in an incognito tab, replace the thumbnail on the same video, or use an auto frame meanwhile. Fix the file, match the image to the video, and give the change time. Sources — Check It Yourself Official page opened and verified live on 29 October 2026. Check the current wording before acting.How to Make a YouTube Thumbnail That Gets Clicks — CreatorPlaybook Add custom thumbnails on YouTube — YouTube Help
- CreatorPlaybook Team
- 29 Oct, 2026
YouTube Video Stuck Uploading or Processing? How to Fix It Without Losing the Video
A stuck upload feels urgent. The bar stops moving, the video will not play, and the work you edited seems lost. Most stuck uploads are not lost. They are paused, converting, or waiting for a check. This guide helps you tell those states apart, check the right place in Studio, and fix the problem without deleting the file you need. If the bar moves slowly, that is still progress. If nothing changes for a long time, the status row, not the bar alone, tells you what to do next. You will work in order. First, name the state. Next, check the status in Studio. Then fix the connection or the file. After that, check processing limits and claims. Only re-upload when the guide says it is safe. Keep the original file and the draft until the replacement is live and playing. Related reading: YouTube Upload Stuck, Comments Disabled, or Wrong Made for Kids Label? Fix All Three, which explains the Studio layout used below. What You Will LearnHow uploading, processing, and a failed upload differ. Where to check the true status in Studio. How to fix a stalled upload safely. Which file and processing checks matter most. When re-uploading helps, and when it harms. A calm upload-day plan you can repeat.Step 1: Tell Uploading, Processing, and Failed Apart What to do: Uploading means the file is still moving from your computer to YouTube. The progress bar may stop, but the transfer has not finished. Processing means the upload finished and YouTube is converting the file into versions viewers can play. Failed means YouTube stopped and showed an error. Each state needs a different fix, so do not treat every stuck video the same way. Studio path: YouTube Studio > Content. Read the video row first. Do not open the upload window again until you know the state. Example: A creator sees 95 percent for an hour and fears the video is lost. The row says Processing, so the file arrived safely and is converting. Common mistake: Deleting the draft because the bar looks frozen. Deleting removes your place in the queue and can lose details you already entered.Illustrative diagram/mock-up — NOT a real YouTube Studio screenshot: uploading, processing, and failed states compared. Step 2: Check the Status First in Studio What to do: Check status before you change anything. In Studio, the Content page shows each video with a status. Uploading and processing look similar on a phone, but they are different problems. An uploading video still needs your connection and browser. A processing video needs time, not another upload. Write down what the row says, including any restriction or error words, before you act. Studio path: YouTube Studio > Content > video row. Look at Status, Visibility, and Restrictions together. Example: A creator opens Content and sees Processing, not Uploading. They leave the tab open, wait, and the HD version appears later. Common mistake: Starting a second upload while the first is processing. Duplicates compete, confuse viewers, and waste your connection.Illustrative diagram/mock-up — NOT a real YouTube Studio screenshot: checking the video status row. Step 3: Fix a Stalled Upload Safely What to do: Fix the connection and the browser first. Use a stable connection, preferably wired or strong Wi-Fi, and avoid large downloads during the upload. Keep the browser tab open and the computer awake. For a retry, export at 1080p, which is smaller and easier to send than 4K. Do not close the tab, sleep the computer, or switch networks mid-upload. Studio path: YouTube Studio > Create > Upload videos. Watch the progress bar and the processing estimate in the upload window. Example: A creator uploads over weak hotel Wi-Fi and stalls at 60 percent. At home, on a stable connection, the same 1080p file finishes. Common mistake: Closing the tab to check the channel page. Closing can interrupt the transfer, so wait until the upload window confirms completion.Illustrative diagram/mock-up — NOT a real YouTube Studio screenshot: stable connection, 1080p retry, and awake tab. Step 4: Check Processing, File Format, and Limits What to do: Check the file before you blame the connection. YouTube recommends MP4 with H.264 video and AAC audio. Check the length and size against the reported limits: under 12 hours and 256 GB, whichever is less, as reported on the official Help page. HD and 4K versions take extra time, even after the standard version plays. A claim can also hold processing, so check Restrictions in Studio and read the claim before re-uploading. Check the file name and the export settings too. A damaged export can fail the same way twice, so export again from the original project if the file will not play. Studio path: YouTube Studio > Content > video > Details > Checks. Read the claim and restriction notes there. Example: A creator uploads a 4K file and sees only standard quality at first. The HD version appears later, without a second upload. Common mistake: Re-exporting at a higher resolution to speed processing. A larger file usually takes longer, not shorter.Illustrative diagram/mock-up — NOT a real YouTube Studio screenshot: MP4, H.264, AAC, size, and HD checks. Step 5: When to Re-Upload, and When to Wait What to do: Wait before you re-upload. For processing, wait up to 24 hours as reported, and check the status again in Studio. Re-upload only if the upload failed, Studio showed an error, or the file is corrupt and will not play. Keep the original file and the draft until the new version is live. Do not delete the first version until you have watched the replacement play. Studio path: YouTube Studio > Content. Confirm the failed or corrupt status, then use Create > Upload videos for the retry. Example: A creator waits overnight for processing, then finds the video live. No duplicate was needed, and the original details stayed intact. Common mistake: Deleting the draft and the original file after a failed upload. Without the original, a clean retry is much harder.Illustrative diagram/mock-up — NOT a real YouTube Studio screenshot: wait, check, then re-upload only if failed. Step 6: Follow a Simple Upload-Day Plan What to do: Use one plan on upload day. Export the file, check the format, and test the connection before you start. Upload early, keep the tab open, and note the time you started. Check status once after upload, once after processing, and once before you share the link. If a step fails, fix one thing, note it, and try again calmly. Studio path: YouTube Studio > Content for checks, and Create > Upload videos for the upload itself. Example: A creator uploads at 9 a.m., checks at noon, and shares at 6 p.m. after the HD version appears. The calm plan avoids duplicates. Common mistake: Sharing the link before checking playback. A shared link to a processing video frustrates viewers and earns no watch time.Illustrative diagram/mock-up — NOT a real YouTube Studio screenshot: export, upload, check, then share. ChecklistState named: uploading, processing, or failed. Status checked in Studio Content. Connection stable, tab open, computer awake. File checked: MP4, H.264, AAC, size, length. Claims and restrictions checked in Studio. Re-upload only after failure or corruption. Original file and draft kept until live.Frequently Asked Questions Why is my upload stuck at a percentage? Usually the connection dropped, or the file is still moving. Check the connection, keep the tab open, and check the status in Studio Content before retrying. How long should processing take? It varies by length, resolution, and format. Standard quality often appears first, while HD takes longer. Wait up to 24 hours as reported, then check Studio again. Should I delete and re-upload a stuck video? Not yet. Check the status first. Re-upload only if the upload failed or the file is corrupt, and keep the original file and draft until the new version plays. What file format works best for uploads? Use MP4 with H.264 video and AAC audio, as recommended in Help. Export at 1080p for a retry, and check the official Help page for current limits before uploading. Can a claim hold up processing? A claim can affect a video, so check Restrictions and Checks in Studio. Read the claim, follow the steps shown there, and do not re-upload the same file to avoid it. Fix one state at a time, and let processing finish before you judge the result. Sources — Check It Yourself Official pages opened and verified live on 29 October 2026. Check the current wording before acting, because limits and wording can change.Upload YouTube videos — YouTube Help Upload videos longer than 15 minutes — YouTube HelpNo official YouTube video is embedded here. No exact official video URL was verified live in this run.
- CreatorPlaybook Team
- 29 Oct, 2026
YouTube Watch Hours Dropping? Why Your 4,000 Hours Keep Falling
Watch hours can fall even when you keep uploading. The number in Studio moves down, the goal feels further away, and it is easy to blame the algorithm. This guide slows that moment down. You will learn which watch-hours number matters for the YouTube Partner Program, where to check it, why it falls, and how to grow hours that actually count. No figure in this post is taken from any individual channel. For the wider picture, read Understanding YouTube Analytics first. It explains views, watch time, and audience retention in Studio. This post focuses only on one number: valid public watch hours in the last 365 days, and why that number keeps moving. What You Will LearnWhich watch-hours number counts for the Partner Program. Where to find it in Studio, in the same 365-day window. Why hours fall, even without a penalty. A simple hours audit you can run in one sitting. How to grow hours that count, without buying them. A 30-day plan to rebuild the number steadily.Step 1: Which Number Are You Looking At? What to do: Do not compare different numbers. Public watch time counts all time, for all time, and it rarely falls. Valid public watch hours in the last 365 days are the Partner Program number, and they move every day. The Shorts route is different again: it uses views, not hours, so Shorts watch time does not add to this number. Know which number you are reading before you judge it. Studio path: YouTube Studio > Earn. Read the eligibility numbers there before you open Analytics. Example: A channel shows a large all-time watch time, but only part of it falls in the last 365 days. The Partner Program number is the smaller, rolling figure, not the all-time total. Common mistake: Panicking over the all-time number, or adding Shorts watch time to it. Use only the 365-day valid public hours for the Partner Program check.Illustrative diagram/mock-up, NOT a real YouTube Studio screenshot: which watch-hours number counts. Step 2: See It in Studio, in the Same Window What to do: Check the same window in two places. In the Earn tab, read the eligibility numbers for subscribers and watch hours or Shorts views. In Analytics, open Watch time and set the same last-365-days period. If the two views use different dates, they will not match, and the gap will look like a sudden fall. Compare like with like, on the same day. Studio path: YouTube Studio > Earn, then YouTube Studio > Analytics > Watch time. Set both to the last 365 days. Example: A creator checks Earn on Monday and Analytics on Friday, with different date ranges, and sees two different numbers. Checking both on the same day, in the same window, removes the false gap. Common mistake: Comparing a 28-day Analytics view with the 365-day eligibility number. The short view will almost always look smaller, and it is not the Partner Program number.Illustrative diagram/mock-up, NOT a real YouTube Studio screenshot: where to see the number. Step 3: Why the Number Falls What to do: Three normal causes explain most falls. First, hours age out: the window rolls forward every day, so strong days from a year ago leave the count. Second, hours leave with the video: making a video private or deleting it removes its hours from the valid total. Third, the mix changes: more Shorts views and fewer long-form views mean fewer hours, even when views rise. None of these needs a penalty to happen. Studio path: YouTube Studio > Analytics > Watch time. Look for the shape of the fall: steady, sudden, or tied to one video. Example: A video that earned many hours last spring passes its 365th day, and the total drops overnight. Nothing broke: the hours simply aged out of the rolling window. Common mistake: Assuming a fall means a strike, a restriction, or a shadowban. Check ageing, privacy, and mix first, before you look for a penalty.Illustrative diagram/mock-up, NOT a real YouTube Studio screenshot: why the number falls. Step 4: Run a Simple Hours Audit What to do: Work through four checks in one sitting. First, confirm the window: last 365 days, in both Earn and Analytics. Second, list videos made private or deleted recently, and note their hours. Third, check that your top videos are still public and still earning watch time. Fourth, check retention past 30 seconds: viewers who leave in the first seconds add almost no hours, however many clicks the video gets. Studio path: YouTube Studio > Content to check privacy, and Analytics > Watch time to check top videos and retention. Example: A creator finds two older videos made private last month. Their hours left the total on the day they were hidden, which explains most of the fall. Common mistake: Auditing views instead of hours. A video can gain views and still add few hours if viewers leave within seconds.Illustrative diagram/mock-up, NOT a real YouTube Studio screenshot: hours audit checks. Step 5: Grow Hours That Count What to do: Make hours easy to earn. Publish 8- to 12-minute videos with a strong hook in the first 30 seconds. Build series and playlists, and add end screens that lead to the next video. Edit for retention first: cut dead air in the first minute. Never buy watch hours: bought hours do not build a real audience, and they put the channel at risk. Studio path: YouTube Studio > Analytics > Audience retention. Find where viewers leave, and fix that moment first. Example: A creator cuts a slow 40-second introduction to 10 seconds. Viewers stay longer, average view duration rises, and the same number of views earns more hours. Common mistake: Making videos longer without making them stronger. Extra minutes only add hours if viewers watch them; dead minutes add nothing.Illustrative diagram/mock-up, NOT a real YouTube Studio screenshot: growing hours that count. Step 6: A 30-Day Hours Plan What to do: Week one: run the audit, restore any video hidden by mistake, and note the starting 365-day number. Week two: publish two 8- to 12-minute videos with strong hooks, and link them in a playlist. Week three: check retention, cut the weakest opening, and add end screens to the top videos. Week four: compare the same 365-day window again, and keep the habits that raised retention. Expect steady rebuilding, not an overnight jump. Studio path: YouTube Studio > Earn each Monday, and Analytics > Watch time each Monday, in the same 365-day window. Example: A creator publishes two longer videos in week two and fixes one weak opening in week three. By week four, retention is higher, and hours stop falling as fast. Common mistake: Checking the number daily and changing the plan each time. The rolling window moves slowly, so judge the plan after four weeks, not four days.Illustrative diagram/mock-up, NOT a real YouTube Studio screenshot: 30-day hours plan. Checklist: Audit in OrderWindow checked: last 365 days, in Earn and Analytics. No top video hidden or deleted by mistake. Top videos still public and earning watch time. Retention past 30 seconds checked for top videos. Next videos planned at 8 to 12 minutes, with hooks. Series, playlists, and end screens in place. No watch hours bought, and no shortcuts used.Frequently Asked Questions Why do my watch hours fall every day? The window rolls forward daily, so hours from 365 days ago leave the count. A small daily fall is normal when no new hours replace the old ones. Do Shorts views count toward 4,000 hours? No. Shorts Feed watch hours do not count toward the watch-hours route. Shorts can qualify through the separate views route: 10 million qualified Shorts views in the last 90 days, with 1,000 subscribers. Do private or deleted videos lose their hours? Yes, for the valid total. Hours from a video that is private or deleted do not count in the last 365 days. Restoring a video to public can return its hours to the count. Can I buy watch hours to reach 4,000? No. Never buy watch hours. Bought hours do not build a real audience, and they put the channel at risk. Grow hours with longer videos, strong hooks, and playlists instead. How long until my hours recover? There is no fixed time. Hours rebuild as new viewing enters the 365-day window and old hours age out. Judge a plan over four weeks, in the same window, before changing it. Sources: Check It Yourself Official pages opened and verified live on 29 October 2026. Check the current wording before acting, because Studio options and Help wording can change.YouTube Partner Program overview and eligibility (YouTube Help) YouTube channel monetization policies (YouTube Help)No official YouTube video is embedded here. No exact official video URL was verified live in this run.
- CreatorPlaybook Team
- 29 Oct, 2026
YouTube Video Age-Restricted or Removed? How to Appeal and Fix It
A notice on one video can change how the whole channel feels. The video is still there for some viewers, or it is gone, and the message in Studio is short. This guide slows that moment down. You will learn how to tell an age restriction, a removal, and a limited-ads rating apart, read the exact notice YouTube sent, and choose the right next step: edit, appeal, or accept the rating and plan better videos. For a different money problem, read YouTube Yellow Dollar Icon? How to Fix Limited Ads and Request a Review first. It explains the yellow dollar icon and how to request a review. This post covers only age restrictions and removals, and it never advises re-uploading the same video as a new upload to get around a decision. What You Will LearnAge-restricted, removed, and limited ads: what each label means. Where to read the reason and the policy named in Studio. The guideline categories that commonly trigger an age gate. What to check and fix before you appeal. When to edit, when to appeal, and when to accept a rating. A seven-day plan to fix the video and the next ones.Step 1: Tell Age-Restricted, Removed, and Limited Ads Apart What to do: Do not act on the first feeling the notice gives you. An age-restricted video is still live, but signed-out viewers and viewers under 18 cannot watch it. A removed video is taken down and cannot be watched at all. Limited ads is different: the video stays up, but ads are limited. Studio path: YouTube Studio > Content > Restrictions. Read the label on the video before you guess the reason. Example: A travel video is age-restricted, so adults can watch it but signed-out viewers cannot. A second video is removed for a policy breach, so nobody can watch it. The fix for each one is different. Common mistake: Treating a limited-ads rating as a removal, or appealing an age restriction as if the video had been removed. Match the response to the label.Illustrative diagram/mock-up, NOT a real YouTube Studio screenshot: age-restricted, removed, and limited-ads compared. Step 2: Read the Notice First, Before You Guess What to do: Open the notice and read it slowly. Note the video, the reason given, and the policy named. Look for the option Studio shows: appeal, edit, or accept. Do not guess the reason from comments or from what happened to another channel. Your notice is the only record that matters for this video. Studio path: YouTube Studio > Content > Restrictions > click the restriction. Read the reason, the policy named, and the appeal or edit option shown. Example: Studio says a video is age-restricted for violent or graphic content. The creator watches the flagged section, sees a close injury shot, and knows exactly what to blur before deciding anything else. Common mistake: Skipping the notice and rewriting the title instead. A new title does not change the flagged content, and it wastes the one appeal you may get.Illustrative diagram/mock-up, NOT a real YouTube Studio screenshot: reading the restriction notice first. Step 3: Know the Common Age-Gate Triggers What to do: Check your video against the guideline categories YouTube Help lists for age-restricted content. They include child safety, harmful or dangerous activities including drug use, nudity and sexually suggestive content, violent or graphic content, and vulgar language. These are categories, not a checklist that guarantees a rating: context, purpose, and how closely the content is shown all matter. Use them to find the likely trigger in your video, then confirm it in your own notice. Studio path: YouTube Studio > Content > Restrictions > click the restriction. Compare the policy named there with the category you found. Example: A documentary shows a close injury during a rescue. The context is news and education, but the close shot still triggers a restriction. Blurring the closest seconds keeps the story and lowers the risk. Common mistake: Saying the content is educational and stopping there. Purpose helps, but it does not remove a close graphic shot. Fix the shot, or explain the context clearly in an appeal.Illustrative diagram/mock-up, NOT a real YouTube Studio screenshot: common age-gate triggers. Step 4: Before You Appeal, Watch and Fix What to do: Watch the exact flagged part, not the whole video from memory. Pause at the seconds Studio names, if it names them, and decide whether the fix is obvious: blur, cut, or mute. Check the title and thumbnail too: they must describe the video honestly and must not promise something the video does not show. Note what you changed, and keep the evidence ready. Studio path: YouTube Studio > Content > click the video > Editor. Trim or blur the flagged part on the same video, and save before you appeal. Example: A creator blurs a three-second injury shot, keeps the rescue story, and checks that the thumbnail no longer shows the injury. The appeal, if needed, can then point to the exact edit. Common mistake: Appealing first and editing later. If the content is clearly the problem, an appeal without a fix asks a reviewer to approve the same flagged content.Illustrative diagram/mock-up, NOT a real YouTube Studio screenshot: checks before you appeal. Step 5: Decide: Edit, Appeal, or Accept What to do: Choose one path and follow it cleanly. Edit in the Studio Editor on the same video when the fix is clear. Appeal only when you believe the decision is wrong for this video, with one clear, factual appeal. Accept a fair rating when the flagged content is really there: plan the next videos differently. Never re-upload the same video as a new upload to avoid a restriction or removal. Studio path: YouTube Studio > Content > Restrictions > click the restriction > appeal or edit, as shown. Use the option Studio shows for your case. Example: A creator edits a graphic shot, then appeals with the edit noted, because the restriction named a policy the edited video no longer breaks. Another creator accepts a fair rating and changes how the next video is filmed. Common mistake: Sending several appeals, or re-uploading the video with a new title. Repeated appeals do not add evidence, and a re-upload can create a second problem for the same content.Illustrative diagram/mock-up, NOT a real YouTube Studio screenshot: edit or appeal decision. Step 6: A Seven-Day Fix Plan What to do: Day one: read the notice and watch the flagged part. Day two: edit or blur the same video, and fix the title and thumbnail. Day three: send one clear appeal, only if the decision is wrong for this video. Days four and five: check email and Studio for the result. Days six and seven: review your other videos for the same trigger, and write a short rule for future videos. Studio path: YouTube Studio > Content > Restrictions to track the result, and Content to review similar videos one by one. Example: A creator fixes one video on day two, checks Studio on day four, and spends day six removing the same close shot from two older videos. Common mistake: Fixing one video and filming the next one the same way. The plan only works if the rule changes how you film, edit, and title videos.Illustrative diagram/mock-up, NOT a real YouTube Studio screenshot: seven-day fix plan. Checklist: Fix It in OrderLabel named: age-restricted, removed, or limited ads. Reason and policy copied from the Studio notice. Flagged part watched, and the exact seconds noted. Edit made on the same video, where the fix was clear. Title and thumbnail checked for honest description. One clear appeal sent, only if the decision was wrong. Same video not re-uploaded as a new upload.Frequently Asked Questions Can I appeal an age restriction more than once? YouTube Help says you can only appeal the age restriction on a video one time, so make the first appeal complete and factual. How long does an age-restriction appeal take? YouTube does not promise a fixed time in the pages checked for this post. Check email and Studio, and do not send repeated appeals while you wait. Should I delete the video and upload it again? No. Do not re-upload the same video as a new upload to avoid a restriction or removal. Edit the same video, appeal if the decision is wrong, or accept a fair rating. What if the video is educational or news? Context and purpose matter, but they do not always remove a restriction for close graphic or sexual content. Fix the closest shots, or explain the context clearly in one appeal. Will an age restriction hurt my whole channel? An age restriction limits who can watch that video. It is not the same as a removal or a strike, but repeated restrictions are a sign to change how you film and edit. Sources: Check It Yourself Official pages opened and verified live on 29 October 2026. Check the current wording before acting, because Studio options and Help wording can change.Age-restricted content (YouTube Help) Appeal the age restriction on your video (YouTube Help)No official YouTube video is embedded here. No exact official video URL was verified live in this run.
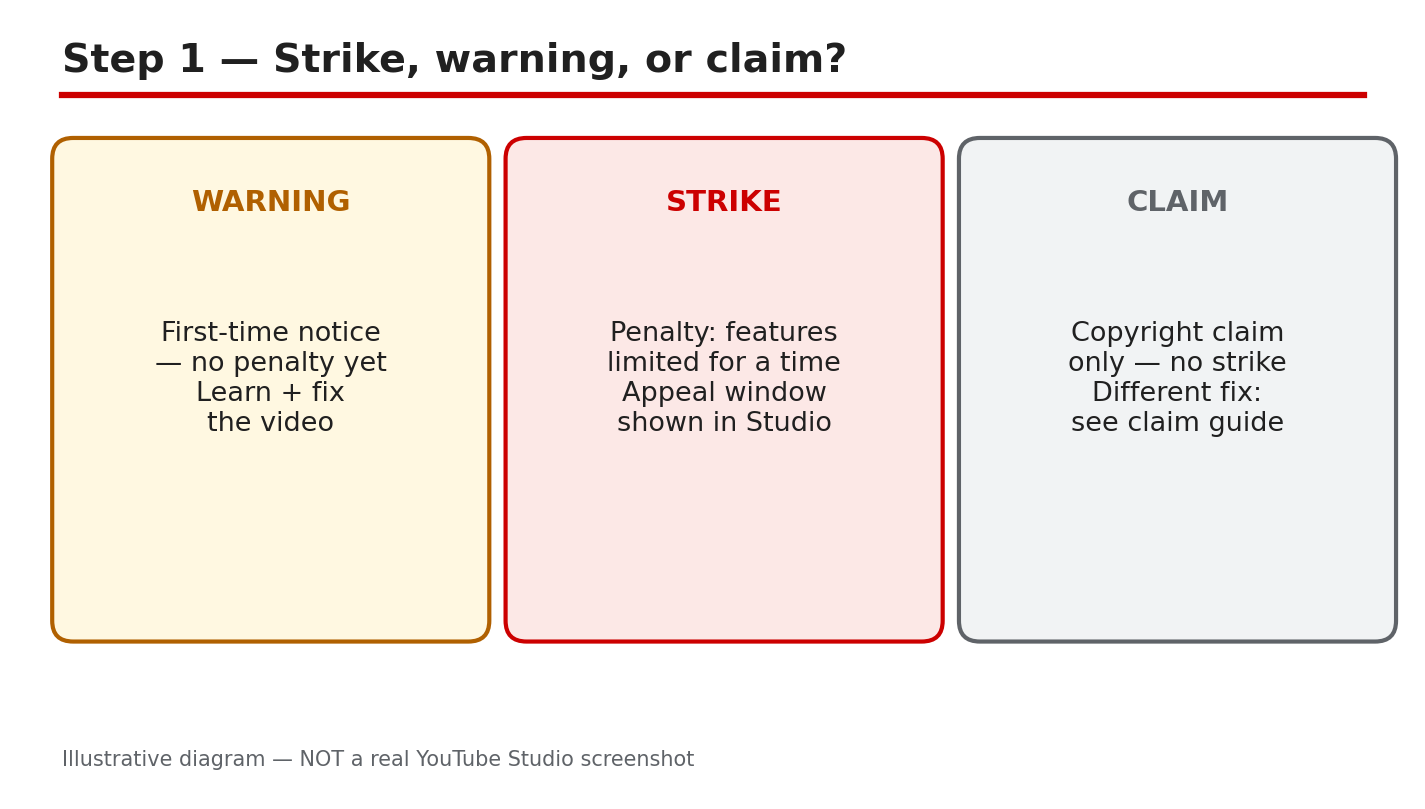
- CreatorPlaybook Team
- 29 Oct, 2026
YouTube Strike Appeal: How to Appeal a Community Guidelines Strike the Right Way
A strike notice can stop your week in its tracks. One email says a video broke a rule, uploads pause, and you are left guessing what went wrong. This guide slows that moment down. You will learn how to tell a warning, a strike, and a Content ID claim apart, find the exact rule YouTube named, write a clear appeal, and protect your record while you wait. For wider channel protection, read How to Protect Your Channel from Strikes, Copyright and Reused Content first. It explains safe music, licences, and reused content. This post focuses only on one job: appealing a Community Guidelines strike correctly, with evidence, and only once, against the rule actually named. What You Will LearnWarning, strike, and Content ID claim: what each one means. Where to find the appeal button and the rule named. The three-strike timings, as reported, and how to confirm them. What evidence makes an appeal clear, and what makes it vague. What to do, and not do, while YouTube reviews your appeal. A clean-record plan for the 90 days after a strike.Step 1: Tell a Warning, a Strike, and a Claim Apart What to do: Do not treat every notice as a strike. A warning is a first notice with no penalty yet, and it usually asks you to learn the policy. A Community Guidelines strike is a penalty that limits features and stays on your record. A Content ID claim is about copyright only: a rights holder may claim revenue or block a video, but it is not a strike and needs a different fix. Studio path: YouTube Studio > Content > Restrictions. Read the label on each video before you act. Example: A creator gets a warning for a misleading thumbnail, fixes the thumbnail, and keeps uploading. The same creator later gets a strike for a different video, and uploads pause. The response must match the label, not the fear. Common mistake: Appealing a Content ID claim as if it were a strike, or ignoring a strike because a claim once caused no harm. Use the fix that matches the notice you actually received.Illustrative diagram/mock-up, NOT a real YouTube Studio screenshot: warning, strike, and claim compared. Step 2: Find the Strike, Read the Rule, and Appeal in Studio What to do: Open the strike notice and read it slowly, word by word. Note the video, the date, the policy named, and the appeal option Studio shows. Appeal against that rule only. If Studio shows a deadline or window for your case, follow that window and do not guess a different one. Studio path: YouTube Studio > Content > Restrictions > click the strike > read the policy named > Appeal or Submit appeal, as shown for your case. Example: Studio names harassment for a video that mocked one person by name. The appeal quotes that rule, explains the context, and says what was edited. It does not argue about a different policy. Common mistake: Writing a general appeal that says the video was fair, without naming the rule. Reviewers need the rule, the facts, and the change, in that order.Illustrative diagram/mock-up, NOT a real YouTube Studio screenshot: where to find the appeal in Studio. Step 3: Three Strikes, Plainly: What Is Reported, and How to Confirm It What to do: Learn the reported pattern, then confirm it in your own notice. As reported in YouTube Help, a warning comes first. The first strike brings a one-week pause on uploads and related features. A second strike within 90 days brings a two-week pause. Three strikes within 90 days may lead to channel termination. Each strike expires after 90 days, as reported. Do not treat these timings as a promise for your case: check your Studio notice and the official Help page. Studio path: YouTube Studio > Content > Restrictions > click the strike > read the penalty, dates, and expiry shown for your case. Example: A creator receives a first strike on 2 May, as reported in the notice, and cannot upload for one week. The strike still counts until its expiry date, even after uploads return. Planning around the return date alone would miss the risk. Common mistake: Assuming a strike is gone because uploads are back, or assuming three strikes always mean the same outcome. Read the dates in your notice, and confirm the current wording in Help.Illustrative diagram/mock-up, NOT a real YouTube Studio screenshot: the three-strike pattern as reported. Step 4: Build Appeal Evidence That Answers the Rule What to do: Build a short, factual appeal. Quote the exact rule back in your own words, explain what the video actually shows, state any edit you made, and attach licence or context evidence. Keep the tone calm and specific. Vague appeals fail because a reviewer cannot see what changed, what was licensed, or why the decision was wrong for this video. Studio path: YouTube Studio > Content > Restrictions > strike > Appeal. Paste your evidence text in the appeal form, and add any file or link Studio asks for. Example: A tutorial used a licensed music track. The appeal names the track, gives the licence date and library, and links the licence. The reviewer can check one fact, instead of reading a long defence. Common mistake: Saying the video took hours to make, or that other channels do the same thing. Effort and comparison are not evidence about the rule named.Illustrative diagram/mock-up, NOT a real YouTube Studio screenshot: appeal evidence checks before submitting. Step 5: While You Wait: Do Not Re-upload, and Keep Records What to do: Wait for the decision without creating a second problem. Do not re-upload the same video, do not use another channel to bypass the pause, and do not delete the video to hide the strike, because deleting does not remove it. Review similar videos, fix the same risk, and check your email and Studio for the result. Studio path: YouTube Studio > Content > Restrictions, and your email inbox. Check both for the appeal result, and note the date you received it. Example: A creator waits two days, as reported for many reviews, and receives an email saying the strike stays. The creator then edits similar videos before uploading again, instead of appealing the same strike a second time. Common mistake: Sending repeated appeals, or re-uploading the video with a new title. YouTube Help says you may appeal each strike only once, and a re-upload can create a new problem.Illustrative diagram/mock-up, NOT a real YouTube Studio screenshot: what to do while you wait. Step 6: Plan the Next 90 Days and Keep a Clean Record What to do: Use the pause as a planning period. List every video with a similar risk, check titles, thumbnails, clips, and music, and fix them before the pause ends. Write a short rule for yourself for each topic you cover, and check new uploads against that rule before publishing. Studio path: YouTube Studio > Content > Restrictions to track expiry, and Content to review similar videos one by one. Example: A creator lists five videos with the same risky clip, replaces the clip in each one, and writes a note: no clip without a licence on file. Future uploads follow that note, and no second strike follows in the 90-day window. Common mistake: Returning to the same habits the day uploads return. A clean record needs a changed checklist, not only a quiet week.Illustrative diagram/mock-up, NOT a real YouTube Studio screenshot: a strike-expiry and clean-record plan. Checklist: Appeal in OrderNotice label read: warning, strike, or claim identified. Policy named, dates, and appeal window copied from Studio. Appeal written against the rule actually named, with facts. Licence or context evidence attached, where Studio asks for it. Same video not re-uploaded, and no second channel used. Similar videos reviewed, and the same risk fixed. Expiry date noted, and a clean-record checklist kept.Frequently Asked Questions Can I appeal a strike more than once? YouTube Help says you may appeal each strike only once, so make the first appeal complete. Check your Studio notice for the appeal option for your case, and do not rely on a second chance. How long does a strike appeal take? Review time is reported as usually 24 to 48 hours for many cases, but times vary. Check email and Studio, and do not send repeated appeals while you wait. Does deleting the video remove the strike? No. YouTube Help says deleting the video will not resolve the strike, and the strike remains on your channel. Fix the cause, and keep the record of what you changed. What if I think the strike is wrong, but I have no evidence? Read the exact policy again, watch the flagged part, and look for context, a licence, or an edit that changes the decision. If you still have no clear fact, do not guess: accept the warning or strike, and plan safer videos. Will one strike end my channel? Not on its own, as reported. The risk grows with repeated strikes within 90 days, so use the first strike as a warning to change the habit that caused it, and confirm your dates in Studio. Sources: Check It Yourself Official pages opened and verified live on 29 October 2026. Check the current wording before acting, because Studio options and Help wording can change.Community Guidelines strike basics on YouTube (YouTube Help) Appeal a Community Guidelines strike or video removal (YouTube Help)No official YouTube video is embedded here. No exact official video URL was verified live in this run.
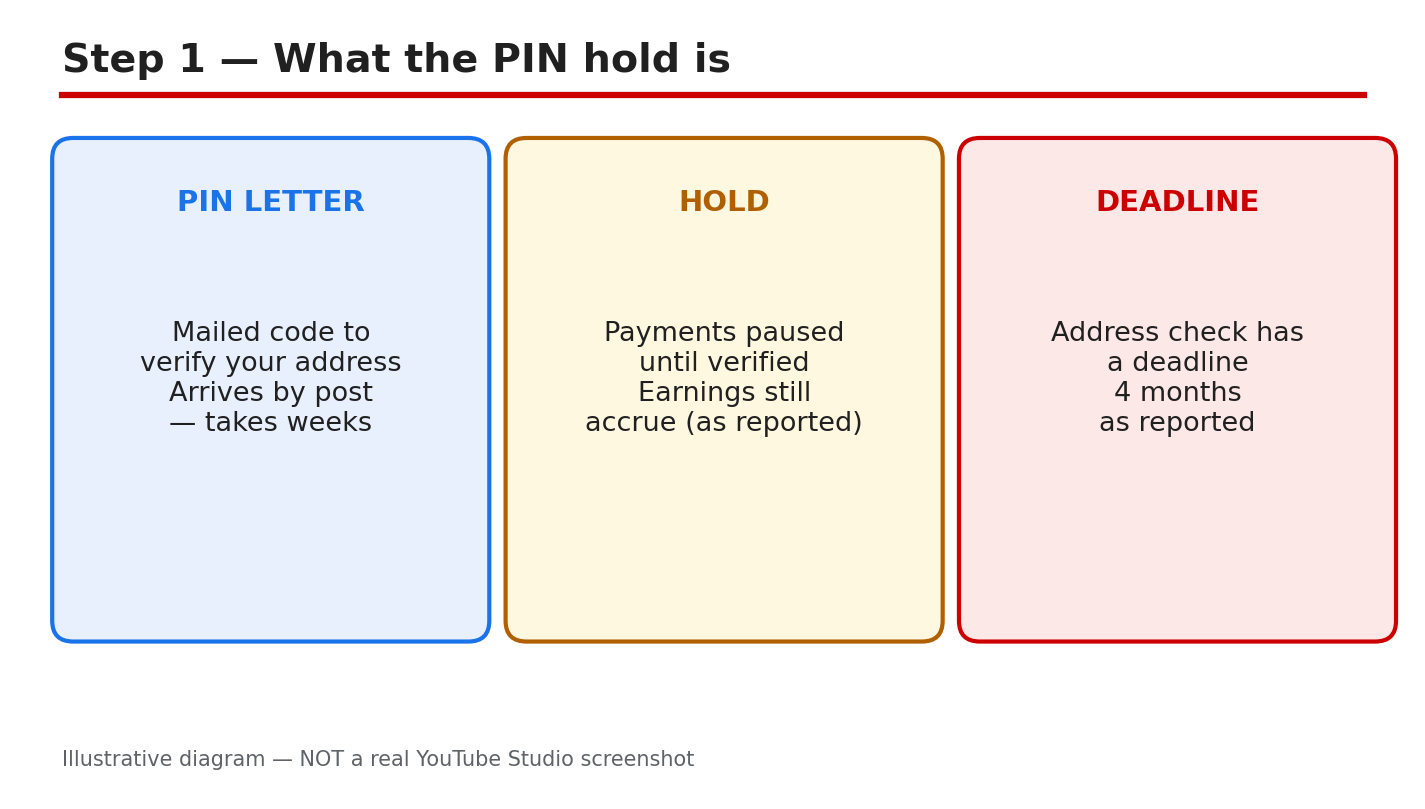
- CreatorPlaybook Team
- 29 Oct, 2026
AdSense PIN Not Arrived? How to Verify Your Address and Release Held Payments
A letter that never arrives can hold up your YouTube earnings. AdSense mails a six-digit Personal Identification Number, called a PIN, to the payment address on your account. Until you enter that PIN, AdSense holds your payments. The money is not lost, but it will not reach your bank until the address is verified. This guide explains what the hold means, where the PIN goes, and what to do when the letter is late or the code does not work. Related reading: How to Earn Money on YouTube. That guide explains how YouTube earnings reach AdSense, so open it if the payment flow is new to you. Below, each step gives what to do, the exact AdSense path, a short example, and a common mistake. Work in order, and never share your PIN. It belongs only in your own AdSense account. What You Will LearnWhat the PIN hold means. Where to enter the PIN. What to do when the letter is late. How to enter the PIN carefully. What to do if the PIN fails. A plan to release held payments.Step 1: What the PIN Hold Is What to do: Understand the hold before you chase the letter. AdSense mails a six-digit PIN to the payment address on your account to prove that the address is real. Until the PIN is entered, AdSense pauses payments. Earnings are reported to keep accruing while payments are held. The verification deadline is reported as four months, so check your own AdSense account for the exact deadline and wording. AdSense path: AdSense home > Payments > Verification. Look for the address verification task and its deadline. The task shows whether a PIN has been mailed, whether it has been entered, and how much time remains. Read that page first. Example: A creator sees a payment hold notice and assumes the channel is demonetized. The AdSense verification page shows only an address check is pending, and earnings are still being recorded. The hold is about the address, not the channel. Common mistake: Asking for a replacement PIN before checking the verification page. A PIN may already be on its way, and a replacement can add confusion. Check the task and the deadline first.Illustrative diagram/mock-up — NOT a real AdSense screenshot: what the PIN hold is. Step 2: Where to Enter the PIN What to do: Enter the PIN only in your own AdSense account, on the verification page. Never type it into an email reply, a chat message, or a site that claims to speed up verification. AdSense will never ask you to share the PIN by email or message. If someone asks for it, stop: it is a scam warning sign. AdSense path: AdSense > Payments > Verification > enter the six-digit PIN from the letter. Type the code exactly as printed, then submit once. Stay on the page until you see the result, and do not press submit twice. Example: A creator finds the letter and enters the code from a phone photo. Two digits are unclear, so the creator checks the paper letter under good light before typing anything. The paper letter is the source of truth. Common mistake: Entering the PIN on a lookalike site reached from a search ad or a message link. Always open AdSense yourself and navigate to Payments, rather than following a link someone sent you.Illustrative diagram/mock-up — NOT a real AdSense screenshot: where to enter the PIN. Step 3: The PIN Never Arrived What to do: Wait out the reported mail period before requesting a replacement. Mail is reported to take two to four weeks, and the official overview says it usually takes three weeks, so one week late is not yet lost. Fix the payment address first, so a replacement goes to the right place. Then request a replacement only after the waiting period has passed. AdSense path: AdSense > Payments > Verification > check the address on file, then use the replacement option shown there. If the address is wrong, update it in the payment settings and confirm the change before requesting the new letter. Example: A creator moved house and the PIN went to the old address. The creator updates the payment address, waits for the confirmation, and then requests a replacement. The second letter arrives at the new address. Common mistake: Requesting replacement after replacement while the address is still wrong. Each new letter goes to the same wrong address. Fix the address once, then request one replacement and wait.Illustrative diagram/mock-up — NOT a real AdSense screenshot: PIN never arrived. Step 4: Before You Enter the PIN What to do: Run four checks before you type anything. First, the address on the letter must match the address in your AdSense account. Second, be signed in to the right AdSense account, the one linked to the channel. Third, read all six digits correctly, and check lookalike digits twice. Fourth, know how many tries remain. Three wrong entries are reported to risk demonetizing the channel; the official overview says they stop the account showing ads. Treat every try as valuable, and check your own account wording. AdSense path: AdSense > Payments > Verification. Read the letter, the account name, and the tries remaining before you enter anything. If any detail does not match, stop and fix it first. Example: A creator is about to type the code when the account name looks unfamiliar. The creator stops, signs in to the correct account, and the verification task appears. The letter belonged to the other account. Common mistake: Guessing a digit you cannot read. A guess uses up a try, and repeated guesses can lock the process. Re-read the letter under good light, or request a fresh PIN instead of guessing.Illustrative diagram/mock-up — NOT a real AdSense screenshot: before entering the PIN. Step 5: If the PIN Fails What to do: Re-read the letter once, slowly, and try one more careful entry. If it fails again, do not keep guessing. Request a fresh PIN from the verification page, and wait for the new letter. If the fresh PIN also fails, contact AdSense support with the letter and your account details ready, and describe what the verification page shows. AdSense path: AdSense > Payments > Verification > request a replacement PIN, then Help or Contact for support. Note the exact message on the verification page before contacting support. Example: A creator enters the code twice and sees the same error. Instead of a third guess, the creator requests a fresh PIN, and the new letter works first time. The old letter had a misprinted digit. Common mistake: Trying the same code again and again in frustration. Repeated failures can use up your tries and delay the fix. One careful retry, then a fresh PIN, is the safer order.Illustrative diagram/mock-up — NOT a real AdSense screenshot: if the PIN fails. Step 6: Follow the Payment-Hold Plan What to do: Work the plan in order. Week one: check the verification page, confirm the address, and wait for the mail. Week two: enter the PIN carefully, or request a replacement if the letter never arrived. After verification: confirm the hold is lifted in Payments, and keep the letter for your records. AdSense path: AdSense > Payments for the hold status, and Verification for the PIN task. Check both pages after entering the PIN; the hold lifts when verification is confirmed. Example: A creator enters the PIN on a Monday and checks Payments on Tuesday. The hold is gone, and the next payment cycle includes the held earnings. The creator keeps the letter filed. Common mistake: Throwing the letter away once the PIN is entered. If verification is questioned later, the letter is your proof. Keep it until the hold has cleared and a payment has gone through.Illustrative diagram/mock-up — NOT a real AdSense screenshot: payment-hold plan. ChecklistVerification page checked: task, address, deadline. Payment address matches the letter. Waiting period respected before a replacement. Right AdSense account signed in. All six digits read and checked twice. PIN entered only in your own AdSense account. Hold confirmed lifted in Payments.Frequently Asked Questions Why are my payments held? AdSense is waiting for address verification. Until the PIN is entered, payments pause, while earnings are reported to keep accruing. Check your own AdSense account for the exact deadline. How long does the PIN letter take? Mail is reported to take two to four weeks, and the official overview says three weeks is usual. Wait out that period, with the right address on file, before requesting a replacement. Can I share my PIN with support? No. Never share the PIN with anyone claiming to be support. Enter it only in your own AdSense account, on the verification page. What if I enter the wrong PIN? Stop guessing. Re-read the letter once, try one careful entry, then request a fresh PIN if it fails. Three wrong entries are reported to risk demonetization; the official wording says ads stop showing. Check your own account. Do I lose earnings while payments are held? Earnings are reported to keep accruing during the hold; check your own AdSense account for the exact position. Once the hold lifts, held earnings join the normal payment cycle. Sources — Check It Yourself Official pages opened and verified live on 29 October 2026. Check current wording before acting.Address verification (PIN) overview — Google AdSense Help Enter your PIN to verify your payments address — Google AdSense HelpNo official YouTube video is embedded here. No exact official video URL was verified live.
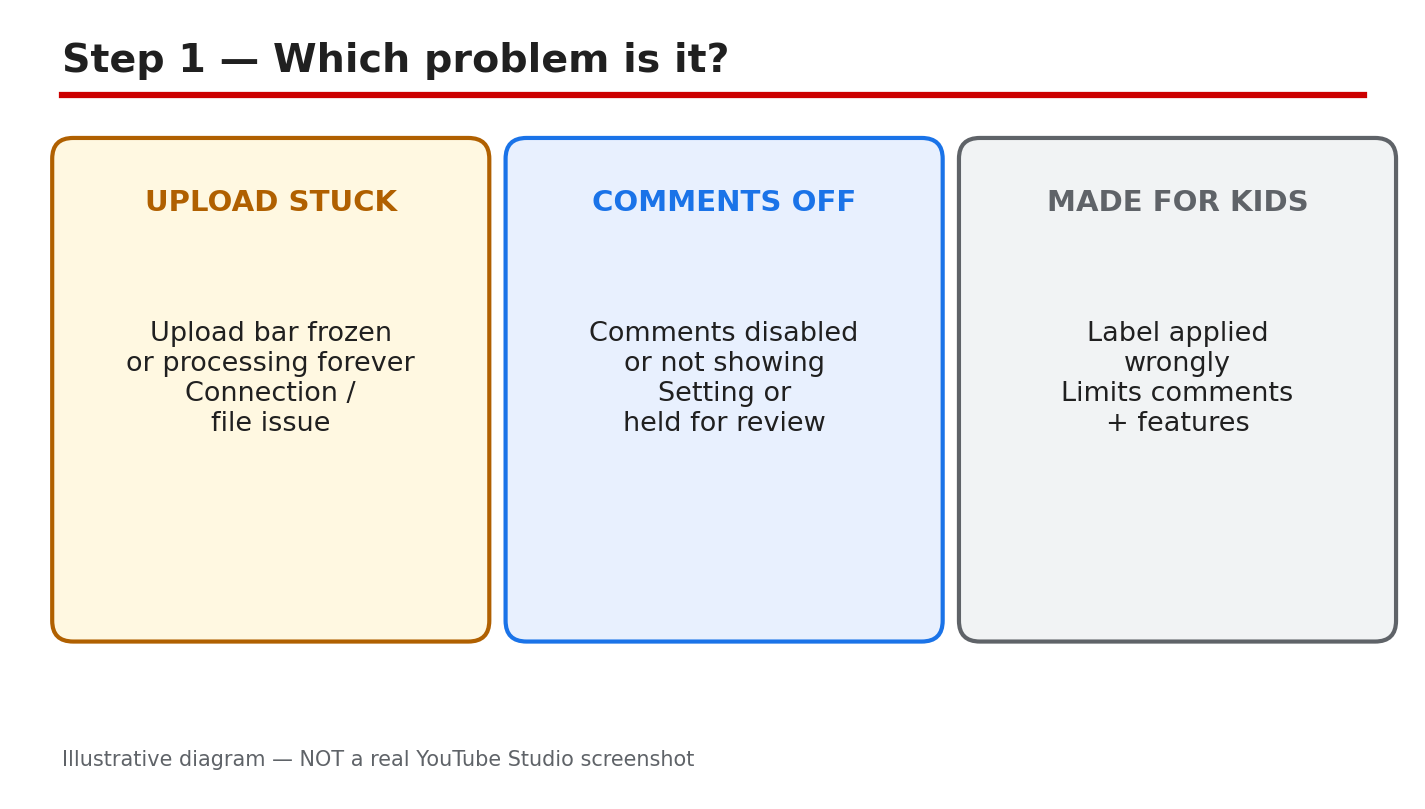
- CreatorPlaybook Team
- 29 Oct, 2026
YouTube Upload Stuck, Comments Disabled, or Wrong Made for Kids Label? Fix All Three
Three YouTube problems look alike at first: a video that never finishes uploading, comments that vanish, and a Made for Kids label that seems wrong. Each has a different cause and a different fix. Most are settings, not bugs, and most can be fixed in one sitting. This guide helps you name the problem, find the setting, and fix it without deleting work you need. Related reading: How to Read and Use the YouTube Studio App. That guide explains the Studio layout used below, so open it if a menu name looks unfamiliar. Below, each step gives what to do, the exact Studio path, a short example, and a common mistake. Work in order, and check only the section that matches your problem if you are short on time. What You Will LearnWhich of the three problems you have. Where each setting lives in Studio. How to unstick an upload safely. How to restore missing comments. How to fix a wrong Made for Kids label. A 24-hour plan to check everything.Step 1: Name the Exact Problem First What to do: Name the problem in one sentence first. An upload problem shows as processing that never finishes. A comments problem shows as comments missing or held where you cannot see them. A Made for Kids problem shows as a label on a video that is not made for children, with comments turned off. Studio path: YouTube Studio > Content. Look at the video row first: check its visibility, its restrictions, and whether comments are shown. The row tells you which of the three problems you are dealing with. Example: A creator sees an upload stuck at 95 percent and assumes comments are broken too. The row shows the upload is still processing, so comments are not the problem yet. Common mistake: Fixing all three problems at once. Changing the label, the comments setting, and the file in the same hour makes it impossible to know which change helped.Illustrative diagram/mock-up — NOT a real YouTube Studio screenshot: which problem is it. Step 2: Find the Setting in Studio What to do: Open the video and go to its Details page. Two controls cause most of these problems: the Audience setting and the comments visibility setting. Both live on the same Details page. Check them in a computer browser, because every option is visible there. Studio path: YouTube Studio > Content > click the video > Details. Scroll to Audience for the Made for Kids label, and find Show more, then Comments, for comment visibility. Note what each setting says before you change it. Example: A creator opens Details and finds Audience set to Yes, it is made for kids, on a video about fixing a bike. That one setting explains why comments are off. Common mistake: Hunting for one fix-all switch in Studio. There is none. Audience, comments, and upload state are separate controls, so check each in turn.Illustrative diagram/mock-up — NOT a real YouTube Studio screenshot: find the setting. Step 3: Fix a Stuck Upload What to do: Check the connection and the file, not the video page. A weak or dropping connection is the most common cause of a stuck upload. Use an H.264 MP4 file, within the size limits on the official upload page. Keep the upload tab open and the computer awake while it processes. Do not delete the stuck upload until you have checked the file and the connection. Studio path: YouTube Studio > Content > Create > Upload videos. During upload, watch the progress bar and the processing notice. After upload, check Content for the video row and its processing state before you edit titles or settings. Example: A creator uploads a video over hotel Wi-Fi, and it stalls at 60 percent. At home, on a stable connection, the same file uploads in twenty minutes. The file was fine; the connection was the problem. Common mistake: Uploading the same file again while the first copy is still processing. Duplicates compete for the same connection and can leave two half-finished copies. Retry once from a stable network instead.Illustrative diagram/mock-up — NOT a real YouTube Studio screenshot: upload stuck checks. Step 4: Fix Comments That Are Disabled or Missing What to do: Check the comments setting first, then the held queue. Set comments to Allow all comments if you want every comment to show. Held comments are not deleted; they wait in Held for review until you approve or remove them. Also check the blocked-words list, because one blocked word can hold a comment. Studio path: YouTube Studio > Content > video > Details > Show more > Comments. For held comments, go to Studio > Content > Comments > Held for review. Approve, hide, or delete from there, and keep a note of what you changed. Example: A creator sees no comments on a new video and assumes viewers stayed silent. The Details page shows comments set to Disable comments from an earlier edit. Switching it back brings the missing comments into view at once. Common mistake: Assuming held comments are lost forever. They sit in the Held for review queue until you act. Deleting the video destroys its watch time for a problem that one approval would have solved.Illustrative diagram/mock-up — NOT a real YouTube Studio screenshot: comments checks. Step 5: Fix a Wrong Made for Kids Label What to do: Change the Audience setting only if the label is wrong. If the video is made for children, keep the label, because comments stay off by design. If the video is for a general audience, set Audience to No, it is not made for kids. If Studio applied the label automatically and it is wrong, use the appeal route in Studio. Studio path: YouTube Studio > Content > video > Details > Audience. Choose Yes or No for made for kids, save, and check that comments follow the label. For an automatic label you disagree with, follow the appeal steps shown in Studio. Example: A creator posts a woodworking tutorial, and Studio labels it made for kids because the thumbnail shows bright colours. Setting Audience to No restores comments, and the video keeps its views. Common mistake: Setting every video to Not made for kids to keep comments on. A video truly made for children must carry the label, and mislabelling it can bring a policy problem. Label by the real audience.Illustrative diagram/mock-up — NOT a real YouTube Studio screenshot: Made for Kids fix. Step 6: Follow the 24-Hour Fix Plan What to do: Work the plan in order, and give each fix time to take effect. Hour one: name the problem and check the Details page. Hours two to six: fix the upload, comments, or label, and note the change. By the next day: re-check the video row, the comments, and the label. Studio path: YouTube Studio > Content for the daily re-check, Details for the Audience and comments settings, and Comments > Held for review for approvals. Use the same three places each time, so the check takes minutes, not hours. Example: A creator fixes the Audience label at noon, but comments are still off at 1 p.m. By the next morning, after a check in Studio, comments are back. The fix had worked; the display needed time. Common mistake: Repeating the same fix every hour. Changing the setting, saving, changing it back, and saving again can leave the video worse off than one careful change. Make the change once, note it, and check again the next day.Illustrative diagram/mock-up — NOT a real YouTube Studio screenshot: 24-hour fix plan. ChecklistProblem named in one sentence. Details page checked: Audience and comments. Connection and file checked before retrying. Held comments reviewed, not assumed lost. Audience label matches the real audience. One change made and noted. Re-checked the next day in Studio.Frequently Asked Questions Why is my upload stuck at a percentage? Usually the connection dropped, or the file is still processing. Check the connection, keep the tab open, and give processing time before retrying. Do not delete the upload. Why did my comments disappear? Check the comments setting in Details, the Held for review queue, and the Made for Kids label. One of the three usually explains it, and held comments are not deleted. Can I keep comments on a video made for kids? No. Comments stay off by design on videos labelled made for kids. Do not mislabel the video to turn comments on; label it by its real audience. Should I delete and re-upload a stuck video? No. Check the connection and the file format, and retry once from a stable network. Deleting loses the processing already done and can leave duplicates. How do I appeal a wrong Made for Kids label? Use the appeal steps shown in Studio for that video, and give the reason the label is wrong. Keep the label while the appeal is pending, and check Studio for the outcome. Sources — Check It Yourself Official pages opened and verified live on 29 October 2026. Check current wording before acting.Upload YouTube videos — YouTube Help Set your channel or video's audience — YouTube Help Learn about comment settings — YouTube Help (verified live, not linked). Determining if your content is 'made for kids' — YouTube Help (verified live, not linked).No official YouTube video is embedded here. No exact official video URL was verified live.
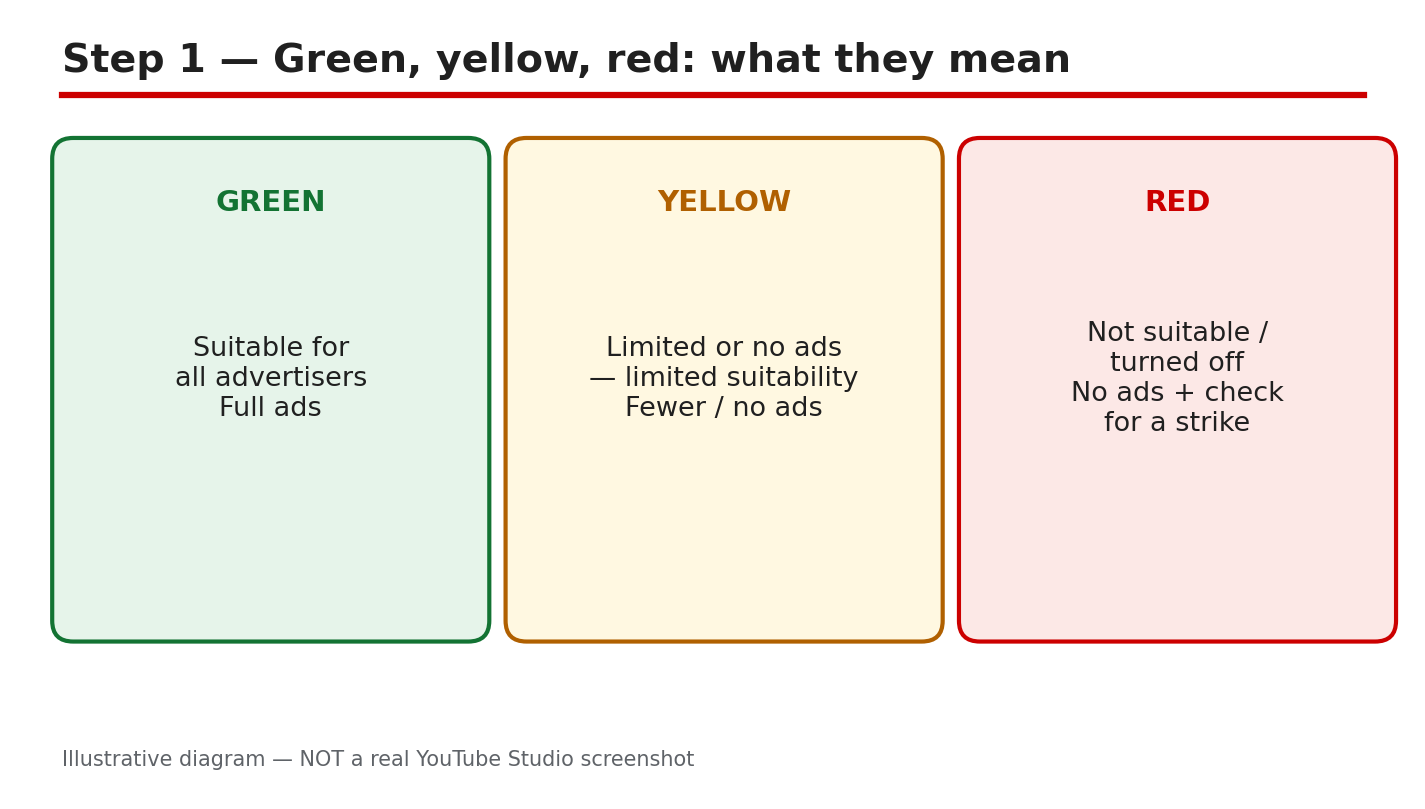
- CreatorPlaybook Team
- 29 Oct, 2026
YouTube Yellow Dollar Icon? How to Fix Limited Ads and Request a Review
A yellow dollar icon can feel like a punishment, but it is a rating, not a penalty on the whole channel. It means YouTube found the video suitable only for limited advertising, or for no ads at all. The video stays public, and the rest of the channel is not automatically affected. The fix is specific: find the reason, change only what caused it, and request a human review if the rating looks wrong. Related reading: YouTube Shorts Not Monetized? 7 Reasons and How to Fix Each One. A yellow icon and a Short with no monetization often share a cause, so check both guides before changing a video. Below, each step gives what to do, the exact Studio path, a short example, and a common mistake. Check the official Help pages at the end, because wording and review options can change. What You Will LearnGreen, yellow, and red icons, explained. Where to find the reason for a rating. Common triggers in the advertiser-friendly guidelines. Fixes to make before requesting a review. How to request a human review in Studio. A prevention plan for future uploads.Step 1: Read the Dollar Icon Correctly What to do: Check the icon before changing anything. Green means the video is suitable for full ads. Yellow means limited or no ads, because part of the content may not suit all advertisers. Red means the video is not suitable for ads. The icon is a rating for one video, not a strike and not a channel penalty. Studio path: YouTube Studio > Content > Monetisation column. The icon sits beside the video title, with the reason shown when you click it. Also check Studio > Content > Notices for appeal steps. Example: A creator sees yellow on one cooking video, while ten others stay green. Only that video needs a fix, so the creator leaves the rest alone. Common mistake: Deleting the video, or changing the title on every video. A rating affects one video, so a channel-wide change wastes work.Illustrative diagram/mock-up — NOT a real YouTube Studio screenshot: green, yellow, and red icon meanings. Step 2: Find Where the Rating Lives What to do: Open the video in Studio and read the exact reason category. Do not guess from the thumbnail or title alone. The reason tells you whether the problem is language, imagery, or topic, and that decides the fix. Note the category word for word before editing. Studio path: YouTube Studio > Content > Monetisation column > click the dollar icon. For appeals, follow the official appeal page: Studio > Content > Notices column, hover over the notice, and use the Action button. Example: A creator clicks the yellow icon and reads a category about strong language. The fix is the audio, not the thumbnail, so editing starts there. Common mistake: Requesting a review before reading the reason. Reviewers see the same content, so an unchanged video gets the same rating.Illustrative diagram/mock-up — NOT a real YouTube Studio screenshot: where the rating lives in Studio. Step 3: Check the Common Triggers What to do: Compare the video with the Advertiser-Friendly Guidelines categories. Strong profanity, especially in the first 30 seconds, is a common trigger. Graphic or shocking imagery, violent or distressing scenes, and sensitive topics such as tragedy or conflict can also limit ads. A single strong moment can affect the rating, even in a long video. Studio path: YouTube Studio > Content > click the icon for the reason category, then compare that category with the official Advertiser-Friendly Guidelines page. Example: A creator finds strong language in the opening 20 seconds. The rest of the video is calm, but the early language alone explains the yellow icon. Common mistake: Assuming the whole topic is banned. Many topics are allowed with care; the trigger is usually one moment, word, or image.Illustrative diagram/mock-up — NOT a real YouTube Studio screenshot: common triggers. Step 4: Fix the Video Before a Review What to do: Edit or blur the offending part, and clean the first 30 seconds first, because early content weighs heavily. Fix any mismatch between the title, thumbnail, and actual video, so the video delivers what it promises. Confirm that only this video is affected, and keep a note of each change made. Studio path: YouTube Studio > Content > video > Details > Editor for cuts and blurs; then Details > Title and description, and the thumbnail picker, for the title and thumbnail. Example: A creator blurs a graphic image, trims one strong phrase, and changes a misleading thumbnail. The video now matches its title and opening. Common mistake: Changing only the title. If the audio or imagery still triggers the rating, the icon will not change.Illustrative diagram/mock-up — NOT a real YouTube Studio screenshot: before requesting a review. Step 5: Request a Human Review What to do: Request a human review only after the fix, using one request for the video. Follow the appeal steps on the official page, and give the exact reason category if asked. As reported, a decision can take up to 7 days, and the specialist decision is reported to be final, so check the current Help page for the latest wording. Creators in the EU are reported to have extra options, so check the page for any local route. Studio path: YouTube Studio > Content > Notices column > hover over the notice > Action > request review, as described on the official appeal page. Also check the Monetisation column for the icon and reason. Example: A creator fixes the opening, requests one review, and waits. The icon stays yellow while the review is pending, so no second request is sent. Common mistake: Sending several requests for the same video. Repeated requests do not speed a review, and they can confuse the record.Illustrative diagram/mock-up — NOT a real YouTube Studio screenshot: review and re-check. Step 6: Prevent the Next Yellow Icon What to do: Build a short pre-upload check. Review the first 30 seconds for strong language and shocking imagery, and check that the title and thumbnail match the video. Keep a list of past reason categories, so the same trigger is not repeated. Review new videos a day after upload, when ratings can settle. Studio path: YouTube Studio > Content > Monetisation column after upload, and Content > video > Details before upload, for title, thumbnail, and audience checks. Example: A creator checks the opening before upload, removes one strong word, and the next three videos stay green. The check takes five minutes. Common mistake: Copying a viral title that overpromises. A mismatch can draw a closer look, even when the video itself is calm.Illustrative diagram/mock-up — NOT a real YouTube Studio screenshot: prevention plan. Checklist: Fix the Icon, in OrderIcon and reason category noted. Trigger found: language, imagery, or topic. First 30 seconds cleaned. Title and thumbnail match the video. Only the affected video changed. One human review requested, after the fix. Pre-upload check added for next time.Frequently Asked Questions Does a yellow icon affect my whole channel? No, as a rule. The rating applies to one video. Other videos keep their own ratings, and the channel is not penalised by one yellow icon alone. Fix the single video, and leave green videos unchanged. Can I request a review more than once? Request one review per video, after fixing the cause. As reported, the specialist decision is final, so a second request for the same unchanged video is unlikely to help. Check the official appeal page for current options before trying again. How long does a human review take? As reported, allow up to 7 days, and check Studio for the outcome. Times can vary, and no exact time can be promised here. Do not send duplicates while waiting; check the Help page for the latest wording. Should I delete a yellow-icon video? Usually no. First read the reason, fix the trigger, and request a review if the rating looks wrong. Deleting loses views, comments, and watch time, and the same mistake can return in the next upload. What if every new video gets a yellow icon? Look for a repeated trigger across videos, such as strong language in every opening, or thumbnails that overpromise. Fix the pattern, not one video at a time. If the pattern is unclear, compare each reason category with the official guidelines page. Sources — Check It Yourself Official pages opened and verified live on 29 October 2026. Check current wording before acting.Advertiser-friendly content guidelines — YouTube Help Submit an appeal for videos with 'Limited ad earnings' or 'No ad earnings' — YouTube HelpNo official YouTube video is embedded here. No exact official video URL was verified live.
- CreatorPlaybook Team
- 29 Oct, 2026
YouTube Channel Hacked or Terminated? How to Recover It Step by Step
Losing access to a channel is frightening when videos, subscribers, and income depend on it. Panic causes the worst mistakes: paying a stranger, sharing a code, or sending repeated appeals. This guide separates three problems, secures the Google account first, and follows the correct recovery route. Work in order, keep every notice, and trust no one promising guaranteed recovery. Slow, calm steps protect both the account and the appeal. Related reading: How to Protect Your Channel from Strikes, Copyright and Reused Content. A hacked, terminated, and suspended channel need different actions, and the wrong form wastes time. Below, each step gives what to do, the exact Studio or Google path, a short example, and a common mistake. Check the official Help pages at the end before acting, because wording and forms can change. What You Will LearnHacked, terminated, and suspended notices, compared. Securing a Google account before any appeal. The right recovery route for each problem. Evidence that makes an appeal easier to review. What never to do, including paying for recovery. Rebuilding security after access returns.Step 1: Tell Hacked, Terminated, and Suspended Apart What to do: Read the exact notice first. A hacked channel shows uploads you did not make, changed passwords or recovery details, or unfamiliar sign-ins. A terminated channel is removed for policy reasons, with an email naming the reason. A suspended channel is held temporarily, often during a check. Save the notice, email, and Studio message exactly as shown. Studio path: YouTube Studio, on sign-in or the Content page. Compare the message word for word with your inbox email before choosing a form. Example: A creator finds a crypto video uploaded overnight, a changed password, and an unknown recovery email. That points to hacking, so account recovery comes first. Common mistake: Filing a termination appeal for a hack, or only resetting a password for a termination. The wrong route delays help.Illustrative diagram/mock-up — NOT a real YouTube Studio screenshot: hacked vs terminated vs suspended. Step 2: Secure the Google Account First What to do: Secure the account before appealing, or a hacker may still control it. Recover access, set a new strong password, turn on 2-Step Verification, and review signed-in devices. Remove unfamiliar devices and third-party access, then update your recovery email and phone. Never share passwords or codes with anyone offering recovery. Studio path: Google Account > Security > How you sign in to Google > 2-Step Verification; then Security > Your devices and Third-party access. Example: A creator changes the password, turns on 2-Step Verification, and removes two unknown sessions. The hacker cannot return with the old password. Common mistake: Appealing first, reusing the old password, or skipping 2-Step Verification. That leaves the door open.Illustrative diagram/mock-up — NOT a real YouTube Studio screenshot: secure the Google account first. Step 3: Choose the Correct Recovery Route What to do: Use the route matching your problem. For a hacked Google account, use Google Account recovery. For a terminated channel, appeal in YouTube Studio, or use the appeal form linked in Help if Studio is unavailable. For a hacked channel, use the hacked-channel report in Help. Some reports mention a 9-month limit for hacking cases; that is reported only, so check current Help wording. The termination Help page opened here says creators have up to 1 year from termination to appeal. Studio path: YouTube Studio > termination information > Begin Review > Next > Start Appeal > Next > contact email and reason > Submit. Example: A creator reads the stated policy in Studio, clicks Begin Review, and submits one appeal. No hacking report is filed for the same termination. Common mistake: Filing every form at once, or filing the same appeal many times. That does not speed review.Illustrative diagram/mock-up — NOT a real YouTube Studio screenshot: recovery routes. Step 4: Build Strong Appeal Evidence What to do: Give clear, dated evidence in one appeal. List when the problem started and was found, with screenshots and emails exactly as received. Name the exact policy cited, explain calmly why it does not fit, and keep original files. List hacker uploads and whether they were removed, and state fixes already made. Studio path: YouTube Studio > termination information > Begin Review > Start Appeal. Give dates, policy, and evidence, without unrelated history. Example: A creator writes: terminated 12 May, email named spam, no bulk uploads made, original files kept, hacker upload deleted 13 May. Each fact is checkable. Common mistake: A long, emotional appeal with no dates, policy name, or evidence. Vague appeals ask reviewers to guess.Illustrative diagram/mock-up — NOT a real YouTube Studio screenshot: appeal evidence checks. Step 5: Avoid Scams and Repeated Appeals What to do: Never pay for recovery, and never share passwords, codes, or access with anyone offering to fix the channel. Google Help warns against recovery services and says Google does not work with them. Do not spam appeals, reuse the old password, or skip 2-Step Verification. Do not create a new channel to circumvent termination; Help prohibits that. Studio path: None for paid recovery. If anyone asks for payment, a password, or a code, stop and use only official routes. Example: A creator is offered guaranteed recovery for a fee, in exchange for a code. The creator refuses and uses the official appeal only. Common mistake: Trusting a service because it uses YouTube logos or urgency. It is still a scam if it asks for money or a code.Illustrative diagram/mock-up — NOT a real YouTube Studio screenshot: what never to do. Step 6: Follow the Recovery Timeline and Rebuild What to do: Check the appeal status in Studio and watch your contact email for the outcome. Times vary, so do not file duplicates while waiting. If access returns, rebuild security before uploading: keep 2-Step Verification on, confirm recovery details, review devices and third-party access, and keep copies of notices, emails, and your appeal. Studio path: YouTube Studio > termination information > appeal status and review time. Then Google Account > Security > devices and third-party access. Example: A creator waits for the email, confirms the appeal in Studio, then removes an old app that still had account access before uploading again. Common mistake: Uploading at once without rechecking security, or deleting evidence after a good outcome. Records help if trouble returns.Illustrative diagram/mock-up — NOT a real YouTube Studio screenshot: recovery timeline. Checklist: Recover Safely, in OrderNotice saved; hacked, terminated, or suspended identified. New, unused strong password set. 2-Step Verification on; recovery email and phone checked. Devices and third-party access reviewed and cleaned. One clear appeal, using the correct route. Evidence kept: dates, screenshots, emails, files, policy. No payment; no password or code shared.Frequently Asked Questions Can I recover my channel if the hacker changed my password and recovery email? Try Google Account recovery, answering as accurately as you can with any remaining recovery phone or email. Wrong guesses do not end the process, per Help. Follow its recovery tips before giving up, and never pay a third party. Use a familiar device and location if possible. What if my channel was terminated but I believe the decision was wrong? Appeal in Studio with Begin Review and Start Appeal, giving dates, the exact policy, and clear evidence. Help opened here says creators have up to 1 year from termination. Keep it calm and factual, and check Studio and email. Save the appeal confirmation and outcome email. Should I pay someone who says they can recover my channel? No. Do not pay, or share a password or code. Google Help warns against recovery services and says Google does not work with them. Use only Google recovery, the hacked-channel route, and the official Studio appeal. Report scam messages and keep them as evidence. How long will an appeal take? Times vary, and no fixed time can be promised here. Check Studio for appeal status and watch your contact email. Do not send duplicates while waiting; that does not speed review. A single, complete appeal is easier to review than several. What if I cannot sign in at all? Work through Google Account recovery and its tips for completing recovery. If recovery still fails, Help says a new Google Account is a last resort. Do not use a new channel to circumvent termination; Help prohibits it. Keep recovery details up to date to avoid a repeat lockout. Sources — Check It Yourself Official pages opened and verified live on 29 October 2026. Check current wording before acting.How to recover your Google Account or Gmail — Google Account Help Channel or account terminations — YouTube HelpNo official YouTube video is embedded here. No exact official video URL was verified live.
- CreatorPlaybook Team
- 29 Oct, 2026
YouTube Music Copyright Strikes in India: Safe Music and How to Fix a Claim
A film song playing quietly in the background can still bring a copyright claim or a strike. YouTube's matching system does not care whether the music was loud, short, or added for atmosphere. If the audio belongs to someone else, the system can find it, and the owner decides what happens next. Film songs and cricket audio are common examples in India. This guide shows you how to check a claim first, choose safe music, run four checks before you use any track, and fix a claimed video in Studio. It also explains the difference between a claim and a strike, so you do not panic over the wrong problem, and do not ignore the serious one. Check Sources for the official Help pages. What You Will LearnWhy film songs and broadcast audio are matched, even when quiet. How to read a claim in Studio, step by step. Safe music sources, and the proof to keep. Four checks to run before you use any track. How to fix a claimed video, and when to dispute.Step 1: Understand Why Strikes Happen Using a hit song, film song, or cricket broadcast audio without permission is a copyright risk, however you use it. Volume and length do not make it safe, and quiet audio can still be matched. If you did not create the music, or you do not hold a licence for it, assume you cannot use it. Decide before you edit, and check every track against Step 4 before you upload. That risk stays even if the music is only in one part of the video, or if you bought the film or the song for personal listening. Studio path: No Studio button fixes this. Decide before editing, and check every track against Step 4 before uploading. Example: A popular film song, played quietly under a travel vlog, is claimed within hours. The owner takes the revenue, and the audio must be fixed or the claim accepted. Common mistake: Crediting the singer or the film in the description is not permission.Illustrative diagram/mock-up, NOT a real Studio screenshot: why strikes happen. Step 2: Check the Claim First Do not guess, and do not delete the video at once. Open the claim and note the song name, the owner, whether it covers the whole video or only part of it, and whether Studio shows a Content ID claim or a copyright strike. Note what Studio shows first, because the right fix depends on which problem you have. Write down the details before you act, so you do not lose them while you work through the fix. Studio path: YouTube Studio > Content > Restrictions > click the claim to see the song, owner, and impact. Then return to Content to act. Example: A film song owned by a music label, with only the music claimed, can be fixed with Replace song or Erase song. It is not a strike appeal. Common mistake: Disputing at once without a licence, or deleting a video that could have been fixed.Illustrative diagram/mock-up, NOT a real Studio screenshot: check the claim first. Step 3: Choose Safe Music Sources Use the YouTube Audio Library, and check the licence terms for each track. You can also use a licensed royalty-free library, with the licence proof kept, or music you created yourself. Save proof for every track you use. A 'no copyright' label on another site is not a licence, and a song downloaded from another video is not safe music. Keep the licence with the video file name, so you can find it months later. Studio path: YouTube Studio > Audio Library in the left menu, or studio.youtube.com > Audio Library. Filter the list, then read the licence before downloading. Example: An Audio Library track allows use with attribution. Add the credit exactly as asked, save a screenshot of the terms, and then use the track. Common mistake: Treating a 'no copyright sounds' channel as a licence.Illustrative diagram/mock-up, NOT a real Studio screenshot: safe music sources. Step 4: Run the Before-Use Checks Run four checks before you use any track. First, the licence must cover YouTube, including monetized videos. Second, check whether attribution is needed, and add it exactly as asked. Third, check whether the track has caused claims for others, as far as you can check. Fourth, save the licence proof where you can find it later. If you are in doubt, choose another track. Do these checks for background music too, not only for songs that play loudly. Studio path: No Studio check replaces the licence check. Do the checks in your notes, upload, then check Studio > Content > Restrictions after processing. Example: A track that covers personal use only is skipped. Use an Audio Library track that covers YouTube instead, and save the licence page before editing. Common mistake: Checking only the price. A free download is not a free licence.Illustrative diagram/mock-up, NOT a real Studio screenshot: before-use checks. Step 5: Fix a Claimed Video Fix the video in Studio first. Use Replace song or Erase song in the video editor, then check Restrictions again after the change. Dispute only if you hold a real licence for that exact track, and you can show it. Do not dispute without proof, because a failed dispute can make the problem worse. After the fix, watch the video once to make sure the new audio fits the pictures. Studio path: YouTube Studio > Content > select the video > Editor > Audio, then Replace song or Erase song. For a dispute, go to Content > Restrictions > claim > Dispute. Example: A vlog is claimed for a film song in the middle of the video. Replace it with an Audio Library track, re-check Restrictions, and the claim is gone without deleting the video. Common mistake: Trimming only the claimed seconds and leaving the rest of the same song in the video.Illustrative diagram/mock-up, NOT a real Studio screenshot: fix a claimed video. Step 6: Build the Music-Safe Habit Keep a short list of tracks you have already checked, with the licence proof saved for each one. Use the same safe sources, check Restrictions after every upload, and fix a claim the same day. Run the checks for every new song, even if a friend recommended it. A small delay before editing is far cheaper than a strike, a lost video, or lost revenue. Share the list with anyone who edits for you, so a helper does not add a risky track. Studio path: YouTube Studio > Content > Restrictions after every upload. For a new safe track, go to YouTube Studio > Audio Library. Example: Pick a checked track, add the credit, upload, and check Restrictions. With no new claim, the video stays monetized. Common mistake: Reusing a risky song 'just for this video.'Illustrative diagram/mock-up, NOT a real Studio screenshot: the music-safe habit. Checklist: Before You Use MusicLicence covers YouTube, including monetized videos. Attribution added exactly as asked. Licence proof saved: licence, download page, and date. No film song, broadcast audio, or hit song without a licence. Restrictions checked after upload, and claims fixed the same day.Frequently Asked Questions Does quiet or short music avoid a claim? No. Matching is about the recording, not about volume or length. Quiet and short music can still be claimed. What is the difference between a claim and a strike? A claim usually affects revenue or availability for that video. A strike is a formal penalty that can restrict the channel. Check Studio to see which one you have. Can I use a song if I credit the owner? No. A credit is not a licence. You need permission or a licence that covers YouTube, and you should keep the proof. Should I dispute a claim for a film song? Only if you hold a real licence for that exact track, and you can show it. Otherwise, use Replace song or Erase song in Studio. Where can I get safe music for free? Start with the YouTube Audio Library. Check the terms for each track, save the proof, and add any attribution asked for. A Simple Rule to Remember If you cannot prove you may use the music, do not use it. Check the claim, choose a safe track, run the four checks, and fix problems in Studio the same day. Safe music keeps the video up. Keep your checked list, keep your proof, and keep the habit. One safe track, checked properly, is worth more than a hit song that brings a claim. Sources — Check It Yourself Check these sources yourself for the current wording.YouTube Help: Use music and sound effects from the Audio Library YouTube Help: Understand copyright strikes CreatorPlaybook: YouTube Copyright and Music: Safe Guide
- CreatorPlaybook Team
- 29 Oct, 2026
How to Get Monetized on YouTube in India: Approval Steps That Actually Work
Getting monetized in India follows the same YouTube Partner Program rules as everywhere else. There is no separate India shortcut, no local office to call, and no paid route that makes YouTube approve a channel faster. What is different is the work around the application: the kinds of reused clips that commonly cause rejections, the clean-up that helps a reviewer see original work clearly, and the patience to apply only when the numbers are truly met. This guide gives you a plain, step-by-step plan. You will check the thresholds, apply through the Earn tab in Studio, fix the reused-content problem that is commonly reported in India, clean up your channel before you apply, and understand the money facts without invented figures. Check the official Help pages linked in Sources before you rely on a number, because eligibility wording can change. What You Will LearnThe exact thresholds, and the Shorts views route. How to apply in Studio, step by step. The reused-content trap commonly reported in India, and the fix. A pre-apply clean-up for your channel and recent videos. Money facts: AdSense, RPM, and what approval really means.Step 1: Check the Thresholds First What to do: Before you do anything else, confirm that you meet every requirement. You need 1,000 subscribers, plus either 4,000 valid public watch hours in the last 12 months or 10 million valid public Shorts views in the last 90 days. You also need an AdSense for YouTube account linked and approved, and no active Community Guidelines strike. If any part is missing, keep publishing and re-check. Studio path: YouTube Studio > Earn > check the subscriber, watch-hour, and Shorts-view figures shown, then check your AdSense link status. Example: Your channel shows 1,240 subscribers and 4,350 watch hours, with AdSense linked. You meet the long-form route, so you can move to Step 2. Common mistake: Counting private, deleted, or Shorts views as watch hours, or counting subscribers bought from a seller. Only valid public watch hours count, and bought growth can harm your channel.Illustrative diagram/mock-up, NOT a real Studio screenshot: the monetization thresholds. Step 2: Apply Through the Earn Tab What to do: Apply only when the figures in Step 1 are met. Open the Earn tab, accept the YouTube Partner Program terms, link your AdSense for YouTube account if it is not linked yet, and submit the application. Then wait. Review typically takes about a month, so wait for the status to change. Studio path: YouTube Studio > Earn > Apply Now > accept the terms > link AdSense for YouTube > submit, then check Earn for the review status. Example: You accept the terms on a Monday, link AdSense, and submit. You keep uploading as normal while the review runs, instead of changing your channel name or deleting videos mid-review. Common mistake: Applying at 900 subscribers in the hope that YouTube will wait. An early application is not a place in a queue; meet the numbers first, then apply once.Illustrative diagram/mock-up, NOT a real Studio screenshot: the Earn tab application path. Step 3: Fix the Reused-Content Problem What to do: Look honestly at your recent videos. The commonly reported India rejection cause is reused content: Bollywood film clips, cricket broadcast clips, and template videos with little original input, presented as if they were your own work. This is reported by creators, not stated as an official YouTube India statistic. The fix is a run of original videos: your own voice, your own commentary or teaching, and your own editing choices. Studio path: YouTube Studio > Content > open each recent video > check the footage, audio, and credits, then plan replacements or new original videos before you apply. Example: A channel posts cricket highlights with a copied commentary track. The fix is not a new thumbnail; it is several new videos where you film, explain, and edit the content yourself. Common mistake: Keeping the reused clips, adding a short intro, and calling the result original. A brief intro does not turn someone else's film or broadcast footage into your original work.Illustrative diagram/mock-up, NOT a real Studio screenshot: the common rejection cause. Step 4: Run the Pre-Apply Clean-Up What to do: Before you apply, make the channel easy to review. Set a clear channel theme and About section that match what you actually upload. Check your newest 10 videos one by one: each should be original, with honest titles, descriptions, and tags that describe the video itself. Resolve any active strike and any unresolved copyright claim before you apply, or wait until the issue is settled. Studio path: YouTube Studio > Customization > Basic info for the theme and About text; YouTube Studio > Content > Restrictions to check strikes and claims. Example: Your newest 10 videos include two old clip compilations. You unlist or replace them, publish two new original videos, and only then check the Earn tab. Common mistake: Cleaning up only the channel banner and leaving misleading titles on the videos. Reviewers look at the videos, so fix the videos first.Illustrative diagram/mock-up, NOT a real Studio screenshot: the pre-apply clean-up. Step 5: Understand the Money Facts What to do: Get the money facts right before you expect payment. Check the AdSense payment threshold amount in your own AdSense account; do not use a figure copied from a social post. RPM varies by topic, audience, advertiser demand, and season, so do not trust a single India RPM figure. Approval is YouTube's decision alone: never pay anyone for approval, and never buy subscribers or watch hours. Studio path: YouTube Studio > Analytics > Revenue to see your own RPM range; AdSense > Payments to check the payment threshold in your account. Example: Two channels in India show very different RPMs because one covers finance and the other covers comedy. The difference is the topic and audience, not a fixed national rate. Common mistake: Paying an agent who promises approval in a week. No agent can approve a channel, and bought subscribers or watch hours can lead to removal from the program.Illustrative diagram/mock-up, NOT a real Studio screenshot: money facts for India. Step 6: Follow the Apply-and-Recheck Plan What to do: Make a simple plan and stick to it. Week one: check the numbers and finish the clean-up in Step 4. Week two: publish original videos and re-check Earn. When the numbers are met, apply, then keep publishing original videos during the review. If the application is rejected, read the reason, fix that exact problem with new original work, and re-apply only when the fix is visible on the channel. Studio path: YouTube Studio > Earn > re-check eligibility weekly; YouTube Studio > Content > confirm the newest videos are original before each re-check. Example: You are rejected for reused content. You publish six original videos over the next month, remove the reused clips, and re-apply with a channel that now shows the fix. Common mistake: Re-applying the next day with nothing changed, or deleting the rejection email without reading it. A repeat application with the same problem wastes the review and your time.Illustrative diagram/mock-up, NOT a real Studio screenshot: the apply-and-recheck plan. Checklist: Before You Apply1,000 subscribers reached, with valid public watch hours or Shorts views. AdSense for YouTube linked and approved. Newest 10 videos original, with honest titles and descriptions. No active strike and no unresolved copyright claim. No bought subscribers, watch hours, or paid approval promised.Frequently Asked Questions Can I apply before I reach 1,000 subscribers? No. Apply only when the subscriber and watch-hour or Shorts-view figures are met, with AdSense linked. An early application does not hold your place. Is the threshold different in India? No. The subscriber, watch-hour, and Shorts-view thresholds are the same everywhere. What differs is your audience, topic, and RPM, not the entry numbers. How long does the review take? Review typically takes about a month. Keep publishing original videos while you wait, and check the Earn tab for the status instead of re-applying. What if I am rejected for reused content? Read the reason, remove or replace the reused videos, and publish a run of original videos with your own voice and editing. Can someone approve my channel for a fee? No. Never pay anyone for approval. Approval is YouTube's decision, based on your channel and the Partner Program policies, and paid approval claims are scams. A Simple Plan to Remember Meet the numbers, clean the channel, apply once, and keep publishing original work while you wait. If you are rejected, treat the reason as a task list, not as a verdict on your channel. Fix the exact problem, show the fix in your newest videos, and apply again. Do not buy growth, do not pay for approval, and do not copy clips and hope the review misses them. Build the channel you would be proud to show a reviewer, one original video at a time. Sources — Check It Yourself Check these sources yourself before you apply. Eligibility wording can change, so use the official Help pages for the current numbers.YouTube Help: YouTube Partner Program overview & eligibility YouTube Help: YouTube channel monetization policies CreatorPlaybook: How to Earn Money on YouTube
- CreatorPlaybook Team
- 29 Oct, 2026
AI Content on YouTube: EU Labelling Rules and How to Disclose It Correctly
If you use AI to make a video that looks real, viewers need to know. A realistic face, voice, place, or event made or changed with AI can mislead people, even when you meant it as a creative edit. YouTube therefore asks creators to disclose realistic AI-generated or altered content, and viewers in the European Union must be able to see that label. This guide explains the rule in plain words, shows the exact place to set the label in YouTube Studio, and gives you a short habit you can repeat for every upload. The EU details below are presented only as reported. Rules and wording can change, so check the official YouTube Help page and the official EU source linked in Sources before you rely on a detail for a particular video. Do not guess a fine, a threshold, or a date that is not stated there. What You Will LearnWhat counts as realistic AI content, and what does not need a label. Where to set the disclosure in Studio, before you publish. The EU transparency and provenance points, as reported. Four quick checks to run before every upload. What happens if YouTube adds a label, or disclosure is missed.Step 1: What Counts as AI Content What to do: Decide, before editing, whether the finished video could look real to a viewer. Disclosure is for AI-generated or meaningfully altered content that seems realistic, including a real person appearing to say or do something they did not do, altered footage of a real event or place, a realistic scene that did not occur, and music that is the main focus and was made with AI. Studio path: No button yet. Make this decision in your planning notes, then use the upload step in Step 2 to record it. Example: You use AI to place a real presenter in a street scene that was never filmed. That looks real, so it needs disclosure. Common mistake: Assuming a small AI change does not count. If a viewer could believe the result is real, treat it as disclosable.Illustrative diagram/mock-up, NOT a real Studio screenshot: what counts as AI content. Step 2: Where to Disclose It in Studio What to do: During upload, answer the altered-content question honestly and set it before publishing. The label follows the viewer, not only the uploader, so EU viewers count even if you live elsewhere. Do not publish first and fix it later. Studio path: YouTube Studio > Create > Upload videos > Details > altered-content question, under Attributes / AI use. Select Yes if the content meets the disclosure rule, or No if it does not, then continue through the upload screens. Example: Your upload includes an AI-generated realistic interview. On the Details screen, you select Yes under AI use before you click Publish. Common mistake: Leaving the question on its default answer without reading it. A rushed upload is how a realistic AI video goes out with no label.Illustrative diagram/mock-up, NOT a real Studio screenshot: where to add the label. Step 3: EU Rules in Plain Words What to do: Understand the reported EU points, then check the official source for the current wording. As reported, viewers must be told when content is AI-generated or altered in a realistic way, provenance or AI markers should travel with the file so the information is not lost when it is shared, and there is a transitional period to 2 December 2026. Present no other date, fine, or threshold as a rule. Studio path: No EU switch in Studio is described here. Use the Step 2 disclosure setting for every video, and keep a note of the source you checked. Example: A clip is shared outside YouTube. If its AI marker travels with the file, a later viewer can still see that it was AI-made. Common mistake: Quoting a fine or deadline you saw in a social post. Check the official Help and EU source first, and do not invent a number.Illustrative diagram/mock-up, NOT a real Studio screenshot: EU rules in plain words. Step 4: Run the Labelling Checks What to do: Ask four questions before you publish: does it show a real person, does it show a real event or place, could a viewer believe it is real, and is disclosure set? If any answer points to realistic AI content, disclose it. When in doubt, label it. Studio path: YouTube Studio > Content > select the video > Details > check the altered-content / AI use answer, and correct it before publishing. Example: A cartoon avatar explains a topic, with no real person or place. It fails the realistic test, so no AI label is needed for that style. Common mistake: Checking only the first question. A realistic place or event can mislead even when no real person appears.Illustrative diagram/mock-up, NOT a real Studio screenshot: labelling checks before publishing. Step 5: If YouTube Labels It for You What to do: If YouTube applies a label automatically, read the Studio notification, check whether the label is correct, and correct the disclosure where Studio allows it. Do not ignore a label, and do not remove a correct label to make a video look more real. Studio path: YouTube Studio > Content > Restrictions / video details > read the AI label notification, then open Details and review the AI use answer. Example: Studio adds a label to a video made with a YouTube AI tool. You leave the correct label in place and note why it appeared. Common mistake: Treating a single missing disclosure as harmless. As reported, repeated missing disclosure risks removal or a review of Partner Program eligibility.Illustrative diagram/mock-up, NOT a real Studio screenshot: if YouTube labels it for you. Step 6: Build the Labelling Habit What to do: Make disclosure part of every upload checklist. Note the AI tools used, the realistic elements, and the answer you selected, and keep that note with the video file. Repeat the same checks for Shorts, livestream clips, and re-uploads. Studio path: YouTube Studio > Content > Details for each upload. Confirm the AI use answer, then publish, and re-check it after any re-upload. Example: Before a weekly upload, you write “AI voice, real street photo, Yes” in your notes, set Yes in Studio, and publish with the label showing. Common mistake: Disclosing once for a series and assuming later episodes are covered. Check every video separately.Illustrative diagram/mock-up, NOT a real Studio screenshot: the labelling habit. Checklist: Before You PublishReal person, event, or place? Note the answer. Could a viewer believe it is real? If yes, disclose. AI use answer set in Studio before publishing? Label checked in the video details after upload? Official source checked for the current wording?Frequently Asked Questions Do I need to disclose clearly cartoon or stylised AI content? No, disclosure is for content that seems realistic. Clearly stylised or cartoon content that no viewer would mistake for real does not need the same label, but check the official examples if you are unsure. Does the EU rule apply if I do not live in the EU? As reported, the rules apply by audience location. If EU viewers watch the video, the label matters for them, even if the creator lives elsewhere. What if YouTube labels my video automatically? Read the Studio notification, check the label, and correct the disclosure where Studio allows it. Do not remove a correct label. Does disclosing AI content limit my audience or earnings? YouTube Help states that disclosing AI content alone will not limit a video’s audience or affect its eligibility to earn money. Other policies still apply. Where can I check the current official wording? Use the official YouTube Help page linked in Sources, and check the official EU source for the current wording before you publish. A Simple Rule to Remember If a viewer could mistake your video for a real recording, disclose it. If the content is clearly invented, cartoon, or stylised, and no viewer would take it as real, disclosure is less likely to be needed, but still pause and run the four checks in Step 4. A label costs little time, while a missing label can cost trust, a removal, or a review. Keep your notes short, keep the Studio answer honest, and check the official source when a rule changes. Label early, label honestly, and keep the check in your upload routine. A clear label protects viewers, and it protects your channel too. Sources — Check It Yourself Check these sources yourself. The EU points in this guide are reported, not legal advice.YouTube Help: Disclosing use of GenAI content YouTube Help: YouTube channel monetization policies CreatorPlaybook: How to Use AI for YouTube Videos Without Breaking Monetization Policy
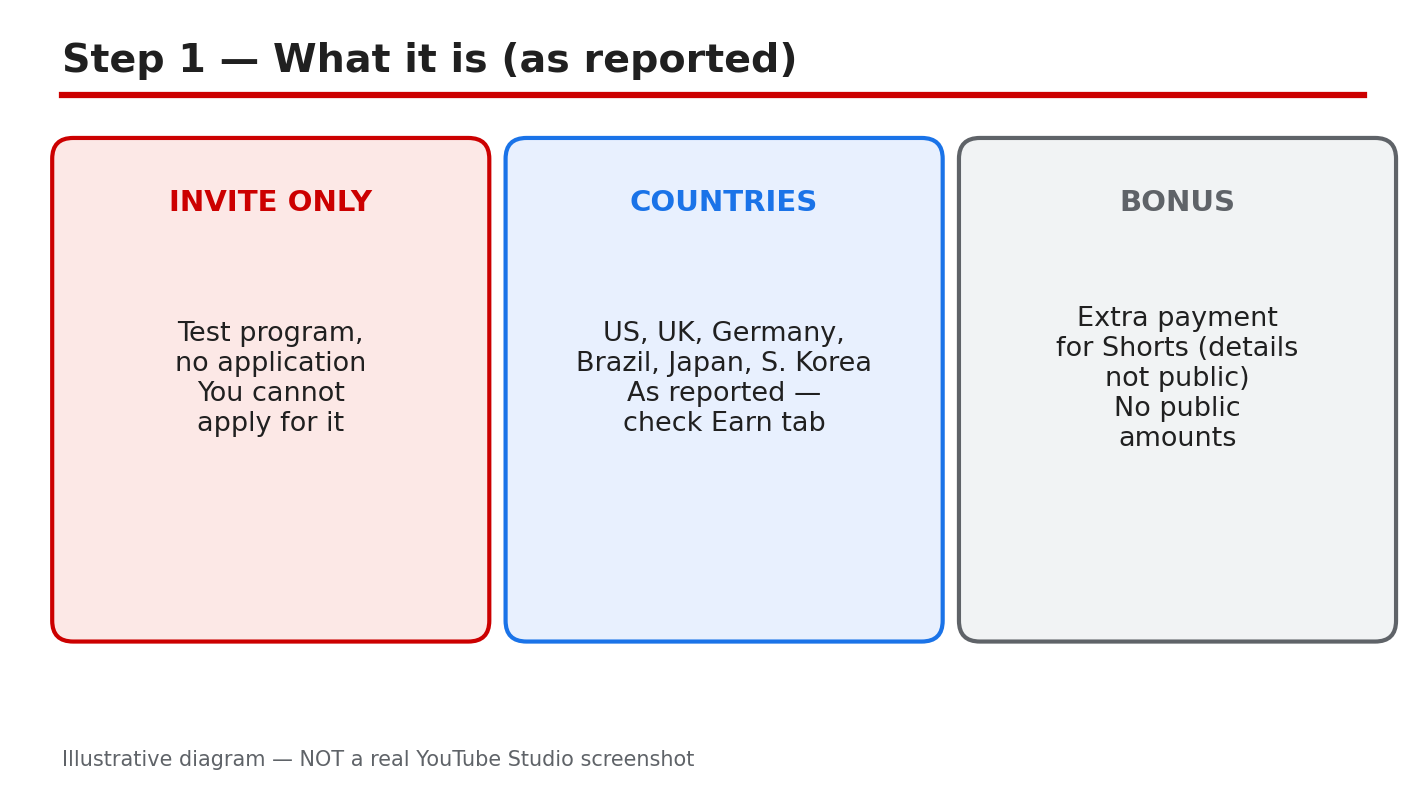
- CreatorPlaybook Team
- 29 Oct, 2026
YouTube Shorts Bonus Program Explained: Invitation Only, No Application
A bonus for Shorts sounds like free money, and that is exactly why it attracts rumours. Screenshots of large payments, paid courses, and forms that promise entry all circulate online. Most of them have nothing to do with YouTube. This guide separates what was reported about the Shorts bonus program from what is not known, and shows you the one safe way to check whether you have an invite. The short version is this: as reported, the program is invitation only, there is no application, and the details are not public. If you cannot find an invite inside your own YouTube Studio account, you are not in the test. The rest of this guide follows from that. What You Will LearnWhat the bonus program is, as reported, and what is not public. Where an invite would appear in your own Studio account. What to check before you accept any invite. What to do if no invite appears, without paying anyone. A monthly check you can run in a few minutes.Related reading: YouTube Shorts Not Monetized? 7 Reasons and How to Fix Each OneDiagram: the invite-only test as reported, with no application and no public details. This is an illustrative diagram and mock-up, not a real YouTube Studio screenshot. Step 1: Understand What the Program Is, as Reported As reported, the Shorts bonus program is a limited, invitation-only test. Creators in the United States, the United Kingdom, Germany, Brazil, Japan, and South Korea were reported to be included, and there is no application form and no way to ask to join. The amounts, the entry criteria, and the end date were not made public. Treat all of that as reported, not as a promise. Example: a creator sees a post claiming a fixed bonus for every 1,000 Shorts views. No such amount was verified, so the claim should be treated as a rumour, not as a rate to plan around. Common mistake: repeating a bonus amount seen in a video or a comment as if YouTube had stated it. A repeated rumour does not become an official figure.Diagram: where an invite would show, in the Earn tab, bonuses, and notifications. This is an illustrative diagram and mock-up, not a real YouTube Studio screenshot. Step 2: Check Where an Invite Would Show An invite would appear inside the creator's own account, so that is the only place to look. Open YouTube Studio, check the Earn tab, look for a bonuses section, and read your notifications, including the Studio inbox. The official Help page states that creators are told by email and by a notification in the YouTube Studio dashboard and inbox, and that acceptance takes place in YouTube Studio. If nothing appears in any of those places, you have no invite. Do not trust someone else's screenshot, and never pay for entry. Exact path: YouTube Studio > Earn tab > bonuses / notifications > Studio inbox. Example: the Earn tab shows only the usual revenue sections, and no bonus offer appears in notifications or the inbox. That means no invite, and no further action is needed. Common mistake: clicking a link in an email or a message that claims to be the invite. Open Studio directly instead, and look for the offer inside your own account.Diagram: what is not public, including amounts, entry criteria, and the end date. This is an illustrative diagram and mock-up, not a real YouTube Studio screenshot. Step 3: Know What Is Not Public Three things about the program are not public, as far as could be verified here: how much a bonus pays, how creators are chosen, and when the test ends or expands. Invented figures circulate freely, and a post, a video, or a comment that states a payment per view, an entry threshold, or a country list beyond the reported one is guessing, unless it shows the same terms inside a Studio account. Example: two videos quote different bonus rates for the same country. Neither rate was verified, so neither one can be used to plan earnings. The only figure that matters is the one inside your own account. Common mistake: treating a blog's bonus-rate table as a price list. A table built from rumours is still a rumour, even when it looks tidy.Diagram: if you get an invite, read the terms shown in your own account first. This is an illustrative diagram and mock-up, not a real YouTube Studio screenshot. Step 4: If You Get an Invite, Read It First Before you accept anything, read every line of the invite shown inside Studio. Note the country it applies to, the exact terms, the date by which you must accept, and the payment details. The official Help page states that acceptance by the 15th of the month is needed for that month's activity to count, and that the deadline shown in Studio applies. Accept only the invite shown inside your own account and Studio. Never accept through a link or a shared login. Example: an invite shows an accept-by date of the 15th and a country that matches your channel. You accept inside Studio before that date, and you keep a note of the terms you agreed to. Common mistake: accepting first and reading later. Once you accept, the terms you skipped are the terms that apply to you.Diagram: if you do not get an invite, Shorts revenue through the Partner Program continues. This is an illustrative diagram and mock-up, not a real YouTube Studio screenshot. Step 5: If You Do Not Get an Invite If no invite appears, nothing is broken, and no form will fix it. Shorts revenue through the YouTube Partner Program continues as before, because the bonus is separate from Partner Program earnings. There is no application, no waiting list, and no paid route into the test. Anyone who offers to add you for a fee, sells an account that claims to be included, or asks for your login is offering a way to lose money, or the channel itself. Example: a channel with no invite keeps earning through the Partner Program, while its owner keeps waiting for a bonus that never arrives. The Partner Program income was the real income all along, and the waiting changed nothing. Common mistake: paying for a course, a form, or an account that promises bonus entry. None of those can add you to an invitation-only test, and the payment is gone either way.Diagram: the monthly check routine, run on the same day each month. This is an illustrative diagram and mock-up, not a real YouTube Studio screenshot. Step 6: Run a Monthly Check Once a month, on the same day, open Studio and run the same short check. Look at the Earn tab, the bonuses section, and your notifications, and note whether anything new appeared. Read any new item in full before you act on it, and ignore offers that arrive outside your account. If nothing new appears, close Studio and carry on; the check took a few minutes, and no further action is needed until next month. Example: on the first of each month, you check the Earn tab and the Studio inbox. In March nothing appears, so you close Studio and keep posting. In April an invite appears, and you read it before accepting. Common mistake: checking every day and treating every rumour as news. A monthly check is enough, because an invite would wait for you inside your account, not in a stranger's post. Quick ChecklistInvite checked inside your own Studio account only. Earn tab, bonuses, and notifications all checked. No amount, criterion, or date quoted without Studio terms. No payment made for entry, an account, or a screenshot. Accept-by date and country read before any acceptance. Partner Program Shorts revenue kept separate from any bonus. Monthly check noted, same day each month. Rumours ignored unless the same terms appear in Studio.Frequently Asked Questions Can I apply for the YouTube Shorts bonus program? No. As reported, there is no application and no way to ask to join. The program is invitation only, and an invite would appear inside your own Studio account. Which countries are included in the test? As reported, the United States, the United Kingdom, Germany, Brazil, Japan, and South Korea were included. Treat that list as reported, and check the terms shown in your own account for the country that applies to you. How much does the bonus pay? That was not made public, as far as could be verified here. Do not use a figure from a blog, a video, or a comment. Use only the terms in your own Studio account. I saw a form that promises bonus entry. Should I fill it in? No. There is no application form, and no form can add you to the test. Do not enter your login, payment details, or personal information into a page that promises entry, and check only inside your own Studio account. Sources — Check It Yourself Check the official pages below for the current monetization rules. The bonus program page was verified live in this run, and its text states the program is invite-only with no application process. No official YouTube video was embedded in this post: no exact official video was verified live in this run, so none is shown here. YouTube Help: Learn about the Shorts bonus program YouTube Help: YouTube Shorts monetization policies
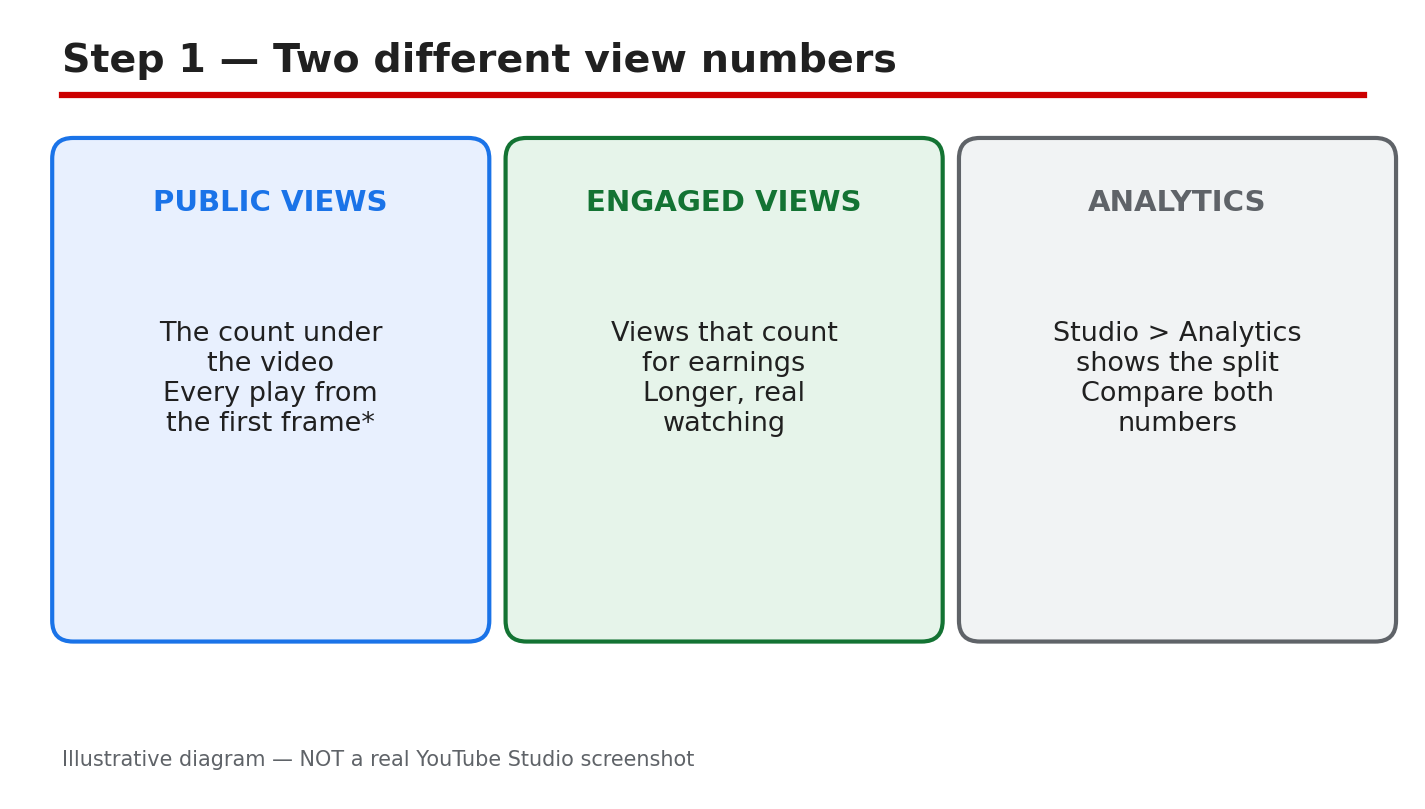
- CreatorPlaybook Team
- 29 Oct, 2026
How YouTube Counts Views in 2026: Public Views vs Engaged Views Explained
Two videos can show the same view count and earn very different amounts. That gap confuses many creators, because YouTube shows more than one kind of view. The number under a video and the number that counts for earnings are not always the same, and treating them as one number leads to wrong conclusions. This guide separates the two numbers, shows where to find each one in YouTube Studio, and explains the reported change to how views are counted. It also gives you a short weekly check, so you can read your numbers without guessing. Where a date or a change is reported, this guide says so, and points you to the official Help page for the current definition. What You Will LearnThe difference between public views and engaged views. Where to see the split in YouTube Studio Analytics. The reported view-counting change, and what to check officially. How to read traffic source, retention, and date ranges correctly. Why views and earnings differ, and what a 7-day check looks like.Related reading: Understanding YouTube AnalyticsDiagram: public views, the count under a video, compared with engaged views, the count used for earnings. This is an illustrative diagram and mock-up, not a real YouTube Studio screenshot. Step 1: Learn the Two View Numbers Public views are the count shown under a video, on its watch page and in search results. Engaged views are the views that count for earnings, after YouTube applies its checks. A play can add to the public count without adding to the engaged count, for example when it is very short or when it is filtered out as invalid. That is why a video can look popular and still earn little. Example: a Short shows 10,000 public views, but only 6,000 engaged views. The gap does not mean views were deleted; it means the two counts measure different things. Common mistake: judging a video only by the public count. A high public count with low engagement can look like success while earnings stay low.Diagram: the Studio path to the view split, from Analytics to a single video. This is an illustrative diagram and mock-up, not a real YouTube Studio screenshot. Step 2: Find the Split in YouTube Studio Open YouTube Studio and go to Analytics in the left menu. Open the Content tab, then open a single video. Look at the Reach tab for how viewers found the video, and the Engagement tab for how long they stayed. Compare the public view count on the video page with the figures shown in Analytics, and note the date range at the top, because different ranges give different totals. Exact path: YouTube Studio > Analytics > Content > video > Reach / Engagement. Example: for one Short, Reach shows most viewers came from the Shorts feed, while Engagement shows many swiped away quickly. The two tabs together explain why public views are high and watch time is low. Common mistake: comparing a 28-day Analytics total with a lifetime public count. Always set the same date range before you compare two numbers.Diagram: the reported change, with views counted from the first frame. This is an illustrative diagram and mock-up, not a real YouTube Studio screenshot. Step 3: Understand the Reported Counting Change As reported, YouTube changed how views are counted. From 24 August 2026, a view is counted the moment a video starts to play, across all formats. For Shorts, the same first-frame approach was reported from 31 March 2025. Treat both dates as reported: this guide does not invent a threshold, such as a number of seconds, and you should check the official Help page for the current definition before you quote it. The reported change affects the public count. As reported, it does not change how earnings are worked out, and it does not change Partner Program eligibility. That is the point most summaries miss: a higher public count does not by itself mean higher earnings. Example: after the reported change, a long video shows more public views in its first week, but its earnings stay in line with engaged views. You would misread the video if you only watched the public count rise. Common mistake: quoting a seconds threshold you read in a comment or a blog post. No threshold is stated in this guide, because none was verified here. Check the official page instead.Diagram: reading numbers correctly, with traffic source, viewed versus swiped away, and retention. This is an illustrative diagram and mock-up, not a real YouTube Studio screenshot. Step 4: Read the Numbers Correctly Read four things together, not one number alone. First, traffic source: where did viewers come from, and did that source bring engaged viewers? Second, viewed versus swiped away: for Shorts, how many viewers stayed and how many swiped past? Third, retention: how long did viewers stay, on average, and where did they leave? Fourth, date range: are all the numbers from the same period? Example: two Shorts each show 5,000 public views. One keeps viewers for most of its length; the other loses most viewers in the first second. The first Short is the stronger video, even though the public counts match. Common mistake: comparing retention across videos of very different lengths. A 15-second Short and a 10-minute video will not hold viewers in the same way, so compare like with like.Diagram: why views and earnings differ, including short plays, replays, and filtered plays. This is an illustrative diagram and mock-up, not a real YouTube Studio screenshot. Step 5: Why Views and Earnings Differ Earnings follow engaged views, not every public view. Very short plays may count publicly but add little or nothing for earnings. Replays can add to the public count in ways that do not match earnings. Invalid or spam plays are filtered out, so they do not count for earnings even if a public total moved first. None of this means views were stolen; it means the two counts were never the same measure. Example: a video gets shared in a group chat and many people open it for a second and leave. Public views rise, but engaged views and earnings barely move, because those plays were too short to count as engaged. Common mistake: assuming every public view should pay the same. Earnings depend on engaged views, ad demand, and other factors, so the same view count can pay differently on different videos.Diagram: the 7-day view check, run once a week on the same day. This is an illustrative diagram and mock-up, not a real YouTube Studio screenshot. Step 6: Run a 7-Day View Check Once a week, on the same day, open Analytics and set the date range to the last 7 days. Write down four numbers for your newest video: public views, the Reach figure, the Engagement figure, and the traffic source that brought the most viewers. Compare them with the previous week, using the same date range and the same video. A single week will not tell you everything, but a repeated check shows whether a change is a trend or a one-off. Example: every Monday, you check last week's Short. Public views fell, but viewed-versus-swiped-away improved. The video is not failing; fewer people found it, but more of those who did stayed. Common mistake: changing the date range each week and then comparing the totals. Keep the range, the video, and the day the same, or the comparison means nothing. Quick ChecklistPublic views and engaged views kept separate. Studio split checked: Analytics > Content > video. Same date range used for every comparison. Traffic source, viewed versus swiped away, and retention read together. No seconds threshold quoted without an official source. Reported dates treated as reported, and checked officially. Short plays, replays, and filtered plays allowed for in the gap. 7-day check written down, same day each week.Frequently Asked Questions What is the difference between public views and engaged views? Public views are the count shown under a video. Engaged views are the views that count for earnings, after YouTube's checks. A play can add to one count without adding to the other. Did YouTube change how views are counted in 2026? As reported, from 24 August 2026 a view is counted the moment a video starts to play, across all formats, and Shorts were reported to use the same approach from 31 March 2025. Check the official Help page for the current definition, because this guide reports the change and does not set a threshold. Why do my views rise but my earnings stay flat? Earnings follow engaged views, not public views. Short plays, replays, and filtered plays can move the public count without moving earnings. Read the Studio split before you judge a video. How often should I check my view numbers? Once a week is enough for most creators. Use the 7-day check in Step 6, keep the date range and the day the same, and look for a trend over several weeks rather than reacting to one day. Sources — Check It Yourself Check the official pages below for the current definition, and re-check them before you quote a date or a rule. No official YouTube video was embedded in this post: no exact official video was verified live in this run, so none is shown here. YouTube Help: How engagement metrics are counted YouTube Help: Get started with YouTube Analytics
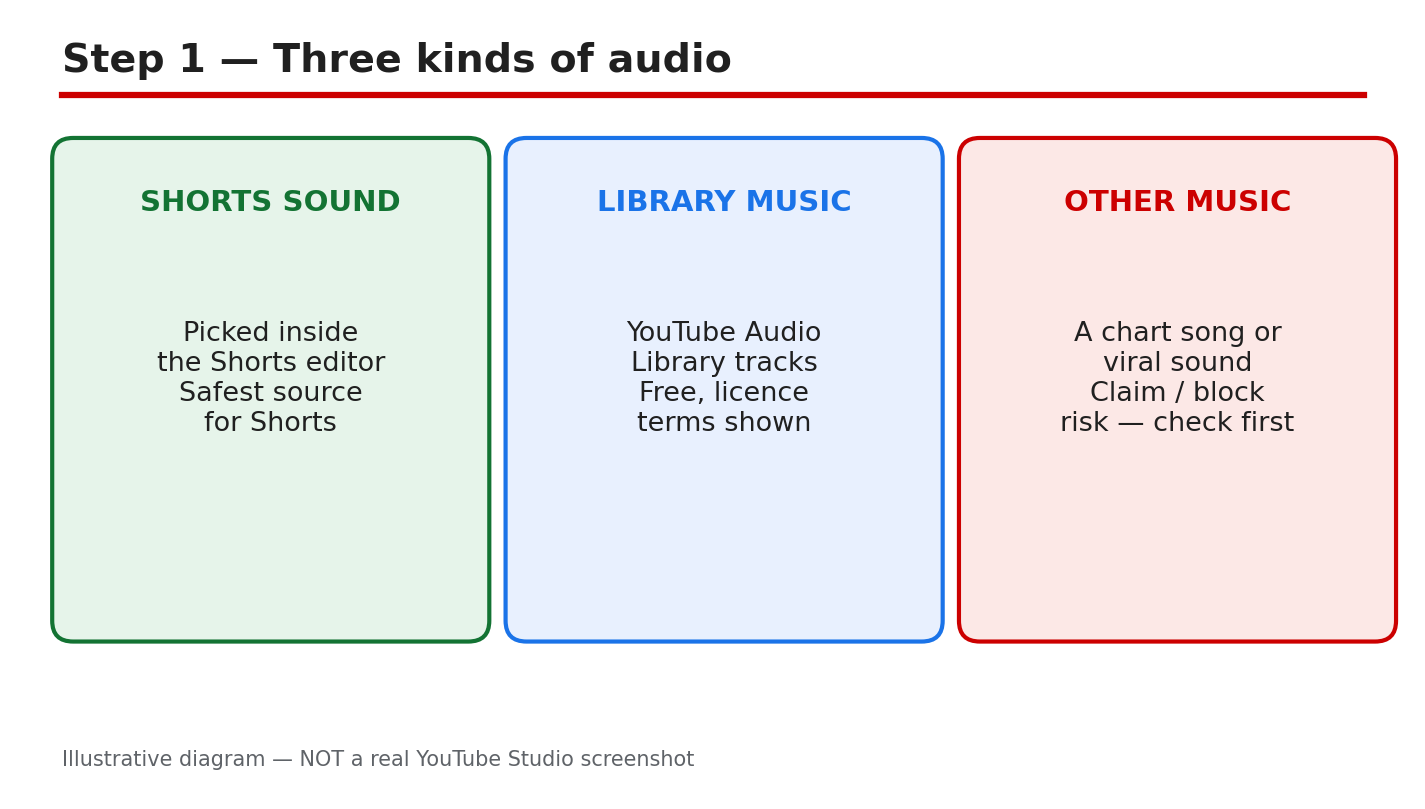
- CreatorPlaybook Team
- 29 Oct, 2026
Can You Use Trending Audio on YouTube? How to Use Popular Sounds Legally
A trending sound can make a Short take off, but the wrong audio can also bring a copyright claim, a muted video, or lost earnings. The sound itself is rarely the problem. The problem is where it came from, and whether you had a right to use that exact recording. This guide keeps the choice simple. Use audio from a source you can check, check it before you publish, and know what to do if a claim still arrives. Do not trust a comment that says a few seconds is always safe. What You Will LearnThe three audio sources on YouTube, and which one is safest for a Short. How to check a video in YouTube Studio before you publish it. What Content ID actually matches, and why short clips are not safe. Four checks to run on any sound you did not pick inside Shorts. What to do if a claim arrives, including when not to dispute it.Related reading: YouTube Copyright and Music: Safe Guide for CreatorsDiagram: three kinds of audio — a Shorts sound, an Audio Library track, and other music. This is an illustrative diagram and mock-up, not a real YouTube Studio screenshot. Step 1: Know the Three Audio Sources Start by naming where your sound came from. There are three common sources. First, a sound picked inside the Shorts editor, using the sound picker for Shorts. Second, a track from the YouTube Audio Library, where the licence terms are shown for each track. Third, any other music: a chart song, a viral sound, or a track from another app or website. The source decides how much checking you must do. Example: You add a dance sound from the Shorts sound picker to a 20-second Short. That is the lowest-risk route in this guide, because the sound was offered inside Shorts for Shorts. Common mistake: Downloading a chart song from another site and adding it to a Short, then assuming it is safe because it is popular. Popularity is not permission, and a claim can still follow.Diagram: the check-before-you-publish path in Studio, ending with the Audio Library licence terms. This is an illustrative diagram and mock-up, not a real YouTube Studio screenshot. Step 2: Check Before You Publish Do this check while the video is still a draft, not after it is public. Open YouTube Studio, then go to Content in the left menu, then look at the Restrictions column for your video. If a copyright claim is shown there, read what it says before you publish. Then, for any Audio Library track, open the track and read its licence terms, including whether attribution is required. Exact path: YouTube Studio > Content > Restrictions column > Audio Library licence terms. Example: A draft Short shows "Copyright claim" in Restrictions. You replace the song before publishing, instead of learning about the claim from a viewer comment a week later. Common mistake: Publishing first and checking later. Once a video is public, a claim can affect it while you are still deciding what to do.Diagram: Content ID matches the exact recording, not the melody, and credit does not remove a claim. This is an illustrative diagram and mock-up, not a real YouTube Studio screenshot. Step 3: Understand What Content ID Matches Content ID compares your video against reference recordings supplied by rights owners. It matches the exact recording, not just a melody, a cover, or a similar beat. There is no safe number of seconds. A very short clip can still match, and a longer clip does not become safe by being edited, sped up, or quieter. Adding credit in the description does not remove a claim. Credit can be polite, and it can be required by a licence, but it is not permission by itself. If the rights owner did not allow the use, a credit line will not change the match. Example: You use four seconds of a chart song as an intro and add the artist's name in the description. The clip can still be matched, because the recording, not the length or the credit, is what is checked. Common mistake: Believing that "a few seconds is safe." That idea is wrong, and it is the most expensive shortcut in this guide. Treat every second of someone else's recording as a possible match.Diagram: four safe-audio checks — source, licence, Restrictions, and territory. This is an illustrative diagram and mock-up, not a real YouTube Studio screenshot. Step 4: Run the Four Safe-Audio Checks Run these four checks on any sound you did not pick inside Shorts. First, source: can you name where the track came from, and does that source allow YouTube use? Second, licence and attribution: read the licence terms and add any required credit exactly as asked. Third, Restrictions: is the Restrictions column clear in Studio? Fourth, territory: is the video blocked in any country, and does that matter for your audience? Example: An Audio Library track requires the artist's name in the description. You paste the credit before publishing, and you keep a screenshot of the licence terms for your records. Common mistake: Checking only the first item, the source, and skipping the licence terms. A free track can still need attribution, and a missing credit can still cause trouble.Diagram: if a claim arrives, replace or erase the song, and dispute only with evidence. This is an illustrative diagram and mock-up, not a real YouTube Studio screenshot. Step 5: If a Claim Arrives, Fix It in Studio Open the claim in YouTube Studio and read it first. Note who claimed the audio, what was matched, and what the claim affects. In Studio, you can use Replace song to swap the audio for a track from the Audio Library, or Erase song to remove the claimed audio. Dispute a claim only if you own the rights or have clear permission, and you can show evidence. A dispute is a formal statement, not a message asking for a favour. If you do not have evidence, fix the audio instead and move on. Example: A claim names a song in the last ten seconds of a vlog. You use Replace song, check Restrictions again, and publish the fix without changing the rest of the video. Common mistake: Disputing every claim at once, including claims on music you know you do not own. A weak dispute wastes time and can damage your standing.Diagram: the safe-audio habit — pick, check, publish, and re-check. This is an illustrative diagram and mock-up, not a real YouTube Studio screenshot. Step 6: Build the Safe-Audio Habit Make the safe route the easy route. Keep a short list of sounds you have already checked, and reuse them. When you try a new sound, run the four checks before you edit around it. Check Restrictions before every publish, even for a Short you made in a hurry. The habit takes minutes, and it is what keeps a channel free of repeat claims. Example: Before a weekly Short, you open your checked-sounds list, pick one sound, and publish without a last-minute search for a trending song. Common mistake: Treating this guide as a one-time fix. Audio rules and claims change, and a sound that was fine last year may not be fine now. Re-check each time. Quick ChecklistSource named: Shorts picker, Audio Library, or other music. Restrictions column checked in Studio before publishing. Audio Library licence terms read, including attribution. No "few seconds is safe" assumption used. Territory blocks checked, if they matter for your audience. Claim read in full before any action is taken. Replace song or Erase song used before disputing. Checked-sounds list updated for the next video.Frequently Asked Questions Can I use a trending sound on YouTube? Yes, if the sound comes from a source that allows it, such as the Shorts sound picker or the Audio Library under its licence terms. A trending chart song from another site is the risky case: check it in Studio first, and expect a possible claim. Is five seconds of a song safe? No. There is no safe number of seconds, and Content ID can match a very short clip. Do not rely on a seconds rule; check the source and the Restrictions column instead. Does adding credit in the description remove a claim? No. Credit does not remove a claim, and it is not permission by itself. Add credit when a licence asks for it, but still check the source and Restrictions first. What should I do if a claim arrives? Read the claim in Studio, then use Replace song or Erase song to fix the audio. Dispute only if you own the rights or have clear permission and can show evidence. Sources — Check It Yourself Check the official pages below for the current rules, and re-check them before you rely on them, because YouTube's help pages change. No official YouTube video was embedded in this post: no exact official video was verified live in this run, so none is shown here. YouTube Help: Use music and sound effects from the Audio Library YouTube Help: How Content ID works
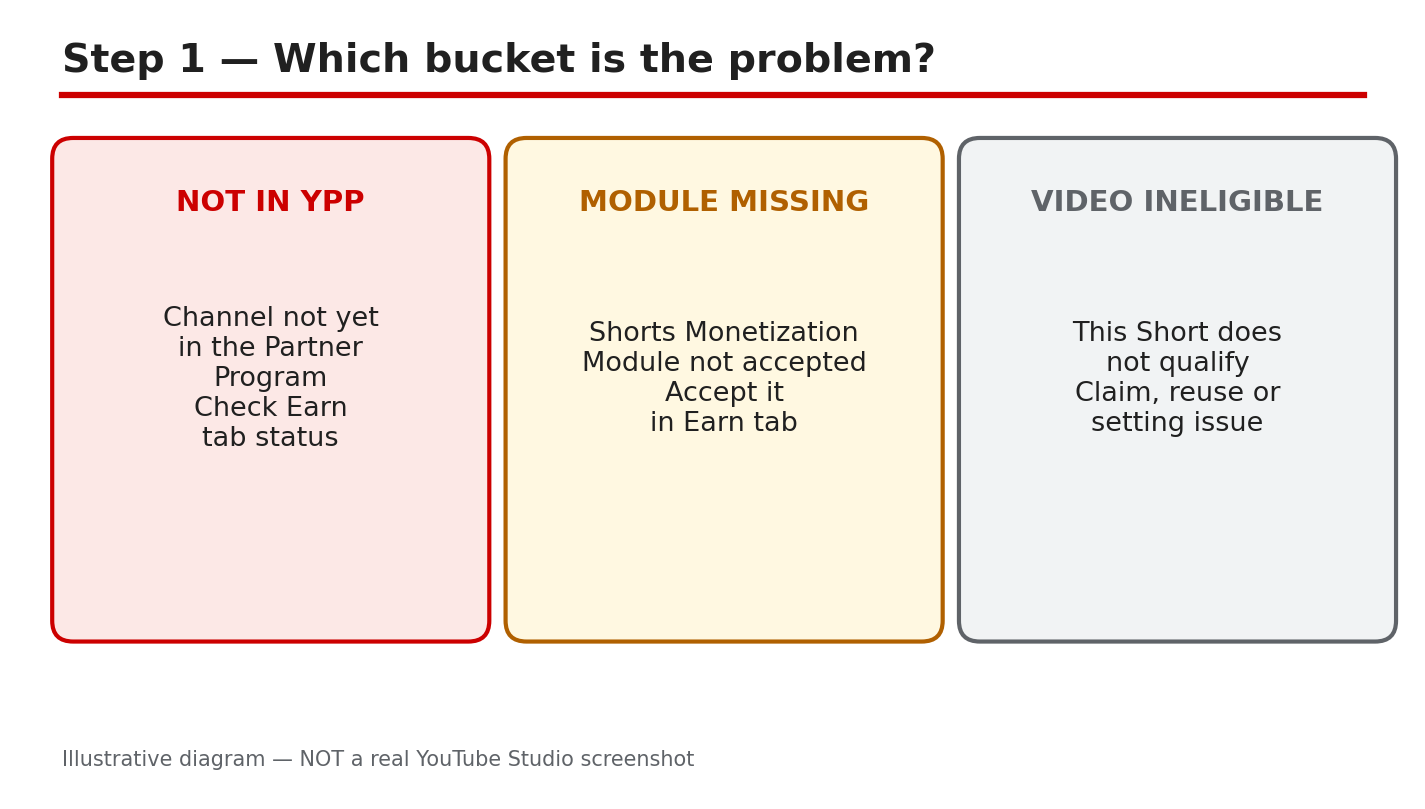
- CreatorPlaybook Team
- 29 Oct, 2026
YouTube Shorts Not Monetized? 7 Reasons and How to Fix Each One
Your Short is getting views, but the earnings stay at zero. That gap is frustrating, and it is also common, because views and earnings are not the same thing. For Shorts, YouTube pays on engaged views , not on every public view. A Short can collect thousands of public views and still earn nothing if the views are not eligible, if your account is not set up to earn, or if that Short itself is ineligible. This guide sorts the cause into three buckets, checks the Earn tab in order, and fixes each reason one at a time. The key fact first: Shorts revenue uses engaged views, and a Short can have public views without earning. Engaged views exclude views YouTube counts as ineligible, such as views on non-original Shorts and artificial or fake views. So a rising view count never proves a Short is monetized. The checks below start with your account, then the Short, then the settings, so you fix the cause instead of guessing. Related reading: YouTube Shorts Monetization and RPM Explained. What You Will LearnHow to sort a non-earning Short into one of three buckets in two minutes. How to check your Partner Program status, the Shorts Monetization Module, and AdSense in the Earn tab. Why reused content, inauthentic or template content, and music claims stop a Short from earning. How age restriction and Made for Kids settings change whether a Short can earn. What engaged views are, and why public views alone never prove earnings. A 14-day fix-and-recheck plan that starts with the Earn tab.Step 1: Sort the Cause into Three Buckets What to do: Before you change anything, name the bucket. Bucket A is account setup: you are not in the YouTube Partner Program, the Shorts Monetization Module is not accepted, or AdSense is not linked. Bucket B is the Short itself: reused content, inauthentic or template content, or a music claim. Bucket C is settings and eligibility: an age restriction, a Made for Kids setting, or views that are public but not engaged. The seven reasons in this guide sit inside these buckets: (1) not in the Partner Program, (2) the Shorts module not accepted, (3) an AdSense or payment problem, (4) reused content, (5) inauthentic content, (6) music or claimed content, and (7) a setting or ineligible views. Write down which bucket your case fits before you move on. Studio path: YouTube Studio > Earn. Read the status at the top of the tab first, then open one Short in YouTube Studio > Content and check its restrictions and details. Example: A creator sees 40,000 views and zero earnings on a Short made from a viral clip. The Earn tab shows the channel is in the Partner Program with the Shorts module accepted, so the cause is Bucket B, not setup. The fix is content, not settings. Common mistake: Re-uploading the same Short, changing the title, or deleting and reposting it. None of these fix an account or eligibility problem, and re-uploads can create a reused-content problem of their own.Illustrative diagram/mock-up of the three problem buckets: not in the Partner Program, the Shorts module missing, and the Short itself ineligible. This is NOT a real YouTube Studio screenshot. Step 2: Run the Earn Tab Check What to do: Open the Earn tab and answer three questions in order. First, does the tab show you are in the YouTube Partner Program? Second, does it show the Shorts Monetization Module as accepted? Only partners who have accepted that module can earn Shorts ad revenue from the Creator Pool. Third, is an AdSense account linked and showing as active? If any answer is no, stop here: no fix to a single Short can make it earn until the account side is right. Note the exact status wording for each item, because the wording tells you what to fix next. Studio path: YouTube Studio > Earn. Read the Partner Program status, the Shorts Monetization Module status, and the AdSense and payment section on the same tab. Example: A new partner sees Shorts views growing but no revenue. The Earn tab shows the Watch Page module accepted and the Shorts module still awaiting acceptance. Accepting the Shorts module, then reloading the tab to confirm it shows as accepted, is the whole fix. Common mistake: Assuming that joining the Partner Program turns on every kind of earning at once. Each module is separate, so Shorts earnings need the Shorts module accepted on its own.Illustrative diagram/mock-up of the five-step Earn tab check: Studio, Earn tab, status, Shorts module, and AdSense. This is NOT a real YouTube Studio screenshot. Step 3: Fix the Content Reasons What to do: If the Earn tab is in order, the Short itself is the next suspect. YouTube's Shorts monetization policies list non-original Shorts as ineligible for payments, including unedited clips from other people's movies or TV shows and re-uploads of other creators' content without original content added. Separately, the channel monetization policies treat repetitive or mass-produced content as "inauthentic content," renamed from "repetitious content" in a July 2025 update, and say it has always been ineligible for monetization. The third content reason is music: a Short that uses claimed music can have its revenue shared with or taken by rights holders, and Shorts over one minute that contain claimed content can be blocked from monetization. Check each Short against all three, and be honest about how much of it is truly yours. Studio path: YouTube Studio > Content > click the Short > Restrictions. Then open YouTube Studio > Content > click the Short > Details and review what the Short contains and which audio it uses. Example: A creator posts daily clips from a TV show with a caption added. The Shorts earn views but nothing else. The clips are non-original, so the views are ineligible. The fix is to publish Shorts built around the creator's own footage, commentary, or editing, and to leave the re-uploads behind. Common mistake: Adding a filter, a caption, or a few seconds of reaction to someone else's clip and calling it original. Small changes to another creator's work do not make a Short original, and templates used with no added value fall under the inauthentic-content policy.Illustrative diagram/mock-up of the three content reasons: reused content, inauthentic or template content, and a music claim. This is NOT a real YouTube Studio screenshot. Step 4: Re-check Membership, Module, AdSense, and Strikes What to do: Go back to the Earn tab and re-check four things as a set: Partner Program membership is active, the Shorts Monetization Module shows as accepted, AdSense is linked and in good standing, and no active strike or enforcement action is blocking monetization. A strike or a monetization suspension can stop earnings even when the module shows as accepted, so do not skip this check. If the Earn tab shows a message or a warning, read it in full and follow the action it names, whether that is an AdSense step, a review, or an appeal. Record the date you checked, so the 14-day re-check in Step 6 has a clear starting point. Studio path: YouTube Studio > Earn for membership, module, and AdSense status. Then YouTube Studio > Content > Restrictions, and the channel status shown in YouTube Studio > Settings > Channel, for strikes and standing. Example: A creator accepts the Shorts module but earnings stay at zero. The Earn tab shows AdSense as needing action because the payment account was never fully set up. Completing the AdSense setup, then confirming the tab shows it as active, restarts the chain. Common mistake: Checking only the module and ignoring AdSense. Earnings cannot be paid without a linked AdSense account in good standing, so a green module with a broken payment link still earns nothing.Illustrative diagram/mock-up of the four Earn-tab checks: membership, module, AdSense, and strikes. This is NOT a real YouTube Studio screenshot. Step 5: Check the Settings Reasons What to do: Two settings can quietly stop a Short from earning. An age restriction limits who can watch and can remove a Short from ad eligibility, and a Made for Kids setting changes the features and ads available on a Short. Check both on the Short itself, and set them correctly for what the Short actually is: do not mark adult content as Made for Kids, and do not leave an age restriction on a Short that does not need one. Then remember the views rule: only eligible engaged views count toward Shorts payments. Views that are fake, automated, or on ineligible content do not count, even if the public counter keeps rising. A Short with 100,000 public views and almost no engaged views will show little or no revenue, and that is the system working as designed, not a bug. Studio path: YouTube Studio > Content > click the Short > Details > Audience, for the Made for Kids setting; and the same Details page and the Restrictions column, for the age restriction. For views, open YouTube Studio > Analytics > the Short, and compare the public view count with the revenue shown in YouTube Studio > Analytics > Revenue. Example: A creator's Short shows 80,000 views and no earnings. Its details show it was wrongly marked Made for Kids, which limited its ads. Correcting the audience setting on future Shorts, and checking the current one, explains the gap without any change to the video itself. Common mistake: Judging monetization from the public view count alone. Public views include views that never count as engaged views, so the counter can climb while revenue stays at zero.Illustrative diagram/mock-up of the settings reasons: age restriction, Made for Kids, and public versus engaged views. This is NOT a real YouTube Studio screenshot. Step 6: Follow the 14-Day Fix-and-Recheck Plan What to do: Fix in order, then wait and re-check. Days 1 to 2: fix the Earn tab first — membership, Shorts module, AdSense, and any strike message. Days 3 to 7: publish only original Shorts, with your own footage, voice, or editing, and with music you have the right to use. Days 8 to 14: leave the new Shorts alone and let the data arrive. On day 14, open the Earn tab and the Revenue report in Analytics, and compare the new Shorts with the old ones. If new original Shorts show revenue and old ones do not, the cause was the content. If nothing shows revenue, repeat Steps 2 and 4 and read every message on the Earn tab before changing anything else. Studio path: YouTube Studio > Earn on day 1 and day 14; YouTube Studio > Content to publish; YouTube Studio > Analytics > Revenue on day 14 to compare Shorts. Example: A creator fixes an unlinked AdSense account on day 1, publishes four original Shorts in the next week, and on day 14 sees the new Shorts earning while the old re-uploads still show zero. The plan proved the cause and the fix in one cycle. Common mistake: Changing five things at once and checking after one day. Revenue data lags, and changing everything together hides which fix worked. One ordered cycle of 14 days gives a clean answer.Illustrative diagram/mock-up of the 14-day fix-and-recheck plan: fix the Earn tab, publish original Shorts, and re-check on day 14. This is NOT a real YouTube Studio screenshot. Checklist: Before You RecheckPartner Program membership shows as active in the Earn tab. Shorts Monetization Module shows as accepted. AdSense is linked and showing as active. No active strike or monetization message is waiting in the Earn tab. The Short is original, not a re-upload or a bare template. Audience and age-restriction settings are correct for the Short. 14 days have passed since the fix, and the Revenue report has been checked.Frequently Asked Questions Why does my Short have views but no revenue? Because Shorts pay on engaged views, not public views. Views on ineligible, non-original, or artificially boosted Shorts do not count, and earnings also need Partner Program membership, the accepted Shorts module, and linked AdSense. I am in the Partner Program. Why are my Shorts still not earning? Check the Shorts Monetization Module separately in the Earn tab. Joining the program does not accept every module, and Shorts revenue needs that module accepted, plus AdSense linked and no blocking strike or message. Can a music claim take all of a Short's revenue? A Short with claimed music can have its associated revenue shared with rights holders, and longer Shorts with claimed content can be blocked from monetization. Check the Restrictions column on the Short, and use music you have the right to use. Does marking a Short Made for Kids stop it earning? It changes the ads and features available, which can reduce or remove earnings on that Short. Mark the audience setting honestly for each Short, and check it in the Details page if revenue looks wrong. How long should I wait after a fix before judging it? Give it 14 days, then check the Earn tab and the Revenue report in Analytics. Revenue data lags, and one day is too soon to tell whether an account fix or a content change worked. Sources — Check It Yourself These official YouTube Help pages were opened and verified live while this guide was prepared. The Shorts page explains engaged views, ineligible Shorts views, and the Shorts Monetization Module. The monetization policies page covers reused and inauthentic content and the July 2025 rename of the repetitious-content policy to inauthentic content. Check the current wording before you act.YouTube Shorts monetization policies — YouTube Help YouTube channel monetization policies — YouTube HelpNo official YouTube video is embedded in this post. No exact official video URL was verified live during preparation, so none was embedded rather than guessing one.
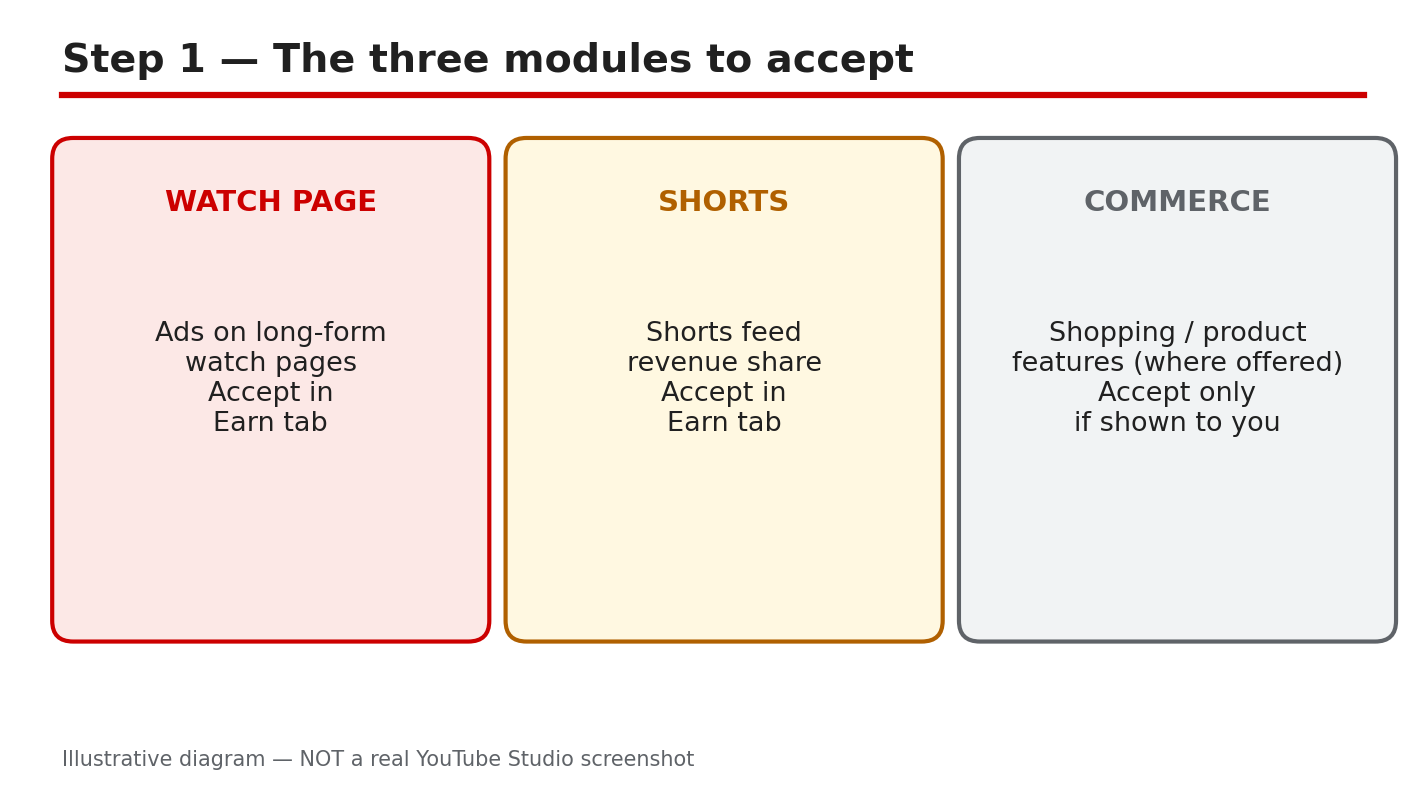
- CreatorPlaybook Team
- 29 Oct, 2026
YouTube Partner Program 2027 Terms: What to Accept by 31 January 2027
If you earn from YouTube, or plan to, a set of new Partner Program terms is coming, and the date to know is 31 January 2027. Reports say YouTube is asking creators to review and accept updated monetization terms, split into separate modules, and that earnings from any module you have not accepted could stop from 1 February 2027. This guide explains what to check in your own Earn tab, what the reported changes mean, and what to do before you tap accept. Do not rely on a screenshot or a summary alone: the deadline and the modules shown in YOUR Earn tab are the ones that apply to you. The important caution first. The new entry figures in Step 3 are reported by secondary sources, not verified from YouTube's official announcement during this guide's preparation. The official YouTube Help pages checked while preparing this guide showed a notice that Partner Program updates start on 1 February 2027, while the eligibility wording then visible still listed the older thresholds. Treat every new figure here as reported, and confirm it in your Earn tab and in the official terms before you act on it. Related reading: YouTube Monetization and the Partner Program Explained. What You Will LearnThe three monetization modules YouTube shows in Studio, and what each one covers. How to review and accept each module in the Earn tab, and where your deadline is shown. The reported new entry bar for new applicants, and why it is still unconfirmed here. What to check before you accept: terms, modules, country eligibility, and AdSense. What reports say happens if a module stays unsigned after 1 February 2027. A simple December-to-January plan for reading, accepting, and confirming.Step 1: Know the Three Modules What to do: Open YouTube Studio and look at the Earn tab as a set of separate agreements, not one switch. The official Help pages and reports describe three modules: Watch Page Monetization, which covers ads on watch pages and related revenue; Shorts Monetization, which covers Shorts feed ads and the Creator Pool revenue share; and Commerce Product, where shown, which covers shopping and product features. Not every channel sees every module, and the list you see depends on your country and your current status. Your job in this step is only to list what YOUR Earn tab shows, module by module, before you accept anything. Studio path: YouTube Studio > Earn. Read each module card or section shown. Note the module name, its status, and any date shown beside it. Example: A channel in the Partner Program sees Watch Page Monetization and Shorts Monetization as accepted, and no Commerce Product module, because that feature is not available in its country. The creator notes all three facts instead of assuming the missing module is a problem. Common mistake: Assuming one accept button covers everything. Each module is a separate agreement, so accepting one does not accept the others. Check each one.Illustrative diagram/mock-up of the three modules: Watch Page Monetization, Shorts Monetization, and Commerce Product. This is NOT a real YouTube Studio screenshot. Step 2: Review and Accept Each Module What to do: For each module shown, open its terms, read them, and accept only when you understand what you are agreeing to. The Earn tab shows the deadline that applies to your account, and that is the date that matters, not a date in a video or a post. Accept each module separately, and after each acceptance, reload the Earn tab and check that the module's status changed to accepted. Take a screenshot or write down the date and time of each acceptance, so you have your own record if a status ever looks wrong later. Studio path: YouTube Studio > Earn > click a module > review the terms > Accept. Repeat for each module shown. Then reload YouTube Studio > Earn and confirm each status. Example: A creator accepts Watch Page Monetization on 12 January, reloads the Earn tab, and sees its status change to accepted, while Shorts Monetization still shows as awaiting acceptance. The creator accepts that module too, rather than assuming the first acceptance covered both. Common mistake: Accepting in a hurry on a phone without reading, then discovering later that a module's terms changed how a revenue stream works. Read first, accept second, and confirm the status after.Illustrative diagram/mock-up of the five-step path to accept the terms in the Earn tab. This is NOT a real YouTube Studio screenshot. Step 3: Understand the Reported New Entry Bar What to do: This step is only about NEW applicants, and every figure in it is reported, not verified from the official announcement. According to secondary reports, new applicants would need 1,000 subscribers plus either 8,000 qualified watch hours in 365 days or 20 million qualified Shorts views in 90 days. That would double the older bar of 4,000 watch hours in 12 months or 10 million Shorts views in 90 days, which was the wording still visible on the official Help page checked during preparation. If you are already in the Partner Program, reports say you are grandfathered on entry, meaning you would not need to meet the new bar to stay in, but you must still accept the new terms. If you are applying for the first time, do not plan around these figures until you confirm them in your Earn tab and in the official terms. Studio path: YouTube Studio > Earn. Read the eligibility wording shown for YOUR account. Compare it with the terms text itself, not with a summary. Example: A channel with 1,000 subscribers and 5,000 watch hours reads a report saying the bar is now 8,000 hours. Instead of giving up, the creator opens the Earn tab, reads the eligibility wording shown there, and plans from that, because the reported figure is unconfirmed. Common mistake: Quoting the reported 8,000 hours or 20 million views as official fact, or telling other creators the old bar is gone. Until the terms in your Earn tab say so, call these figures reported.Illustrative diagram/mock-up of the reported new entry bar for new applicants, compared with the older bar. Figures are reported, not official. This is NOT a real YouTube Studio screenshot. Step 4: Check Four Things Before You Accept What to do: Before you accept any module, run four checks. First, read the terms themselves, including any section about revenue share, content rules, and how YouTube can change the terms. Second, check that every module shown in your Earn tab is listed, so you do not miss one. Third, confirm your country is eligible for each module you want, because availability varies by country. Fourth, confirm your AdSense account is linked and in good standing, because earnings cannot be paid without it. If any check fails, fix it before you accept, rather than accepting and hoping it sorts itself out. Studio path: YouTube Studio > Earn for the modules, the deadline, and the AdSense and payment section shown there. Read each module and the payment information on the same tab. Example: A creator reads the terms, finds the Shorts module shown but no Commerce Product module, confirms the channel's country is eligible for the first two, and checks that AdSense shows as linked. Only then does the creator accept, one module at a time. Common mistake: Accepting with an unlinked or troubled AdSense account, then wondering why earnings do not arrive. The terms and the payment link are both part of being ready.Illustrative diagram/mock-up of the four checks before you accept: read the terms, check all modules shown, confirm country eligibility, and confirm AdSense is linked. This is NOT a real YouTube Studio screenshot. Step 5: Know What Happens If You Do Not Accept What to do: Reports say the consequence of not accepting is simple and costly: from 1 February 2027, you would earn nothing from any module you have not signed. That means a channel that accepts Watch Page Monetization but not Shorts Monetization would, on the reported reading, keep watch-page earnings but earn nothing from Shorts. Reports also say Shorts Creator Pool revenue needs 10 million qualified Shorts views in the previous 90 days, which is a separate condition from accepting the module. Both points are reported, not verified from the official announcement, so confirm them in your Earn tab and in the official terms. Do not assume a grace period exists unless your own Earn tab says so. Studio path: YouTube Studio > Earn. Read the deadline and the consequence wording shown for each unsigned module. To see where you stand on Shorts views, check YouTube Studio > Analytics. Example: A creator accepts the Watch Page module in January but leaves the Shorts module unsigned, thinking it can wait. On the reported reading, Shorts earnings would stop from 1 February, even though watch-page earnings continue. The fix is to accept the Shorts module before the deadline shown in the Earn tab. Common mistake: Assuming earnings pause only briefly, or that old terms keep paying you. On the reported reading, unsigned means unpaid for that module, so treat the deadline as real.Illustrative diagram/mock-up of the reported consequences of not accepting: no earnings from unsigned modules, the Shorts Creator Pool condition, and checking the Earn tab. This is NOT a real YouTube Studio screenshot. Step 6: Follow the December-to-January Plan What to do: Use a short December-to-January plan. In December, read the terms for each module shown in your Earn tab, run the four checks from Step 4, and note the deadline shown in your Earn tab. In early January, accept each module, one at a time, and record the date of each acceptance. In late January, reload the Earn tab and confirm every module you need shows as accepted, and that your AdSense link still shows as active. If a module still shows as awaiting acceptance, do not leave it: re-open it, read any new message, and complete it before the deadline in your Earn tab. Studio path: YouTube Studio > Earn in December to read; the same tab in January to accept; and again in late January to confirm. Keep your own notes beside each check. Example: A creator reads the terms on 15 December, accepts both modules on 8 January, and checks the Earn tab on 28 January. Both show as accepted, so the creator starts February with nothing unsigned. Common mistake: Leaving acceptance to 31 January and hitting a problem, such as an AdSense check that needs days to resolve. Start in December so January has room for fixes.Illustrative diagram/mock-up of the December-to-January acceptance plan: read in December, accept in January, and confirm the accepted status. This is NOT a real YouTube Studio screenshot. Checklist: Before You AcceptEvery module shown in my Earn tab is listed, with its status noted. The deadline shown in MY Earn tab is written down. Terms read for each module I plan to accept. Country eligibility checked for each module. AdSense linked and showing as active. Each acceptance confirmed in the Earn tab after accepting.Frequently Asked Questions Do I need to accept the new terms if I am already in the Partner Program? Reports say yes. Existing partners are reported to be grandfathered on the entry bar, but they must still accept the new modules. Confirm the wording in your Earn tab. Is the new entry bar really 8,000 watch hours or 20 million Shorts views? That is the reported figure from secondary sources, not verified from YouTube's official announcement during this guide's preparation. The official Help page checked still showed the older 4,000-hour and 10-million-view wording. Confirm the current figures in your Earn tab and in the official terms. What happens if I accept one module but not another? On the reported reading, you would earn from the modules you accepted and nothing from the ones you did not, from 1 February 2027. Check the consequence wording in your Earn tab. I do not see the Commerce Product module. Is something wrong? Not necessarily. The modules shown depend on your country and status. If a module is not shown in your Earn tab, it may not be available to you. Do not try to accept a module you cannot see; work from what your Earn tab lists. Where do I confirm the real deadline? In your own Earn tab in YouTube Studio. That deadline, and the terms text shown there, override any date in a video, a post, or a report, including this one. Sources — Check It Yourself These official YouTube Help pages were opened and verified live while this guide was prepared. The Partner Program page showed a notice that updates start on 1 February 2027, while its eligibility wording then visible still listed the older thresholds, which is why new figures in this guide are presented as reported. Check the current wording in your Earn tab and in these pages before you act.YouTube channel monetization policies — YouTube Help YouTube Partner Program overview and eligibility — YouTube HelpNo official YouTube video is embedded in this post. No exact official video URL was verified live during preparation, so none was embedded rather than guessing one.
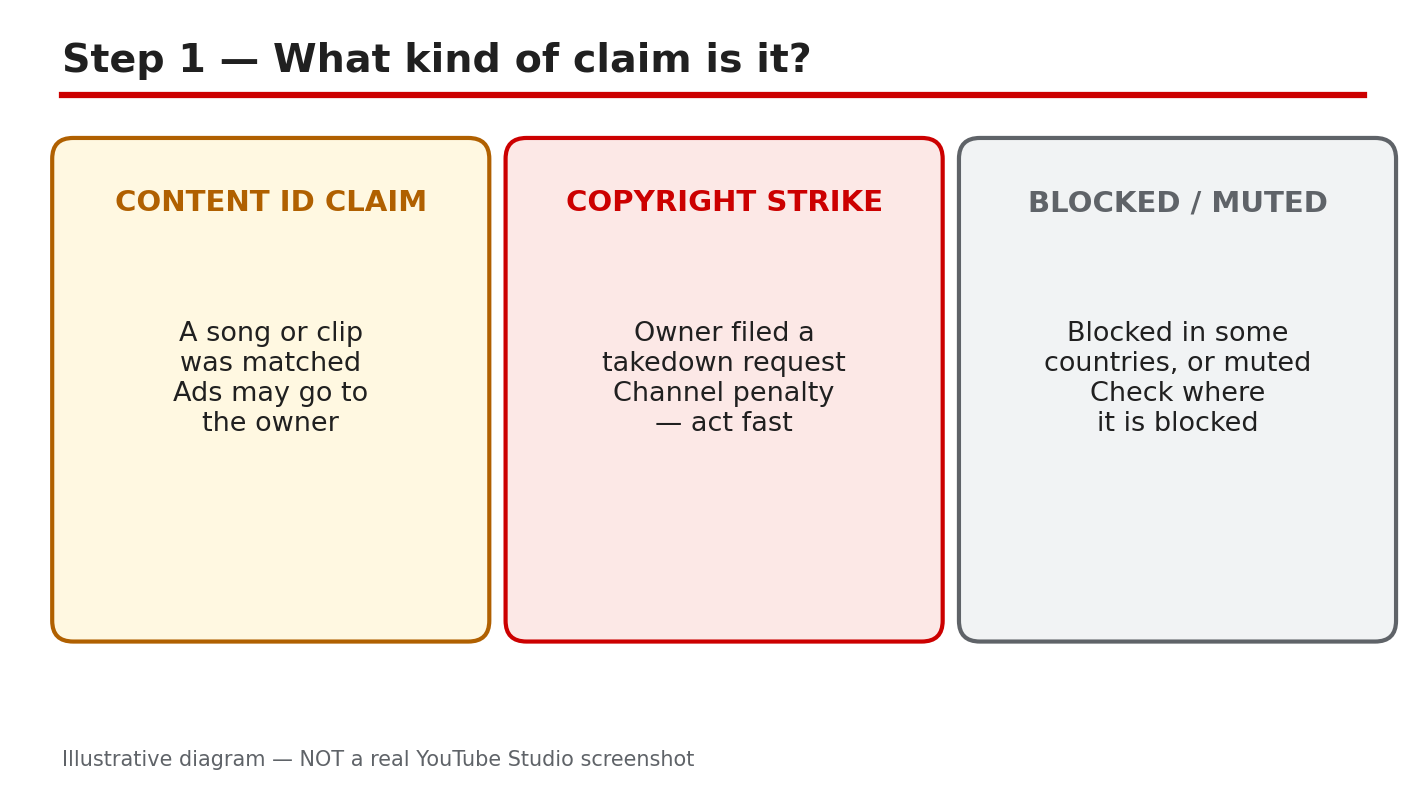
- CreatorPlaybook Team
- 29 Oct, 2026
YouTube Copyright Claim? How to Trim, Replace or Erase the Song — and When to Dispute
A copyright claim on a video you worked hard on can feel like a punishment, even when you did nothing dishonest. In most cases it is not. A Content ID claim usually means YouTube matched part of your video, often a song, to material a rights holder has registered, and the rights holder chose what happens next. The video may stay up, it may be blocked in some places, or its advertising revenue may go to the claimant. Your first job is not to panic, dispute, or delete. Your first job is to read the claim exactly as Studio shows it, because the right fix depends on what was claimed, where, and for how long. This guide walks through the checks and fixes in YouTube Studio in order. You will learn how to tell a claim from a strike, how to see the exact work, claimant, and territory, how the three Studio fixes differ, what to gather before you dispute, and how to choose between disputing, fixing, or leaving the claim alone. Read Studio's warning on the edit screen before you save any change. This is general information, not legal advice. If a dispute could affect important income or a channel you depend on, consider professional advice. Related reading: How to Protect Your Channel from Strikes, Copyright and Reused Content. What You Will LearnHow to tell a Content ID claim, a copyright strike, and a blocked or muted video apart. How to find the exact claimed work, claimant, and territory in Studio. What Trim out segment, Replace song, and Erase song each do, and what each costs. What evidence you need before a dispute is honest and safe to file. When to dispute, when to fix in Studio, and when to leave a claim alone. A calm seven-day plan for checking, deciding, and fixing one claimed video.Step 1: Identify the Claim Type What to do: Before you touch the video, name the problem correctly. A Content ID claim, a copyright removal request that creates a strike, and a restriction such as a block or mute are different systems, with different consequences. YouTube says copyright claims are different from copyright strikes and usually do not impact your channel or account, while a strike comes from a formal takedown request and is more serious. A claim can block, monetize, or track a video, and any of those actions can be geography-specific, so a video can be monetized in one country and blocked in another. Do not treat every notice as a strike, and do not treat a strike as a minor claim. Studio path: YouTube Studio > Content > Restrictions column. Hover over the entry for the video and read whether it says Claims, Copyright - Takedown, or another restriction. Click See details only after you have noted the label. Example: A tutorial shows "Claims" in Restrictions, plays normally for you, but earns no revenue for you. That is most likely a Content ID claim, not a strike. Common mistake: Deleting the video in a panic. Deletion removes your watch time and comments, and it does not teach you what caused the claim, so the next video can repeat it.Illustrative diagram/mock-up comparing claim types. This is NOT a real YouTube Studio screenshot. Step 2: Read the Exact Claim Details What to do: Open the claim details and write down four facts before you decide anything: the exact work named, who claimed it, what action applies, and where it applies. A claim can cover only a short segment, and different claimants can claim different segments or different countries. You may also have more than one claim on one video. If you do not know the claimant, do not assume the claim is invalid. YouTube notes that a claimant you do not recognize may be a collecting society or another authorized representative, so an unfamiliar name alone is not proof of error. Studio path: YouTube Studio > Content > Restrictions > click the claim > See details > Content used > See details. Read the Claimant, the content used, the policy, and the territory or territories shown. Example: The details name a 22-second song segment from 1:04 to 1:26, claimed by a music publisher, with a monetize policy in most countries and a block in two countries. The rest of the video is not claimed. Common mistake: Reading only the email subject or the first line in Studio. The email tells you a claim exists; only the details tell you whether a short trim will clear it or whether the whole audio track is involved.Illustrative diagram/mock-up of the five-step path to see a claim in Studio. This is NOT a real YouTube Studio screenshot. Step 3: Compare Trim, Replace, and Erase What to do: Once you know the claimed segment, compare the three Studio fixes by what they remove and what they leave behind. Trim out segment edits out just the claimed segment from your video, so both picture and sound in that part go. Replace song swaps claimed audio for other audio from the YouTube Audio Library, so the picture stays and new music plays instead. Erase song mutes the claimed audio; you can erase just the song, keeping dialogue and sound effects where possible, or mute all sound in the claimed segments. If done successfully, any of these options will automatically clear a copyright claim. Preview every edit before you save, and check that no claimed audio or picture remains, because a partial fix will not clear the claim. Studio path: YouTube Studio > Content > click the notice on the video > View details > find the relevant claim > Take Action > Trim out segment, Replace song, or Erase song. Then preview, adjust the start and end times if offered, and click Save, then confirm Trim, Save, or Mute as Studio asks. Example: A 22-second claimed song plays over a talking-head explanation. Trim would cut the explanation too, so Replace song is better: the explanation stays, with a quiet Audio Library track underneath, and the claim can clear. Common mistake: Choosing Erase song for a video where the song and the voice are mixed together, then discovering the voice is hard to hear. Preview with headphones, and use Mute all sound in the claimed segments only when losing all sound there is acceptable.Illustrative diagram/mock-up comparing Trim out segment, Replace song, and Erase song. This is NOT a real YouTube Studio screenshot. Step 4: Gather Evidence Before You Dispute What to do: A dispute is a statement that you have a right to use the material, or that the claim is wrong. Do not file one because you are annoyed, because the song is short, or because you gave credit. Credit alone does not replace permission. Gather real evidence first: your licence or written permission, with the track name, licensor, dates, and territory; proof that the work is yours, such as project files or an original recording; or a clear, specific fair-use explanation, such as commentary, criticism, or teaching that transforms the material, with timestamps showing what you added. Save screenshots and emails in one folder, and note the exact claim you are disputing. If you cannot point to ownership, a licence, or genuine fair-use grounds, do not dispute yet. Studio path: YouTube Studio > Content > Restrictions > See details > Content used > See details. Keep this page open while you check your licence file, so the work, claimant, and segment you are checking match the evidence in your hand. Example: A creator finds a licence email for a track, dated before publication, covering YouTube worldwide. That is evidence worth attaching or quoting accurately in a dispute. A screenshot of a download page with no licence terms is not. Common mistake: Disputing with "I found it on the internet" or "everyone uses it." Those are not grounds, and a weak dispute can waste time and damage your credibility with the claimant and with YouTube.Illustrative diagram/mock-up of the four questions to check before disputing a claim. This is NOT a real YouTube Studio screenshot. Step 5: Decide — Dispute, Fix, or Leave It What to do: Use a simple decision rule. Dispute only when you have genuine grounds and evidence from Step 4, and you can state them accurately. Fix in Studio when the claimed material is not essential, when a trim, replacement, or erase will leave a video you are still proud to publish, or when the claim blocks viewers you care about. Leave the claim and move on when the video stays viewable where your audience is, the revenue at stake is small, and a fix would damage the video more than the claim does. Leaving a claim is not ignoring it: note the claimant, segment, and decision, and change the music or clip source for your next video. Whatever you choose, read Studio's warning on the edit screen before saving. YouTube Help states that, starting in June 2025, once you save your edited video, you will not be able to revert the changes, and that as of June 2025 you are not able to undo changes made with the YouTube Studio Editor after saving. Keep a copy of the original video before you edit, if you may need it later. Studio path: YouTube Studio > Content > Restrictions > See details. For a fix, continue to Take Action > Trim out segment, Replace song, or Erase song > Preview > Save and confirm. For a dispute, use the dispute option shown for that claim, and enter only grounds and evidence you can support. Example: A creator with a licence disputes a song claim and keeps the video intact. The same creator leaves a different claim alone on an old video with 40 views, because replacing its music would take longer than the video is worth. Common mistake: Saving a Studio edit before previewing it, then finding the trim cut a key sentence. Preview first, because the saved edit cannot be reverted in Studio Editor.Illustrative diagram/mock-up comparing dispute, fix, and leave-it choices for a claim. This is NOT a real YouTube Studio screenshot. Step 6: Follow a Seven-Day Fix Plan What to do: Give the claim a short, dated plan so it does not drift. Day 1: record the claim type, work, claimant, segment, policy, and territory from Step 2. Day 2: check licences, permissions, and project files, and decide whether a dispute has genuine grounds. Day 3: choose dispute, fix, or leave, using Step 5, and write down why. Day 4: if fixing, preview the trim, replacement, or erase in Studio, and save a copy of the original first. Day 5: save the chosen fix, then wait for processing to finish; do not make other edits while the video is processing. Day 6: reload Studio, confirm the claim is gone or changed, and play the edited segment. Day 7: fix the cause for future videos, such as switching music libraries, shortening borrowed clips, or adding real commentary, and file your notes and licences together. Studio path: YouTube Studio > Content > Restrictions for the daily check; then Content > the video > View details > Take Action for the fix; then Content > Restrictions again on Day 6 to confirm the result. Example: On Day 4 a creator previews a replacement track, notices it starts too loudly, lowers it, previews again, and only then saves. On Day 6 the claim is gone and the explanation is intact. Common mistake: Making a second edit while the first is still processing, or judging the result before processing finishes. Wait, reload, and check the edited segment itself.Illustrative diagram/mock-up of the seven-day fix plan for a claim. This is NOT a real YouTube Studio screenshot. Checklist: Before You Save or DisputeClaim type named: Content ID claim, takedown, or another restriction. Exact work, claimant, segment times, policy, and territory written down. Fix compared: trim, replace, or erase, with the preview watched. Dispute evidence ready, or a clear decision not to dispute. Studio warning read, original video copied, and no other edit in progress. Result re-checked after processing, and the cause fixed for future videos.Frequently Asked Questions Does a copyright claim give my channel a strike? Not by itself. YouTube says copyright claims are different from copyright strikes and usually do not impact your channel or account. A strike follows a formal copyright removal request, which is a different process, so read the Restrictions label carefully. Can I use a song if I only use a few seconds? Short does not mean safe. Content ID can match a short segment, and a licence or genuine fair-use ground matters more than length. If you have no licence, replace the music or keep the segment out. Will trimming, replacing, or erasing always clear the claim? If done successfully, YouTube says any of these options will automatically clear a copyright claim. If claimed material remains, the claim will not clear, so preview the whole claimed segment and re-check after processing. Should I dispute if I gave credit to the owner? No, not on credit alone. Credit does not replace permission or a licence. Dispute only with ownership, a licence, or another genuine ground, with evidence you can show. Can I undo a Studio edit after I save it? YouTube Help states that, starting in June 2025, once you save your edited video, you will not be able to revert the changes, and you cannot undo Studio Editor changes after saving. Preview carefully and keep a copy of the original before you save. Sources — Check It Yourself These official YouTube Help pages were opened and verified live while this guide was prepared. Check the current wording in Studio and in these pages before you act, because policies and Studio screens can change.Learn about copyright claims — YouTube Help Remove copyright-claimed content from videos — YouTube HelpNo official YouTube video is embedded in this post. No exact official video URL was verified live during preparation, so none was embedded rather than guessing one. This guide is general information, not legal advice.
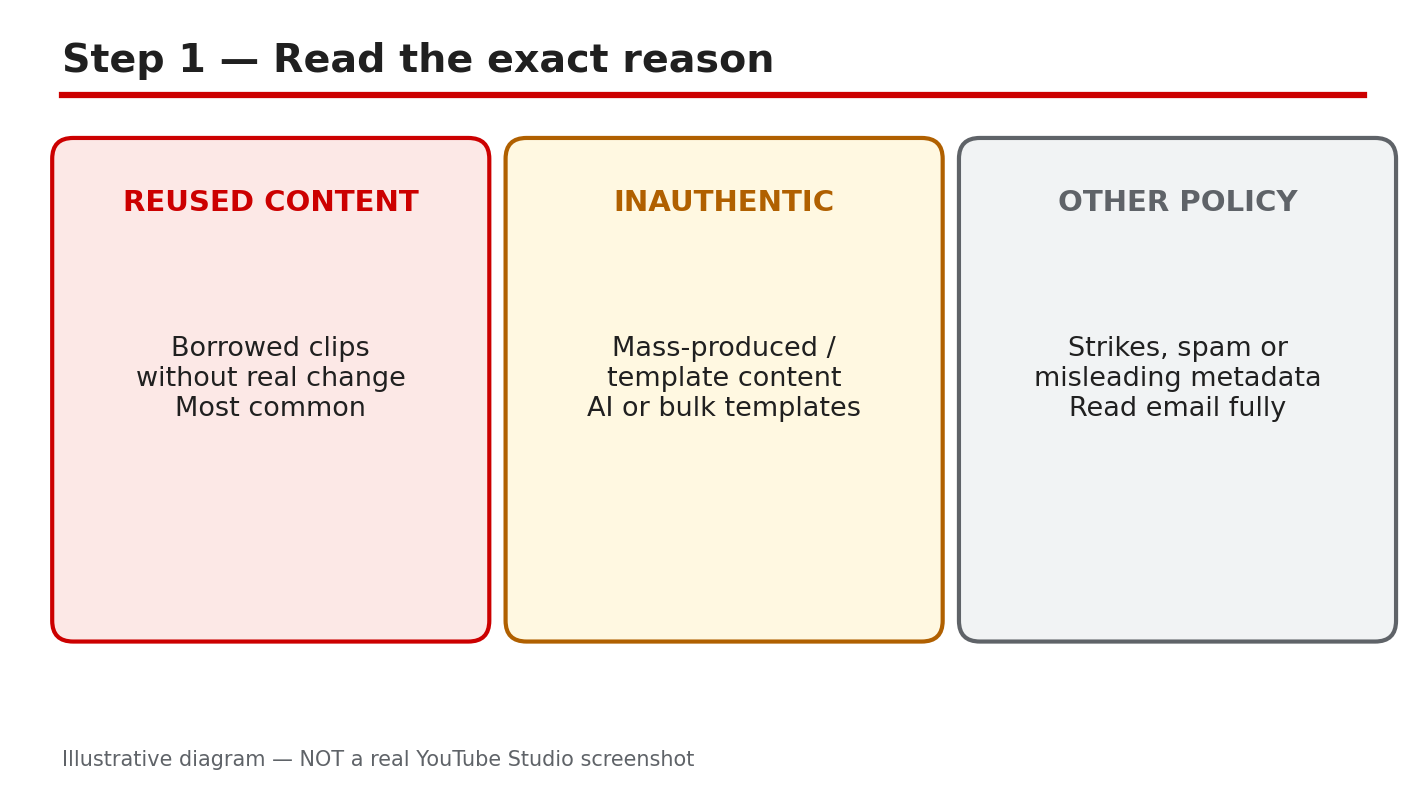
- CreatorPlaybook Team
- 28 Oct, 2026
YouTube Monetization Rejected? How to Fix Reused Content and Appeal the Right Way
A monetization rejection feels final, but it is a decision about your channel's content measured against YouTube's monetization policies — not a ban on your channel, and not a judgment on every video you will ever make. The way back is orderly: read the exact reason, clean up the content that caused it, and then appeal or reapply the right way, with original work to show. This guide works through six steps in order. Do them in order: the reason decides what to fix, the Earn tab shows whether you can appeal and by when, and the clean-up has to happen before you appeal — not after. What You Will LearnHow to read the exact rejection reason word-for-word — reused content, inauthentic content, or another policy. Where to find your status, the appeal or reapply option, and the exact deadline in the Studio Earn tab. How to clean up before you appeal: remove or unlist template and borrowed clips, and publish original videos. How to make an appeal video that shows your original work and explains how your videos were made. Which reapply waiting window applies to your case, and how to use the wait to rebuild.Step 1 — Read the Exact Reason Word-for-Word What to do. Open the rejection email YouTube sent and the notice in YouTube Studio, and read the reason exactly as written. Copy the words down. The reason is usually “reused content” or “inauthentic content,” but it can name another policy instead — and each reason points at a different fix. Do not guess from the subject line or from what happened to another creator. Note that YouTube renamed its “repetitious content” policy to “inauthentic content” in July 2025; the reused-content policy itself did not change. Studio menu path. Your rejection email, then YouTube Studio > Earn tab > read the status and reason shown for your channel. Example. An email says the channel was rejected for “reused content.” The creator lists the videos that are re-uploaded clips with no added commentary — those are the videos to deal with in Step 3, not the original videos. Common mistake. Appealing with a general message such as “please monetize my channel” without naming the reason or fixing anything. Reviewers decide against the policy named in the rejection, so a general plea gives them nothing new to review. Diagram 1: The exact rejection reason — reused content, inauthentic content, or another policy — read word-for-word before you act. Illustrative diagram/mock-up, NOT a real YouTube Studio screenshot.Quick ChecklistRead the exact rejection reason word-for-word. Check the Earn tab: status, appeal or reapply option, and exact deadline. Clean up before appealing: remove or unlist violating videos, and publish original videos. Make an appeal video that shows your original work, explains how your videos were made, and stays calm and factual. If the appeal fails, use only your case's reapply window — 30 days after a first rejection, 90 days if it is not your first rejected application or you previously re-applied — and check the exact window in the Earn tab. Rebuild with original videos on a schedule, then reapply when the window opens.Frequently Asked Questions What does "reused content" mean? YouTube's monetization policies require content to be original and authentic. Reused content means videos taken from elsewhere with little or nothing original added. In July 2025, YouTube renamed the "repetitious content" policy to "inauthentic content"; the reused-content policy itself did not change. How long do I have to appeal? Appeal within 21 days where the Earn tab offers an appeal. Check the exact deadline shown in the Earn tab for your channel. What if my appeal fails? Use the reapply window for your case: 30 days after a first rejection, or 90 days if it is not your first rejected application or you previously re-applied. Check the exact window in the Earn tab, and use the wait to publish original videos. Should I delete all my videos? No. Remove or unlist only the videos that break the policy named in the rejection, and add original videos that show your own work. Will I be monetized again if I reapply? There is no guarantee. Reapplying after the clean-up gives YouTube new original content to review; the decision is YouTube's. Sources — Check It YourselfYouTube channel monetization policies YouTube Partner Program overview & eligibility My channel was rejected for monetization FAQs Manage restrictions on your content Get started with YouTube Analytics No official video is embedded in this post: no official YouTube Creators or Creator Insider video matching this exact monetization-appeal topic was verified, so none was embedded rather than guessing at a link. All diagrams in this post are illustrative diagrams/mock-ups, NOT real YouTube Studio screenshots. Step 6 — Follow a Rebuild-Then-Reapply Plan What to do. Work in order over several weeks. First, finish the clean-up from Step 3. Then publish original videos on a regular schedule — videos you made yourself, showing your own work. Before each video goes up, check it against the monetization policies linked in the Sources section: is it original, and does it add something of your own? When your reapply window from Step 5 opens, check the Earn tab, confirm the channel shows original work, and only then reapply. Studio menu path. YouTube Studio > Content (publish original videos on a schedule) > Earn tab (check status and reapply when the window opens). Example. A creator publishes one original video a week for a month, reviews each one against the monetization policies, checks the Earn tab when the 30-day window opens, and reapplies only when the channel clearly shows original work. Common mistake. Reapplying on the first day the window opens with the same reused clips still public, or publishing nothing new during the wait. The window alone does not change the decision — the channel's content does. Diagram 6: Rebuild-then-reapply plan — publish original videos over several weeks, then reapply when the window opens. Illustrative diagram/mock-up, NOT a real YouTube Studio screenshot. Step 5 — If the Appeal Fails, Use the Reapply Window for Your Case What to do. Do not re-appeal the same way with the same channel. Read what the Earn tab shows for your case, and use only the reapply window that applies to you. YouTube's official guidance says: if this was your first application rejected, you can re-apply after a 30-day period; if it is not your first application to be rejected, or you have previously re-applied, you can try again after a 90-day period. Check the exact window and date in the Earn tab for your channel — that date is the one that counts. Use the waiting time to publish original videos, so the next review sees new original content. Studio menu path. YouTube Studio > Earn tab > status and reapply option > the exact reapply date shown for your channel. Example. A creator whose first application was rejected sees a 30-day window, spends the wait publishing original videos, and reapplies only after that window opens. A creator on a second rejection sees a 90-day window instead — the two cases are not the same number. Common mistake. Merging the two windows into one number — for example, telling every creator to wait 30 days — or reapplying immediately with the same reused clips still public. Both waste the next review. Diagram 5: Reapply waiting rule — the 30-day and 90-day windows are separate cases; use only the window the Earn tab shows for your channel. Illustrative diagram/mock-up, NOT a real YouTube Studio screenshot. Step 4 — Make an Appeal Video That Shows Your Original Work What to do. If the Earn tab offers an appeal, record a video that shows your original work and explains how your videos are made. Show yourself on camera, show your editing process or raw files, and explain in plain words what you create and how. Answer exactly what the appeal screen asks for, and keep the tone calm and factual. Upload or link the video exactly as the appeal screen instructs. Studio menu path. YouTube Studio > Earn tab > appeal option > follow the appeal screen's instructions for the appeal video. Example. A creator records a short video showing their editing timeline, the raw clips they filmed, and themselves explaining how each video is made — then submits it through the appeal screen. Common mistake. Sending an angry video with no evidence, or a long video that never shows the work itself. Reviewers need to see the original work, not hear a complaint about the decision. Diagram 4: Appeal video checklist — show your original work, explain how your videos were made, and include evidence. Illustrative diagram/mock-up, NOT a real YouTube Studio screenshot. Step 3 — Clean Up Before You Appeal What to do. Do the clean-up before you send any appeal. Go through your channel and remove or unlist the videos that match the reason in Step 1: template compilations, re-uploaded clips with nothing original added, and any other videos that break the policy named in the rejection. Then publish new, original videos that show your own work — your own recording, commentary, editing, or teaching. Appeal only after the channel itself shows the fix, because reviewers look at the channel as it is when they review it. Studio menu path. YouTube Studio > Content > select the videos > Visibility: Unlisted, or remove the video; then Content > Upload to publish original videos. Example. A channel rejected for reused content unlists five template compilation videos and publishes three original videos — the creator on camera, explaining each topic in their own words — before appealing. Common mistake. Appealing first and promising to clean up later, or leaving the violating videos public while appealing. The review is based on what the channel shows at review time, so an unchanged channel gives the reviewer the same answer. Diagram 3: Clean up before appealing — remove or unlist template and borrowed clips, and publish original videos first. The counts in the diagram are illustrative examples, not a required number. Illustrative diagram/mock-up, NOT a real YouTube Studio screenshot. Step 2 — Check the Earn Tab: Status, Appeal Option, and Deadline What to do. Open YouTube Studio and go to the Earn tab. Read three things: the monetization status shown for your channel, whether an appeal or reapply option is offered, and the exact deadline shown. Write the deadline down with the date. If an appeal is offered, you can normally appeal within 21 days of the decision — but the date shown in the Earn tab for your channel is the one that counts, so follow that date, not a date you read elsewhere. Studio menu path. YouTube Studio > Earn tab > monetization status > appeal or reapply option and the deadline shown. Example. The Earn tab shows the channel as not approved, with an appeal button and a deadline 21 days out. The creator notes the date, finishes the clean-up in Step 3, and appeals with five days to spare. Common mistake. Missing the deadline because the appeal was left until later, or hunting for an appeal form when the Earn tab offers no appeal. If no appeal is offered, use the reapply route in Step 5 instead of looking for a hidden appeal form. Diagram 2: The Earn tab — status, appeal or reapply option, and the exact deadline shown. Appeal within 21 days where the Earn tab offers an appeal. Illustrative diagram/mock-up, NOT a real YouTube Studio screenshot.
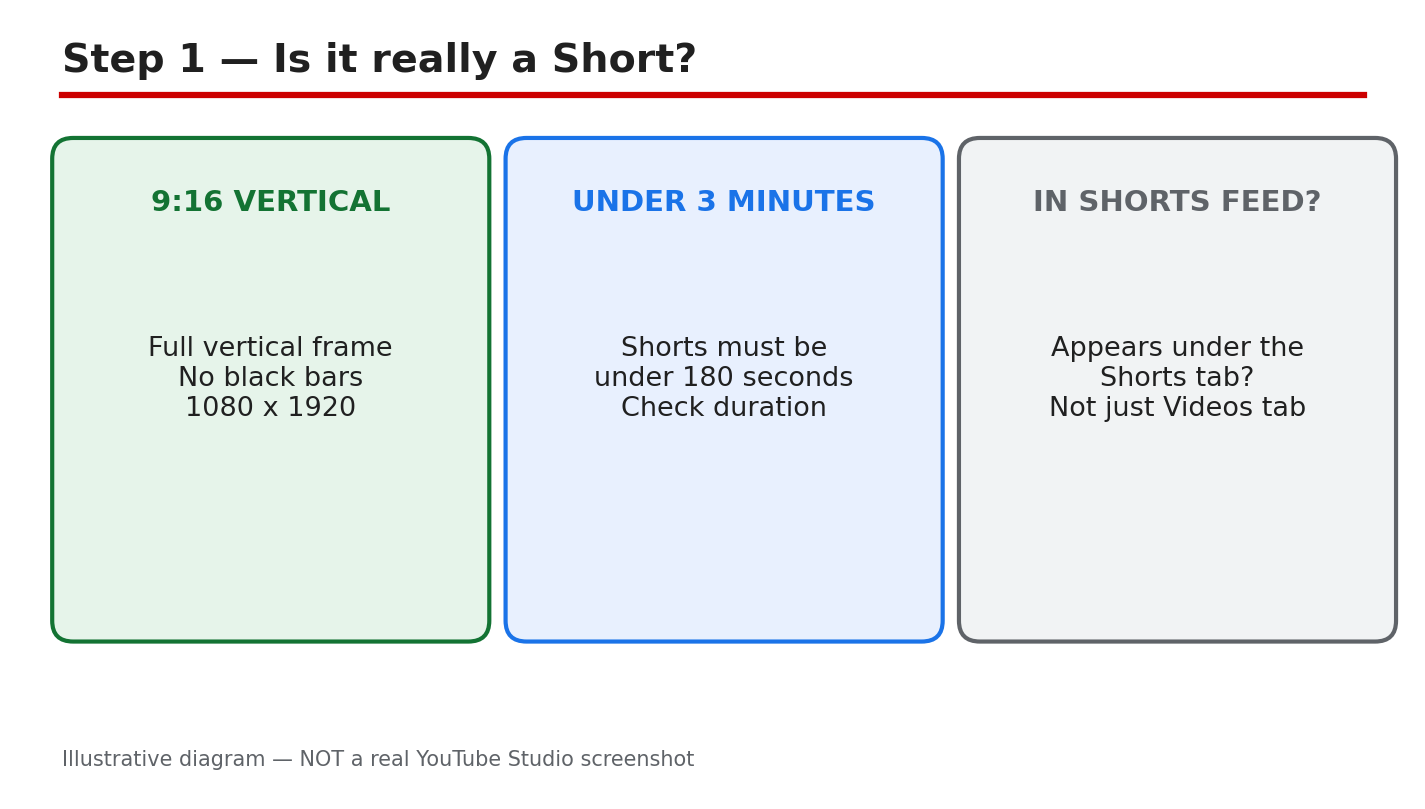
- CreatorPlaybook Team
- 28 Oct, 2026
YouTube Short Stuck at 0 Views? 6 Checks for Format, Restrictions, and Upload Spacing
A Short stuck at 0 views feels different from a long video with low views. A Short lives or dies in the vertical feed, and the first checks are not about the idea — they are about whether the file is a Short at all, whether anything is restricting it, and whether it was given a fair chance. This guide works through six checks in order, from format to restrictions to upload spacing, so you fix the real cause instead of deleting and re-uploading the same file and hoping. One thing to say plainly first: there is no Studio page that confirms a Short is being suppressed because of the October 1 original-content change. YouTube announced a recommendation change that gives more reach to original content in Shorts, but it provided no Studio indicator, threshold, or status that labels a single Short as suppressed. So do not spend your time hunting for a suppression badge that does not exist. Check what Studio actually shows — the format, the Restrictions column, the visibility — and fix what you can see. What You Will LearnHow to confirm a video is really a Short: vertical format, under 180 seconds, listed under the Shorts tab. Where to check restrictions, claims, strikes, and visibility in YouTube Studio. Why new channels should space Shorts out and judge a Short only after 24–48 hours. The four 0-view checks: format, claimed audio, duplicate clip, and age restriction or Made for Kids. Why deleting and re-uploading the identical file blindly does not help — and what to do instead.Step 1 — Confirm It Is Really a Short What to do. Open the video in YouTube Studio and check three things: the shape, the length, and where it appears. A Short must be vertical or square, up to three minutes long, and it should appear under the Shorts tab in Studio. If any of the three fails, the video is treated as a regular video, not a Short, and it will not enter the Shorts feed. Studio menu path. YouTube Studio > Content > click the video > check the format and duration shown, then Content > Shorts tab to confirm it is listed there. Example. A 45-second clip exported at 1080 x 1920 (9:16) appears under the Shorts tab. The same clip exported at 1920 x 1080 (16:9) with black bars does not — it is a regular video, however short it is. Common mistake. Uploading a landscape video with black bars top and bottom and calling it a Short. The frame must actually be vertical or square; bars do not count. Re-export the clip in 9:16 and upload it again as a new file only after the other checks below are done. Diagram 1: The three Shorts format checks — 9:16 vertical, under 180 seconds, and listed under the Shorts tab. Illustrative diagram/mock-up, NOT a real YouTube Studio screenshot.Step 2 — Check the Restrictions Column What to do. In Studio, open the Content list and look at the Restrictions column for the Short. That column flags copyright issues, and it is also where you spot whether a video has a claim or a strike. Then open the video's details and confirm the Visibility is set to Public. A Short set to Private or Unlisted cannot gather views in the feed, and a restriction can hold it at 0. Studio menu path. YouTube Studio > Content > find the Short > read the Restrictions column > click the video > Visibility: Public. Example. A Short using a popular song shows a copyright claim in the Restrictions column. The claim does not always block the video, but a claim that blocks or mutes the audio in some regions can leave the Short with no reach. Checking the column first tells you whether audio is the problem before you change anything else. Common mistake. Assuming the Short is Public because it was uploaded that way. Check it again — scheduled, unlisted, and private uploads are easy to confuse, and a Short left Unlisted after a scheduled publish will sit at 0 views with no error message. Diagram 2: The Restrictions column check — Studio, Content, Restrictions column, claim or strike, and Visibility Public. Illustrative diagram/mock-up, NOT a real YouTube Studio screenshot.Step 3 — Space Your Uploads on a New Channel What to do. If your channel is new, publish Shorts one at a time with hours between them, and judge each Short only after 24–48 hours. A brand-new channel has no watch history for YouTube to learn from, so early Shorts often start slowly. Spacing uploads gives each Short its own first day in the feed instead of making them compete with each other. Studio menu path. YouTube Studio > Content > check the publish dates and times of your recent Shorts; plan the next upload at least several hours after the last one, or the next day. Example. A new channel publishes one Short on Monday morning and one on Tuesday morning. Both get their first 24 hours alone. The same channel publishing ten Shorts in one hour on Monday sees most of them stall, because no single Short gets a clean test. Common mistake. Uploading a backlog of ten Shorts in one sitting to “catch up,” then concluding the channel is broken when none of them move. The burst, not the content, is the likely cause — spread the same videos out instead. Diagram 3: A spaced upload example — one Short per day across a week, compared with many Shorts published in one hour. Illustrative diagram/mock-up, NOT a real YouTube Studio screenshot.Step 4 — Run the four 0-view checks What to do: Work through four checks in order: (1) format — confirm Step 1 again on the uploaded file, not on the project file in your editor; (2) claimed audio — check whether the music in the Short is claimed by someone else; (3) duplicate clip — ask whether this exact clip is already posted elsewhere unchanged; (4) audience settings — check age restriction and the Made for Kids setting. Studio menu path: YouTube Studio > Content > Restrictions column, then click the video and open Details > Show more to check the Audience setting. The Restrictions column is where a copyright claim, an age restriction, or a Made for Kids setting shows up for that video. Example: A creator uploads a Short with a trending song. The Restrictions column shows a copyright claim on the audio. The fix is not to delete and re-upload the same file. It is to replace the claimed audio with original audio in a new test upload, as described in Step 5. Common mistake: Re-uploading the identical clip because “everyone posts this clip.” A clip that duplicates content already on YouTube, with nothing original added, can sit at 0 views and can also cause reused-content trouble later. Add your own recording, commentary, or edit before you test again. Diagram 4 — Illustrative diagram: the four 0-view checks. This is an illustrative diagram/mock-up, NOT a real YouTube Studio screenshot.Step 5 — Do not delete and re-upload the identical file blindly What to do: Fix the problem you found in Steps 1–4 first, then run ONE fresh test. Change the file itself: re-export in vertical format, replace claimed audio with original audio, add your own recording or commentary to a borrowed clip, or correct the audience setting. Then upload that fixed version as a new Short, spaced out as described in Step 3. Studio menu path: YouTube Studio > Content > Restrictions column on the new upload, and check Visibility: Public. Compare the new upload's Restrictions and Visibility entries with the old one, and write down the view count after 24–48 hours for each. Example: A Short with claimed audio is fixed by swapping in original audio. The creator uploads the fixed version once, the next morning, and waits 48 hours before judging it — instead of deleting and re-uploading the same claimed-audio file three times in one evening. Common mistake: Deleting a 0-view Short and re-uploading the identical file, again and again, hoping for a different result. The file has not changed, so the checks in Steps 1–4 give the same answer — and a burst of identical uploads looks like spam. Fix first, test once, then judge. Diagram 5 — Illustrative diagram: fix first, then one fresh test. This is an illustrative diagram/mock-up, NOT a real YouTube Studio screenshot. Step 6 — Follow a spaced retest plan What to do: Run one spaced test over seven days. Day 1: upload ONE fixed Short, using the fix from Step 5. Days 2–3: upload nothing new; let the first test run. Day 4: check the view count after 24–48 hours and write it down. Day 5: if the first test is still at 0, upload ONE more fixed Short with a different fix from Step 4. Day 7: compare the two tests and keep the version that moved. Studio menu path: YouTube Studio > Content, filter to Shorts and sort by date to see each test upload; then open Studio > Analytics > Content to check Shorts views for each video. Record the numbers in a notebook or a simple sheet so you compare facts, not feelings. Example: A creator uploads a fixed Short on Monday morning. On Wednesday it shows 12 views. The next Monday, a second fixed Short with original audio is uploaded the same spaced way, and by Wednesday it shows 40 views. The spaced plan made the comparison possible. Common mistake: Judging a Short after two hours and uploading five more the same day. New Shorts can take time to enter the feed, and a same-day burst hides which fix, if any, worked. Wait the full 24–48 hours before you judge each test. Diagram 6 — Illustrative diagram: the spaced retest plan. This is an illustrative diagram/mock-up, NOT a real YouTube Studio screenshot.Quick checklistConfirmed the file is vertical or square, under 180 seconds, and appears under the Shorts tab. Checked Studio > Content > Restrictions column: no claim, strike, or age restriction, and Visibility is Public. Spaced uploads: one at a time, hours apart, and judged only after 24–48 hours. Ran the four 0-view checks: format, claimed audio, duplicate clip, and Made for Kids / age restriction. Fixed the problem first, then ran one fresh test — did not delete and re-upload the identical file. Followed the 7-day spaced retest plan and wrote down the numbers.Frequently asked questions Why is my Short still at 0 views after a few hours? New Shorts can take time to enter the feed, so judge only after 24–48 hours. If it is still at 0 after that, work through the format and Restrictions checks in Steps 1, 2, and 4. Did the October 1 original-content change suppress my Short? There is no Studio page that confirms suppression by the October 1 original-content change for a specific video. Check the concrete items in this guide — format, restrictions, claims, and spacing — instead of assuming a penalty. Should I delete my Short and upload it again? Not the identical file. Fix the problem first — format, audio, duplicate clip, or audience setting — and then upload one fresh test, spaced out as described in Step 5. How long should I wait before I judge a test? Wait 24–48 hours for each test upload, and run the spaced plan in Step 6 over seven days so each fix gets a fair comparison. Sources — Check It Yourself Only official YouTube Help pages, opened and checked for this post:Create YouTube Shorts — YouTube Help Understand three-minute YouTube Shorts — YouTube Help Manage restrictions on your content — YouTube Studio Help Change video privacy settings — YouTube Help Get started with YouTube Analytics — YouTube HelpRelated reading, specific to Shorts views dropping after upload: YouTube Shorts Views Dropped? How to Check What Changed. No video is embedded in this post. No official YouTube Creators or Creator Insider video matching this exact topic was verified, so none was embedded rather than guessing at a link.
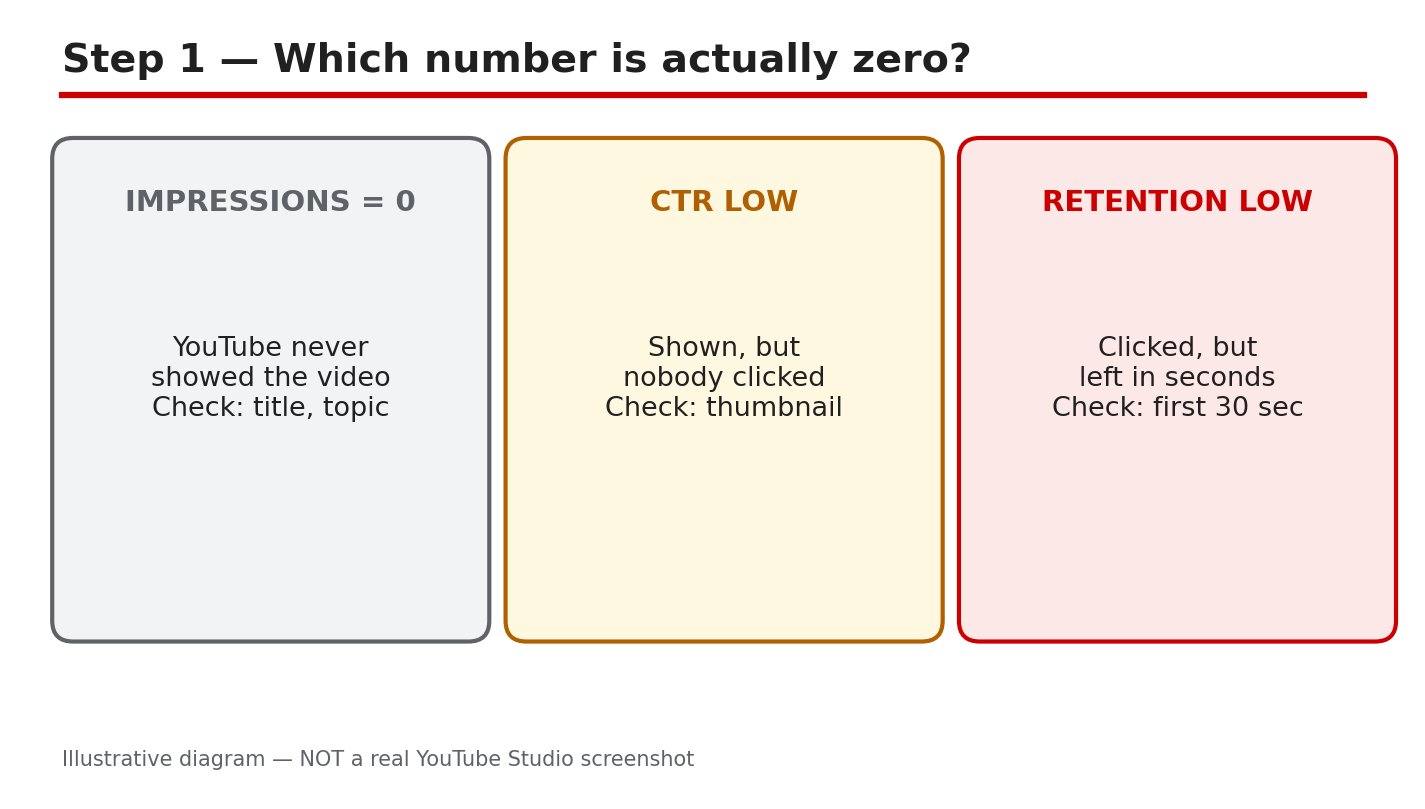
- CreatorPlaybook Team
- 28 Oct, 2026
0 Views on YouTube? How to Diagnose No Impressions, Low CTR, or Low Retention in 6 Steps
Zero views can feel like a dead end, but it is usually a clue. Views are the last number in a chain: YouTube shows your video (impressions), people click (click-through rate, or CTR), and people stay (audience retention). When the final number is zero, one of those earlier links is broken. This guide helps you find which one, fix the right thing, and test it once — instead of guessing, re-uploading the same file, or changing five things at once. The diagram above sums up the three very different problems that all look like “0 views.” Keep it in mind as you work through the steps: the fix for “YouTube never showed it” is not the fix for “people saw it and did not click.” What You Will LearnHow to tell whether your problem is impressions, CTR, or retention. Where to find each number in YouTube Studio, and how to read the three together. How to rule out the simple causes first: privacy, restrictions, claims, and a brand-new channel. How to change one thing, wait long enough to judge it, and record what happened. How to run a clean 7-day retest without deleting and re-uploading blindly.Step 1: Name Which Number Is Zero What to do: Before you touch the title, the thumbnail, or the video, write down which of the three numbers is the problem. There are three different “zero” situations, and each points to a different fix. First, is the video actually getting shown at all? Second, if it is shown, are people clicking? Third, if people click, are they staying past the opening seconds? Studio menu path: YouTube Studio > Analytics > Content > click the video > Reach tab (impressions and CTR) and Engagement tab (retention). You do not need the full Analytics tour yet — Step 2 walks the path in detail. For this step, you only need to know which screen holds which number. Example: A new creator uploads a how-to video. After two days it shows 0 impressions, 0 views, and no CTR. Nothing was clicked because nothing was shown. That is a discovery or settings problem, not a thumbnail problem. In contrast, a video with 2,000 impressions, a 1.5% CTR, and 30 views has a packaging problem: people saw it and mostly scrolled past. A third video has 3,000 impressions, a healthy 8% CTR, but viewers leave after 12 seconds. That is an opening-hook problem. Common mistake: Treating every 0-view video the same way. Changing the thumbnail when impressions are 0 cannot help, because nobody has seen the thumbnail. Likewise, re-uploading the same video when retention is the problem only restarts the same opening that viewers already left. Caption: Diagram 1 — The three different “0 views” problems: no impressions, low CTR, and low retention. Illustrative diagram and mock-up only; NOT a real YouTube Studio screenshot.Step 2: Open the Right Screen in YouTube Studio What to do: Open the video-level Analytics for the exact video, not the channel-level overview. The channel overview mixes all your videos together and hides the problem with one video. On the video’s own Reach tab you can see how many times YouTube showed that video, and what share of those showings turned into clicks. Then check the Engagement tab for how long people stayed. Studio menu path: YouTube Studio > Analytics > Content > click the video title or thumbnail > Reach tab for impressions and impressions click-through rate, and Engagement tab for average view duration and audience retention. Give the numbers a few days to settle for a new upload before you judge them. Example: A creator opens the Reach tab for a new tutorial and sees 40 impressions and 0 views. The video was shown 40 times and nobody clicked — a small sample, but the next question is whether impressions keep growing. Another creator sees 12,000 impressions, a 2% CTR, and 240 views: the video is being shown widely, but the packaging is not earning clicks. Both creators are looking at the same screen; only the numbers differ. Common mistake: Judging a video from the channel dashboard, or from the video’s public view count alone. The public count tells you the result; the Reach and Engagement tabs tell you where the chain broke. Also, do not compare a 1-day-old video with a 1-year-old video — older videos have had far more time to collect impressions. Caption: Diagram 2 — The Studio path to video-level Analytics: Studio, Analytics, Content, video, Reach tab. Illustrative diagram and mock-up only; NOT a real YouTube Studio screenshot.Step 3: Read the Three Numbers Together What to do: Put impressions, CTR, and retention side by side and match the pattern to a cause before you change anything. Each pattern has a different fix, and the diagram above shows the three most common ones. Write the three numbers down with the date, so you can compare like with like after your test in Step 5. Studio menu path: YouTube Studio > Analytics > Content > click the video > Reach tab (impressions and CTR) and Engagement tab (retention). Read both tabs for the same date range, and use the same range again when you retest. Example: Pattern one: 0 impressions. YouTube is barely showing the video at all, so the title and thumbnail cannot be the problem yet — check Step 4 first. Pattern two: 5,000 impressions, 1% CTR, 40 views. The video is shown, but almost nobody clicks: the packaging (thumbnail and title) is the likely problem. Pattern three: 4,000 impressions, 9% CTR, but average view duration of 20 seconds on a 10-minute video, with a sharp drop in the first 30 seconds. People clicked, then left: the opening hook is the likely problem. Common mistake: Fixing the thumbnail when retention is the problem, or re-editing the opening when CTR is the problem. Each fix costs time and resets your test. Name the pattern first, then fix only what matches it. Also, do not judge CTR from a tiny sample: 2 clicks from 10 impressions is not a reliable 20% CTR. Caption: Diagram 3 — Reading impressions, CTR, and retention together: low CTR points to packaging, low retention points to the opening hook, and 0 impressions points to discovery or a setting. Illustrative diagram and mock-up only; NOT a real YouTube Studio screenshot.Step 4: Rule Out the Simple Causes First What to do: Before you blame the algorithm, check the four simple causes in the diagram above. Each one can produce 0 views on its own, and each has a plain fix. Work through them in order and fix any problem you find before you judge the video’s performance. Studio menu path: YouTube Studio > Content > find the video > check the Visibility column (Public, Unlisted, or Private) and the Restrictions column. For claims and strikes, check YouTube Studio > Content > Restrictions, and read any notice or email YouTube sent about the video. For privacy, open the video’s details in Studio > Content > click the video > Visibility. Example: A creator is sure a video is “suppressed” until they open Content and see Visibility: Unlisted — the video was never public. Another creator finds a Content ID claim on the audio that limits where the video can be shown. A third creator, three days into a brand-new channel with two uploads, has 0 impressions on both: the channel has almost no history yet, so slow early discovery is expected, not proof of a penalty. Fix the setting, then judge the video. Common mistake: Changing the title and thumbnail five times while the video is still Private or Unlisted, or while a restriction is in place. No packaging change can fix a video that is not public or cannot be shown. Also, do not assume a brand-new channel is being punished: a new channel simply has little watch history for YouTube to learn from yet, so early numbers are often slow. Caption: Diagram 4 — The four simple causes to rule out first: Private or Unlisted visibility, a claim or strike or age restriction, a brand-new channel, and a title or topic with no search demand. Illustrative diagram and mock-up only; NOT a real YouTube Studio screenshot.Step 5: Change ONE Thing, Then Wait What to do: Change exactly one thing — the thumbnail OR the title, never both at once — then wait before you judge. Use the rule from the diagram above: wait 7 days or until the video reaches 5,000 impressions, whichever comes first, and record the numbers before and after. One change, one wait, one comparison: that is how you learn what worked. Studio menu path: YouTube Studio > Content > click the video > Details to edit the title, and Thumbnail to replace the thumbnail image. After the change, return to YouTube Studio > Analytics > Content > click the video > Reach tab to compare impressions and CTR with the numbers you recorded in Step 3, using the same date-range length. Example: A video has 6,000 impressions and a 1.8% CTR. The creator records those numbers, then replaces only the thumbnail with a clearer, larger-subject version and leaves the title alone. After 7 days the video has 5,400 new impressions and a 3.1% CTR. Because only the thumbnail changed, the improvement can fairly be credited to it. If the creator had changed the title, the thumbnail, and the opening all at once, nobody could say which change helped. Common mistake: Changing something every day and reading the numbers hourly. Daily edits restart the test before it has a sample, and hourly checks show noise, not a trend. Pick one change, write down the starting numbers, wait the full period, and only then compare. If impressions are still very low after the wait, the problem may be the one from Step 4, not the packaging — go back and re-check. Caption: Diagram 5 — Change ONE thing (thumbnail OR title), wait 7 days or 5,000 impressions, and record the before-and-after numbers. Illustrative diagram and mock-up only; NOT a real YouTube Studio screenshot.Step 6: Run the 7-Day Retest Plan What to do: Follow the 7-day plan from the diagram above. Day 1: make the one fix from Step 5 and write down the starting numbers. Days 2–6: publish nothing new on this video and change nothing on it — no title edits, no thumbnail swaps, no re-uploads. Day 7: compare impressions, CTR, and retention with the starting numbers, using the same date-range length, and decide: keep the change, or test the next ONE thing. If the numbers moved in the right direction, keep the winning version and move on to improving the next weakest number. If nothing moved, go back to Step 4 and re-check the settings and restrictions before blaming the packaging. Studio menu path: YouTube Studio > Analytics > Content > click the video > Reach tab (impressions and CTR) and Engagement tab (audience retention) for the Day 7 comparison. Keep the date range the same length as the starting measurement so the comparison is fair. Example: Starting numbers: 800 impressions, 2.0% CTR, 32% retention at 30 seconds. The creator changes only the title, waits 7 days, and records 5,100 impressions, 3.4% CTR, and 33% retention. CTR improved while retention stayed nearly flat, so the title helped discovery but the opening still needs work — the next single test is the hook, not another title change. Common mistake: Declaring a video dead after 48 hours and deleting it, or changing everything at once on Day 3 because the numbers have not moved yet. Small channels often need the full wait before a fair sample exists. Finish the plan, write the numbers down, and let one test teach you one lesson. Caption: Diagram 6 — The 7-day retest plan: fix the ONE weakest number, wait, compare, then decide. Illustrative diagram and mock-up only; NOT a real YouTube Studio screenshot. Quick ChecklistWrite down impressions, CTR, and retention for the same date range before you change anything. Name the weakest number: 0 impressions, low CTR, or low retention. Check Visibility, Restrictions, claims, strikes, age restriction, and Made for Kids before you edit. Change ONE thing only: thumbnail OR title. Wait 7 days or 5,000 impressions, then compare the same three numbers. Keep what worked; test the next ONE thing. Do not change everything at once.Frequently Asked Questions Is 0 views in the first few hours normal? Yes, it can be. Brand-new channels and brand-new uploads often show little or no data at first, and Analytics can lag behind real activity. Work through Step 4 to rule out a settings or restriction problem, then give the video the full 7-day window from Step 6 before calling it a failure. Does 0 impressions mean YouTube is not showing my video at all? Zero impressions means the thumbnail was not shown to viewers in the measured period. It points to discovery or a setting, not to viewers rejecting the video — nobody could click what they never saw. Check Step 4 first, then the packaging fixes in Step 5. What is a good CTR on YouTube? YouTube does not publish one good CTR for all channels, because CTR depends on the topic, the audience, and where impressions come from. Use your own numbers as the baseline: compare the CTR before and after a single change, as in Step 5, instead of chasing a universal target. Should I delete a video with 0 views and re-upload it? Not as a first step. Deleting and re-uploading the identical file teaches you nothing and loses the history. Fix the real cause first — the setting, the restriction, the thumbnail, or the title — and only then test a fresh upload if you have a clear reason to. For Shorts, see the related reading below. How long should I wait before changing the thumbnail or title? Give one change a fair test: 7 days or 5,000 impressions, as in Steps 5 and 6. Changing things daily restarts the test before it has a sample, so the numbers you read are noise. Sources — Check It Yourself These are the official YouTube Help pages used for the menu paths and definitions in this guide. Open them to confirm each step for yourself:Get started with YouTube Analytics — Studio > Analytics, Content, video-level Analytics, Reach and Engagement tabs. Check your YouTube thumbnail impressions and watch time — impressions and click-through rate. Measure key moments for audience retention — audience retention. Change video privacy settings — Public, Unlisted, and Private visibility. Manage restrictions on your content — Studio > Content > Restrictions column, copyright, age restriction, and Made for Kids.Related reading on this blog, for Shorts specifically: YouTube Shorts Views Dropped? How to Check What Changed. No official YouTube video is embedded in this post. No official YouTube Creators or Creator Insider video matching this exact diagnosis topic was verified, so none is embedded rather than guessing at a link.
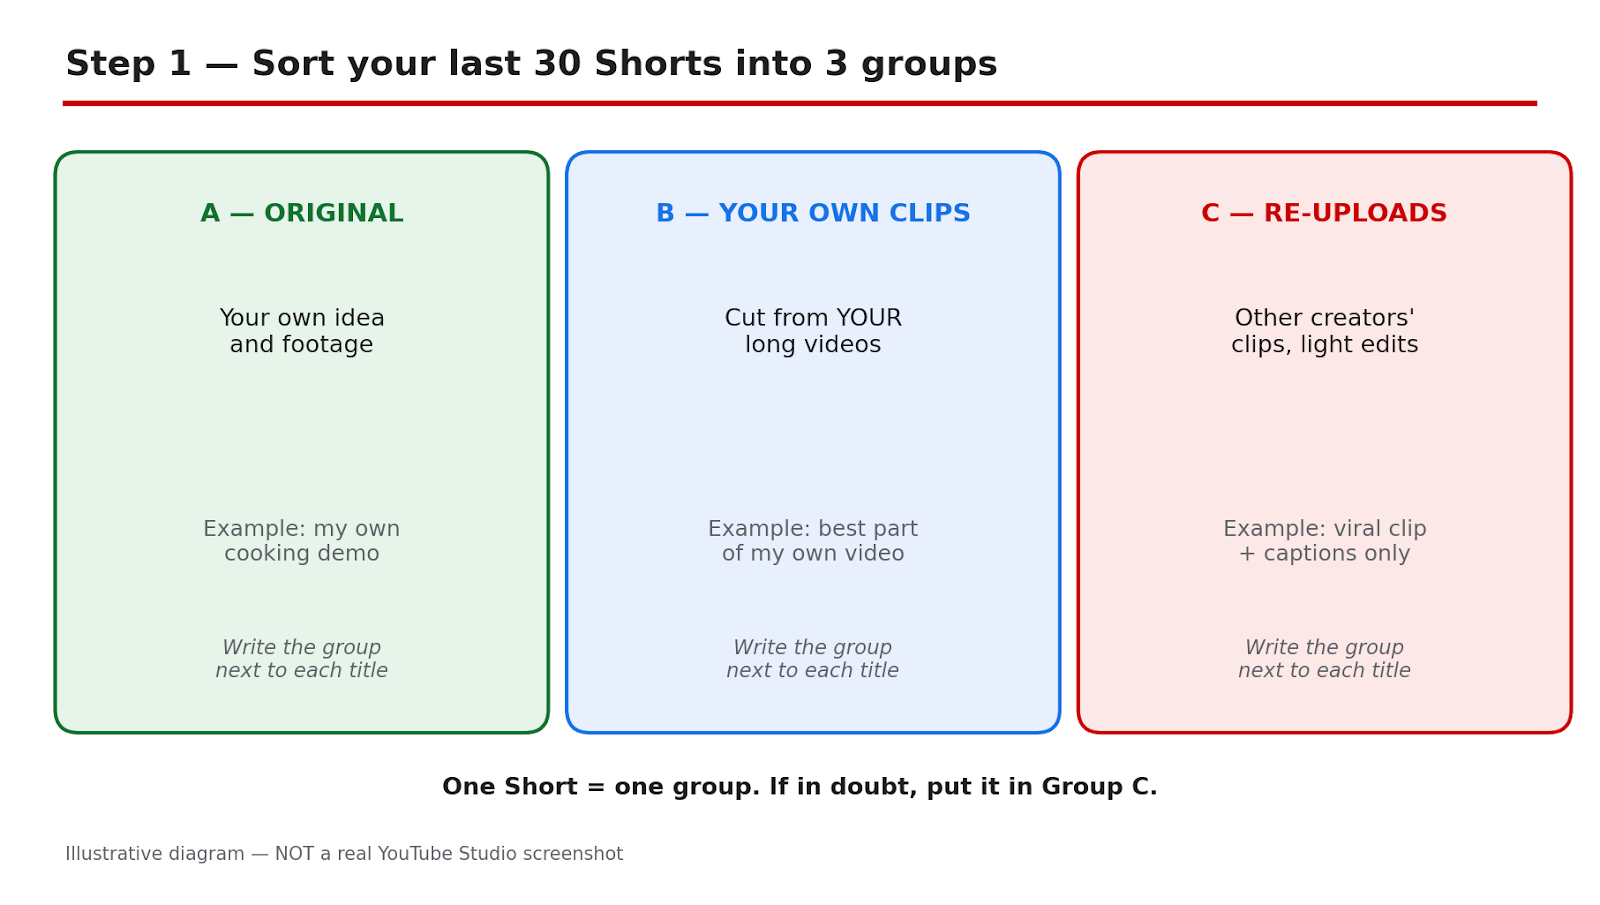
- CreatorPlaybook Team
- 28 Oct, 2026
YouTube Shorts Views Dropped? How to Check If the October 1, 2026 Original Content Update Affected Your Channel
Your Shorts views have fallen. Did something happen to your channel, or only to one kind of video? A channel-wide fall and a fall in only re-uploaded Shorts are not the same problem. This diagnosis tutorial separates the two with numbers from YouTube Studio, rules out other causes, and tests a change without guessing or deleting videos. On 1 October 2026, YouTube Creator Liaison Rene Ritchie announced in a Creator Insider video that Shorts recommendations would further prioritise original content and reduce the reach of channels that primarily aggregate or re-upload other creators' videos without significant changes. That is a recommendation change, not a ban and not a new monetisation rule. Monetisation still follows the separate reused-content policy. For what changed, read the background explainer first, then work through the checks in order. YouTube gave no start date, no threshold for how much original work is enough, no Studio indicator for reduced reach, and no re-evaluation timeline. This guide states those gaps plainly and invents no date, percentage, or recovery period. What You Will LearnWhat the 1 October 2026 announcement changed, and what counts as original. How to classify your last 30 Shorts and compare median Shorts feed views by group. How to rule out claims, strikes, restrictions, posting changes, and seasonality. How to keep reach, monetisation, and copyright separate. How to fix the mix, test six original Shorts, and re-evaluate.Step 1: Classify Your Last 30 Shorts Into Groups What to do: Before you open Analytics, classify your last 30 Shorts. You need the mix first: the announcement was about channels that primarily aggregate or re-upload without significant changes, not one borrowed clip in an otherwise original channel. How to do it in YouTube Studio: Open YouTube Studio and go to Content, then filter to Shorts. Work from the most recent 30. In a spreadsheet, record title, date, group, and Shorts feed views: A, fully original; B, clips from your own long videos; C, re-uploads or other creators' clips with light changes; D, template or AI-narrated borrowed clips. Example: A cooking channel finds 8 in A, 6 in B, 11 in C, and 5 in D. Sixteen of 30 Shorts were borrowed clips or templates. Common mistake: Do not classify by intention. A Short you spent an hour captioning is still group C if the picture and idea came from another creator.Illustrative diagram made to explain Step 1. This is a mock-up, NOT a real screenshot of YouTube Studio or any creator's channel. Step 2: Compare Equal Windows With the Median, Not the Average What to do: Compare two equal windows around 1 October, using median Shorts feed views per Short and engaged views, not the average or the public count. One viral Short can lift an average and hide a fall in the typical Short. How to do it in YouTube Studio: In YouTube Studio, go to Analytics, then Content. Filter to Shorts and open Advanced mode. Use the 28 days before 1 October and the 28 days from 1 October, keeping them exactly equal. Record the median, the number of Shorts, and the dates. Example: An average falls from 9,400 to 6,100, but one Short with 92,000 views pulls up the first window. The median falls from 3,800 to 3,100. Common mistake: Do not compare a 28-day window with a 7-day window, or use the public count, which mixes traffic sources. Isolate Shorts feed views.Illustrative diagram made to explain Step 2. This is a mock-up, NOT a real screenshot of YouTube Studio or any creator's channel. Step 3: Compare Each Group Separately What to do: Repeat the comparison for each group separately. A channel-wide drop alone proves nothing. The pattern pointing toward this update is: group C (and D) falls, while A and B hold steady. If all groups fall similarly, the cause is more likely channel-wide. How to do it in YouTube Studio: In YouTube Studio, go to Analytics, then Content, filter to Shorts, and use Advanced mode, as in Step 2. Calculate the median for each group in each window. Keep the groups fixed from Step 1. Example: Group A moves from 4,200 to 4,050 and B from 3,900 to 3,850. Group C moves from 3,600 to 1,900 and D from 2,800 to 1,400. That split fits the announcement, but does not prove the cause alone. Common mistake: Do not move a Short to another group after seeing its views. If you reclassify, recalculate both windows.Illustrative diagram made to explain Step 3. This is a mock-up, NOT a real screenshot of YouTube Studio or any creator's channel. Step 4: Rule Out Other Causes Before Blaming the Update What to do: Rule out other causes before blaming the update. A claim, a strike, an age restriction, a posting change, a title or thumbnail change, or a cooling topic can cause the same fall. How to do it in YouTube Studio: In YouTube Studio, go to Content, then Restrictions, and check the affected videos one by one for a claim or strike. Check age restriction, visibility, and title or thumbnail changes. Then compare posting frequency and spacing, and check seasonality for the topic. Example: A travel channel finds three borrowed clips received claims and posting stopped for 11 days. It fixes the claims, restores posting, and repeats the comparison. Common mistake: Do not check only the channel total in Restrictions, or only one video. Claims act on individual videos.Illustrative diagram made to explain Step 4. This is a mock-up, NOT a real screenshot of YouTube Studio or any creator's channel. Step 5: Keep Reach, Monetisation, and Copyright Separate What to do: Keep reach, monetisation, and copyright separate. Fewer feed views with no notice is reach. A monetisation status change is the reused-content policy. A named claim or strike is copyright. How to do it in YouTube Studio: In YouTube Studio, go to Analytics, then Content, and confirm the fall is in Shorts feed views, with no notice. Check monetisation status separately and read the reason for any change. Then check Content, then Restrictions, for a named claim or strike. Example: A channel has fewer views on borrowed Shorts, one compilation marked as reused content, and one claim. It keeps three separate notes and actions. Common mistake: Do not call it a ban, demonetisation, or shadowban from views alone, with no notice. Those are different actions.Illustrative diagram made to explain Step 5. This is a mock-up, NOT a real screenshot of YouTube Studio or any creator's channel. Step 6: Fix the Mix Slowly, Test Original Shorts, and Re-Evaluate What to do: Change the mix slowly over four weeks. Stop bulk templates. Replace description voice-overs with a point of view: why the clip matters, what most people miss, or what you would do differently. Description-only voice-overs, minor edits, and one template on many clips do not count. Add commentary to any borrowed clip you keep, and share other videos through the Posts tab. How to do it in YouTube Studio: Write the point of view in one sentence before recording. In weeks two to four, move one in three new Shorts from group C to group A each week. Publish six original Shorts on one topic, on your normal schedule. In Analytics, then Content, filter to Shorts, use Advanced mode, and record the median after 7 and 28 days. Re-evaluate: If original Shorts recover and re-uploads stay low, keep the new mix. If all groups stay low, return to Step 4. Do NOT delete your back catalogue on a guess: deleting cannot be undone, and YouTube gave no re-evaluation timeline. Example: A fitness channel stops its template, films original demonstrations, and shifts one in three Shorts each week. After 28 days, its test median is close to its old group A median. Common mistake: Do not replace a descriptive voice-over with a longer one. If the clip were removed, would your Short still teach, warn, or entertain on its own?Illustrative diagram made to explain Step 6. This is a mock-up, NOT a real screenshot of YouTube Studio or any creator's channel. Checklist Before You Change AnythingLast 30 Shorts classified into A, B, C, and D, with title, date, group, and Shorts feed views. Two equal 28-day windows compared, using median Shorts feed views and engaged views. Group medians compared side by side, with the number of Shorts in each group. Restrictions, age restriction, posting, titles, thumbnails, and seasonality checked, video by video. Reach, monetisation, and copyright named separately, with any notice recorded. Six original test Shorts planned, with 7-day and 28-day checks booked. No deletion planned.Frequently Asked Questions 1. Did YouTube ban re-uploads on 1 October 2026? No. It was a recommendation change, not a ban or a new monetisation rule. Channels that primarily aggregate or re-upload without significant changes were described as likely to see less Shorts feed reach. 2. Does a voice-over make a borrowed clip original? Not on its own. A voice-over that only describes what is on screen does not count. Commentary, analysis, storytelling, unique editing, or a clear point of view do. 3. How much original work is enough? YouTube did not state a threshold, and this guide does not invent one. Ask: if the clip were removed, would your Short still teach, warn, or entertain on its own? 4. Can I check in YouTube Studio whether this update affected my channel? No. YouTube gave no Studio indicator for reduced reach. Compare medians by group over equal windows and rule out other causes; that can point toward the update, but cannot prove a hidden label. 5. Should I delete my old re-uploaded Shorts? Do not delete your back catalogue on a guess. Deleting cannot be undone, and YouTube has not said old re-uploads count against a channel after it changes. No re-evaluation timeline was given, and no recovery is guaranteed. Sources — Check It YourselfYouTube channel monetization policies — YouTube Help. This page was opened and checked live. It states that content should be original and authentic, and that borrowed content must be changed significantly to make it your own.No official TeamYouTube Help Community post or official Creator Insider video dated 1 October 2026 could be verified live, so none is linked here. No official embed was verified, so no video is embedded.

- CreatorPlaybook Team
- 27 Oct, 2026
Made on YouTube 2026: Video A/B Testing, Dynamic Thumbnails, and Draft Feedback Announced
Announced — prepare now, Studio me dhoondhne mat jao abhi. That is the key to Made on YouTube 2026. YouTube announced three tools that will change how creators test and improve videos: Video A/B testing, Dynamic Thumbnails, and Get Feedback, also called Draft Feedback. They are announcements, not releases. None of them should be treated as live in Studio today. Do not waste an afternoon clicking through Studio looking for buttons that have not arrived yet. Use this time to prepare the material those tools will need, so you are ready on day one. The dates matter, and so does the honesty about them. Shorts video A/B testing was reported for 2027. Get Feedback and dynamic thumbnails have no firm date in the framing for this guide. That does not make the announcements unimportant. It means the right work now is preparation: different hooks, different thumbnails, and a clear checklist for feedback on a draft, before you publish. Related guides: How to Make a YouTube Thumbnail That Gets Clicks and How to Use New YouTube Studio Features. For how recommendations treat videos, see How the YouTube Algorithm Works in 2026. What You Will LearnWhat was announced at Made on YouTube 2026, and what was not released How Video A/B testing will work, with up to three cuts How Dynamic Thumbnails differ from one A/B winner How Get Feedback and Draft Feedback will work on unpublished drafts How to prepare two to three different hooks for every video now How to prepare three distinct thumbnails, and keep a draft-feedback checklistStep 1: Treat the Announcements as Announcements, Not as Live Tools What to do: Separate what was announced from what you can use today. Video A/B testing, Dynamic Thumbnails, and Get Feedback were announced at Made on YouTube 2026. Shorts video A/B testing was reported for 2027. The other two tools have no firm date in this guide. If a tutorial claims to show you the exact Studio buttons today, be careful, because the tools may not be in your Studio yet. How to do it in simple steps:Write down the three tool names, and mark each one as "announced, not live." Note the only date in this guide: Shorts video A/B testing reported for 2027. Do not change your publishing plan to wait for a tool with no firm date. Check Studio and official help pages again only when an official rollout is confirmed.Practical example: A creator hears about Video A/B testing and delays a video for two weeks, hoping the tool will appear. The video is never published, and the delay teaches nothing. A better creator publishes the video, saves two other hook versions, and keeps a note: "Test these hooks when A/B testing arrives." The second creator learns from real viewers and is ready for the tool. Common mistake to avoid: Claiming a tool is live in Studio today, or inventing a release date for Get Feedback or dynamic thumbnails. Both mistakes lead viewers to search for something that is not there. Another mistake is doing nothing until the tools arrive; the preparation in this guide is the work that makes the tools useful. Illustrative image: Note what was announced, and do not treat an announcement as a live Studio tool. This is an illustrative image, not a screenshot of a channel or another creator's work. Step 2: Prepare Two to Three Different Hooks for Every Video What to do: Prepare two to three different hooks for every video, even though Video A/B testing is not live yet. A hook is the opening that tells a viewer why to stay. Different hooks can test different promises: a question, a result, or a mistake to avoid. When A/B testing arrives, you will already have real alternatives to test, instead of one opening and a guess. How to do it in simple steps:Write the main promise of the video in one sentence. Write three openings from that promise: one question, one result, and one common mistake. Keep each hook short, under fifteen seconds, and record it in the same style as the video. Save the hooks with clear names, so you can compare them later without confusion.Practical example: For a video about beginner lighting, Hook 1 asks, "Why does your face look dark on camera?" Hook 2 says, "Fix your lighting with one window and no new equipment." Hook 3 says, "Stop putting the light behind you." Each hook promises the same topic, but each one speaks to a different viewer. When testing is possible, the creator can learn which promise keeps viewers watching. Common mistake to avoid: Making three hooks that are almost the same, with only one word changed. A test needs real differences to teach you anything. Also avoid hooks that promise something the video does not deliver; a strong hook that misleads will hurt retention, even if it gets a click. Illustrative image: Record two or three truly different hooks, not three versions of the same line. This is an illustrative image, not a screenshot of a channel or another creator's work. Step 3: Prepare Three Distinct Thumbnails for Every Video What to do: Prepare three distinct thumbnails for every video, so you are ready for both A/B testing and dynamic thumbnails. Three thumbnails should not be three crops of the same image. They should test different ideas: a close face with emotion, a clear object or result, and a simple text-led design. Distinct thumbnails give a future test a real choice, instead of a false choice. How to do it in simple steps:Choose three different thumbnail ideas, and write each one in a short sentence. Keep the same title words in mind, but change the main image and the short thumbnail words. Check all three at phone size, and make sure each one is clear on its own. Save the three files with clear names, such as face, result, and text-led, so you can find them later.Practical example: For a thumbnail guide, Thumbnail 1 shows a surprised face beside a bright thumbnail. Thumbnail 2 shows a before-and-after result with no face. Thumbnail 3 uses a simple design with three short words. The creator learns which idea viewers notice first, instead of learning only which shade of blue works best. Common mistake to avoid: Using the same image with a different filter, or adding more text to a crowded design. Both mistakes look like testing, but they do not test a new idea. Also avoid thumbnails that mislead; a thumbnail that promises a result the video does not show will lose trust, even if it wins a click test. Illustrative image: Make three thumbnails that test different ideas, not three copies of one design. This is an illustrative image, not a screenshot of a channel or another creator's work. Step 4: Understand Video A/B Testing and Plan Your First Test What to do: Understand Video A/B testing as it was announced: up to three cuts of a video, with a watch-time and retention breakdown. That means you will be able to compare different versions of the same video, and see which version keeps viewers watching longer. Plan your first test now, on paper, so you do not test everything at once and learn nothing. How to do it in simple steps:Choose one video idea, and decide the single question you want to answer, such as which hook keeps viewers longer. Plan up to three cuts that differ in that one area only, such as the opening, not the whole video. Write down what you will measure: watch time and retention, as announced, not only clicks. Keep the rest of the video the same, so the result points to the opening, not to ten changes at once.Practical example: A creator plans three cuts of a Shorts tutorial. Cut 1 starts with a question, Cut 2 starts with the result, and Cut 3 starts with a mistake. The middle and ending are the same in all three cuts. When the test runs, the watch-time and retention breakdown will show which opening holds viewers, and the creator will know what to repeat next time. Common mistake to avoid: Testing three completely different videos and calling it one A/B test. If the topic, length, editing, and opening all change, you cannot know which change caused the result. Another mistake is judging a test only by clicks; the announced breakdown is about watch time and retention, so use those measures. Illustrative image: Plan one clear question for a test, and keep everything else the same across cuts. This is an illustrative image, not a screenshot of a channel or another creator's work. Step 5: Understand Dynamic Thumbnails Versus One A/B Winner What to do: Understand the difference between Dynamic Thumbnails and a single A/B winner. In a simple A/B test, one thumbnail wins for everyone. Dynamic thumbnails were announced as showing different thumbnails to different audiences. That means the same video could show one thumbnail to one group of viewers and a different thumbnail to another group, based on what each group is more likely to click. How to do it in simple steps:Write the difference in one line: A/B picks one winner; dynamic thumbnails can match thumbnails to audiences. Make your three thumbnails for different audiences, not only for one imagined viewer. For each thumbnail, write who it is for, such as beginners, phone creators, or returning viewers. Do not promise viewers that dynamic thumbnails are live today; treat them as announced, with no firm date.Practical example: A video about editing on a phone could show a phone close-up to viewers who watch mobile tutorials, and a result-focused thumbnail to viewers who watch editing results. A single A/B winner would force one choice for both groups. Dynamic thumbnails, as announced, would let each group see the thumbnail that speaks to them. That is the idea to prepare for, even though the tool is not live yet. Common mistake to avoid: Treating dynamic thumbnails as the same as A/B testing, or making three thumbnails for the same narrow audience. If all three thumbnails speak to the same viewer in the same way, the dynamic idea has nothing to work with. Also avoid claiming dynamic thumbnails are available in Studio today; they are announced, with no firm date in this guide. Illustrative image: Different audiences may respond to different thumbnails, which is the idea behind dynamic thumbnails. This is an illustrative image, not a screenshot of a channel or another creator's work. Step 6: Keep a Draft-Feedback Checklist for Get Feedback What to do: Keep a draft-feedback checklist for Get Feedback, also called Draft Feedback, which was announced as feedback on unpublished drafts. The idea is simple: get feedback before you publish, while you can still fix the video. Until the tool arrives, use a simple checklist with a trusted viewer, and keep the same questions ready for the day the tool is available. How to do it in simple steps:Save every video as a draft first, and do not publish on the same day you finish editing, if you can avoid it. Ask one trusted viewer three questions: what is the video about, where did you want to stop, and what was unclear? Write down the exact time where the viewer lost interest, and fix that section before you publish. Check the title, thumbnail, and first ten seconds together, because feedback on a draft should cover the whole entry point.Practical example: A creator shares a draft with a friend. The friend says the topic is clear, but the middle repeats the same point for forty seconds. The creator cuts that section, and the final video is shorter and clearer. That is the habit Get Feedback is meant to support: feedback on a draft, before the public sees it, not after. Common mistake to avoid: Asking only, "Did you like it?" That question gives praise, but no fixable detail. Ask for the moment, the unclear line, and the missing step. Another mistake is sharing a draft with too many people and changing everything; one or two clear notes are enough to improve a draft without losing your own voice. Illustrative image: Ask for specific feedback on a draft, while you can still fix the video before publishing. This is an illustrative image, not a screenshot of a channel or another creator's work. Checklist Before the New Tools ArriveI know all three tools are announced, not live in Studio today I know Shorts video A/B testing was reported for 2027, and the other tools have no firm date here Every video has two to three different hooks saved with clear names Every video has three distinct thumbnails that test different ideas My first A/B test has one question, up to three cuts, and a watch-time and retention check I understand dynamic thumbnails as different thumbnails for different audiences I have a draft-feedback checklist, and I ask for specific moments, not only praiseFrequently Asked Questions Are Video A/B testing, Dynamic Thumbnails, and Get Feedback live in Studio today? No. They were announced at Made on YouTube 2026, and this guide treats them as announcements, not releases. Studio me dhoondhne mat jao abhi. Prepare the hooks, thumbnails, and feedback checklist now, and check official pages when a rollout is confirmed. When will Shorts video A/B testing arrive? It was reported for 2027 in the framing for this guide. No firm date for Get Feedback or dynamic thumbnails is given here. Do not invent a date, and do not delay publishing while you wait. What is Video A/B testing? As announced, it lets creators compare up to three cuts of a video, with a watch-time and retention breakdown. Plan one question per test, change one area only, and judge the result by watch time and retention, not only by clicks. How are Dynamic Thumbnails different from A/B testing? A/B testing picks one winner for everyone. Dynamic thumbnails, as announced, show different thumbnails to different audiences. Make thumbnails for different audiences, not only different crops of the same design. What is Get Feedback or Draft Feedback? It was announced as feedback on unpublished drafts. Until it arrives, use a draft-feedback checklist with a trusted viewer, ask for the exact moment where interest drops, and fix the draft before you publish. Announcements are useful only if they change what you do before the tools arrive. Prepare different hooks, distinct thumbnails, and a clear draft checklist now, and the new tools will have real material to test when they finally appear.
- CreatorPlaybook Team
- 27 Oct, 2026
YouTube Prompt-Built Home Feeds Explained: US Only for Now, Not in India Yet
US me live, India me abhi nahi. That is the most important sentence in this guide. YouTube's prompt-built Home feeds, rolled out on 22 October 2026, let a viewer type a prompt and get a custom Home feed built around that idea. But the rollout is limited: US only, signed-in viewers aged 13 and older, English only, and watch and search history must be on. This is not a how-to-use-it-now guide for India, because Indian viewers cannot use it yet. It is a preparation guide, so your videos are ready if and when prompt feeds arrive in India. The limits are specific, and they should shape your expectations. Viewers get three custom feeds free, and eight with Premium. Subscriptions was renamed "Subs" and moved to the Home top bar. Custom feeds expire after 30 days of inactivity. And prompt feeds are not on tablets, according to the Help page. Do not promise Indian viewers a feature they cannot open, and do not waste time searching Studio for a prompt-feed button that is meant for viewers, not for creators. Related guides: How to Make Educational Videos That Rank and How the YouTube Algorithm Works in 2026. For keyword thinking, see How to Earn Money on YouTube only for its planning habits, not for prompt feeds. What You Will LearnExactly who can use prompt-built Home feeds today, and who cannot What the 3-feed, 8-feed, Subs, and 30-day limits mean in plain language How to find the literal prompt words a viewer might type How to put those exact words into titles honestly How to put those exact words into descriptions and opening lines How to keep watch and search history signals clean and consistentStep 1: Understand the Limits Before You Promise Anything What to do: Learn the limits first, and repeat them to your audience in the same words. Prompt-built Home feeds are for signed-in US viewers aged 13 and older, in English, with watch and search history on. They are not available in India, and they are not on tablets. If you tell Indian viewers to "try it now," they will search for a button that is not there, and they will lose trust in your next update. How to do it in simple steps:Write the limits in one short note: US only, 13+, English, history on, not on tablets. Check your own audience location in Studio before you assume most viewers are in the US. Do not make a tutorial video that shows clicks or screens you cannot show from India. Use the words "US me live, India me abhi nahi" when you explain it to Hindi-speaking viewers.Practical example: A Hindi creator with mostly Indian viewers records a video titled "YouTube's New Prompt Feeds - Try It Now." Viewers comment that they cannot find the feature, and the creator spends a week answering the same question. A better video is titled "Prompt Feeds Explained: US Only, Not in India Yet," and it teaches preparation instead. The second video keeps trust, even though the feature is not available. Common mistake to avoid: Presenting a US-only rollout as a worldwide launch, or guessing an India date. No India date was given in the limits in this guide. Do not invent one. Also avoid claiming the feature works on tablets; the Help page position in this guide is that it does not. Illustrative image: Check who can actually use a new feature before you promise it to all viewers. This is an illustrative image, not a screenshot of a channel or another creator's work. Step 2: Find the Literal Prompt Words Viewers Might Type What to do: Find the literal words a viewer might type as a prompt, in the viewer's own language. A prompt feed is built from a prompt, so the exact topic phrase matters. Do not guess a clever phrase. Look at the words viewers already use in search, comments, and questions, and write down the simplest, most direct version of each idea. How to do it in simple steps:List ten questions your viewers ask most, in their exact words where you can. Shorten each question to a topic phrase, such as "beginner lighting setup" or "how to start a Hindi channel." Check YouTube search suggestions for each phrase, and note the wording that appears most often. Keep a short list of five to ten prompt phrases, and use the same wording across videos on that topic.Practical example: A creator teaches phone editing. Viewers ask, "How do I edit videos on my phone for free?" The literal prompt phrase for planning is "edit videos on phone for free." The creator uses that phrase in the title and description, instead of a vague title like "My Editing Secrets." The video is still honest, but its topic is now written in the words a viewer might type. Common mistake to avoid: Using only broad words like "motivation" or "viral" as your prompt phrase. Broad words can match almost anything, so they do not help a viewer who wants a specific answer. Another mistake is changing the phrase in every video, so no clear pattern forms around your best topics. Illustrative image: Write down the literal topic phrases viewers use, in their own words. This is an illustrative image, not a screenshot of a channel or another creator's work. Step 3: Put the Exact Prompt Phrase in Your Title What to do: Put the exact prompt phrase in your title, in a natural way, when the video truly answers it. The title is the clearest signal of what a video is about. If a viewer might type "how to make thumbnails that get clicks," a title that contains those words is easier to match than a title that only hints at the idea. Keep the title honest and readable; do not stuff it with extra phrases. How to do it in simple steps:Choose one prompt phrase per video, from your list in Step 2. Put that phrase near the start of the title, in the same words a viewer would type. Add one clear result or audience word, such as "for beginners" or "on a phone." Read the title aloud, and remove any word that does not help the viewer decide to watch.Practical example: A creator changes a title from "This Changed My Channel" to "How to Make Thumbnails That Get Clicks for Beginners." The first title is mysterious, but it does not name the topic. The second title uses the literal phrase, names the audience, and still promises a clear result. If a prompt feed later looks for thumbnail videos, the second title is ready. Common mistake to avoid: Putting a prompt phrase in a title for a video that does not deliver it. If the video is about something else, the mismatch will hurt watch time and trust. Also avoid repeating the same phrase three times in one title; one clear use is enough, and the rest of the title should add meaning. Illustrative image: One exact topic phrase, near the start of the title, is clearer than a vague promise. This is an illustrative image, not a screenshot of a channel or another creator's work. Step 4: Put the Same Words in Your Description and Opening Lines What to do: Repeat the same prompt words in your description and in your opening lines, so the video's topic is consistent from start to finish. A title alone can be a hint, but a description that restates the topic in the first two lines, and a spoken opening that names the topic, leaves less room for confusion. Keep the wording natural, and make sure the video actually covers what you wrote. How to do it in simple steps:Write the prompt phrase in the first two lines of the description, in a full sentence. List the steps or questions the video answers, using the same topic words. Say the topic aloud in the first ten seconds, in the same plain words. Check that the description, the title, and the spoken opening all name the same topic.Practical example: A video titled "How to Start YouTube With Only a Mobile Phone" opens with, "In this video, you will learn how to start YouTube with only a mobile phone, from filming to uploading." The description begins with the same sentence, then lists filming, editing, and uploading. A viewer who typed that phrase, and a system that reads the title and description, both get the same clear topic. Common mistake to avoid: Writing a description full of unrelated keywords, or starting the video with a long story before naming the topic. Viewers and systems both need the topic early. Another mistake is using a different phrase in every place, so the title, description, and opening sound like three different videos. Illustrative image: Keep the title, description, and opening lines naming the same topic. This is an illustrative image, not a screenshot of a channel or another creator's work. Step 5: Keep Watch and Search History Signals Clean and Consistent What to do: Keep your channel's topic signals clean and consistent. Prompt feeds depend on watch and search history being on for the viewer, which means a viewer's past viewing helps shape what they are shown. As a creator, you cannot control a viewer's history, and you should not try to manipulate it. What you can control is consistency: publish videos that clearly belong to a topic, use honest titles, and avoid mixing unrelated topics in one video. How to do it in simple steps:Group your videos by topic, and keep each video focused on one clear topic. Use the same topic words for videos in the same group, instead of a new phrase every time. Avoid misleading titles that bring viewers who leave quickly, because that weakens the topic signal. Do not ask viewers to search or watch in a fake pattern; let real interest build the signal.Practical example: A creator publishes six videos about beginner lighting, all with clear lighting titles and descriptions. A viewer who watches two of them builds a clear lighting history, and future lighting videos are easier to surface. If the same creator mixes lighting, gaming, cooking, and finance in one week with vague titles, no clear topic pattern forms, and no prompt phrase can fix that confusion. Common mistake to avoid: Trying to game history signals with click exchanges, fake traffic, or misleading titles. That is not preparation; it is spam, and it harms trust. Also avoid changing your niche every week. Clean signals come from steady, honest topic focus, not from tricks. Illustrative image: A steady topic focus gives viewers and systems a clear pattern to follow. This is an illustrative image, not a screenshot of a channel or another creator's work. Step 6: Plan for Subs, Expiry, and the Day Prompt Feeds Arrive What to do: Plan for the other changes that came with the rollout, and for the day prompt feeds might arrive in India. Subscriptions was renamed "Subs" and moved to the Home top bar, so viewers may look for subscriptions in a new place. Custom feeds expire after 30 days of inactivity, so a feed is not permanent. Keep a simple plan: remind viewers to subscribe, keep publishing on a steady schedule, and re-check official help pages before you announce any India launch. How to do it in simple steps:Tell viewers where to find "Subs" in the Home top bar, using the new name. Keep a steady publishing schedule, so your topic stays active and visible. Revisit your prompt-phrase list every month, and update titles only when a video truly needs it. Before you announce an India rollout, open YouTube's official help or announcement pages and confirm it yourself.Practical example: A creator ends videos with, "If this helped, tap Subs at the top of Home to see more." That short line uses the new name and the new place. The creator also keeps a monthly note: "Prompt feeds: still US only, checked on 27 October 2026." When the status changes, the creator can update viewers with evidence, instead of guessing. Common mistake to avoid: Telling viewers that a custom feed will stay forever, or that three feeds are enough for every interest. Remember the limits: three custom feeds free, eight for Premium, and expiry after 30 days of inactivity. Also avoid renaming subscriptions in your own words in a confusing way; use the name viewers will see, "Subs." Illustrative image: Keep a steady schedule and re-check official pages before announcing a new rollout. This is an illustrative image, not a screenshot of a channel or another creator's work. Checklist for Prompt-Ready Videos in IndiaI explain the limits honestly: US me live, India me abhi nahi I know the rules: US only, 13+, English, history on, not on tablets I have a short list of literal prompt phrases in viewers' own words Each title uses one exact prompt phrase, honestly, near the start Descriptions and opening lines repeat the same topic in plain words My videos stay focused on one topic, with clean and consistent signals I use the name "Subs" and the Home top bar when I talk about subscriptionsFrequently Asked Questions Can I use prompt-built Home feeds in India today? No, based on the rollout limits in this guide. Prompt-built Home feeds are US only, for signed-in viewers aged 13 and older, in English, with watch and search history on. US me live, India me abhi nahi. Do not present this guide as a how-to-use-it-now guide for India. How many custom feeds can a viewer make? Three custom feeds free, and eight for Premium, according to the rollout limits in this guide. Custom feeds expire after 30 days of inactivity, so they need to be used to stay active. Do prompt feeds work on tablets? No, according to the Help page position in this guide, prompt feeds are not on tablets. Check the official Help page if you need to confirm the current device list before you tell viewers where to look. What changed about Subscriptions? Subscriptions was renamed "Subs" and moved to the Home top bar. Use the name "Subs" when you guide viewers, so they can find the same label they see on screen. What should I do now if I am in India? Prepare, do not pretend. Build a list of literal prompt phrases, put the exact words in honest titles and descriptions, keep your topic focus steady, and keep checking official pages for any India rollout. When prompt feeds arrive, videos that already name their topic clearly will be ready. Prompt feeds reward clarity. A viewer who can type a plain topic phrase should be able to find a video that plainly answers it. That is work you can do today, even while the feature itself is still US only.

- CreatorPlaybook Team
- 27 Oct, 2026
How to Make a YouTube Shorts Series: Seasons, Episodes, and Custom Thumbnails Explained
Many Shorts work alone, but some ideas only work in order. A recipe, a story, a challenge, or a lesson can lose its meaning when a viewer sees part three first. On 23 September 2026, at its Made on YouTube event, YouTube announced Shorts Series, a way to organize Shorts into TV-style seasons and episodes, with custom thumbnails and sequential playback. TechCrunch reported that the feature was rolling out to creators in the YouTube Partner Program across web, mobile, and connected TVs. That rollout detail matters: do not assume every creator can see it in Studio today. A Shorts Series is not the same as a playlist. A playlist is a collection you can add videos to in any order, and viewers often arrive in the middle. A Series is built for order. It presents a show with seasons and episodes, a clear starting point, and episodes that play one after another. This guide explains how a Series differs from a playlist, how to plan one, and how to check whether the feature is available to you yet. Related guides: How to Make a YouTube Thumbnail That Gets Clicks and YouTube Shorts Monetization and RPM Explained. For how recommendations treat Shorts, see How the YouTube Algorithm Works in 2026. What You Will LearnWhat a YouTube Shorts Series is, and how it was announced How a Series differs from a playlist in structure and viewing How to choose a series idea that truly needs episodes in order How to plan a season and episode arc that keeps viewers watching How to name episodes clearly and make custom thumbnails How to set episode order and promote episode one and the next episodeStep 1: Choose a Series Idea That Needs Episodes in Order What to do: Choose a series idea that needs episodes in order, not a set of unrelated Shorts. A good Series has a promise that grows over time. The viewer should feel that missing an episode means missing a step, a clue, or a result. If any episode works just as well alone and in any order, the idea may be better as a playlist or as separate Shorts. How to do it in simple steps:Write the full result or ending of the series in one sentence. List the steps, clues, or events that must happen before that ending. Check that each step depends on the one before it, not only on the same topic. Reject ideas that are only a theme, such as random tips with no order or progress.Practical example: A creator plans a five-part series called "My First 30 Days Learning to Edit." Episode one is the setup, episode two is the first project, episode three is the mistake, episode four is the fix, and episode five is the finished video. A viewer who starts at episode four will miss the mistake that makes the fix meaningful, so the order matters. Common mistake to avoid: Turning a loose collection of tips into a Series just because the feature is new. Viewers expect a story or a sequence, and a random order will disappoint them. A playlist is often the better home for tips that stand alone, because viewers can dip in and out without losing the thread. Illustrative image: Choose an idea where the order itself is part of the value. This is an illustrative image, not a screenshot of a channel or another creator's work. Step 2: Plan the Season and Episode Arc What to do: Plan the season and episode arc before you film episode one. A season is a complete run with a beginning, a middle, and an ending. An episode is one short step in that run. Plan the arc on one page, so each episode has a job: introduce, complicate, teach, test, or resolve. A clear arc stops you from repeating the same Short five times. How to do it in simple steps:Decide how many episodes the first season will have, and keep it small, such as four to six. Give each episode one job and one clear outcome for the viewer. Write the last line of each episode, so the next episode has a reason to start. Leave room for a second season only if the first season ends cleanly.Practical example: A cooking creator plans a season called "Five Breakfasts, One Pan." Episode one teaches the pan and the base recipe. Episode two adds a new ingredient and a timing rule. Episode three fixes a common burning mistake. Episode four shows a faster version. Episode five is a viewer-style challenge with the same pan. Each episode builds skill, and the final episode proves it. Common mistake to avoid: Planning only episode one and hoping the rest will appear. Without an arc, episode three often repeats episode one, and viewers stop following. Another mistake is planning too many episodes before you know if viewers want a second one. Finish a short season well, then decide. Illustrative image: Plan the whole season arc before you film the first episode. This is an illustrative image, not a screenshot of a channel or another creator's work. Step 3: Name Episodes Clearly So Viewers Know the Order What to do: Name episodes clearly, so viewers know where they are and what comes next. Episode titles should carry the series name, the episode number, and the specific step or event. A viewer scrolling quickly should be able to tell episode two from episode four without opening the video. Clear names also help you, because they force you to keep each episode focused. How to do it in simple steps:Use one series name for every episode, written the same way each time. Add the episode number at the start or end of the title, in the same place every time. Add the specific step, such as the skill, the place, or the result for that episode. Check the full season list together, and remove any title that could fit two episodes.Practical example: Instead of five titles like "Amazing Tip," "You Must See This," and "Part 3," a creator uses "Learn to Edit: Ep 1 - Set Up Your Project," "Learn to Edit: Ep 2 - Your First Cut," and "Learn to Edit: Ep 3 - Fix the Jump Cut." A new viewer can see the order, the topic, and the next step in seconds. Common mistake to avoid: Using only "Part 1," "Part 2," and "Part 3" with no other information. Parts tell viewers the order, but not the reason to watch. Another mistake is changing the series name halfway through, which breaks the sense that the episodes belong together. Illustrative image: Clear episode names show the order and the step at a glance. This is an illustrative image, not a screenshot of a channel or another creator's work. Step 4: Make Custom Thumbnails for the Series and Each Episode What to do: Make custom thumbnails that work as a set and as single episodes. Shorts Series was announced with custom thumbnails, which help viewers recognize a show and choose the right episode. Your series artwork should stay consistent, while each episode thumbnail should show what is different about that episode. Think of a book cover and chapter headings: the family resemblance matters, and so does the difference. How to do it in simple steps:Choose one layout, one font, and two or three colors for the whole series. Keep the series name or a short series mark in the same place on every thumbnail. Change the main image and the short episode words for each episode, to show its step. Check all thumbnails together at phone size, and make sure episode order is easy to follow.Practical example: A travel creator uses the same bold frame and series name on every episode, but episode one shows a map, episode two shows a train, and episode three shows a mountain view. The thumbnails look like one show, and each one still promises a different place. A viewer can spot the series in a feed and pick the episode they missed. Common mistake to avoid: Using the same thumbnail for every episode, or using completely different styles with no link between them. Identical thumbnails hide the order, and unrelated thumbnails hide the series. Also avoid small text that cannot be read on a phone; use two to four large words, as in the thumbnail guide linked above. Illustrative image: Keep the series look consistent, and change the image and words for each episode. This is an illustrative image, not a screenshot of a channel or another creator's work. Step 5: Set the Episode Order and Check Sequential Playback What to do: Set the episode order carefully, and check how the series plays from start to finish. Sequential playback is the main benefit of a Series: viewers can watch a selection of Shorts as a continuous story, rather than scrolling from one stand-alone clip to the next, as TechCrunch described the announcement. If the order is wrong, that benefit becomes confusion. Check the order before you promote the series. How to do it in simple steps:List the episodes in story order, from the first step to the final result. Watch the first ten seconds of each episode in that order, and check that each one follows the last. Fix any episode that repeats the previous ending or assumes knowledge from a later episode. Check the series on a phone and, if you can, on a larger screen, because Series were announced for web, mobile, and TV.Practical example: A creator sets a four-episode series in order, then watches it as a viewer would. Episode two starts with "As I said in the last video" but the previous episode ended with a different point, so the creator re-records the opening line. That small fix makes the sequence feel planned, instead of four separate Shorts placed in a list. Common mistake to avoid: Adding episodes in upload order without checking story order, or adding a later episode first because it got more views. Views do not show order. Another mistake is leaving a gap: if episode three is missing or private, viewers hit a dead end and may leave the series entirely. Illustrative image: Check the episode order as a viewer would, from episode one to the end. This is an illustrative image, not a screenshot of a channel or another creator's work. Step 6: Promote Episode One and Build Next-Episode Hooks What to do: Promote episode one as the entry point, and build next-episode hooks into every episode. A Series grows when new viewers start at the beginning and existing viewers keep going. Episode one should promise the whole season in a few seconds. Every other episode should end with a clear reason to watch the next one, not a vague "stay tuned." How to do it in simple steps:Share episode one first, with the series name and the final result in the caption or title. End each episode with the next step in one sentence, such as the problem the next episode solves. Add the series name and episode number to community posts, descriptions, and end screens where you can. After the season ends, share a short recap that links back to episode one for new viewers.Practical example: A fitness creator ends episode two with, "Next, we fix the one mistake that makes this move hurt your back." Viewers who care about that problem have a reason to continue, and viewers who do not can stop without confusion. The creator also pins a comment on episode one that lists the full season, so late viewers can find the start. Common mistake to avoid: Promoting only the newest episode, which may be episode four, to a new audience. New viewers arrive in the middle and leave because they missed the setup. Also avoid hooks that promise a surprise with no topic; a hook should name the next step, so the right viewers stay. Illustrative image: Promote episode one, and end each episode with a clear reason to watch the next. This is an illustrative image, not a screenshot of a channel or another creator's work. Checklist for a YouTube Shorts SeriesThe idea needs order: each episode depends on the one before it The season arc is planned, with a beginning, middle, and ending Episode titles show the series name, number, and specific step Custom thumbnails look like one series, with a different image per episode Episode order is checked by watching the sequence in order Episode one is promoted as the starting point Each episode ends with a clear next-episode hookFrequently Asked Questions What is a YouTube Shorts Series? It is a way to organize Shorts into TV-style seasons and episodes, with custom thumbnails and sequential playback. It was announced at Made on YouTube on 23 September 2026, and reported as rolling out to creators in the YouTube Partner Program across web, mobile, and connected TVs. How is a Series different from a playlist? A playlist is a collection that viewers can enter at any point, and the order is often flexible. A Series is built for order, with a season arc, episode numbers, and episodes that play as a continuous story. Use a playlist for stand-alone videos on a theme, and a Series for a story or sequence that loses meaning out of order. Is Shorts Series available to all creators today? Do not assume so. The announcement coverage described a rollout to creators in the YouTube Partner Program. If you do not see the Series option in Studio, check Studio on desktop and in the app, look for a series or seasons option when you upload or organize Shorts, and check YouTube's official help pages for current eligibility. Plan the series now, and set it up when the option appears for your account. Do I need custom thumbnails for a Series? Custom thumbnails were part of the announcement, and they help viewers recognize the series and choose episodes. Keep the series design consistent, and change the image and short words for each episode. Even if you cannot set a Series thumbnail yet, the same design habit will help your Shorts look like a planned show. Can a Series work on TV as well as on a phone? Yes, according to the announcement coverage, Series were described for web, mobile, and connected TVs. That is why thumbnails and episode titles should be clear at both phone size and TV size. Test the series list on a larger screen if you can, and avoid tiny text that only works on one device. A Shorts Series is a promise of order. If you plan the arc, name the episodes clearly, and make the sequence easy to follow, you give viewers a reason to watch the next episode instead of scrolling away.

- CreatorPlaybook Team
- 27 Oct, 2026
YouTube Shorts Original Content Update: What Changed on 1 October 2026 and What Creators Should Do
On 1 October 2026, YouTube updated its Shorts recommendation system to give more reach to original content and less reach to channels that mainly aggregate or re-upload other creators' work without significant changes. This was a recommendation change, not a new ban and not a new monetization rule. Re-sharing and remixing were not banned. The change affects how Shorts are recommended, so creators who add real value have a better chance to grow, while channels built mainly on other people's clips are more likely to see less distribution in the Shorts feed. That distinction matters for beginners. You do not need expensive equipment or a large team to meet this standard. You need your own voice, your own structure, and your own reason for the viewer to watch your version. A small change to someone else's clip, a ready-made template, or simply describing what is already on screen does not count as a significant change. Original commentary, unique editing, educational value, and storytelling do. This guide explains the update in plain language and gives you a practical audit you can finish today. Related guide: How to Protect Your Channel from Strikes, Copyright and Reused Content. For the wider recommendation system, see also How the YouTube Algorithm Works in 2026. Official source: YouTube channel monetization policies What You Will LearnWhat YouTube said on 1 October 2026, in its own recommendation terms What counts as real value, and what does not count as a significant change How to audit your existing Shorts quickly and honestly How to add original commentary on camera or with a voiceover How to rebuild edits with your own structure and story How to keep proof of your original work for the futureStep 1: Understand What Changed, and What Did Not Change What to do: Learn the update as a recommendation change, not as a ban. YouTube said it was updating its recommendation systems to further prioritize original content and reduce the reach of content re-uploaded from other creators without adding anything of your own. Social Media Today reported that wording on 1 October 2026, linking to YouTube's support pages. Channels identified as primarily aggregating or re-uploading other creators' videos without significant changes will likely see less distribution within the Shorts feed. How to do it in simple steps:Read the update as being about distribution in the Shorts feed, not about deleting your channel. Note the key phrase: primarily aggregating or re-uploading without significant changes. Separate this update from monetization rules and copyright strikes, which are different systems. Tell yourself the test clearly: would this Short still be useful if the original clip were removed?Practical example: A creator posts ten Shorts a week, each one a short clip from another channel with a new caption and a filter. After the update, those Shorts may reach fewer new viewers, because the main value came from the other creator. The same creator could keep the topic, film a 40-second reaction with their own opinion, and add a clear lesson. That version has a stronger claim to original value. Common mistake to avoid: Calling every change a ban, or telling viewers that re-uploading is now illegal. That creates fear and confusion. The reported wording is about recommendation and distribution, and re-sharing and quoting can still add to a discussion when you add your own voice. Illustrative image: Start by understanding the recommendation change before you change your workflow. This is an illustrative image, not a screenshot of a channel or another creator's work. Step 2: Audit Your Existing Shorts Honestly What to do: Audit your existing Shorts before you post more. Open your last 20 Shorts and score each one for original value. You are looking for a pattern, not one bad video. If most of your Shorts depend on other people's footage, music, or ideas with only small changes, that pattern is the risk. A short, honest audit now is cheaper than weeks of low reach later. How to do it in simple steps:List your last 20 Shorts in a simple sheet, with the title and the main source of the material. Mark each one as original, mixed, or mainly re-uploaded, using the definitions in Step 1. Note what you added: commentary, teaching, a new edit, a story, or nothing new. Decide for each mixed or re-uploaded Short whether to keep it, remake it, or leave it and move on.Practical example: A beginner finds that 14 of 20 Shorts are clips from other videos with captions added. Only six include the creator's face, voice, or a clear lesson. The creator does not delete everything at once. They keep the six strong Shorts as models, remake the best four topics in their own voice, and plan only original-first Shorts for the next two weeks. Common mistake to avoid: Auditing only views and likes. A re-uploaded clip can get views for a short time and still be weak on original value. Judge the work you added, not only the result. Also avoid deleting old Shorts in a panic; focus on what you publish next and remake only what is worth remaking. Illustrative image: Review your last Shorts and score the original value you added. This is an illustrative image, not a screenshot of a channel or another creator's work. Step 3: Add Original Commentary on Camera or With a Voiceover What to do: Add original commentary that only you can give. Commentary means your judgment, your experience, or your explanation, not a summary of what the viewer can already see. Speak on camera if you can, or record a clear voiceover if you prefer not to show your face. Your voice should change what the viewer understands, not only fill silence. How to do it in simple steps:Write one clear point before you record, in one sentence, such as the mistake to avoid or the result to expect. Record your commentary in your own words, with one example from your own experience. Put the commentary at the start, so the viewer hears your value in the first three seconds. Remove any section where you only describe the clip, and replace it with a reason, a warning, or a next step.Practical example: A creator uses a 10-second clip of a cooking mistake. Instead of saying, "Look, the pan is hot," they say, "I made this same mistake last month, and the fix is to dry the pan first, because water makes the oil spit." The clip is the same, but the commentary adds experience, a cause, and a fix that the viewer could not get from the clip alone. Common mistake to avoid: Adding commentary that only narrates the screen, such as "Here he runs, then he jumps." That is describing, not adding value. Also avoid reading a generic script that could fit any video. If your words would work over a completely different clip, they are probably not specific enough. Illustrative image: Your commentary should add judgment and experience, not just describe the picture. This is an illustrative image, not a screenshot of a channel or another creator's work. Step 4: Rebuild the Edit With Your Own Structure What to do: Rebuild the edit so the structure is yours. Unique editing is one of the examples YouTube gave for adding value, along with original commentary and educational value. A unique edit is not a new filter or a faster cut of the same sequence. It is a new order, a new focus, and a new reason for each cut. Start from your point, not from the original clip's order. How to do it in simple steps:Write your hook, your main point, and your ending before you open the editor. Choose only the clips that prove your point, and cut everything that does not serve it. Add your own text, graphics, or examples to mark the steps, in your own order. Watch the Short without sound and without the original context, and check that it still makes sense.Practical example: A creator finds a popular 60-second tutorial. Instead of reposting it with captions, they rebuild it as three clear steps: the wrong way, the fix, and the result. They film their own hands doing the fix, add on-screen labels in their own words, and end with a one-line checklist. The topic is similar, but the structure, examples, and evidence are theirs. Common mistake to avoid: Relying on a template, a trending effect, or a speed change as your main change. Templates can help with presentation, but they do not by themselves add commentary, teaching, or storytelling. If you remove the template and nothing original remains, the edit is not yet a significant change. Illustrative image: Build the edit around your own hook, steps, and ending. This is an illustrative image, not a screenshot of a channel or another creator's work. Step 5: Add Context and a Story Only You Can Give What to do: Add context and a story only you can give. Storytelling was named in the reported YouTube wording as a way to add real value when you use clips from another creator. Context answers the questions the clip alone does not answer: why does this matter, what happened before, what should the viewer do next, and what did you learn? A short story can do that work in 20 seconds if it is specific. How to do it in simple steps:Choose one specific detail from your own experience, such as a time, a place, a cost, or a result. Explain the situation in one sentence, the decision in one sentence, and the result in one sentence. Connect the story to the clip, so the clip illustrates your point instead of replacing it. End with a clear takeaway the viewer can use, even if they never see the original video.Practical example: A creator shares a clip about a small business mistake. They add: "I spent 200 rupees on the wrong cable last year, returned it twice, and now I check the connector photo before I buy." That short story gives the clip a personal cost, a lesson, and a check the viewer can copy. Without the story, the clip is only someone else's anecdote. Common mistake to avoid: Adding a vague personal claim, such as "This happened to me too," with no detail, no decision, and no lesson. Vague stories do not add value, because any creator could say them. Also avoid making the story longer than the lesson; the story should serve the point, not replace it. Illustrative image: A specific story with a decision and a result adds value a clip alone cannot give. This is an illustrative image, not a screenshot of a channel or another creator's work. Step 6: Keep Proof of Your Original Work and Publish Original First What to do: Keep proof of your original work, and make original-first Shorts your default. Proof does not guarantee reach, but it helps you learn, reuse, and defend your work. Keep your scripts, your raw recordings, your project files, and your notes in one folder for each Short. Then publish a simple rule for yourself: if a Short has no original commentary, teaching, edit, or story, do not publish it until you add one. How to do it in simple steps:Create one folder per Short, with the script, raw clips, project file, and final export. Save the source and permission details for any clip you did not film, in the same folder. Write a one-line note for each Short: what original value did I add? Review that note before publishing, and add the missing value before you post.Practical example: A creator keeps a folder called "Short 42 - cable check" with a phone recording, a short script, and the edited project. Weeks later, when a viewer asks how the tip was tested, the creator can answer from the script and re-film a follow-up in minutes. The folder also makes it easy to turn the Short into a longer video, a community post, or a new episode. Common mistake to avoid: Keeping only the final exported file and no notes. If you cannot show what you added, you cannot repeat what worked. Another mistake is publishing first and planning to add value later. In a feed that rewards original content, the first version is the version most viewers will judge. Illustrative image: Keep scripts, raw clips, and notes so your original work can be reused and checked. This is an illustrative image, not a screenshot of a channel or another creator's work. Checklist for Original Shorts After the October 2026 UpdateThe Short is built around my own commentary, teaching, edit, or story The first three seconds show my value, not only someone else's clip Minor edits, templates, and screen description alone are not the main change Any borrowed clip has a clear purpose and adds to my point The story or example is specific, with a decision and a result Script, raw clips, and notes are saved in one folder The Short still makes sense without the original videoFrequently Asked Questions Is re-uploading now banned on YouTube Shorts? No, based on the reported wording. The 1 October 2026 update was described as a change to recommendation systems. Re-sharing and quoting were still described as relevant formats, but creators were told to add their own voice or a distinct point of view instead of only re-sharing other people's work. Does this update change Shorts monetization? Do not treat this as a new monetization rule. The reported update was about recommendation and distribution in the Shorts feed. Monetization, copyright, and strikes are separate topics, and the related guide linked at the top of this post covers strikes, copyright, and reused content in more detail. What counts as a significant change? YouTube's reported examples were original commentary, educational value, unique editing, and storytelling. A significant change should add something the viewer could not get from the original clip alone. A filter, a template, a speed change, or describing what is on screen, on its own, does not meet that test in this guide. Can I still use clips from other creators? You can use clips as part of a larger original piece, but the clip should not be the whole value. Add your own commentary, teaching, or story, and make sure you also respect copyright and permission rules. If the clip is the main attraction and you added almost nothing, remake the idea in your own words and footage. Should I delete my old re-uploaded Shorts? Do not delete in a panic. Audit first, as in Step 2. Keep strong original Shorts, remake the topics that are worth remaking, and focus your next Shorts on original-first work. Deleting everything at once can remove useful data about what your audience liked, without fixing the pattern in future posts. The safest habit after this update is simple: start with your own point, prove it with your own voice or your own footage, and use other clips only to support that point. Original value is not about being perfect. It is about being the reason the viewer watches your version.

- CreatorPlaybook Team
- 25 Oct, 2026
How to Make a YouTube Thumbnail That Gets Clicks
On YouTube, the thumbnail is often the first reason a viewer clicks, or scrolls past. Even a great video will struggle if its thumbnail is blurry, cluttered, or unclear at phone size, because viewers decide in seconds, among many competing videos. A good thumbnail does not need expensive design skills; it needs one clear subject, readable text, and an honest promise that matches the video. This guide explains how to make a YouTube thumbnail that gets clicks, without misleading viewers. It covers choosing the main idea, taking or selecting a clear image, adding short readable text, using colour and contrast, testing thumbnails, and avoiding clickbait. It is a focused thumbnail guide, distinct from general SEO or title guides, because it deals only with the image viewers see before they click. Related guides: YouTube SEO: Tags, Description and Hashtags, How to Make Educational Videos That Rank, and How to Read and Use the YouTube Studio App. What You Will LearnWhat makes a thumbnail clickable at phone size How to choose one clear idea per thumbnail How to write short, readable thumbnail text How to use colour, contrast, and faces honestly How to test and improve thumbnails How to avoid clickbait that harms trustStep 1: Design for Phone Size First What to do: Design for phone size first, because most viewers see thumbnails small, on a mobile feed. A thumbnail that looks detailed on a computer may look like a blur on a phone, so check it at small size before publishing. If the main subject and text are not clear when the thumbnail is small, simplify it: remove details, enlarge the subject, and shorten the text. How to do it in simple steps:Make the thumbnail at the recommended size for YouTube. Zoom out, or view it at phone size, before publishing. Check that the subject and text are clear at that size. Remove anything that is not readable at small size.Practical example: A creator's thumbnail with five objects and ten words looks busy on a phone, so they keep one object, a face, and three words. Clicks improve, because viewers understand the video instantly. Common mistake to avoid: Designing only on a large screen, with small text and many details. What looks rich on a computer often looks confusing on a phone, where most clicks happen. Illustrative image: Design for phone size first, and check it small. This is an illustrative image, not a screenshot of your channel or another creator's work. Step 2: Choose One Clear Idea Per Thumbnail What to do: Choose one clear idea per thumbnail, which is the main promise or emotion of the video. A tutorial thumbnail might show the result, a story thumbnail might show a key moment, and a comparison thumbnail might show before and after. One idea is easier to understand than three ideas competing for attention, and it pairs well with a clear title, where the title and thumbnail together tell one story, not two different stories. How to do it in simple steps:Write the video's main promise in one sentence. Choose one image that shows that promise. Remove other ideas, objects, and text that compete with it. Check that title and thumbnail together make sense.Practical example: A lighting tutorial thumbnail shows a face lit well, with the words "Better Light," while the title explains the setup. Together they promise one clear result, and viewers who want better lighting click. Common mistake to avoid: Putting the whole video into one thumbnail, with many scenes, arrows, and words. A thumbnail is an invitation, not a summary, and too much information makes viewers skip it. Illustrative image: One clear idea beats three competing ideas. This is an illustrative image, not a screenshot of your channel or another creator's work. Step 3: Write Short, Readable Thumbnail Text What to do: Write short, readable thumbnail text, of two to four words, in a large, bold font, with strong contrast against the background. Thumbnail text should add to the title, not repeat it word for word, and it should be readable at phone size. Use simple words that viewers understand instantly, and avoid long sentences, small fonts, and text over busy backgrounds. How to do it in simple steps:Choose two to four words that add emotion or result. Use a large, bold font, with a shadow or outline if needed. Place text on a plain area, not over a busy image. Check readability at phone size, in different light.Practical example: A creator changes thumbnail text from "How to Improve Your Lighting Setup at Home" to "Better Light," in large white text on a dark background. The thumbnail becomes readable instantly, and clicks rise. Common mistake to avoid: Repeating the full title in small text on the thumbnail, or using fancy fonts that are hard to read. Thumbnail text is a headline, not a paragraph. Illustrative image: Two to four large words, with strong contrast, work best. This is an illustrative image, not a screenshot of your channel or another creator's work. Step 4: Use Colour, Contrast, and Faces Honestly What to do: Use colour, contrast, and faces honestly to draw attention, without misleading viewers. Bright, contrasting colours help a thumbnail stand out in a feed, and a clear face with a natural expression can help viewers connect, especially for personal or story videos. For tutorials, a clear result or object may work better than a face. Whatever you use, it must be in the video, or closely related to it, or viewers will feel tricked when they click. How to do it in simple steps:Choose two or three colours that contrast well. Make the subject stand out from the background. Use a face only if it fits the video and looks natural. Check that the thumbnail honestly represents the video.Practical example: A creator uses a bright background, a clear product photo, and a natural expression, for a review video. The thumbnail stands out, and viewers who click find the product actually reviewed, so they stay and trust the channel. Common mistake to avoid: Using shocked faces, red arrows, and bright colours to promise something the video does not contain. Misleading thumbnails may bring clicks once, but they damage retention and trust, and can lead to strikes for misleading content. Illustrative image: Contrast draws eyes; honesty keeps viewers. This is an illustrative image, not a screenshot of your channel or another creator's work. Step 5: Test Thumbnails and Learn From Click Data What to do: Test thumbnails and learn from click data, instead of guessing which style works. Where Studio offers thumbnail testing, compare two or three honest options and keep the winner. If testing is not available, change one thumbnail at a time, wait for enough impressions, and note the click-through rate, together with retention, because a thumbnail that brings clicks but not watch time is not truly working. Keep a simple record of what worked, so your style improves over time. How to do it in simple steps:Test two or three thumbnail options for one video, where possible. Compare click-through rate and retention together. Keep the winner, and note why it won. Apply the lesson to the next video, with one change at a time.Practical example: A creator tests a cluttered thumbnail against a simple one, and the simple one wins on both clicks and retention. They adopt a simple style for the series, and overall channel clicks improve. Common mistake to avoid: Changing thumbnails every few hours, or judging a thumbnail by clicks alone. Testing needs time and enough data, and a thumbnail must also lead to satisfied viewers, not just clicks. Illustrative image: Test one change at a time, and check retention too. This is an illustrative image, not a screenshot of your channel or another creator's work. Step 6: Build a Consistent Thumbnail Style What to do: Build a consistent thumbnail style, so viewers recognise your videos in a feed. Consistency does not mean every thumbnail looks the same, but that it shares colours, fonts, layout, or framing, so subscribers can spot your videos quickly. A consistent style also saves time, because you can reuse a template and change only the subject and text for each video, while keeping quality high. How to do it in simple steps:Choose colours, fonts, and a layout you can reuse. Make a template, with space for subject and short text. Keep the style, but change the subject for each video. Review your channel page, to check that thumbnails look coherent.Practical example: A creator uses the same font, colour, and layout for a tutorial series, with a different result photo each time. Subscribers recognise the series instantly, and new viewers understand the channel's topic at a glance. Common mistake to avoid: Using a completely different style for every video, with no recognisable pattern. Inconsistent thumbnails make a channel look scattered, and viewers cannot learn to spot your videos. Illustrative image: A consistent style helps viewers recognise your videos. This is an illustrative image, not a screenshot of your channel or another creator's work. Checklist for YouTube Thumbnails That Get ClicksThumbnail checked at phone size, and readable One clear idea per thumbnail Two to four words, large and readable Strong colour and contrast, with a clear subject Thumbnail honestly represents the video Tested, with clicks and retention checked together Consistent style across the channelFrequently Asked Questions Do I need paid design software for thumbnails? No. Free tools, and even phone apps, are enough for clear thumbnails, as long as you use a clear image, large text, and strong contrast. Design skill matters more than software cost. Should thumbnails use faces? Faces can help for personal, story, and reaction videos, but they are not required for tutorials, where a clear result or object may work better. Test what fits your topic and audience. How much text should a thumbnail have? Usually two to four words, that add to the title rather than repeating it. Long thumbnail text is hard to read at phone size, and it competes with the title. Is clickbait ever okay? Curiosity is okay, misleading is not. A thumbnail can create curiosity about a real result in the video, but it should not promise something the video does not deliver. When should I change a thumbnail? When click-through is low but impressions are high, and you have a clearer, honest alternative. Change one element, wait for data, and judge by clicks and retention together. A good thumbnail is a clear, honest invitation: one idea, readable at phone size, that promises what the video actually delivers. Make that your standard, and clicks will follow, with viewers who stay.

- CreatorPlaybook Team
- 25 Oct, 2026
How to Grow a Hindi YouTube Channel in India
Growing a Hindi YouTube channel in India offers a huge opportunity, because Hindi is spoken by hundreds of millions of people, and viewers search for tutorials, entertainment, and explanations in Hindi every day. Yet the market is also competitive, with many channels on similar topics, so success comes from speaking clearly, choosing topics Indian viewers actually search for, and building trust through consistent, helpful videos. You do not need expensive equipment or perfect English; you need clear Hindi, useful content, and a channel that viewers can find and follow. This guide explains how to grow a Hindi YouTube channel in India, in practical steps. It covers choosing a niche and language style, making searchable Hindi titles and thumbnails, filming and editing simply, using Shorts and Community posts, understanding Indian audiences and monetization, and growing without copying others. The guide is written in English, about making Hindi videos, so you can follow it whether you make videos in pure Hindi, Hinglish, or a regional mix. Related guides: How to Make Educational Videos That Rank, How to Repurpose One Video into Shorts, Reels and Posts, and How to Read and Use the YouTube Studio App. What You Will LearnHow to choose a Hindi niche that has demand How to use Hindi and Hinglish in titles and speech How to make searchable titles, thumbnails, and descriptions How to film and edit simply, with a phone if needed How to use Shorts, Community posts, and series How to grow and monetize honestly in IndiaStep 1: Choose a Niche Indian Viewers Search For What to do: Choose a niche that Indian viewers search for, that you know well, and that you can make videos about for months. Popular Hindi niches include study tips, tech help, cooking, fitness, finance basics, farming, government exam preparation, and local skills, but the best niche for you is one where demand meets your knowledge. Check what questions people ask, what videos already exist, and where you can add a clearer, simpler explanation, rather than copying the biggest channel in a crowded niche. How to do it in simple steps:List five topics you know well and enjoy explaining. Search YouTube in Hindi for questions in each topic. Note which questions have many views but weak or unclear answers. Choose one niche, and plan ten videos in it.Practical example: A creator who knows smartphone settings well finds that Hindi searches for "phone storage full" have many views but confusing answers. They make a clear, step-by-step Hindi tutorial, and it becomes their first video to reach 1,000 views. Common mistake to avoid: Choosing a niche only because it is popular, such as general vlogging, without a clear skill or topic. Broad channels grow slowly, because viewers do not know what to expect from the next video. Illustrative image: Choose a niche where demand meets your knowledge. This is an illustrative image, not a screenshot of your channel or another creator's work. Step 2: Speak Clearly, in the Hindi Your Audience Uses What to do: Speak in the Hindi your audience actually uses, whether that is simple Hindi, Hinglish, or a mix with English technical words. Many Indian viewers understand Hinglish better than formal Hindi, especially for tech, study, and finance topics, where English terms are common. Speak slowly, explain technical words in Hindi, and use examples from daily life in India, such as local prices, phones, and situations viewers recognise. Clear speech matters more than perfect grammar. How to do it in simple steps:Use simple sentences, and explain technical words in Hindi. Use Hinglish naturally, where your audience does. Speak slowly, and pause after important steps. Test your video with a friend, and ask what was unclear.Practical example: A creator explains "storage" as "phone ki memory," shows the settings screen, and uses a local example of photos and WhatsApp videos filling the phone. Viewers comment that they finally understood the problem, because the language was theirs. Common mistake to avoid: Using very formal Hindi, or very fast English, that your audience struggles to follow. If viewers have to replay every sentence, they will leave, even if the information is correct. Illustrative image: Speak in the Hindi your audience actually uses. This is an illustrative image, not a screenshot of your channel or another creator's work. Step 3: Make Searchable Hindi Titles, Thumbnails, and Descriptions What to do: Make titles that match the words Indian viewers type in search, in Hindi, Hinglish, or Roman Hindi, depending on how your audience searches. Many viewers type in Roman Hindi, such as "phone storage kaise khali kare," while others type in Devanagari. Check how top videos in your niche title their videos, and use the style your audience uses, while keeping the title clear and honest. Thumbnails should be readable on a phone, with large text and a clear image, because most Indian viewers watch on mobile. How to do it in simple steps:Search your topic in Hindi, Hinglish, and Roman Hindi, and note common phrases. Use the most common phrase near the start of your title. Make thumbnails with large, readable text and one clear image. Write descriptions in the same language style, with the main point first.Practical example: A creator titles a video "Phone Storage Full? Kaise Khali Kare (Step by Step)," with a thumbnail showing a full storage warning and a clean phone. The video is found by viewers searching in Roman Hindi, and by viewers searching in English, because the thumbnail is clear. Common mistake to avoid: Using only English titles for a Hindi audience, or using a title so clever that no one searches for it. Searchable titles bring your first viewers; clever titles alone do not. Illustrative image: Match the words your audience types in search. This is an illustrative image, not a screenshot of your channel or another creator's work. Step 4: Film and Edit Simply, With What You Have What to do: Film and edit simply, with what you have, because Indian viewers value clarity over expensive production. A phone, natural light, clear audio, and tight editing are enough for most tutorials and explanations. Film in a quiet room, face a window for light, speak close to the phone for clear audio, and cut pauses and mistakes. Add text on screen for important steps, especially for viewers who watch without sound or in noisy places. How to do it in simple steps:Film with a phone, in good light, in a quiet room. Record audio close to you, with no background noise. Cut pauses, mistakes, and long introductions. Add on-screen text for key steps and warnings.Practical example: A creator films a cooking tutorial on a phone, in a kitchen with window light, with clear Hindi instructions and on-screen quantities. Viewers say the video is easy to follow, even on a small phone screen, and they try the recipe. Common mistake to avoid: Waiting for an expensive camera, or filming in a noisy, dark room with long, unedited footage. Viewers leave quickly if they cannot see or hear clearly, no matter how good the information is. Illustrative image: Clear light, audio, and editing beat expensive equipment. This is an illustrative image, not a screenshot of your channel or another creator's work. Step 5: Use Shorts, Series, and Community to Grow in India What to do: Use Shorts, series, and Community posts to grow in India, where mobile viewing and Shorts are huge. Cut one tip from each long video into a Short, in Hindi, with a link to the full video. Make series, such as "10 phone tips" or "30 days of study tips," so viewers know what to expect next. Use Community posts and polls to ask viewers what they want next, in Hindi, and follow through on the results. Consistency matters more than frequency: one good video a week, on schedule, beats five rushed videos. How to do it in simple steps:Cut one Short from each long video, with a Hindi hook. Plan a series of five to ten related videos. Publish on a consistent day, even if only weekly. Use polls to choose the next topic, and make that video.Practical example: A creator makes a series on phone settings, with a Short for each tip, and a poll for the next tip. Viewers who find a Short watch the series, subscribe, and comment in Hindi, building a community that returns. Common mistake to avoid: Posting random videos, with no series, no Shorts, and no schedule. Viewers cannot follow a channel that has no pattern, and the algorithm cannot learn who likes it. Illustrative image: Shorts, series, and polls build a returning Hindi audience. This is an illustrative image, not a screenshot of your channel or another creator's work. Step 6: Grow and Monetize Honestly, With Indian Audiences in Mind What to do: Grow and monetize honestly, with Indian audiences in mind. Understand that Hindi channel RPM is often lower than English channel RPM, because advertising rates differ by market, so do not judge success only by ad revenue. Build income through long videos, affiliates for products you actually use, small sponsorships from brands that fit your niche, and memberships or courses when you have trust. Avoid buying views, copying others, or making misleading claims, which can lead to strikes and loss of trust. How to do it in simple steps:Focus first on useful videos and returning viewers. Use affiliates and sponsorships only for products you trust. Disclose sponsorships and affiliates clearly, in Hindi. Check monetization rules and taxes for India, in official sources.Practical example: A creator with a Hindi tech channel earns modest ad revenue, but also earns from affiliate links for phones and accessories they review honestly, and from a small sponsorship for a local brand. Total income grows as the audience grows, without misleading viewers. Common mistake to avoid: Copying popular Hindi channels, buying subscribers, or promoting products you have not used. Short-term growth from these tactics damages trust, and trust is the main asset of a Hindi channel. Illustrative image: Honest growth and disclosure build lasting income in India. This is an illustrative image, not a screenshot of your channel or another creator's work. Checklist for Growing a Hindi YouTube Channel in IndiaNiche chosen, with ten videos planned Clear Hindi or Hinglish, with technical words explained Searchable titles, readable thumbnails, and clear descriptions Simple filming, clear audio, and tight editing Shorts cut from long videos, with links Series and consistent schedule in place Polls used, with results acted on Honest monetization, with clear disclosureFrequently Asked Questions Should I make videos in Hindi, Hinglish, or English? Use the language your audience uses. For most Indian viewers, simple Hindi or Hinglish works best, especially for tutorials. Use English technical terms where your audience already uses them, and explain them in Hindi. Should I use Devanagari or Roman Hindi in titles? Check how your audience searches. Many viewers type in Roman Hindi on phones, while others use Devanagari. Use the style your top competitors and your viewers use, and keep the title clear either way. Can I grow a Hindi channel with only a phone? Yes. Many Hindi creators start with a phone, window light, and free editing apps, and grow through clear, useful videos. Equipment helps later, but clarity and consistency matter first. Why is Hindi channel RPM lower? Advertising rates differ by country, audience, and topic, so Hindi channels in India often have lower RPM than English channels in higher-advertising markets. Focus on total income, including affiliates and sponsorships, not only on RPM. How long does it take to grow a Hindi channel? It varies, but most channels grow through a catalogue of useful videos over months, not through one viral video. Publish consistently, learn from analytics, and improve one thing per video. Growing a Hindi YouTube channel in India is not about being famous, but about being useful in the language viewers trust. Speak clearly, answer real questions, publish consistently, and your audience will find you, and stay with you.

- CreatorPlaybook Team
- 25 Oct, 2026
How to Grow Engagement with Community Posts and Polls
Videos are not the only way to talk to your audience. Community posts and polls let you share updates, ask questions, and keep viewers involved between uploads, without making a full video. Used well, they turn passive viewers into active community members, who comment, vote, and return for the next video. Used poorly, they become noise that viewers ignore, so the key is to post with a purpose, not just to post often. This guide explains how to grow engagement with Community posts and polls, in a practical, beginner-friendly way. It covers what to post, how to write polls that people actually answer, how often to post, how to turn poll results into videos, and how to handle comments kindly. It focuses on engagement that leads to videos, not on empty likes, and it is distinct from a general Community Tab guide: it is about polls, posts, and turning responses into content. Related guides: How to Handle Negative Comments, How to Read and Use the YouTube Studio App, and How to Repurpose One Video into Shorts, Reels and Posts. What You Will LearnWhat Community posts and polls are best for How to write polls that get real answers What to post between videos, without spamming How to turn poll results into videos How to reply to comments and build trust How to measure whether Community posts helpStep 1: Use Community Posts to Stay Present Between Videos What to do: Use Community posts to stay present between videos, by sharing short updates, behind-the-scenes notes, and questions that keep your channel in viewers' minds. A viewer who sees a helpful post on Tuesday is more likely to watch your video on Friday, because the channel feels active and human. The goal is not to replace videos, but to bridge the gap between them, especially if you publish only once a week or less. How to do it in simple steps:Post once or twice between videos, not every hour. Share one useful tip, update, or question per post. Link to a relevant video only when it truly helps. Keep posts short, clear, and in your own voice.Practical example: A creator posts a short update on Wednesday: "I am filming the lighting tutorial you voted for, and it will be out Friday. What is your biggest lighting problem?" Viewers reply, and Friday's video gets more comments, because viewers feel involved. Common mistake to avoid: Posting only "New video out!" links, every day, with no value. Viewers quickly learn to ignore link-only posts, and engagement drops, even for important announcements. Illustrative image: Stay present between videos with short, useful posts. This is an illustrative image, not a screenshot of your channel or another creator's work. Step 2: Write Polls That Ask One Clear Question What to do: Write polls that ask one clear question, with two to four simple options, so viewers can answer in seconds. The best polls are about decisions viewers care about: which video next, which tool to review, or which problem to solve. A poll should not be a trick, a test, or a vague question, because viewers will skip it if they have to think too hard. Give each option a clear meaning, and avoid options that overlap. How to do it in simple steps:Ask one question, in plain words. Offer two to four clear, different options. Make the question about a real decision you will act on. Share the result, and what you will do with it.Practical example: A creator asks: "Which tutorial next? Window light, lamp light, or ring light?" Viewers vote, the winner becomes the next video, and viewers watch it because they chose it. Common mistake to avoid: Asking a vague poll, such as "Do you like my channel? Yes or No," with no action after it. Viewers answer once, learn nothing, and stop voting in future polls. Illustrative image: One clear question, with simple options, gets real answers. This is an illustrative image, not a screenshot of your channel or another creator's work. Step 3: Post Useful Content, Not Just Announcements What to do: Post useful content in Community posts, such as a quick tip, a photo of your setup, a short story, or a question that teaches something. A post that helps viewers on its own, even without a video, builds trust and engagement, because viewers learn that your posts are worth reading. Announcements still matter, but they should be the minority of your posts, not the majority. How to do it in simple steps:Share one tip that stands alone, without a video. Show a setup, mistake, or before-and-after, with a short caption. Ask a question that invites experience, not just yes or no. Save announcements for new videos and important updates.Practical example: A creator posts a photo of a window-light setup, with a caption: "This one window, plus a white sheet, gave me my best lighting yet. What is your lighting setup?" Viewers share photos and tips, and the post gets more comments than a simple announcement would. Common mistake to avoid: Using Community posts only to promote, with no useful content. Promotion without value trains viewers to skip your posts, which hurts even your best announcements. Illustrative image: Useful posts build trust; promotion alone does not. This is an illustrative image, not a screenshot of your channel or another creator's work. Step 4: Turn Poll Results Into Videos Viewers Asked For What to do: Turn poll results into videos viewers asked for, and tell them you did. When viewers vote and then see their choice become a video, they feel ownership, and they are more likely to watch, comment, and vote again. If the winning option is not feasible, explain why, and offer the next best option, rather than ignoring the vote. Following through is what turns a poll from a game into a community habit. How to do it in simple steps:Run a poll about a real next video. Share the result in a post, with thanks. Make the winning video, and mention the poll in it. Ask for the next poll question in the video.Practical example: A poll chooses "lamp light" over "ring light," the creator makes a lamp-light tutorial, opens it by saying "You voted for this," and viewers comment that they feel part of the channel. The next poll gets even more votes. Common mistake to avoid: Running polls and then ignoring the results, making a different video without explanation. Viewers learn that voting changes nothing, and they stop participating. Illustrative image: Follow through on poll results, and viewers will vote again. This is an illustrative image, not a screenshot of your channel or another creator's work. Step 5: Reply, Moderate, and Build a Kind Community What to do: Reply to comments on Community posts, moderate kindly, and set the tone you want. A reply, even a short one, shows viewers that you read their comments, and it encourages others to comment too. Moderate by hiding or blocking abuse, while keeping criticism that is respectful, and by modelling the tone you want: helpful, curious, and kind. A community that feels safe grows faster than one that feels chaotic. How to do it in simple steps:Reply to early comments, especially questions. Thank viewers who share useful experiences. Hide or block abuse, without engaging in arguments. Keep respectful criticism, and answer it calmly.Practical example: A creator replies to five comments on a poll post, thanking voters and asking follow-up questions. Other viewers join the conversation, and the post's comment count grows, which helps it reach more viewers. Common mistake to avoid: Never replying, or replying only to praise and ignoring questions. Viewers who feel ignored stop commenting, and a community that is not tended will not grow. Illustrative image: Replies and kind moderation build a community that returns. This is an illustrative image, not a screenshot of your channel or another creator's work. Step 6: Measure Community Engagement, and Adjust Your Rhythm What to do: Measure whether Community posts help, by checking votes, comments, and whether video views and subscribers rise after a post, not just by likes. A post with many votes but no video views may be entertaining but not useful, while a post with fewer votes but more comments and video clicks may be better for growth. Adjust your rhythm: if posts are ignored, post less often but with more value; if polls work, run them regularly, but not so often that they lose novelty. How to do it in simple steps:Note votes, comments, and video clicks for each post. Compare post types: tips, polls, updates, and announcements. Keep what works, and drop what is ignored. Set a sustainable rhythm, such as one or two posts between videos.Practical example: A creator finds polls about next videos get the most votes and comments, while link-only announcements get the least. They shift to more polls and tips, and fewer announcements, and overall engagement rises. Common mistake to avoid: Posting more and more when engagement falls, without changing the content. More of what viewers ignore does not help; better, more useful posts do. Illustrative image: Measure votes, comments, and video clicks, then adjust. This is an illustrative image, not a screenshot of your channel or another creator's work. Checklist for Community Posts and PollsOne or two useful posts between videos Poll asks one clear question, with simple options Poll result shared, and acted on in a video Useful tip or story in most posts, not only announcements Comments replied to, with kind moderation Post types compared, with a sustainable rhythm setFrequently Asked Questions How often should I post in Community? For most creators, once or twice between videos is enough. More frequent posts can feel like spam, especially if they are only announcements, while too few posts make the channel feel quiet. Do Community posts help small channels? Yes, but slowly. They help by keeping existing viewers engaged and by building a habit of interaction, which supports video growth. They are not a shortcut to subscribers on their own. What if my polls get few votes? That is normal at first. Ask clearer questions, about real decisions, share the results, and follow through. Votes grow as viewers learn that voting changes what you make. Should I post in Community if I have few subscribers? Yes, if you have access to the feature, because it trains you to communicate with viewers and builds a record of useful posts for future subscribers to discover. Can Community posts replace videos? No. Posts support videos, but they do not replace them. Viewers subscribe for videos, and posts keep them engaged between videos, not instead of them. Community posts and polls are not about posting more, but about asking better questions, sharing useful things, and following through. Do that consistently, and your viewers will not just watch, they will participate.

- CreatorPlaybook Team
- 25 Oct, 2026
How to Use New YouTube Studio Features
YouTube Studio changes often, and new features can be easy to miss, especially when you are busy making videos. Yet Studio is where you learn what viewers want, where you improve titles and thumbnails, and where you manage your channel safely. Knowing how to use its newer features, from deeper analytics to better editing tools, can save time and help you make better decisions, without needing extra software. This guide explains how to use new YouTube Studio features in a practical way. It covers the dashboard, analytics, audience insights, content tools, and mobile app, with a focus on features that help small and growing creators. Features change over time, so this guide teaches you how to find, test, and use new tools, and how to check YouTube's official help pages for the latest details, rather than promising that every button will look the same forever. Related guides: How to Read and Use the YouTube Studio App, How to Review Your Channel Every Month and Improve, and How to Make Educational Videos That Rank. What You Will LearnHow to navigate Studio without getting lost How to use newer analytics and audience insights How to test titles, thumbnails, and ideas How to use editing, chapters, and end-screen tools How to use the Studio mobile app effectively How to adopt new features safely, without breaking what worksStep 1: Start With the Dashboard and the Right Questions What to do: Start with the dashboard, but use it to ask questions, not just to check numbers. The dashboard shows recent performance, top videos, and news from YouTube, but its real value is in helping you decide what to do next: which video to improve, which topic to repeat, and which audience to serve. Before opening analytics, decide what you want to learn, such as "Which of my last five videos kept viewers longest?" How to do it in simple steps:Open the dashboard and note your top recent videos. Write down one question you want analytics to answer. Open analytics for that question only, to avoid overload. Write down one action based on what you find.Practical example: A creator asks why one tutorial outperformed others, checks its traffic sources, and finds it came from search. They make a follow-up tutorial on a related search question, and it also performs well. Common mistake to avoid: Opening Studio, scrolling through every number, and closing it without a decision. Analytics without an action is entertainment, not learning. Illustrative image: Start Studio with a question, not just a number check. This is an illustrative image, not a screenshot of your channel or another creator's work. Step 2: Use Deeper Analytics to Understand Your Audience What to do: Use deeper analytics to understand who watches, where they come from, and what they watch next. Newer analytics features often show audience segments, returning versus new viewers, and which videos bring subscribers. These insights help you decide whether to make more tutorials, more stories, or more Shorts, and whether your audience is growing or just changing. Compare similar videos, not different formats, for fair comparisons. How to do it in simple steps:Compare new versus returning viewers for your channel. Check traffic sources for your top five videos. Note which videos bring subscribers, not only views. Use audience insights to plan your next series.Practical example: A creator finds that tutorials bring subscribers, while entertainment videos bring views but few subscribers. They keep both, but make tutorials the core series, and entertainment the occasional extra. Common mistake to avoid: Judging a video only by views, without checking subscribers, retention, or audience. A video with fewer views but more subscribers and better retention can be more valuable for growth. Illustrative image: Deeper analytics show who returns, who subscribes, and why. This is an illustrative image, not a screenshot of your channel or another creator's work. Step 3: Test Titles, Thumbnails, and Ideas Before You Commit What to do: Use Studio's testing tools, where available, to test titles and thumbnails, instead of guessing. Testing lets you compare two or three options with real viewers, and learn which one earns more clicks without misleading viewers. If a formal test tool is not available for your channel, you can still test by changing one element at a time, waiting for enough data, and noting the result. The key is to test one thing, with a clear question, and to give it time. How to do it in simple steps:Choose one video and one element to test: title or thumbnail. Create two or three clear, honest options. Run the test, or change one element, and wait for data. Keep the winner, and note why it won for future videos.Practical example: A creator tests two thumbnails: one cluttered, one simple with a clear before-and-after. The simple thumbnail earns more clicks, and the creator uses that style for the whole series. Common mistake to avoid: Changing titles, thumbnails, and topics all at once, and then not knowing what caused a change. Test one thing at a time, or you learn nothing. Illustrative image: Test one title or thumbnail at a time, with real viewers. This is an illustrative image, not a screenshot of your channel or another creator's work. Step 4: Use Content Tools for Chapters, Cards, and End Screens What to do: Use Studio's content tools to help viewers navigate and stay: chapters for long tutorials, cards for related videos, and end screens for the next video. Chapters help viewers jump to the part they need, which improves satisfaction and retention for long videos. End screens help viewers continue to another video, which builds watch time and subscribers. These tools are small, but they make a channel feel professional and easy to follow. How to do it in simple steps:Add chapters to long tutorials, with clear time stamps. Add end screens that link to the next video in a series. Use cards sparingly, for truly related videos. Check that links work, before and after publishing.Practical example: A creator adds chapters to a 20-minute tutorial, and viewers comment that they could find the section they needed quickly. Retention improves, because viewers do not leave when they cannot find a step. Common mistake to avoid: Adding too many cards, end screens, and links, which distract viewers. One clear next step is better than five competing links. Illustrative image: Chapters and end screens help viewers stay and continue. This is an illustrative image, not a screenshot of your channel or another creator's work. Step 5: Use the Studio Mobile App for Quick Checks, Not Deep Work What to do: Use the Studio mobile app for quick checks and replies, such as checking a new video's early performance, replying to comments, and reading notifications, while saving deep analytics and editing for a computer. The mobile app is convenient, but its small screen makes it easy to misread data or make rushed changes. Use it to stay in touch, not to make big decisions in a hurry. How to do it in simple steps:Use the app for comments, notifications, and quick performance checks. Save title, thumbnail, and analytics decisions for a computer. Set notification limits, so Studio does not distract you all day. Review weekly on a computer, with a notebook for actions.Practical example: A creator replies to comments on the app during a break, but waits until evening on a computer to change a thumbnail, after checking retention properly. The decision is better, because it was not rushed. Common mistake to avoid: Checking the app every hour, changing thumbnails from a phone, or panicking over early numbers. Mobile checks should inform, not control, your day. Illustrative image: Use the mobile app for quick checks, and a computer for deep decisions. This is an illustrative image, not a screenshot of your channel or another creator's work. Step 6: Adopt New Features Safely, One at a Time What to do: When Studio adds a new feature, adopt it safely, one at a time: learn what it does, test it on one video, measure the result, and only then use it widely. New features are not automatically better for every channel, and some may not fit your format or audience. A careful test protects what already works, while letting you benefit from genuine improvements, such as better analytics, easier editing, or new ways to reach viewers. How to do it in simple steps:Read YouTube's official description of the new feature. Test it on one video, with a clear goal. Compare the result with similar videos without the feature. Keep it only if it helps, and note how to use it for future videos.Practical example: A creator tests a new analytics view that shows which videos bring subscribers, finds it useful for planning series, and adds it to their monthly review. Another new feature, for a format they do not use, is ignored without guilt. Common mistake to avoid: Turning on every new feature at once, or ignoring all new features because they feel unfamiliar. Test one, keep what helps, and ignore the rest. Illustrative image: Test new features one at a time, and keep only what helps. This is an illustrative image, not a screenshot of your channel or another creator's work. Checklist for New YouTube Studio FeaturesDashboard question written before opening analytics New versus returning viewers checked Traffic sources and subscriber videos noted Title or thumbnail test run, one element at a time Chapters and end screens added to long videos Mobile app used for quick checks, not rushed decisions New feature tested on one video, with a clear resultFrequently Asked Questions Why does my Studio look different from a tutorial? Studio changes over time, and features roll out at different times to different channels. Use tutorials for concepts, and check YouTube's official help pages for the current layout in your account. Should I use every new Studio feature? No. Use features that help your format and audience, and ignore those that do not. A feature is useful only if it improves a decision, a video, or a workflow for you. How often should I check Studio? Daily for comments and quick checks, weekly for performance, and monthly for deeper decisions. More frequent deep checks create stress without enough data to act on. Can Studio tell me what video to make next? It can suggest topics, based on what your audience watches, but it cannot replace your judgment. Use Studio to inform ideas, then choose topics you can teach well and sustain. What if a new feature disappears? That happens, as features are tested and changed. Keep notes on what you learned, not only on the button you clicked, so your knowledge survives layout changes. YouTube Studio is not a scoreboard, but a workshop. Use it to ask better questions, test honestly, and make one improvement at a time, and new features will help you, instead of distracting you.

- CreatorPlaybook Team
- 25 Oct, 2026
How to Protect Your Channel from Strikes, Copyright and Reused Content
A single strike can limit a channel, and repeated strikes can remove it, yet many strikes are avoidable with simple habits: using licensed or original material, checking claims before publishing, and adding real value to anything you reuse. Copyright, community guidelines, and reused-content rules are different systems, but they share one idea: YouTube protects viewers, creators, and rights holders, and it expects creators to make original work that follows the rules. This guide explains how to protect your channel from strikes, copyright problems, and reused-content issues, in plain language. It covers the difference between claims and strikes, how to use music, clips, and images safely, how to transform reused material with original commentary, how to check your channel status, and what to do if you receive a claim or strike. This is general information, not legal advice; for a serious dispute, check YouTube's official help pages and consider professional advice. Related guides: YouTube Copyright and Music: Safe Guide, Monetization Beyond AdSense: Affiliate, Sponsorship, Membership, and How to Read and Use the YouTube Studio App. Official source: Understand copyright strikes What You Will LearnThe difference between claims, strikes, and reused-content issues How to use music, clips, and images safely How to add original value to reused material How to check your channel status regularly How to avoid community-guidelines strikes What to do if you get a claim or strikeStep 1: Learn the Difference Between Claims and Strikes What to do: Learn that a Content ID claim and a copyright strike are not the same. A claim usually means a rights holder has identified their material in your video, and the video may be monetized by them, blocked in some regions, or left alone, but it is not a strike. A strike comes from a formal takedown request, and it is more serious: it can limit features, and multiple strikes can lead to channel termination. Community-guidelines strikes are separate, and come from breaking YouTube's rules on content, not from copyright alone. How to do it in simple steps:Check YouTube Studio for claims, strikes, and restrictions, separately. Read the details of each claim: what material, and what action was taken. Do not panic over a claim, but do not ignore a strike. Learn the current strike rules in YouTube's official help pages.Practical example: A creator gets a claim on a song used in a tutorial, and the video's revenue goes to the rights holder, but the channel is not struck. The creator switches to licensed music for future videos, and the problem does not repeat. Common mistake to avoid: Treating every claim as a strike, or treating a strike as a minor claim. Ignoring a strike, or repeating the same mistake that caused it, is how small problems become channel-ending problems. Illustrative image: Claims and strikes are different, and need different responses. This is an illustrative image, not a screenshot of your channel or another creator's work. Step 2: Use Music, Clips, and Images Only With a Right to Use Them What to do: Use only music, clips, and images you have a right to use: your own work, properly licensed music, royalty-free libraries with clear terms, or material you have permission for. For music, check whether a track is licensed for YouTube, whether it needs attribution, and whether it can be used for monetized videos. For clips and images, check the licence, not just whether you found them online. Finding something online does not mean you may reuse it. How to do it in simple steps:Keep a list of music and image sources, with their licence terms. Check music licences before publishing, not after a claim. Save licences and permissions, in case you need to show them later. When in doubt, replace the material with your own or licensed work.Practical example: A creator replaces a popular song with a licensed track from a music library, and a tutorial that previously received claims now publishes cleanly, with no revenue loss and no strike risk. Common mistake to avoid: Using a popular song, movie clip, or photo because "everyone uses it," or because it is short. Length does not make reuse legal, and popularity does not grant permission. Illustrative image: Use only material you have a right to use, and keep the licence. This is an illustrative image, not a screenshot of your channel or another creator's work. Step 3: Add Real Original Value to Anything You Reuse What to do: If you reuse other material, add real original value: your own commentary, teaching, criticism, or transformation, so the video is not simply someone else's work re-uploaded. Reused content, such as compilations, clips without commentary, or minimally edited videos, can be flagged for monetization and policy reasons, even without a copyright strike. The test is whether a viewer gets something new from your video, beyond what the original already offered. How to do it in simple steps:Ask: what does my video add that the original does not? Add your own voice, explanation, examples, and structure. Use short clips to support a point, not as the whole video. Credit sources where appropriate, without assuming credit replaces permission.Practical example: A creator reacts to a news clip by pausing, explaining the background, showing examples, and teaching a skill related to it. The video is original teaching that uses a clip, not a re-upload of the clip itself. Common mistake to avoid: Uploading a compilation, a reaction with no commentary, or a video that is mostly someone else's footage, and calling it original because you added an intro. Minimal changes do not make reused content original. Illustrative image: Add teaching and commentary, not just a re-upload. This is an illustrative image, not a screenshot of your channel or another creator's work. Step 4: Check Your Channel Status and Copyright Notices Regularly What to do: Check your channel status, copyright notices, and restrictions regularly, in YouTube Studio, so you catch problems early. A weekly check takes minutes and can prevent a small issue from becoming a strike: you can remove, replace, or dispute material, update music, or edit a video before a pattern forms. Keep a simple log of claims, actions taken, and licences used, so you can see patterns and avoid repeating mistakes. How to do it in simple steps:Check copyright and community-guidelines status weekly. Review each new claim, and note what material caused it. Fix the cause for future videos, not only for the claimed video. Keep licences, permissions, and dispute records in one place.Practical example: A creator checks Studio weekly, notices two claims from the same music source, and switches libraries before a third video is affected. The channel stays clean, because the pattern was caught early. Common mistake to avoid: Never checking Studio until a strike arrives, or checking only views and subscribers. Channel health is as important as growth, and it needs regular attention. Illustrative image: A weekly channel-health check catches problems early. This is an illustrative image, not a screenshot of your channel or another creator's work. Step 5: Avoid Community-Guidelines Strikes With Clear Rules for Yourself What to do: Avoid community-guidelines strikes by setting clear rules for yourself: no misleading titles or thumbnails, no harmful or deceptive content, no spam, and no content that breaks YouTube's policies on safety, harassment, or misinformation. Read the guidelines for your topic, especially if you cover health, finance, news, or sensitive subjects, where rules are stricter. When a topic is borderline, choose a safer angle, or do not publish it. How to do it in simple steps:Read the community guidelines for your main topics. Check titles and thumbnails for misleading claims. Avoid deceptive practices, such as fake giveaways or spam. When unsure, choose a clearer, safer version of the video.Practical example: A creator changes a thumbnail that promised a result the video did not deliver, to an honest thumbnail showing the actual setup. Views are slightly lower, but the channel avoids a misleading-content strike and keeps viewer trust. Common mistake to avoid: Using clickbait, misleading thumbnails, or controversial claims to chase views, and then being surprised by a strike. Short-term views are not worth long-term channel risk. Illustrative image: Honest titles and safe content protect your channel. This is an illustrative image, not a screenshot of your channel or another creator's work. Step 6: Respond Calmly and Correctly to a Claim or Strike What to do: If you receive a claim or strike, respond calmly and correctly: read the notice fully, check what material is involved, and choose the right response, which may be to accept it, replace the material, trim the video, or dispute it only if you have a valid reason, such as a licence or fair use. Do not dispute a valid claim, do not re-upload a removed video, and do not repeat the same mistake in the next video. Keep records of your response, and learn from the notice. How to do it in simple steps:Read the full notice, including the material and the action. Check your licences and permissions for that material. Choose the correct action: accept, replace, trim, or dispute with evidence. Fix the cause for future videos, and keep a record.Practical example: A creator receives a claim for a music track, replaces it with a licensed track, and the claim is resolved. The creator also updates their music list, so the same track is never used again. Common mistake to avoid: Disputing every claim without evidence, re-uploading a removed video, or ignoring a strike. These actions can worsen the situation and lead to further strikes. Illustrative image: Read the notice, check your licence, and act correctly. This is an illustrative image, not a screenshot of your channel or another creator's work. Checklist to Protect Your ChannelClaims, strikes, and restrictions checked weekly Music, clips, and images used only with a right to use them Licences and permissions saved Original commentary added to any reused material Honest titles and thumbnails, with no misleading claims Community guidelines read for your topics Claim or strike response planned, with records keptFrequently Asked Questions Can I use a short clip of a song or movie? Short does not mean safe. Use licensed music, or a clip only where you have a right or a valid fair-use reason, and check YouTube's official guidance. When in doubt, replace it. Does giving credit protect me from copyright? No. Credit does not replace permission or a licence, although it is good practice where required. You still need a right to use the material. What happens if I get three strikes? Rules can change, but historically, multiple strikes can lead to channel termination. Check YouTube's current strike policy in its official help pages, and treat any strike seriously. Can I dispute a claim? Yes, if you have a valid reason, such as a licence, permission, or fair use, and evidence to support it. Do not dispute a claim you know is valid, as a false dispute can cause further problems. Is reused content always bad? No, but it must add original value. Compilations, clips, and reactions without commentary are risky, while teaching, criticism, and transformation with your own work are much safer. Protecting your channel is not about fear, but about habits: licensed material, original value, regular checks, and honest content. Those habits keep your channel safe, and they also make your videos better for viewers.

- CreatorPlaybook Team
- 25 Oct, 2026
How the YouTube Algorithm Works in 2026
Many creators think of the YouTube algorithm as a single machine that decides who succeeds, but in 2026 it is better understood as several systems working together: search, suggestions, home, and Shorts, each trying to match the right video to the right viewer at the right time. None of them rewards tricks, and none of them punishes small channels on purpose. They reward videos that viewers choose, watch, and return for, in ways that are specific to each viewer. This guide explains how the YouTube algorithm works in 2026, in plain language, and how to work with it without gaming it. It covers the main surfaces, the signals that matter most, why small channels can still be tested, how Shorts and long videos differ, and what to change when a video underperforms. It is distinct from a general introduction to the algorithm: it focuses on current practice, testing, and realistic expectations for 2026. Related guides: How to Read and Use the YouTube Studio App, How to Make Educational Videos That Rank, and How to Repurpose One Video into Shorts, Reels and Posts. What You Will LearnWhy there is no single YouTube algorithm How search, home, suggested, and Shorts differ Which signals matter most in 2026 How new videos are tested with small audiences How to improve a video's chances, honestly What to do when a video underperformsStep 1: Think in Surfaces, Not in One Algorithm What to do: Think in surfaces, not in one algorithm. Search helps viewers who know what they want; home and suggested help viewers discover what they might like; Shorts help viewers browse quickly. A video can succeed on one surface and not another, and that is normal. For example, a tutorial may do well in search for years, while a story video may do well in suggestions for a week, and a Short may do well in the feed for a day. Planning for the right surface helps you set the right title, length, and opening. How to do it in simple steps:Decide the main surface for each video: search, suggested, home, or Shorts. For search, use clear, searchable titles and descriptions. For suggested and home, focus on topic fit and viewer satisfaction. For Shorts, focus on a fast hook and complete point.Practical example: A creator makes a tutorial for search, with a precise title, and a story video for suggestions, with a curiosity title. Both succeed, but in different ways, and the creator does not judge the tutorial by Shorts views or the story by search rank. Common mistake to avoid: Making every video for "the algorithm" in general, with the same title style and length, regardless of surface. A search tutorial and a Short need different structures, and treating them the same weakens both. Illustrative image: Search, home, suggested, and Shorts are different systems. This is an illustrative image, not a screenshot of your channel or another creator's work. Step 2: Understand the Signals That Matter Most What to do: Understand the signals that matter most: whether viewers click, whether they watch, whether they are satisfied, and whether they return. Click-through rate shows whether a title and thumbnail appeal; retention shows whether the video delivers; satisfaction shows whether viewers liked, commented, shared, or watched more; and returning viewers show whether a channel is worth recommending again. No single signal decides everything, and the system weighs them together, in context, for each viewer. How to do it in simple steps:Improve click-through with clear titles and readable thumbnails. Improve retention with strong openings and tight editing. Improve satisfaction by delivering what the title promises. Improve return visits with series, schedules, and consistent topics.Practical example: A video with a high click rate but low retention stops being recommended, because viewers leave quickly. The creator shortens the opening, removes filler, and the next video's retention improves, which helps it reach more viewers. Common mistake to avoid: Chasing clicks with misleading titles or thumbnails. Clicks without satisfaction harm retention and trust, and the system learns that viewers do not enjoy the video, even if the click rate looks good at first. Illustrative image: Clicks, watch time, satisfaction, and returns work together. This is an illustrative image, not a screenshot of your channel or another creator's work. Step 3: Learn How New Videos Are Tested What to do: Learn that new videos are usually tested with a small audience first, often including subscribers and viewers with similar interests, and then expanded if those viewers respond well. That is why a video's first hours and days matter, but do not decide everything: a search tutorial can grow slowly over months, while a suggested video can grow quickly if early viewers watch it fully. For small channels, the test audience is small, so early results can look noisy, and one video's result does not prove the channel is failing. How to do it in simple steps:Publish at a time when your audience is likely online, if you know it. Share the video with the right audience, not with everyone. Give the video time, especially if it is made for search. Judge a video by its surface: search videos grow slowly, suggested videos faster.Practical example: A new tutorial gets only 50 views in its first week, then grows to 1,000 over three months as search finds it. The creator does not delete it after week one, and the catalogue effect becomes clear. Common mistake to avoid: Deleting or re-uploading a video after a slow first day, or changing its title and thumbnail every few hours. Constant changes confuse the test, and re-uploads lose any early signals the video had earned. Illustrative image: New videos are tested small first, then expanded if viewers respond. This is an illustrative image, not a screenshot of your channel or another creator's work. Step 4: Make Videos for Viewers, Not for Tricks What to do: Make videos for viewers, not for tricks, because the system in 2026 is designed to learn from real viewer behaviour, not from keywords alone. That means clear topics, honest titles, useful content, and a structure that respects viewers' time. It also means avoiding engagement bait, misleading thumbnails, and repetitive content that viewers swipe away from. Creators who focus on one audience, one topic at a time, and one clear promise per video, tend to build a clearer signal for the system to learn from. How to do it in simple steps:Choose one audience and one promise per video. State the promise in the title, thumbnail, and opening. Deliver the promise fully, without filler. End with a clear next step, such as a related video.Practical example: A creator who made random videos on many topics switches to one niche, with a consistent title pattern and series. Over months, the system learns who likes the channel, and suggested traffic grows, even though no trick was used. Common mistake to avoid: Using keyword stuffing, misleading thumbnails, or copied content to chase views. These may bring a short spike, but they damage retention, satisfaction, and trust, which the system learns from over time. Illustrative image: Clear topics and honest promises build a clearer signal. This is an illustrative image, not a screenshot of your channel or another creator's work. Step 5: Use Shorts and Long Videos Differently in 2026 What to do: Use Shorts and long videos differently, because their systems differ. Shorts are browsed quickly, so the feed tests many Shorts and rewards fast hooks, high completion, and rewatches. Long videos are chosen more deliberately, so search, titles, thumbnails, and retention matter more, and growth can be slower but deeper. A channel that uses Shorts for discovery and long videos for depth, with links between them, gets the best of both, without expecting Shorts to behave like long videos. How to do it in simple steps:Use Shorts to introduce topics and attract new viewers. Use long videos for tutorials, stories, and depth. Link Shorts to related long videos. Do not judge Shorts by long-video metrics, or vice versa.Practical example: A Short about one lighting trick brings new viewers, who then watch a long lighting tutorial. The Short's value is discovery, the long video's value is depth and subscribers, and together they grow the channel. Common mistake to avoid: Posting the same content as a Short and a long video, with no difference, and expecting both to succeed equally. Each format needs its own structure, length, and hook. Illustrative image: Shorts discover, long videos deepen; use each for its strength. This is an illustrative image, not a screenshot of your channel or another creator's work. Step 6: Diagnose Underperformance by Surface and Signal What to do: When a video underperforms, diagnose it by surface and signal, instead of blaming the algorithm in general. Check where traffic came from, what the click rate was, where retention dropped, and whether viewers were satisfied. Then change one thing: a clearer title, a simpler thumbnail, a stronger opening, or a better topic fit. A systematic diagnosis turns a disappointing video into a lesson, while a vague complaint teaches nothing. How to do it in simple steps:Check traffic sources for the video. Check click-through and retention together, not alone. Find the exact moment viewers leave, and ask why. Change one thing in the next video, and keep the rest the same.Practical example: A creator sees high impressions but low clicks, and realises the thumbnail is cluttered. They simplify the next thumbnail, clicks rise, and the video reaches more viewers, without changing the content itself. Common mistake to avoid: Changing everything after one poor video, or blaming the algorithm and quitting. Most underperformance has a specific, fixable cause, such as a vague title, a slow opening, or a topic that does not fit the audience. Illustrative image: Diagnose by surface and signal, then fix one thing. This is an illustrative image, not a screenshot of your channel or another creator's work. Checklist for How the YouTube Algorithm Works in 2026Main surface chosen for each video Clear title, thumbnail, and opening for that surface One audience and one promise per video Retention and satisfaction checked, not only views Shorts and long videos used differently Underperformance diagnosed by surface and signal One improvement made per video, consistentlyFrequently Asked Questions Does YouTube favour big channels? Big channels have larger test audiences, so their videos can grow faster, but the system still tests new videos with relevant viewers first. Small channels grow by serving a specific audience well, consistently, until that audience grows. Does posting more often help the algorithm? Only if quality stays high. More videos give the system more data, but rushed, low-retention videos teach it that viewers do not enjoy your content. A consistent, sustainable schedule beats a frantic one. Should I use trending topics to beat the algorithm? Trending topics can bring views, but only if they fit your audience and you can add real value. A trending video that viewers leave quickly harms your signal more than it helps. Why did my video stop being recommended? It may have reached the viewers most likely to enjoy it, or its retention and satisfaction may have dropped as it reached a broader audience. That is normal, and the next video, not a re-upload, is the best response. Can I ever know exactly how the algorithm works? No, because it changes, and it is personalised for each viewer. Focus on what is stable: clear value, strong openings, honest titles, and viewer satisfaction, which matter in every version. The algorithm in 2026 is not a puzzle to solve, but a matchmaker to work with. Make videos that specific viewers choose, watch, and return for, and the systems will learn to find more of those viewers for you.

- CreatorPlaybook Team
- 25 Oct, 2026
YouTube Shorts Monetization and RPM Explained
Shorts can bring millions of views, yet earn far less per view than long videos, and that gap confuses many creators. Shorts monetization works differently: instead of ads placed on each video, revenue comes from a shared pool, based on views, music use, and other factors, and the amount per thousand views, known as RPM, is usually much lower for Shorts than for long videos. Understanding that system helps you set realistic expectations, and helps you use Shorts for what they do best: discovery, audience growth, and indirect income. This guide explains YouTube Shorts monetization and RPM in plain language. It covers how Shorts revenue is calculated, why RPM varies by topic, country, and music, what eligibility means, and how to increase Shorts income without chasing views alone. It also covers other ways Shorts can earn, such as affiliate links, sponsorships, and driving viewers to long videos, where RPM is often higher. Related guides: How to Repurpose One Video into Shorts, Reels and Posts, Monetization Beyond AdSense: Affiliate, Sponsorship, Membership, and How to Read and Use the YouTube Studio App. Official source: YouTube Shorts monetization policies What You Will LearnHow Shorts monetization actually works What RPM means, and why Shorts RPM is lower What affects your Shorts RPM How to check Shorts revenue in YouTube Studio How to increase Shorts income realistically How Shorts can earn indirectly, beyond ad revenueStep 1: Understand How Shorts Revenue Is Shared What to do: Understand that Shorts ad revenue is pooled and shared, rather than paid per video in the same way as long videos. Advertisers pay for ads shown between Shorts in the feed, that revenue goes into a creator pool, and creators receive a share based on their eligible Shorts views, after music licensing costs where applicable. This is why Shorts income does not follow a simple "views times a fixed rate" formula, and why two creators with similar views can earn different amounts. How to do it in simple steps:Check your monetization status and Shorts eligibility in YouTube Studio. Learn the current revenue-share terms in YouTube's official help pages, as terms can change. Separate Shorts revenue from long-video revenue in your reports. Do not compare Shorts income directly with long-video income, view for view.Practical example: A creator with one million Shorts views earns a modest amount from the Shorts pool, while a long video with 100,000 views earns more, because long videos carry direct ads and longer watch time. The Shorts still help, by bringing new viewers to the long videos that earn more. Common mistake to avoid: Expecting Shorts to pay like long videos, and then feeling that Shorts are "broken" when they do not. Shorts are a discovery format with a different revenue model, and judging them only by direct ad income misses their main value. Illustrative image: Shorts revenue comes from a shared pool, not direct ads per video. This is an illustrative image, not a screenshot of your channel or another creator's work. Step 2: Learn What RPM Means, and What It Does Not Mean What to do: Learn that RPM, revenue per mille, means revenue per 1,000 views, and that it is an average, not a guaranteed rate. For Shorts, RPM is usually much lower than for long videos, often measured in cents rather than dollars per 1,000 views, depending on topic, audience, and other factors. RPM also varies over time, so a single month's RPM does not predict next month's income. Use RPM to compare your own performance over time, not to predict exact earnings from a future view count. How to do it in simple steps:Find Shorts RPM in YouTube Studio, separated from long-video RPM. Compare your Shorts RPM month to month, not with other creators' screenshots. Note that RPM is revenue after YouTube's share, where applicable, not gross ad spend. Use RPM for planning, not for promises: it changes with audience and season.Practical example: A creator's Shorts RPM is 0.08 dollars per 1,000 views in one month, and 0.12 dollars the next, because audience countries and topics changed slightly. Both are normal for Shorts, and neither means the creator did something wrong in the lower month. Common mistake to avoid: Sharing or believing a single screenshot of a high RPM as a promise for all Shorts. RPM depends on many factors, and a high RPM in one niche, country, or month does not apply to every channel. Illustrative image: RPM is an average that varies; use it to track trends, not to predict exact pay. This is an illustrative image, not a screenshot of your channel or another creator's work. Step 3: Know What Raises or Lowers Your Shorts RPM What to do: Know the main factors that affect Shorts RPM: audience country, topic, viewer age and purchasing power, advertiser demand, season, and music licensing. Topics that attract advertisers, such as finance, technology, and education, often have higher RPM than broad entertainment, because advertisers pay more to reach those audiences. Audience country matters too, because advertising rates differ by market. Music can also affect revenue, because licensed music costs are shared, so original or licensed audio choices matter. How to do it in simple steps:Check which countries your Shorts viewers come from, in analytics. Note which topics have higher RPM in your own reports, over several months. Use original or properly licensed audio, and understand music costs where applicable. Do not chase a high-RPM topic you do not understand, simply for RPM.Practical example: A creator finds that tutorials for beginners in English-speaking countries have a higher Shorts RPM than general entertainment Shorts, but the entertainment Shorts bring more new subscribers. They keep both, using entertainment Shorts for growth and tutorials for revenue and depth. Common mistake to avoid: Switching your whole channel to a high-RPM topic you dislike, and then struggling to make videos viewers trust. A slightly lower RPM on a topic you can sustain beats a high RPM on a topic you quit after a month. Illustrative image: Topic, audience, season, and music all affect Shorts RPM. This is an illustrative image, not a screenshot of your channel or another creator's work. Step 4: Check Shorts Revenue Correctly in YouTube Studio What to do: Check Shorts revenue separately from long-video revenue, and over a full month, not after a single viral day. In YouTube Studio, filter by Shorts, look at views, estimated revenue, and RPM together, and note which Shorts earned the most, not only which got the most views. A Short with fewer views but a higher-value audience can earn more than a viral Short with a broad, low-value audience, and that distinction helps you plan future Shorts. How to do it in simple steps:Open revenue reports in YouTube Studio, filtered to Shorts. Compare views, revenue, and RPM for your top ten Shorts. Note the topic and audience of high-earning Shorts, not only high-view Shorts. Review monthly, not daily, because Shorts revenue can lag views.Practical example: A creator's most-viewed Short earned little, because its audience was broad and young, while a tutorial Short with half the views earned more, because its audience matched advertisers better. The creator makes more tutorial Shorts, without stopping entertainment Shorts entirely. Common mistake to avoid: Judging a Short's value only by views, or checking revenue hours after posting and concluding it earned nothing. Shorts revenue builds over days and weeks, and needs a monthly view to be judged fairly. Illustrative image: Check Shorts revenue separately, over a full month. This is an illustrative image, not a screenshot of your channel or another creator's work. Step 5: Increase Shorts Income Without Chasing Views Alone What to do: Increase Shorts income by improving the factors you can control: watch time and completion, audience fit, and links to higher-earning content. Shorts that viewers watch to the end, that attract your target audience, and that lead to long videos, memberships, or affiliate clicks, earn more in total than Shorts that merely get views and swipes. Focus on a clear hook, a complete point, and a next step, rather than on tricks to inflate view counts. How to do it in simple steps:Hook viewers in the first second, with a clear benefit or question. Deliver one complete point, so viewers watch to the end. Link to a related long video, product, or series where relevant. Publish consistently, so the feed learns who likes your Shorts.Practical example: A creator improves Shorts hooks and endings, and adds a link to a related long tutorial. Shorts views stay similar, but completion rises, long-video views rise, and total channel income rises, even though Shorts RPM itself changes little. Common mistake to avoid: Using misleading hooks, clickbait, or loop tricks to inflate views, while viewers swipe away quickly. Low completion harms distribution, and misleading Shorts damage trust, which is worth more than a small RPM gain. Illustrative image: Completion, audience fit, and links matter more than views alone. This is an illustrative image, not a screenshot of your channel or another creator's work. Step 6: Earn From Shorts Indirectly, Through Long Videos and Other Routes What to do: Treat Shorts as part of a larger income system, not as the whole system. Shorts can bring subscribers to long videos, where RPM is higher, drive affiliate clicks for products shown in the Short, attract small sponsorships, and build an audience for memberships or courses. Measure Shorts success by total channel growth and income, not only by Shorts ad revenue, and plan Shorts that naturally lead to those other routes. How to do it in simple steps:Link each Short to a related long video, where a longer explanation exists. Add affiliate links for products shown, with clear disclosure. Use Shorts to test topics, then expand popular ones into long videos. Track subscribers and long-video views that follow Shorts, where data allows.Practical example: A Short about a budget microphone brings few dollars directly, but it brings 200 new subscribers, and those subscribers watch long tutorials that earn far more over time. The Short's real value was audience growth, not its direct ad revenue. Common mistake to avoid: Judging Shorts only by direct ad revenue, and stopping Shorts because the RPM looks low. A Short that brings subscribers, long-video views, or affiliate sales can be far more valuable than its direct revenue suggests. Illustrative image: Shorts earn indirectly, through subscribers and long videos. This is an illustrative image, not a screenshot of your channel or another creator's work. Checklist for YouTube Shorts Monetization and RPMShorts monetization and revenue-share terms checked in official help pages Shorts revenue checked separately from long-video revenue RPM understood as an average, not a guaranteed rate Topic, audience, and music factors noted Top-earning Shorts identified, not only top-viewed Shorts Hooks, completion, and links improved Indirect income tracked: subscribers, long videos, affiliatesFrequently Asked Questions Why is Shorts RPM so much lower than long-video RPM? Because Shorts use a pooled revenue model, with ads between videos rather than on each video, and because Shorts are short, with less watch time per view. Long videos carry direct ads and longer attention, which advertisers pay more for. Can I increase my Shorts RPM directly? Only indirectly, by attracting a higher-value audience, choosing topics advertisers value, improving completion, and using licensed audio wisely. There is no setting that simply raises RPM, and chasing RPM alone can harm your channel. Do views from all countries pay the same? No. Advertising rates differ by country, audience, and season, so the same number of views can earn different amounts depending on where viewers are and what advertisers pay in those markets. Should I stop making Shorts if RPM is low? Not necessarily. Judge Shorts by total value: discovery, subscribers, long-video views, and indirect income, not only by direct ad revenue. If Shorts bring no growth or income at all, then reconsider the format or topics. How often should I check Shorts revenue? Monthly is enough for most creators. Daily checks create stress without enough data, and Shorts revenue can lag views, so a monthly review gives a fairer picture. Shorts monetization is not about earning a fortune per view, but about understanding a different revenue model and using Shorts wisely within it. Let Shorts discover, let long videos earn, and judge Shorts by the whole channel they help build.

- CreatorPlaybook Team
- 25 Oct, 2026
How to Get Your First 100 and First 1,000 Views as a New Creator
The first 100 views feel impossible, and the first 1,000 feel even further away, because a new channel has no audience, no history, and no recommendation data for YouTube to learn from. That is normal, not a sign that your videos are bad. Early growth comes from a different system than later growth: instead of waiting for the algorithm to find you, you must help the right viewers find you, through search, sharing, and videos that answer specific questions. This guide explains how to get your first 100 and first 1,000 views as a new creator, with realistic steps for each milestone. It covers choosing searchable topics, improving titles and thumbnails, sharing without spamming, learning from early analytics, and turning first viewers into returning viewers. The goal is not a viral video, but a repeatable path from zero to 1,000 views, and then beyond. Related guides: How to Make Educational Videos That Rank, How to Read and Use the YouTube Studio App, and How to Repurpose One Video into Shorts, Reels and Posts. What You Will LearnWhy early views are slow, and what to do about it How to choose topics that can reach 100 views first How to improve titles, thumbnails, and openings How to share videos without spamming How to use Shorts to reach new viewers How to turn 100 views into 1,000, and then into subscribersStep 1: Aim for 100 Views From Search, Not From Virality What to do: Aim for your first 100 views from search and specific questions, not from a viral recommendation. A new channel rarely gets recommended widely, because YouTube has little data about who likes your videos. Search is different: if your video answers a specific question, with a title that matches the words viewers type, it can be found by the few people searching for that exact answer, even with no subscribers. How to do it in simple steps:Choose a specific question, such as "how to fix echo in a small room," not a broad topic. Use that question, in plain words, near the start of your title. Answer the question fully in the first two minutes, then add detail. Write a description that repeats the question naturally and summarises the answer.Practical example: A new creator publishes a tutorial titled "How to Remove Echo From a Small Room for YouTube Videos." It does not go viral, but it answers a specific search, and over three weeks it reaches 100 views from search alone, with comments asking follow-up questions. Common mistake to avoid: Publishing a broad, vague video, such as "My YouTube Journey," and expecting strangers to find it. Without a searchable question, even a good video has no path to its first viewers. Illustrative image: Your first 100 views usually come from search, not virality. This is an illustrative image, not a screenshot of your channel or another creator's work. Step 2: Make Titles, Thumbnails, and Openings That Earn the Click What to do: Make it easy for a stranger to understand, in two seconds, what your video offers and why it is worth watching. A clear title, a readable thumbnail, and a strong opening work together: the title promises an answer, the thumbnail shows it visually, and the opening delivers it immediately. For a new channel, clarity beats cleverness, because viewers have no reason yet to trust you based on your name alone. How to do it in simple steps:Write a title that states the benefit or question, in plain language. Design a thumbnail with one clear image and two or three large words. Open the video by stating the problem and the result, in the first 30 seconds. Cut any long introduction before the useful part.Practical example: A creator changes a title from "My Lighting Setup" to "Budget Lighting Setup for YouTube in a Small Room," adds a thumbnail showing the before-and-after, and opens with the result. Click-through improves, and the same video that stalled at 20 views reaches 100. Common mistake to avoid: Using a vague title, a cluttered thumbnail, and a two-minute introduction about yourself. Strangers decide in seconds, and a slow start loses them before your best content appears. Illustrative image: Clear titles, thumbnails, and openings earn clicks from strangers. This is an illustrative image, not a screenshot of your channel or another creator's work. Step 3: Share Where the Question Is Already Being Asked What to do: Share your video where people are already asking the question it answers, such as relevant forums, groups, or comment sections, but only where sharing is welcome and helpful. The goal is not to post links everywhere, but to answer a question with your video as the explanation. One thoughtful share in the right place can bring your first 100 views, while one hundred spammy shares can harm your reputation and get you removed from groups. How to do it in simple steps:Find two or three places where your topic's questions are asked. Answer the question in text, then link the video as a fuller explanation. Share only videos that truly answer the question, not every upload. Reply to comments on your video, and thank viewers who share it.Practical example: A creator answers a forum question about echo in a small room, with a short written answer and a link to their tutorial for the full setup. The post brings 40 views in a day, all from people who needed that exact answer, and several subscribe for more. Common mistake to avoid: Posting "Please watch my video" in dozens of groups, without answering any question. Spam sharing brings few views, annoys communities, and teaches you nothing about what viewers actually want. Illustrative image: Share where the question is asked, and answer it first. This is an illustrative image, not a screenshot of your channel or another creator's work. Step 4: Use Shorts to Bring New Viewers to Long Videos What to do: Use Shorts as a discovery tool for your long videos, by cutting one useful tip, mistake, or before-and-after from each long video into a self-contained Short, with a link to the full video. Shorts can reach viewers who have never seen your channel, and a small percentage will click through to the long video, especially if the Short ends with a clear next step. Treat Shorts as introductions, not as replacements for long videos. How to do it in simple steps:Cut one standalone tip from each long video into a Short. Give the Short its own hook, point, and ending. Link the long video in the description and pinned comment. End the Short with one sentence about the full video.Practical example: A Short showing one window-light trick reaches 2,000 views, and 80 viewers click through to the full lighting tutorial, which then reaches its first 1,000 views faster than search alone would have. The Short did not replace the tutorial; it introduced it. Common mistake to avoid: Posting random Shorts with no link to long videos, or posting Shorts that only make sense after watching the long video. A Short must satisfy viewers alone, or they will not follow it to more content. Illustrative image: Use Shorts as introductions that link to full videos. This is an illustrative image, not a screenshot of your channel or another creator's work. Step 5: Learn From Your First 100 Views, Then Improve One Thing What to do: After your first 100 views, look at what actually happened: where viewers came from, how long they watched, where they left, and what they commented. Then improve one thing in the next video, such as a stronger opening, a clearer title, or a better thumbnail. Early analytics are not for judging yourself, but for learning what to fix next. A channel that improves one thing per video will reach 1,000 views faster than a channel that changes everything after every video. How to do it in simple steps:Check traffic sources: search, suggested, Shorts, or external. Watch the retention graph, and note where viewers leave. Read comments for questions, confusion, and praise. Choose one improvement for the next video, and keep the rest the same.Practical example: A creator sees viewers leave at 40 seconds, during a long background story. The next video starts with the result, and retention improves, which helps the video reach more viewers through suggestions. Common mistake to avoid: Checking analytics every hour, panicking over daily changes, or changing titles, thumbnails, and topics after every video. Early data needs time, and constant changes make it impossible to learn what works. Illustrative image: Learn from your first 100 views, then improve one thing. This is an illustrative image, not a screenshot of your channel or another creator's work. Step 6: Turn 100 Views Into 1,000 With Series and Consistency What to do: Turn first viewers into returning viewers by publishing a series, not unrelated videos, on a consistent schedule. When a viewer finds one useful video, the next video in the series should be obvious and easy to find, through playlists, end screens, and a clear title pattern. Consistency matters because viewers return when they know when to expect you, and YouTube learns who likes your videos when you publish regularly on one topic. How to do it in simple steps:Turn your best topic into a series of five to ten related videos. Publish on a consistent day, even if that is only once a week. Link the next video in end screens, descriptions, and playlists. Ask viewers what question to answer next, and make that video.Practical example: A creator's first lighting video reaches 100 views, and they follow it with a series: window light, lamp light, ring light, common mistakes, and a full setup. Viewers who found the first video watch several more, the channel reaches 1,000 views across the series, and subscribers start to grow. Common mistake to avoid: Publishing one good video, then disappearing for a month, then publishing an unrelated video. First viewers cannot become subscribers if there is nothing consistent for them to return to. Illustrative image: A series and a consistent schedule turn 100 views into 1,000. This is an illustrative image, not a screenshot of your channel or another creator's work. Checklist for Your First 100 and First 1,000 ViewsSpecific, searchable question chosen for each video Clear title, readable thumbnail, and strong opening Video shared where the question is already asked Shorts cut from long videos, with links to the full video Early analytics reviewed, with one improvement per video Series planned, with a consistent publishing day Next video linked in end screens, descriptions, and playlistsFrequently Asked Questions How long does it take to get 100 views? It varies widely, from days to weeks, depending on topic, search demand, and sharing. A specific, searchable video shared in the right place usually reaches 100 views faster than a broad video left to be discovered alone. Should I buy views to reach 1,000? No. Bought views do not bring real viewers, subscribers, or watch time, and they can harm your channel and break platform rules. Real views from search, sharing, and Shorts are slower, but they build an audience that actually returns. Do Shorts count toward 1,000 views? Shorts views are counted, but they behave differently from long-video views, and they rarely bring the same watch time or subscribers alone. Use Shorts for discovery, and long videos for depth and subscribers. What if my first videos get almost no views? That is common for new channels. Check whether the topic is searchable, the title is clear, and the opening is strong, improve one thing, and keep publishing. Most channels grow through a catalogue of useful videos, not through one video. When should I worry about low views? Worry less about a single video, and more about a pattern: if ten searchable, well-titled videos on one topic all stall, consider a narrower topic, a different angle, or better openings, rather than quitting after two videos. Your first 100 views come from helping the right people find a specific answer. Your first 1,000 come from repeating that help, in a series, on a schedule, with one improvement at a time. Focus on searchable value, not on virality, and the views will follow.
- CreatorPlaybook Team
- 25 Oct, 2026
How to Start YouTube with Only a Mobile Phone
You do not need a camera, a computer, or a studio to start YouTube. A mobile phone can film, edit, upload, and manage a channel, and many successful creators started exactly that way. A phone is not a compromise for beginners; it is a complete, portable studio that fits in a pocket, works in good light, and lets you publish from anywhere. The challenge is not equipment, but learning to use the phone well: stable footage, clear audio, good light, and a simple editing routine. This guide explains how to start YouTube with only a mobile phone, step by step. It covers choosing a format that suits a phone, filming with stability and light, recording clear audio, editing on the phone, designing thumbnails, and uploading and managing a channel without a computer. You will learn a practical phone-only workflow you can repeat every week, and when, if ever, you might want to add equipment later. Related guides: Lighting Setup on a Budget for YouTube Videos, Voiceover Tips for Clear Audio, and How to Edit Videos in CapCut for Beginners. What You Will LearnWhich formats work best filmed on a phone How to film stable, well-lit phone video How to record clear audio with a phone How to edit a complete video on a phone How to design thumbnails and titles on a phone How to upload, schedule, and manage a channel by phoneStep 1: Choose a Format That Suits a Phone What to do: Choose a format where a phone is an advantage, not a limitation: talking-head tutorials, vlogs, demonstrations, screen recordings, cooking from a hands-only angle, or short-form videos. These formats work well with a phone's camera, portability, and front-facing screen. Avoid formats that need multiple cameras, complex lighting, or heavy post-production at first, because they add difficulty without adding value for a new channel. How to do it in simple steps:List formats you can film with one phone, in one location. Choose one format you enjoy and can repeat weekly. Test one video in that format, and watch it on a larger screen. Ask whether the phone helped, such as portability, or hurt, such as low light.Practical example: A creator starts a phone-only channel teaching simple recipes, filmed hands-only with the phone on a small tripod above the counter. The phone's portability and close focus suit the format perfectly, and viewers never notice that no dedicated camera was used. Common mistake to avoid: Trying to copy a studio channel's format, with multiple angles and complex sets, using only a phone, and then feeling that phone videos can never look good. Choose a format that plays to the phone's strengths, and it will look professional. Illustrative image: Choose a format where a phone is an advantage, not a limitation. This is an illustrative image, not a screenshot of your channel or another creator's work. Step 2: Film Stable, Well-Lit Video With Simple Tools What to do: Film stable, well-lit video using a small tripod or a stack of books, a window for daylight, and the phone's rear camera where possible. Stability and light matter more than resolution: a shaky, dark video looks amateur even in 4K, while a stable, bright video in 1080p looks professional. Lock exposure and focus on your face or subject, so the phone does not constantly adjust brightness during the video. How to do it in simple steps:Place the phone on a tripod, at eye level for talking-head videos. Face a window in daylight, or use a simple lamp in front of you. Use the rear camera for the best quality, where you can frame with a mirror or a test clip. Lock focus and exposure by tapping and holding on the subject, where your phone allows it.Practical example: A tutorial creator films facing a window, with the phone on a small tripod, and locks exposure on their face. The video is bright, stable, and sharp, even though the only equipment is a phone and a ten-dollar tripod. Common mistake to avoid: Holding the phone in your hand for a long tutorial, filming with light behind you, and letting the phone's auto-exposure flicker. Stability and front light are free or cheap, and they transform phone footage more than any camera upgrade. Illustrative image: A tripod and window light transform phone footage. This is an illustrative image, not a screenshot of your channel or another creator's work. Step 3: Record Clear Audio, Even With a Phone What to do: Record clear audio by getting the microphone close, filming in a quiet room, and using a wired lavalier microphone when possible. A phone's built-in microphone works well at close range in a quiet room, but it picks up room echo and background noise from a distance. A simple wired lavalier, plugged into the phone, keeps your voice close and clear, even when the camera is farther away, and it costs far less than a camera or a computer. How to do it in simple steps:Film in the quietest room available, with doors closed and fans off. Keep the phone or lavalier microphone close to your mouth. Record a test clip and listen on headphones before filming the full video. Speak clearly and at a steady volume, without shouting or whispering.Practical example: A creator films tutorials with a wired lavalier clipped to their shirt, plugged into the phone. The voice is clear and close, even though the phone sits on a tripod two metres away, and viewers comment on the good audio, not the equipment. Common mistake to avoid: Filming from across a large, echoey room with only the phone's built-in microphone, then trying to fix the audio in editing. Distance and echo are hard to fix after recording, but easy to prevent with a close microphone and a quiet room. Illustrative image: A close microphone and a quiet room make phone audio clear. This is an illustrative image, not a screenshot of your channel or another creator's work. Step 4: Edit a Complete Video on Your Phone What to do: Edit on your phone with a beginner-friendly app, such as CapCut, and follow a simple routine: cut mistakes and pauses, add text for key points, add music at a low volume, and add a clear opening and ending. Phone editing is powerful enough for most beginner videos, and it has a major advantage: you can edit anywhere, in short sessions, without waiting for a computer. Keep edits simple at first, and add complexity only when a specific video needs it. How to do it in simple steps:Import clips in order, and cut mistakes, long pauses, and repeated takes. Add on-screen text for steps, names, or key points. Add licensed music at a low volume, under your voice, not over it. Export in 1080p, and watch the full video on a larger screen before uploading.Practical example: A creator edits a 10-minute tutorial on their phone during a commute: cuts, text, and music in one app, exported and uploaded the same day. The video looks polished, and the creator never needed a computer to make it. Common mistake to avoid: Adding many effects, transitions, and stickers to every clip, because phone apps make them easy. Heavy effects distract from teaching, slow down editing, and make videos look less professional, not more. Illustrative image: Cut, add text, and keep phone edits simple and clear. This is an illustrative image, not a screenshot of your channel or another creator's work. Step 5: Design Thumbnails and Titles on Your Phone What to do: Design thumbnails on your phone with a simple design app, using a clear photo from the video, two or three large words, and a consistent colour or layout. Titles should be written on the phone too, using the exact words viewers search for, and checked for clarity on a small screen. A thumbnail that is readable on a phone, where most viewers will see it, is more important than a detailed design that only looks good on a computer. How to do it in simple steps:Take a clear, expressive photo during filming, for the thumbnail. Use a simple layout: photo, two or three large words, and one colour accent. Check the thumbnail at phone size, not only at full size. Write the title in plain language, with the main search phrase near the start.Practical example: A cooking creator takes a photo of the finished dish during filming, adds the words "15-Minute Dinner" in large text, and uses the same layout for every video. Viewers recognise the channel instantly in a feed, even on a small phone screen. Common mistake to avoid: Cramming a thumbnail with small text, many images, and a long title that cannot be read on a phone. Simplicity wins in a feed, where viewers decide in seconds whether to click. Illustrative image: Design thumbnails that are readable on a phone screen. This is an illustrative image, not a screenshot of your channel or another creator's work. Step 6: Upload, Schedule, and Manage Your Channel by Phone What to do: Upload and manage your channel with the YouTube app and YouTube Studio app, which allow you to upload, add titles, descriptions, tags, and thumbnails, schedule videos, check analytics, and reply to comments. Plan uploads on a schedule you can keep, back up your footage to cloud storage or a computer when possible, and keep your phone charged and with enough storage before filming. A phone-only channel still needs a routine, just as a studio channel does. How to do it in simple steps:Upload from the YouTube app, with a clear title, description, and thumbnail. Schedule videos in advance, so publishing day is not a rush. Check analytics weekly in the Studio app, and reply to comments. Free up storage before filming, and back up finished videos.Practical example: A creator films on Saturday, edits on Sunday, schedules for Tuesday, and checks comments on Wednesday, all from a phone. The routine is simple, repeatable, and produces one video a week without a computer. Common mistake to avoid: Running out of storage mid-filming, or uploading with a rushed title and no description, because the phone was low on battery or space. A short pre-filming check prevents most phone-only problems. Illustrative image: Upload, schedule, and check analytics from your phone. This is an illustrative image, not a screenshot of your channel or another creator's work. Checklist for Starting YouTube With Only a Mobile PhonePhone-friendly format chosen and tested Small tripod and window light or lamp ready Quiet room and close microphone planned Phone editing app learned, with a simple routine Thumbnail layout that is readable on a phone Upload and schedule routine set, with storage checked Weekly analytics and comment check plannedFrequently Asked Questions Is a phone good enough for YouTube in 2026? Yes, for most beginner formats. A phone with good light, a tripod, and clear audio produces videos that look and sound professional, especially for tutorials, vlogs, and Shorts. Do I need a computer to grow on YouTube? No, not at first. A phone can handle filming, editing, uploading, and analytics. A computer becomes useful later, for longer edits or complex projects, but it is not required to start or grow a small channel. Which phone editing app should I use? Choose one beginner-friendly app, such as CapCut, and learn it well, rather than switching apps for every video. Consistency in editing saves time and keeps your videos looking like a series. How do I avoid running out of storage? Film in 1080p unless you need 4K, delete failed takes regularly, and back up finished videos to cloud storage. Check storage before filming, not during it. When should I upgrade from a phone? When a specific limitation appears repeatedly, such as low-light performance, a need for multiple cameras, or very long edits that are slow on a phone. Upgrade to solve a real problem, not because other creators have more equipment. Starting YouTube with only a mobile phone is not a limitation to overcome, but a complete way to begin. Film steadily, light well, record clearly, edit simply, and publish consistently, and your phone will carry you much further than waiting for perfect equipment ever will.

- CreatorPlaybook Team
- 25 Oct, 2026
How to Choose a Good YouTube Channel Name
A good YouTube channel name is easy to say, easy to spell, and easy to remember, and it gives viewers a hint about what your channel is about. It is not the reason a channel grows, but a confusing name can slow growth, because viewers cannot search for you, recommend you, or remember you after watching one video. The best name is usually simple, not clever, and it leaves room for your channel to grow without trapping you in one narrow topic. This guide explains how to choose a good YouTube channel name, with practical tests you can run before you commit. It covers what makes a name memorable, how to check availability and trademarks, how to avoid common naming traps, and when to change a name. You will end with a shortlist of names that are clear, available, and flexible enough for the channel you want to build. Related guides: How to Script a YouTube Video, How to Make Educational Videos That Rank, and How to Stay Consistent Without Burnout. What You Will LearnWhat makes a channel name easy to remember and search How to brainstorm names from your topic and audience How to check availability across YouTube and social platforms How to avoid trademark, spelling, and meaning traps How to test a name with real people before choosing When and how to change a channel name safelyStep 1: Aim for Short, Clear, and Easy to Say What to do: Aim for a name with two or three words, that is easy to pronounce, easy to spell after hearing it once, and easy to type without looking it up. A name that is short and clear works in video introductions, in comments, in search, and in word-of-mouth recommendations. Avoid long phrases, unusual spellings, numbers that are hard to explain, and words that sound like other words when spoken aloud. How to do it in simple steps:Write names with two or three words, not five or six. Say each name aloud, as if introducing a video. Ask someone to spell it after hearing it once. Drop any name that needs explanation, spelling help, or a story to make sense.Practical example: A beginner cooking creator chooses "Simple Home Kitchen" over "The Art of Culinary Excellence for Everyday Home Cooks." The shorter name is easy to say, easy to search, and still tells viewers what the channel is about. Common mistake to avoid: Choosing a clever pun that only makes sense in writing, or a name with creative spelling, such as replacing letters with numbers. Viewers who hear the name cannot find it, and search engines may not match it to what they type. Illustrative image: A good name is short, clear, and easy to say aloud. This is an illustrative image, not a screenshot of your channel or another creator's work. Step 2: Connect the Name to Your Topic, Without Trapping Yourself What to do: Connect the name to your topic or audience, but leave room to grow. A name that includes your exact first topic can become a problem if you later expand, while a name that is completely unrelated gives viewers no clue about your channel. The balance is a name that hints at the topic, such as a broad theme, a feeling, or an audience, rather than a single tool, trend, or video format. How to do it in simple steps:List three words that describe your topic, audience, or style. Combine them into names that hint at the topic, without naming one product. Ask whether the name still works if you expand to a related topic. Avoid years, trends, and platform names that will date quickly.Practical example: A creator teaching beginner video skills chooses "Creator Basics" rather than "CapCut Tutorials 2026." The first name still works if they later teach lighting, scripting, or editing in other tools, while the second traps them in one tool and one year. Common mistake to avoid: Naming a channel after a single trend, tool, or game that may fade. When the trend fades, the name becomes confusing, and changing it later costs recognition you have already built. Illustrative image: Hint at your topic, but do not trap yourself in one tool or trend. This is an illustrative image, not a screenshot of your channel or another creator's work. Step 3: Brainstorm Widely, Then Shortlist Ruthlessly What to do: Brainstorm at least twenty names before shortlisting, using different approaches: topic words, audience words, your own name, a feeling, or a simple combination. Do not judge ideas while brainstorming; the goal is quantity first. Then shortlist ruthlessly: keep only names that are short, clear, pronounceable, and connected to your topic, and drop names that are clever but confusing, long, or hard to spell. How to do it in simple steps:Brainstorm twenty names in one sitting, without judging them. Try different styles: topic plus audience, name plus topic, and simple phrases. Score each name for clarity, pronounceability, and topic fit. Keep a shortlist of five, and drop the rest, even if you liked them at first.Practical example: A creator brainstorms twenty names for a beginner filming channel, including "Film School for Beginners," "Simple Creator Studio," and "The Daily Camera Show." They shortlist five, then test those five, rather than choosing the first idea that sounded good. Common mistake to avoid: Falling in love with the first name you think of, and refusing to consider alternatives. The first idea is rarely the best, and a short brainstorm often produces a clearer, more memorable name. Illustrative image: Brainstorm twenty names, then shortlist five ruthlessly. This is an illustrative image, not a screenshot of your channel or another creator's work. Step 4: Check Availability, Handles, and Trademarks Carefully What to do: Check whether your shortlisted names are available as a YouTube channel name, a handle, and on other platforms you may use, such as Instagram or a website domain. Also check for existing brands, trademarks, or well-known channels with the same or a very similar name, to avoid confusion and legal problems. A name that is taken by a large channel, even on another platform, will cause confusion and make it hard for viewers to find you. How to do it in simple steps:Search each shortlisted name on YouTube, Google, and social platforms. Check whether the handle and a simple domain are available. Look for existing brands or trademarks with the same name in your topic. Drop any name that is already used by a known channel or brand.Practical example: A creator loves "Studio Simple," but finds a large design channel with the same name and a registered brand. They choose "Simple Studio Sessions" instead, which is available, distinct, and still clear, avoiding confusion from the start. Common mistake to avoid: Adding numbers, underscores, or extra words to copy a taken name, such as "Studio Simple Official 123." Viewers will still confuse you with the original, and the name looks less trustworthy. Illustrative image: Check YouTube, handles, domains, and brands before you commit. This is an illustrative image, not a screenshot of your channel or another creator's work. Step 5: Test the Name With Real People, Out Loud What to do: Test your shortlist with real people, out loud, before you commit. Say the name as if introducing a video, ask people to spell it, and ask what kind of channel they expect from the name alone. A name that passes this test is easy to remember, easy to find, and sets the right expectation. A name that fails, even if you love it, will cost you viewers who cannot find or recommend you. How to do it in simple steps:Say each name aloud to five people who do not know your channel. Ask them to spell it, and to guess what the channel is about. Ask them a day later which name they remember. Choose the name that is remembered, spelled correctly, and understood.Practical example: A creator tests three names with friends. One name is remembered by everyone and spelled correctly, one is forgotten, and one is guessed as a gaming channel when it is actually about cooking. The creator chooses the remembered, correctly understood name, even though it was not their personal favourite. Common mistake to avoid: Testing a name only in writing, with people who already know your channel. Written tests hide pronunciation and spelling problems, and friends who know you will be polite about a confusing name. Illustrative image: Test names out loud, with people who do not know your channel. This is an illustrative image, not a screenshot of your channel or another creator's work. Step 6: Choose, Use Consistently, and Change Only With a Plan What to do: Choose one name, use it consistently everywhere, and give it time to work. Use the same name and handle on YouTube, social platforms, and your channel banner and description, so viewers can find you in one place. If you later need to change the name, do it with a plan: announce it, explain it briefly, keep your content and style the same, and update all platforms at once, so viewers are not confused. How to do it in simple steps:Choose one name from your tested shortlist, and commit to it. Use the same name, handle, and logo style everywhere. Give the name at least several months before judging it. If changing, announce the new name in a video and update all platforms together.Practical example: A creator launches as "Simple Home Kitchen," uses the same name on YouTube and Instagram, and introduces every video with it. After a year, viewers search for that exact name, recommend it by word of mouth, and find it easily, because it never changed. Common mistake to avoid: Changing your channel name every few months because growth is slow. Frequent changes erase recognition, confuse subscribers, and hide the real problem, which is usually content, consistency, or topic, not the name. Illustrative image: Use one name consistently, and change it only with a clear plan. This is an illustrative image, not a screenshot of your channel or another creator's work. Checklist for Choosing a YouTube Channel NameName is two or three words, easy to say and spell Name hints at topic, without trapping you in one tool or trend Twenty names brainstormed, five shortlisted Availability checked on YouTube, handles, and domains No conflict with known brands or channels Name tested out loud, remembered, and understood Same name used consistently on all platformsFrequently Asked Questions Should I use my real name? It depends. A personal name works well for personality-based channels and is flexible, but it gives no clue about the topic. A topic-based name works well for teaching channels, but it can feel less personal. Either can work, if it is clear and consistent. Can I change my channel name later? Yes, YouTube allows name changes, but changing often confuses viewers and loses recognition. Choose carefully at first, and change only with a clear announcement and updated branding everywhere. Does the name affect search? Somewhat. A name that includes a topic word can help viewers understand your channel, but titles, descriptions, and video content matter far more for search than the channel name alone. What if my ideal name is taken? Choose a distinct alternative, not a copy with numbers or extra words. A clear, original name that is available is better than a confusing copy of a known channel. Should the name be funny or clever? Only if it is also clear and easy to remember. A clever name that confuses viewers is worse than a simple name that tells them what to expect. A good channel name does one job well: it helps viewers find you, remember you, and understand you, in a few seconds. Choose a short, clear, available name, test it out loud, and then focus on the videos that will make that name worth remembering.

- CreatorPlaybook Team
- 25 Oct, 2026
How to Choose the Best YouTube Niche in 2026
Choosing a YouTube niche feels like a permanent decision, which is why so many creators get stuck before their first video. In reality, a niche is a starting focus, not a life sentence. It helps viewers understand what your channel is about, helps YouTube recommend your videos to the right people, and helps you plan content without starting from a blank page every week. The best niche is not the most profitable one in a list, but the one where your interest, your skills, and real viewer demand meet. This guide explains how to choose the best YouTube niche in 2026, with a practical test you can run before committing. It covers how to assess interest, demand, competition, and monetization, how to narrow a broad topic into a focused channel, and how to test a niche with a small batch of videos. By the end, you will have a niche you can explain in one sentence, and twenty video ideas to start with. Related guides: How to Script a YouTube Video, How to Make Educational Videos That Rank, and How to Stay Consistent Without Burnout. What You Will LearnWhat a niche is, and what it is not How to balance interest, skill, demand, and competition How to narrow a broad topic into a focused channel How to research demand and competition honestly How to test a niche before committing fully When to narrow, expand, or change a nicheStep 1: Start With What You Can Talk About for a Year What to do: List topics you already know, enjoy, or are learning seriously, and ask whether you could make twenty videos on each without running out of ideas or enthusiasm. A niche you love but know nothing about can work, if you are willing to learn publicly, but a niche you know well and find boring will be hard to sustain. Interest matters because YouTube growth takes months, and only genuine curiosity survives slow weeks. How to do it in simple steps:Write down ten topics you enjoy, know, or are actively learning. For each, list five video ideas immediately, without research. Cross out topics where ideas stop after two or three videos. Keep the three topics with the most ideas and energy.Practical example: A creator lists cooking, photography, and gaming. Cooking produces twenty ideas easily, photography produces five, and gaming produces ideas they do not enjoy filming. Cooking becomes the shortlist, even though gaming looked more popular, because it can sustain a year of videos. Common mistake to avoid: Choosing a niche only because a list says it pays well, even though you have no interest or experience in it. Viewers sense a lack of genuine knowledge quickly, and the creator usually quits before the channel grows. Illustrative image: Start with topics you can discuss for a year, not a week. This is an illustrative image, not a screenshot of your channel or another creator's work. Step 2: Check Real Demand, Not Just Popularity What to do: Check whether real viewers search for your topic, ask questions about it, and watch videos on it regularly. Use YouTube search suggestions, related videos, comments, and community questions to find the exact phrases viewers use. Demand is not the same as popularity: a huge topic with millions of searches may be dominated by large channels, while a smaller topic with steady, specific questions may be perfect for a new creator. How to do it in simple steps:Type your topic into YouTube search and note autocomplete suggestions. Read comments on popular videos in the topic for unanswered questions. Note whether new videos in the topic still get views, not only old viral ones. List ten specific questions viewers actually ask, in their own words.Practical example: A creator considers "photography," which is huge, but finds a steady stream of specific questions about "phone photography for beginners" and "budget lighting for small rooms." Narrowing to phone photography for beginners gives clearer demand and less direct competition. Common mistake to avoid: Choosing a topic because it is trending this month, without checking whether people searched for it last year or will search next year. Trends fade, but steady questions keep bringing viewers for years. Illustrative image: Check specific questions viewers ask, not only broad popularity. This is an illustrative image, not a screenshot of your channel or another creator's work. Step 3: Narrow Until You Can Explain the Channel in One Sentence What to do: Narrow your topic until you can explain the channel in one sentence that includes who you help and what you help them do. "Cooking" is too broad. "Simple weeknight meals for beginners, in under 30 minutes" is a niche. Narrowing does not trap you forever; it gives you a clear starting audience, and you can expand later once viewers trust you. A narrow channel also makes titles, thumbnails, and recommendations clearer for YouTube. How to do it in simple steps:Write your broad topic, then add an audience: beginners, students, parents, or small creators. Add a format or constraint, such as budget, time, or skill level. Test the sentence: could a stranger guess what your next ten videos will be? If not, narrow once more, until the answer is yes.Practical example: "Fitness" becomes "Home workouts for beginners with no equipment," and then "15-minute home workouts for busy beginners." Each narrowing makes the audience clearer, the video ideas easier, and the channel easier to recommend to the right viewers. Common mistake to avoid: Staying so broad that every video targets a different audience. A channel about cooking, travel, gaming, and finance in the same month confuses viewers and YouTube, and subscribers rarely return, because they do not know what comes next. Illustrative image: Narrow until a stranger can guess your next ten videos. This is an illustrative image, not a screenshot of your channel or another creator's work. Step 4: Assess Competition Honestly, and Find Your Angle What to do: Look at the channels already in your niche, not to copy them, but to find a gap. Note what they cover well, what they miss, who they serve, and how they present videos. Your angle could be a different audience, a simpler style, a specific problem, a language, or a format, such as hands-only tutorials or short daily tips. Competition is not a reason to avoid a niche, but it is a reason to be specific about how you will be different. How to do it in simple steps:List five channels in your niche, with their audience and style. Note two topics each channel covers well, and one they miss. Read comments for complaints or requests those channels do not answer. Write your angle in one sentence: how your channel differs, specifically.Practical example: A creator finds many budget lighting channels, but none focused on small, shared rooms for students. They choose that angle: budget lighting for students in small rooms, with simple setups and dorm-friendly tips. The niche is crowded overall, but the angle is clear and underserved. Common mistake to avoid: Copying the largest channel's topics, titles, and style exactly, and expecting the same results. Viewers already have that channel; they need a reason to watch yours, which comes from a different angle, audience, or approach. Illustrative image: Study competitors to find a gap, not to copy them. This is an illustrative image, not a screenshot of your channel or another creator's work. Step 5: Test the Niche With Ten Videos Before You Commit What to do: Test your niche with a small batch of ten videos, published consistently, before deciding it is wrong or right. Ten videos are enough to learn whether you enjoy the work, whether viewers find and watch them, and whether ideas keep coming. Judge the test by enjoyment, completion, comments, and whether you want to make the eleventh video, not only by views, which are often low at first for any new channel. How to do it in simple steps:Plan ten videos in your niche, covering different questions in that topic. Publish them on a consistent schedule, such as weekly. Track enjoyment, comments, retention, and ideas for the next ten. After ten, decide: continue, narrow further, or test a different angle.Practical example: A creator tests ten beginner phone-photography videos. Views are modest, but comments ask for more, retention is steady, and the creator enjoys filming. They continue, knowing the niche works, even though growth is still slow. Common mistake to avoid: Judging a niche after two videos, or after one viral video. Two videos tell you almost nothing, and one viral video in a niche you dislike is not a reason to stay in it for a year. Illustrative image: Test a niche with ten videos before you judge it. This is an illustrative image, not a screenshot of your channel or another creator's work. Step 6: Check Monetization and Growth Paths, Without Letting Them Decide Alone What to do: Check how your niche could earn and grow, without letting money alone choose it. Some niches attract sponsors, affiliate products, or courses more easily, while others grow mainly through advertising or memberships. A niche with clear products, problems, and buying intent often monetizes earlier, but a niche with passionate viewers and steady search traffic can also grow well. Use monetization as one factor, alongside interest, demand, and competition, not as the only factor. How to do it in simple steps:List products, services, or courses viewers in your niche actually buy. Check whether brands in the niche work with small creators. Note whether the niche has evergreen questions, or only trends. Balance the result with your interest and test results.Practical example: A creator chooses beginner home-studio tutorials, because viewers buy microphones, lights, and software, brands work with small channels, and questions are evergreen. The niche is not the highest-paying in a list, but it combines interest, demand, and realistic income paths. Common mistake to avoid: Choosing a niche with high advertising rates but no genuine audience connection, then struggling to create content viewers trust. Trust is what makes monetization work, and it comes from a niche you understand and enjoy. Illustrative image: Check income paths, but do not let money alone choose your niche. This is an illustrative image, not a screenshot of your channel or another creator's work. Checklist for Choosing a YouTube Niche in 2026Ten topics listed, narrowed to three with real energy Real viewer questions found, in viewers' own words Channel explained in one sentence, with audience and focus Competition studied, with a clear angle written down Ten-video test planned and published consistently Monetization and evergreen growth paths checked Decision based on interest, demand, and test results togetherFrequently Asked Questions Can I change my niche later? Yes, gradually. Many creators start narrow, then expand as their audience grows. A sudden, complete change can confuse subscribers, so expand in steps, and explain the change simply. Is it too late to start in a popular niche? No, if you have a clear angle and audience. Popular niches have demand, and new creators succeed by serving a specific group or problem better than general channels do. Should I choose a niche I love or one that pays? Choose where they overlap as much as possible. A niche you love but cannot sustain financially, or a niche that pays but bores you, both make long-term growth hard. How narrow is too narrow? Too narrow is when you cannot plan twenty videos, or when search demand is almost zero. If ideas run out quickly, broaden slightly, such as from one tool to a related set of tools. What if I have several interests? Start with one, and use the others as occasional series or personal examples within that niche. Once the channel is established, you can test whether viewers welcome a second topic. The best niche in 2026 is not a secret category, but a clear focus you can sustain: a topic you enjoy, questions viewers actually ask, an angle competitors miss, and a test that proves you want to make the eleventh video.

- CreatorPlaybook Team
- 25 Oct, 2026
How to Grow with Multi-Language and Dubbed Audio on YouTube
Many creators reach a ceiling in one language, even when their videos could help viewers in other languages too. Multi-language audio and dubbed versions let the same teaching, story, or demonstration reach new audiences without filming a completely new channel. Done well, dubbing feels natural, respects the original video, and opens search traffic in languages where competition is lower. Done badly, it feels robotic, confuses viewers, and damages the trust a channel has built. This guide explains how to grow with multi-language and dubbed audio on YouTube. It covers when to use YouTube's multi-language audio tracks, when to start a separate channel, how to dub or translate well, and how to adapt titles, descriptions, and thumbnails for each language. It also covers the cultural side: translation is not only words, but examples, humour, and references that make sense to a new audience. Related guides: Voiceover Tips for Clear Audio, How to Read and Use the YouTube Studio App, and How to Make Educational Videos That Rank. What You Will LearnWhen multi-language audio helps, and when it does not How to choose your first new language How to dub well, with a human voice or a careful tool How to translate titles, descriptions, and on-screen text Whether to use audio tracks or a separate channel How to measure growth in each language separatelyStep 1: Choose One New Language Based on Real Audience Data What to do: Choose your first new language from audience data, not from guesswork. Check YouTube Studio for where viewers already watch, which countries and languages appear in comments, and which videos get traffic from other-language search. A language where you already have some viewers, or where similar topics have less competition, is a better first choice than a large language with no existing connection to your channel. How to do it in simple steps:Check audience geography and language data in YouTube Studio. Read comments for language requests and questions in other languages. List two or three candidate languages, with reasons for each. Choose one language for a test of five to ten dubbed videos.Practical example: An English tutorial creator notices many viewers from India and comments asking for Hindi explanations. They test Hindi dubbed audio for their ten most popular tutorials, rather than dubbing everything at once, and measure which topics perform best in Hindi. Common mistake to avoid: Dubbing into five languages at once, with poor quality in each, and no way to tell which language worked. One well-dubbed language teaches you more than five rushed ones. Illustrative image: Choose one new language from real audience data, not guesswork. This is an illustrative image, not a screenshot of your channel or another creator's work. Step 2: Decide Between Audio Tracks and a Separate Channel What to do: Decide whether to add multi-language audio tracks to existing videos, where that feature is available to you, or to create a separate channel for the new language. Audio tracks keep all views and subscribers on one channel and let viewers choose a language, which is efficient for evergreen tutorials. A separate channel gives full control over titles, thumbnails, community, and branding for that language, and is often better when the new audience is large, culturally distinct, or needs different examples. How to do it in simple steps:Check whether multi-language audio is available for your channel. Use audio tracks for evergreen videos with a broad audience. Consider a separate channel when the new audience needs different titles, examples, or community. Do not publish the same video on both, without a clear reason, as that can confuse viewers.Practical example: A creator adds Spanish audio tracks to existing tutorials, so Spanish-speaking viewers find the same videos through search. Later, when the Spanish audience grows large, they launch a separate Spanish channel for local examples and live streams, while keeping the original channel's tracks for existing videos. Common mistake to avoid: Creating a separate channel for every language immediately, then struggling to publish consistently on any of them. A separate channel is a second channel, with its own schedule, community, and workload. Illustrative image: Audio tracks suit evergreen videos; a separate channel suits a large, distinct audience. This is an illustrative image, not a screenshot of your channel or another creator's work. Step 3: Translate for Meaning and Culture, Not Word for Word What to do: Translate scripts for meaning, natural speech, and culture, not word for word. A literal translation often sounds stiff, uses the wrong examples, or misses humour and idioms. Work with a translator who understands your topic, or review machine translation carefully with a native speaker. Adapt examples, units, and references where needed, and keep sentences short, so dubbing matches the video's pace. How to do it in simple steps:Translate the script, then read it aloud to check natural flow. Replace examples that do not make sense in the new language or culture. Keep technical terms consistent, and explain them the first time they appear. Have a native speaker review the final script before recording.Practical example: A cooking tutorial translated into another language replaces an ingredient that is hard to find locally with a common local alternative, and explains the swap on screen. Viewers in the new language can actually follow the recipe, instead of being confused by an unfamiliar ingredient. Common mistake to avoid: Publishing a machine translation without review, with awkward sentences, wrong terms, and jokes that make no sense. Viewers notice quickly, and a bad translation can harm your reputation in that language for a long time. Illustrative image: Translate meaning and examples, not just words. This is an illustrative image, not a screenshot of your channel or another creator's work. Step 4: Dub With a Natural Voice and Careful Timing What to do: Dub with a voice that sounds natural, warm, and close to the original video's tone, whether you hire a voice artist, record yourself if you speak the language, or use a careful AI dubbing tool with human review. Match the timing to the visuals, keep pauses where the original had them, and avoid rushing through sentences to fit a long script into a short scene. Good dubbing should feel like the video was made in that language, not like a voice layered over a foreign video. How to do it in simple steps:Choose a voice artist or tool that matches your channel's tone. Record in sections that match the original video's scenes. Adjust timing so speech matches on-screen actions and text. Listen to the full dubbed video on headphones before publishing.Practical example: A tutorial creator hires a native voice artist for Hindi dubbing, records section by section, and checks that instructions match the on-screen steps. Viewers comment that the video feels made for them, not translated as an afterthought. Common mistake to avoid: Using a robotic or mismatched voice, or a dub that runs ahead of the visuals, because it was cheap or fast. Poor dubbing makes even excellent teaching hard to follow, and viewers leave quickly. Illustrative image: Dub with a natural voice and timing that matches the visuals. This is an illustrative image, not a screenshot of your channel or another creator's work. Step 5: Adapt Titles, Descriptions, Thumbnails, and On-Screen Text What to do: Adapt titles, descriptions, tags, and on-screen text for each language, not only the audio. Search terms differ by language, so a direct translation of an English title may not match what viewers actually search for. Translate thumbnails where text matters, add subtitles in the new language where helpful, and update descriptions with local examples or links. For audio tracks, ensure the title and description help viewers discover the language version. How to do it in simple steps:Research search terms in the new language, using YouTube search suggestions. Write a new title and description for that language, not a literal translation. Translate on-screen text and thumbnail words where they carry meaning. Add subtitles in the new language, even for dubbed videos, where possible.Practical example: A creator's English title, "Budget Lighting Setup," becomes a Hindi title using the phrase Hindi viewers actually search for, with a translated thumbnail. The video is discovered through Hindi search, not only through the original English title. Common mistake to avoid: Dubbing the audio but leaving the title, thumbnail, and on-screen text in the original language. New-language viewers may never find the video, even though the audio is ready for them. Illustrative image: Adapt titles, thumbnails, and on-screen text for each language. This is an illustrative image, not a screenshot of your channel or another creator's work. Step 6: Measure Each Language Separately, and Expand Slowly What to do: Measure each language separately: views, watch time, retention, and comments in that language, plus whether dubbed videos bring subscribers. Compare dubbed videos with their original versions, and with each other, to learn which topics travel well and which do not. Expand to a second language only when the first is working and sustainable, and keep the original language as the priority, because it funds and feeds the new versions. How to do it in simple steps:Track views and retention for dubbed videos, by language where data allows. Note which topics perform best in the new language. Read comments in the new language, and reply with help where possible. Expand only after a test of five to ten videos shows a clear result.Practical example: A creator finds that beginner tutorials perform well in Hindi, but advanced topics do not, because the Hindi audience is mostly beginners. They focus Hindi dubbing on beginner topics, and keep advanced videos in the original language, where that audience already exists. Common mistake to avoid: Dubbing your entire back catalogue, including outdated or low-performing videos, before testing. Dubbing is work, and it should start with your best, most evergreen videos, not with everything you have ever made. Illustrative image: Measure each language separately, and expand only when the first works. This is an illustrative image, not a screenshot of your channel or another creator's work. Checklist for Multi-Language and Dubbed AudioFirst new language chosen from audience data Audio tracks or separate channel decision made Scripts translated for meaning and culture, and reviewed Natural voice and timing matched to visuals Titles, descriptions, thumbnails, and on-screen text adapted Test of five to ten dubbed videos completed Each language measured separately before expandingFrequently Asked Questions Should I use audio tracks or a separate channel? Use audio tracks for evergreen videos and a first test, where available. Use a separate channel when the new audience is large, needs different branding or examples, or will have its own schedule and community. Can I use AI dubbing? Yes, if the result sounds natural, is reviewed by a native speaker, and matches the visuals. Poor AI dubbing harms trust, so human review is essential, especially for the first videos in a new language. Do I need to translate thumbnails? Yes, where thumbnail text carries meaning. A thumbnail in the original language can confuse new-language viewers, even if the audio is dubbed, and it reduces clicks from search. Which videos should I dub first? Your most popular, evergreen videos, especially beginner tutorials that remain useful for a long time. Avoid dubbing outdated, time-sensitive, or low-performing videos first. Will dubbing hurt my original channel? Not if done well. Audio tracks keep viewers on the same video, and a separate channel does not affect the original. Poor dubbing, however, can confuse viewers, so test quality carefully before expanding. Multi-language growth is not about translating everything, but about translating the right videos well, for the right audience, and measuring what works. Start with one language, dub it naturally, adapt the whole video, and let that success guide your next language.

- CreatorPlaybook Team
- 25 Oct, 2026
How to Start a Video Podcast on YouTube
A video podcast is a conversation viewers can both watch and listen to, and YouTube is now one of the best places to publish one. Unlike a traditional tutorial, a video podcast grows through personality, discussion, and regular episodes that viewers follow like a show. Unlike an audio-only podcast, it also benefits from YouTube search, thumbnails, chapters, and clips that can reach new viewers every week. This guide explains how to start a video podcast on YouTube, from format and guests to recording, editing, and distribution. It focuses on a simple, repeatable setup that a small creator can run without a studio, and on the habits that turn a first episode into a series viewers return to. You do not need expensive equipment or famous guests to start; you need a clear topic, a reliable format, and conversations that are genuinely useful or interesting. Related guides: Voiceover Tips for Clear Audio, How to Script a YouTube Video, and How to Repurpose One Video into Shorts, Reels and Posts. What You Will LearnHow to choose a video podcast format and topic How to plan episodes and questions that create good conversation What recording setup works for solo and guest podcasts How to record clean audio for two or more voices How to edit a long conversation into a watchable episode How to publish, distribute, and grow a podcast seriesStep 1: Choose a Format and a Topic Viewers Can Follow What to do: Choose whether your podcast will be solo, co-hosted, interview-based, or discussion-based, and choose a topic narrow enough to build an audience. A solo podcast works when you teach or reflect on a topic regularly. An interview podcast works when you can bring guests with different experiences. A co-hosted show works when two voices have good chemistry and a shared topic. In every case, the topic should be specific enough that a viewer can describe the show in one sentence. How to do it in simple steps:Pick one format and one topic, such as beginner creators sharing what they learned. Write the show promise in one sentence, including who it helps. List twenty episode topics or guests before recording episode one. Choose an episode length you can sustain, such as 30 to 45 minutes.Practical example: A creator starts a 35-minute interview podcast for beginner YouTubers, with one guest each week sharing one specific lesson. The topic is narrow, the format is repeatable, and viewers know exactly what each episode will deliver. Common mistake to avoid: Starting a general chat podcast with no topic, no structure, and guests chosen at random. Viewers may enjoy one episode, but they have no reason to return for the next, because they do not know what the show is about. Illustrative image: Choose one format and one topic viewers can describe in a sentence. This is an illustrative image, not a screenshot of your channel or another creator's work. Step 2: Plan Episodes With Questions, Not Just Topics What to do: Plan each episode around questions, stories, and takeaways, not only a broad topic. A good podcast outline includes an opening question, three or four main questions, a story or example for each, and a closing takeaway for listeners. Share the outline with guests in advance, so they can prepare stories, but do not script answers word for word; the best podcast moments come from follow-up questions and honest reactions. How to do it in simple steps:Write the episode question in one sentence, such as "What actually helped you get your first 1,000 views?" List four main questions, in the order a listener would naturally ask them. Add one story prompt for each question, such as "Tell me about a time that failed." End with a takeaway question: "What should a beginner do first this week?"Practical example: An interview outline asks a guest about their first video, their biggest mistake, the change that improved retention, and one habit they still use. The conversation flows naturally, because each question builds on the last, and listeners leave with clear actions. Common mistake to avoid: Asking only vague questions, such as "Tell us about yourself," for an hour. Vague questions produce vague answers, and listeners leave before the useful part arrives. Illustrative image: Plan questions and stories, not just a broad topic. This is an illustrative image, not a screenshot of your channel or another creator's work. Step 3: Build a Simple Recording Setup for One or Two Voices What to do: Build a setup that records clean video and separate audio for each voice, if possible. For a solo podcast, a camera or phone, a good microphone, and a quiet room are enough. For guests, record remotely with software that captures each voice on a separate track, or record in person with two microphones and two cameras, or one wide camera. Keep the background simple and consistent, so episodes look like a series, not like unrelated calls. How to do it in simple steps:Use one microphone per voice, placed close to each speaker. Record video in good light, facing a window or a simple lamp setup. Use a consistent background, such as a bookshelf or a plain wall with a plant. Test with a five-minute call before a real guest episode.Practical example: A remote interview podcast records video calls with separate audio tracks, using a USB microphone at home and a guest's phone microphone as a backup. Editing is easy because each voice can be adjusted separately, and the video looks consistent across episodes. Common mistake to avoid: Recording two voices on one laptop microphone in an echoey room, then trying to fix it in editing. Separate, close microphones prevent most podcast audio problems before they happen. Illustrative image: One close microphone per voice makes editing much easier. This is an illustrative image, not a screenshot of your channel or another creator's work. Step 4: Record With a Warm-Up, a Clear Start, and a Clean Ending What to do: Start each recording with a short warm-up off camera, then a clear on-camera introduction, then the conversation. A warm-up helps guests relax, especially first-time guests. A clear start helps listeners: state the show, the guest, and the episode question in the first minute. Record a clean ending too, with a summary and a thank-you, so editing does not need to invent an ending from a trailing conversation. How to do it in simple steps:Chat for five minutes off camera before recording. Open on camera with the show name, guest, and episode question. Let the guest speak in full answers, without interrupting mid-story. End with a summary, a takeaway, and where listeners can find the guest.Practical example: A host spends five minutes chatting with a nervous guest about their journey, then records a confident introduction. The guest relaxes, tells better stories, and the episode needs far less editing than a cold start would have. Common mistake to avoid: Starting recording immediately, with no warm-up and no introduction, then spending hours editing a slow opening. A few minutes of preparation saves hours of editing and produces a better episode. Illustrative image: A warm-up and a clear introduction improve every episode. This is an illustrative image, not a screenshot of your channel or another creator's work. Step 5: Edit for Listening, Not Just for Watching What to do: Edit a video podcast for listeners first, because many people will listen while doing other things. Remove long pauses, repeated questions, and off-topic sections, but keep natural conversation and laughter. Add chapters for each main question, a clear title, and a thumbnail that shows the guest or topic, not only a logo. For video, switch between speakers or use a simple two-person layout, rather than a single static wide shot for an hour. How to do it in simple steps:Remove pauses and tangents, keeping stories and answers intact. Balance audio levels so both voices are equally clear. Add chapters, timestamps, and a short description with key points. Cut three to five Shorts from the best moments for discovery.Practical example: A 50-minute recording becomes a 38-minute episode with chapters for each question, plus three Shorts: one surprising story, one practical tip, and one mistake to avoid. The episode is easier to watch, and the Shorts bring new listeners to the full show. Common mistake to avoid: Publishing a raw, unedited hour-long call with uneven audio and no chapters. Listeners may enjoy the guest, but they will struggle to follow, share, or return to the episode. Illustrative image: Edit for listeners first, with chapters and balanced audio. This is an illustrative image, not a screenshot of your channel or another creator's work. Step 6: Publish as a Series, and Distribute the Audio Too What to do: Publish episodes on a regular schedule, as a playlist series on YouTube, and consider distributing the audio version to podcast platforms as well, following each platform's rules. Use consistent titles, such as the guest or topic first, then the show name, and promote each episode with a Short, a community post, and a guest share. Ask listeners to subscribe to the series, not only to the channel, by telling them what the next episode will cover. How to do it in simple steps:Create a YouTube playlist for the podcast series, and add every episode. Publish on the same day each week, so listeners build a habit. Share the audio version on podcast platforms, if you choose to distribute it. Promote with a Short, a community post, and a message to the guest to share.Practical example: A podcast publishes every Thursday, with the next guest teased at the end of each episode. Listeners return on Thursdays, guests share their episodes, and the playlist keeps new viewers watching several episodes in a row. Common mistake to avoid: Publishing episodes irregularly, with different titles and no playlist, so even interested listeners cannot follow the show. A series needs a schedule and a home, or it remains a collection of unrelated videos. Illustrative image: Publish as a series, on a regular day, with a playlist. This is an illustrative image, not a screenshot of your channel or another creator's work. Checklist for Starting a Video Podcast on YouTubeFormat and narrow topic chosen Twenty episode topics or guests planned Episode outlines built around questions and stories One microphone per voice, with a quiet recording space Warm-up, clear introduction, and clean ending recorded Episode edited for listening, with chapters and Shorts Series playlist and regular publishing day setFrequently Asked Questions Do I need a studio for a video podcast? No. A quiet room, good light, a decent microphone, and a simple background are enough to start. Upgrade lighting and cameras only after several episodes prove the format works. Should I start solo or with guests? Start solo if you have regular teaching or reflections to share, and add guests when you have a clear question for them. Guests bring new audiences, but they also add scheduling and editing work. How long should episodes be? Long enough to answer the episode question well, usually 30 to 45 minutes for most beginner shows. Shorter, focused episodes often retain listeners better than very long, unfocused ones. Can I publish the audio version elsewhere? Yes, many creators publish the same episode as an audio podcast, following each platform's rules and using the same title and description. Keep YouTube as the video home, and use audio platforms for listeners who prefer audio only. How do I get guests as a small creator? Invite creators at a similar size, with a specific episode question and a simple recording plan. Small, relevant guests often say yes, because the episode helps them too, and the conversation is focused. A video podcast grows when listeners know what the show is, when the next episode arrives, and why it is worth their time. Start simple, plan questions well, record clean audio, and let the series build episode by episode.

- CreatorPlaybook Team
- 25 Oct, 2026
Shorts and Long Videos Together: Best Mix Strategy for 2026
Shorts and long videos can work together, but only if they have different jobs. Shorts bring discovery: quick, eye-catching moments that reach new viewers who have never seen your channel. Long videos bring depth: teaching, trust, and watch time that turn a casual viewer into a subscriber. When creators treat Shorts as tiny long videos, or long videos as stretched Shorts, both formats suffer. When each format does its own job, and links to the other, the channel grows faster than either format alone. This guide explains the best mix strategy for Shorts and long videos in 2026. It covers how to decide your ratio, how to turn one long video into several Shorts without spamming viewers, how to link formats so viewers move from Shorts to long videos, and how to measure whether the mix is actually working. The exact ratio matters less than the system: one strong long video, a few purposeful Shorts, and a clear path between them. Related guides: How to Repurpose One Video into Shorts, Reels and Posts, How to Read and Use the YouTube Studio App, and How to Make Educational Videos That Rank. What You Will LearnWhat Shorts and long videos each do best How to choose a mix ratio for your schedule How to plan one long video and its Shorts together How to link Shorts to long videos without annoying viewers How to judge Shorts and long videos with different metrics How to adjust the mix each monthStep 1: Give Each Format a Different Job What to do: Decide, in one sentence each, what Shorts do for your channel and what long videos do. For most creators, Shorts do discovery and curiosity: a surprising tip, a quick before-and-after, or a question that makes a viewer want the full answer. Long videos do teaching and trust: a complete tutorial, a detailed explanation, or a story that viewers finish and remember. When the jobs are clear, planning becomes easier, because you no longer ask Shorts to teach everything, or long videos to go viral in seconds. How to do it in simple steps:Write one job for Shorts, such as "reach new viewers with one useful tip." Write one job for long videos, such as "teach a complete skill and earn subscribers." Check every idea against those jobs before filming. If an idea fits neither job, save it for another format, or drop it.Practical example: A lighting creator uses Shorts to show one quick trick, such as moving a lamp to remove shadows, and long videos to teach a complete budget lighting setup. Shorts viewers who want the full setup click through, and long-video viewers who want quick tips enjoy the Shorts, without either format repeating the other. Common mistake to avoid: Posting the same content as a Short and as a long video, with no difference in depth or purpose. Viewers who see both feel they have already watched it, and neither version performs well. Illustrative image: Shorts discover, long videos teach; give each format its own job. This is an illustrative image, not a screenshot of your channel or another creator's work. Step 2: Choose a Mix You Can Sustain Every Week What to do: Choose a weekly mix based on your real time, not on another creator's schedule. A common, sustainable mix for beginners is one long video a week and two or three Shorts drawn from it, or one long video every two weeks with Shorts in between. The key is consistency: a mix you can keep for months beats a heroic week of daily Shorts followed by silence. Start small, measure for a month, and only then add more Shorts or more long videos. How to do it in simple steps:Count your available hours for filming and editing each week. Choose one long-video slot and two or three Shorts slots. Put them on a calendar, with filming and editing days separate. Keep the mix for four weeks before changing it.Practical example: A creator with a full-time job publishes one tutorial every Sunday and three Shorts on Tuesday, Thursday, and Saturday, all cut from the same tutorial. The schedule is busy but repeatable, and viewers learn when to expect each format. Common mistake to avoid: Copying a full-time creator's mix of daily Shorts and several long videos a week, then burning out in a month. Your mix must fit your life, or it will not last long enough to work. Illustrative image: Choose a weekly mix you can keep for months, not weeks. This is an illustrative image, not a screenshot of your channel or another creator's work. Step 3: Plan the Long Video and Its Shorts Together What to do: Plan Shorts while you plan the long video, not as an afterthought. When you outline a long tutorial, mark two or three moments that work alone: a surprising result, a common mistake, a quick tip, or a before-and-after. Film those moments in vertical format as well, or plan to crop and reframe them, and record a short, self-contained introduction for each Short, so it makes sense without the long video. How to do it in simple steps:Outline the long video, then highlight two or three standalone moments. Write a 15 to 40 second script for each Short, with its own hook. Film vertical versions of those moments during the same session. Edit Shorts immediately, while the long video is fresh in your mind.Practical example: A tutorial on budget lighting includes a Short on window light, a Short on a common lamp mistake, and a Short showing a before-and-after. Each Short stands alone, but each also points to the full tutorial for viewers who want the complete setup. Common mistake to avoid: Cutting random 60-second slices from a long video and posting them as Shorts, with no hook, no context, and no ending. A slice is not a Short; a Short needs its own beginning, point, and ending. Illustrative image: Plan Shorts during the long-video outline, not afterwards. This is an illustrative image, not a screenshot of your channel or another creator's work. Step 4: Link Shorts to Long Videos With a Clear Next Step What to do: Help interested Shorts viewers find the long video, without forcing every Short to be an advertisement. Use YouTube's related-video linking where available, mention the full tutorial briefly at the end of a Short, add it in the description or pinned comment, and use a playlist that groups the Shorts and the long video together. The goal is a path, not a push: viewers who want more can find it in one tap, and viewers who only want Shorts can keep watching Shorts happily. How to do it in simple steps:Link the long video in the Short's description and pinned comment. End the Short with one sentence, such as "Full setup in the long video." Group the long video and its Shorts in a playlist. Use end screens and cards in the long video to point to related Shorts.Practical example: A Short ends with, "That was window light only. The full budget setup, with lamp and ring light, is linked below." Viewers who are curious click through, while others simply enjoy the tip and move on, without feeling sold to. Common mistake to avoid: Spending half of every Short promoting the long video, or posting Shorts that only make sense after watching the long video. A Short must satisfy viewers on its own, or they will not trust the link to more. Illustrative image: Link Shorts to long videos with one clear next step. This is an illustrative image, not a screenshot of your channel or another creator's work. Step 5: Judge Each Format by Its Own Metrics What to do: Judge Shorts and long videos differently, because they succeed in different ways. For Shorts, look at views, swipe-away rate, and whether viewers watch to the end, plus how many new viewers discover your channel. For long videos, look at watch time, average view duration, retention, and subscribers gained. Do not judge a long video by Shorts views, or a Short by long-video watch time, and do not delete a format because its numbers look smaller in the other format's terms. How to do it in simple steps:Check Shorts for swipe-away and completion, not only views. Check long videos for retention and subscribers gained. Note which Shorts bring viewers to long videos, where that data is available. Compare each format with its own past performance, not with the other format.Practical example: A creator's Shorts get many views but few subscribers, while long videos get fewer views but most subscribers. They do not stop Shorts; they improve Shorts hooks and links, so discovery turns into subscribers through long videos. Common mistake to avoid: Deleting Shorts because they do not bring subscribers directly, or deleting long videos because Shorts get more views. Each format plays a different role, and removing one weakens the other. Illustrative image: Judge Shorts and long videos by their own metrics. This is an illustrative image, not a screenshot of your channel or another creator's work. Step 6: Review the Mix Monthly and Adjust One Thing What to do: Once a month, review the mix and change only one thing at a time: the ratio, the Shorts hooks, the linking, or the long-video topics. A monthly review prevents both panic and drift. If Shorts bring discovery but few long-video views, improve links and hooks. If long videos perform well but Shorts are ignored, improve Shorts titles and first seconds. Small, tested changes beat constant overhauls, which make it impossible to know what worked. How to do it in simple steps:Write down last month's long videos, Shorts, views, and subscribers gained. Note which Shorts led to long-video views, and which did not. Choose one change for next month, such as stronger Shorts hooks. Keep everything else the same, so the change can be judged fairly.Practical example: A monthly review shows Shorts hooks are weak: viewers swipe away in two seconds. The creator changes only the first second of each Short, keeping the same ratio and topics, and swipe-away improves the next month. The cause is clear, because only one thing changed. Common mistake to avoid: Changing the ratio, topics, hooks, and posting times all at once after a slow week. When everything changes, you learn nothing, and the next slow week starts another random overhaul. Illustrative image: Review the mix monthly, and change one thing at a time. This is an illustrative image, not a screenshot of your channel or another creator's work. Checklist for a Shorts and Long Video MixDifferent job written for Shorts and for long videos Sustainable weekly mix on a calendar Long video and its Shorts planned together Each Short self-contained, with its own hook Clear link from Shorts to the long video Each format judged by its own metrics Monthly review with one change at a timeFrequently Asked Questions How many Shorts should I post per long video? Two or three is a good starting point for most creators. It gives discovery without overwhelming viewers or turning your channel into only Shorts. Adjust after a month of data, not after a single week. Do Shorts hurt long videos? Not usually, if they are linked well and have their own purpose. Problems arise when Shorts replace long videos entirely, or when every Short is a random clip with no path to deeper content. Should Shorts and long videos have the same audience? They can overlap, but Shorts often reach new viewers first. Use Shorts to introduce a topic, and long videos to serve viewers who want the full answer, including new subscribers. Can I reuse a long video as Shorts? Yes, if you re-edit it as a self-contained Short with its own hook and ending, rather than posting a raw slice. Add a link to the full video for viewers who want more. What if my Shorts get views but no subscribers? Improve the path to long videos: stronger hooks, a clear link, a related playlist, and long videos that deliver on the Short's promise. Discovery alone is useful, but it needs a next step to become growth. Shorts and long videos are partners, not competitors. Let Shorts discover, let long videos teach, link them clearly, and adjust the mix slowly based on what your own numbers show.
- CreatorPlaybook Team
- 25 Oct, 2026
How to Start a Faceless YouTube Channel
A faceless YouTube channel lets you create videos without showing your face on camera. That appeals to creators who are shy, who value privacy, who want to focus on teaching rather than personality, or who simply prefer working behind the camera. Faceless does not mean impersonal, and it does not mean automated. The most successful faceless channels have a clear voice, a consistent style, and original value that viewers recognise, even without a face. This guide explains how to start a faceless YouTube channel the right way. It covers choosing a format that works without a face, building a voice and visual identity, creating original content that can be monetized, and avoiding the reused-content trap that harms many faceless channels. You will learn a practical workflow, from first idea to first twenty videos, that keeps your channel human, original, and sustainable. Related guides: Voiceover Tips for Clear Audio, How to Edit Videos in CapCut for Beginners, and How to Script a YouTube Video. What You Will LearnWhich faceless formats work, and which do not How to choose a niche for a faceless channel How to build voice, visuals, and branding without a face How to create original faceless videos that can be monetized How to script and record efficiently How to grow a faceless channel and keep viewers returningStep 1: Choose a Format That Works Without a Face What to do: Choose a format where the value is in what viewers see or learn, not in who you are. Good faceless formats include screen tutorials, demonstrations, animations, explainers with diagrams, cooking from a hands-only angle, nature or travel footage with narration, and data or history explainers with original visuals. Formats that rely mainly on personality, reaction, or lifestyle are much harder without a face, because viewers connect through the person. How to do it in simple steps:List formats where the screen, the hands, or the visuals carry the teaching. Choose one format you can repeat for at least twenty videos. Test one video in that format and watch it as a stranger would. Ask whether the video is useful even if you do not know who made it.Practical example: A creator starts a faceless channel teaching spreadsheet skills with screen recordings and their own voice. Viewers return for clear explanations and real examples, not for a face, and the format is easy to repeat every week. Common mistake to avoid: Choosing a faceless format that is only stock footage with generic narration, such as a slideshow of unrelated clips. Without a demonstration, a voice with personality, or original insight, the video feels automated and struggles to keep viewers or to be monetized. Illustrative image: Choose a format where teaching and visuals carry the video. This is an illustrative image, not a screenshot of your channel or another creator's work. Step 2: Pick a Focused Niche and a Clear Promise What to do: Pick a narrow niche and a clear promise, such as helping beginners learn a specific skill, explaining a topic in simple language, or showing a process step by step. A faceless channel needs a stronger niche than a personality channel, because viewers cannot bond with a face. They bond with usefulness and consistency. A clear promise also makes it easier to plan videos, write titles, and be found in search. How to do it in simple steps:Choose one topic and one audience, such as beginners learning photo editing. Write your promise in one sentence: who you help, and with what. List twenty video questions in that niche before you launch. Check that you can answer those questions from experience or careful research.Practical example: A faceless channel promises, "Simple home cooking for beginners, filmed hands-only, in under 20 minutes." Every video fits that promise, viewers know what to expect, and the channel grows through search for specific recipes, not through personality. Common mistake to avoid: Starting a general faceless channel about motivation, facts, or news, with no clear audience or expertise. General faceless channels face the most competition and the most reused-content risk, because their videos are easy to copy. Illustrative image: A narrow niche and a clear promise replace the need for a face. This is an illustrative image, not a screenshot of your channel or another creator's work. Step 3: Build a Voice and Visual Identity Viewers Recognise What to do: Build an identity without a face: a consistent voice, a simple logo or channel icon, a colour scheme, a thumbnail style, an intro sound, and a repeatable video structure. Your voice is especially important for faceless channels, because it becomes the personality viewers recognise. Record in your own voice where possible, speak clearly and warmly, and keep the same tone across videos, so viewers feel they are hearing from the same trusted teacher each time. How to do it in simple steps:Record your own narration, with a good microphone and a quiet room. Choose two colours and one thumbnail layout, and use them consistently. Create a short intro that states the topic, not a long animated logo. Use the same structure in every video: problem, steps, example, summary.Practical example: A history explainer channel uses the same narrator voice, the same map-and-diagram style, and the same thumbnail layout for every video. Viewers recognise a new upload instantly, even though they have never seen the creator's face. Common mistake to avoid: Using a different synthetic voice, style, and thumbnail for every video. Inconsistency makes a faceless channel feel like many unrelated channels, and viewers have no reason to subscribe. Illustrative image: A consistent voice and thumbnail style become your identity. This is an illustrative image, not a screenshot of your channel or another creator's work. Step 4: Create Original Content, Not Reused Clips What to do: Create original material in every video: your own script, your own narration, your own screen recordings, demonstrations, diagrams, or footage. Avoid building videos mainly from other people's clips, stock footage, or copied scripts, even if you add narration. Monetization policies favour channels where the creator's own work is the main value, and viewers can tell the difference between a taught skill and a stitched-together compilation. How to do it in simple steps:Write each script yourself, based on research and your own experience. Record your own demonstrations, screen work, or hands-on footage. Use licensed or original visuals, and credit sources where required. Add commentary, comparisons, or examples that only you provide.Practical example: A faceless gardening creator films their own hands planting seeds, explains mistakes from their own garden, and shows results over weeks. The footage is simple, but it is original, and no other channel could publish the same video by copying clips. Common mistake to avoid: Publishing videos made almost entirely from stock clips and a generic script, then being surprised by limited monetization. Original demonstration and personal commentary are what separate a real faceless channel from a reused-content channel. Illustrative image: Your own demonstrations and narration make a faceless channel original. This is an illustrative image, not a screenshot of your channel or another creator's work. Step 5: Script and Record With a Repeatable Workflow What to do: Build a workflow you can repeat weekly: research, outline, script, record narration, gather or film visuals, edit, and publish. Scripting matters even more for faceless videos, because there is no face to carry a slow or unclear section. Write in spoken language, keep sentences short, and plan visuals for each section, so editing is assembly, not invention. Batch recording and editing where possible, to keep the schedule sustainable. How to do it in simple steps:Outline the video: problem, three to five steps, example, summary. Write the script in spoken words, and read it aloud once before recording. Record narration in a quiet room, in sections, so mistakes are easy to fix. Edit visuals to match the narration, not the other way round.Practical example: A tutorial creator scripts on Monday, records narration on Tuesday, edits screen footage on Wednesday, and publishes on Friday. The routine produces one clear video a week, without last-minute rushing or burnout. Common mistake to avoid: Recording without a script and hoping editing will fix a rambling narration. Faceless videos without a script often feel slow, and viewers leave before the useful part arrives. Illustrative image: A script and a weekly workflow keep faceless videos clear. This is an illustrative image, not a screenshot of your channel or another creator's work. Step 6: Grow With Search, Series, and Community What to do: Grow a faceless channel through search, series, and community, rather than personality. Make series that viewers follow, such as a beginner course in parts, use searchable titles that match real questions, and invite comments and questions that shape future videos. Reply to comments, use community posts and polls where available, and link related videos in end screens, so a single search view becomes a returning viewer. How to do it in simple steps:Turn your first twenty ideas into two or three series, not twenty unrelated videos. Use titles that match the exact question a viewer would search for. End each video with a clear next video in the series. Ask viewers what to cover next, and make the most requested video.Practical example: A faceless coding channel publishes a ten-part beginner series, with each video linking to the next. Viewers who find part one through search watch several parts in a row, subscribe for the rest, and return for the next series. Common mistake to avoid: Publishing unrelated faceless videos and expecting subscribers to stay. Without a series or a clear niche, each video must find a brand-new audience, and growth stays slow. Illustrative image: Series and searchable titles help faceless channels grow. This is an illustrative image, not a screenshot of your channel or another creator's work. Checklist for Starting a Faceless YouTube ChannelFaceless format chosen that suits teaching or demonstration Focused niche and one-sentence promise written Twenty video ideas planned in series Own voice, thumbnail style, and video structure consistent Original footage, narration, and commentary in every video Repeatable weekly scripting and recording workflow Searchable titles and series links in placeFrequently Asked Questions Can a faceless channel be monetized? Yes, if it meets YouTube's requirements and provides original, valuable content. Channels built mainly from reused clips or generic automated content face much higher risk, so original work is essential. Do I need to use my own voice? Not always, but it helps greatly. Your own voice builds trust and identity, and it is a clear signal that a human creator is behind the channel. Synthetic voices can work for extras, but they make it harder to stand out. What equipment do I need? A decent microphone, a quiet recording space, screen-recording or camera equipment for your format, and editing software you know well. Start simple, and upgrade only when a limitation appears. How long does a faceless channel take to grow? Usually months, like any channel. Search-based faceless channels often grow steadily as their catalogue grows, especially when videos are organised into series that viewers follow. Can I show my face later? Yes. Many creators start faceless and introduce themselves later, or keep the channel faceless permanently. Either choice works, as long as the change is explained simply and the video quality stays consistent. A faceless channel succeeds when viewers recognise the voice, the style, and the value, even without a face. Choose a teachable format, create original work, and let consistency do what personality does for other channels.

- CreatorPlaybook Team
- 25 Oct, 2026
How to Use AI for YouTube Videos Without Breaking Monetization Policy
Artificial intelligence can help YouTube creators research, script, edit, and organise their work faster than ever before. It can also create a serious problem: videos that look automated, repetitive, or copied may struggle to be monetized, even if they were made with good intentions. YouTube's monetization policies focus on originality and value, not on whether a tool was used. That distinction is good news, because it means you can use AI safely, if you use it as an assistant, not as a replacement for your own work. This guide explains how to use AI for YouTube videos without breaking monetization policy. It covers what counts as original value, which AI uses are low risk, which are high risk, and how to build a workflow that keeps you, your voice, and your judgement at the centre of every video. Policies can change, so always check YouTube's current monetization and content policies in YouTube Studio before publishing, and treat this guide as general information, not legal advice. Related guides: YouTube Copyright and Music: Safe Guide, Monetization Beyond AdSense: Affiliate, Sponsorship, Membership, and How to Make Educational Videos That Rank. Official source: Disclosing use of GenAI content What You Will LearnWhat monetization policy means by original and valuable content Which AI uses help, and which create risk How to use AI for research and scripting safely How to use AI voices, images, and editing without losing originality How to disclose AI use clearly How to check a video before publishingStep 1: Understand the Rule: Original Value, Not Just Original Files What to do: Understand that monetization is about whether your video adds value a viewer cannot get elsewhere. A video that is only AI-generated narration over stock footage, with no personal insight, demonstration, or commentary, may be seen as reused or low-value content, even if the files are technically new. A video where you research, test, demonstrate, or explain something in your own way, using AI to help with drafts or editing, is a different kind of video, because your judgement is visible throughout. How to do it in simple steps:Ask, "What does a viewer learn or experience here that only I could provide?" List your original contributions: experience, testing, examples, opinions, or footage. If the list is empty, add one before publishing, such as a demonstration or a real example. Keep notes on what you created yourself, for future reference.Practical example: A creator uses AI to draft a script about lighting, then films their own room, shows their own lamp setup, and explains what worked and what failed. The AI helped with structure, but the value comes from the creator's demonstration and experience, which is clear in the final video. Common mistake to avoid: Publishing dozens of AI-narrated videos on topics you have not researched, tested, or filmed, and expecting them all to be monetized. Volume without original value is the pattern monetization policies are designed to catch. Illustrative image: AI should assist your work, not replace your original contribution. This is an illustrative image, not a screenshot of your channel or another creator's work. Step 2: Use AI Safely for Research, Ideas, and Outlines What to do: Use AI to brainstorm topics, organise research, and draft outlines, then verify every fact yourself. AI can suggest angles you had not considered, summarise public information, and turn a messy idea into a clear structure. It can also invent facts, dates, and quotations, so never copy AI output into a video without checking it against reliable sources, especially for health, finance, legal, or technical claims. How to do it in simple steps:Ask AI for topic ideas and outline options, not for a finished script. Check each factual claim against an official or reliable source. Rewrite the outline in your own words and order, based on your audience. Add your own examples, which AI cannot provide from your experience.Practical example: A creator asks AI for ten questions beginners ask about microphones, checks the answers against manufacturer specifications and their own tests, then builds a script around the three questions their viewers actually ask most. The AI saved research time, but the final video is checked and personal. Common mistake to avoid: Reading an unchecked AI script on camera, including invented statistics or outdated rules. Viewers and platforms both notice errors, and factual mistakes damage trust far more than a slower script saves time. Illustrative image: Use AI for ideas and outlines, then verify every fact yourself. This is an illustrative image, not a screenshot of your channel or another creator's work. Step 3: Keep Your Voice and Face at the Centre Where Possible What to do: Where your format allows, use your own voice and presence, even if AI helps with editing, captions, or summaries. Your voice, face, and style are strong signals of originality, and they build the trust that keeps viewers returning. AI voices can be useful for accessibility, translation, or a first draft, but a channel made entirely of synthetic voices over generic visuals is much harder to distinguish from automated content. How to do it in simple steps:Record your own narration or on-camera segments for the main teaching points. Use AI voices only for clearly labelled extras, such as translations or short summaries. Add on-camera introductions, demonstrations, or reactions where possible. Keep a consistent personal style, so viewers recognise your channel.Practical example: A faceless tutorial creator still records their own voice, shows their own screen and hands, and explains decisions in real time. The channel has no face on camera, but it clearly has a human creator behind it, which is very different from a fully synthetic channel. Common mistake to avoid: Replacing your voice with a synthetic voice for every video, simply to save recording time, and then wondering why viewers do not trust or return to the channel. Speed is not worth losing the human connection that makes a channel sustainable. Illustrative image: Your own voice and presence are strong signals of original work. This is an illustrative image, not a screenshot of your channel or another creator's work. Step 4: Use AI Images, Music, and Editing With Care and Rights in Mind What to do: Use AI tools for editing help, such as captions, cuts, thumbnails, and colour, and for generating supporting visuals, but check the rights and terms of each tool. Some AI tools allow commercial use, others do not, and some may generate images that resemble copyrighted work. Prefer your own footage and licensed assets for the main content, and use AI-generated visuals as supporting material, not as the whole video. How to do it in simple steps:Read the commercial-use terms of any AI tool before publishing with it. Keep receipts, licences, and tool names in your video records. Use your own footage for demonstrations, and AI visuals only where they add clarity. Avoid AI content that imitates a real person's voice, face, or work without permission.Practical example: A creator uses AI to generate a simple diagram for a tutorial, while the main video shows their own screen and process. The diagram helps viewers understand, but the video would still work without it, because the original teaching is the creator's own. Common mistake to avoid: Building a whole video from AI images and a synthetic voice, with no original footage, demonstration, or commentary, and assuming that because each file is new, the video is automatically original. Monetization looks at the video as a whole, not at file novelty alone. Illustrative image: Check AI tool terms, and keep your own footage at the centre. This is an illustrative image, not a screenshot of your channel or another creator's work. Step 5: Disclose AI Use Clearly, Especially for Realistic Content What to do: Follow YouTube's disclosure rules for altered or synthetic content, especially when a video contains realistic-looking scenes, voices, or events that did not actually happen. Use YouTube's disclosure options during upload where required, and tell viewers in plain language when AI played a major role. Disclosure does not punish honest creators; it protects viewers from being misled, and it protects you if a video is later reviewed. How to do it in simple steps:During upload, answer YouTube's altered-content questions honestly. Label realistic AI scenes in the video or description, in plain words. Do not present AI-generated events, quotations, or people as real. When in doubt, disclose more, not less.Practical example: A creator makes a video with an AI-generated illustration of a future studio setup. They label it on screen as an illustration, and explain that it is a concept, not a real room. Viewers understand, and the video is not misleading. Common mistake to avoid: Using a realistic AI voice or face to imitate a real person, or presenting an AI scene as documentary footage, without disclosure. Misleading synthetic content is a policy risk, even if the video is entertaining. Illustrative image: Disclose realistic AI content plainly, and never present it as real. This is an illustrative image, not a screenshot of your channel or another creator's work. Step 6: Run a Pre-Publish Originality Check on Every AI-Assisted Video What to do: Before publishing, run a short originality check: does the video contain your own footage, voice, testing, or commentary? Could another creator publish the same video by typing the same prompt? If yes, add something only you can add. Also check for factual errors, misleading claims, copyrighted material, and disclosure, and upload as unlisted first if you want YouTube's checks to run before the video goes public. How to do it in simple steps:List your original contributions in the video, in one sentence. Remove or replace any segment that is only generic AI output. Check facts, licences, music, and disclosure one more time. Upload as unlisted first, review YouTube's checks, then publish.Practical example: A creator reviews an AI-assisted script and realises the middle section is generic advice anyone could generate. They replace it with a short screen recording of their own workflow, with mistakes and fixes included. The video becomes specific, useful, and clearly original. Common mistake to avoid: Publishing AI-assisted videos at high volume without reviewing any of them, then being surprised when monetization is limited. A short check on each video is far cheaper than appealing a policy decision afterwards. Illustrative image: Check originality, facts, and disclosure before every publish. This is an illustrative image, not a screenshot of your channel or another creator's work. Checklist for Safe AI Use on YouTubeOriginal contribution clear in every video Facts verified against reliable sources Your voice, footage, or demonstration included where possible AI tool terms and licences checked and recorded Realistic synthetic content disclosed plainly No impersonation or misleading AI scenes Pre-publish originality check completedFrequently Asked Questions Does using AI automatically prevent monetization? No. YouTube does not ban AI assistance in general. Monetization problems arise when a video lacks original value, reuses content, or misleads viewers, not simply because a tool was used. Can I use AI to write my scripts? Yes, if you verify facts, rewrite in your own voice, and add your own examples, demonstrations, or opinions. A script you never checked or personalised is much riskier than one you shaped yourself. Can I use an AI voice for my whole channel? It is risky, especially combined with generic visuals and no personal footage. Use your own voice for main content where possible, and reserve synthetic voices for clearly labelled extras. Do I need to disclose every AI edit? Not every small edit, such as captions or colour correction, but you must follow YouTube's disclosure rules for altered or synthetic content, especially realistic scenes that could mislead viewers. When in doubt, disclose. What should I do if monetization is limited? Read the notice carefully, identify which policy was cited, improve the video with original footage or commentary where possible, and check YouTube's official help pages for appeal or reapplication steps. Do not simply re-upload the same video unchanged. Use AI to work faster, not to replace your judgement. When your experience, voice, and testing are visible in every video, AI becomes a safe and powerful assistant, not a monetization risk.

- CreatorPlaybook Team
- 25 Oct, 2026
How to Stream on YouTube
Streaming on YouTube is different from uploading a finished video. A stream is live, unedited, and interactive, which makes it exciting, but also unforgiving. There is no second take, no quiet edit, and no hiding a mistake. The good news is that a good stream does not need a complex studio. It needs a clear purpose, a reliable setup, and a simple plan for what happens before, during, and after you go live. This guide focuses on the practical workflow of streaming: choosing a stream format, setting up software and scenes, testing audio and internet, running the live chat, and turning the stream into later videos. It is written for creators who already know the basics of going live and want a repeatable streaming routine they can use every week, whether they stream from a phone, a computer, or both. Related guides: YouTube Live Streaming for Beginners, How to Repurpose One Video into Shorts, Reels and Posts, and How to Read and Use the YouTube Studio App. What You Will LearnHow to choose a stream format that fits your channel How to set up scenes, audio, and overlays simply How to test internet, audio, and video before going live How to run chat without losing control of the stream How to keep a stream engaging for its full length How to reuse a stream as edited videos and ShortsStep 1: Choose a Stream Format With a Clear Job What to do: Give every stream one job: answer questions, teach a skill live, work alongside viewers, play or demonstrate something, or celebrate a milestone. A stream without a job drifts, loses viewers, and is hard to promote. A stream with a job is easy to title, easy to explain in the first minute, and easy to turn into clips afterwards. Choose a length you can sustain, such as 45 to 90 minutes, rather than an open-ended marathon. How to do it in simple steps:Pick one format: question-and-answer, tutorial, work-along, discussion, or showcase. Write one sentence that explains what viewers will get by joining live. Plan three segments, such as welcome, main activity, and viewer questions. Set a start time and a realistic end time, and tell viewers both.Practical example: A tutorial creator runs a weekly 60-minute live workshop: 10 minutes of welcome and questions, 35 minutes of building a project step by step, and 15 minutes of viewer questions. Viewers know what to expect, return each week, and the recording becomes a useful tutorial afterwards. Common mistake to avoid: Starting a stream with no plan and hoping chat will provide the content. Chat helps, but it cannot carry a stream that has no structure, especially for a small channel with few live viewers at first. Illustrative image: Give every stream one clear job and three simple segments. This is an illustrative image, not a screenshot of your channel or another creator's work. Step 2: Set Up Scenes, Audio, and Overlays Simply What to do: Use streaming software, such as OBS Studio, to build a few simple scenes: a starting screen, a main camera or screen-share scene, and a break or ending screen. Keep overlays minimal: your channel name, the stream topic, and a simple lower-third for questions. Audio matters more than overlays, so use an external microphone, monitor your levels, and keep background music low enough that your voice stays clear. How to do it in simple steps:Create three scenes: starting, main, and ending. Add your camera, microphone, and screen share to the main scene. Set audio levels so your voice peaks comfortably, without distortion. Test switching scenes before the stream, not during it.Practical example: A coding creator uses a main scene with screen share large and camera small in the corner, a starting screen with the topic and start time, and an ending screen thanking viewers. The setup looks clean, switches smoothly, and takes only a few minutes to prepare each week. Common mistake to avoid: Adding animated overlays, alerts, tickers, and multiple cameras before the basics work. Flashy scenes distract viewers and hide audio or internet problems that actually end streams. Illustrative image: Three simple scenes and clear audio beat a complex overlay. This is an illustrative image, not a screenshot of your channel or another creator's work. Step 3: Test Internet, Audio, and Video Before You Go Live What to do: Test everything in a private or unlisted stream before your public stream, especially if you changed software, audio, or internet settings. Check upload speed, audio clarity, camera framing, and screen-share readability. A ten-minute test prevents most live disasters, including silent audio, a frozen screen, or a stream that drops every few minutes. Keep a short pre-stream checklist and use it every time. How to do it in simple steps:Run a private test stream and watch it on another device. Speak, play any music, and share your screen, checking each sound. Check that text on screen is readable on a phone, not only on a monitor. Close unnecessary programmes that use internet or processing power.Practical example: A creator tests a new microphone in a private stream and discovers it is set to the laptop microphone instead. The fix takes two minutes before the stream, but would have ruined the first 20 minutes of a public stream. Common mistake to avoid: Going live for the first time with a new setup, in front of an audience, without a test. Live viewers forgive small mistakes, but they rarely stay through silent audio or a frozen screen. Illustrative image: A private test stream catches audio and video problems early. This is an illustrative image, not a screenshot of your channel or another creator's work. Step 4: Open Strong, and Welcome Viewers by Name and Question What to do: Start every stream with a clear welcome in the first minute: who you are, what the stream will cover, and what viewers should do. Greet early viewers, read a few chat messages aloud, and state the plan, so late joiners can catch up quickly. A strong opening matters even more live than in edited video, because viewers decide in seconds whether to stay, and a stream has no thumbnail or edit to save a slow start. How to do it in simple steps:Begin on time, with camera and audio ready, not with setup talk. State the topic, the plan, and the end time in the first minute. Ask a simple opening question for chat to answer. Pin or repeat the topic for viewers who join later.Practical example: A study stream opens with, "Welcome to our 60-minute focus session. We will work in two 25-minute blocks, with questions in between. Tell me in chat what you are working on today." Viewers immediately know the format and join in, instead of wondering what the stream is about. Common mistake to avoid: Spending the first ten minutes waiting for viewers, adjusting settings on camera, or saying, "We will start soon." Late viewers who join during that wait usually leave before the stream properly begins. Illustrative image: Open on time with a clear topic, plan, and question for chat. This is an illustrative image, not a screenshot of your channel or another creator's work. Step 5: Run Chat With Clear Rules and a Simple Rhythm What to do: Treat chat as part of the show, not as a distraction. Set simple rules, such as no insults and no spam, use slow mode or moderators when needed, and answer chat in batches rather than reading every message the moment it appears. A rhythm helps: work or teach for a few minutes, then pause for chat, then continue. This keeps the stream moving for viewers who are watching, not only for those who are typing. How to do it in simple steps:State chat rules briefly at the start, and pin them if possible. Appoint a trusted moderator for larger streams, or use YouTube's moderation tools. Answer questions in groups, naming the viewer and the question. Ignore or hide disruptive messages calmly, without arguing on stream.Practical example: A question-and-answer creator collects questions for ten minutes, then answers five in a row, then opens chat again. Viewers get thoughtful answers, the stream keeps a steady pace, and the host is not constantly interrupted mid-sentence. Common mistake to avoid: Trying to read and answer every chat message instantly. The stream becomes chaotic, the main topic disappears, and quiet viewers who came to learn leave. Illustrative image: Answer chat in batches, with clear rules and a steady rhythm. This is an illustrative image, not a screenshot of your channel or another creator's work. Step 6: End Cleanly, and Turn the Stream Into Lasting Videos What to do: End every stream with a summary, a thank-you, and a clear next step, such as the next stream date or a related video to watch. Then turn the recording into lasting content: cut the best segments into a tutorial, a highlight video, or Shorts, add chapters and a clear title, and remove long silences or setup sections. A stream that lives only as a long replay helps few viewers; the same stream, edited into focused videos, can keep working for months. How to do it in simple steps:End on time, summarise the main points, and thank viewers and moderators. Review the recording and note timestamps for the best moments. Cut one or two focused videos, plus a few Shorts, from the stream. Retitle and add chapters, so the replay is useful for new viewers.Practical example: A 60-minute workshop becomes a 12-minute tutorial, three Shorts answering common questions, and a chaptered replay. The stream itself brought live viewers, but the edited versions bring search viewers for weeks afterwards. Common mistake to avoid: Leaving every stream as an unedited, two-hour replay with a vague title. Few new viewers will watch it, and the best teaching moments stay buried where search cannot find them. Illustrative image: Edit streams into focused videos and Shorts that last. This is an illustrative image, not a screenshot of your channel or another creator's work. Checklist for Streaming on YouTubeStream format and one clear job chosen Three simple scenes built and tested External microphone and audio levels checked Private test stream completed Strong opening and chat rules prepared End time set, with summary and next step planned Edited highlights and Shorts planned from the recordingFrequently Asked Questions Do I need expensive software to stream? No. Free software such as OBS Studio, a decent microphone, and a stable internet connection are enough for most beginner and intermediate streams. Add paid tools only when a specific limitation appears. Should I stream from a phone or a computer? Use a phone for simple, mobile streams, and a computer when you need screen sharing, multiple scenes, or overlays. Many creators use both, choosing the tool that fits each stream format. How long should a stream be? Long enough to deliver its job, usually 45 to 90 minutes for most formats. Shorter, focused streams often keep viewers better than very long streams that drift. What if few viewers join live? That is normal at first. Treat the stream as a recording session with live interaction as a bonus, promote it in advance, keep a regular schedule, and turn the recording into edited videos that grow over time. Can I stream and upload regular videos? Yes, if the schedule is sustainable. Many creators stream once a week and upload edited videos on other days, using streams to answer questions and edited videos to reach search viewers. Streaming rewards preparation, not perfection. Choose a format, test your setup, open strong, run chat with a rhythm, and turn every stream into videos that keep working after you go offline.
- CreatorPlaybook Team
- 25 Oct, 2026
Which Camera Should You Use for YouTube
Choosing a camera for YouTube feels overwhelming because every review promises that one more upgrade will transform your channel. In reality, most beginners already own a capable camera: their phone. Viewers care far more about clear audio, good lighting, and a useful video than about sensor size or megapixels. The right camera is the one that fits your format, your budget, and the way you actually film. This guide compares the main choices for YouTube: phones, webcams, mirrorless cameras, and action cameras. It explains when each one makes sense, what features matter for video rather than photography, and how to upgrade in stages. By the end, you will know whether to start with what you own, buy a modest webcam, or invest in a dedicated camera, and what to spend on first instead of a camera. Related guides: Lighting Setup on a Budget for YouTube Videos, Voiceover Tips for Clear Audio, and How to Edit Videos in CapCut for Beginners. What You Will LearnWhen a phone is enough for YouTube How webcams, mirrorless, and action cameras compare Which video features actually matter How lighting and audio affect camera choice How to test a camera in your real filming space How to upgrade in sensible stagesStep 1: Start With the Camera You Already Own What to do: Before you buy anything, test your phone as a YouTube camera. Modern phones record sharp video, focus well in good light, and are easy to edit on. Many successful channels started with a phone, a simple tripod, and good audio. Spend your first money on a microphone and lighting, which improve perceived quality far more than a new camera body in a dim room. How to do it in simple steps:Film a test video in your usual room, facing a window in daylight. Use the rear camera where possible, with the phone on a tripod. Record with an external microphone or a lavalier, not only the phone microphone. Watch the test on a television or laptop, not only on the phone screen.Practical example: A tutorial creator films with a mid-range phone, a small tripod, and a wired lavalier, in front of a window. Viewers comment on how clear the videos look, even though no dedicated camera was used. The creator later buys a camera only when they need better low-light performance and interchangeable lenses. Common mistake to avoid: Buying an expensive camera before learning framing, lighting, and audio. A costly camera in a dark, echoey room still produces a dark, echoey video, while a phone in good light with clear audio looks professional. Illustrative image: A phone in good light with clear audio is a strong starting camera. This is an illustrative image, not a screenshot of your channel or another creator's work. Step 2: Consider a Webcam for Desk and Streaming Videos What to do: If you film at a desk, record tutorials, stream, or make talking-head videos for a computer audience, a good webcam can be simpler than a phone or a mirrorless camera. A webcam connects by USB, works with recording and streaming software, and stays in place. Look for 1080p video, good low-light performance, and a wide enough field of view for your framing, rather than chasing 4K alone. How to do it in simple steps:Place the webcam at eye level, not looking up from a laptop. Light your face from the front, with a window or a lamp. Use an external microphone, even if the webcam has one built in. Test framing: head and shoulders, with a little space above your head.Practical example: A coding tutorial creator uses a webcam at eye level, a desk lamp as a key light, and a USB microphone. The setup takes two minutes to start, produces consistent videos, and avoids the cables and settings of a larger camera. Common mistake to avoid: Placing a webcam below eye level, which creates an unflattering angle, or filming in a dark room and blaming the webcam. Position and light matter more than the webcam model. Illustrative image: A webcam at eye level suits desk videos and streaming. This is an illustrative image, not a screenshot of your channel or another creator's work. Step 3: Choose a Mirrorless Camera When You Need More Control What to do: Consider a mirrorless camera when you want shallow depth of field, better low-light video, interchangeable lenses, or a more polished look for a studio or location channel. Mirrorless cameras offer manual controls, clean video output, and excellent autofocus in many models, but they also need lenses, batteries, memory cards, and sometimes a capture device for streaming. Budget for the whole system, not only the camera body. How to do it in simple steps:List what you need: low light, autofocus, flip screen, or microphone input. Choose a lens that suits your distance, often a wide or standard zoom for indoor filming. Check that the camera has a microphone input and a flip screen for self-filming. Test recording limits and battery life for your usual video length.Practical example: A studio creator upgrades to a mirrorless camera with a 24mm lens, a shotgun microphone, and two batteries. The background blurs softly, low-light videos look cleaner, and the channel's look improves, but only because lighting and audio were already good. Common mistake to avoid: Buying a mirrorless camera for photography features you will never use for video, or choosing a model without a microphone input. Video features, not photo megapixels, should drive the choice. Illustrative image: A mirrorless camera adds control, but needs lenses, batteries, and audio. This is an illustrative image, not a screenshot of your channel or another creator's work. Step 4: Choose an Action Camera for Movement and Outdoors What to do: If you vlog while moving, film sports, travel, or work outdoors in rain or dust, an action camera is often the practical choice. Action cameras are small, tough, stabilised, and easy to mount on a chest, helmet, or handlebar. Their wide angle suits movement, but it can distort close faces, and their small sensors struggle in low light compared with larger cameras. Use them for what they do best, and use another camera for quiet, indoor talking-head videos. How to do it in simple steps:Choose a mount that keeps the camera stable and at a natural height. Use a wind cover or an external microphone adapter for clear audio outdoors. Film in good daylight where possible, and avoid very dark scenes. Carry spare batteries, because stabilisation and 4K drain power quickly.Practical example: A travel vlogger mounts an action camera on a chest harness for walking tours, then switches to a phone for indoor interviews. Each camera does the job it suits, and neither is forced to do everything. Common mistake to avoid: Using an action camera as your only camera for close, indoor talking-head videos. The wide angle and small sensor make faces look distant and noisy in low light, even though the same camera looks great outdoors. Illustrative image: Action cameras suit movement and outdoors, not close indoor filming. This is an illustrative image, not a screenshot of your channel or another creator's work. Step 5: Compare the Video Features That Actually Matter What to do: When comparing cameras, focus on video features: resolution and frame rate, autofocus, stabilisation, microphone input, flip screen, battery life, and low-light performance. Resolution above 1080p matters less than good light and stable footage for most beginners. A camera that focuses smoothly, stays stable, and records clear audio will serve you better than one with impressive specifications that is hard to use. How to do it in simple steps:Write down your top three needs, such as autofocus, microphone input, and flip screen. Ignore features you will not use, such as advanced photo modes. Compare real video samples in similar light to your filming space. Check total cost, including lens, tripod, batteries, and memory cards.Practical example: A creator compares two cameras: one offers 4K but has no microphone input, the other offers 1080p with a microphone input, flip screen, and reliable autofocus. They choose the second, because clear audio and usable framing matter more than 4K on a small channel. Common mistake to avoid: Choosing a camera only because it shoots 4K, then uploading in 1080p anyway, with poor audio. Specifications should serve your workflow, not impress a specification sheet. Illustrative image: Compare autofocus, audio input, and low light, not only resolution. This is an illustrative image, not a screenshot of your channel or another creator's work. Step 6: Test, Then Upgrade in Stages What to do: Test any new camera in your real space before the return window closes. Film your usual format, in your usual light, with your usual microphone, and watch the result on a large screen. Then upgrade in stages: tripod and microphone first, lighting second, camera third, and lenses or accessories only when a specific limitation appears. This order prevents expensive purchases that do not solve your actual problem. How to do it in simple steps:Film the same script with your old and new camera, in the same light. Check focus, colour, stabilisation, and audio on a large screen. Note one real improvement and one remaining limitation. Buy the next upgrade only to fix that remaining limitation.Practical example: A creator starts with a phone, adds a tripod and lavalier, then lighting, then a webcam for desk work, and only later a mirrorless camera for a studio series. Each step improves videos noticeably, and no purchase sits unused. Common mistake to avoid: Upgrading cameras every few months in search of a look that actually comes from lighting, framing, and editing. A new camera rarely fixes a lighting or audio problem. Illustrative image: Test a new camera in your real space before the return window closes. This is an illustrative image, not a screenshot of your channel or another creator's work. Checklist for Choosing a YouTube CameraCurrent camera tested in your real filming space Format matched to phone, webcam, mirrorless, or action camera Microphone input and external audio planned Lighting planned before any camera upgrade Video features compared, not only photo specifications Total system cost checked, including lenses and batteries Upgrade order set: tripod, audio, lighting, then cameraFrequently Asked Questions Can I start YouTube with just a phone? Yes. A phone with good light, a tripod, and an external microphone produces videos that look and sound professional for most beginner formats. Is 4K necessary for YouTube? No, not for most beginners. Sharp 1080p video with good light and audio is enough, and it is easier to edit and upload. Consider 4K later, if you need to crop or future-proof footage. Should I buy a mirrorless camera as a beginner? Only if you have a clear reason, such as low-light studio work or interchangeable lenses, and a budget for the whole system. Otherwise, start with a phone or webcam and upgrade later. What matters more: camera or lighting? For most beginners, lighting and audio matter more. A modest camera in good light with clear audio beats an expensive camera in a dark, echoey room. Do I need different cameras for vlogging and studio videos? Not necessarily, but it helps. Many creators use a phone or action camera outdoors and a webcam or mirrorless camera indoors, choosing each tool for the job it does best. Start with what you own, improve light and audio first, and choose a camera for your format. When you do upgrade, let a real limitation, not a review, decide the purchase.
- CreatorPlaybook Team
- 25 Oct, 2026
Which Mic Should You Buy for YouTube
Audio is the fastest way to make a YouTube video feel professional, and the wrong microphone is the fastest way to lose viewers. Viewers will forgive a modest camera, but they rarely forgive muffled, echoey, or distant sound. Choosing a microphone does not mean buying the most expensive one. It means matching the microphone to where you film, how you move, and what your videos sound like. This guide answers a simple question: which mic should you buy for YouTube? It compares USB microphones, lavalier microphones, and shotgun microphones, explains when each one works best, and gives a practical buying plan for beginners, talking-head creators, vloggers, and voiceover creators. You do not need to understand every technical term to choose well; you need to know your room, your format, and your budget. Related guides: Voiceover Tips for Clear Audio, Lighting Setup on a Budget for YouTube Videos, and How to Edit Videos in CapCut for Beginners. What You Will LearnHow USB, lavalier, and shotgun microphones differ Which mic suits talking-head, vlog, and voiceover videos How your room affects microphone choice How to test a microphone before you commit What accessories actually improve sound How to upgrade in stages without wasting moneyStep 1: Start With Your Room and Your Format, Not the Price Tag What to do: Before you shop, describe where you film and how you move. A quiet, small room with soft furniture is forgiving. A large, echoey room, a noisy street, or a moving vlog needs a microphone that rejects unwanted sound. A creator who sits at a desk has different needs from one who walks, cooks, or films outdoors. The best microphone is the one that suits your real filming conditions, not the one a famous creator uses in a studio. How to do it in simple steps:Film a test clip with your phone in your usual room and listen for echo, fan noise, and traffic. Note whether you sit still, move around, or film outside. Decide whether you record voiceover separately or live on camera. Write down your budget and the one problem you most want to fix, such as echo or low volume.Practical example: A creator films tutorials at a desk in a quiet bedroom. A USB microphone on a small arm, close to the mouth, solves their problem for a modest price. The same creator would struggle with a distant camera microphone, which picks up the whole room. Common mistake to avoid: Buying a popular studio microphone for a noisy, echoey room and expecting it to fix the room. A sensitive microphone in a bad room often sounds worse than a simpler microphone placed close to your mouth. Illustrative image: Choose a microphone for your room and format, not only for its price. This is an illustrative image, not a screenshot of your channel or another creator's work. Step 2: Choose a USB Microphone for Desk and Voiceover Work What to do: If you record at a desk, for tutorials, voiceovers, or talking-head videos, a USB microphone is usually the simplest and best-value choice. It connects directly to a computer, needs no extra audio interface, and is easy to set up. Look for a cardioid pattern, which picks up sound mainly from the front and rejects some sound from behind, and for a headphone jack so you can hear yourself while recording. How to do it in simple steps:Choose a USB microphone with a cardioid pattern and a headphone output. Place it 15 to 25 centimetres from your mouth, slightly off to one side. Use a small boom arm or stand so the microphone stays in the same place. Record a test and check for plosives, those popping sounds on words starting with P and B.Practical example: A voiceover creator records narration for tutorials with a USB microphone, a pop filter, and a blanket hung behind the desk to reduce echo. The result sounds clear and close, without a studio or an expensive audio interface. Common mistake to avoid: Placing the microphone far away on the desk, or behind a laptop, and then raising the volume in editing. Distance and noise are much harder to fix after recording than they are to prevent while recording. Illustrative image: A USB microphone close to your mouth beats a distant microphone every time. This is an illustrative image, not a screenshot of your channel or another creator's work. Step 3: Choose a Lavalier Microphone for Moving and On-Camera Work What to do: If you move while filming, teach with your hands, cook, or walk and talk, a lavalier, or lapel, microphone is often the best choice. It clips to your clothing, stays close to your mouth wherever you move, and keeps your voice clear even when the camera is far away. Wireless lavalier systems are more convenient, while wired lavaliers are cheaper and simpler, especially for a phone. How to do it in simple steps:Clip the microphone about 15 centimetres below your chin, on the centre of your chest. Hide the cable under clothing where possible, and avoid fabric rubbing against the microphone. Test while moving, turning your head, and handling props. Carry spare batteries or a charged receiver for wireless systems.Practical example: A cooking creator clips a small lavalier to an apron and films from across the kitchen. The voice stays clear while hands are busy, and the camera microphone would have sounded distant and echoey by comparison. Common mistake to avoid: Clipping the microphone too low, under a scarf, or next to a rustling jacket. Placement matters more than the brand: a well-placed budget lavalier often beats an expensive one clipped badly. Illustrative image: A lavalier microphone keeps your voice close even when you move. This is an illustrative image, not a screenshot of your channel or another creator's work. Step 4: Choose a Shotgun Microphone for Camera and Outdoor Work What to do: If you film with a camera, outdoors, or at events, a shotgun microphone mounted on the camera is a strong choice. Shotgun microphones focus mainly on sound in front of them and reject some sound from the sides, which helps when you cannot clip a microphone to the speaker. They are also useful for vlogging, interviews, and run-and-gun filming, especially with a wind cover outdoors. How to do it in simple steps:Mount the shotgun microphone on the camera shoe, pointing toward the speaker. Add a foam cover indoors and a furry wind cover outdoors. Keep the camera as close to the speaker as your shot allows. Monitor with headphones when possible, and check levels before filming.Practical example: A vlogger films street interviews with a camera-mounted shotgun microphone and a wind cover. Voices stay intelligible despite traffic, while the built-in camera microphone would have sounded thin and noisy. Common mistake to avoid: Standing far away and expecting a shotgun microphone to work like a lavalier. Even a directional microphone sounds distant if the speaker is several metres away; get closer, or switch to a lavalier. Illustrative image: A shotgun microphone helps outdoors, but distance still matters. This is an illustrative image, not a screenshot of your channel or another creator's work. Step 5: Test Before You Buy, and Test Again After What to do: Test any microphone in your real conditions before you decide it is the right one. Listen for clarity, background noise, handling noise, and how it sounds on headphones and on a phone speaker. Many viewers listen on phones, so a microphone that sounds rich on studio headphones but muddy on a phone may not be the best choice. Keep the receipt and the return window in mind, and test within the first few days. How to do it in simple steps:Record the same script with your old setup and the new microphone, in your usual room. Listen on headphones, a phone speaker, and a laptop speaker. Ask one honest listener which version is easier to understand. Test movement, silence, and background noise, not only a perfect take.Practical example: A creator tests two microphones with the same tutorial script. On paper, the more expensive one looks better, but in their echoey room the cheaper, closer microphone is clearer. They keep the cheaper one and spend the difference on soft furnishings and a pop filter. Common mistake to avoid: Judging a microphone only by online reviews recorded in treated studios. Your room, your voice, and your distance matter more than a reviewer's room. Illustrative image: Test microphones in your own room, with the same script. This is an illustrative image, not a screenshot of your channel or another creator's work. Step 6: Upgrade in Stages and Fix the Room First What to do: Upgrade in a sensible order: microphone placement, room treatment, a suitable microphone, then accessories such as a boom arm, pop filter, and shock mount. Soft furnishings, curtains, rugs, and a blanket behind you reduce echo for free or very little money. Only after placement and room are reasonable should you consider an audio interface, an XLR microphone, or a second microphone for a different format. How to do it in simple steps:Fix placement first: get the microphone close and consistent. Add soft materials to reduce echo in your filming space. Add a pop filter and a stable stand or arm. Upgrade to a new microphone type only when your format changes.Practical example: A creator starts with a phone and a wired lavalier, then adds a USB microphone for voiceovers, and only later adds a shotgun microphone for outdoor vlogs. Each purchase solves a real problem, and none sits unused. Common mistake to avoid: Buying an expensive XLR microphone and audio interface before learning placement and room treatment. The extra equipment adds complexity without fixing the echo and distance problems that actually hurt sound. Illustrative image: Upgrade in stages, starting with placement and your room. This is an illustrative image, not a screenshot of your channel or another creator's work. Checklist for Choosing a YouTube MicrophoneRoom and format described before shopping Microphone type matched to desk, movement, or outdoor filming Microphone placed close to the mouth, consistently Test recording checked on headphones and a phone speaker Pop filter, stand, and wind cover added where needed Room echo reduced with soft materials Upgrade plan based on real problems, not trendsFrequently Asked Questions Is a USB microphone good enough for YouTube? Yes, for most desk and voiceover creators. A good USB microphone, placed close and used in a reasonably quiet room, sounds clear and professional for tutorials, commentary, and narration. Should I buy a lavalier or a shotgun microphone? Choose a lavalier if you move and need your voice close at all times. Choose a shotgun microphone if you film with a camera, outdoors, or with several speakers in front of the camera. Do I need an audio interface? Not at first. USB microphones work without one. Consider an interface only when you want an XLR microphone, multiple microphones, or more control over recording. Why does my microphone sound echoey? Usually because the microphone is too far away, or the room is hard and empty. Move closer, add soft furnishings, and test again before buying a new microphone. Can I start with just my phone? Yes, especially with a wired lavalier for clear, close sound. A phone with a good lavalier often sounds better than a camera with a built-in microphone, and it is a sensible first step. The right microphone is the one that fits your room, your movement, and your videos. Test in real conditions, place it close, fix the room, and upgrade only when a new problem appears.

- CreatorPlaybook Team
- 25 Oct, 2026
How to Earn Money on YouTube
Earning money on YouTube is possible for far more creators than most beginners believe, but it rarely happens the way viral stories suggest. You do not need a million subscribers, a studio, or a lucky video to earn your first income. You need a clear topic, videos people search for or return to, and one or two income routes that fit your channel size. Many creators earn their first money not from advertisements alone, but from a helpful recommendation, a small sponsorship, or a loyal viewer who chooses to support the channel. This guide explains how to earn money on YouTube in a realistic, step-by-step way. It covers the main income routes, the requirements that matter, and the habits that turn a small channel into a steady, trustworthy source of income. You will learn what to focus on first, what to avoid, and how to grow your income slowly without harming the trust that makes earning possible in the first place. Related guides: Monetization Beyond AdSense: Affiliate, Sponsorship, Membership, How to Get Brand Deals as a Small Creator, and How to Make Educational Videos That Rank. Official source: YouTube Partner Program overview & eligibility What You Will LearnHow YouTube advertising income actually works How affiliates, sponsorships, and memberships compare What eligibility and audience you need before each route How to choose your first income stream How to disclose paid links and sponsorships honestly How to grow income without damaging viewer trustStep 1: Understand the Main Ways Creators Earn What to do: Learn the main income routes before you chase any one of them. YouTube advertising pays you a share of ad revenue on eligible videos. Affiliate income pays a commission when a viewer buys through your link. Sponsorships pay a fee for featuring a product. Memberships, Super Thanks, and channel support let viewers pay you directly. Selling your own products, courses, or services is another route, but it usually works best after you have built trust. How to do it in simple steps:List every route and note whether it needs an audience, a product, or a brand partner. Mark which routes fit a channel of your current size. Choose one route to start with, not five at once. Write down what success would look like in the first three months, in plain numbers.Practical example: A beginner cooking creator starts with affiliate links for the pan and knife used in videos. Those links cost nothing to set up, fit every tutorial naturally, and earn small commissions while the channel grows toward advertising eligibility. Common mistake to avoid: Chasing every income route at once. A channel with affiliate links, sponsorships, merchandise, memberships, and courses in the same month usually confuses viewers and delivers none of them well. Illustrative image: Compare income routes before you choose your first one. This is an illustrative image, not a screenshot of your channel or another creator's work. Step 2: Build the Audience and Watch Time That Income Depends On What to do: Focus on watch time, returning viewers, and a clear topic, because almost every income route rewards those things. Advertisers pay for attention, brands pay for trusted audiences, and viewers support creators they return to. A channel that publishes useful videos on a consistent schedule, answers real questions, and keeps viewers watching will qualify for more opportunities than a channel that chases trends without a topic. How to do it in simple steps:Choose one topic and make a series of videos that answer its most common questions. Publish on a schedule you can keep, even if that is once every two weeks. Improve titles and openings so viewers stay past the first minute. Reply to comments and ask viewers what problem to solve next.Practical example: A home-studio creator publishes one lighting tutorial each week for three months. Average views rise slowly, but returning viewers grow steadily, and brands in lighting later notice a focused, engaged audience rather than one viral video. Common mistake to avoid: Buying views or subscribers, or using misleading titles to inflate numbers. Fake growth can harm your channel, break platform rules, and scare away the brands and viewers who would otherwise pay you. Illustrative image: Steady, returning viewers are the foundation of creator income. This is an illustrative image, not a screenshot of your channel or another creator's work. Step 3: Qualify for Advertising the Right Way What to do: Work toward the YouTube Partner Program requirements by growing eligible watch time and subscribers, and by following YouTube's policies on original, advertiser-friendly content. Check the current requirements in YouTube Studio, because thresholds and rules can change, and do not rely on old advice from other creators. Keep your content original, avoid reused or copied material, and make sure music and clips are licensed. How to do it in simple steps:Check your eligibility progress in YouTube Studio regularly. Make longer, useful videos that viewers watch to the end, where that fits your topic. Use only licensed music and original footage or properly licensed clips. Review YouTube's monetization policies before applying, not after a rejection.Practical example: A tutorial creator reaches the watch-time threshold with twenty detailed guides rather than fifty short, shallow uploads. The longer videos also attract more affiliate clicks, so income starts before advertising does. Common mistake to avoid: Applying with reused content, such as re-uploaded clips with little added value, and then being surprised by a rejection. Original teaching, commentary, and demonstration are what make a channel eligible and sustainable. Illustrative image: Check eligibility in YouTube Studio and build original, watchable videos. This is an illustrative image, not a screenshot of your channel or another creator's work. Step 4: Start With Affiliate Income You Can Earn Early What to do: Recommend products you already use and trust, and add affiliate links in your video descriptions. Affiliate income is often the first realistic route for small creators because it does not require a large audience or a brand deal. It works when the product is a natural part of the video, when you show it in use, and when viewers believe your recommendation is honest. How to do it in simple steps:List the tools, books, or software you genuinely use for your topic. Join affiliate programmes for retailers that sell those items. Demonstrate the product in the video and mention one drawback honestly. Add a clear disclosure that links may earn you a commission.Practical example: A beginner filming creator links to a budget microphone used in every tutorial, plays a before-and-after audio sample, and notes that it is not ideal in noisy rooms. Viewers trust the advice, buy the microphone they wanted, and the creator earns a small commission on each sale. Common mistake to avoid: Recommending expensive products you have never used, simply because the commission is high. Viewers notice quickly, returns rise, and future recommendations stop working. Illustrative image: Affiliate income works best for products you actually use and show. This is an illustrative image, not a screenshot of your channel or another creator's work. Step 5: Add Sponsorships and Viewer Support When You Are Ready What to do: When your audience is focused and engaged, approach small brands that fit your topic, and offer loyal viewers a simple way to support you. A sponsorship should feel like a useful part of the video, not an interruption. Viewer support, through memberships or tips where available, should offer simple, sustainable perks such as early access or a monthly question-and-answer video, not a long list of promises you cannot keep. How to do it in simple steps:Make a list of brands your viewers already ask about. Pitch one clear deliverable, such as a short integration in a tutorial. Agree the price, message, and disclosure in writing before filming. Keep most content free, and offer membership perks you can deliver every month.Practical example: A channel with a few thousand subscribers partners with a small lighting brand for a 60-second integration inside a tutorial. The video remains useful, the brand reaches exactly the right viewers, and the creator is invited back for a second video. Common mistake to avoid: Accepting any sponsor that pays, even when the product does not fit your channel. One bad sponsorship can cost more trust than it earns in money, especially for a small creator. Illustrative image: Small, well-matched sponsorships can beat large, irrelevant ones. This is an illustrative image, not a screenshot of your channel or another creator's work. Step 6: Track Income, Taxes, and Trust Together What to do: Keep a simple record of every income source, the time it takes, and how viewers respond. Income that takes a great deal of time for very little return may not be worth keeping. Also keep records for tax purposes, set aside money for tax where your country requires it, and check the rules that apply to you, since tax rules vary by country and by income type. Finally, review your income every month and ask one question: did this route help viewers, or only extract money from them? How to do it in simple steps:Record each source, payment, and the hours spent on it. Set aside a portion of earnings for tax, following your local rules. Drop routes that harm trust or take too much time for too little return. Reinvest a small part of earnings in better audio, lighting, or editing only when it helps viewers.Practical example: A creator reviews three months of income and finds affiliate links earn steadily, a membership with heavy perks earns little and causes burnout, and one sponsorship earns well. They simplify the membership, keep the affiliates, and focus sponsorship pitches on similar brands. Common mistake to avoid: Spending the first payments without keeping records, then facing tax or accounting problems later. A simple spreadsheet from the start prevents most of that stress. Illustrative image: Track income, time, and viewer trust together each month. This is an illustrative image, not a screenshot of your channel or another creator's work. Checklist for Earning Money on YouTubeMain income routes understood and one chosen to start Clear topic and consistent schedule in place Original, licensed content that meets monetization policies Affiliate products chosen from tools you actually use Disclosure clear in video and description Sponsorships matched to your audience, agreed in writing Income and time tracked monthly, with tax records keptFrequently Asked Questions How many subscribers do I need to earn money? It depends on the route. Affiliate income has no subscriber minimum in most programmes, while advertising requires meeting YouTube's Partner Program thresholds. Sponsorships depend on audience fit and engagement, not a fixed number. Is advertising the best income for beginners? Usually not at first. Advertising income is often slow for small channels, while affiliate links and small sponsorships can earn earlier, especially in topics where viewers buy tools or courses. Do I need to disclose affiliate links? Yes. Say clearly, in the video and in the description, when a link earns you a commission. Disclosure is required in many countries and builds trust everywhere. Can I earn from Shorts? Shorts can earn through the Shorts revenue system and through affiliate links or sponsorships, but rates and rules differ from long videos. Treat Shorts as one part of a mix, not the whole income plan. What if my first income is very small? That is normal. Most creators start with small commissions and grow income as their audience, trust, and catalogue grow. A small, honest start beats a large, misleading one that damages your channel. Earning money on YouTube is a long game built on helpful videos, a focused audience, and honest recommendations. Start with one route, serve viewers first, and let income grow with trust.

- CreatorPlaybook Team
- 25 Oct, 2026
How to Review Your Channel Every Month and Improve
A monthly channel review is the difference between uploading and improving. Without a review, creators repeat the same mistakes, chase the same ideas, and wonder why growth stalls. With a simple monthly review, you can see what worked, what did not, and what to change next month, in less than an hour. Related guides: How to Script a YouTube Video, Lighting Setup on a Budget for YouTube Videos, and How to Repurpose One Video into Shorts, Reels and Posts. What You Will LearnHow to run a monthly review in under an hour Which numbers to check, and which to ignore How to find your best and weakest videos How to review titles, thumbnails, and hooks How to set three clear improvements for next month How to track progress over several monthsStep 1: Set a Fixed Monthly Review Time What to do: Choose one day each month, such as the first Saturday, for a 45-minute review. A fixed time turns review into a habit, instead of a task you postpone. How to do it in simple steps:Pick a day and time, and add it to your calendar. Gather YouTube Studio, your content plan, and a notebook. Review the last month only, not your whole channel history. Write your findings down, so next month's review can compare them.Practical example: A creator reviews on the first of each month, with coffee and a simple template. After three months, they can see a clear pattern: tutorials outperform vlogs, and shorter intros retain better. Common mistake to avoid: Reviewing only when growth feels bad. Reviews are most useful when done regularly, including in good months, so you learn what to repeat. Illustrative image: A fixed monthly review turns guesswork into a habit. This is an illustrative image, not a screenshot of your channel or another creator's work. Step 2: Check Growth, Watch Time, and Subscribers Together What to do: Look at views, watch time, and subscribers gained together, for the last 28 days. One number alone can mislead; together, they show whether your channel is growing healthily. How to do it in simple steps:Note views, watch time, and subscribers for the last 28 days. Compare each with the previous 28 days. Ask which changed most, and why. Note whether growth came from new videos, old videos, or Shorts.Practical example: Views are up, but subscribers are flat. That suggests videos attract clicks but do not convince viewers to stay, so the next month's focus is stronger calls to subscribe and follow-up videos. Common mistake to avoid: Celebrating a single viral video while ignoring falling watch time. A healthy channel grows steadily, not only in spikes. Illustrative image: Views, watch time, and subscribers together show real growth. This is an illustrative image, not a screenshot of your channel or another creator's work. Step 3: Identify Your Best and Weakest Videos What to do: List your top three and bottom three videos from the month, by views and by watch time. Patterns in these lists reveal what your audience wants more of, and less of. How to do it in simple steps:Sort videos by views, then by watch time, for the month. Note the topic, format, and length of each top video. Do the same for the weakest videos. Look for a pattern: topic, title style, thumbnail, or length.Practical example: A creator's top videos are all step-by-step tutorials under 10 minutes, while longer opinion videos perform worst. Next month, they plan three tutorials and one opinion video, instead of the reverse. Common mistake to avoid: Judging videos only by views on day one. Some videos grow slowly through search, so check 28-day performance, not first-day spikes. Illustrative image: Top and bottom videos reveal patterns worth repeating or dropping. This is an illustrative image, not a screenshot of your channel or another creator's work. Step 4: Review Titles, Thumbnails, and Hooks What to do: Review how viewers first meet your videos: title, thumbnail, and first 30 seconds. Small changes here often improve performance more than re-editing a whole video. How to do it in simple steps:Check click-through rate for each video, in context of its traffic source. Look at retention in the first 30 seconds for top and weak videos. Note which titles and thumbnails promised clearly, and which were vague. Choose one title or thumbnail habit to improve next month.Practical example: A creator finds thumbnails with a clear before-and-after image outperform text-heavy thumbnails. Next month, all thumbnails use one clear image and few words. Common mistake to avoid: Changing titles and thumbnails every day based on tiny changes. Test one clear change, wait a week, then judge it. Illustrative image: Titles, thumbnails, and hooks are often the fastest improvements. This is an illustrative image, not a screenshot of your channel or another creator's work. Step 5: Review Your Schedule and Energy, Not Just Numbers What to do: Ask whether your upload schedule was realistic, and whether you enjoyed making the videos. A review that ignores energy leads to burnout, even when numbers look good. How to do it in simple steps:Note how many videos you planned versus published. Note which videos were enjoyable to make, and which felt like a chore. Check whether batching, breaks, or simpler formats would help. Adjust next month's schedule to fit real life, not ideal life.Practical example: A creator planned eight videos but published five, and felt exhausted. Next month, they plan five, publish all five, and enjoy the process again. Consistency returns, and so does growth. Common mistake to avoid: Setting next month's plan based only on numbers, with no regard for time or energy. A plan you cannot keep helps no one. Illustrative image: A good review checks your energy, not only your numbers. This is an illustrative image, not a screenshot of your channel or another creator's work. Step 6: Choose Three Improvements for Next Month What to do: End the review with exactly three improvements: one about content, one about presentation, and one about process. Three is enough to act on, and few enough to remember. How to do it in simple steps:Content: choose a topic or format to make more of, based on your best videos. Presentation: choose one title, thumbnail, or hook habit to improve. Process: choose one workflow change, such as batching or a buffer video. Write them where you will see them when planning next month's videos.Practical example: A creator's three improvements are: more beginner tutorials, clearer thumbnails, and filming two videos per session. Next month's review checks whether all three happened, and what changed. Common mistake to avoid: Listing ten improvements and achieving none. Three focused changes, repeated monthly, compound into major growth. Illustrative image: Three clear improvements beat a long list you never act on. This is an illustrative image, not a screenshot of your channel or another creator's work. Checklist for a Monthly Channel ReviewFixed review day and 45-minute slot set Views, watch time, and subscribers compared over 28 days Top three and bottom three videos identified Titles, thumbnails, and hooks reviewed Schedule and energy honestly assessed Three improvements written for next monthFrequently Asked Questions How long should a monthly review take? About 45 minutes is enough for most small channels. Longer reviews often become procrastination, not insight. Should I review every video, or only the month's videos? Focus on the month's videos, plus any older video that suddenly grew. Reviewing everything every month wastes time. What if my numbers fell? Look for a cause: fewer uploads, a topic change, or a weaker hook. One bad month is data, not a verdict on your channel. Should I share my review with viewers? You can, briefly, if it helps them understand your direction. Most reviews, however, are for you, not for content. How do I track progress over time? Keep a one-page note each month: numbers, best videos, and three improvements. Comparing notes over three months shows real trends. Review monthly, act on three improvements, and repeat. That simple loop is how small channels learn faster than channels that only upload.

- CreatorPlaybook Team
- 25 Oct, 2026
Vlogging Tips for Beginners
Vlogging looks easy because good vlogs feel natural, but the best ones are planned just enough to have a story. A beginner vlog does not need expensive gear or a dramatic life. It needs a simple idea, honest filming, and tight editing, so viewers feel they spent time with a real person, not just watched random clips. Related guides: How to Script a YouTube Video, Lighting Setup on a Budget for YouTube Videos, and Voiceover Tips for Clear Audio. What You Will LearnHow to choose a simple story for a vlog How to film naturally without overperforming How to capture good audio and light on the move How to edit a vlog tightly How to protect privacy while sharing your life How to improve vlogging with each videoStep 1: Start With One Simple Story or Question What to do: Give each vlog a simple focus: a day, a task, a place, or a question. A focus turns random footage into a story viewers can follow. How to do it in simple steps:Write one sentence: "Today I will try..." or "Today I will show..." List three moments that will show that story. Film an opening that states the plan in 20 seconds. End by answering the question or showing the result.Practical example: A vlog titled "My first time filming in a busy market" follows one task: finding good light and sound in a crowd. Viewers follow the challenge, not just a walk. Common mistake to avoid: Filming everything with no plan, hoping editing will create a story. Editing can tighten a story, but it cannot invent one from unrelated clips. Illustrative image: One simple story turns random clips into a vlog. This is an illustrative image, not a screenshot of your channel or another creator's work. Step 2: Film Naturally, and Talk to One Person What to do: Talk to the camera as if you are talking to one friend, not performing for a crowd. Natural vlogging feels warm, while overperforming feels exhausting to watch. How to do it in simple steps:Speak in your normal voice, at a normal pace. Explain what you are doing and why, in short sentences. Film small reactions and details, not only big events. If you feel awkward, keep filming; awkwardness often edits out.Practical example: A creator films a morning routine, talking quietly about what they are making and why they are nervous about a shoot. Viewers comment that it felt like a real conversation, not a performance. Common mistake to avoid: Shouting, exaggerating, or constantly saying "Guys, this is crazy!" Energy helps, but constant hype makes a vlog tiring and less believable. Illustrative image: Talk to one friend, not a crowd, for a natural vlog. This is an illustrative image, not a screenshot of your channel or another creator's work. Step 3: Capture Clear Audio and Usable Light on the Move What to do: Prioritise audio and light, even when filming outside or on the move. Viewers forgive shaky footage more easily than unintelligible sound or a completely dark face. How to do it in simple steps:Use your phone's mic close to you, or a small clip-on mic if you have one. Face windows or open shade outdoors, rather than harsh direct sun. Film a 10-second test and listen back before a long segment. Move to a quieter spot for important talking parts.Practical example: A creator films in a noisy street, then steps into a quiet shop doorway to explain the plan. The main message is clear, even though the street footage is noisy and lively. Common mistake to avoid: Filming an important explanation in wind, traffic, or music, with no test. By the time you notice, the moment cannot be refilmed. Illustrative image: Good audio and light matter more than perfect camera movement. This is an illustrative image, not a screenshot of your channel or another creator's work. Step 4: Edit Tightly, and Cut What Does Not Serve the Story What to do: Edit a vlog to its story, not to its filming time. Cut pauses, repetitions, and scenes that do not move the story forward, even if you enjoyed filming them. How to do it in simple steps:Watch all footage and mark only the clips that serve the story. Build the vlog in order: opening, challenge, turning point, result. Cut any clip longer than it needs to be to make its point. Add music quietly, and only where it supports the mood.Practical example: A creator films 40 minutes and edits it to 8 minutes: opening, market challenge, a funny mistake, and the final result. The vlog feels fast and complete, not long and random. Common mistake to avoid: Keeping every clip because you filmed it. Viewers do not know what you cut, and they judge the vlog by what remains. Illustrative image: Tight editing turns hours of footage into a clear story. This is an illustrative image, not a screenshot of your channel or another creator's work. Step 5: Protect Privacy, Yours and Others' What to do: Decide in advance what you will not share: addresses, children's details, private conversations, and other people's faces without permission. Privacy mistakes are hard to undo once a video is public. How to do it in simple steps:Do not show house numbers, school names, or car plates. Ask friends before filming them, and respect a "no." Blur faces or details you did not intend to share. Wait before posting a vlog about a sensitive day, and review it calmly.Practical example: A creator films a walk home but cuts the final street and house number. The vlog still feels personal, without giving away where they live. Common mistake to avoid: Sharing personal details for views, then regretting it. Once viewers know something, you cannot reliably take it back. Illustrative image: Review every vlog for private details before publishing. This is an illustrative image, not a screenshot of your channel or another creator's work. Step 6: Review, Learn, and Make the Next Vlog Slightly Better What to do: After each vlog, note one thing that worked and one thing to improve. Small, steady improvements build a vlogging style far better than trying to fix everything at once. How to do it in simple steps:Watch your vlog once as a viewer, not as its maker. Note where you felt bored, confused, or engaged. Read comments for patterns, not for single opinions. Choose one improvement for the next vlog, such as a stronger opening.Practical example: A creator notices viewers drop off in long travel sections, so the next vlog cuts travel to 30 seconds with music. Retention improves immediately, with no new gear. Common mistake to avoid: Changing your whole style after one video's comments. Patterns over several videos show real issues; single comments often show personal taste. Illustrative image: One small improvement per vlog builds a strong style over time. This is an illustrative image, not a screenshot of your channel or another creator's work. Checklist for Beginner VloggingOne simple story or question chosen Natural, friendly filming to one viewer Audio and light tested on the move Vlog edited tightly to its story Privacy checked for you and others One improvement chosen for the next vlogFrequently Asked Questions Do I need a vlogging camera to start? No. A phone with good light and clear audio is enough for beginner vlogs. Upgrade only when a limit actually affects your videos. How long should a vlog be? Long enough to tell its story, usually 6 to 12 minutes for beginners. Shorter, focused vlogs often perform better than long, unfocused ones. Should I vlog every day? Only if you can sustain it without burnout. Weekly or twice-weekly vlogs with a clear story are usually better than daily vlogs with no focus. What if I feel shy on camera? Start with voiceover vlogs, or film in quiet places first. Confidence grows with practice, and viewers often like honest, quiet creators. Can I vlog without showing my face? Yes. Hands-only, voiceover, or place-focused vlogs work well, as long as the story is clear and the audio is engaging. Start with a simple story, film honestly, edit tightly, and protect your privacy. That is the foundation of vlogging that viewers actually enjoy.

- CreatorPlaybook Team
- 25 Oct, 2026
How to Make Educational Videos That Rank
Educational videos rank when they answer a clear question, teach a skill completely, and keep viewers watching until they understand it. A video that is accurate but confusing will not rank, and a video that is entertaining but incomplete will not satisfy searchers. The best educational videos combine clear teaching with search-friendly structure, so both viewers and YouTube can see their value. Related guides: How to Script a YouTube Video, How to Write a Strong Video Hook in the First 30 Seconds, and Voiceover Tips for Clear Audio. What You Will LearnHow to choose a teachable question viewers search for How to structure a lesson for retention and search How to explain simply without losing accuracy How to use examples, visuals, and practice How to write titles and descriptions that match the lesson How to improve an educational video after publishingStep 1: Choose One Clear Question to Answer What to do: Build each educational video around one question a viewer would type into search. A single, clear question gives the video a title, a structure, and a satisfying ending. How to do it in simple steps:Write the question in a viewer's words, such as "How do I set up budget lighting?" Check that the question is specific enough to answer in one video. Note what the viewer should be able to do after watching. If the question needs several videos, split it into a series.Practical example: Instead of "All about lighting," a creator makes "How to light a talking-head video with one lamp." The specific question ranks better, and viewers know exactly what they will learn. Common mistake to avoid: Trying to teach a whole subject in one video. Broad videos confuse viewers and search, while focused videos satisfy both. Illustrative image: One clear question gives a lesson focus and a searchable title. This is an illustrative image, not a screenshot of your channel or another creator's work. Step 2: Structure the Lesson Like a Teacher, Not a Lecture What to do: Open with the outcome, teach in small steps, and end with a recap and a next action. This structure helps viewers follow, remember, and finish the video. How to do it in simple steps:Start by stating what the viewer will learn and why it matters. Break the lesson into three to five steps, in logical order. Teach one step at a time, with an example for each. Recap the steps at the end, and suggest what to try next.Practical example: A tutorial opens, "By the end, you will light a video with one lamp," then teaches placement, diffusion, and colour, and ends with a simple checklist. Viewers stay because they always know where they are. Common mistake to avoid: Starting with background history or theory before the viewer knows what they will gain. Viewers leave before the useful part begins. Illustrative image: Outcome first, then steps, then recap keeps learners watching. This is an illustrative image, not a screenshot of your channel or another creator's work. Step 3: Explain Simply, and Define Every New Term What to do: Use plain language, short sentences, and a definition for every term a beginner might not know. Simplicity is not dumbing down; it is good teaching. How to do it in simple steps:Replace jargon with everyday words, or define jargon immediately. Use one idea per sentence in complex sections. Repeat key terms in context, so viewers learn them naturally. Ask, "Would a complete beginner follow this?" after each section.Practical example: Instead of saying "Use a key light with diffusion," a creator says, "Your key light is your main light. Diffusion means softening it, for example with a thin curtain." Beginners understand instantly. Common mistake to avoid: Using expert language to sound knowledgeable. If beginners cannot follow, they cannot learn, and they will not return. Illustrative image: Plain language and quick definitions help beginners learn faster. This is an illustrative image, not a screenshot of your channel or another creator's work. Step 4: Show, Don't Just Tell, With Examples and Visuals What to do: Show every step on screen, with examples, before-and-after comparisons, and simple visuals. Viewers learn a skill by seeing it done, not only by hearing about it. How to do it in simple steps:Demonstrate each step while you explain it. Show a common mistake, then the correct version. Use on-screen text for key steps, names, and numbers. Keep visuals simple and focused on the point being taught.Practical example: A lighting tutorial shows a dark face, then the same face with a lamp moved, then with diffusion added. Viewers see the difference in seconds, and remember it far better than a verbal description. Common mistake to avoid: Talking over a static slide or your own face while describing a visual skill. If viewers cannot see the step, they cannot copy it. Illustrative image: Demonstrations and before-and-after examples teach skills faster. This is an illustrative image, not a screenshot of your channel or another creator's work. Step 5: Match Title, Description, and Chapters to the Lesson What to do: Use the viewer's question in the title, summarise the lesson in the description, and add chapters for each step. This helps search, and it helps viewers find the part they need. How to do it in simple steps:Put the main question or skill in the title, in plain words. Open the description with what the viewer will learn. Add timestamps for each step, so viewers can jump back. Use tags and hashtags that describe the skill, not unrelated trends.Practical example: A video titled "How to Light a Talking-Head Video With One Lamp" has chapters for placement, diffusion, and colour, and a description that lists the same steps. Search and viewers both understand it immediately. Common mistake to avoid: A vague title like "Lighting Tips Part 3" with no description. Even a great lesson will not rank if search cannot tell what it teaches. Illustrative image: Title, description, and chapters should all describe the same lesson. This is an illustrative image, not a screenshot of your channel or another creator's work. Step 6: Invite Practice, and Improve From Comments What to do: End with a small practice task, invite viewers to share results or questions, and use their comments to improve the next lesson. Educational channels grow by teaching better each time, not by teaching more topics. How to do it in simple steps:Give one simple task viewers can try in five minutes. Ask a specific question, such as "Which step was hardest?" Read comments for points of confusion, and note them. Make a follow-up video or update that answers the most common question.Practical example: A creator asks viewers to try one-lamp lighting and comment on their result. Many ask about colour, so the next video explains colour temperature simply, and it ranks well because it answers a real question. Common mistake to avoid: Ending with only "Like and subscribe." A practice task and a question turn passive viewers into learners who return. Illustrative image: A small practice task turns viewers into learners who return. This is an illustrative image, not a screenshot of your channel or another creator's work. Checklist for Educational Videos That RankOne clear, searchable question per video Lesson structured as outcome, steps, and recap Plain language, with new terms defined Each step demonstrated with examples and visuals Title, description, and chapters matched to the lesson Practice task given, and comments used to improveFrequently Asked Questions How long should an educational video be? As long as the lesson needs, and no longer. A focused 8-minute video that teaches completely beats a padded 20-minute video that loses viewers. Should I script educational videos? Yes, at least an outline with steps, definitions, and examples. Scripting keeps lessons clear and prevents rambling. Do I need to be an expert to teach? You need to be a few steps ahead of your viewer, and honest about your level. Teaching what you have recently learned can be especially clear, because you remember the confusion. How do I handle mistakes in a lesson? Correct them in a pinned comment or a short follow-up, and update future videos. Honest correction builds trust. Can educational videos also entertain? Yes. Clear examples, humour, and a friendly tone help learning, as long as they do not distract from the lesson. Teach one question well, show every step, and make the lesson easy to find. That combination is what helps educational videos rank and keeps learners coming back.
- CreatorPlaybook Team
- 25 Oct, 2026
YouTube Copyright and Music: Safe Guide
Copyright and music cause more confusion, and more claims, than almost any other topic for new creators. The safe approach is simple: use only music and clips you have a clear right to use, understand what a claim means, and keep records. This guide explains YouTube copyright and music in plain language, without legal jargon, so you can publish with confidence. Related guides: How to Edit Videos in CapCut for Beginners, Voiceover Tips for Clear Audio, and How to Script a YouTube Video. Official source: Use music and sound effects from the Audio Library What You Will LearnWhat copyright means for a YouTube video How to choose music that is safe to use What Content ID claims, strikes, and disputes mean How to use short clips and fair use safely How to check a video before publishing What to do if you receive a claim or strikeStep 1: Use Only Music You Have a Clear Right to Use What to do: Start from licensed music: YouTube's Audio Library, a subscription music library, or music you created or commissioned. If you cannot show where the music came from and what licence it has, do not use it. How to do it in simple steps:Browse the YouTube Audio Library and filter by mood, genre, and licence. Check whether attribution is required, and add it to the description if so. Keep the licence, receipt, or download record for every paid track. Avoid popular songs unless you have a written licence for YouTube use.Practical example: A creator uses a free track from the Audio Library that requires attribution, and adds the artist's name to the description. The video stays monetised, with no claim, because the licence terms were followed. Common mistake to avoid: Using a popular song because "everyone does it" or because you bought it on a music store. Buying a song for listening does not give you the right to use it in a video. Illustrative image: Use music with a clear licence, not just a song you like. This is an illustrative image, not a screenshot of your channel or another creator's work. Step 2: Understand Claims, Strikes, and Takedowns What to do: Learn the difference between a Content ID claim, a copyright strike, and a takedown. They sound similar, but they have very different consequences. How to do it in simple steps:A Content ID claim usually means the rights holder may monetise your video or restrict it; it is not automatically a strike. A copyright strike is more serious and can lead to channel restrictions if you receive several. Read every notice carefully: it tells you what content was matched and who claimed it. Do not ignore strikes; act within the time given in the notice.Practical example: A creator receives a claim for background music in one video. The video stays up, but ad revenue goes to the rights holder. Replacing the track with licensed music avoids the same problem next time. Common mistake to avoid: Assuming a claim means your channel is about to be deleted, or ignoring it completely. Most claims are resolved by replacing music, removing a clip, or disputing with evidence. Illustrative image: Read every copyright notice: claim, strike, and takedown mean different things. This is an illustrative image, not a screenshot of your channel or another creator's work. Step 3: Be Careful With Short Clips and Fair Use What to do: If you use other people's clips, keep them short, purposeful, and transformed by your commentary. Fair use is a legal defence, not a guarantee, and YouTube's automated system may still claim a video. How to do it in simple steps:Use only the part of a clip needed to make your point. Add your own commentary, criticism, or teaching over or around it. Do not use a clip as a substitute for the original work. Credit the source, but remember credit alone does not make use legal.Practical example: A creator shows a 10-second clip while explaining what makes its editing work, with commentary throughout. That is far safer than playing a full song or scene with no added value. Common mistake to avoid: Believing that "under 30 seconds," "with credit," or "for educational purposes" automatically makes any use safe. No single rule guarantees fair use. Illustrative image: Short, commented clips are safer than long, unedited ones. This is an illustrative image, not a screenshot of your channel or another creator's work. Step 4: Check Music and Clips Before You Publish What to do: Check your video for copyright issues before it goes public, using YouTube's checks during upload. Fixing a problem before publishing is much easier than after viewers have watched it. How to do it in simple steps:Upload as unlisted or private first, if you want to check carefully. Read the copyright checks shown during upload. If a track is flagged, replace it, trim it, or mute that section. Keep a list of safe tracks you have used successfully before.Practical example: A creator uploads a tutorial, sees a music claim during checks, swaps the track for an Audio Library alternative, and publishes with no claim. The extra five minutes saved weeks of dispute. Common mistake to avoid: Publishing immediately and hoping no one notices. Automated detection notices most popular music quickly, even on small channels. Illustrative image: Check for copyright issues before publishing, not after. This is an illustrative image, not a screenshot of your channel or another creator's work. Step 5: Keep Records for Every Track and Clip What to do: Keep a simple record for each video: music source, licence, and any permission you received. Records make disputes faster and calmer. How to do it in simple steps:Note the track name, library, and licence in a spreadsheet or document. Save receipts, licence emails, and attribution notes. For commissioned music, keep the written agreement. If a claim arrives, check your record before disputing.Practical example: A creator receives a claim for a licensed track, finds the licence receipt in two minutes, and disputes successfully with that evidence. Without the record, the dispute would have been guesswork. Common mistake to avoid: Relying on memory for licences. Six months later, you will not remember which track came from which library, or what its terms were. Illustrative image: A simple licence record makes disputes much easier. This is an illustrative image, not a screenshot of your channel or another creator's work. Step 6: Respond Calmly to Claims and Strikes What to do: If you receive a claim or strike, read it, decide on the facts, and choose the simplest safe action: accept, replace, remove, or dispute with evidence. How to do it in simple steps:Read the notice and identify the exact content matched. If you have no right to use it, replace or remove that section. If you have a licence, dispute with the licence details. Learn from the outcome and update your safe-music list.Practical example: A creator disputes a claim with a subscription library licence, and the claim is released. They then add that library to their trusted list and avoid the same issue. Common mistake to avoid: Disputing every claim without evidence, or disputing with anger. False disputes can lead to strikes, so dispute only when your record supports you. Illustrative image: Respond with evidence and a calm, factual dispute when you have a licence. This is an illustrative image, not a screenshot of your channel or another creator's work. Checklist for Safe Copyright and MusicMusic from a licensed library, with terms checked Attribution added where required Licences and receipts saved Clips short, purposeful, and commented on Copyright checks reviewed before publishing Claims handled by replacing, removing, or disputing with evidenceFrequently Asked Questions Can I use any song if I give credit? No. Credit does not replace a licence. You still need permission or a licence that covers YouTube use. Is music from the YouTube Audio Library always safe? It is safe when you follow its licence terms, including attribution if required, and use it on YouTube as intended. What happens if I get a Content ID claim? Usually, the rights holder may monetise the video or restrict it in some regions. It is not the same as a strike, but you should still fix the issue. Can I dispute a claim? Yes, if you have a licence or a fair-use basis. Provide clear evidence, and only dispute when your record supports you. Should I avoid music altogether? No. Music adds mood and energy, and licensed music is easy to find. The safe path is licensed music, not silence. This guide is general information, not legal advice. For complex cases, check YouTube's official help pages or seek professional advice. For most creators, licensed music, short purposeful clips, and good records keep publishing safe.
- CreatorPlaybook Team
- 25 Oct, 2026
How to Get Brand Deals as a Small Creator
Brand deals are not reserved for channels with hundreds of thousands of subscribers. Brands pay for trust and relevance, and a small creator with a focused audience can be more valuable than a large creator whose viewers are scattered. Getting brand deals as a small creator is a skill: package your value clearly, pitch the right brands, and deliver work that makes them want to return. Related guides: How to Script a YouTube Video, Lighting Setup on a Budget for YouTube Videos, and How to Repurpose One Video into Shorts, Reels and Posts. What You Will LearnHow to make your channel attractive to brands How to build a simple media kit How to find and pitch the right brands How to price a deal fairly as a small creator How to deliver a sponsored video professionally How to turn one deal into repeat workStep 1: Make Your Channel Easy for Brands to Understand What to do: Before pitching, make it obvious who you help, what you make, and why viewers trust you. Brands decide in minutes, based on your recent videos, your niche, and your comments. How to do it in simple steps:Write a clear channel description: topic, audience, and upload schedule. Keep your recent videos consistent in topic and quality. Show real engagement: helpful comments, questions, and returning viewers. Remove or update old videos that no longer represent your channel.Practical example: A beginner filming channel states, "Weekly tutorials for new creators setting up a home studio." A lighting brand instantly understands the fit, without guessing what the channel is about. Common mistake to avoid: A channel that mixes unrelated topics with no clear audience. Brands cannot tell who they would reach, so they choose a clearer channel instead. Illustrative image: A clear niche makes your channel easy for brands to understand. This is an illustrative image, not a screenshot of your channel or another creator's work. Step 2: Build a Simple One-Page Media Kit What to do: Create a one-page media kit with your audience, your best videos, and what you offer. A media kit answers a brand's questions before they ask, and it makes a small channel look professional. How to do it in simple steps:Include your niche, audience, and average views for recent videos. Add two or three of your best videos as examples. List what you offer: dedicated video, integration, or Short. Add your contact email and a short note about why you fit the brand.Practical example: A media kit shows 4,000 subscribers, 8,000 average views, and viewers who are mostly beginner creators. A brand selling beginner microphones sees a perfect match, despite the modest subscriber count. Common mistake to avoid: Hiding weak numbers behind vague claims, or inflating them. Brands check, and honesty builds the trust that leads to repeat deals. Illustrative image: A one-page media kit answers a brand's questions quickly. This is an illustrative image, not a screenshot of your channel or another creator's work. Step 3: Pitch Brands That Already Fit Your Videos What to do: Pitch brands whose products you already mention, use, or that your viewers ask about. A pitch that shows genuine familiarity stands out from generic mass emails. How to do it in simple steps:Make a list of 20 brands that fit your niche. Find the right contact: marketing, partnerships, or creator relations. Write a short, personal email: one line about their product, one about your audience, one video idea. Attach your media kit and suggest a simple next step, such as a short call.Practical example: A creator emails a tripod brand, "Your viewers often ask about my tripod in tutorials. Here is a video idea featuring it in a beginner setup guide." The brand replies because the idea is specific, not generic. Common mistake to avoid: Sending the same long, generic pitch to 100 brands. Personal, relevant pitches get replies; mass pitches get ignored. Illustrative image: Pitch brands you already use and understand. This is an illustrative image, not a screenshot of your channel or another creator's work. Step 4: Price Fairly, and Start With a Clear Offer What to do: Price based on the value you deliver, not only on subscribers. For a first deal, a clear, modest price with one deliverable is better than a vague, expensive proposal. How to do it in simple steps:Base your price on average views, audience fit, and the work involved. Offer one package first: for example, one integration plus one Short. State what is included: filming, editing, usage rights, and revisions. Ask for payment terms in writing before you film.Practical example: A small creator charges a modest fee for a 60-second integration, with one revision included. The brand accepts quickly, the work is clear, and both sides are happy to work again. Common mistake to avoid: Working for free "for exposure" repeatedly, or pricing so high that no small brand can say yes. Fair pricing respects both your time and the brand's budget. Illustrative image: A clear, fair offer makes it easy for a brand to say yes. This is an illustrative image, not a screenshot of your channel or another creator's work. Step 5: Deliver a Sponsored Video That Still Helps Viewers What to do: Make the sponsored video useful first, and promotional second. Viewers accept sponsorship when the video still teaches, entertains, or solves a problem. How to do it in simple steps:Disclose the sponsorship clearly at the start of the segment. Show the product in a real use case, not only in a scripted claim. Keep the sponsored part focused and honest, including limits. Deliver on time, and send the brand the link and basic results.Practical example: A creator integrates a microphone into a tutorial, demonstrates it, notes it is not ideal for noisy rooms, and still teaches the full lesson. Viewers learn, and the brand gets an honest, credible mention. Common mistake to avoid: Turning the whole video into an advertisement with no value. Viewers leave, and the brand's message reaches fewer people, not more. Illustrative image: A sponsored video should still be useful on its own. This is an illustrative image, not a screenshot of your channel or another creator's work. Step 6: Follow Up and Turn One Deal Into Repeat Work What to do: After a deal, follow up with results, thank the brand, and suggest a next idea. Repeat deals are easier than new pitches, because the brand already knows your work. How to do it in simple steps:Send a short report: views, comments, and any clicks or sales you can see. Thank the contact by name, and note what worked well. Suggest one follow-up idea, such as a second video or a series. Keep the relationship warm, even if the next deal is months away.Practical example: After a successful integration, a creator sends results and proposes a three-video series for the next quarter. The brand agrees, and the creator gains steady, predictable income. Common mistake to avoid: Disappearing after payment. Brands remember creators who communicate well, and they return to them first. Illustrative image: A good follow-up turns one deal into repeat work. This is an illustrative image, not a screenshot of your channel or another creator's work. Checklist for Getting Brand DealsChannel niche and audience clearly stated One-page media kit ready List of fitting brands, pitched personally Clear offer and fair price agreed in writing Sponsored video useful, honest, and disclosed Results sent and follow-up idea proposedFrequently Asked Questions How small is too small for brand deals? There is no fixed minimum. A focused audience of a few thousand engaged viewers can be valuable to the right brand. Should I accept free products instead of payment? Occasionally, if the product is valuable and you would buy it anyway. For most work, however, your time deserves payment, not only a product. What if a brand wants me to say something untrue? Decline that part of the deal. Your credibility is worth more than one payment, and brands respect creators who protect it. How do I find brand contacts? Check brand websites for partnership or press contacts, and look for creator or influencer pages. A short, respectful email is usually enough to start. Do I need a manager? No, not as a small creator. Direct, professional communication works well, and it keeps you in control of your channel. Start with fit, not size. Show brands a clear audience, pitch personally, price fairly, and deliver work viewers still enjoy. That is how small creators earn repeat brand deals.

- CreatorPlaybook Team
- 25 Oct, 2026
Monetization Beyond AdSense: Affiliate, Sponsorship, Membership
AdSense is only the first way many creators earn, and for small channels it is often the slowest. Monetization beyond AdSense, through affiliate links, sponsorships, and memberships, can bring income earlier, and it usually grows from trust, not just views. This guide explains each route honestly, so you can choose one that fits your channel size and your values. Related guides: How to Script a YouTube Video, Voiceover Tips for Clear Audio, and Lighting Setup on a Budget for YouTube Videos. Official source: YouTube channel monetization policies What You Will LearnHow affiliate income works for small creators How to recommend products honestly How sponsorships work before you are large How memberships and channel support work How to disclose paid links and sponsorships clearly How to combine income streams without confusing viewersStep 1: Start With Affiliate Links for Products You Already Use What to do: Recommend products you genuinely use, and earn a small commission when viewers buy through your link. Affiliate income works best when the product is a natural part of the video, not a forced advertisement. How to do it in simple steps:List the tools you already use: camera, mic, lights, software, or books. Join an affiliate programme for a retailer that sells those tools. Add links in the description, with a clear note that they are affiliate links. Mention the product only when it helps the video's topic.Practical example: A creator's lighting tutorial links to the exact lamp and diffuser they use. Viewers who want the same setup buy through the link, and the creator earns a small commission without making a separate sales video. Common mistake to avoid: Promoting expensive products you have never used, just because the commission is high. Viewers notice, trust falls, and future recommendations stop working. Illustrative image: Affiliate links work best for products you actually use. This is an illustrative image, not a screenshot of your channel or another creator's work. Step 2: Show the Product in Action, Not Just in a Link What to do: Demonstrate the product, explain its limits, and show who it suits. A demonstration builds far more trust, and sales, than a link alone. How to do it in simple steps:Show the product solving a real problem in your video. Mention one drawback, so the recommendation feels honest. Explain who should not buy it, as well as who should. Put the link where viewers can find it easily, in the description.Practical example: A creator shows a budget microphone, plays a before-and-after audio clip, and notes it is not ideal for noisy rooms. Viewers trust the review and are more likely to buy, even with the drawback mentioned. Common mistake to avoid: Reading a product description aloud as a review. Viewers can read that themselves; they watch you for real experience and honest judgement. Illustrative image: A real demonstration beats a read-out product description. This is an illustrative image, not a screenshot of your channel or another creator's work. Step 3: Approach Small Sponsorships With a Simple Offer What to do: Sponsorships are not only for large channels. Small, trusted channels can work with small brands, especially when the brand's audience matches yours closely. How to do it in simple steps:List brands whose products your viewers already ask about. Send a short email: who you are, your audience, and one video idea. Offer one clear deliverable, such as a 60-second mention in a tutorial. Agree the price, the message, and the disclosure before filming.Practical example: A channel with 3,000 subscribers focused on beginner filming partners with a small lighting brand. The brand gets a highly relevant audience, and the creator gets paid work that fits their content. Common mistake to avoid: Accepting any sponsor that pays, even if the product does not fit your channel. One bad sponsor can damage trust built over many videos. Illustrative image: A small, well-matched sponsor can be better than a large, irrelevant one. This is an illustrative image, not a screenshot of your channel or another creator's work. Step 4: Offer Memberships That Give Real Value What to do: Memberships let loyal viewers support you regularly, in exchange for extra value such as early videos, behind-the-scenes content, or a members-only community. How to do it in simple steps:Choose one or two perks you can deliver every month without burning out. Keep most content free, so membership feels like a bonus, not a paywall. Price memberships modestly at first, and raise them only with added value. Thank members by name or in a regular update, if they are comfortable with it.Practical example: A creator offers members early access to tutorials and a monthly question-and-answer video. Twenty members at a modest price provide steadier income than ad revenue alone. Common mistake to avoid: Promising many perks you cannot sustain, such as weekly exclusive videos on top of regular uploads. Members leave when perks stop arriving. Illustrative image: Memberships work when perks are simple and sustainable. This is an illustrative image, not a screenshot of your channel or another creator's work. Step 5: Disclose Clearly, Every Time What to do: Tell viewers clearly when a link earns you commission or a video is sponsored. Disclosure is required in many places, and it also builds trust: viewers respect honesty more than hidden promotion. How to do it in simple steps:Say in the video, in plain words, "This video includes a sponsored message" or "These are affiliate links." Add the same disclosure in the description. Use YouTube's paid promotion label when a video is sponsored. Never claim an opinion is independent when a brand paid for it.Practical example: A creator says at the start of a segment, "This part is sponsored, and here is my honest experience with the product." Viewers still watch, because the honesty is clear. Common mistake to avoid: Hiding disclosure in tiny text at the end of a long description. If viewers discover promotion later, they feel misled, even if the product was good. Illustrative image: Clear disclosure protects viewers and your reputation. This is an illustrative image, not a screenshot of your channel or another creator's work. Step 6: Combine Streams Slowly, and Track What Works What to do: Add one income stream at a time, track it for a month, and only then add another. A channel with several small, steady streams is more stable than one that depends on a single source. How to do it in simple steps:Start with affiliate links, which need no negotiation. After a month, review which links were clicked and bought. Add sponsorships or memberships only when you can deliver them well. Keep a simple record: source, income, time spent, and viewer reaction.Practical example: A creator finds affiliate links for lighting gear earn steadily, while a membership with heavy perks takes too much time. They simplify membership perks and keep affiliate income as the main extra stream. Common mistake to avoid: Launching affiliate links, sponsorships, merchandise, and memberships in the same month. Too many offers confuse viewers and overwhelm the creator. Illustrative image: Add one income stream at a time and track it honestly. This is an illustrative image, not a screenshot of your channel or another creator's work. Checklist for Monetization Beyond AdSenseAffiliate products chosen from tools you actually use Products demonstrated, with honest drawbacks Small sponsorships matched to your audience Membership perks simple and sustainable Disclosure clear in video and description Income streams added one at a time and trackedFrequently Asked Questions Can small channels earn from affiliates? Yes. Affiliate income depends on trust and relevance, not only on size. A small, focused audience often buys more than a large, general one. How many subscribers do I need for sponsorships? There is no fixed number. Brands care about audience fit, engagement, and professionalism, so small channels with a clear niche can attract sponsors. Do I need to disclose affiliate links? Yes, in most countries, and it is good practice everywhere. A short, clear note protects you and your viewers. Should I stop AdSense if I earn elsewhere? No. AdSense can continue alongside other income. The goal is several steady streams, not replacing one with another. What if a product I recommend disappoints viewers? Acknowledge it, explain what you learned, and update the recommendation. Honest correction often strengthens trust. Earn by helping first. Recommend what you use, partner with brands that fit, offer simple membership value, and disclose clearly. Trust is the income stream that makes the others possible.

- CreatorPlaybook Team
- 25 Oct, 2026
How to Stay Consistent Without Burnout
Consistency is the habit that grows a channel, but burnout is the habit that ends one. Many creators start by uploading every day, exhaust themselves, and then disappear for months. Staying consistent without burnout is not about willpower. It is about a realistic schedule, simpler videos, and rest built into the plan from the start. Related guides: How to Script a YouTube Video, How to Repurpose One Video into Shorts, Reels and Posts, and Voiceover Tips for Clear Audio. What You Will LearnHow to choose a schedule you can keep for months How to batch filming, editing, and publishing How to simplify videos without lowering quality How to use rest weeks and buffer videos How to spot early signs of burnout How to restart calmly after a breakStep 1: Choose a Schedule Based on Real Life, Not Ambition What to do: Choose how often you can realistically publish, given work, study, family, and energy. A schedule you can keep for a year beats a heroic schedule you keep for two weeks. How to do it in simple steps:Count the hours you actually have each week for YouTube, not the hours you wish you had. Time one full video, from idea to upload, and multiply honestly. Start with one video a week, or one every two weeks, if that fits. Publish on the same day, so viewers and you know what to expect.Practical example: A creator with a full-time job tries daily uploads, burns out in three weeks, then switches to one video every Saturday. After six months, they have 26 videos and a growing audience, instead of a short burst and a long silence. Common mistake to avoid: Copying a full-time creator's schedule. Your life, equipment, and editing speed are different, and a schedule that works for them may break you. Illustrative image: A schedule you can keep for a year beats a heroic one you keep for two weeks. This is an illustrative image, not a screenshot of your channel or another creator's work. Step 2: Batch Similar Work Together What to do: Do similar tasks in one block: plan several videos together, film several in one session, then edit them over the week. Batching reduces the mental cost of switching tasks and makes each video faster. How to do it in simple steps:Plan three or four video ideas in one sitting, with outlines for each. Film two videos in one session, while lights and camera are already set up. Edit in focused blocks, rather than a few minutes here and there. Schedule uploads in advance, so publishing day is not a rush.Practical example: A creator films two tutorials on Sunday afternoon, edits one on Wednesday and one on Friday, and publishes on Saturday. The same total work feels much lighter than starting from scratch each week. Common mistake to avoid: Treating every video as a brand-new project with new setup, new research, and new editing style. Repetition of a simple system is what makes consistency possible. Illustrative image: Batching similar tasks makes each video faster and less tiring. This is an illustrative image, not a screenshot of your channel or another creator's work. Step 3: Simplify the Video, Not the Value What to do: Make videos simpler to produce without making them less useful. A clear, simple format that you can repeat is better than a complex format you dread filming. How to do it in simple steps:Choose one format you enjoy, such as talking-head tutorials or screen recordings. Use the same intro, lighting, and editing template for every video. Limit each video to one main idea and three to five points. Cut any segment that does not help the viewer, however much you liked filming it.Practical example: A creator replaces elaborate animations with simple on-screen text and a clear example. Viewers still learn the same skill, but editing time falls from six hours to two. Common mistake to avoid: Adding more effects, locations, and segments to prove you are improving. Complexity often hides the message and exhausts the creator. Illustrative image: A simple format you can repeat beats a complex one you dread. This is an illustrative image, not a screenshot of your channel or another creator's work. Step 4: Build Buffer Videos and Planned Rest What to do: Keep one or two finished videos ready as a buffer, and plan rest weeks in advance. A buffer means illness, busy weeks, or low energy do not break your schedule. How to do it in simple steps:When energy is high, film one extra video for the buffer. Keep the buffer at one or two videos, not ten, so it does not become a burden. Mark rest weeks on your calendar, such as one week off every two months. Tell viewers in advance, so a break feels planned, not like disappearance.Practical example: A creator announces a one-week break after a series, uses a buffer video during a busy work week, and returns refreshed. Viewers respect the honesty, and the channel keeps growing. Common mistake to avoid: Using every free moment to get ahead, with no buffer and no rest. Getting ahead without rest usually leads to a longer, unplanned break later. Illustrative image: Planned rest is part of a consistent schedule, not a failure of it. This is an illustrative image, not a screenshot of your channel or another creator's work. Step 5: Watch for Early Signs of Burnout What to do: Learn your own early warning signs, and act on them early. Burnout rarely arrives suddenly; it builds through tiredness, dread, and loss of enjoyment. How to do it in simple steps:Notice if filming starts to feel like dread, not just effort. Check whether you are sleeping worse, skipping meals, or avoiding comments. Ask whether you are chasing numbers instead of enjoying the topic. If two or more signs appear, simplify the next video or take a planned break.Practical example: A creator notices they delay editing for days and feel anxious opening YouTube Studio. They switch to a shorter format for a month, and enjoyment returns before burnout becomes serious. Common mistake to avoid: Pushing through burnout with more caffeine and longer hours. Pushing through usually makes the recovery longer, not the channel stronger. Illustrative image: Acting on early tiredness prevents a long, forced break later. This is an illustrative image, not a screenshot of your channel or another creator's work. Step 6: Restart Calmly After a Break What to do: If you do take a break, restart with a small, enjoyable video, not a grand comeback. A calm restart rebuilds the habit without pressure. How to do it in simple steps:Choose a topic you genuinely want to talk about. Make the video shorter and simpler than your usual format. Tell viewers briefly that you are back, without over-explaining the break. Return to your normal schedule only after two or three easy videos.Practical example: After a month away, a creator posts a short, helpful tutorial instead of a long apology video. Viewers respond to the value, and the creator's confidence returns quickly. Common mistake to avoid: Making a long apology video that focuses on absence instead of value. Viewers care most about what you offer now, not why you were away. Illustrative image: A small, enjoyable video is the best way back after a break. This is an illustrative image, not a screenshot of your channel or another creator's work. Checklist for Consistency Without BurnoutSchedule based on real weekly hours Planning, filming, and editing batched where possible Simple, repeatable video format chosen One or two buffer videos ready Rest weeks planned in advance Early burnout signs watched and acted on earlyFrequently Asked Questions How often should a beginner upload? Once a week is a strong start for most people. Once every two weeks is also fine if the videos are useful and the schedule is kept. Will a break hurt my channel? A short, planned break rarely harms a small channel as much as a long, exhausted silence. Returning with good videos matters more than never pausing. Is batching hard for beginners? Start small: plan two videos together, or film two in one session. You do not need to batch a whole month at once. How do I stay motivated? Focus on viewers you help, not only on numbers. Saving positive comments and tracking small improvements helps on slow weeks. What if I miss a scheduled upload? Publish the next video on your normal day, without a long apology. One missed upload does not end a channel; quitting does. Consistency is a long game. Build a schedule you can live with, simplify the work, rest on purpose, and let steady videos do their work over time.

- CreatorPlaybook Team
- 25 Oct, 2026
How to Handle Negative Comments
Negative comments are part of publishing on YouTube, even for kind, careful creators. Some comments contain useful criticism, some are simply rude, and some are meant to provoke a reaction. Learning how to handle negative comments calmly protects your confidence, your community, and your channel, without letting one loud voice decide what you make next. Related guides: YouTube Live Streaming for Beginners, Voiceover Tips for Clear Audio, and Lighting Setup on a Budget for YouTube Videos. What You Will LearnHow to tell useful criticism from abuse and trolling How to pause before replying, instead of reacting How to reply calmly to fair criticism How to hide, block, and report harmful comments How to protect your community without silencing debate How to look after yourself after a hard commentStep 1: Sort Comments Before You Respond What to do: Read a negative comment once and sort it into one of three groups: useful criticism, rude opinion, or abuse. Each group deserves a different response, and sorting first stops you from treating all three the same way. How to do it in simple steps:Ask, "Is there a specific point I can learn from, even if the tone is harsh?" If yes, treat it as criticism, however uncomfortable it feels. If it is only an insult with no point, treat it as noise, not feedback. If it contains threats, hate, or harassment, treat it as abuse and act to remove it.Practical example: "Your audio is too quiet in the middle" is useful, even if blunt. "You are terrible" is not feedback. A threatening comment is not a debate; it should be hidden and reported. Common mistake to avoid: Replying to every negative comment as if it were a fair argument. Some comments are only looking for a fight, and engaging gives them exactly what they want. Illustrative image: Sort a comment first, then decide whether it deserves a reply. This is an illustrative image, not a screenshot of your channel or another creator's work. Step 2: Pause, Then Decide With a Clear Head What to do: Give yourself time before replying to a comment that hurts. A reply written in anger often becomes a bigger problem than the original comment, and it stays visible long after your mood has passed. How to do it in simple steps:Step away from the comment for at least an hour, or until the next day. Read it again and ask whether a reply would help any viewer. Draft a reply, then delete any sentence written to win, not to explain. If you still feel angry, do not reply; hide or ignore the comment instead.Practical example: A creator drafts a sharp reply to a rude comment, sleeps on it, and the next morning deletes it. The comment is forgotten in a day, while a public argument would have stayed pinned in viewers' minds. Common mistake to avoid: Replying instantly from your phone while upset. Speed feels satisfying, but a calm, delayed reply almost always reads better. Illustrative image: A pause turns a reaction into a response you can stand behind. This is an illustrative image, not a screenshot of your channel or another creator's work. Step 3: Reply Calmly to Fair Criticism What to do: When criticism is fair, reply briefly, thank the viewer for the point, and explain what you will do. A calm reply shows other viewers that you listen, and it often turns a critic into a supporter. How to do it in simple steps:Acknowledge the specific point, not just the feeling. Explain your choice briefly, without over-defending it. Say what you will change, or why you will keep your approach. End the conversation there; do not argue in a long thread.Practical example: A creator replies, "You are right, the middle section was quiet. I have raised the audio for the next video, thanks for flagging it." Other viewers see a creator who improves, not one who argues. Common mistake to avoid: Writing a long defence that explains every decision. Long defences invite more argument, while a short, honest reply closes the issue gracefully. Illustrative image: A short, honest reply builds trust with everyone reading. This is an illustrative image, not a screenshot of your channel or another creator's work. Step 4: Use Hide, Block, and Report Without Guilt What to do: Use YouTube's tools for comments that are abusive, hateful, or repeatedly disruptive. Protecting your comment section is not censorship of fair debate; it is basic moderation. How to do it in simple steps:Hide a user whose comments you no longer want visible to others. Block repeat harassers, and report threats or hate speech. Add common abusive words to your blocked-words list in YouTube Studio. Set comments to be held for review on sensitive videos if needed.Practical example: A creator adds a few insulting phrases to the blocked-words list. Those comments are held for review instead of appearing instantly, and the comment section becomes calmer without daily policing. Common mistake to avoid: Feeling you must keep every comment visible to prove you can take criticism. A safe comment section helps genuine viewers speak up; an abusive one silences them. Illustrative image: Moderation tools protect your community, not just you. This is an illustrative image, not a screenshot of your channel or another creator's work. Step 5: Set Clear Community Expectations What to do: Tell viewers, in your videos or pinned comment, what kind of discussion you welcome. Clear expectations make moderation feel fair, and they encourage respectful viewers to comment. How to do it in simple steps:State simply that disagreement is welcome, but insults and abuse are removed. Pin that expectation on videos that often attract heated comments. Thank viewers who disagree respectfully, so others copy that tone. Apply the same rules to supporters and critics alike.Practical example: A creator pins, "Disagree with my method if you like, just keep it respectful and specific." The comment section still debates, but with far fewer personal attacks. Common mistake to avoid: Enforcing rules only against critics. Viewers notice unfair moderation quickly, and it damages trust more than a rude comment does. Illustrative image: Clear expectations help respectful viewers feel safe to comment. This is an illustrative image, not a screenshot of your channel or another creator's work. Step 6: Look After Yourself After a Hard Day What to do: After a difficult comment or a wave of negativity, look after yourself before making your next video. Creators who ignore the emotional cost often burn out or start avoiding comments altogether. How to do it in simple steps:Limit comment reading to set times, not all day. Talk to a friend or fellow creator about a comment that stuck with you. Remind yourself of positive comments and the viewers you actually help. Take a break from comments, not from creating, if you need one.Practical example: A creator reads comments only twice a day, for 15 minutes, and stops reading before bed. Their sleep improves, and their replies become calmer and more thoughtful. Common mistake to avoid: Reading comments late at night and letting one negative voice outweigh dozens of positive ones. Timing changes how criticism feels. Illustrative image: Protecting your wellbeing is part of running a channel. This is an illustrative image, not a screenshot of your channel or another creator's work. Checklist for Handling Negative CommentsComment sorted into criticism, noise, or abuse Pause taken before any emotional reply Fair criticism answered briefly and honestly Abusive users hidden, blocked, or reported Community expectations stated clearly and fairly Comment reading limited to set times for wellbeingFrequently Asked Questions Should I delete negative comments? Delete abuse and harassment, but keep fair criticism visible when you can. Deleting fair criticism can look defensive and erode trust. Should I reply to trolls? Usually no. A reply rewards the behaviour and can start a thread that dominates your comment section. Hide and move on instead. What if a comment is factually wrong? Correct it briefly with a fact or a link, then stop. One clear correction helps other viewers; a long argument does not. How do I handle a wave of negative comments? Slow down, use held-for-review comments, moderate firmly, and do not make a response video while emotions are high. Does replying to criticism hurt my channel? No, when the reply is calm and short. Viewers often respect a creator who listens, and other viewers judge you by your reply, not just by the comment. You cannot control what strangers write, but you can control how you sort it, answer it, and protect your community. That control is what keeps creating enjoyable.

- CreatorPlaybook Team
- 25 Oct, 2026
How to Read and Use the YouTube Studio App
The YouTube Studio app puts your channel's most important numbers in your pocket, but numbers alone do not grow a channel. Learning to read the YouTube Studio app means knowing which numbers matter, what they actually mean, and what small change to make next. This guide turns a confusing dashboard into a simple weekly routine. Related guides: How to Script a YouTube Video, Lighting Setup on a Budget for YouTube Videos, and How to Repurpose One Video into Shorts, Reels and Posts. What You Will LearnHow to find views, watch time, and subscribers in the app How to read audience retention without overreacting How to use traffic sources to find new viewers How to check which videos bring subscribers How to read Shorts analytics differently from long videos How to turn one weekly check into a clear next stepStep 1: Start on the Dashboard, Not in Every Chart What to do: Open the dashboard first and look at the last 28 days. The dashboard gives a summary of views, watch time, and subscribers, which is enough to spot whether your channel is growing, flat, or falling. How to do it in simple steps:Open YouTube Studio and check the overview for the last 28 days. Compare views and watch time with the previous 28 days. Note your top three videos in that period. Write down one observation before opening any other chart.Practical example: A creator sees views are down but watch time is steady. That suggests fewer people are finding videos, rather than viewers leaving early, so the next step is improving titles and search, not re-editing videos. Common mistake to avoid: Checking the app every hour and reacting to daily ups and downs. Daily numbers bounce naturally; weekly and monthly trends tell the real story. Illustrative image: Start with the 28-day overview before digging into charts. This is an illustrative image, not a screenshot of your channel or another creator's work. Step 2: Read Retention as a Story, Not a Score What to do: Open a video's retention graph and look for where viewers leave. A sharp drop means something in the video lost them; a gradual fall is normal for most videos. How to do it in simple steps:Open a video and look at its retention curve. Find the biggest drop and watch that exact moment. Ask what happened there: a slow intro, a tangent, or a confusing section? Note one fix for the next video, such as a tighter opening.Practical example: A tutorial loses many viewers at 40 seconds, right when the creator spends a minute explaining background. Cutting that section and starting with the result keeps more viewers to the end. Common mistake to avoid: Judging a video only by its average percentage. A 40 percent retention on a 20-minute video means eight minutes watched, which is very different from 40 percent of a two-minute video. Illustrative image: A sharp drop in retention points to a specific moment to fix. This is an illustrative image, not a screenshot of your channel or another creator's work. Step 3: Use Traffic Sources to Find Your Audience What to do: Check where viewers come from: search, browse, suggested videos, Shorts feed, or external links. Each source tells you which part of your strategy is working. How to do it in simple steps:Open the reach or traffic source section for a video or for the channel. Note the top two sources for your best videos. For search traffic, note the exact search terms that brought viewers. For suggested traffic, note which videos yours appear next to.Practical example: A creator finds most views come from search for "budget lighting." That tells them to make more searchable how-to videos, rather than only chasing browse traffic with broad topics. Common mistake to avoid: Trying to grow every traffic source at once. Focus on the source that already works, and make one or two videos designed for it. Illustrative image: Traffic sources show which strategy is already working. This is an illustrative image, not a screenshot of your channel or another creator's work. Step 4: Find the Videos That Earn Subscribers What to do: Look for videos that bring subscribers, not just views. A video with fewer views but many subscribers is doing something right: it attracts the right people and convinces them to stay. How to do it in simple steps:Sort videos by subscribers gained in the analytics section. Watch the top subscriber-earning video again. Note its topic, hook, and call to subscribe, if any. Plan a follow-up video on a similar topic or problem.Practical example: A small channel finds a beginner lighting video brings most subscribers, even though a vlog got more views. Making a second beginner guide grows the channel faster than another vlog. Common mistake to avoid: Chasing a viral video that brings views but no subscribers. Views without subscribers rarely build a lasting audience. Illustrative image: Subscriber-earning videos reveal your channel's strongest topics. This is an illustrative image, not a screenshot of your channel or another creator's work. Step 5: Read Shorts Analytics With Different Expectations What to do: Judge Shorts by views, swipe-away rate, and whether viewers stay past the first seconds. Shorts behave differently from long videos, so the same benchmarks do not apply. How to do it in simple steps:Open a Short and check how many viewers watched versus swiped away. Look at the first three seconds: is the benefit or question clear immediately? Compare Shorts on the same topic, not Shorts with long videos. Note which hooks kept viewers watching longest.Practical example: A Short that opens with a question keeps viewers longer than one that opens with "Hey guys, welcome back." The creator removes long greetings from all future Shorts. Common mistake to avoid: Deleting a Short after a slow first day. Shorts can be shown over days or weeks, so give them time before judging them. Illustrative image: Shorts need their own benchmarks, not long-video ones. This is an illustrative image, not a screenshot of your channel or another creator's work. Step 6: Make One Weekly Decision From the Numbers What to do: Once a week, turn your check into a single decision: what to make, fix, or repeat next. Analytics should lead to action, not just worry. How to do it in simple steps:Set a fixed weekly time, such as 20 minutes on the same day. Write down your best video, your weakest point, and one trend. Choose one action: a new video topic, a better hook, or a repeat of a winner. Ignore every other number until next week's check.Practical example: A creator's weekly note reads: best video, lighting guide; weakest point, slow intros; action, start next video with the result. That one change improves retention across the next three videos. Common mistake to avoid: Collecting data without deciding anything. A dashboard you only stare at is a distraction; a dashboard you act on is a tool. Illustrative image: End each check with one clear action for the next video. This is an illustrative image, not a screenshot of your channel or another creator's work. Checklist for Using the YouTube Studio App28-day overview checked, not hourly numbers Retention drops watched at the exact moment viewers leave Top two traffic sources and search terms noted Subscriber-earning videos identified Shorts judged by swipe-away and first seconds One weekly decision written down and acted onFrequently Asked Questions How often should I check analytics? Once a week is enough for most small creators. Daily checks create stress without giving enough data to act on. Which number matters most? It depends on your goal. For growth, watch time and subscribers gained matter most; for discovery, traffic sources and search terms matter most. Why do my views drop suddenly? A single day can drop for many reasons, including a video ageing out of suggestions. Look at 28-day trends before changing your strategy. Can I see analytics in the mobile app? Yes. The YouTube Studio app shows overview, video, and audience data, though the desktop version has deeper detail for some charts. Should I worry about a low click-through rate? Only in context. A low rate on a video shown to a broad audience is normal; a low rate on a search video may mean the title or thumbnail needs work. Use the app as a compass, not a scoreboard. Check weekly, find one clear signal, and let it guide your next video.

- CreatorPlaybook Team
- 25 Oct, 2026
YouTube SEO: Tags, Description and Hashtags
YouTube SEO is not about tricking the algorithm. It is about helping YouTube and viewers understand what your video is about, so it can be shown to the right people. Tags, description, and hashtags each play a different role, and when they work together, a good video has a much better chance of being found in search and suggested next to similar videos. Related guides: Lighting Setup on a Budget for YouTube Videos, How to Repurpose One Video into Shorts, Reels and Posts, and How to Script a YouTube Video. What You Will LearnHow tags, descriptions, and hashtags each help discovery How to write a description that search can read How to choose tags without stuffing keywords How to use hashtags so they help, not hurt How to match your title, thumbnail, and description How to check and improve SEO after publishingStep 1: Find the Exact Words Viewers Search For What to do: Start with the words real viewers type. A video about a topic nobody searches for can still grow through suggestions, but a video that matches a searched phrase has a clear path to new viewers. How to do it in simple steps:Type your topic into YouTube search and note the autocomplete suggestions. Look at the titles of top videos on the same topic for common phrases. Choose one main phrase that clearly describes your video. Note two or three related phrases for your description and tags.Practical example: A creator plans a video called "My Lighting Tips." Searching shows viewers type "budget lighting setup for YouTube," so that clearer phrase becomes the main keyword, and the video is much easier to find. Common mistake to avoid: Choosing a clever title that nobody searches for. Clever is fine for a thumbnail, but the title and description still need words viewers actually use. Illustrative image: Start with the words viewers actually search for. This is an illustrative image, not a screenshot of your channel or another creator's work. Step 2: Write a Description That Explains the Video First What to do: Put the most important information in the first two lines of the description. Those lines appear in search results, so they should tell a viewer exactly what they will learn. How to do it in simple steps:Open with one or two sentences that include your main phrase naturally. Summarise the main points or steps in the video. Add timestamps for longer videos, so viewers can jump to a section. End with links to related videos, not with a wall of keywords.Practical example: A description opens, "Learn a simple budget lighting setup for YouTube, using window light and one affordable lamp," then lists the three steps covered. A viewer knows in seconds whether to click. Common mistake to avoid: Starting with "Please like and subscribe" or a long channel biography. Viewers and search need the topic first; calls to action can come later. Illustrative image: The first two lines of your description matter most. This is an illustrative image, not a screenshot of your channel or another creator's work. Step 3: Choose Tags That Describe, Not Stuff What to do: Use tags to add context YouTube may not get from the title alone, such as synonyms, common misspellings, and the broader topic. Tags are a helper, not the main ranking factor. How to do it in simple steps:Add your main phrase as the first tag. Add five to ten closely related phrases, in order of relevance. Include the broader topic, such as "YouTube lighting" or "beginner YouTube tips." Remove tags that are unrelated, even if they are popular.Practical example: For a budget lighting video, useful tags include "budget lighting setup," "YouTube lighting for beginners," "ring light setup," and "window light video." A tag like "viral" adds nothing and can confuse the topic. Common mistake to avoid: Adding 50 tags, including famous creators' names or trending topics that have nothing to do with the video. Irrelevant tags do not bring the right audience. Illustrative image: A few relevant tags beat a long list of unrelated ones. This is an illustrative image, not a screenshot of your channel or another creator's work. Step 4: Use Three to Five Hashtags With Purpose What to do: Add three to five hashtags that describe the video's topic. Hashtags can help a video appear on hashtag pages and signal its category, but too many make a description look spammy. How to do it in simple steps:Choose one broad hashtag, such as #YouTubeTips. Add two or three specific hashtags for the topic. Place hashtags at the end of the description, or in the title only if one fits naturally. Check that the first three hashtags are the most accurate, as they show above the title.Practical example: A lighting video uses #YouTubeTips, #BudgetLighting, and #VideoLighting. All three match the video, and none promises something the video does not deliver. Common mistake to avoid: Adding 15 hashtags, including misleading or unrelated trending tags. Viewers notice, and YouTube may ignore hashtags that do not match the content. Illustrative image: Three accurate hashtags help more than fifteen vague ones. This is an illustrative image, not a screenshot of your channel or another creator's work. Step 5: Match Title, Thumbnail, and Description What to do: Make sure your title, thumbnail, and description promise the same video. When they match, viewers click with the right expectation, watch longer, and YouTube learns who to show the video to next. How to do it in simple steps:Write the title first, using your main phrase in plain language. Design the thumbnail to show the same benefit or question as the title. Repeat the main phrase naturally in the description, not word for word every time. Read all three together before publishing and ask, "Would I expect this video?"Practical example: A title promises a budget lighting setup, the thumbnail shows a simple lamp and a bright face, and the description explains the same three steps. A viewer who clicks gets exactly what was promised. Common mistake to avoid: A clickbait thumbnail that promises a result the video never shows. It may earn clicks, but viewers leave quickly, and that hurts the video's performance. Illustrative image: Title, thumbnail, and description should promise the same video. This is an illustrative image, not a screenshot of your channel or another creator's work. Step 6: Check Search Traffic and Improve the Next Video What to do: After publishing, check which search terms brought viewers, and use that information for the next video. SEO improves with each video, not from one perfect upload. How to do it in simple steps:Wait at least a week before judging a video's search performance. Look at traffic sources and search terms in YouTube Studio. Note which phrases brought viewers and which did not. Use winning phrases as topics or sections in future videos.Practical example: A creator sees that "window light" brings more viewers than "ring light." The next video focuses on window light, with ring light as a supporting tip, and search traffic improves. Common mistake to avoid: Changing the title, tags, and description every day. Small, patient changes based on real data work better than constant guessing. Illustrative image: Search data from one video should shape the next one. This is an illustrative image, not a screenshot of your channel or another creator's work. Checklist for YouTube SEOMain search phrase chosen from real viewer language Description opens with a clear summary and the main phrase Five to ten relevant tags, most relevant first Three to five accurate hashtags Title, thumbnail, and description promise the same video Search traffic reviewed after a week and used for the next videoFrequently Asked Questions Do tags still matter? Yes, but less than title, thumbnail, and viewer satisfaction. Tags help with context and misspellings; they cannot save a video viewers do not enjoy. How long should a description be? Long enough to explain the video clearly, usually a short summary plus timestamps and related links. Avoid keyword lists with no useful information. Should hashtags go in the title? Only if one fits naturally. Otherwise, put them at the end of the description, where they help without cluttering the title. Can I use the same tags on every video? Some broad channel tags are fine, but most tags should be specific to each video. Identical tags on unrelated videos confuse the topic. How long does SEO take to work? Search traffic often builds over weeks, not hours. A clear, accurate video can keep gaining views long after its first day. Think of SEO as clear labelling: tell YouTube and viewers, in their own words, what your video offers, and let a good video do the rest.
- CreatorPlaybook Team
- 25 Oct, 2026
How to Repurpose One Video into Shorts, Reels and Posts
One good video should not live only once. When you repurpose one video into Shorts, Reels, and written posts, you reach people who prefer different formats, fill your content calendar without filming every day, and give a strong idea several chances to find its audience. Repurposing is not copying the same clip everywhere. It is reshaping one idea so it works in each place. Related guides: Lighting Setup on a Budget for YouTube Videos, How to Script a YouTube Video, and How to Edit Videos in CapCut for Beginners. What You Will LearnHow to choose one video worth repurposing How to find five to seven short clips inside a long video How to adapt clips for Shorts, Reels, and other platforms How to turn video points into text posts and carousels How to schedule repurposed content without spamming viewers How to measure which versions actually workStep 1: Start With a Video That Has Clear, Separate Points What to do: Choose a long video built from clear points, examples, or steps. A video with one long story and no natural breaks is hard to cut, while a tutorial with five tips gives you five ready-made short videos. How to do it in simple steps:Pick a video that already performed reasonably well or answered a common question. Write down its main points, one per line, as you watch it again. Mark the time where each point starts and ends. Choose points that make sense alone, without needing the whole video.Practical example: A creator's ten-minute lighting guide has sections on window light, key light, and fill light. Each section becomes a separate short, and the full guide remains the place viewers go for detail. Common mistake to avoid: Repurposing a video that only works as a whole. If a clip needs three minutes of context, it will confuse short-form viewers instead of attracting them. Illustrative image: A video with clear sections is easiest to repurpose. This is an illustrative image, not a screenshot of your channel or another creator's work. Step 2: Cut Short Clips With a Beginning, Middle, and End What to do: Cut each point into a short video that stands alone. Every clip should open with a hook, deliver one clear idea, and end with a reason to watch more or follow. How to do it in simple steps:Start the clip at the hook or the surprising result, not at the introduction. Keep one idea per clip, usually between 20 and 60 seconds. Add captions, because many viewers watch without sound. End with a simple next step, such as watching the full video.Practical example: A 45-second clip opens with, "Your face is dark because the window is behind you," then shows the fix in 20 seconds and points viewers to the full lighting guide. Common mistake to avoid: Cutting a clip in the middle of a sentence or idea. A clip that feels unfinished makes viewers scroll away, even if the original video was good. Illustrative image: Each short clip should make sense on its own. This is an illustrative image, not a screenshot of your channel or another creator's work. Step 3: Adapt Each Clip for Shorts and Reels What to do: Adapt, do not just re-upload. Shorts and Reels reward vertical video, fast pacing, large text, and a strong first second, so reshape the same idea for each format. How to do it in simple steps:Reformat the clip to vertical, and keep important text away from the edges. Use a different hook or caption for each platform, so followers do not see identical posts. Remove platform watermarks before cross-posting. Keep the core message the same, but change the opening line and the call to action.Practical example: The same lighting tip becomes a YouTube Short with a text hook, and a Reel with a question in the caption and a slower, more visual opening. Both point back to the long video. Common mistake to avoid: Posting the exact same file, caption, and hashtags everywhere on the same day. It looks lazy, and followers who see it twice have no reason to engage the second time. Illustrative image: Adapt the format for each platform instead of re-uploading the same file. This is an illustrative image, not a screenshot of your channel or another creator's work. Step 4: Turn the Same Points Into Written Posts What to do: Turn each main point into a short written post, a checklist, or a carousel. Written posts reach people who search or scroll text, and they are easy to save and share. How to do it in simple steps:Take one point and write it as a problem, a fix, and a result. Add a simple example that was not in the video, so the post adds value. Turn a list of steps into a checklist image or carousel. End with a question that invites comments, not just likes.Practical example: The fill-light section becomes a post titled "One cheap lamp fixed my dark videos," with three steps and a photo-style illustration, plus a link to the full guide. Common mistake to avoid: Copying your video transcript as a post. Transcripts read slowly and repeat spoken fillers; a post should be tight, scannable, and written for reading. Illustrative image: A good written post rewrites the idea for readers, not just copies the transcript. This is an illustrative image, not a screenshot of your channel or another creator's work. Step 5: Build a Simple Repurposing Schedule What to do: Spread repurposed pieces over one to two weeks. Spacing them out gives each piece a fair chance, avoids overwhelming followers, and keeps your channel active between long videos. How to do it in simple steps:Publish the long video first, so shorts and posts have somewhere to point. Release one or two shorts in the first week, and a written post in the second. Space similar clips at least a day apart on the same platform. Keep a simple tracker: original video, clip, platform, date, and result.Practical example: A creator publishes a tutorial on Monday, a Short on Tuesday, a Reel on Thursday, a checklist post the next Monday, and a second Short the following week, all from one recording session. Common mistake to avoid: Publishing five clips from the same video in one day. Even good content feels repetitive when it floods a feed, and later clips get ignored. Illustrative image: Spacing repurposed pieces out gives each one a fair chance. This is an illustrative image, not a screenshot of your channel or another creator's work. Step 6: Check Results and Repurpose the Winners Again What to do: After two weeks, look at which clips and posts performed best, then make a second version of the winners. Repurposing works best as a loop, not a one-time task. How to do it in simple steps:Compare views, watch time, saves, and comments, not just likes. Note which hook, format, and platform worked best for each idea. Remake the top clip with a new hook or example after a month. Retire ideas that performed poorly everywhere, and try a different angle.Practical example: A window-light clip gets three times the views of other clips. The creator makes a follow-up short with a before-and-after demo, and it becomes the channel's most-shared video. Common mistake to avoid: Judging a clip after only a few hours. Short-form content can grow over days, so wait, compare fairly, and then decide what to remake. Illustrative image: Let the results tell you which ideas deserve a second version. This is an illustrative image, not a screenshot of your channel or another creator's work. Checklist for Repurposing One VideoOriginal video chosen for its clear, separate points Five to seven standalone clips identified Each clip has a hook, one idea, and a next step Clips adapted for vertical Shorts and Reels At least one written post or checklist created Pieces scheduled across one to two weeks and results reviewedFrequently Asked Questions Will repurposing hurt my channel? No, if each version is adapted and spaced out. Platforms and audiences differ, and most viewers will see only one version. How many shorts can I make from one video? Usually three to seven good ones. Quality matters more than quantity; one clear clip beats five confusing ones. Should I post the same clip on YouTube and Instagram? Yes, but adapt the caption, hook, and format, and remove watermarks. Treat each platform as a different audience. Can I repurpose old videos? Yes. Old videos with useful, evergreen points are often the best candidates, especially if you update the hook or example. Does repurposing replace new videos? No. It extends a good video's life and fills gaps, but new ideas are still needed to grow a channel over time. Film once, then reshape the idea with care. One strong video, cut well and shared in the right formats, can work for you for weeks.
- CreatorPlaybook Team
- 25 Oct, 2026
Lighting Setup on a Budget for YouTube Videos
Good lighting makes a small channel look professional long before an expensive camera does. When your face is bright, clear, and free from harsh shadows, viewers stay longer, trust you more, and forgive a modest room or a phone camera. The good news is that you do not need a studio. With window light, one affordable lamp, and a few simple adjustments, you can build a lighting setup on a budget that looks clean in almost any home. Related guides: Voiceover Tips for Clear Audio, How to Script a YouTube Video, and How to Edit Videos in CapCut for Beginners. What You Will LearnHow to use free window light as your main light How to build a simple three-point setup on a budget How to avoid harsh shadows and mixed colours How to light a small room, a desk, and a talking-head video How to test your lighting before you record How to fix common lighting problems without buying more gearStep 1: Start With Window Light, Not New Gear What to do: Use a window as your main light before you spend anything. Soft daylight falling on your face is flattering, even, and free, and it is the fastest way to improve a video that currently looks dark or yellow. How to do it in simple steps:Face the window, with the camera between you and the glass, so light falls on your face. Record in the morning or late afternoon, when light is softer than harsh midday sun. Close a thin white curtain if the light is too strong or creates hard shadows. Move closer to the window if your face looks dark, and farther back if it looks washed out.Practical example: A creator records with a window behind them and looks like a dark silhouette. Turning the chair around so the window faces them instantly brightens their face, with no purchase at all. Common mistake to avoid: Recording with a bright window behind you. The camera exposes for the window, not for you, and your face disappears into shadow. Illustrative image: Soft light in front of you beats a bright light behind you. This is an illustrative image, not a screenshot of your channel or another creator's work. Step 2: Add One Affordable Key Light What to do: Add one main, or key, light at about 45 degrees to your face. This is the light that defines your face, and one good budget light is enough for most talking-head videos. How to do it in simple steps:Place a ring light, desk lamp, or small LED panel slightly above eye level and to one side. Angle it toward your face, not directly into the camera lens. Keep it about an arm's length away to start, then adjust for brightness. Diffuse it with a white shower curtain, baking paper, or a cheap diffuser if it looks harsh.Practical example: A creator uses a single ring light on a desk, angled slightly left, and suddenly their eyes are bright and their face has gentle depth instead of flat, grey light from a ceiling bulb. Common mistake to avoid: Putting the light directly overhead. Overhead light creates dark shadows under your eyes and brow, making you look tired even when you feel energetic. Illustrative image: One key light at an angle gives your face shape and brightness. This is an illustrative image, not a screenshot of your channel or another creator's work. Step 3: Fill the Shadows With a Cheap Second Light What to do: Use a second, softer light on the opposite side to fill shadows. It does not need to match your key light in price; a desk lamp, a phone light, or light bounced off a white wall can work. How to do it in simple steps:Place the fill light on the side opposite your key light, farther away or dimmer. Aim for shadows that are soft and visible, not completely removed. Bounce light off a white poster board if you have no second lamp. Check that the fill light does not create a second harsh shadow on the wall.Practical example: A creator's left cheek is bright while the right side is almost black. Adding a small lamp on the right, dimmed by moving it back, balances the face without flattening it completely. Common mistake to avoid: Making the fill light as bright as the key light. Equal lights on both sides remove all depth and make a face look flat and less natural. Illustrative image: A gentle fill light softens shadows without flattening your face. This is an illustrative image, not a screenshot of your channel or another creator's work. Step 4: Separate Yourself From the Background What to do: Add a little light behind you, or simply create distance from the background, so you do not blend into the wall. Separation makes the picture look deeper and more professional. How to do it in simple steps:Move your chair at least a metre away from the wall behind you. Point a small lamp at the wall or a plant behind you for a soft glow. Keep background lights dimmer than the light on your face. Remove clutter that catches bright spots and distracts from you.Practical example: A creator sits against a plain wall and looks pasted onto it. Moving forward and adding a warm lamp behind them creates depth, and the background becomes a pleasant blur rather than a flat backdrop. Common mistake to avoid: Lighting the background more brightly than your face. Viewers should look at you first, not at a bright poster or lamp behind you. Illustrative image: Distance and a soft background glow give your video depth. This is an illustrative image, not a screenshot of your channel or another creator's work. Step 5: Match Colour Temperature and Avoid Mixed Light What to do: Keep your lights the same colour. Mixing warm household bulbs with cool daylight makes skin look patchy, and it is hard to fix in editing. How to do it in simple steps:Turn off room lights that are a different colour from your main light. Set your phone or camera white balance to match the main light, or use auto and test it. If you use daylight, use daylight-balanced bulbs for extra lights. Record a 20-second test and check your skin tone on a phone screen.Practical example: A creator records by a window with a warm bedside lamp on. One side of their face looks blue and the other looks orange. Switching the lamp off, or swapping its bulb, gives one clean, natural colour. Common mistake to avoid: Leaving every light in the room on. More lights are not better when they fight each other; one matched set always looks cleaner. Illustrative image: Matching light colours keeps skin tones natural and clean. This is an illustrative image, not a screenshot of your channel or another creator's work. Step 6: Test, Record a Sample, and Lock Your Setup What to do: Before every recording, test your lighting with a short sample, then keep the same setup for a series. Consistency helps viewers recognise your channel and saves time. How to do it in simple steps:Record 30 seconds in your normal speaking position and watch it back. Check your eyes, skin tone, background, and any harsh shadows or bright spots. Mark light positions with tape on the floor or a photo on your phone. Only change one light at a time when something looks wrong.Practical example: A creator photographs their lamp positions after a video they love. The next week, they recreate the same look in two minutes instead of spending 30 minutes guessing again. Common mistake to avoid: Rebuilding your lighting from scratch for every video. A locked setup is not boring; it is reliable, and reliability is what lets you focus on the content. Illustrative image: A short test clip saves a whole recording from bad lighting. This is an illustrative image, not a screenshot of your channel or another creator's work. Checklist for Budget LightingMain light in front of you, not behind you One key light at about 45 degrees, slightly above eye level Soft fill light or bounce card to soften shadows Distance from the background for depth All lights matched in colour temperature 30-second test watched before the full recordingFrequently Asked Questions Do I need a ring light to start? No. Window light works well, and a desk lamp with a diffuser can be your first key light. Buy a ring light only when you record often at night. Why does my video look yellow? Mixed warm bulbs and wrong white balance are the usual causes. Turn off extra lights, match your bulbs, and test your white balance. Can I use phone lights? Yes, for fill light or a small subject, but a phone light alone is usually too narrow for a full talking-head shot. Use it to soften shadows, not as your only light. What is the cheapest useful upgrade? A white poster board for bouncing light, a thin curtain for diffusing window light, and a small LED panel with adjustable brightness are usually the best first buys. Does lighting matter more than camera quality? Often, yes. Good light makes a phone camera look sharp and clean, while poor light makes even a good camera look noisy and dull. Start with the light you already have, add one affordable key light, and test before you record. A simple, repeatable setup will make every video you make look more confident and professional.
- CreatorPlaybook Team
- 25 Oct, 2026
Voiceover Tips for Clear Audio
Viewers will forgive a slightly shaky picture, but they will leave a video with bad audio in seconds. Clear voiceover is not about having an expensive microphone. It is about a quiet room, a steady distance from the mic, a natural speaking pace, and a few simple checks before you record. This guide shows you how to get clean, warm, easy-to-hear audio with the equipment you already have. Related guides: How to Script a YouTube Video, YouTube Live Streaming for Beginners, and How to Edit Videos in CapCut for Beginners. What You Will LearnHow to choose the quietest room you already have How to place your microphone for clear, even sound How to speak at a pace viewers can follow How to record a test clip and fix problems early How to reduce echo, hiss, and background noise How to do a simple edit that makes voiceover sound polishedStep 1: Pick a Small, Quiet Room What to do: Record in the smallest, softest room you can find, away from traffic, fans, and appliances. Sound bounces off hard walls and floors, which creates echo. Soft surfaces, such as curtains, bedding, books, and clothes, absorb sound and make your voice sound closer and warmer. How to do it in simple steps:Turn off fans, air conditioning, and noisy appliances for the recording. Close windows and doors, and warn others in the house that you are recording. Choose a room with carpet, curtains, or furniture rather than a bare bathroom or kitchen. If the room still echoes, hang a blanket behind you and record facing the soft surface.Practical example: A creator records in a large empty living room and hears a hollow echo. Moving into a smaller bedroom, closing the curtains, and recording near a wardrobe full of clothes removes most of the echo without buying anything. Common mistake to avoid: Recording next to an open window or a running fan because the picture looks good there. Listeners notice the noise long before they notice the view. Illustrative image: A small, quiet room beats a large, echoey one. This is an illustrative image, not a screenshot of your channel or another creator’s work. Step 2: Place the Microphone at a Steady Distance What to do: Keep the microphone the same distance from your mouth for the whole recording, about a hand’s width away, slightly to one side. When you move closer and farther, your volume jumps up and down, and listeners have to keep adjusting. How to do it in simple steps:Hold your hand flat between your mouth and the mic, about 15 centimetres away, and keep that gap. Angle the mic slightly off to the side, so breath sounds do not hit it directly. Use a stand, a stack of books, or a phone holder, rather than holding the mic in your hand. If you use a phone, place it on a stable surface at the same height as your mouth.Practical example: A creator records a tutorial while holding a phone and moving it around. The audio fades in and out. Placing the phone on a stack of books, 15 centimetres away, makes the whole recording even, even though the equipment is the same. Common mistake to avoid: Leaning in for emphasis and pulling back to read notes. Big distance changes create big volume changes that are hard to fix later. Illustrative image: A steady mic distance keeps your volume even. This is an illustrative image, not a screenshot of your channel or another creator’s work. Step 3: Speak Steadily, and Breathe on Purpose What to do: Speak a little slower than you think you need to, pause between ideas, and breathe quietly through your nose when you need air. Fast, breathless speech is hard to follow, especially for viewers watching in a second language or at higher playback speeds. How to do it in simple steps:Read your script aloud once before recording, at a pace a friend could take notes from. Pause for one second after each main point, so the idea lands. Drink water before you start, and keep a glass nearby for longer sessions. If you stumble, pause, breathe, and repeat the sentence, rather than rushing through it.Practical example: A creator explains three settings in one long, fast sentence, and viewers replay it three times. Slowing down, pausing after each setting, and naming each one clearly turns the same information into a lesson viewers understand first time. Common mistake to avoid: Speaking faster when you feel nervous. Speed does not sound confident. Pauses sound confident, because they show you are in control of the message. Illustrative image: A steady pace and clear pauses help viewers follow you. This is an illustrative image, not a screenshot of your channel or another creator’s work. Step 4: Record a 30-Second Test Before the Real Take What to do: Before every session, record 30 seconds, listen back on headphones, and fix any problem you hear. A test takes half a minute and can save a whole recording that would otherwise need to be redone. How to do it in simple steps:Record your opening lines exactly as you will record the video. Listen back with headphones, not speakers, so you hear hiss, echo, and clicks. Check three things: volume, clarity, and background noise. Fix the loudest problem first, such as moving the mic, closing a window, or lowering the input level, then test again.Practical example: A creator records a test and hears a faint fridge hum. Moving to another room and recording again removes the hum. Without the test, the hum would have been in a 20-minute video. Common mistake to avoid: Recording for an hour and only listening afterwards. By then, a small problem has become a large one, and re-recording feels like starting over. Illustrative image: Listen to a test clip on headphones before you record. This is an illustrative image, not a screenshot of your channel or another creator’s work. Step 5: Reduce Echo, Hiss, and Mouth Sounds Gently What to do: Fix most noise at the source, and use only light cleanup in editing. Heavy noise removal can make a voice sound robotic or underwater, which is worse than a little room sound. How to do it in simple steps:Move closer to soft surfaces and farther from noisy ones before you touch any filter. Set your recording level so loud words do not distort, and quiet words are still audible. In editing, apply a small amount of noise reduction, and listen after each step. Remove only obvious clicks and long silences, and keep natural breathing.Practical example: A creator’s recording has a light computer fan sound. Turning the computer to face away, recording facing a curtain, and applying a gentle noise reduction makes the voice clean. Applying maximum noise reduction instead would have made the voice sound thin and strange. Common mistake to avoid: Chasing perfect silence with strong filters. A voice that sounds natural with a little room tone is far better than a voice that sounds processed and unnatural. Illustrative image: Fix noise at the source first, then clean up gently. This is an illustrative image, not a screenshot of your channel or another creator’s work. Step 6: Edit for Flow, Then Listen One Last Time What to do: After editing, listen to the whole voiceover from start to finish, at normal volume, and check that the level stays even and the meaning stays clear. This final listen catches volume jumps, repeated sentences, and missing words that are easy to miss while editing. How to do it in simple steps:Listen once without watching the video, so you focus only on sound. Note any place where the volume suddenly changes or a word is unclear. Fix those places with small volume adjustments, not by re-recording everything. Export, then listen to the first 30 seconds on a phone speaker, because many viewers will hear it that way.Practical example: A creator edits a cooking voiceover and, on the final listen, finds one section recorded much quieter after a break. Raising that section by a small amount makes the whole video feel consistent, and viewers never notice the fix. Common mistake to avoid: Skipping the final listen because the edit looks finished on the timeline. Timelines do not show volume problems. Ears do. Illustrative image: A final full listen catches what editing hides. This is an illustrative image, not a screenshot of your channel or another creator’s work. Checklist for Clear Voiceover AudioSmall, quiet room with soft surfaces chosen Microphone steady, about a hand’s width away, slightly to the side Steady pace with pauses between main points 30-second test recorded and listened to on headphones Echo and hiss reduced at the source, with only gentle cleanup Full voiceover listened to once before publishingFrequently Asked Questions Do I need an expensive microphone for clear audio? No. A phone in a quiet room with a steady distance often sounds better than an expensive microphone in an echoey, noisy room. Improve the room first, then the microphone. Why does my voice sound different on recordings? You normally hear your voice partly through your bones, while a recording captures only the sound in the air. Record, listen, and adjust your pace and distance, and the recorded voice will start to sound like the voice you want. Should I use background music under voiceover? Only very quietly, and only if it does not compete with your words. If viewers have to strain to hear you, turn the music down or remove it. How do I handle mouth clicks and breaths? Drink water, avoid recording right after eating, and leave short pauses. Remove only loud clicks in editing, and keep natural breathing, because a voice with no breath sounds unnatural. Can I fix bad audio completely in editing? Editing can improve audio, but it cannot fully rescue a recording with loud echo, distortion, or constant noise. The best fix is always a better recording, so test first and record again when needed. Clear audio is a habit, not a purchase. Choose a quiet room, keep your distance steady, speak at a pace viewers can follow, test before you record, clean up gently, and listen once more before you publish, and your videos will sound professional long before you buy new equipment.

- CreatorPlaybook Team
- 25 Oct, 2026
How to Script a YouTube Video
Scripting a YouTube video does not mean reading every word like a robot. It means planning what you will say, in what order, before you press record, so your video feels clear, confident, and easy to follow. Many beginners skip scripting because it feels slow, and then they ramble, repeat themselves, or forget the main point. A simple script fixes all three problems, and it usually makes filming faster, not slower. Related guides: How to Write a Strong Video Hook in the First 30 Seconds, Storytelling for YouTube Videos, and Audience Retention: How to Keep Viewers Watching. What You Will LearnHow to choose one clear idea for a video before you write How to write a hook that makes viewers stay past the first 30 seconds How to outline a video in a simple beginning, middle, and end How to write in a natural, spoken style that is easy to film How to add examples, visuals, and calls to action without clutter How to rehearse and revise a script in under an hourStep 1: Choose One Idea and One Viewer Promise What to do: Before you write a single line, decide the one idea your video will teach and the one promise you make to the viewer. A script built on five ideas will confuse viewers. A script built on one idea, explained well, will be remembered. How to do it in simple steps:Write the topic in one sentence, such as “how to plan a weekly budget on a phone.” Write the viewer’s result in one sentence: “After watching, you will have a simple budget you can follow.” Delete anything that does not help that result, and save it for another video. Check that a stranger could repeat your promise back to you in their own words.Practical example: A creator plans a video called “Grow Tomatoes at Home.” The first draft covers soil, watering, pests, cooking, and selling tomatoes. That is five videos, not one. The creator narrows it to “Plant tomato seeds in pots in 20 minutes,” and the script becomes short, focused, and useful. Common mistake to avoid: Starting with a broad title and trying to cover everything. Broad scripts ramble, run long, and leave viewers unsure what they learned. Illustrative image: Start with one idea and one promise before you write. This is an illustrative image, not a screenshot of your channel or another creator’s work. Step 2: Write a Hook That Earns the First 30 Seconds What to do: Write the opening of your script first, and make it answer three questions fast: what is this video about, who is it for, and why should the viewer stay? Viewers decide in seconds, so the hook cannot wait until minute two. How to do it in simple steps:State the topic and the benefit in the first two sentences. Add one specific detail, such as a common mistake, a time frame, or a result. Remove greetings, long introductions, and channel history from the opening. Read the hook aloud and ask whether a new viewer would know why to keep watching.Practical example: Instead of “Hey everyone, welcome back, today I want to talk about something I have been thinking about,” a creator writes, “Most new gardeners water their tomatoes too often. In this video, you will learn the simple watering routine that keeps plants healthy.” The second version gives a reason to stay. Common mistake to avoid: Spending the first minute on apologies, weather, or a long story about why you made the video. Save your personality for the content, and put the value first. Illustrative image: A strong hook states the topic and benefit at once. This is an illustrative image, not a screenshot of your channel or another creator’s work. Step 3: Outline the Middle in Three Clear Blocks What to do: Break the middle of your video into three blocks, each with one job. Three blocks are easy for viewers to follow and easy for you to film, because you always know which block you are in. How to do it in simple steps:List the three main points, in the order a beginner would need them. Give each block a short heading, such as “Prepare,” “Do,” and “Check.” Under each heading, write two or three bullet points, not full paragraphs. Add a short bridge sentence between blocks, such as “Now that the soil is ready, let us plant.”Practical example: A phone photography script uses three blocks: “Set up your light,” “Frame the shot,” and “Edit in two minutes.” Each block has three bullets. The creator films one block at a time, and the finished video feels organised even though the script is only one page. Common mistake to avoid: Writing the middle as one long list of ten points with no grouping. Viewers lose track, and you will too when you film. Illustrative image: Three clear blocks keep a video organised. This is an illustrative image, not a screenshot of your channel or another creator’s work. Step 4: Write How You Talk, Not How You Write Essays What to do: Turn your bullets into spoken sentences that sound like you explaining something to a friend. Written language is formal and long. Spoken language is short, direct, and full of simple words, and it films much better. How to do it in simple steps:Write a draft, then read it aloud and mark every sentence that feels stiff. Replace long words with short ones, and split long sentences into two. Add natural signposts, such as “First,” “Next,” and “Here is the key part.” Keep most sentences under 20 words, and leave pauses where a viewer needs to absorb a point.Practical example: A written sentence says, “It is essential to utilise appropriate illumination to facilitate optimal image quality.” The spoken version says, “Good light matters. Face a window, and your video will look much better.” The second version is easier to say, easier to hear, and easier to remember. Common mistake to avoid: Writing a script in academic language and then reading it stiffly on camera. Viewers hear the difference, and they leave. Illustrative image: Write short, spoken sentences you can say naturally. This is an illustrative image, not a screenshot of your channel or another creator’s work. Step 5: Add One Example and One Visual Note per Block What to do: For each block, add one concrete example and one note about what viewers should see on screen. Examples make ideas real, and visual notes stop you from talking over a screen that shows something different. How to do it in simple steps:After each block, write “Example:” and add a real situation, number, or before-and-after. After the example, write “Show:” and note the shot, text on screen, or close-up you need. Keep examples short, honest, and from your own experience when possible. If a block has no example, ask whether that point is clear enough to keep.Practical example: In a budgeting block, the example is, “A student with 200 dollars a week spends 40 on food, 30 on transport, and saves 20.” The visual note is, “Show: phone screen with the three amounts.” The viewer hears the idea and sees it at the same time. Common mistake to avoid: Explaining every point in abstract words with no example and no visual. Abstract scripts sound clever but teach little, and viewers forget them fast. Illustrative image: One example and one visual note per block makes ideas stick. This is an illustrative image, not a screenshot of your channel or another creator’s work. Step 6: End Clearly, Then Rehearse and Cut What to do: Write a short ending that repeats the main point and gives one clear next step, then rehearse the whole script aloud and cut anything that does not earn its place. A good ending turns a finished video into a next action, such as trying the method, watching a related guide, or leaving a comment. How to do it in simple steps:Write the ending in two parts: “You learned X” and “Now try Y.” Add only one call to action, not three, so viewers know what to do. Rehearse aloud with a timer, and note where you stumble or slow down. Cut repeated points, long introductions, and sentences that do not help the promise.Practical example: A creator ends with, “You now have a simple three-step watering routine. Try it this week, and tell me in the comments how your plants respond.” The ending is short, repeats the promise, and invites a response without begging for likes. Common mistake to avoid: Ending with a long, vague ramble such as “So yeah, that is basically it, I hope you liked it, please do all the things.” Viewers leave confused, and the video feels unfinished. Illustrative image: A clear ending and a quick rehearsal finish the script. This is an illustrative image, not a screenshot of your channel or another creator’s work. Checklist for Scripting a YouTube VideoOne idea and one viewer promise written down Hook that states topic, audience, and benefit in 30 seconds Middle divided into three clear blocks with bridges Spoken, short sentences that read naturally aloud One example and one visual note in each block Short ending with one clear next step, rehearsed and trimmedFrequently Asked Questions Should I write a word-for-word script or just bullets? Beginners do best with a full draft for the hook and ending, and bullets for the middle. As you gain confidence, you can move to bullets alone, because you will already know how to stay on track. How long should a script be? Plan roughly 150 words per minute of video. A 10-minute video needs about 1,500 words, but a clear 8-minute script beats a padded 12-minute script every time. Will scripting make me sound robotic? Only if you read without rehearsing. Read your script aloud twice, look up from your notes, and speak to one viewer, not to a crowd. Rehearsal is what makes a script sound natural. How long does scripting take? A simple script for a 10-minute video usually takes 45 to 60 minutes once you practise the steps in this guide. That time is saved during filming, because you will need fewer retakes. What if I go off script while filming? That is fine if the new point helps the viewer and fits the promise. Keep the detour short, then return to your next bullet, so the video stays on track. Scripting is a skill, not a talent. Start with one idea, a strong hook, three blocks, spoken language, real examples, and a clear ending, and your next video will feel calmer, clearer, and easier to watch from start to finish.

- CreatorPlaybook Team
- 25 Oct, 2026
YouTube Branding: Logo, Banner and Intro
Branding is how viewers recognise your channel in a crowded feed. A consistent logo, banner, colour scheme, and intro tell viewers, in seconds, that this video belongs to a channel they know, or a channel worth remembering. Branding does not need to be expensive or complicated; it needs to be consistent. Many small creators delay branding until they are “big enough.” That is backwards: clear branding helps small channels look trustworthy and professional from the start, which helps them grow. This guide shows you how to create a simple, consistent brand with free or low-cost tools. Related guides: How to Make a Channel Trailer, How to Design Clickable Thumbnails, and How to Improve Click-Through Rate. What You Will LearnWhat YouTube branding includes, beyond a logo How to choose colours, fonts, and a style that fit your niche How to design a clear logo that works at small sizes How to design a banner that states your channel's promise How to make a short intro that does not waste viewer time How to apply branding consistently across videos and thumbnailsStep 1: Choose a Simple Brand Style for Your Niche What to do: Choose two main colours, one or two fonts, and a tone, such as calm, playful, or professional, that fits your niche and audience. Write these choices down, so every future design follows them. How to do it in simple steps:Look at three channels in your niche and note which colours and styles feel right for your audience. Choose two colours: one main colour and one accent colour, with strong contrast. Choose one font for titles and one for body text, both easy to read. Write your brand choices in a short note, and use them for every design.Practical example: A gardening channel chooses green as a main colour, cream as an accent, and a friendly, rounded font. Its logo, banner, thumbnails, and end screens all use the same colours and font, so viewers recognise its videos instantly in a feed. Common mistake to avoid: Using a different colour scheme, font, and style for every video. Random styling makes a channel look disorganised, and viewers cannot learn to recognise it, even if individual designs look good. Illustrative image: Two colours and one style keep a channel recognisable. This is an illustrative image, not a screenshot of your channel or another creator's work. Step 2: Design a Logo That Works at Small Sizes What to do: Design a simple logo that is clear as a tiny profile picture. A logo is often seen at less than one centimetre wide, so simple shapes, one or two colours, and no small text work best. How to do it in simple steps:Sketch three simple ideas: an initial, a symbol, or a simple illustration of your niche. Choose the simplest idea, and remove any detail that disappears at small size. Test the logo at profile-picture size, on both light and dark backgrounds. Save it in a square format, with a version for light and dark backgrounds if needed.Practical example: A photography channel uses a simple camera shape in its main colour, with no text. At small size, the camera shape is still clear, while a logo with a long channel name in small letters would be unreadable. Common mistake to avoid: Designing a detailed logo with a long name, a tagline, and several colours. At profile-picture size, detail becomes a blur, and viewers cannot tell what the logo is, or remember it. Illustrative image: Simple logos stay clear at tiny sizes. This is an illustrative image, not a screenshot of your channel or another creator's work. Step 3: Design a Banner That States Your Promise What to do: Your banner is the large image at the top of your channel page. It should show your channel name, what you help viewers do, and when you upload, in a design that works on desktop, tablet, and mobile, where only the centre is visible. How to do it in simple steps:Use the recommended banner size in YouTube Studio, and keep key text in the safe centre area. Write your channel name, your promise in a few words, and your upload schedule. Use your brand colours and fonts, and one simple image or pattern. Preview the banner on desktop and mobile before saving it.Practical example: A cooking channel's banner reads, in the centre, “Healthy Dinners in 20 Minutes — New videos every Friday.” A new visitor instantly knows the topic, the benefit, and when to return, without reading a long description. Common mistake to avoid: Putting important text at the edges of a banner, where it is cut off on mobile, or filling the banner with social media handles, logos, and clutter. Most visitors see only the centre, so that is where the message must be. Illustrative image: Keep banner text in the safe centre area. This is an illustrative image, not a screenshot of your channel or another creator's work. Step 4: Make a Short Intro That Respects Viewer Time What to do: A channel intro is a 3 to 5 second clip at the start of videos, showing your logo and channel name, with a short sound if you use one. It should brand the video without delaying the content viewers came for. How to do it in simple steps:Design a 3 to 5 second animation or static logo card, using your brand colours. Keep music, if any, short and quiet, so it does not overpower your voice. Place the intro after a brief hook, or at the very start only if it is under 5 seconds. Use the same intro in every video, so viewers learn to recognise it.Practical example: A creator opens videos with a 4-second logo card and a soft sound, then immediately states the video's topic. Viewers recognise the channel, but the content starts within seconds, so retention stays strong. Common mistake to avoid: Using a 15 to 20 second animated intro with loud music before every video. Long intros delay the content, and many viewers leave before the video actually starts, especially on mobile. Illustrative image: A 3 to 5 second intro brands without delaying content. This is an illustrative image, not a screenshot of your channel or another creator's work. Step 5: Apply Branding to Thumbnails and Video Style What to do: Use your brand colours, fonts, and layout consistently in thumbnails, titles, and video graphics, such as lower-thirds and end screens. Consistency helps viewers spot your videos in a feed, even before reading the title. How to do it in simple steps:Create a thumbnail template with your colours, font, and logo position. Use the same lower-third style for names and key points in videos. Use the same end screen layout, with your colours and subscribe prompt. Check that new thumbnails still look clear at small size, even with branding.Practical example: A fitness channel uses the same yellow accent, font, and bottom-left logo on every thumbnail. Viewers scrolling a feed recognise the channel's videos by colour and layout alone, and click because they already trust the style. Common mistake to avoid: Branding every thumbnail so heavily, with large logos and borders, that the subject becomes hard to see. Branding should help recognition, not hide the reason to click. Illustrative image: Consistent colours and layout make videos recognisable. This is an illustrative image, not a screenshot of your channel or another creator's work. Step 6: Review and Refresh Branding Without Starting Over What to do: Review your branding every year, and refresh only what is outdated, such as a blurry logo or a banner with an old schedule. Keep the core colours and style, so existing viewers still recognise you. How to do it in simple steps:Look at your channel page, thumbnails, and recent videos together, and note what looks inconsistent. Ask viewers, in a Community post, what they recognise most about your channel's look. Update only the weakest element, such as the banner or logo resolution. Keep the main colours and style, so the refresh feels familiar, not like a new channel.Practical example: A creator updates a blurry logo to a sharper version in the same colours, and updates a banner schedule from “weekly” to “every Friday.” Viewers notice a cleaner look, but still recognise the channel immediately. Common mistake to avoid: Rebranding completely every few months, with new colours, fonts, and logos each time. Frequent rebrands confuse existing viewers and erase the recognition you built, so refresh gradually, not constantly. Illustrative image: Refresh the weakest element, keep the core style. This is an illustrative image, not a screenshot of your channel or another creator's work. Checklist for YouTube BrandingBrand style chosen: two colours, one or two fonts, one tone, written down Simple logo designed, tested at profile-picture size Banner designed with name, promise, and schedule in the safe centre Intro kept to 3 to 5 seconds, used consistently Thumbnail template, lower-thirds, and end screens using the same style Branding reviewed yearly, refreshed gradually, not completely replacedFrequently Asked Questions Do I need to pay for branding? No. Free design tools, phone apps, and templates are enough for a simple, professional brand. Spend time on clarity and consistency, not money, especially when you are starting out. Should my logo include my channel name? Not necessarily. At small sizes, a simple symbol is often clearer than text. If your channel name is short, you can include it, but test it at profile-picture size first, and keep it readable. How often should I change my banner? Update it when your promise, schedule, or best content changes, or when it looks outdated. A banner that still states your current promise accurately does not need changing just for the sake of change. Do intros hurt retention? Long intros can hurt retention, because they delay content. Short intros of 3 to 5 seconds, placed after a hook, usually do not, because viewers get to the content quickly. What if I am not good at design? Start simple: one symbol, two colours, one font, and a clean layout. Simple branding done consistently looks far more professional than complex branding done inconsistently. You can improve it gradually as you learn. Branding is not about looking fancy. It is about being recognisable and trustworthy, every time a viewer sees your channel. Choose a simple style, apply it consistently to your logo, banner, intro, and thumbnails, and refresh it gradually. Over time, viewers will spot your videos in a feed, and click because they know what to expect.

- CreatorPlaybook Team
- 25 Oct, 2026
How to Make a Channel Trailer
A channel trailer is a short video that tells new visitors, in under a minute, what your channel is about, who it is for, and why they should subscribe. It plays on your channel page for people who have not subscribed yet, so it is often the first impression a new viewer gets. A good trailer is not a showreel of everything you have ever made. It is a focused invitation: one audience, one promise, and one reason to stay. This guide shows you how to plan, script, film, and publish a trailer that turns visitors into subscribers. Related guides: How to Write a Strong Video Hook in the First 30 Seconds, How to Use Playlists to Increase Watch Time, and YouTube Branding: Logo, Banner and Intro. What You Will LearnWhat a channel trailer should do, and what it should not try to do How to define your audience and promise in one sentence How to write a 30 to 60 second trailer script How to film a trailer with simple equipment How to edit a trailer for pace and clarity How to publish, feature, and update your trailer over timeStep 1: Define Your Audience and Promise in One Sentence What to do: Before filming, write one sentence that states who your channel helps and what it helps them do. Every part of the trailer should support that sentence, and anything that does not should be cut. How to do it in simple steps:Write who you help, such as “beginner photographers” or “busy home cooks.” Write what you help them do, such as “take better photos with a phone” or “cook healthy dinners in 20 minutes.” Combine them into one sentence, and read it aloud. Check that your best videos actually deliver that promise.Practical example: “I help beginner photographers take better photos with the phone they already own.” A visitor who is a beginner photographer instantly knows this channel is for them. A visitor who is not can move on, which is fine, because they were unlikely to subscribe anyway. Common mistake to avoid: Trying to appeal to everyone, with a trailer that says “I make videos about lots of stuff.” A channel that tries to be for everyone feels like it is for no one, and visitors leave without subscribing. Illustrative image: One clear audience and promise make a trailer work. This is an illustrative image, not a screenshot of your channel or another creator's work. Step 2: Write a Short Script with Three Parts What to do: A trailer script has three parts: a hook that names the viewer's problem, a promise that shows what the channel offers, and a call to action that asks for a subscription. Keep the whole script to 30 to 60 seconds when spoken. How to do it in simple steps:Hook, 5 to 10 seconds: name a problem your viewer recognises. Promise, 20 to 30 seconds: show three examples of videos that solve that problem. Call to action, 5 to 10 seconds: tell viewers to subscribe and what they will get next. Read the script aloud with a timer, and cut anything that pushes it past 60 seconds.Practical example: “Do your indoor photos look dark and yellow? On this channel, I show beginners how to fix light, composition, and editing with just a phone. Subscribe, and start with the beginner playlist linked below.” The script is short, specific, and ends with a clear next step. Common mistake to avoid: Writing a long life story or listing every topic you have ever covered. New visitors decide in seconds whether to stay, and a long introduction loses them before they hear the promise. Illustrative image: Hook, promise, and call to action in under a minute. This is an illustrative image, not a screenshot of your channel or another creator's work. Step 3: Film with Simple, Clean Footage What to do: Film the trailer speaking to the camera, in good light, with clear audio, and add a few short clips from your best videos to show what viewers will get. Simple, clean footage beats fancy effects that distract from the message. How to do it in simple steps:Film in a quiet room, with light facing you and a plain background. Use a phone or camera on a stable stand, at eye level. Speak naturally, as if talking to one new viewer, not a crowd. Collect three or four short clips, 2 to 3 seconds each, from your best videos.Practical example: A cooking creator films a 40-second trailer in a kitchen, speaking to the camera, with three quick clips of finished dishes. Viewers see the creator, hear the promise, and see the results, all in under a minute. Common mistake to avoid: Filming a trailer with loud background music, fast cuts, and text on screen at the same time. Viewers cannot follow the message when sound, movement, and text compete, and they leave confused. Illustrative image: Clean light, clear audio, and a calm background. This is an illustrative image, not a screenshot of your channel or another creator's work. Step 4: Edit for Pace, Not for Show What to do: Edit the trailer so it moves quickly but remains easy to follow. Cut pauses, keep clips short, and use text only to reinforce the promise, such as the channel name or a playlist name. How to do it in simple steps:Cut the script recording into hook, promise, and call to action. Insert short clips during the promise section, to show rather than tell. Add the channel name and a subscribe reminder at the end, not throughout. Watch the trailer on a phone, with sound on and off, to check clarity.Practical example: A trailer that was 90 seconds long, with long pauses, becomes 45 seconds after cutting pauses and shortening clips. The shorter version keeps the same message, but viewers actually watch it to the end. Common mistake to avoid: Adding an intro animation, music, and effects that take 10 seconds before the message starts. New visitors may leave before they hear why they should subscribe, so start with the hook, not with branding. Illustrative image: Fast, clear editing keeps new visitors watching. This is an illustrative image, not a screenshot of your channel or another creator's work. Step 5: Publish and Feature the Trailer on Your Channel Page What to do: Upload the trailer as a normal video, with a clear title and description, then feature it as your channel trailer in YouTube Studio, so non-subscribers see it first when they visit your channel page. How to do it in simple steps:Upload the trailer with a title such as “Welcome to [Channel Name]” and a description stating your promise. In YouTube Studio, set it as the featured trailer for non-subscribers. Link a beginner playlist in the description and in a pinned comment. Check your channel page as a non-subscriber, by viewing it in a private browser window.Practical example: A creator uploads a trailer, features it, and links the beginner playlist below. New visitors watch the trailer, click the playlist, and watch several videos in one visit, instead of leaving after one video. Common mistake to avoid: Uploading a trailer but never featuring it, so it sits in your video list like any other video. A trailer only works as a first impression if new visitors actually see it first. Illustrative image: Feature the trailer so new visitors see it first. This is an illustrative image, not a screenshot of your channel or another creator's work. Step 6: Update the Trailer When Your Channel Changes What to do: Review your trailer every six months, or when your channel's focus, audience, or best videos change. A trailer that promises videos you no longer make will mislead new visitors and hurt trust. How to do it in simple steps:Watch your trailer and ask whether it still describes your current videos. Check whether new visitors comment that the trailer helped, or that it was confusing. Update the clips, promise, or call to action if your focus has changed. Replace the featured trailer, and update the description and playlist links.Practical example: A channel that started with phone photography adds video editing tutorials. The creator updates the trailer to mention both, and links two playlists, so new visitors are not surprised by the wider range of videos. Common mistake to avoid: Leaving a trailer unchanged for years, while your channel moves in a new direction. Visitors who subscribe for the old promise, then find different videos, are more likely to unsubscribe. Illustrative image: A trailer should grow with your channel. This is an illustrative image, not a screenshot of your channel or another creator's work. Checklist for a Channel Trailer That ConvertsAudience and promise defined in one clear sentence Script written: hook, promise, call to action, 30 to 60 seconds Filmed in good light with clear audio, plus short clips from best videos Edited for pace, with text only to reinforce the promise Uploaded and featured for non-subscribers, with a beginner playlist linked Reviewed every six months, and updated when the channel changesFrequently Asked Questions How long should a channel trailer be? Aim for 30 to 60 seconds. Shorter trailers are more likely to be watched to the end, and a trailer that is watched to the end is more likely to earn a subscription than a longer trailer viewers abandon. Do I need a trailer if my channel is small? Yes, especially when you are small. New visitors have no history with your channel, so a short, clear trailer helps them decide quickly whether to subscribe, instead of guessing from a list of videos. Should the trailer be different from a normal video? Yes, in purpose. A normal video teaches one topic in depth. A trailer introduces the channel, shows the range of videos, and invites a subscription. It should not try to teach a full topic. Can I use clips from old videos in a trailer? Yes, if they still represent your current quality and focus. Use short, strong clips that show results, and avoid clips from videos you would not want new visitors to watch first. What if I do not like being on camera? You can still make a trailer with voiceover, text, and clips, without appearing on camera. The key is a clear promise and strong examples, not necessarily a face, although a face can help build trust. A channel trailer is a first impression, not a summary of everything you have done. Define one audience, promise one clear benefit, show it in under a minute, and invite viewers to subscribe and start with your best playlist. Done well, it works for you every time a new visitor finds your channel.

- CreatorPlaybook Team
- 25 Oct, 2026
How to Improve Click-Through Rate
Click-through rate, or CTR, is the percentage of people who click your video after seeing its thumbnail and title. If 100 people see your video and 5 click, your CTR is 5 percent. It is one of the clearest signals of whether your packaging, the thumbnail and title together, is doing its job. A low CTR does not always mean a bad video. It often means the right viewers did not understand, in two seconds, why they should click. This guide shows you how to diagnose low CTR, improve thumbnails and titles honestly, and test changes without resorting to clickbait. Related guides: How to Design Clickable Thumbnails, Thumbnail A/B Testing Guide, and How to Write Titles That Get Clicks Without Clickbait. What You Will LearnWhat CTR is, and what a good CTR depends on How to find low-CTR videos in YouTube Analytics How to make thumbnails clearer at small sizes How to write titles that create curiosity without misleading viewers How to match thumbnail, title, and video so clicks turn into watch time How to test CTR changes and track improvement over timeStep 1: Understand What CTR Really Measures What to do: CTR measures how appealing your thumbnail and title are to the people who see them. It does not measure video quality on its own, because a great video with a confusing thumbnail can have a low CTR, and a weak video with a sensational thumbnail can have a high CTR but poor retention. How to do it in simple steps:In Analytics, look at impressions and CTR together, not CTR alone. Compare CTR across videos in the same niche and traffic source, not across all videos. Note that browse and search traffic often have different CTR patterns. Judge CTR together with average view duration, to see if clicks lead to real viewing.Practical example: A video with 10,000 impressions and a 3 percent CTR earned 300 clicks. A video with 1,000 impressions and an 8 percent CTR earned only 80 clicks. The second video has a better CTR, but the first reached more people. Both numbers matter, and neither tells the whole story alone. Common mistake to avoid: Chasing a single “good” CTR number you read online. CTR varies by niche, audience, traffic source, and video age, so a healthy CTR for a news channel may look very different from a healthy CTR for a tutorial channel. Illustrative image: CTR shows how often impressions become clicks. This is an illustrative image, not a screenshot of your channel or another creator's work. Step 2: Find the Videos That Need Help First What to do: In Analytics, sort videos by impressions and CTR, and look for videos with many impressions but low CTR. Those videos are already being shown to people, so improving their packaging can bring more clicks without needing new traffic. How to do it in simple steps:Open Analytics and look at content performance by video. Sort by impressions, and note videos with high impressions and below-average CTR. Check whether those videos have a clear topic, a clear thumbnail, and a clear title. Start with one or two such videos, not your entire back catalogue at once.Practical example: A creator finds a gardening video with 20,000 impressions but a 2 percent CTR, while similar videos average 5 percent. The video is being shown, but viewers are not clicking, so a new thumbnail and title are worth testing before making a new video on the same topic. Common mistake to avoid: Changing thumbnails on videos with very few impressions. If almost no one sees a video, a new thumbnail will not help much. Fix discovery first, such as topic and search, or focus on videos that already get impressions. Illustrative image: High impressions with low CTR point to packaging problems. This is an illustrative image, not a screenshot of your channel or another creator's work. Step 3: Make Thumbnails Clear at Small Sizes What to do: Most viewers see thumbnails small, on phones, in a feed full of other videos. A thumbnail that is clear at that size, with one subject, strong contrast, and readable text, will outperform a busy thumbnail that only looks good full-screen. How to do it in simple steps:Use one main subject, large in the frame, with a clean background. Use high contrast between subject and background. Keep text to four words or fewer, large and readable. Test the thumbnail at phone size before publishing, by shrinking it on screen.Practical example: A cooking thumbnail with a close-up bowl, a plain background, and the words “20-Minute Dinner” is clear at small size. The same video with a wide kitchen shot, five ingredients, and a paragraph of text is unreadable in a feed, and viewers scroll past it. Common mistake to avoid: Filling a thumbnail with many small details, logos, and long sentences. Detail that looks impressive on a computer monitor becomes noise on a phone, and viewers cannot tell what the video is about in two seconds. Illustrative image: One subject and few words read clearly on a phone. This is an illustrative image, not a screenshot of your channel or another creator's work. Step 4: Write Titles That Create Honest Curiosity What to do: A good title tells viewers the topic and the benefit, and leaves one question unanswered, so they click to learn the answer. It should promise what the video actually delivers, in words viewers would search for or understand instantly. How to do it in simple steps:Write the topic and benefit first: what will viewers learn or be able to do? Add one specific detail, such as a time, a number, or a common mistake. Remove vague words, such as “amazing” or “best ever,” unless you can prove them. Read the title aloud, and ask whether a stranger would know what the video is about.Practical example: “How to Take Better Photos” is vague. “Why Your Indoor Photos Look Yellow, and How to Fix It” is specific, names a problem viewers recognise, and promises a fix. The second title gives viewers a reason to click, without exaggerating. Common mistake to avoid: Writing a title that promises something the video does not deliver, such as “You Won't Believe This!” Viewers who click and feel misled leave quickly, and the channel loses trust, even if CTR rises for one video. Illustrative image: A specific promise beats a vague superlative. This is an illustrative image, not a screenshot of your channel or another creator's work. Step 5: Match Thumbnail, Title, and Video Content What to do: Thumbnail, title, and the first 30 seconds of the video should tell the same story. When they match, viewers who click feel they arrived at the right video, stay longer, and are more likely to watch the next one. How to do it in simple steps:Write down the one promise your thumbnail and title make together. Check that the video delivers that promise in the first minute. Remove thumbnail or title elements that suggest a different topic. If the video covers several topics, choose the strongest one for packaging, and mention the rest inside.Practical example: A thumbnail shows a finished loaf and the title promises “Your First Sourdough Loaf.” The video opens with the finished loaf, then shows the steps. Viewers who clicked for sourdough get sourdough immediately, and retention stays strong. Common mistake to avoid: Using a dramatic thumbnail image that appears only briefly, or not at all, in the video. Viewers notice the mismatch, leave early, and may avoid your future videos, even if CTR looked good at first. Illustrative image: Packaging and content should tell the same story. This is an illustrative image, not a screenshot of your channel or another creator's work. Step 6: Test One Change and Track CTR Over Time What to do: Change one element at a time, such as the thumbnail image or the title wording, and compare CTR before and after, over a similar period. Keep a simple log, so you learn what works for your audience instead of guessing each time. How to do it in simple steps:Record the current CTR and impressions for the video you will change. Change only the thumbnail, or only the title, not both at once. Wait at least one to two weeks, and compare CTR over a similar number of impressions. Keep the winner, record the lesson, and apply it to the next video's packaging.Practical example: A creator changes only the thumbnail for a low-CTR video, from a wide shot to a close-up. After two weeks, CTR rises from 2 percent to 4 percent, with similar watch time. The creator learns that close-ups work for this channel, and uses them for new videos. Common mistake to avoid: Changing thumbnails every day and checking CTR every hour. Constant changes and tiny samples create noise, not learning. One change, enough time, and a clear comparison teach you far more. Illustrative image: One change and enough time reveal what really works. This is an illustrative image, not a screenshot of your channel or another creator's work. Checklist for Improving Click-Through RateCTR understood as impressions to clicks, judged with watch time High-impression, low-CTR videos identified in Analytics Thumbnails simplified: one subject, high contrast, four words or fewer Titles specific, with topic, benefit, and one honest curiosity gap Thumbnail, title, and first minute of video telling the same story One change tested at a time, with results logged for future videosFrequently Asked Questions What is a good CTR? There is no single good number, because CTR varies by niche, traffic source, and audience. Compare your videos with each other, and with similar videos in your niche, rather than chasing a universal target. Should I change thumbnails on old videos? Yes, if an old video still gets impressions but has a low CTR. A new thumbnail can revive a good video. If an old video gets almost no impressions, a new thumbnail alone is unlikely to help much. Does CTR matter more than watch time? Both matter. CTR brings viewers in, and watch time keeps them there. A video with high CTR but very low watch time will struggle, because viewers leave quickly. Aim for packaging that attracts the right viewers, not just any viewers. How quickly should CTR improve after a change? Give a change at least one to two weeks, with enough impressions to compare fairly. Daily CTR swings with small numbers, so a few days of data can mislead you. Is it clickbait to use a surprising thumbnail? Not if the video delivers what the thumbnail promises. Surprise, curiosity, and strong visuals are fair tools. Clickbait is when the packaging promises something the video does not contain, or exaggerates beyond what viewers will actually see. Improving CTR is not about tricking viewers into clicking. It is about making the value of a good video obvious in two seconds: one clear subject, one specific promise, and a video that delivers it. When packaging and content match, clicks turn into watch time, subscribers, and a channel viewers trust.
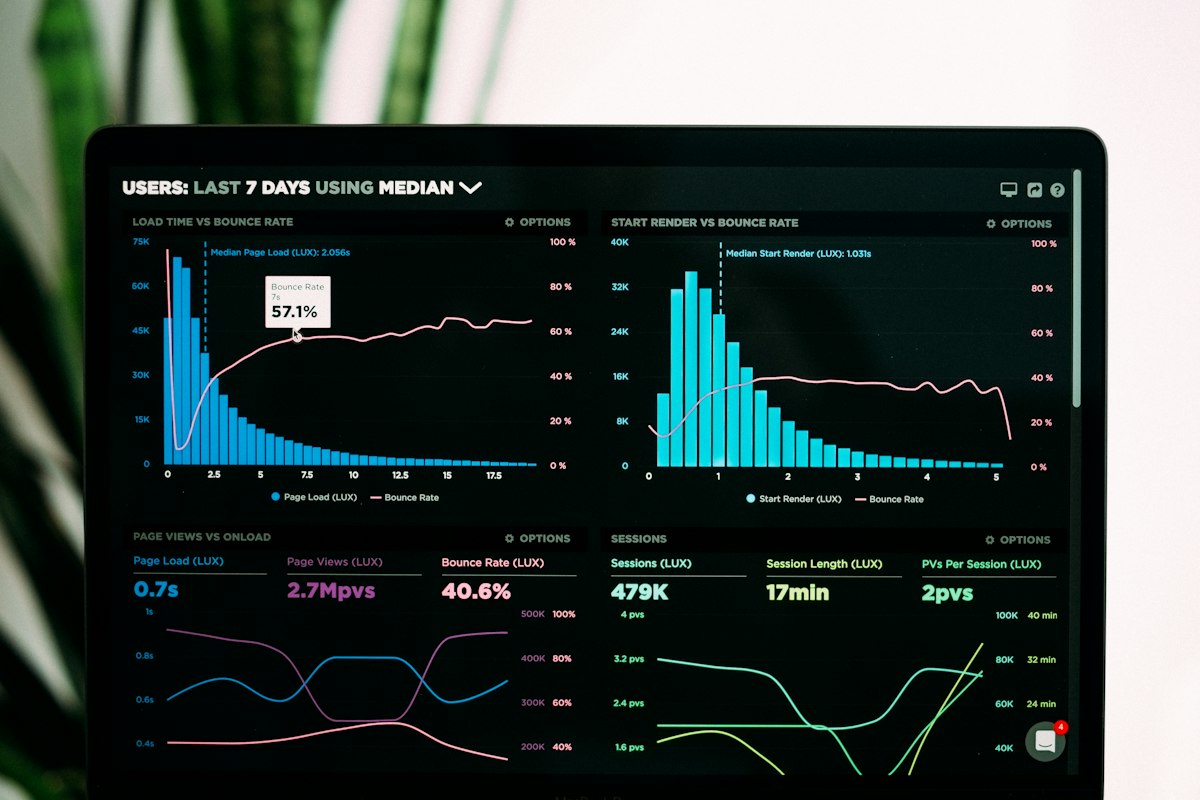
- CreatorPlaybook Team
- 25 Oct, 2026
Thumbnail A/B Testing Guide
Guessing which thumbnail works best is a gamble. A/B testing removes the guesswork: you show different thumbnails to different viewers, compare how often each one gets clicked, and keep the winner. Done carefully, it can lift clicks without changing your video at all. This guide explains thumbnail A/B testing in plain language. You will learn how to design two thumbnails that test one idea, how to run a fair test in YouTube Studio, how to read the results without being fooled by small numbers, and how to apply what you learn to future thumbnails. Related guides: How to Design Clickable Thumbnails, How to Improve Click-Through Rate, and Understanding YouTube Analytics. What You Will LearnWhat thumbnail A/B testing is, and what it can and cannot prove How to design two thumbnails that test one clear variable How to set up a test in YouTube Studio How long to run a test, and how much data you need How to read results and choose a winner with confidence How to turn test results into rules for future thumbnailsStep 1: Understand What A/B Testing Actually Tests What to do: A/B testing compares two versions of a thumbnail, shown to similar audiences, to see which gets more clicks. It tests the thumbnail, not the video, the title, or the audience. Keep everything else the same, so any difference comes from the thumbnail. How to do it in simple steps:Choose one video to test, ideally one that still gets regular impressions. Keep the title, description, and video exactly the same during the test. Change only the thumbnail, and only one element of it if possible. Compare click-through rate, not just total views, because views also depend on impressions.Practical example: A creator tests two thumbnails for a soup video: one shows the finished bowl, the other shows ingredients. The title stays the same. If the bowl version earns a higher click-through rate, the creator learns that finished food beats ingredients for this audience. Common mistake to avoid: Changing the title and thumbnail at the same time, then crediting the result to the thumbnail. If two things change, you cannot know which one caused the difference, and the test teaches you nothing reliable. Illustrative image: Test one thumbnail change at a time. This is an illustrative image, not a screenshot of your channel or another creator's work. Step 2: Design Two Thumbnails That Test One Variable What to do: Make two thumbnails that differ in one clear way: the main image, the text, the colour, or the expression. If the thumbnails differ in everything, a win tells you nothing about what worked. How to do it in simple steps:Start with your current thumbnail as version A. Create version B by changing one thing: for example, remove the text, change the background colour, or use a closer photo. Keep the size, style, and branding consistent between both versions. Check both thumbnails at small size, because most viewers see them on phones.Practical example: Version A has the text “5-Minute Dinner” over a photo. Version B uses the same photo with no text. If B wins, the creator learns that, for this video, the photo alone is clearer than photo plus text. Common mistake to avoid: Testing two completely different thumbnails, one with a face and text, the other with a landscape and no text. If one wins, you will not know whether the face, the text, or the image caused the win, and you cannot repeat it. Illustrative image: One clear difference makes the result useful. This is an illustrative image, not a screenshot of your channel or another creator's work. Step 3: Set Up the Test in YouTube Studio What to do: In YouTube Studio, use the thumbnail test feature for the video, upload your alternative thumbnails, and let YouTube show them to different viewers. Follow YouTube's current test options, because the feature and its settings can change. How to do it in simple steps:Open the video in YouTube Studio and find the thumbnail test option. Upload version B, and a version C if you want to test a second variable separately. Start the test, and note the start date in your own records. Do not change the title, thumbnail manually, or promotion during the test.Practical example: A creator starts a test on Monday for a video that gets about 500 impressions a day. They leave the test alone for two weeks, resisting the urge to check every hour, so the data has time to build up. Common mistake to avoid: Stopping a test after a few hours because one version is ahead. Early results swing wildly with small numbers, and a version that leads on day one can lose by day ten. Patience is part of a fair test. Illustrative image: Let the test run long enough to gather real data. This is an illustrative image, not a screenshot of your channel or another creator's work. Step 4: Run the Test Long Enough to Trust It What to do: A test needs enough impressions to be meaningful. Small channels need more time, because they get fewer impressions per day. A difference based on 50 impressions is not evidence; a difference based on thousands is much stronger. How to do it in simple steps:Check daily impressions for the video before starting, to estimate how long the test needs. Run the test for at least one to two weeks, or until each version has a large number of impressions. Ignore daily swings, and look at the overall trend instead. If impressions are very low, test on a more popular video first, where data builds faster.Practical example: A video with 200 impressions a day needs about two weeks to give each thumbnail version a few thousand impressions. A video with 20 impressions a day would need months, so it is a poor choice for a first test. Common mistake to avoid: Declaring a winner from a tiny sample, such as 10 clicks versus 8 clicks. That difference could easily be chance, and acting on it can make your thumbnails worse, not better. Illustrative image: Small samples mislead; larger samples reveal real winners. This is an illustrative image, not a screenshot of your channel or another creator's work. Step 5: Read the Results and Pick a Winner Carefully What to do: Compare click-through rates and watch time for each version. A thumbnail that gets clicks but loses viewers quickly may be misleading, so check whether the winning thumbnail also keeps viewers watching. How to do it in simple steps:Compare click-through rate for each thumbnail version over the full test period. Check average view duration for viewers who clicked each version. Choose the version with the best balance of clicks and watch time, not clicks alone. Record the result and the variable you tested, so you can learn from it later.Practical example: Version B earns more clicks, but viewers leave after 30 seconds, while version A earns fewer clicks but longer viewing. The creator keeps A, or tests a new version that combines B's clarity with A's honest promise, because misleading clicks hurt the channel long term. Common mistake to avoid: Choosing a thumbnail purely because it got the most clicks, even if it promises something the video does not deliver. Clickbait thumbnails may win a test and lose subscribers, which is a bad trade. Illustrative image: Balance clicks with watch time when choosing a winner. This is an illustrative image, not a screenshot of your channel or another creator's work. Step 6: Turn Results into Rules for Future Thumbnails What to do: After several tests, look for patterns. Do faces win? Does less text win? Do bright backgrounds win? Turn repeated results into simple rules for your channel, and test new ideas against those rules. How to do it in simple steps:Keep a simple log: video, variable tested, winner, and click-through rates. After three or four tests, look for a pattern across different videos. Write one or two rules, such as “use one clear subject, no more than four words.” Apply the rules to new thumbnails, and test exceptions when you have a reason to.Practical example: After four tests, a creator finds that close-up photos beat wide shots every time, and that text longer than four words loses. Their new rule is simple: one close-up subject, four words or fewer. Future thumbnails start from that rule, not from scratch. Common mistake to avoid: Treating one test result as a universal law. A result for one video, audience, and topic may not apply to every video. Patterns across several tests are far more reliable than a single win. Illustrative image: Patterns across tests become reliable thumbnail rules. This is an illustrative image, not a screenshot of your channel or another creator's work. Checklist for Thumbnail A/B TestingOne video chosen, with title and video kept unchanged during the test Two thumbnails differing in one clear variable, checked at small size Test set up in YouTube Studio, with start date recorded Test run for at least one to two weeks, with enough impressions per version Winner chosen on click-through rate and watch time, not clicks alone Result logged, with patterns turned into rules after several testsFrequently Asked Questions Can small channels A/B test thumbnails? Yes, but tests take longer, because fewer impressions arrive each day. Start with your most-viewed videos, run tests longer, and focus on large, clear differences, which are easier to detect with smaller samples. Should I test titles too? You can test titles separately, but do not test a title and a thumbnail at the same time. Change one thing, learn from it, then test the next thing. Otherwise you cannot tell which change caused the result. What if the test shows no clear winner? That is still useful information: it means both thumbnails work similarly for that video. Keep either one, and test a larger difference next time, such as a different image instead of a different colour. Do I need a third-party tool? YouTube Studio's built-in test feature is enough for most creators. Third-party tools can add options, but they also add cost and complexity. Start with the built-in feature, and only consider other tools if you need a feature it does not offer. Can A/B testing hurt my channel? A fair test should not hurt a channel, because each version is shown to only part of the audience. A misleading winning thumbnail can hurt retention, which is why you should check watch time, not just clicks, before keeping a winner. Thumbnail A/B testing turns opinion into evidence. Test one variable, run the test long enough, read clicks together with watch time, and build rules from patterns, not single wins. Over time, your thumbnails will get clearer, more clickable, and more honest, and your videos will get the audience they deserve.

- CreatorPlaybook Team
- 25 Oct, 2026
How to Find Video Ideas That People Search For
Running out of video ideas is not a sign that you lack creativity. It usually means you are trying to invent ideas from nothing, instead of looking at what people already search for, ask about, and struggle with. The best video ideas are not guesses; they are answers to real questions. This guide shows you a simple system for finding ideas that have proven demand. You will learn how to use YouTube search suggestions, comments, community questions, and competitor gaps to build a list of ideas you can trust, and how to turn each idea into a video viewers want to watch. Related guides: YouTube Keyword Research Step by Step, How to Grow with the YouTube Community Tab, and Collaboration Ideas for Small Creators. What You Will LearnWhy searched-for ideas outperform invented ideas How to use YouTube search suggestions to find real questions How to turn comments and community answers into video topics How to spot gaps in competitor videos that you can fill How to test and rank ideas before you film them How to keep an idea bank so you never start from zero againStep 1: Start with Problems, Not Topics What to do: A topic is broad, such as “photography.” A problem is specific, such as “my indoor photos look yellow.” Viewers search for solutions to problems, so ideas built around problems are far more likely to be found. How to do it in simple steps:Write down 10 problems your target viewers face in your niche. Turn each problem into a question, such as “Why do my indoor photos look yellow?” Check whether the question sounds like something a beginner would type into search. Keep only the questions that are specific, common, and answerable in one video.Practical example: Instead of “cooking tips,” a creator lists problems: burnt garlic, soggy rice, dull knives, and bland soup. Each problem becomes a video: “Why Your Rice Is Soggy and How to Fix It.” Specific problems attract specific searches. Common mistake to avoid: Choosing ideas because they sound interesting to you, without checking whether anyone searches for them. A video you love making still needs an audience, and searched-for problems give you that audience. Illustrative image: Problems become searched-for video ideas. This is an illustrative image, not a screenshot of your channel or another creator's work. Step 2: Use YouTube Search Suggestions as a Question Bank What to do: Type a broad keyword into YouTube search and read the suggestions that appear. Those suggestions are based on real searches, so they show you the exact words and questions viewers use. How to do it in simple steps:Type your niche keyword, such as “phone photography,” into YouTube search. Write down every relevant suggestion, especially questions starting with how, why, and what. Add a second word, such as “beginner,” and repeat the process. Group similar suggestions into one video idea, using the most common wording.Practical example: Typing “guitar” suggests “guitar for beginners,” “guitar chords for beginners,” and “how to tune a guitar.” Each suggestion is a ready-made video idea, written in the language viewers actually search with. Common mistake to avoid: Copying a suggestion word for word as a title without checking whether you can answer it well. A suggestion is a starting point; your video still needs a clear, honest answer and a structure that helps beginners. Illustrative image: Search suggestions reveal real viewer questions. This is an illustrative image, not a screenshot of your channel or another creator's work. Step 3: Mine Comments and Community Answers for Ideas What to do: Read comments on your videos, on competitor videos, and in community posts. Questions that appear repeatedly are video ideas with a built-in audience, because the people asking them are already watching in your niche. How to do it in simple steps:Read the last 50 comments on your most popular video, and note repeated questions. Read comments on two popular competitor videos in your niche, and note questions they did not answer. Check your Community poll results for topics viewers voted for but you have not covered. Turn each repeated question into a video idea, and credit the question in your video.Practical example: A fitness creator notices five comments asking how to stretch after a workout. A single video, “A 10-Minute Stretch After Every Workout,” answers all five commenters and attracts new viewers searching for the same thing. Common mistake to avoid: Answering repeated questions only in comment replies, and never making a video about them. A comment reply helps one person; a video helps every future viewer with the same question. Illustrative image: Repeated questions are ready-made video ideas. This is an illustrative image, not a screenshot of your channel or another creator's work. Step 4: Spot Gaps in Competitor Videos What to do: Watch the top videos for a topic and ask what they missed, what they explained too quickly, or what has changed since they were made. A gap is an opportunity to make a better, clearer, or more current video. How to do it in simple steps:Search for a topic and watch the top three videos. Note what each video covers, and what it skips or rushes. Read their comments for complaints, such as “too fast” or “what about beginners?” Plan a video that fills the clearest gap, such as a slower beginner version.Practical example: Top videos on sourdough assume viewers already have a starter. A new creator makes “Sourdough Starter from Scratch, Day by Day,” filling the beginner gap, and attracts viewers the top videos confused. Common mistake to avoid: Copying a competitor's video idea and structure exactly, with no improvement. Viewers who have already seen the original have no reason to watch a weaker copy. Fill a gap, or do not make the video. Illustrative image: A gap in top videos is an opening for a better video. This is an illustrative image, not a screenshot of your channel or another creator's work. Step 5: Test and Rank Ideas Before You Film What to do: Before filming, rank each idea by demand, fit, and effort. Demand is whether people search for it. Fit is whether it suits your channel. Effort is how hard it is to film well. The best ideas score well on all three. How to do it in simple steps:For each idea, note the search evidence: suggestions, comments, or poll votes. Score fit from 1 to 5: does this video serve your target viewer? Score effort from 1 to 5: can you film this well with your current setup? Film the idea with the best balance first, not the easiest or the flashiest.Practical example: A creator has three ideas: a complex drone video (high effort, low fit), a beginner lighting video (good demand, good fit, low effort), and a trending challenge (high demand, low fit). The lighting video wins, because it serves the channel's audience and can be filmed well. Common mistake to avoid: Filming the most exciting idea first, even if it does not fit your channel or audience. Exciting ideas that confuse your audience can hurt a small channel more than a steady, relevant video helps it. Illustrative image: Rank ideas by demand, fit, and effort before filming. This is an illustrative image, not a screenshot of your channel or another creator's work. Step 6: Keep an Idea Bank You Refill Every Week What to do: Keep a simple list of ideas, with the source of each idea and its demand evidence. Add to it every week, so you always have 10 or more ideas ready, and never face a blank page on filming day. How to do it in simple steps:Create a list with columns for idea, source, and demand evidence. Add at least five new ideas each week from search, comments, and polls. Remove ideas that no longer fit your channel, or that you have already covered. Before filming, pick the top-ranked idea from the bank, not a new guess.Practical example: A creator keeps a phone note with 20 ideas, each with a note like “from comments, asked 4 times” or “search suggestion, beginner.” On filming day, they open the note and choose, instead of spending an hour brainstorming from scratch. Common mistake to avoid: Keeping ideas only in your head, or on scattered notes you lose. Ideas you cannot find when you need them are the same as no ideas at all. One simple, always-accessible list is enough. Illustrative image: An idea bank means you never start from zero. This is an illustrative image, not a screenshot of your channel or another creator's work. Checklist for Finding Searched-For Video Ideas10 viewer problems listed, turned into specific questions Search suggestions collected for your niche and beginner keywords Repeated questions noted from comments and Community polls Top competitor videos watched, with at least one clear gap identified Ideas ranked by demand, fit, and effort before filming Idea bank kept, with at least five new ideas added each weekFrequently Asked Questions How do I know if an idea has enough demand? Look for multiple signals: search suggestions, repeated comments, poll votes, and several videos on the same topic with good views. One signal alone is weak; two or three together suggest real demand. Should I only make videos about searched topics? Searched topics should form the core of your channel, especially when you are small, because they bring new viewers. Once you have an audience, you can mix in original ideas your existing viewers will enjoy, even if few people search for them. What if many videos already cover my idea? Check for a gap: a beginner angle, a current update, a clearer explanation, or a different example. If you cannot find a gap, choose a more specific version of the idea, or a related question that is less covered. How many ideas should I keep in my bank? Aim for 10 to 20 ideas at any time. Fewer than 10 means you will run out quickly; far more than 20 can become overwhelming. Add new ideas weekly, and remove ones you film or that no longer fit. Can I use the same idea for a video and a Short? Yes. A searched-for topic can work as both a detailed video and a short tip or teaser. The Short can introduce the problem and point viewers to the full video, giving one idea two chances to reach viewers. Good ideas are found, not invented. Listen to search, comments, and questions, find the gaps others missed, rank ideas honestly, and keep a bank you refill every week. When you film what people already want to learn, your videos start with an audience waiting for them.

- CreatorPlaybook Team
- 25 Oct, 2026
Collaboration Ideas for Small Creators
Collaboration is one of the fastest ways for a small creator to reach new viewers who already trust another creator. When two channels work together, each audience gets introduced to a new creator in a friendly, natural way, instead of through an advertisement or a random recommendation. Small creators often think collaboration is only for large channels. In fact, small channels have an advantage: they can collaborate with creators at a similar size, share work fairly, and build real relationships. This guide gives you practical collaboration ideas, shows you how to approach other creators, and explains how to plan a collaboration that helps both channels. Related guides: How to Grow with the YouTube Community Tab, How to Use Playlists to Increase Watch Time, and YouTube Live Streaming for Beginners. What You Will LearnWhy collaboration works well for small creators How to find creators at a similar size and in a related niche How to write a short, respectful collaboration invitation Guest video, challenge, live, and series collaboration ideas How to plan, film, and promote a collaboration fairly How to measure results and turn one collaboration into an ongoing relationshipStep 1: Find Creators at a Similar Size in a Related Niche What to do: Look for creators with a similar audience size, a related topic, and a similar style. A cooking creator might collaborate with a gardening creator on growing herbs, because their audiences share an interest in food, even though the channels are different. How to do it in simple steps:List 10 channels in your niche, or a closely related niche, with a similar subscriber count. Watch two or three videos from each, and note their style, audience, and values. Shortlist three creators whose audience would genuinely enjoy your content. Follow and engage with their work for a week before contacting them.Practical example: A beginner photography creator with 800 subscribers collaborates with a phone editing creator with 1,200 subscribers. They film a joint video on taking and editing a photo with a phone. Both audiences learn something new, and both channels gain subscribers who already like the topic. Common mistake to avoid: Contacting only much larger creators and asking for a shout-out. Large creators receive many such requests, and a one-sided request with no benefit to them is unlikely to succeed. Start with creators at a similar stage, where the benefit is mutual. Illustrative image: Similar-sized creators in related niches make fair partners. This is an illustrative image, not a screenshot of your channel or another creator's work. Step 2: Write a Short, Respectful Invitation What to do: Send a short message that shows you know their work, explains one clear idea, and states what you will do. Keep it to a few sentences, and make it easy to say yes or no. How to do it in simple steps:Start with one specific compliment about a video you watched. Propose one idea in one sentence, such as a joint challenge or guest appearance. State what you will handle, such as editing, promotion, or filming your part. End with an easy next step, such as a short call or a reply with their thoughts.Practical example: “Hi, I enjoyed your video on indoor plant care. I make beginner gardening videos, and I would love to film a joint video on growing herbs indoors. I can edit and promote it on both channels. Would you be open to a short chat about it?” This message is specific, respectful, and clear. Common mistake to avoid: Sending a long, generic message that says only “Let's collaborate” with no idea, no benefit, and no sign that you watched their work. Generic messages are easy to ignore, because they ask the other creator to do all the planning. Illustrative image: A specific idea and a clear offer make a yes easier. This is an illustrative image, not a screenshot of your channel or another creator's work. Step 3: Try a Guest Appearance or Video Swap What to do: A guest appearance is a simple first collaboration: you appear in each other's videos, or you each film a video for the other's channel. Viewers meet a new creator in a familiar setting, which builds trust faster than a link alone. How to do it in simple steps:Agree on one topic that fits both channels. Decide who films what, and how each video will introduce the guest. Film a short introduction for the guest, explaining why viewers should watch them. Link to each other's channels in descriptions, end screens, and pinned comments.Practical example: Two fitness creators swap videos: one films a beginner workout for the other's channel, and the other films a stretching routine in return. Each audience discovers a useful new channel, and both creators gain content without extra filming days. Common mistake to avoid: Appearing in a video with no introduction, so viewers do not know who you are or why they should subscribe. A 30-second introduction, explaining what you do and what you will teach, turns a cameo into a real introduction. Illustrative image: A clear introduction turns a guest spot into new subscribers. This is an illustrative image, not a screenshot of your channel or another creator's work. Step 4: Film a Challenge or a Joint Series What to do: Challenges and short series give viewers a reason to watch both channels. Each creator films their version, or one part of a series, and viewers follow the story across both channels. How to do it in simple steps:Choose a challenge that is fun, safe, and related to both niches. Agree on the rules, the filming dates, and the publish dates. Film your part, and mention the other creator's part at the start and end. Publish close together, so viewers can watch both parts while the topic is fresh.Practical example: Two cooking creators film a “cook with five ingredients” challenge, each with a different dish. Viewers watch one, then click through to see the other, and both channels gain watch time from the same idea. Common mistake to avoid: Publishing collaboration parts weeks apart, with no links between them. By the time part two appears, viewers have forgotten part one, and the collaboration loses its cross-channel effect. Illustrative image: A shared challenge gives viewers a reason to visit both channels. This is an illustrative image, not a screenshot of your channel or another creator's work. Step 5: Go Live Together or Host a Joint Q and A What to do: A joint live stream or Q and A lets both audiences ask questions in real time. It is low-cost, needs little editing, and shows the personalities behind both channels. How to do it in simple steps:Agree on a topic and a set of questions to start with, in case chat is quiet. Decide who hosts, who moderates chat, and how questions will be shared. Test audio and connection together before going live. Introduce each other clearly at the start, and link both channels in the description.Practical example: A photography creator and an editing creator host a live Q and A on “taking and editing travel photos.” Viewers ask about both topics, and each creator answers their part. Both channels gain live viewers and new subscribers. Common mistake to avoid: Going live together with no plan, no host, and no moderation. Two people talking over each other, with unanswered chat, feels chaotic, and viewers leave even if the topic is good. Illustrative image: A planned joint live session showcases both creators. This is an illustrative image, not a screenshot of your channel or another creator's work. Step 6: Promote Fairly and Review the Results Together What to do: Promote the collaboration on both channels, in videos, Community posts, and descriptions, and share the results honestly afterwards. A fair collaboration promotes both creators equally, not just one. How to do it in simple steps:Agree in advance how each creator will promote the collaboration. Use end screens, cards, and Community posts to point viewers to the partner's video. After a week, share views, new subscribers, and comments with each other. Thank the other creator publicly, and discuss what to do differently next time.Practical example: After a joint series, two creators compare results and find that one video earned more views than the other. They discuss why, such as a stronger title, and use that lesson for their next collaboration, instead of blaming each other. Common mistake to avoid: Promoting your own video heavily while barely mentioning your partner's video. Viewers notice unfair promotion, and the partner is unlikely to collaborate again. Fair promotion builds long-term relationships. Illustrative image: Sharing results fairly builds trust for the next collaboration. This is an illustrative image, not a screenshot of your channel or another creator's work. Checklist for Small Creator CollaborationsPartner chosen at a similar size, in a related niche, after watching their work Short invitation sent, with one specific idea and a clear offer of help Guest appearance, video swap, challenge, series, or joint live planned Roles agreed: who films, edits, publishes, and promotes each part Both channels introduced clearly, with links in descriptions and end screens Results shared after a week, with thanks and a plan for next timeFrequently Asked Questions How small is too small to collaborate? There is no minimum size. Even channels with a few hundred subscribers can collaborate usefully, because the goal is reaching a relevant new audience, not a large one. Relevance matters more than size. Should I collaborate with a direct competitor? A creator in the same niche can be a good partner if your styles or subtopics differ. For example, two cooking creators might focus on different cuisines. If your content is almost identical, a related niche may be a better fit. Do I need a written agreement? For a simple, unpaid collaboration, a clear message agreeing on who does what, when videos publish, and how promotion works is usually enough. For paid work, sponsorships, or shared revenue, get the terms in writing before filming. What if a collaboration does not work out? Stay polite, finish any agreed promotion if you can, and learn from the experience. Not every collaboration will succeed, but a respectful ending keeps the door open for future work with other creators. How do I avoid being used for free promotion? Agree on mutual promotion before filming, and check that both creators follow through. If a partner repeatedly takes promotion without giving it, do not repeat the collaboration, and focus on partners who value fairness. Collaboration is not about borrowing an audience. It is about introducing two audiences to something useful, in a way that helps both creators. Start small, choose partners carefully, plan fairly, and promote each other well, and one good collaboration can lead to many more.
- CreatorPlaybook Team
- 25 Oct, 2026
YouTube Live Streaming for Beginners
Related guides: How to Grow with the YouTube Community Tab, Collaboration Ideas for Small Creators, and How to Use Playlists to Increase Watch Time. Live streaming feels different from a recorded video. There is no editing, no second take, and viewers can talk to you in real time. That can feel scary, but it is also why live streams build loyalty: viewers meet the real person behind the channel, ask questions, and feel part of a shared moment. You do not need expensive equipment or a large audience to start. A simple first stream, with a clear topic, a stable setup, and a plan for talking to chat, can teach you more about your audience than ten recorded videos. This guide walks you through your first live streams step by step. What You Will LearnWhat makes a live stream different from a recorded video How to choose a simple topic for your first stream How to set up audio, video, and internet for a stable stream How to plan a loose structure so you are not stuck for words How to talk to chat, handle trolls, and keep the stream friendly How to review a stream and improve the next oneStep 1: Choose a Simple First Stream Topic What to do: Pick a topic you can talk about for 30 to 45 minutes without slides or complicated demonstrations. A question-and-answer session, a beginner tutorial, or a casual discussion of a topic you know well works better than a complex live project. How to do it in simple steps:List five topics you could discuss comfortably from memory. Choose the one viewers ask about most in comments. Write a title that states the topic and the benefit, such as “Beginner Photography Questions, Answered Live.” Write a short description explaining who the stream is for and what questions you will cover.Practical example: A cooking creator's first stream is “Ask Me Anything About Weeknight Dinners.” Viewers bring the questions, the creator answers from experience, and no recipe needs to be cooked live. The stream is useful, interactive, and low-pressure. Common mistake to avoid: Planning a first stream around a difficult live demonstration, such as building something complex on camera. If the project goes wrong, the stream stalls, and a beginner host has to fix a problem while talking to chat at the same time. Illustrative image: A simple, familiar topic makes a first stream easier. This is an illustrative image, not a screenshot of your channel or another creator's work. Step 2: Set Up Stable Audio, Video, and Internet What to do: Test your setup before you go live. Good audio matters more than perfect video: viewers will leave a stream with echo or muffled sound faster than one with slightly soft video. A stable internet connection matters more than high resolution. How to do it in simple steps:Use a phone, webcam, or camera that you have already tested for recorded videos. Use earphones or a simple microphone to reduce echo. Film in a quiet room with light facing you, not behind you. Do a short private or unlisted test stream to check sound, picture, and connection. Keep a charger plugged in, and close other apps that use internet.Practical example: A creator tests a 10-minute private stream the day before, discovers the room echoes, and adds a rug and closes a window. The next day's public stream sounds clear, because the problem was found in testing, not live. Common mistake to avoid: Going live for the first time with untested equipment, in a noisy room, on a weak connection. Technical problems in the first minutes drive viewers away before they hear what you have to say. Illustrative image: Test audio and connection before you go live. This is an illustrative image, not a screenshot of your channel or another creator's work. Step 3: Plan a Loose Structure, Not a Script What to do: Write a simple outline: a welcome, three main points or segments, and a closing. A loose structure keeps you talking without sounding scripted, and gives viewers a reason to stay for the next segment. How to do it in simple steps:Write a welcome line: who you are, what the stream is about, and how viewers can ask questions. List three segments, each about 10 minutes, such as three common beginner mistakes. Write one question for each segment to ask chat, so viewers can join in. Write a closing line: what to watch next, and when the next stream will be.Practical example: A guitar stream runs: welcome and warm-up, three beginner chord tips with chat questions, then a short live practice session. Viewers know what is coming, and the host never has to wonder what to say next. Common mistake to avoid: Going live with no plan and saying, “So, what should we talk about?” Viewers who join a stream with no direction leave quickly, because they cannot tell whether the stream will be worth their time. Illustrative image: A loose outline keeps a live stream moving. This is an illustrative image, not a screenshot of your channel or another creator's work. Step 4: Promote the Stream Before It Starts What to do: Tell viewers in advance, so they can plan to join. A scheduled stream, announced in a video, a Community post, and a short reminder, will usually draw more live viewers than a surprise stream. How to do it in simple steps:Schedule the stream at least a few days ahead, with a clear title and description. Mention it at the end of your previous video. Post a Community update on the day of the stream, with the time and topic. Start on time, even if only a few viewers are present, because late starts lose early joiners.Practical example: A creator schedules a Saturday morning stream on Wednesday, mentions it in Friday's video, and posts a reminder Saturday morning. Viewers who would have missed a surprise stream can join, ask questions, and invite friends. Common mistake to avoid: Going live without any notice and expecting a large audience. Even loyal subscribers need time to notice a notification and join, especially if they are in different time zones. Illustrative image: Advance notice helps viewers plan to join live. This is an illustrative image, not a screenshot of your channel or another creator's work. Step 5: Talk to Chat and Keep the Stream Friendly What to do: Read chat regularly, answer questions by name when you can, and set a friendly tone early. Acknowledge viewers, repeat questions aloud for people listening without reading chat, and keep the conversation on topic without being harsh. How to do it in simple steps:Welcome early viewers by name and restate the topic every 10 minutes for newcomers. Read a question aloud, answer it, then ask a follow-up question to chat. Use moderation tools: hide or block abusive comments calmly, without arguing. If chat is quiet, ask a simple question, such as “Where are you watching from?”Practical example: A host reads, “Priya asks how to practise chords without hurting fingers,” answers with a short practice tip, then asks chat, “How long do you practise each day?” One question becomes a conversation, not just a lecture. Common mistake to avoid: Ignoring chat for long stretches, or arguing with a troll on camera. Ignored viewers leave, and arguments make other viewers uncomfortable. A calm, brief moderation action keeps the stream friendly for everyone else. Illustrative image: Reading chat aloud makes viewers feel included. This is an illustrative image, not a screenshot of your channel or another creator's work. Step 6: Review the Stream and Improve the Next One What to do: After the stream, watch part of the replay, check how many viewers stayed, and note which segments earned the most chat activity. Use one improvement for the next stream, not ten at once. How to do it in simple steps:Watch the first 10 minutes and one middle segment of the replay. Note where audio, lighting, or pacing could improve. Check live viewer numbers and chat activity over time in Analytics. Choose one change for the next stream, such as better audio, a shorter intro, or more chat questions.Practical example: A creator notices viewers dropped off during a long, quiet demonstration. For the next stream, they shorten demonstrations and add a chat question every few minutes. Retention improves without changing the topic or equipment. Common mistake to avoid: Judging a first stream only by live viewer numbers. A first stream with ten engaged viewers who ask great questions is a success. The goal is learning and connection, not a record audience on day one. Illustrative image: One improvement per stream builds skill steadily. This is an illustrative image, not a screenshot of your channel or another creator's work. Checklist for Your First Live StreamsSimple, familiar topic chosen, with a clear title and description Audio, video, and internet tested in a short private stream Loose outline written: welcome, three segments, closing Stream scheduled and announced in a video and a Community post Chat plan ready: welcome viewers, read questions aloud, moderate calmly Replay reviewed, with one improvement chosen for the next streamFrequently Asked Questions How long should a first live stream be? Thirty to 45 minutes is a good length for a first stream. It is long enough for real conversation, but short enough to stay energetic. Longer streams can come later, once you know your pacing. Do I need a large audience to go live? No. Small, live audiences are often more engaged than large, passive ones, because everyone can be heard. A stream with a handful of active viewers is a great place to learn. Can I stream from my phone? Yes, many creators start with a phone, especially for casual question-and-answer streams. Use a stable stand, good light, and earphones, and test the connection before you go live. What if no one joins? Start on time, talk as if viewers are present, and cover your planned points. Late joiners will find a stream already in progress, and the replay can still be useful for viewers who watch later. Should I keep the replay public? If the stream went well and the content is still useful, keeping it public can help new viewers. If there were long technical problems or mistakes, you can keep it unlisted, edit a highlight, or remove it, and use what you learned next time. Live streaming is a skill, not a talent you either have or do not have. Start small, test your setup, plan a loose outline, talk to chat, and improve one thing at a time. Your first stream does not need to be perfect; it needs to be real, helpful, and friendly enough that viewers want to join the next one.
- CreatorPlaybook Team
- 25 Oct, 2026
How to Grow with the YouTube Community Tab
Related guides: Collaboration Ideas for Small Creators, How to Find Video Ideas That People Search For, and YouTube Live Streaming for Beginners. The Community Tab lets you talk to your audience between videos. With text posts, polls, images, and video links, you can ask questions, share updates, tease upcoming videos, and keep your channel active on days when you do not upload. For small creators, it is one of the easiest ways to stay visible without filming a full video. Many creators ignore the Community Tab, or use it only to say “new video out.” That wastes its value. Used well, it builds a habit: viewers check in, answer polls, and comment, and they are more likely to watch the next video because they already feel part of the channel. This guide shows you how to use it step by step. What You Will LearnWhat the Community Tab can do, and what it cannot replace How to plan a simple weekly Community posting rhythm How to write polls that teach you about your audience How to share behind-the-scenes posts without oversharing How to promote videos through Community posts without sounding spammy How to reply, learn from comments, and improve future postsStep 1: Understand What the Community Tab Is For What to do: Think of the Community Tab as a conversation space, not an advertisement board. Its job is to start conversations, gather opinions, and keep viewers connected between uploads. Videos remain the main product; Community posts support them. How to do it in simple steps:Check your channel's Community Tab and note what post types are available to you. Decide on one goal for Community posts: learning about viewers, or keeping them updated. Plan posts that invite a reply, not just an announcement. Use Community posts between videos, not as a replacement for videos.Practical example: A cooking creator posts a poll on Monday: “Which dinner should I film next: pasta, soup, or curry?” Viewers vote, comment with ideas, and return on Friday to see the winning recipe. The poll did three jobs at once: it engaged viewers, chose the next video, and promoted it. Common mistake to avoid: Posting only “Watch my new video!” links, day after day. Viewers quickly ignore repeated promotion, and the Community Tab becomes a notice board no one reads. Mix promotion with questions, tips, and behind-the-scenes content. Illustrative image: Community posts start conversations between videos. This is an illustrative image, not a screenshot of your channel or another creator's work. Step 2: Set a Simple Weekly Rhythm What to do: Post two or three times a week, on a rhythm viewers can expect, such as a poll early in the week and a behind-the-scenes update later. Consistency matters more than volume: a few thoughtful posts beat daily low-effort posts. How to do it in simple steps:Choose two fixed days for Community posts, such as Tuesday and Thursday. On one day, post a question or poll about the next video. On the other day, share a tip, a photo, or a short update from your work. Keep each post short and focused on one question or idea.Practical example: A photography creator posts a poll on Tuesday about the next tutorial topic, and on Thursday shares a photo with one tip about light. Viewers know when to expect posts, and the creator does not have to invent a new idea every day. Common mistake to avoid: Posting five times in one day, then nothing for three weeks. Bursts overwhelm viewers, and long silences make them forget the channel. A steady, modest rhythm builds a habit for both you and your audience. Illustrative image: A steady rhythm beats bursts followed by silence. This is an illustrative image, not a screenshot of your channel or another creator's work. Step 3: Write Polls That Teach You About Your Audience What to do: Write polls with clear choices that help you decide what to make next, or understand what viewers struggle with. A good poll is easy to answer in seconds, and its results are useful to you. How to do it in simple steps:Ask one clear question, such as “What should I teach next?” Offer three or four specific choices, not vague ones like “good” or “bad.” Use the winning choice for your next video, and tell viewers you did. Read the comments too, because they often contain better ideas than the poll options.Practical example: A fitness creator asks, “Which workout do you want next: 10-minute morning, 20-minute evening, or beginner strength?” The winning choice becomes the next video, and the creator opens that video by saying, “You voted for this one.” Viewers feel heard, and they watch because they chose it. Common mistake to avoid: Asking polls with no clear use, such as “Do you like my channel?” The answers feel good but do not help you plan content. Every poll should answer a question you actually need answered. Illustrative image: A useful poll helps you choose the next video. This is an illustrative image, not a screenshot of your channel or another creator's work. Step 4: Share Behind-the-Scenes Content with Boundaries What to do: Share short, honest glimpses of your process: a workspace photo, a filming setup, a mistake you fixed, or a lesson you learned. Behind-the-scenes posts make a channel feel human, but they should stay relevant and safe. How to do it in simple steps:Choose one process moment worth sharing, such as setting up a shot or editing a scene. Write one or two sentences explaining what you did and what you learned. Add a photo or short clip that shows the moment, without private details. Ask viewers a follow-up question, such as “Do you do it this way too?”Practical example: A creator shares a photo of a messy desk with the caption, “This is what editing day looks like. I cut 20 minutes down to 8 today. What is the hardest part of editing for you?” Viewers relate, comment, and share their own editing struggles. Common mistake to avoid: Sharing personal details that should stay private, such as your home address, your daily routine, or other people's information. Behind-the-scenes content should show your work, not your private life. Illustrative image: Show your process, not your private life. This is an illustrative image, not a screenshot of your channel or another creator's work. Step 5: Promote Videos Without Sounding Spammy What to do: When you share a video in a Community post, give viewers a reason to watch it, not just a link. State the problem the video solves, or the question it answers, in one or two sentences. How to do it in simple steps:Write the benefit first: what will viewers learn or be able to do after watching? Add the video link, and one question that invites comments. Share the post once, at a time when your audience is usually online. Do not repost the same promotion every day; let the video find its audience.Practical example: Instead of “New video out, please watch,” a creator writes, “If your photos look dark indoors, this video shows three fixes you can try with your phone. Which one works best for you?” The post explains the value and invites a reply. Common mistake to avoid: Posting the same video link repeatedly with no new context. Viewers who ignored it the first time are unlikely to click the fourth identical post, and they may start ignoring all your Community posts. Illustrative image: Explain the benefit, then share the link. This is an illustrative image, not a screenshot of your channel or another creator's work. Step 6: Reply, Learn, and Improve Future Posts What to do: Reply to comments on Community posts, especially early ones, and note which post types earn the most replies, votes, and likes. Use that pattern to plan the next month's posts. How to do it in simple steps:Check Community comments daily, and reply to thoughtful comments with a question or thanks. Once a month, list your Community posts and note which earned the most engagement. Look for a pattern: do polls, tips, or behind-the-scenes posts work best for your audience? Do more of what works, and drop post types that consistently earn little response.Practical example: A creator finds that polls about the next video earn far more votes than generic announcements. They shift to one poll per week, and use the results to plan content, which improves both Community engagement and video views. Common mistake to avoid: Posting and never returning to read replies. Viewers who take time to answer a poll or comment, and get no response, are less likely to engage next time. A short reply is often enough to keep the conversation going. Illustrative image: Replies turn a post into a conversation. This is an illustrative image, not a screenshot of your channel or another creator's work. Checklist for Growing with the Community TabCommunity goal chosen: learn about viewers and keep them connected between videos Two or three posts per week, on a steady rhythm Polls with specific choices, used to plan the next video Behind-the-scenes posts that show work, without private details Video promotions that state the benefit and invite a comment Comments replied to, with monthly review of what earned the most engagementFrequently Asked Questions Do I need a certain number of subscribers to use the Community Tab? Access to Community features depends on YouTube's current eligibility rules, which can change. If you do not see the tab yet, keep publishing videos and building your channel, and check YouTube Studio for the latest eligibility information. How often should I post on the Community Tab? Two or three times a week is a good starting point for most small creators. That keeps your channel active without taking time away from making videos, which remain the main way viewers discover you. Do Community posts help videos get views? Community posts can remind subscribers about a channel and invite them to watch, but they do not replace good titles, thumbnails, and topics. Treat them as support for videos, not as a shortcut to views. Should Community posts be in the same language as my videos? Usually, yes. Use the language your audience uses in comments, so viewers can understand and reply. If your audience is bilingual, you can occasionally test a post in another language and see how viewers respond. What should I do if a Community post gets negative comments? Reply calmly to fair criticism, ignore or hide comments that are abusive, and follow YouTube's community guidelines. Do not argue in public, and do not delete fair criticism just because you disagree with it. The Community Tab works best when it feels like a conversation, not a broadcast. Ask real questions, share real work, reply to real people, and use what you learn to make better videos. Over time, that habit turns casual viewers into a community that returns for every upload.
- CreatorPlaybook Team
- 25 Oct, 2026
End Screens and Cards: Complete Guide
Related guides: How to Use Playlists to Increase Watch Time, How to Improve Click-Through Rate, and Audience Retention: How to Keep Viewers Watching. End screens and cards are two small features that can quietly change how long viewers stay on your channel. An end screen appears in the last 5 to 20 seconds of a video and points viewers to another video, a playlist, or a subscribe button. A card appears during a video, as a small notice in the corner, and can point to a related video, playlist, or channel. Used well, these tools guide viewers to the next useful video instead of leaving them to YouTube's recommendations alone. Used badly, they distract viewers, interrupt the video, or point to content that has nothing to do with what was just watched. This guide explains both tools step by step, so you can use them deliberately in every video. What You Will LearnWhat end screens and cards are, and when each one works best How to plan an end screen that matches the video's topic How to add and time cards so they help, not interrupt How to choose the right next video, playlist, or subscribe prompt How to record a simple closing that makes end screens feel natural How to check end screen and card clicks and improve weak onesStep 1: Understand the Difference Between End Screens and Cards What to do: End screens appear only at the end of a video and can include several elements at once, such as a video, a playlist, and a subscribe button. Cards appear during a video, one at a time, as a small teaser that viewers can tap to expand. Think of end screens as a closing menu, and cards as helpful signposts during the journey. How to do it in simple steps:Use an end screen to suggest the single most relevant next step after the video ends. Use a card when a viewer might want more detail on a point you mention mid-video. Keep end screens for the final seconds, after the main content is finished. Limit cards to moments when they add value, not every minute of the video.Practical example: In a video about making soup, a card at the moment you mention stock could link to a video on homemade stock. At the end, an end screen could link to the full “Healthy Dinners” playlist and a subscribe button. The card helps during the video; the end screen guides the next session. Common mistake to avoid: Treating cards and end screens as the same thing, or adding both everywhere. Too many cards annoy viewers and pull them away mid-video, while an end screen that appears before the content ends can feel like the video stopped early. Illustrative image: End screens guide the next step; cards help during the video. This is an illustrative image, not a screenshot of your channel or another creator's work. Step 2: Plan the End Screen Before You Record What to do: Decide what the end screen will promote before you film, so you can leave 20 seconds of clean, uncluttered video at the end for it. If the ending is busy, fast-moving, or full of text, end screen elements will be hard to see and tap. How to do it in simple steps:Choose one next video and one playlist that match the video's topic. Plan a simple closing shot, such as you speaking to the camera with a plain background. Leave the last 20 seconds free of important text, faces, or fast movement where elements will sit. Write one closing sentence that names the next video, such as “Next, watch part two.”Practical example: A creator ends a guitar lesson standing with the guitar, saying, “Next, try the chord changes video linked here.” The screen stays calm for 20 seconds, so viewers can see and click the video element without the picture changing underneath it. Common mistake to avoid: Adding an end screen to a video that ends abruptly, with credits rolling or a fast montage. Elements placed over busy footage are hard to read, and viewers leave before they notice the next video. Illustrative image: A calm, planned ending gives end screens room to work. This is an illustrative image, not a screenshot of your channel or another creator's work. Step 3: Add End Screen Elements in YouTube Studio What to do: In YouTube Studio, open the video editor, choose End screen, and add elements for a video, a playlist, and a subscribe button. Place them where they do not cover faces or important visuals, and check them on both desktop and mobile previews. How to do it in simple steps:Open YouTube Studio, select the video, and open the editor's End screen section. Add a video element for the most relevant next video, or a playlist element for a series. Add a subscribe element in a corner where it is visible but not in the way. Set the timing so elements appear in the last 20 seconds, not earlier. Save, then watch the ending on a phone and a computer to check placement.Practical example: A beginner photography video might use a video element on the left for “Composition Basics,” a playlist element on the right for “Phone Photography Basics,” and a small subscribe circle in the corner. A viewer has two clear next steps, not five competing choices. Common mistake to avoid: Filling the end screen with four or five elements that all compete for attention. When everything is promoted, nothing stands out. Two or three well-chosen elements outperform a crowded screen. Illustrative image: Two or three clear elements beat a crowded end screen. This is an illustrative image, not a screenshot of your channel or another creator's work. Step 4: Time Cards to Moments When Viewers Want More What to do: Add cards at moments when a viewer is likely to want more detail, such as when you mention a related technique, a product, or a previous video. Say the card out loud, briefly, so viewers know to look for it. How to do it in simple steps:Watch your edited video and note two or three moments where a related video would help. In YouTube Studio, add a card at each moment, linking to the most relevant video or playlist. Mention the card in your voiceover, such as “I have a full video on this linked in the corner.” Avoid cards in the first 30 seconds, when viewers are still deciding whether to stay.Practical example: A travel video mentions packing light. At that moment, a card links to a full packing video. Viewers who care can click; viewers who do not can ignore the small notice and keep watching. The card helps without forcing anyone away. Common mistake to avoid: Adding a card every minute, or linking cards to unrelated videos just to get clicks. Frequent, irrelevant cards feel like interruptions, and viewers learn to ignore them, or leave the video entirely. Illustrative image: A well-timed card appears when viewers want more detail. This is an illustrative image, not a screenshot of your channel or another creator's work. Step 5: Choose the Right Next Video, Not Just Your Latest Video What to do: The next video you promote should be the one most likely to keep this viewer watching. That is usually the next video in a series, or a video on the same problem, not simply your most recent upload. How to do it in simple steps:Ask: after watching this video, what question is the viewer most likely to ask next? Promote the video that answers that question, even if it is older. If the video is part of a series, promote the next part, not a random video. Use a playlist element when several videos together answer the next question.Practical example: A viewer finishes a video on sourdough starter. The best next video is “Your First Sourdough Loaf,” not the creator's latest video about a different bread. Relevance keeps the session going; novelty alone does not. Common mistake to avoid: Always promoting your latest video in every end screen. Viewers who just watched a beginner tutorial may not care about your latest advanced video, and will leave instead of clicking. Illustrative image: The right next video answers the viewer's next question. This is an illustrative image, not a screenshot of your channel or another creator's work. Step 6: Check Clicks and Improve Weak End Screens What to do: In YouTube Analytics, check end screen element clicks and card clicks. If few viewers click, the problem may be the choice of video, the placement, or a closing that does not invite a click. How to do it in simple steps:Open Analytics for a video and look at end screen and card click rates. Compare videos: which end screens earn clicks, and which earn almost none? For weak ones, change one thing: the promoted video, the placement, or the closing sentence. Re-check after a few weeks, and keep the changes that improve clicks.Practical example: A creator finds that an end screen promoting a playlist earns more clicks than one promoting a single unrelated video. They switch future end screens to playlists for series videos, and single videos only when one video is the obvious next step. Common mistake to avoid: Adding end screens once and never checking them. A broken link, an outdated video, or a poorly placed element can sit for months, quietly losing viewers who would have kept watching. Illustrative image: Click data shows which end screens actually guide viewers onward. This is an illustrative image, not a screenshot of your channel or another creator's work. Checklist for End Screens and CardsEnd screen planned before recording, with 20 seconds of calm footage at the end Two or three elements only: a relevant video or playlist, plus subscribe Elements placed where they do not cover faces or key visuals, checked on mobile Cards timed to moments when viewers want more detail, not in the first 30 seconds Next video chosen by relevance and viewer need, not by recency Click rates checked, with one improvement per video where clicks are lowFrequently Asked Questions How long should an end screen last? End screens can last up to 20 seconds, and most creators use the full final 20 seconds. Shorter end screens give viewers less time to notice and click, so use the full window when you can. Can I add end screens to Shorts? End screens are a feature for long-form videos. Shorts use a different system, with related video links and channel links, so plan Shorts endings separately and do not expect the same elements to appear. How many cards should I use in one video? Two or three well-timed cards are usually enough for a 10-minute video. More than that risks distracting viewers, especially if the cards are not closely related to the moment they appear. Do cards and end screens work on mobile? Yes, both work on mobile, but placement matters more on a small screen. Always preview on a phone, because an element that looks fine on desktop may cover a face or text on mobile. What if my video is too short for an end screen? Videos need to be long enough to include an end screen in the final seconds. If a video is very short, focus on a strong description and a clear verbal suggestion of the next video, and save end screens for longer videos. End screens and cards are not tricks. They are signposts. When they point to the right next video, at the right moment, and in a clear, uncluttered way, viewers stay longer, learn more, and come back for the next video in the series.

- CreatorPlaybook Team
- 25 Oct, 2026
How to Use Playlists to Increase Watch Time
Related guides: End Screens and Cards: Complete Guide, How to Make a Channel Trailer, and Audience Retention: How to Keep Viewers Watching. A playlist is a simple tool with a powerful effect: it turns one view into a viewing session. When a viewer finishes a video, YouTube can automatically play the next video in a playlist, instead of sending the viewer elsewhere. That extra video, and the one after it, adds watch time, helps viewers learn a topic in order, and gives new subscribers a clear path through your channel. This guide shows you how to use playlists deliberately, not just as a folder for old videos. You will learn how to group videos by topic and journey, how to order them for beginners, how to name and describe them for search, and how to promote them in videos, end screens, and on your channel page. What You Will LearnWhy playlists increase watch time and session length How to group videos into series that viewers can follow in order How to write playlist titles and descriptions that help search and browsing How to order videos so beginners are not lost and advanced viewers are not bored How to feature playlists on your channel page and in videos How to review playlist performance and improve weak playlistsStep 1: Group Videos by One Topic and One Journey What to do: A good playlist has one clear topic and one clear journey, such as beginner to advanced, or a complete project from start to finish. Viewers should know, from the title alone, what they will learn by watching the whole playlist. How to do it in simple steps:List your videos and group them by the problem they solve. Choose groups that contain at least four or five related videos. Give each group one topic, such as “Phone Photography Basics” or “Beginner Guitar Chords.” Remove videos that do not fit, even if they are popular, because they break the journey.Practical example: A cooking channel might create “Healthy Dinners in 20 Minutes” with ten related recipes, instead of one giant playlist called “All Videos.” A viewer who enjoys one dinner recipe can watch the next one without searching, and the channel earns extra watch time from the same visit. Common mistake to avoid: Creating one playlist for everything, or dozens of playlists with only one video each. A giant playlist has no focus, and a one-video playlist has no next step. Aim for focused playlists with enough videos to make a session worthwhile. Illustrative image: One topic and one journey make a playlist easy to follow. This is an illustrative image, not a screenshot of your channel or another creator's work. Step 2: Order Videos So Beginners Can Follow Along What to do: Order playlist videos from easiest to hardest, or in the order a viewer needs them to complete a project. The first video should be welcoming and useful on its own, so new viewers are not confused by advanced terms. How to do it in simple steps:Put the most beginner-friendly, broadly useful video first. Arrange the rest in learning order, not in upload order. Check that each video refers to the next one, or at least does not assume knowledge from a later video. Update the order when you publish a new video that belongs in the middle of a series.Practical example: A photography playlist might run: light, composition, focus, editing, portraits, and landscapes. A viewer who starts at light can follow the whole journey. If the playlist started with advanced editing, beginners would leave after one video. Common mistake to avoid: Leaving playlists in default upload order, with newest first. Newest first often puts advanced follow-ups before the beginner videos they depend on, which confuses new viewers and shortens sessions. Illustrative image: Learning order beats upload order for a helpful playlist. This is an illustrative image, not a screenshot of your channel or another creator's work. Step 3: Write Clear Playlist Titles and Descriptions What to do: Write playlist titles that include the topic and the benefit, and descriptions that explain who the playlist is for and what viewers will learn. Playlists can appear in search, so clear wording helps new viewers find them. How to do it in simple steps:Write a title with the topic plus a benefit, such as “Beginner Phone Photography: Light, Composition, and Editing.” Write a two- or three-sentence description: who it is for, what it covers, and in what order. Use natural keywords from the topic, without stuffing the description with repeated phrases. Add a note at the end of the description pointing to a related playlist, if you have one.Practical example: A vague title, “My Videos 1,” tells viewers nothing. A clear title, “How to Start a Garden in Small Spaces,” tells a new viewer exactly what to expect, and a description that lists the steps — soil, seeds, watering, and harvesting — helps them decide to watch the whole series. Common mistake to avoid: Using playlist titles that only make sense to you, such as “Stuff” or “2025.” Searchers and new viewers cannot guess what those playlists contain, so they will not click, even if the videos inside are excellent. Illustrative image: A clear playlist title tells viewers what they will learn. This is an illustrative image, not a screenshot of your channel or another creator's work. Step 4: Link Playlists Inside Videos and End Screens What to do: A playlist only increases watch time if viewers know it exists. Mention it at the end of related videos, add it to end screens where possible, and link it in descriptions and pinned comments. How to do it in simple steps:At the end of a video, name the playlist and the next video in it, in one sentence. Use an end screen element that points to the playlist or to the next video in the series. Add the playlist link to the video description, near the top, with a short label. When a viewer asks a question covered by a playlist, reply with that playlist link.Practical example: A creator ends a video with, “This was part one of Phone Photography Basics. Part two is about composition, and the full playlist is linked below.” A viewer who enjoyed part one now has one clear click to continue, instead of having to search for part two. Common mistake to avoid: Creating playlists and never mentioning them. Playlists hidden only on your channel page will help some viewers, but most viewers will never find them unless you point to them inside videos and descriptions. Illustrative image: Mentioning a playlist at the end turns one view into a session. This is an illustrative image, not a screenshot of your channel or another creator's work. Step 5: Feature Playlists on Your Channel Page What to do: Arrange your channel page so new visitors see your best playlists first. A well-organised channel page acts like a shop window: it shows visitors what you offer and where to start. How to do it in simple steps:Choose two or three playlists that best represent your channel. Feature them as sections on your channel home page, in order of importance. Put a beginner playlist first, so new visitors are not overwhelmed. Update the featured playlists when you publish a stronger series.Practical example: A fitness channel might feature “Beginner Workouts at Home” first, then “Healthy Meals in 20 Minutes,” then “Beginner Strength Training.” A new visitor can immediately see the channel's main topics and start with the easiest series. Common mistake to avoid: Leaving your channel page on default settings, with random uploads in no order. New visitors who cannot quickly understand what you offer are less likely to subscribe, even if individual videos are good. Illustrative image: Featured playlists help new visitors know where to start. This is an illustrative image, not a screenshot of your channel or another creator's work. Step 6: Review Playlist Performance and Improve Weak Ones What to do: In YouTube Analytics, check which playlists earn views and watch time, and which ones viewers abandon quickly. A playlist with low completion may need better ordering, a clearer title, or a stronger first video. How to do it in simple steps:Open Analytics and look at playlist views, watch time, and average view duration. Note which playlists keep viewers for several videos, and which lose them after one. For weak playlists, check the first video: is it clear, welcoming, and representative? Improve one thing at a time: reorder, retitle, or replace the first video, then re-check after a month.Practical example: A playlist loses most viewers after video one, because video one is a long, advanced tutorial. Moving a shorter, beginner-friendly video to the front, and retitling the playlist to match it, can improve completion without filming anything new. Common mistake to avoid: Judging a playlist only by total views. A playlist with many views but short sessions may be less valuable than a smaller playlist that keeps viewers watching for several videos. Watch time and session length matter more than clicks alone. Illustrative image: Playlist data shows which series keep viewers watching. This is an illustrative image, not a screenshot of your channel or another creator's work. Checklist for Playlists That Increase Watch TimeOne clear topic and journey per playlist, with at least four videos Videos ordered from easiest to hardest, not newest first Clear title and description, with topic and benefit stated Playlist mentioned at the end of related videos and in descriptions Best playlists featured on the channel page, beginner series first Playlist performance reviewed, with one improvement per monthFrequently Asked Questions How many playlists should a small channel have? Start with three to five focused playlists, covering your main topics. That is enough to organise your library without overwhelming viewers. Add new playlists only when you have a genuine series to put in them. Can a video belong to more than one playlist? Yes. A video can appear in several playlists if it genuinely fits each one. For example, a video on natural light could belong to both “Phone Photography Basics” and “Video Lighting on a Budget,” if it helps viewers in both journeys. Do playlists help with search? Playlists can appear in search results, especially when their titles and descriptions are clear and match what viewers search for. They are not a replacement for good video titles, but they give your content another way to be found. Should I use autoplay? Playlists can play automatically to the next video, which helps watch time, but viewers can also turn autoplay off. Focus on making the next video genuinely relevant, so viewers choose to continue even without autoplay. What if I only have a few videos? Start with one playlist for your main topic, even with three or four videos, and add to it as you publish. A small, focused playlist is still useful, and it grows into a stronger series over time. Playlists work because they remove friction. When the next video is obvious, relevant, and easy to play, viewers stay longer, learn more, and are more likely to subscribe. Group your videos by journey, order them for beginners, name them clearly, and point viewers to them in every related video.