Showing Posts From
Troubleshooting
 CreatorPlaybook Team
- 31 Oct, 2026
YouTube Channel Not Growing? Diagnose the 4-Stage Analytics Bottleneck in Order
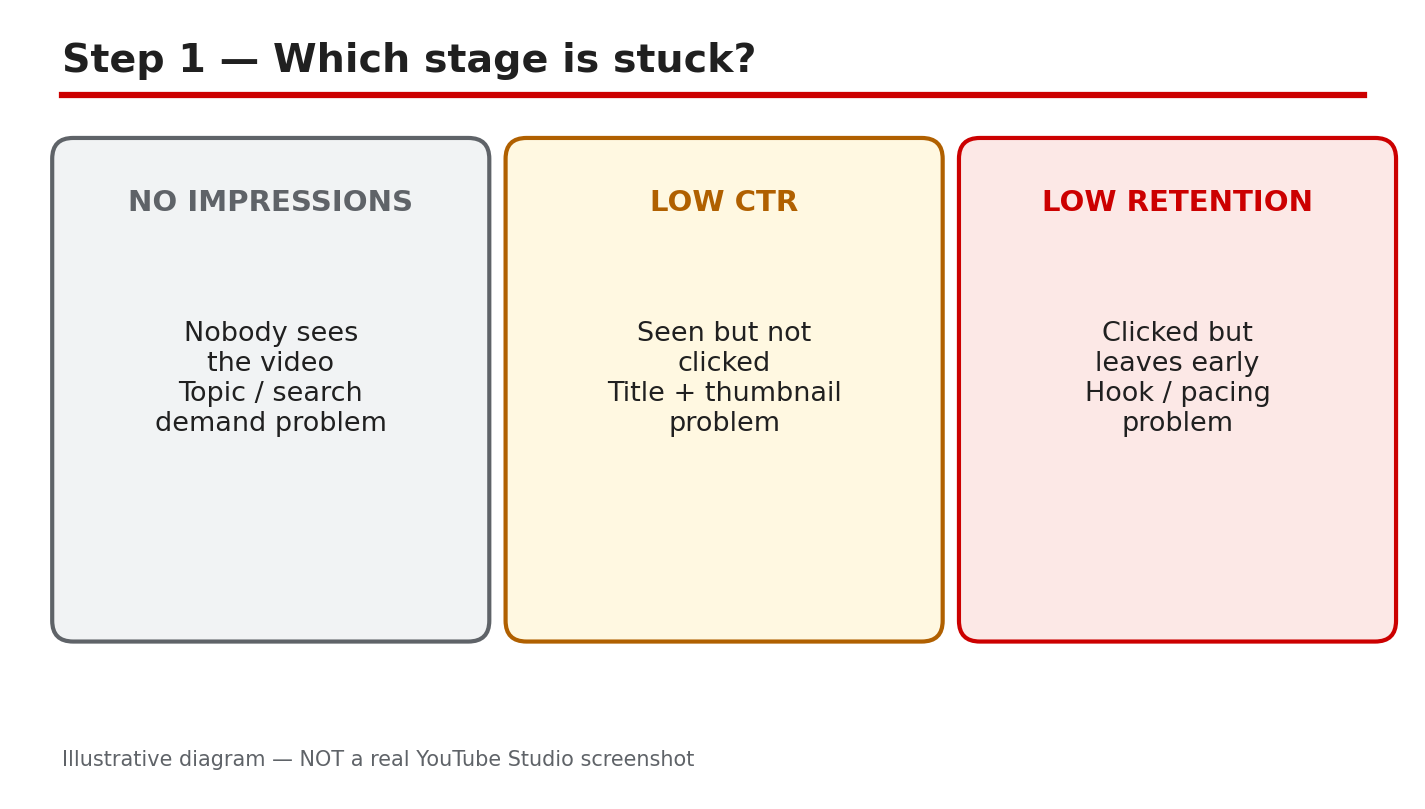
Your channel is not growing, but the views graph does not tell you why. A channel can stall at four different stages, and each stage needs a different fix. YouTube Analytics shows the chain in order: impressions, click-through rate, retention, then subscribers. If nobody sees your video, the thumbnail is not the problem. If people see it but do not click, the title and thumbnail are. If they click but leave in ten seconds, the opening is. If they watch but never subscribe, the channel is giving them no reason to return. This guide walks the chain in order, so you fix the stage that is actually broken. What You Will Learn In this guide you will learn how to find the stage where your channel stalls, how to read impressions, click-through rate, retention, and subscriber data in Analytics, and how to fix one stage at a time and measure the result over seven days. Step 1 - Check Impressions First What to do: Open YouTube Studio, go to Analytics, open the Reach tab, and look at impressions for your last five videos. Compare them with your best recent video, not with a large channel. How: Impressions count how often YouTube shows your thumbnail to viewers. As reported, YouTube Help describes impressions as the number of times a thumbnail is shown, so a low number means YouTube is showing the video to few people. Compare impressions per video, not the channel total. For more, see how to read YouTube Analytics. Example: A creator's new video had only 300 impressions in a week while her older videos had 4,000 each. She checked the topic and found almost nobody was searching for it, so she remade the idea around a question people ask. Common mistake: Blaming the thumbnail when impressions are near zero. A thumbnail cannot earn clicks YouTube never shows. Fix the topic and the search demand first.Illustrative diagram (mock-up, not a real YouTube Studio screenshot): the four-stage bottleneck chain in order. Step 2 - Fix the Click-Through Rate What to do: Pick the video with high impressions and low clicks, then test a new thumbnail and title on a fresh upload. Change one thing at a time so you know what worked. How: Click-through rate is the share of impressions that turn into clicks. As reported, YouTube Help explains that it shows how often viewers watched a video after seeing its thumbnail. A rate below your channel average means the thumbnail is not promising the video well. Make the thumbnail readable at small size, with a title that promises the benefit. For more, see this guide to how to improve your click-through rate. Example: A creator had 20,000 impressions and a 2% click-through rate. She rewrote the title to promise the benefit, and the rate rose to 4% on the next video about the same topic. Common mistake: Changing the thumbnail and the title and the topic all at once. You will never know which change fixed the clicks.Illustrative diagram (mock-up, not a real YouTube Studio screenshot): a clear title and thumbnail earn the click. Step 3 - Hold Viewers Past the First 30 Seconds What to do: Open the retention graph for your last three videos and find where most viewers leave. Rewrite the opening so the promise of the video lands in the first ten seconds. How: Retention is the share of a video your viewers actually watch, shown moment by moment in Analytics. As reported, YouTube counts a view the moment a video starts to play, so the early seconds decide everything. Start with the outcome, cut the long intro, and promise the result in one sentence. Example: A creator lost 60% of viewers in the first thirty seconds. She cut a 40-second channel intro, started with the result, and her average view duration doubled on the next video. Common mistake: Asking for likes and subscriptions before the video has delivered anything. Earn the first minute, then ask.Illustrative diagram (mock-up, not a real YouTube Studio screenshot): most viewers decide in the first thirty seconds. Step 4 - Turn Watchers into Subscribers What to do: Check which videos bring subscribers in Analytics, then compare them with videos that get views but no subscribers. Make more of the first kind and give viewers a clear next video to watch. How: Subscribers come from viewers who expect more of the same value, not from one viral video. Viewers subscribe when the channel has a clear topic, a regular pattern, and a next video they already want. Add an end screen that points to a related video, and say at the end of the video what the next one covers. Example: A creator got 50,000 views on a viral video but only 40 subscribers, because the video had nothing to do with the rest of the channel. Her next series on one topic brought 400 subscribers from 8,000 views. Common mistake: Chasing viral topics that do not match the channel. Random viewers leave, and the subscribers you gain do not watch the next video.Illustrative diagram (mock-up, not a real YouTube Studio screenshot): subscribers come from viewers who want the next video. Step 5 - Fix One Stage at a Time What to do: Write down which stage is broken, change only the part that controls it, and publish the next video with that one change. Do not redesign the channel while you are testing. How: The chain runs in order, so a fix at the wrong stage wastes the effort. If impressions are low, a better thumbnail changes nothing. If retention is low, more impressions only bring more people who leave early. Work the bottleneck first, and keep a note of what you changed so you can trace any change in the numbers back to it. Example: A creator changed her thumbnail, title, opening, and upload time in the same week. Views rose, but she had no idea which change did it, so she could not repeat it. Common mistake: Fixing the stage you enjoy fixing, not the stage the numbers show is broken. Check the chain before you choose.Illustrative diagram (mock-up, not a real YouTube Studio screenshot): fix one stage at a time, then check the next stage. Step 6 - Measure for Seven Days, Then Repeat What to do: Wait seven days after the change, then compare the stage number with the same number from before the change. Use the same video length and topic type for a fair comparison. How: Seven days is enough for YouTube to show the video to its usual audience. Compare the same stage on the same kind of video, not a new video against a viral one. If the stage number moved the right way, keep the change and move to the next stage. If it did not move, change one thing again. Example: A creator rewrote only her titles and waited a week. Click-through rate rose from 3% to 5%, so she kept the new title style and moved on to fixing retention. Common mistake: Judging a change after one day, when YouTube has barely shown the video. Wait the full seven days before you decide.Illustrative diagram (mock-up, not a real YouTube Studio screenshot): measure seven days, then repeat the check. Your Channel Growth ChecklistBottleneck stage found in Analytics, in order: impressions, CTR, retention, subscribers. Only the broken stage was changed, one thing at a time. Click-through rate checked against the channel average. Opening rewritten so the promise lands in ten seconds. Seven days waited before judging the fix.Frequently Asked Questions Why is my channel not growing even though I upload every week? Uploading more does not fix a broken stage. Check the chain in order — impressions, click-through rate, retention, subscribers — and fix the first stage that is weak. What is a good click-through rate on YouTube? It depends on the channel and the topic, so compare a video with your own average, not with another channel. If the rate is below your average, the thumbnail or title is the stage to fix. How long should I wait before judging a change? Seven days, as this guide recommends. YouTube needs time to show the video to its usual audience, and one day of data is too noisy to trust. Should I fix impressions or retention first? Fix whichever comes first in the chain. Impressions come before clicks, and clicks come before retention, so work the earliest weak stage first. SourcesYouTube Help, How to understand your video reach: support.google.com/youtube/answer/9314355 (verified live 31 October 2026). CreatorPlaybook, Understanding YouTube Analytics: creatorplaybook.blogspot.com/2026/10/understanding-youtube-analytics.html CreatorPlaybook, How to Improve Click-Through Rate: creatorplaybook.blogspot.com/2026/10/how-to-improve-click-through-rate.html
- CreatorPlaybook Team
- 30 Oct, 2026
YouTube Scheduled Video or Premiere Not Publishing? Why It Misses the Start Time
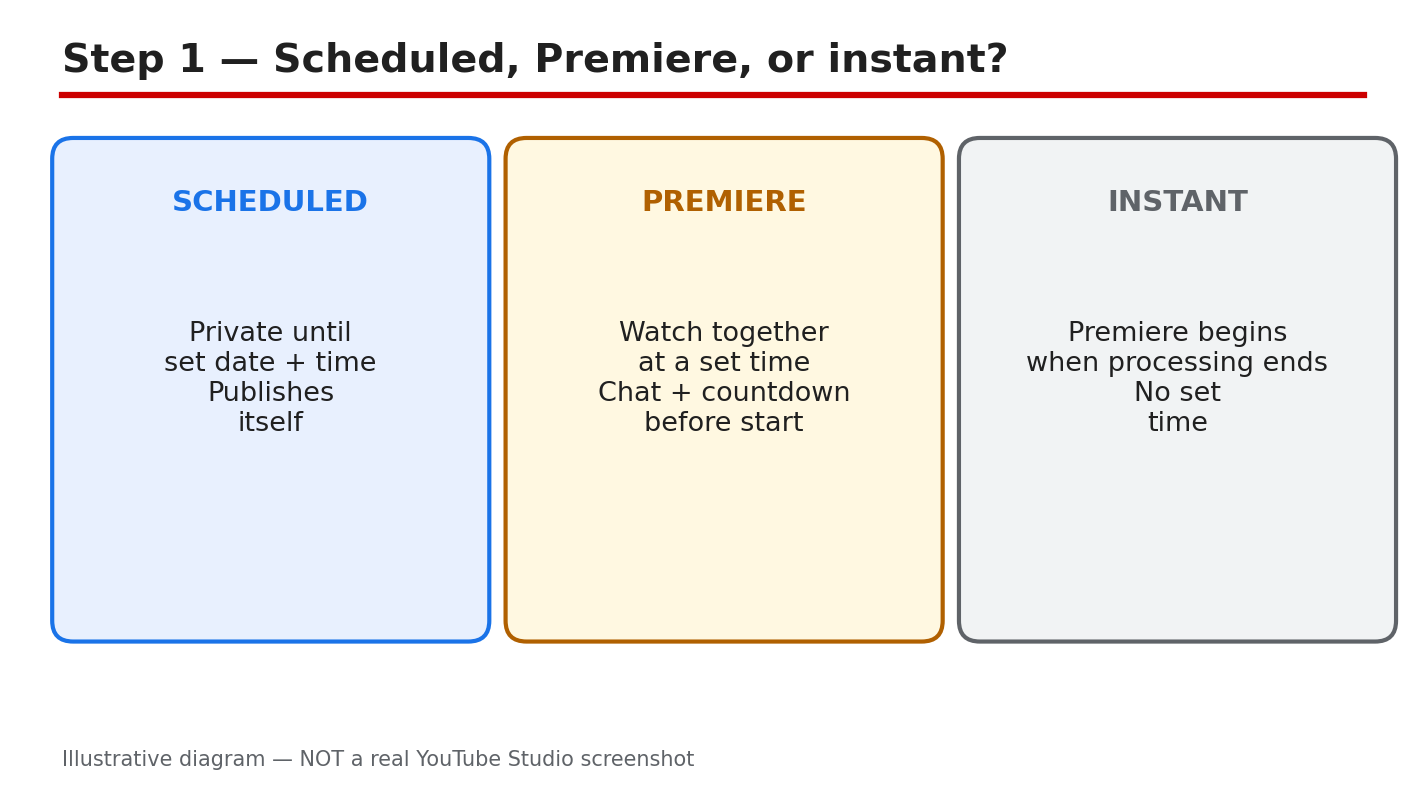
You set the time, told your viewers, and counted down, but when the hour came, nothing happened. A scheduled video or a Premiere can miss its start for a few simple reasons, and most of them are easy to prevent once you know where to look. Most misses come from three causes, and all three are easy to check. This guide explains the difference between a scheduled video, a Premiere, and an instant Premiere, shows you the checks to run the day before, and gives you a plan for the day itself. Work through the six steps, and your next video will start on time. What You Will LearnHow a scheduled video, a Premiere, and an instant Premiere differ. The checks to run the day before, not five minutes before. Why processing, time zones, and format limits delay a start. What to do when a Premiere is stuck at start time. A Premiere-day plan you can reuse for every launch.Step 1: Tell the Three Release Types Apart A scheduled video is a normal upload with a date and time attached. You upload it, set it to go Public at the chosen time, and it stays Private until then. A Premiere is different: your viewers watch together at a set time, with a countdown, a live chat, and a shared watch page. An instant Premiere is the third type: it begins as soon as processing finishes, instead of at a set date and time. If you only want the video to go live at a set time, a scheduled upload is enough, and there is no countdown for viewers to join. Example: you schedule a tutorial for Friday 6 p.m. and it goes Public on its own. For a countdown and live chat, set it as a Premiere instead. Common mistake: calling every scheduled upload a Premiere. Figure 1: Illustrative diagram comparing a scheduled video, a Premiere, and an instant Premiere. This is a mock-up, not a real YouTube Studio screenshot. Step 2: Check Everything Before Start Time Run these checks the day before, not five minutes before the start. In YouTube Studio, go to Content, open the video row, and check the upload and processing status. On the watch page, open Settings, then Quality, to confirm HD is ready. Then re-read the scheduled date, time, and time zone. Finally, confirm the video is eligible for a Premiere: Shorts are not supported, neither are 360 or VR180 videos, and neither is output over 1080p. Also check that the video is not still uploading, because a schedule cannot start a file that has not finished uploading. Example: on Thursday, confirm HD is ready and the time reads Friday 6 p.m. in your own time zone. Common mistake: checking the schedule while travelling and reading the time in the wrong zone. Figure 2: Illustrative diagram of the pre-start checks: processing status, date, time, time zone, and eligibility. This is a mock-up, not a real YouTube Studio screenshot. Step 3: Learn Why It Misses the Time The most common cause is unfinished processing. YouTube publishes the low-quality version first and adds HD later, so a video can be live but not finished. A 60-minute 4K video at 30 frames per second can take up to 4 hours to finish high-resolution processing, and 60 frames per second takes longer. A longer video, a higher resolution, and a higher frame rate all add processing time, and busy traffic on YouTube can slow it further. The second cause is the wrong time zone: the video is fine, but the clock was set for another zone. The third cause is format: Shorts, 360 and VR180 videos, and output over 1080p are not supported for Premieres, as YouTube Help states. Example: you upload a 4K video at 5 p.m. and schedule the Premiere for 7 p.m., but the video is still processing at 7 p.m. Common mistake: uploading an hour before a Premiere and assuming the schedule guarantees a start. Upload hours early instead. Figure 3: Illustrative diagram of the three delay causes: processing, time zone, and unsupported format. This is a mock-up, not a real YouTube Studio screenshot. Step 4: Run the Pre-Premiere Checks Run this list the day before, and again three hours before the start. First, confirm processing has finished and HD is available in the Quality menu. Second, re-read the date, time, and time zone, and compare them with the time you announced to your viewers. Third, confirm the format is supported: a regular video at 1080p or lower, not a Short, and not a 360 or VR180 video. Fourth, check for anything that can block publishing, such as a Community Guidelines strike. YouTube Help says a strike can stop a Premiere from publishing during the penalty period. If anything on the list fails, move the start time and tell your viewers before the countdown begins. Example: three hours before the start, the quality menu tops out at 360p, so you move the Premiere later and tell viewers in a Community post. Common mistake: skipping the three-hour check because the video looked fine yesterday. Figure 4: Illustrative diagram of the pre-Premiere checklist: processed, time correct, format supported, no block. This is a mock-up, not a real YouTube Studio screenshot. Step 5: What to Do If It Is Stuck Check the processing status before you panic. Processing may finish late, and a Premiere can begin once the video is ready. Do not delete the video, and do not upload a second copy in a rush. If the delay is long, re-schedule the Premiere and tell your viewers in a Community post and on the watch page. If the audience is waiting and the wait is urgent, start a normal live stream instead and play the video there. Tell viewers what happened and when the new start time is, so they come back instead of leaving. Example: the countdown ends but the video does not play, so you post an update, move the Premiere by one hour, and your viewers return. Common mistake: re-uploading the same video while the first copy is still processing, which splits the audience. Figure 5: Illustrative diagram of the stuck-Premiere options: wait, re-schedule and tell viewers, or go live instead. This is a mock-up, not a real YouTube Studio screenshot. Step 6: Follow a Premiere-Day Plan Upload the video the day before and keep it Private until the start. Confirm HD has finished three hours before the start. Open the watch page and check the date, time, and time zone one last time. Be in the chat five minutes early, pin a comment with your key links, and stay after the Premiere to reply to the first comments. After the Premiere ends, the video stays as a regular upload, and the chat replay is available. Keep the schedule unchanged on the day itself, unless a check fails. Example: your Premiere is Saturday 6 p.m., so you upload on Friday, confirm HD on Saturday at 3 p.m., and join the chat at 5:55 p.m. Common mistake: leaving the chat empty until the video starts. The countdown is part of the event. Figure 6: Illustrative diagram of the Premiere-day plan: upload early, confirm HD, join chat early, pin the replay. This is a mock-up, not a real YouTube Studio screenshot. Quick ChecklistUploaded the video the day before, as Private. Confirmed HD is finished three hours before the start. Checked the date, time, and time zone twice. Confirmed the format is supported for Premieres. Checked for strikes or restrictions that can block publishing. Joined the chat five minutes early and pinned the replay.Frequently Asked Questions Why did my Premiere not start at the scheduled time? Unfinished processing is the most common reason. YouTube publishes the low-quality version first and adds HD later, and a 60-minute 4K video at 30 frames per second can take up to 4 hours to finish high-resolution processing. Upload hours early and confirm HD is ready before the start. Check the Quality menu on the watch page to see whether HD is ready. Can I Premiere a Short? No. Shorts are not supported for Premieres, and neither are 360 or VR180 videos, or output over 1080p. What is an instant Premiere? An instant Premiere begins as soon as processing finishes, instead of at a set date and time. My Premiere is stuck. Should I re-upload the video? No, not in a panic. Check the processing status first, then re-schedule and tell your viewers, or start a normal live stream if the wait is urgent. Can a strike stop my Premiere? Yes. YouTube Help says a Community Guidelines strike means the Premiere will not publish during the penalty period. Sources — Check It YourselfYouTube Help: Premiere a new video YouTube Help: Low video quality after upload Related on CreatorPlaybook: YouTube Live Streaming for Beginners
- CreatorPlaybook Team
- 30 Oct, 2026
YouTube Subscribers Dropping or Stuck? Why Your Count Falls and How to Stop It
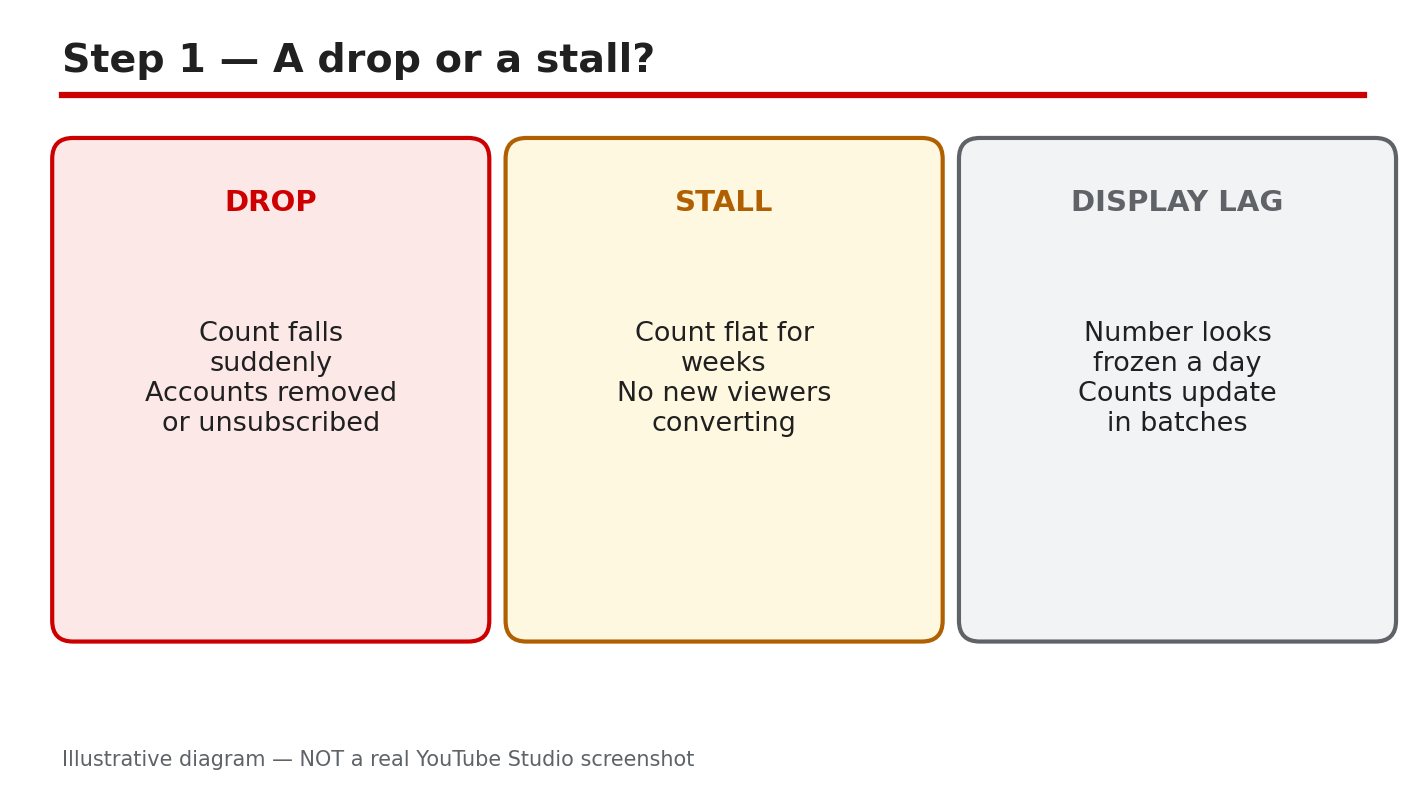
Your subscriber count falls by ten overnight, then stalls for a week. No video was deleted, no settings changed, and the comments look normal. Before you panic, know this: small drops are normal on YouTube, and a flat count often means slow growth, not lost fans. This guide helps you tell a drop, a stall, and a display lag apart. Then you will find where the number lives, learn why counts fall, audit the videos that lost subscribers, and follow a 30-day plan to stop the leak. Work in order, and do not buy subscribers. This post uses YouTube's own help pages as its source. What You Will LearnTell a real drop, a stall, and a display lag apart. Find subscribers gained and lost in YouTube Analytics. Learn why closed and spam accounts are removed from counts. Audit which videos lost subscribers and why. Stop the leak with on-topic videos, early hooks, and one subscribe ask.Step 1: Drop, Stall, or Display Lag? Three patterns look alike but need different fixes. A drop means the number fell after YouTube removed closed or spam accounts, or after viewers unsubscribed. A stall means the count is flat because new subscribers roughly match the people leaving. A display lag means the public count is rounded and updates in steps, so it can look frozen while the real count moves. Check Studio before you react, because each pattern points to a different fix. Path: YouTube Studio > Dashboard, then check the real-time subscriber card. Example: a channel showed 1,240 subscribers for three days, then jumped to 1,260. The public count updates in steps, so the stall was only a display lag. Common mistake: announcing a 'subscriber crisis' to your audience after one bad day, which only pushes more people to unsubscribe.Diagram: drop vs stall vs display lag — three patterns, three different fixes. Illustrative diagram, not a real Studio screenshot. Step 2: Find Where the Number Lives Open YouTube Studio, go to Analytics, then the Audience tab. There you will see subscribers gained and lost, and which videos gained or lost them. Compare that line with your views trend. If views are steady but subscribers fall, the problem is who the videos reach, not how many watch. If views also fall, reach is the first problem to fix. Check the last 28 days, not a single day, so one viral video does not hide the trend. Path: YouTube Studio > Analytics > Audience > Subscribers gained and lost, by video. Example: one tutorial gained 90 subscribers while a reaction video lost 40. The channel kept the tutorials and dropped the reactions. Common mistake: reading only the public count on your channel page, which is rounded and hides small daily changes.Diagram: Studio, Analytics, Audience — where subscribers gained and lost live. Illustrative diagram, not a real Studio screenshot. Step 3: Why Counts Fall Counts fall for three usual reasons. First, YouTube removes closed accounts and spam subscribers in regular checks. YouTube reports that it verifies the legitimacy of accounts and actions on your channel, and removes subscribers gained through artificial means, such as buying them. Second, viewers unsubscribe after a video that breaks your promise. A sudden topic change, a misleading title, or a long break can all push loyal viewers away. Third, bought subscribers vanish in the same clean-ups. Buying subscribers breaks YouTube's rules and the numbers never stay, so never buy subscribers or views. The public count also hides small moves because YouTube shortens it: a channel with 1,234 subscribers shows 1.23K, and the display only moves after ten new subscribers. Path: YouTube Studio > Analytics > Audience, then sort videos by subscribers lost. Example: a channel changed from cooking to gaming overnight and lost subscribers for a month. Returning to cooking stopped the loss within two weeks. Common mistake: blaming every drop on YouTube while ignoring the video that caused the unsubscribes.Diagram: three reasons counts fall — removed accounts, viewers leaving, bought subscribers removed. Illustrative diagram, not a real Studio screenshot. Step 4: Run a Subscriber Audit List your last ten videos and write down subscribers gained and lost for each one. Mark the worst three and watch their first minute. Ask four questions. Which video lost the most subscribers? Are bell subscribers still getting notified? Were recent videos off-topic for your audience? Did anyone buy subscribers or views for the channel? Answer honestly, because a fix aimed at the wrong cause wastes weeks. Keep the audit to one page so you can repeat it every month. Path: YouTube Studio > Analytics > Audience > See more, then sort by subscribers lost. Example: an audit showed one rant video lost 60 subscribers while every tutorial gained some. The channel stopped making rants. Common mistake: auditing totals instead of videos, which hides the one video doing the damage.Diagram: the subscriber audit — worst videos, bell notices, topic fit, bought subs. Illustrative diagram, not a real Studio screenshot. Step 5: Stop the Leak Three habits keep subscribers. First, stay on-topic. Keep one niche per video cluster, so a new subscriber knows what the next video will be. Second, hook early. Say the value of the video in the first 30 seconds, before the viewer decides to leave. Third, make one clear subscribe ask per video, near the moment you deliver value. Never beg for subscribers in every minute, and never buy them. A clean channel that keeps its promise grows slower at first, then holds its audience. Path: YouTube Studio > Content > video > Details, then check the title and first line match the video's topic. Example: a channel added one subscribe ask right after its best tip. Subscribers gained per video rose without changing anything else. Common mistake: asking viewers to subscribe in the first five seconds, before you have given them a reason.Diagram: stop the leak — one niche, an early hook, one subscribe ask. Illustrative diagram, not a real Studio screenshot. Step 6: Follow the 30-Day Subscriber Plan Week 1: run the audit and list your three worst videos. Week 2: publish two on-topic videos with a hook in the first 30 seconds. Week 3: reply to comments daily and pin a question that invites viewers back. Week 4: compare subscribers gained and lost with Week 1, and keep the format that gained the most. Repeat the cycle with one change at a time, so you learn what works. Expect slow, steady growth, not a sudden jump, and check the count weekly instead of hourly. Write down one lesson each week so the next cycle starts smarter. Path: YouTube Studio > Analytics > Audience > Subscribers, reviewed on Day 30. Example: a small channel followed this plan for a month. Losses fell by half, and two tutorial formats gained subscribers every week. Common mistake: copying a big channel's upload schedule instead of fixing the leak in your own videos.Diagram: the 30-day subscriber plan — audit, publish, engage, compare, repeat. Illustrative diagram, not a real Studio screenshot. Quick ChecklistDrop, stall, or lag named before any fix is tried. Audience tab checked over the last 28 days. Worst three videos listed with subscribers lost. No bought subscribers or views on the channel. Videos on-topic, hook in the first 30 seconds. One subscribe ask per video, after value is delivered.Frequently Asked Questions Is a small subscriber drop normal? Yes. YouTube regularly removes closed and spam accounts, so small drops happen on healthy channels too. Why does my public count look frozen for days? The public count is shortened and updates in steps, so it can look flat while your real-time count in Studio keeps moving. A video made people unsubscribe. Should I delete it? Usually not. Learn from it, keep it unlisted only if it truly misleads viewers, and make the next video on-topic. Can buying subscribers fix a falling count? No. Bought subscribers are removed in YouTube's checks, and buying them breaks the rules. Earn subscribers with on-topic videos instead. How often should I check my subscriber count? Weekly. Daily checks show noise, while a weekly audit shows whether the 30-day plan is working. Sources — Check It Yourself Check the facts in this guide against YouTube's own help pages.Check your YouTube subscriber count — YouTube Help How to Get Your First 1,000 Subscribers

- CreatorPlaybook Team
- 30 Oct, 2026
YouTube Channel Not Showing in Search? Why Your Videos Don't Rank and How to Fix It
You upload a video, wait a day, then search its exact title on YouTube. Nothing appears. Not on page one, not on page ten, and not even when you add your channel name. Before you assume the worst, know this: most 'invisible' videos are not banned or hidden. They are new, mismatched to what people type, set to the wrong visibility, or weak on the signals YouTube uses to rank search results. This guide walks you through six steps. You will tell the three cases apart, run a five-minute check, find why search skips your video, audit your ranking signals, judge the 'shadowban' claim fairly, and follow a seven-day plan. What You Will LearnSpot which of the three not-found cases you have. Check visibility, restrictions, and your exact-title search in five minutes. Match your title to words viewers actually type. Audit keywords, captions, click-through rate, and first-30-seconds retention. Tell a real restriction apart from the shadowban story.Step 1: Tell the Three Cases Apart A video that does not appear in search usually falls into one of three groups, and each group needs a different fix. First, a new video may simply not be indexed yet. YouTube needs time to process and rank a fresh upload, so waiting 24 to 48 hours is normal. Second, the title may use words nobody types. If your title says 'My Big Day' but viewers search 'how to start a YouTube channel', search has no match to offer them. Third, the video may be Private or Unlisted by mistake, which keeps it out of search entirely. Path: YouTube Studio > Content > click your video > Visibility. Confirm it says Public. Example: a creator titled a video 'Episode 7' and found nothing. Renaming it 'How to Edit YouTube Videos for Beginners' matched real searches within days. Common mistake: changing the title, thumbnail, and description all at once, then not knowing which change helped.Diagram: three not-found cases — new video, keyword mismatch, or wrong visibility. Illustrative diagram, not a real Studio screenshot. Step 2: Run the 5-Minute Search Check Open a private browser window, sign out of YouTube, and search your exact title in quotes. If your video appears, search is working and your problem is ranking, not indexing. Next, in YouTube Studio, open Content, click the video, and confirm Visibility is Public and no restriction or claim shows under Restrictions. Then search your main keyword without quotes and look at the top five results. Note their titles, lengths, and thumbnails. Your video must earn its place among them. Path: YouTube Studio > Content > video > Details > Visibility and Restrictions. Example: a video ranked nowhere for 'vlog', but appeared on page one for 'morning routine vlog in Hindi' once its title matched the longer phrase. Common mistake: testing search while signed in, where your watch history pushes your own videos up and hides the real result.Diagram: the five-minute check — exact-title search, visibility, restrictions, keyword, and top results. Illustrative diagram, not a real Studio screenshot. Step 3: Why Search Skips Your Video Search shows videos it expects viewers to click and keep watching. Three gaps stop most small channels. First, no keyword in the title means no match for the query. Put the main phrase near the start of the title, not buried at the end. Second, weak retention in the first 30 seconds tells YouTube viewers leave early, so it stops showing the video. Say the promise of the video in the first sentence. Third, thin channel history slows trust. A channel with fewer than 10 to 20 uploads, or a long gap between videos, has little proof that viewers stay. Path: YouTube Studio > Content > video > Analytics > Reach, then check impressions and click-through rate. Example: a tutorial kept viewers for 12 seconds on average. Moving the answer to the opening line raised it to 45 seconds, and search traffic followed. Common mistake: stuffing the title with five keywords, which reads badly and matches none of them well.Diagram: three reasons search skips a video — no keyword, weak first-30-seconds retention, thin channel history. Illustrative diagram, not a real Studio screenshot. Step 4: Run a Simple Ranking Audit Open the four numbers that decide most search results. First, does the title hold the keyword people type? Second, are captions on and accurate, so YouTube can read what the video covers? Add or correct them in YouTube Studio > Content > video > Subtitles. Third, what is the click-through rate on search impressions? A low rate means the title or thumbnail is losing the click. Fourth, how long do viewers stay in the first minute? Fix the weakest of the four before you touch anything else. Path: YouTube Studio > Analytics > Reach > Traffic source: YouTube search, then Impressions click-through rate. Example: captions were auto-generated with the wrong key phrase. Fixing three captions lines made the video appear for its main keyword the next week. Common mistake: judging a video after two days. Search data needs a full week before you call a title a failure.Diagram: the ranking audit — keyword, captions, click-through rate, and retention in one check. Illustrative diagram, not a real Studio screenshot. Step 5: 'Shadowban' or Normal? YouTube has said it does not run a shadowban system that hides channels from search. That claim is reported here as YouTube states it; this guide does not claim a shadowban exists. When a video vanishes from results, the cause is usually ordinary: a restriction, a copyright claim, a visibility mistake, or weak ranking signals. Check each one before you blame a hidden penalty. Open YouTube Studio > Content, look at the Restrictions column, and open any claim or restriction to read what it says. Fix the cause, then wait a few days before judging the result. Path: YouTube Studio > Content > Restrictions column, then open the video to read the restriction or claim. Example: a creator feared a shadowban, then found a music claim on the video. Replacing the track restored the video in search within a week. Common mistake: re-uploading the same video three times, which splits views and restarts the ranking process from zero.Diagram: shadowban or normal — check restrictions, claims, visibility, and signals first. Illustrative diagram, not a real Studio screenshot. Step 6: Follow the 7-Day Search Plan Day 1: run the five-minute check and fix visibility. Day 2: rewrite the title around one main keyword and fix captions. Day 3: improve the first 30 seconds with a clear promise. Day 4: publish a short that points viewers to the video. Day 5: answer every comment to lift engagement. Day 6: compare the video with the top five results and adjust the thumbnail. Day 7: read the search traffic in Analytics and keep the change that worked, then repeat the plan on your next video. If the video is Public, has no restriction, and still does not appear after 72 hours, contact YouTube support through YouTube Studio > Help > Contact us. Path: YouTube Studio > Analytics > Reach > Traffic source: YouTube search, checked on Day 7. Example: one channel followed this plan on three videos. Two of them reached page one for their main keyword by Day 7. Common mistake: changing the plan every day, so no single fix gets enough time to show a result.Diagram: the seven-day search plan — one clear action each day, measured on Day 7. Illustrative diagram, not a real Studio screenshot. Quick ChecklistVisibility is Public, and no restriction or claim shows. Exact-title search in a private window finds the video, or explains why not. Main keyword sits near the start of the title. Captions are on, accurate, and mention the keyword. First 30 seconds state the video's promise clearly. Search traffic checked on Day 7 before the next change.Frequently Asked Questions How long should I wait before worrying about a new video? Wait 24 to 48 hours first. If the video is Public with no restriction after that time, start the ranking audit in Step 4. Can I pay YouTube to rank higher in search? No. YouTube states it does not accept payment for better placement in organic search results. Does changing my title hurt the video? A small keyword fix helps, but changing the title daily resets what search has already learned about the video. My video plays fine but never appears. Is my channel shadowbanned? YouTube says it has no shadowban system, so check restrictions, claims, visibility, and ranking signals first. When should I contact YouTube support? After 72 hours with Public visibility and no restriction, contact support from YouTube Studio > Help > Contact us. Sources — Check It Yourself Check the facts in this guide against YouTube's own help pages.How YouTube search works — YouTube Help 0 Views on YouTube? How to Diagnose No Impressions, Low CTR, or Low Retention in 6 Steps
- CreatorPlaybook Team
- 29 Oct, 2026
YouTube Live Stream Keeps Disconnecting? Stream Health Red? Fix It
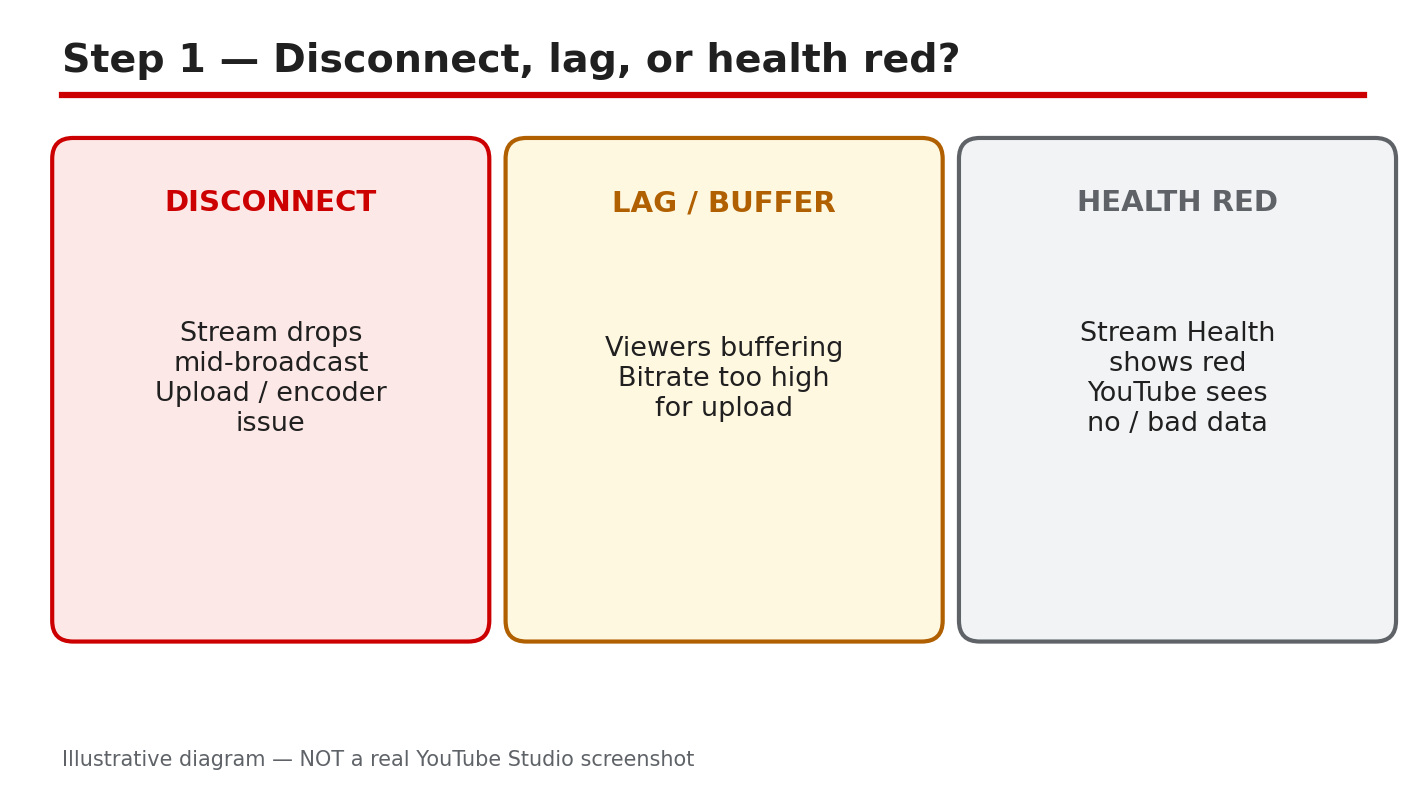
A disconnect can empty a live chat in seconds. The picture freezes, the sound drops, or the stream ends, and viewers leave before you can explain. The cause is often the connection between your encoder and YouTube, not your video idea. A bitrate too high for your upload speed, unstable Wi-Fi, or an overloaded device can each break the stream. This guide helps you tell a disconnect, lag, and a red Stream Health panel apart, check the health panel and your upload speed, and set a bitrate your connection can carry. You will test before you go live, keep a safe copy of your stream key, and learn what to do when the stream drops without ending it early. Bitrates in this guide are the Help page's recommendations for the resolution and frame rate you choose, not fixed rules for every connection. If your upload speed cannot carry the recommended bitrate, use a lower resolution or frame rate first, and let stability beat sharpness. What You Will Learn By the end, you will be able to:Tell a disconnect, lag, and red Stream Health apart. Read the Stream Health panel and test your upload speed. Match your bitrate to the Help page recommendations and your upload. Run pre-stream checks, including a safe stream key. Act calmly during a disconnect without ending the stream early. Build a stable-stream plan and record locally too.Step 1: Name the problem you see What to do: Name what viewers see before you change any setting. A disconnect means the stream drops or ends. Lag or buffering means the picture stutters while the stream stays live, often because the bitrate is too high for the upload speed. A red Stream Health panel means YouTube is receiving no data or poor-quality data, even if your own screen looks fine. Studio path: YouTube Studio > Create > Go Live > Stream. Watch the Stream Health panel and your encoder together, so you can match the sign to the panel. Example: Nina's viewers see buffering, but her stream stays live. She treats it as lag from a high bitrate, not a disconnect, and lowers the bitrate instead of ending the stream. Common mistake: Ending the stream at the first freeze. A short freeze can be lag, and ending the stream loses the viewers who were still watching.Illustrative diagram, not a real screenshot: disconnect, lag, and Stream Health red. Step 2: Check Stream Health and your speed What to do: Open the Stream Health panel and read the bitrate and frame drops it shows. Then run a connection speed test on the same device and network you will stream from, and write down the upload speed. Compare the two: if the panel shows drops while the upload speed is low, the connection, not the content, is the first suspect. Studio path: YouTube Studio > Create > Go Live > Stream > Stream Health panel. Keep the panel open while you test, so you can see changes as you make them. Example: Omar's panel shows frame drops and his upload test reads 4 Mbps. He knows a high-resolution bitrate will not fit, so he plans a lower resolution before he goes live. Common mistake: Checking speed on your phone while streaming from a PC. Test the device and network you will actually use.Illustrative diagram, not a real screenshot: Stream Health panel and speed test. Step 3: Find the usual causes What to do: Compare your settings with the Help page's recommended bitrate ranges, and treat them as recommendations, not fixed rules. The page recommends, for H.264 video: 720p at 30 frames per second, minimum 3 Mbps and recommended 8 Mbps; 1080p at 30 frames per second, minimum 5 Mbps and recommended 14 Mbps; and 1080p at 60 frames per second, minimum 6 Mbps and recommended 17 Mbps. Higher resolutions need higher ranges. If your upload speed cannot carry the range for the resolution you chose, lower the resolution or frame rate. Also check for unstable Wi-Fi and an overloaded PC or phone. Studio path: Your encoder settings for bitrate, resolution, and frame rate, checked against the Help page linked in Sources and the Stream Health panel. Example: Lee streams at 1080p and 60 frames per second, but his upload speed is 8 Mbps. He drops to 720p at 30 frames per second and the drops stop. Common mistake: Choosing 4K because the camera can shoot it. The stream needs upload speed to match, not only a camera that can record 4K.Illustrative diagram, not a real screenshot: bitrate, Wi-Fi, and overloaded device. Step 4: Run the pre-stream checks What to do: Test before you go live, including audio and movement, as the Help page advises. Check your upload speed, set the bitrate to fit it, use wired ethernet or strong Wi-Fi close to the router, and close apps that load the PC or phone. Copy the stream key from the Stream tab and save it safely. Never share it in chat, on screen, or in a screenshot. Studio path: YouTube Studio > Create > Go Live > Stream. Copy the stream key, set the encoder to fit your upload speed, and run a short private test first. Example: Ana tests for five minutes with music and walking around the room. Her panel stays green, so she knows the settings fit before viewers arrive. Common mistake: Showing the stream key on screen while setting up. Cover the key, and never post a screenshot that shows it.Illustrative diagram, not a real screenshot: pre-stream checks and stream key safety. Step 5: What to do during a disconnect What to do: Stay calm and keep talking if your audio is still live. Let the encoder try to reconnect on its own, and do not end the stream early for a short drop. If your encoder lets you change settings live, lower the bitrate or resolution to a level your upload can carry. Stability beats sharpness: a steady, softer picture keeps viewers longer than a sharp picture that keeps freezing. Studio path: Your encoder and the Stream Health panel. Watch the panel while you lower the bitrate, and wait for it to turn green before you raise settings again. Example: Sam's picture freezes for ten seconds, but his audio stays live. He keeps talking, lowers his bitrate, and the picture returns without ending the stream. Common mistake: Ending and restarting the stream again and again. Each restart splits the audience and the chat, and the same bitrate problem returns.Illustrative diagram, not a real screenshot: keep talking, reconnect, lower bitrate. Step 6: Build a stable-stream plan What to do: Write down the settings that worked: resolution, frame rate, bitrate, connection type, and device. Use those settings as your starting point for the next stream, and change only one thing at a time when you test a higher quality. Record locally too, so a disconnect does not lose the whole show. Studio path: YouTube Studio > Create > Go Live > Stream for the next stream, with your written settings and a local recording running. Example: Mia writes down 720p, 30 frames per second, and wired ethernet. Her next stream uses the same settings, records locally, and stays stable. Common mistake: Raising every setting for a big event. A special stream is the worst time to test a bitrate your connection has never carried.Illustrative diagram, not a real screenshot: written settings and local recording. Checklist: Before you go live Tick each item before you press Go Live.I have named the problem: disconnect, lag, or Stream Health red. I have checked the Stream Health panel and my upload speed. My bitrate fits my upload speed for the resolution I chose. I use wired ethernet or strong Wi-Fi. My stream key is saved safely and never shared. I record locally too, in case the stream drops.Frequently Asked Questions Why does my stream disconnect at the same time each day? A pattern can point to a network cause, such as others using the same Wi-Fi at that time. Test at that time, check the panel, and try wired ethernet or a lower bitrate. What bitrate should I use for 1080p? The Help page recommends, for H.264 video, a minimum of 5 Mbps and a recommended 14 Mbps at 30 frames per second, and a minimum of 6 Mbps and a recommended 17 Mbps at 60 frames per second. If your upload cannot carry that range, use 720p instead. Is red Stream Health always my fault? Not always. A red panel means YouTube is receiving no data or poor-quality data, usually from the connection or encoder. Check your panel, speed, and encoder first. Should I end the stream when it disconnects? No, not for a short drop. Keep talking if audio is live, let the encoder reconnect, and lower the bitrate if you can. End the stream only if it will not reconnect and the panel stays red. Do I need to be 16 to live stream? The Help page says you must be at least 16 to live stream, with a verified channel and no live-streaming restrictions in the past 90 days. Sources — Check It Yourself Check the official pages below before your next stream. No official YouTube video is embedded in this post, because no exact official video was verified live in this run.Live streaming guide: YouTube Live Streaming for Beginners Choose live encoder settings, bitrates, and resolutions Get started with live streaming
- CreatorPlaybook Team
- 29 Oct, 2026
YouTube Video Blocked in Some Countries or Worldwide? How to Fix It
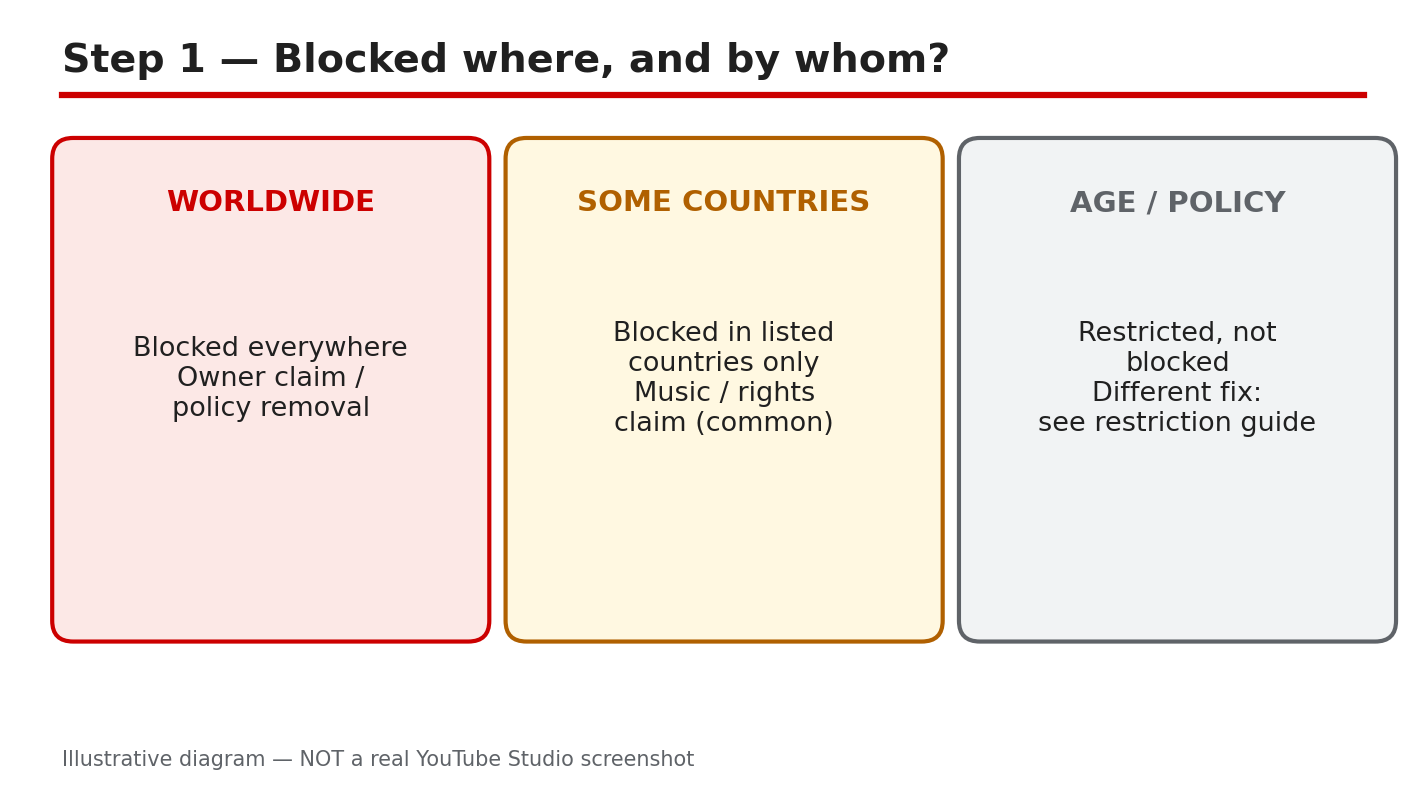
A block can feel sudden and unfair. Your video plays for you, but viewers in some countries see that it is blocked, or the video is blocked everywhere and earns nothing. The fix depends on where it is blocked, who claimed it, and whether the block is a claim, a restriction, or a removal. Acting on the wrong reason, such as disputing a licence you do not have, can waste time and make the problem worse. This guide helps you find the exact block list in YouTube Studio, read which content and owner are named, and choose the fix that matches the evidence. You will check how many territories are affected, whether the video still earns elsewhere, and whether a licence truly covers the blocked countries before you dispute, replace, or erase anything. Work slowly, and keep the claim details in front of you. What You Will Learn By the end, you will be able to:Tell a country block, a worldwide block, and a restriction apart. Find the Blocked in list and the named owner. Explain why music and footage rights differ by country. Check territories, earnings, and licence cover before acting. Replace or erase claimed audio the right way. Build a block-proof plan for your next upload.Step 1: Name the block you have What to do: Name the block before you act. A worldwide block stops the video everywhere. A block in some countries stops it only in the listed territories, while it can still play and earn elsewhere. An age or policy restriction is different: the video may play only for signed-in adults. Each type has a different fix, so write down which one your video has. Studio path: YouTube Studio > Content > Restrictions. Read the restriction type shown for the video before you open the claim. Example: Ravi's video plays in India but is blocked in Germany and France. He treats it as a country block, not a worldwide block, and checks only those two territories. Common mistake: Calling every block a strike. A claim that blocks a video is not the same as a strike, and the fixes are different.Illustrative diagram, not a real screenshot: worldwide, some countries, and restriction compared. Step 2: See the block list and the owner What to do: Open Restrictions for the video and open the claim. Read the Blocked in list, the content that was matched, and the copyright owner named on the claim. Note every territory listed, and whether different owners are named for different countries. The Help page says different claimants in different countries or regions can mean multiple claims, so do not assume one owner controls the whole video. Studio path: YouTube Studio > Content > Restrictions > click the claim > Blocked in list. Read the matched content and the owner before you choose a fix. Example: Meera opens her claim and sees one song, one owner, and 12 blocked territories. She writes down the song and the owner before she acts. Common mistake: Reading only the first territory. A list with many territories needs a different decision from a list with one.Illustrative diagram, not a real screenshot: Blocked in list, content, and owner. Step 3: Why blocks happen What to do: Match the block to its likely rights cause. Music rights are often licensed in some countries only, so a song that is cleared in one country can still be blocked in another. Sports and film footage can have separate rights by region, with a different owner in each place. A local law or policy removal is different from a rights claim. Studio path: YouTube Studio > Content > Restrictions > the claim. Use the named content and owner to judge whether the cause is music, footage, or a policy notice. Example: Tom used a song cleared for the United States, but his video is blocked in Japan. His licence did not cover Japan. Common mistake: Assuming a licence covers the whole world. Many licences cover only named countries, and the Blocked in list shows where cover ends.Illustrative diagram, not a real screenshot: music, footage, and policy causes. Step 4: Check before you act What to do: Answer four questions before you choose a fix. How many territories are blocked? Is the video still earning in the countries where it plays? Is this a claim, with a Blocked in list, or a strike or removal? Does your licence, in writing, cover the blocked countries? If you cannot answer the licence question with evidence, do not dispute. A dispute without evidence can fail and leave the block in place. Studio path: YouTube Studio > Content > Restrictions for the block list, and your licence or purchase record for the cover question. Example: Sara's video is blocked in 3 territories but earns in 40 others. She checks her licence first, before she risks the 40. Common mistake: Disputing first and checking the licence later. A failed dispute does not prove the licence, and the block stays.Illustrative diagram, not a real screenshot: territories, earnings, claim, and licence. Step 5: Fix the block with the right tool What to do: Choose the fix that matches the evidence. If the audio is the problem, use Replace song or Erase song in Studio to remove or swap the claimed audio. If you hold a licence that truly covers the blocked countries, dispute the claim and give the evidence the dispute form asks for. The Help page says credit, owning a copy, and not monetizing are not legitimate dispute reasons, so do not use them. The claimant has 30 days to respond to a dispute. Studio path: YouTube Studio > Content > Restrictions > See details > Take action. Choose Replace song, Erase song, or Dispute, and follow only the option that matches your evidence. Example: Ben's claim names one song and no licence covers it. He uses Replace song with a track from the Audio Library, and removes the claimed audio. Common mistake: Disputing because you paid for the song once. A purchase can cover only named uses or countries, so read the licence terms first.Illustrative diagram, not a real screenshot: replace song, erase song, or dispute. Step 6: Make the next upload block-proof What to do: Build the check into every upload. Use music from the YouTube Audio Library or a licence that names the countries you need, and save the licence with the project file. Before you set a video to Public, open Content > Restrictions and check for claims. After publishing, re-check Restrictions in 24 hours. If a new claim appears, fix the audio before you promote the video. Studio path: YouTube Studio > Content > Restrictions, checked before Public and again 24 hours after publishing. Example: Priya saves her Audio Library licence, checks Restrictions before Public, and re-checks the next day. Her video stays live in the countries her licence covers. Common mistake: Promoting a video before the 24-hour re-check. A late claim can block the video just as viewers start to find it.Illustrative diagram, not a real screenshot: library music, licence saved, re-check. Checklist: Before you dispute or edit Tick each item before you change the video or file a dispute.I know the block type: worldwide, some countries, or restriction. I have read the Blocked in list, the content, and the owner. I know the blocked territories and whether the video earns elsewhere. I know whether this is a claim, a strike, or a removal. My licence, in writing, covers the blocked countries, or I will fix the audio. I have not disputed with credit, a copy, or no monetization as my reason.Frequently Asked Questions Can a video be blocked in one country and earn in another? Yes. A Content ID action can apply to some countries or regions only, so a video can be blocked in the listed territories and still play and earn elsewhere. Check the Blocked in list for the exact territories. Is a blocked video the same as a strike? No. A claim can block, monetize, or track a video, while a strike comes from a removal request and carries channel penalties. Check which one your video has. Should I dispute if I gave the owner credit? No. The Help page says giving credit is not a legitimate reason to dispute. Dispute only if you have a valid reason, such as holding all the necessary rights or a licence that covers the blocked countries. How long does a dispute take? The claimant has 30 days to respond to a dispute. Note the date you filed it, do not file the same dispute again while you wait, and check Restrictions for the result. Can I keep the video and only fix the song? Yes, when the claim is about audio. Use Replace song or Erase song in Studio to remove or swap the claimed audio, instead of deleting the whole video and losing its views and comments. Sources — Check It Yourself Check the official pages below, and re-read your own claim before you act. No official YouTube video is embedded in this post, because no exact official video was verified live in this run.Copyright claim guide: YouTube Copyright Claim? How to Trim, Replace or Erase the Song — and When to Dispute Learn about copyright claims Dispute a copyright claim
- CreatorPlaybook Team
- 29 Oct, 2026
YouTube Custom Thumbnail Rejected or Not Showing? How to Fix It
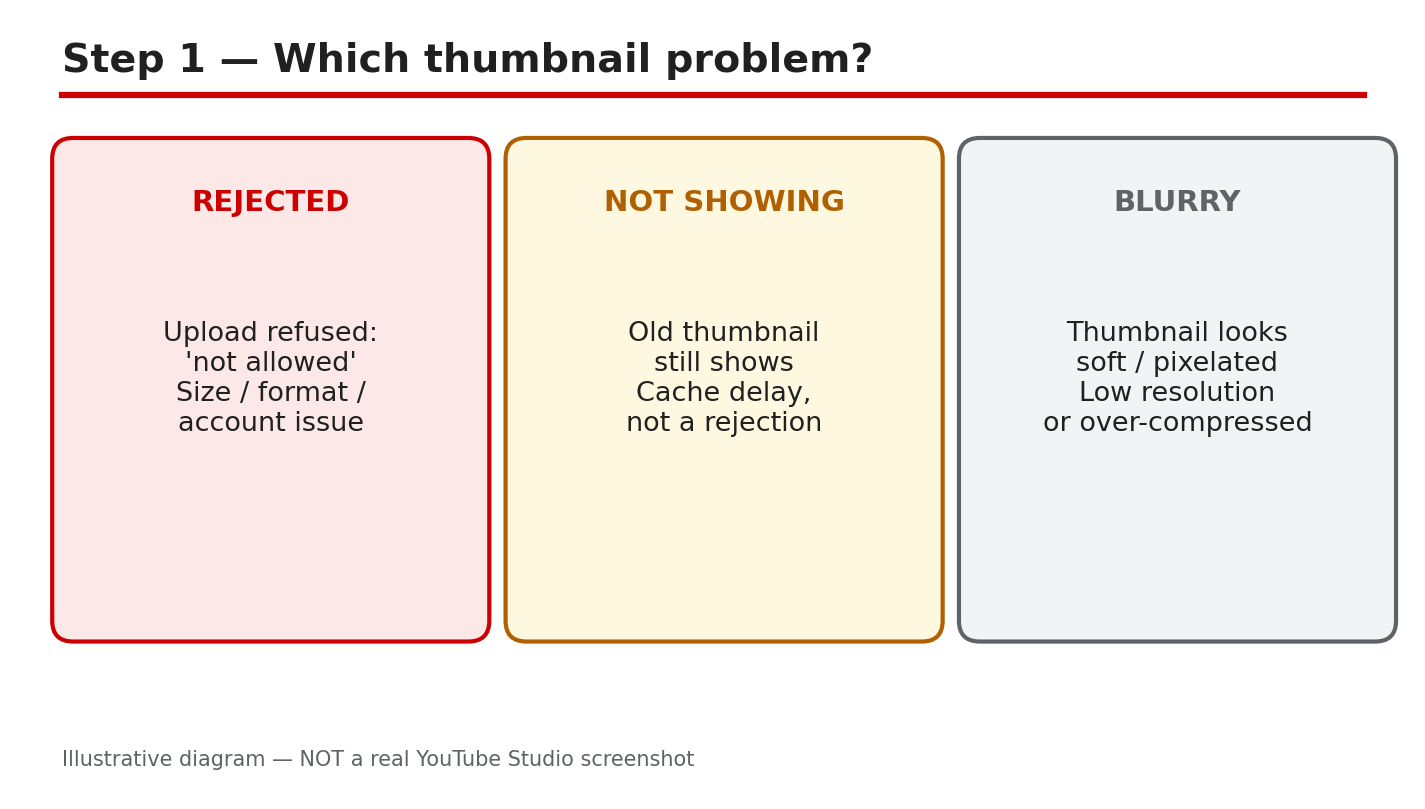
A thumbnail decides whether a viewer clicks or scrolls past. When YouTube rejects your custom thumbnail, or the new image will not show, the video loses its best chance to be seen. Most problems come from three causes: a file that breaks the size or format rules, an image that breaks a policy, or a delay before the change appears. Work in order. First, name the problem: rejected, not showing, or blurry. Next, check the file against the official rules. Then fix the image, re-upload it on the same video, and wait. Do not upload the video again, and do not keep re-uploading the same rejected image. Related reading: How to Make a YouTube Thumbnail That Gets Clicks, which explains what makes viewers click. What You Will LearnHow rejected, slow, and blurry thumbnails differ. The size, format, and ratio rules your file must meet. Which policy problems cause rejections, and how to avoid them. How to re-upload a thumbnail on the same video. What to check when the new thumbnail will not show. A simple habit for thumbnails that stay sharp and clickable.Step 1: Tell Rejected, Not Showing, and Blurry Apart What to do: Rejected means YouTube refused the upload, often with a message about the file or a policy. Not showing means the upload worked, but the old thumbnail still appears while YouTube updates every surface. Blurry means the image is low resolution or over-compressed, so text looks soft on a phone. Name the state first, because each one needs a different fix. Studio path: YouTube Studio > Content > video > Thumbnail. Look at the current thumbnail and any message shown there. Example: A creator uploads a new thumbnail and still sees the old one an hour later. The file was accepted, so this is a delay, not a rejection, and an incognito check settles it. Common mistake: Re-uploading the same rejected file again and again. If YouTube refused it once, the same file will fail again, so check the rules first.Illustrative diagram/mock-up — NOT a real YouTube Studio screenshot: rejected, not showing, and blurry thumbnails compared. Step 2: Check the Size, Format, and Verification Rules What to do: Check the file against the official Help page before you edit anything else. YouTube recommends 3840 by 2160 for videos, and 2160 by 3840 for Shorts, with a minimum width of 640 pixels, in JPG or PNG, at 16:9 for videos. Files must stay under 2 MB on mobile uploads for video thumbnails, while desktop uploads allow up to 50 MB. A 1280 by 720 export meets the minimum width and the 16:9 ratio, and staying under 2 MB is the safest size on every device. Custom thumbnails also need a verified account. Studio path: YouTube Studio > Content > video > Thumbnail > Upload file > SAVE. Check the account status in Studio before you upload. Example: A creator exports at 1280 by 720, under 2 MB, from a verified account. The thumbnail is accepted at once, because the file already meets the rules. Common mistake: Exporting a huge file, then shrinking it at very low quality. Heavy compression makes text soft, so export at the right size with readable text.Illustrative diagram/mock-up — NOT a real YouTube Studio screenshot: thumbnail size, format, ratio, and verification checks. Official YouTube video: How to Add Custom Thumbnails to Your YouTube Videos (YouTube Creators). Watch it for the Studio steps. Step 3: Fix Policy Rejections Before You Re-Upload What to do: A policy rejection means the image itself breaks a rule, not the file size. Misleading thumbnails promise something the video does not show, and YouTube treats that as deceptive. Graphic or sexual imagery, hate speech, violence, and harmful or dangerous content can also lead to rejection, and repeat offenses can remove custom-thumbnail privileges for 30 days or end the account. Keep text to three to five big words, readable on a phone, and show only what the video truly delivers. Studio path: YouTube Studio > Content > video > Thumbnail. Read any policy message, fix the image, then use Upload file > SAVE. Example: A creator uses a shocked face and a promise the video never keeps. Viewers feel tricked, and the thumbnail is rejected. A calmer image that matches the video is accepted. Common mistake: Adding more text and brighter arrows to a rejected thumbnail. Clutter is harder to read on a phone and does not fix the policy problem.Illustrative diagram/mock-up — NOT a real YouTube Studio screenshot: misleading, graphic, and unreadable thumbnail problems. Step 4: Check the Image Before You Re-Upload It What to do: Run four checks before the next upload. First, confirm the size, ratio, and format match the official rules. Second, confirm the image matches the video, with no promise the video cannot keep. Third, shrink the image to phone size and read every word. Fourth, confirm the account is verified. Fix one problem at a time, export once, and upload on the same video. Studio path: YouTube Studio > Content > video > Thumbnail > Upload file. Keep the same video open, and click SAVE after the new file loads. Example: A creator checks the file at phone size, finds the title unreadable, and shortens it to four big words. The new thumbnail stays clear on small screens. Common mistake: Re-uploading on a duplicate video instead of the original. The new video splits views and comments, while the original keeps the old thumbnail.Illustrative diagram/mock-up — NOT a real YouTube Studio screenshot: the four checks before re-uploading a thumbnail. Step 5: If the New Thumbnail Still Will Not Show What to do: Wait for the cache first. YouTube says it may take time for thumbnail changes to appear, so check the video in an incognito tab, where the old image is less likely to be stored. If the old thumbnail still shows after a reasonable wait, replace it again on the same video and save. As a temporary step, use an auto frame, so the video does not keep a broken image while you fix the custom file. Studio path: YouTube Studio > Content > video > Thumbnail > Upload file > SAVE. Then open the video in an incognito tab to check. Example: A creator replaces the thumbnail, saves, and still sees the old image. In an incognito tab the new image shows, which proves the change worked and the old view was cached. Common mistake: Deleting the video and uploading it again to force the change. A new upload loses views, comments, and watch time, and the same delay can happen again.Illustrative diagram/mock-up — NOT a real YouTube Studio screenshot: cache check, replace, and temporary auto frame. Step 6: Build a Thumbnail Habit and Track Clicks What to do: Use one repeatable habit. Make the thumbnail from a real frame that matches the video, add three to five big words, and check it at phone size before you upload. Keep one style for colors and text, so returning viewers spot your videos at once. After publishing, watch the click-through rate in Studio Analytics, and change only the thumbnail when a video underperforms. Studio path: YouTube Studio > Analytics > Content. Compare the click-through rate before and after a thumbnail change. Example: A creator keeps the same colors, tests one new thumbnail on an older video, and watches clicks rise over a week. The single change is easy to read. Common mistake: Changing the title, thumbnail, and description all at once. When clicks rise, you cannot tell which change caused it, so change one thing at a time.Illustrative diagram/mock-up — NOT a real YouTube Studio screenshot: a repeatable thumbnail habit and click tracking. ChecklistProblem named: rejected, not showing, or blurry. File checked: size, format, ratio, verification. Image matches the video, no misleading promise. Text readable at phone size, three to five words. Re-uploaded on the same video, then saved. Checked in an incognito tab after waiting. Click-through rate watched after the change.Frequently Asked Questions Why was my custom thumbnail rejected? Usually the file breaks a size or format rule, the account is not verified, or the image breaks a policy. Check the rules, fix the file or the image, and upload again on the same video. How long does a new thumbnail take to show? It can take time for the change to appear everywhere, so wait, then check in an incognito tab. If the old image still shows, replace the thumbnail again and save. What size should my thumbnail be? YouTube recommends 3840 by 2160 for videos and 2160 by 3840 for Shorts, minimum width 640 pixels, JPG or PNG, 16:9 for videos. A 1280 by 720 export under 2 MB meets the practical rules. Can I use any image as a thumbnail? No. The image must follow the Community Guidelines, match the video, and avoid misleading promises and graphic, hateful, violent, or harmful content. A rejected image must be changed, not re-uploaded as it is. Should I delete the video if the thumbnail will not change? No. Deleting loses views, comments, and watch time. Wait for the cache, check in an incognito tab, replace the thumbnail on the same video, or use an auto frame meanwhile. Fix the file, match the image to the video, and give the change time. Sources — Check It Yourself Official page opened and verified live on 29 October 2026. Check the current wording before acting.How to Make a YouTube Thumbnail That Gets Clicks — CreatorPlaybook Add custom thumbnails on YouTube — YouTube Help
- CreatorPlaybook Team
- 29 Oct, 2026
YouTube Strike Appeal: How to Appeal a Community Guidelines Strike the Right Way
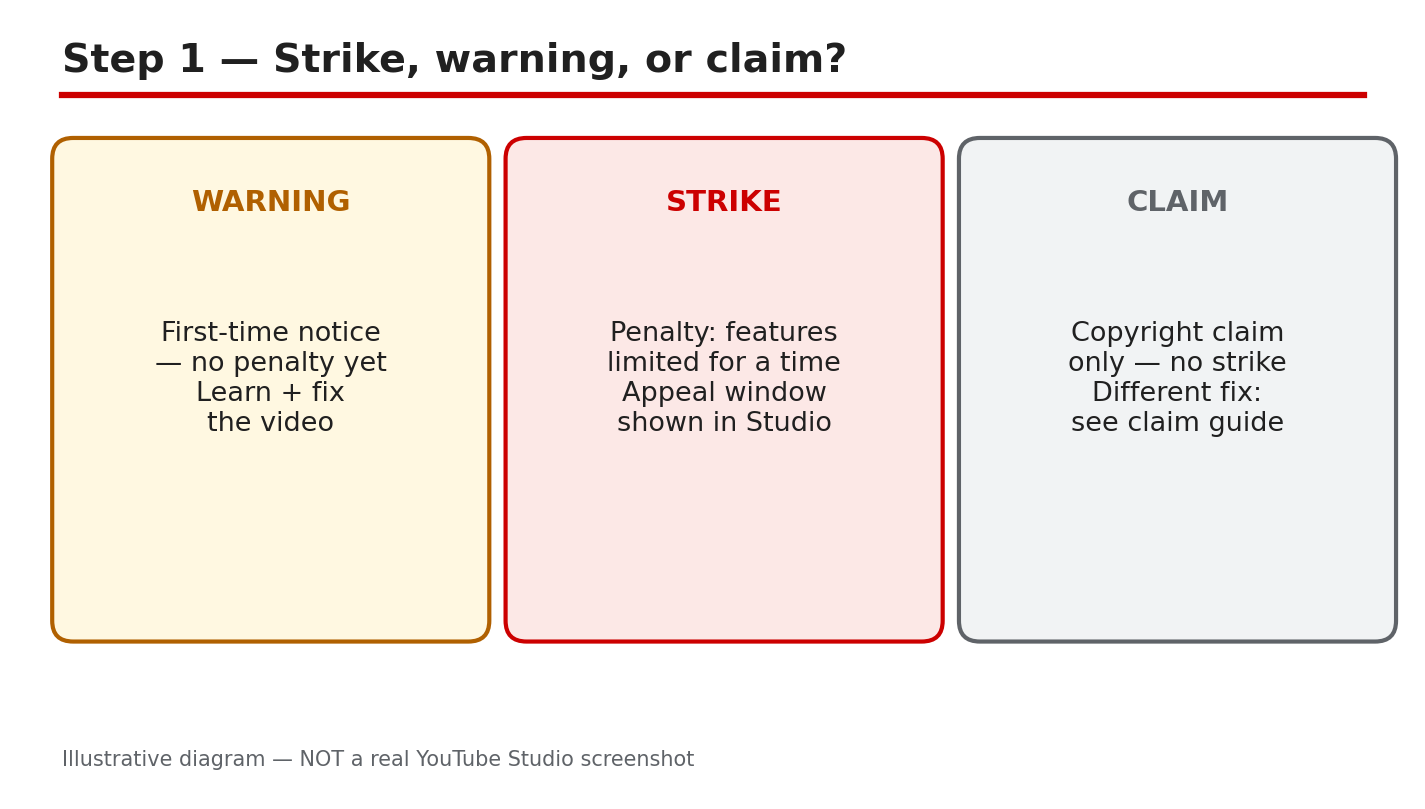
A strike notice can stop your week in its tracks. One email says a video broke a rule, uploads pause, and you are left guessing what went wrong. This guide slows that moment down. You will learn how to tell a warning, a strike, and a Content ID claim apart, find the exact rule YouTube named, write a clear appeal, and protect your record while you wait. For wider channel protection, read How to Protect Your Channel from Strikes, Copyright and Reused Content first. It explains safe music, licences, and reused content. This post focuses only on one job: appealing a Community Guidelines strike correctly, with evidence, and only once, against the rule actually named. What You Will LearnWarning, strike, and Content ID claim: what each one means. Where to find the appeal button and the rule named. The three-strike timings, as reported, and how to confirm them. What evidence makes an appeal clear, and what makes it vague. What to do, and not do, while YouTube reviews your appeal. A clean-record plan for the 90 days after a strike.Step 1: Tell a Warning, a Strike, and a Claim Apart What to do: Do not treat every notice as a strike. A warning is a first notice with no penalty yet, and it usually asks you to learn the policy. A Community Guidelines strike is a penalty that limits features and stays on your record. A Content ID claim is about copyright only: a rights holder may claim revenue or block a video, but it is not a strike and needs a different fix. Studio path: YouTube Studio > Content > Restrictions. Read the label on each video before you act. Example: A creator gets a warning for a misleading thumbnail, fixes the thumbnail, and keeps uploading. The same creator later gets a strike for a different video, and uploads pause. The response must match the label, not the fear. Common mistake: Appealing a Content ID claim as if it were a strike, or ignoring a strike because a claim once caused no harm. Use the fix that matches the notice you actually received.Illustrative diagram/mock-up, NOT a real YouTube Studio screenshot: warning, strike, and claim compared. Step 2: Find the Strike, Read the Rule, and Appeal in Studio What to do: Open the strike notice and read it slowly, word by word. Note the video, the date, the policy named, and the appeal option Studio shows. Appeal against that rule only. If Studio shows a deadline or window for your case, follow that window and do not guess a different one. Studio path: YouTube Studio > Content > Restrictions > click the strike > read the policy named > Appeal or Submit appeal, as shown for your case. Example: Studio names harassment for a video that mocked one person by name. The appeal quotes that rule, explains the context, and says what was edited. It does not argue about a different policy. Common mistake: Writing a general appeal that says the video was fair, without naming the rule. Reviewers need the rule, the facts, and the change, in that order.Illustrative diagram/mock-up, NOT a real YouTube Studio screenshot: where to find the appeal in Studio. Step 3: Three Strikes, Plainly: What Is Reported, and How to Confirm It What to do: Learn the reported pattern, then confirm it in your own notice. As reported in YouTube Help, a warning comes first. The first strike brings a one-week pause on uploads and related features. A second strike within 90 days brings a two-week pause. Three strikes within 90 days may lead to channel termination. Each strike expires after 90 days, as reported. Do not treat these timings as a promise for your case: check your Studio notice and the official Help page. Studio path: YouTube Studio > Content > Restrictions > click the strike > read the penalty, dates, and expiry shown for your case. Example: A creator receives a first strike on 2 May, as reported in the notice, and cannot upload for one week. The strike still counts until its expiry date, even after uploads return. Planning around the return date alone would miss the risk. Common mistake: Assuming a strike is gone because uploads are back, or assuming three strikes always mean the same outcome. Read the dates in your notice, and confirm the current wording in Help.Illustrative diagram/mock-up, NOT a real YouTube Studio screenshot: the three-strike pattern as reported. Step 4: Build Appeal Evidence That Answers the Rule What to do: Build a short, factual appeal. Quote the exact rule back in your own words, explain what the video actually shows, state any edit you made, and attach licence or context evidence. Keep the tone calm and specific. Vague appeals fail because a reviewer cannot see what changed, what was licensed, or why the decision was wrong for this video. Studio path: YouTube Studio > Content > Restrictions > strike > Appeal. Paste your evidence text in the appeal form, and add any file or link Studio asks for. Example: A tutorial used a licensed music track. The appeal names the track, gives the licence date and library, and links the licence. The reviewer can check one fact, instead of reading a long defence. Common mistake: Saying the video took hours to make, or that other channels do the same thing. Effort and comparison are not evidence about the rule named.Illustrative diagram/mock-up, NOT a real YouTube Studio screenshot: appeal evidence checks before submitting. Step 5: While You Wait: Do Not Re-upload, and Keep Records What to do: Wait for the decision without creating a second problem. Do not re-upload the same video, do not use another channel to bypass the pause, and do not delete the video to hide the strike, because deleting does not remove it. Review similar videos, fix the same risk, and check your email and Studio for the result. Studio path: YouTube Studio > Content > Restrictions, and your email inbox. Check both for the appeal result, and note the date you received it. Example: A creator waits two days, as reported for many reviews, and receives an email saying the strike stays. The creator then edits similar videos before uploading again, instead of appealing the same strike a second time. Common mistake: Sending repeated appeals, or re-uploading the video with a new title. YouTube Help says you may appeal each strike only once, and a re-upload can create a new problem.Illustrative diagram/mock-up, NOT a real YouTube Studio screenshot: what to do while you wait. Step 6: Plan the Next 90 Days and Keep a Clean Record What to do: Use the pause as a planning period. List every video with a similar risk, check titles, thumbnails, clips, and music, and fix them before the pause ends. Write a short rule for yourself for each topic you cover, and check new uploads against that rule before publishing. Studio path: YouTube Studio > Content > Restrictions to track expiry, and Content to review similar videos one by one. Example: A creator lists five videos with the same risky clip, replaces the clip in each one, and writes a note: no clip without a licence on file. Future uploads follow that note, and no second strike follows in the 90-day window. Common mistake: Returning to the same habits the day uploads return. A clean record needs a changed checklist, not only a quiet week.Illustrative diagram/mock-up, NOT a real YouTube Studio screenshot: a strike-expiry and clean-record plan. Checklist: Appeal in OrderNotice label read: warning, strike, or claim identified. Policy named, dates, and appeal window copied from Studio. Appeal written against the rule actually named, with facts. Licence or context evidence attached, where Studio asks for it. Same video not re-uploaded, and no second channel used. Similar videos reviewed, and the same risk fixed. Expiry date noted, and a clean-record checklist kept.Frequently Asked Questions Can I appeal a strike more than once? YouTube Help says you may appeal each strike only once, so make the first appeal complete. Check your Studio notice for the appeal option for your case, and do not rely on a second chance. How long does a strike appeal take? Review time is reported as usually 24 to 48 hours for many cases, but times vary. Check email and Studio, and do not send repeated appeals while you wait. Does deleting the video remove the strike? No. YouTube Help says deleting the video will not resolve the strike, and the strike remains on your channel. Fix the cause, and keep the record of what you changed. What if I think the strike is wrong, but I have no evidence? Read the exact policy again, watch the flagged part, and look for context, a licence, or an edit that changes the decision. If you still have no clear fact, do not guess: accept the warning or strike, and plan safer videos. Will one strike end my channel? Not on its own, as reported. The risk grows with repeated strikes within 90 days, so use the first strike as a warning to change the habit that caused it, and confirm your dates in Studio. Sources: Check It Yourself Official pages opened and verified live on 29 October 2026. Check the current wording before acting, because Studio options and Help wording can change.Community Guidelines strike basics on YouTube (YouTube Help) Appeal a Community Guidelines strike or video removal (YouTube Help)No official YouTube video is embedded here. No exact official video URL was verified live in this run.
- CreatorPlaybook Team
- 29 Oct, 2026
YouTube Yellow Dollar Icon? How to Fix Limited Ads and Request a Review
A yellow dollar icon can feel like a punishment, but it is a rating, not a penalty on the whole channel. It means YouTube found the video suitable only for limited advertising, or for no ads at all. The video stays public, and the rest of the channel is not automatically affected. The fix is specific: find the reason, change only what caused it, and request a human review if the rating looks wrong. Related reading: YouTube Shorts Not Monetized? 7 Reasons and How to Fix Each One. A yellow icon and a Short with no monetization often share a cause, so check both guides before changing a video. Below, each step gives what to do, the exact Studio path, a short example, and a common mistake. Check the official Help pages at the end, because wording and review options can change. What You Will LearnGreen, yellow, and red icons, explained. Where to find the reason for a rating. Common triggers in the advertiser-friendly guidelines. Fixes to make before requesting a review. How to request a human review in Studio. A prevention plan for future uploads.Step 1: Read the Dollar Icon Correctly What to do: Check the icon before changing anything. Green means the video is suitable for full ads. Yellow means limited or no ads, because part of the content may not suit all advertisers. Red means the video is not suitable for ads. The icon is a rating for one video, not a strike and not a channel penalty. Studio path: YouTube Studio > Content > Monetisation column. The icon sits beside the video title, with the reason shown when you click it. Also check Studio > Content > Notices for appeal steps. Example: A creator sees yellow on one cooking video, while ten others stay green. Only that video needs a fix, so the creator leaves the rest alone. Common mistake: Deleting the video, or changing the title on every video. A rating affects one video, so a channel-wide change wastes work.Illustrative diagram/mock-up — NOT a real YouTube Studio screenshot: green, yellow, and red icon meanings. Step 2: Find Where the Rating Lives What to do: Open the video in Studio and read the exact reason category. Do not guess from the thumbnail or title alone. The reason tells you whether the problem is language, imagery, or topic, and that decides the fix. Note the category word for word before editing. Studio path: YouTube Studio > Content > Monetisation column > click the dollar icon. For appeals, follow the official appeal page: Studio > Content > Notices column, hover over the notice, and use the Action button. Example: A creator clicks the yellow icon and reads a category about strong language. The fix is the audio, not the thumbnail, so editing starts there. Common mistake: Requesting a review before reading the reason. Reviewers see the same content, so an unchanged video gets the same rating.Illustrative diagram/mock-up — NOT a real YouTube Studio screenshot: where the rating lives in Studio. Step 3: Check the Common Triggers What to do: Compare the video with the Advertiser-Friendly Guidelines categories. Strong profanity, especially in the first 30 seconds, is a common trigger. Graphic or shocking imagery, violent or distressing scenes, and sensitive topics such as tragedy or conflict can also limit ads. A single strong moment can affect the rating, even in a long video. Studio path: YouTube Studio > Content > click the icon for the reason category, then compare that category with the official Advertiser-Friendly Guidelines page. Example: A creator finds strong language in the opening 20 seconds. The rest of the video is calm, but the early language alone explains the yellow icon. Common mistake: Assuming the whole topic is banned. Many topics are allowed with care; the trigger is usually one moment, word, or image.Illustrative diagram/mock-up — NOT a real YouTube Studio screenshot: common triggers. Step 4: Fix the Video Before a Review What to do: Edit or blur the offending part, and clean the first 30 seconds first, because early content weighs heavily. Fix any mismatch between the title, thumbnail, and actual video, so the video delivers what it promises. Confirm that only this video is affected, and keep a note of each change made. Studio path: YouTube Studio > Content > video > Details > Editor for cuts and blurs; then Details > Title and description, and the thumbnail picker, for the title and thumbnail. Example: A creator blurs a graphic image, trims one strong phrase, and changes a misleading thumbnail. The video now matches its title and opening. Common mistake: Changing only the title. If the audio or imagery still triggers the rating, the icon will not change.Illustrative diagram/mock-up — NOT a real YouTube Studio screenshot: before requesting a review. Step 5: Request a Human Review What to do: Request a human review only after the fix, using one request for the video. Follow the appeal steps on the official page, and give the exact reason category if asked. As reported, a decision can take up to 7 days, and the specialist decision is reported to be final, so check the current Help page for the latest wording. Creators in the EU are reported to have extra options, so check the page for any local route. Studio path: YouTube Studio > Content > Notices column > hover over the notice > Action > request review, as described on the official appeal page. Also check the Monetisation column for the icon and reason. Example: A creator fixes the opening, requests one review, and waits. The icon stays yellow while the review is pending, so no second request is sent. Common mistake: Sending several requests for the same video. Repeated requests do not speed a review, and they can confuse the record.Illustrative diagram/mock-up — NOT a real YouTube Studio screenshot: review and re-check. Step 6: Prevent the Next Yellow Icon What to do: Build a short pre-upload check. Review the first 30 seconds for strong language and shocking imagery, and check that the title and thumbnail match the video. Keep a list of past reason categories, so the same trigger is not repeated. Review new videos a day after upload, when ratings can settle. Studio path: YouTube Studio > Content > Monetisation column after upload, and Content > video > Details before upload, for title, thumbnail, and audience checks. Example: A creator checks the opening before upload, removes one strong word, and the next three videos stay green. The check takes five minutes. Common mistake: Copying a viral title that overpromises. A mismatch can draw a closer look, even when the video itself is calm.Illustrative diagram/mock-up — NOT a real YouTube Studio screenshot: prevention plan. Checklist: Fix the Icon, in OrderIcon and reason category noted. Trigger found: language, imagery, or topic. First 30 seconds cleaned. Title and thumbnail match the video. Only the affected video changed. One human review requested, after the fix. Pre-upload check added for next time.Frequently Asked Questions Does a yellow icon affect my whole channel? No, as a rule. The rating applies to one video. Other videos keep their own ratings, and the channel is not penalised by one yellow icon alone. Fix the single video, and leave green videos unchanged. Can I request a review more than once? Request one review per video, after fixing the cause. As reported, the specialist decision is final, so a second request for the same unchanged video is unlikely to help. Check the official appeal page for current options before trying again. How long does a human review take? As reported, allow up to 7 days, and check Studio for the outcome. Times can vary, and no exact time can be promised here. Do not send duplicates while waiting; check the Help page for the latest wording. Should I delete a yellow-icon video? Usually no. First read the reason, fix the trigger, and request a review if the rating looks wrong. Deleting loses views, comments, and watch time, and the same mistake can return in the next upload. What if every new video gets a yellow icon? Look for a repeated trigger across videos, such as strong language in every opening, or thumbnails that overpromise. Fix the pattern, not one video at a time. If the pattern is unclear, compare each reason category with the official guidelines page. Sources — Check It Yourself Official pages opened and verified live on 29 October 2026. Check current wording before acting.Advertiser-friendly content guidelines — YouTube Help Submit an appeal for videos with 'Limited ad earnings' or 'No ad earnings' — YouTube HelpNo official YouTube video is embedded here. No exact official video URL was verified live.
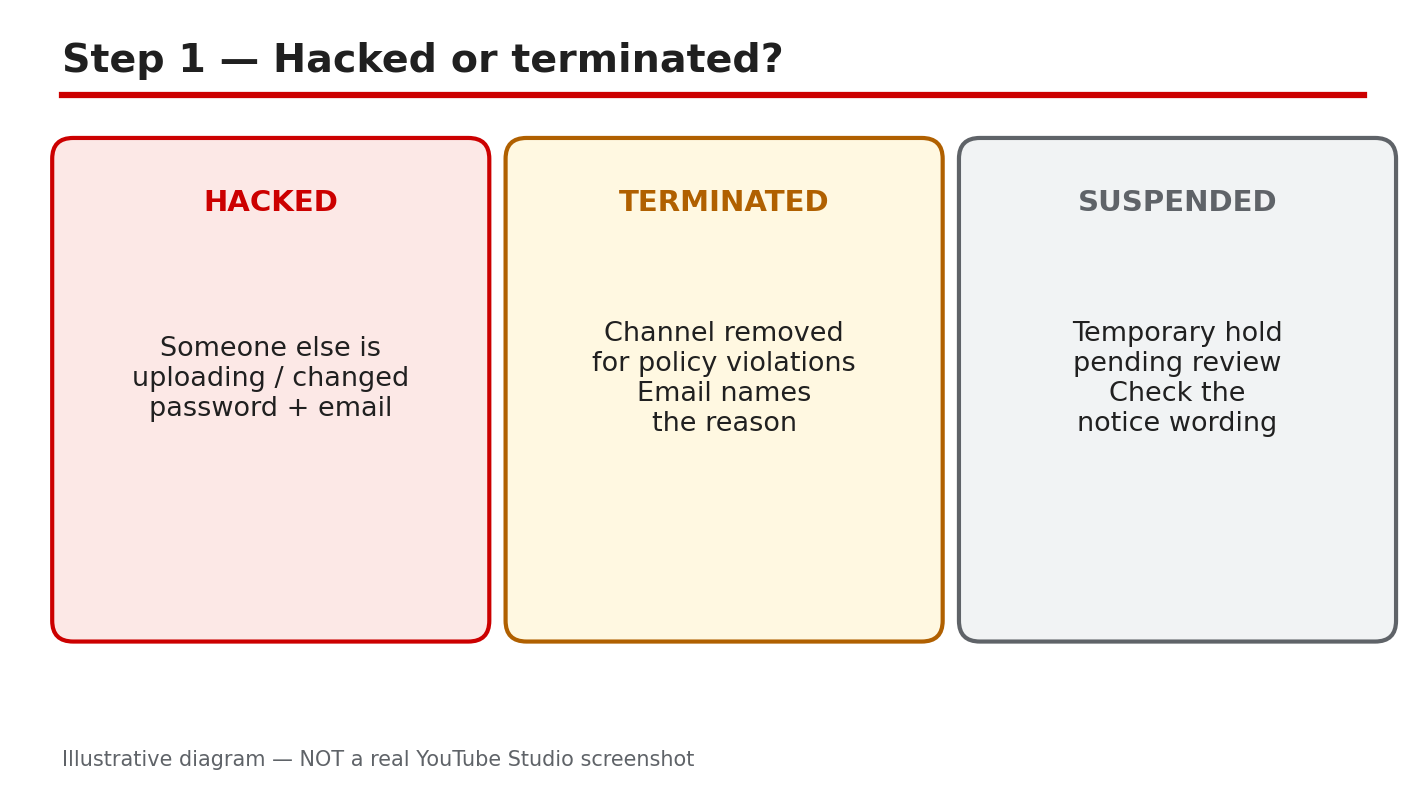
- CreatorPlaybook Team
- 29 Oct, 2026
YouTube Channel Hacked or Terminated? How to Recover It Step by Step
Losing access to a channel is frightening when videos, subscribers, and income depend on it. Panic causes the worst mistakes: paying a stranger, sharing a code, or sending repeated appeals. This guide separates three problems, secures the Google account first, and follows the correct recovery route. Work in order, keep every notice, and trust no one promising guaranteed recovery. Slow, calm steps protect both the account and the appeal. Related reading: How to Protect Your Channel from Strikes, Copyright and Reused Content. A hacked, terminated, and suspended channel need different actions, and the wrong form wastes time. Below, each step gives what to do, the exact Studio or Google path, a short example, and a common mistake. Check the official Help pages at the end before acting, because wording and forms can change. What You Will LearnHacked, terminated, and suspended notices, compared. Securing a Google account before any appeal. The right recovery route for each problem. Evidence that makes an appeal easier to review. What never to do, including paying for recovery. Rebuilding security after access returns.Step 1: Tell Hacked, Terminated, and Suspended Apart What to do: Read the exact notice first. A hacked channel shows uploads you did not make, changed passwords or recovery details, or unfamiliar sign-ins. A terminated channel is removed for policy reasons, with an email naming the reason. A suspended channel is held temporarily, often during a check. Save the notice, email, and Studio message exactly as shown. Studio path: YouTube Studio, on sign-in or the Content page. Compare the message word for word with your inbox email before choosing a form. Example: A creator finds a crypto video uploaded overnight, a changed password, and an unknown recovery email. That points to hacking, so account recovery comes first. Common mistake: Filing a termination appeal for a hack, or only resetting a password for a termination. The wrong route delays help.Illustrative diagram/mock-up — NOT a real YouTube Studio screenshot: hacked vs terminated vs suspended. Step 2: Secure the Google Account First What to do: Secure the account before appealing, or a hacker may still control it. Recover access, set a new strong password, turn on 2-Step Verification, and review signed-in devices. Remove unfamiliar devices and third-party access, then update your recovery email and phone. Never share passwords or codes with anyone offering recovery. Studio path: Google Account > Security > How you sign in to Google > 2-Step Verification; then Security > Your devices and Third-party access. Example: A creator changes the password, turns on 2-Step Verification, and removes two unknown sessions. The hacker cannot return with the old password. Common mistake: Appealing first, reusing the old password, or skipping 2-Step Verification. That leaves the door open.Illustrative diagram/mock-up — NOT a real YouTube Studio screenshot: secure the Google account first. Step 3: Choose the Correct Recovery Route What to do: Use the route matching your problem. For a hacked Google account, use Google Account recovery. For a terminated channel, appeal in YouTube Studio, or use the appeal form linked in Help if Studio is unavailable. For a hacked channel, use the hacked-channel report in Help. Some reports mention a 9-month limit for hacking cases; that is reported only, so check current Help wording. The termination Help page opened here says creators have up to 1 year from termination to appeal. Studio path: YouTube Studio > termination information > Begin Review > Next > Start Appeal > Next > contact email and reason > Submit. Example: A creator reads the stated policy in Studio, clicks Begin Review, and submits one appeal. No hacking report is filed for the same termination. Common mistake: Filing every form at once, or filing the same appeal many times. That does not speed review.Illustrative diagram/mock-up — NOT a real YouTube Studio screenshot: recovery routes. Step 4: Build Strong Appeal Evidence What to do: Give clear, dated evidence in one appeal. List when the problem started and was found, with screenshots and emails exactly as received. Name the exact policy cited, explain calmly why it does not fit, and keep original files. List hacker uploads and whether they were removed, and state fixes already made. Studio path: YouTube Studio > termination information > Begin Review > Start Appeal. Give dates, policy, and evidence, without unrelated history. Example: A creator writes: terminated 12 May, email named spam, no bulk uploads made, original files kept, hacker upload deleted 13 May. Each fact is checkable. Common mistake: A long, emotional appeal with no dates, policy name, or evidence. Vague appeals ask reviewers to guess.Illustrative diagram/mock-up — NOT a real YouTube Studio screenshot: appeal evidence checks. Step 5: Avoid Scams and Repeated Appeals What to do: Never pay for recovery, and never share passwords, codes, or access with anyone offering to fix the channel. Google Help warns against recovery services and says Google does not work with them. Do not spam appeals, reuse the old password, or skip 2-Step Verification. Do not create a new channel to circumvent termination; Help prohibits that. Studio path: None for paid recovery. If anyone asks for payment, a password, or a code, stop and use only official routes. Example: A creator is offered guaranteed recovery for a fee, in exchange for a code. The creator refuses and uses the official appeal only. Common mistake: Trusting a service because it uses YouTube logos or urgency. It is still a scam if it asks for money or a code.Illustrative diagram/mock-up — NOT a real YouTube Studio screenshot: what never to do. Step 6: Follow the Recovery Timeline and Rebuild What to do: Check the appeal status in Studio and watch your contact email for the outcome. Times vary, so do not file duplicates while waiting. If access returns, rebuild security before uploading: keep 2-Step Verification on, confirm recovery details, review devices and third-party access, and keep copies of notices, emails, and your appeal. Studio path: YouTube Studio > termination information > appeal status and review time. Then Google Account > Security > devices and third-party access. Example: A creator waits for the email, confirms the appeal in Studio, then removes an old app that still had account access before uploading again. Common mistake: Uploading at once without rechecking security, or deleting evidence after a good outcome. Records help if trouble returns.Illustrative diagram/mock-up — NOT a real YouTube Studio screenshot: recovery timeline. Checklist: Recover Safely, in OrderNotice saved; hacked, terminated, or suspended identified. New, unused strong password set. 2-Step Verification on; recovery email and phone checked. Devices and third-party access reviewed and cleaned. One clear appeal, using the correct route. Evidence kept: dates, screenshots, emails, files, policy. No payment; no password or code shared.Frequently Asked Questions Can I recover my channel if the hacker changed my password and recovery email? Try Google Account recovery, answering as accurately as you can with any remaining recovery phone or email. Wrong guesses do not end the process, per Help. Follow its recovery tips before giving up, and never pay a third party. Use a familiar device and location if possible. What if my channel was terminated but I believe the decision was wrong? Appeal in Studio with Begin Review and Start Appeal, giving dates, the exact policy, and clear evidence. Help opened here says creators have up to 1 year from termination. Keep it calm and factual, and check Studio and email. Save the appeal confirmation and outcome email. Should I pay someone who says they can recover my channel? No. Do not pay, or share a password or code. Google Help warns against recovery services and says Google does not work with them. Use only Google recovery, the hacked-channel route, and the official Studio appeal. Report scam messages and keep them as evidence. How long will an appeal take? Times vary, and no fixed time can be promised here. Check Studio for appeal status and watch your contact email. Do not send duplicates while waiting; that does not speed review. A single, complete appeal is easier to review than several. What if I cannot sign in at all? Work through Google Account recovery and its tips for completing recovery. If recovery still fails, Help says a new Google Account is a last resort. Do not use a new channel to circumvent termination; Help prohibits it. Keep recovery details up to date to avoid a repeat lockout. Sources — Check It Yourself Official pages opened and verified live on 29 October 2026. Check current wording before acting.How to recover your Google Account or Gmail — Google Account Help Channel or account terminations — YouTube HelpNo official YouTube video is embedded here. No exact official video URL was verified live.
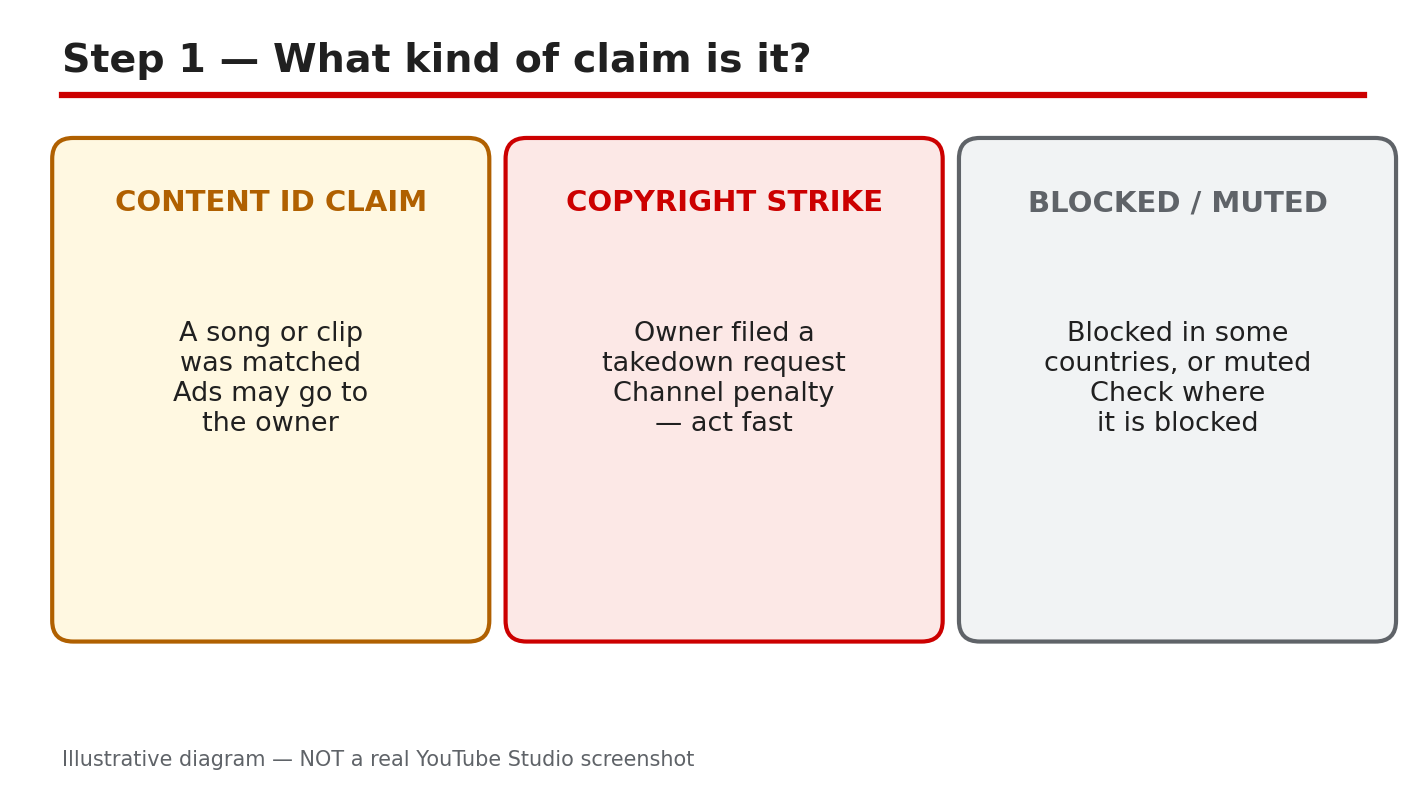
- CreatorPlaybook Team
- 29 Oct, 2026
YouTube Copyright Claim? How to Trim, Replace or Erase the Song — and When to Dispute
A copyright claim on a video you worked hard on can feel like a punishment, even when you did nothing dishonest. In most cases it is not. A Content ID claim usually means YouTube matched part of your video, often a song, to material a rights holder has registered, and the rights holder chose what happens next. The video may stay up, it may be blocked in some places, or its advertising revenue may go to the claimant. Your first job is not to panic, dispute, or delete. Your first job is to read the claim exactly as Studio shows it, because the right fix depends on what was claimed, where, and for how long. This guide walks through the checks and fixes in YouTube Studio in order. You will learn how to tell a claim from a strike, how to see the exact work, claimant, and territory, how the three Studio fixes differ, what to gather before you dispute, and how to choose between disputing, fixing, or leaving the claim alone. Read Studio's warning on the edit screen before you save any change. This is general information, not legal advice. If a dispute could affect important income or a channel you depend on, consider professional advice. Related reading: How to Protect Your Channel from Strikes, Copyright and Reused Content. What You Will LearnHow to tell a Content ID claim, a copyright strike, and a blocked or muted video apart. How to find the exact claimed work, claimant, and territory in Studio. What Trim out segment, Replace song, and Erase song each do, and what each costs. What evidence you need before a dispute is honest and safe to file. When to dispute, when to fix in Studio, and when to leave a claim alone. A calm seven-day plan for checking, deciding, and fixing one claimed video.Step 1: Identify the Claim Type What to do: Before you touch the video, name the problem correctly. A Content ID claim, a copyright removal request that creates a strike, and a restriction such as a block or mute are different systems, with different consequences. YouTube says copyright claims are different from copyright strikes and usually do not impact your channel or account, while a strike comes from a formal takedown request and is more serious. A claim can block, monetize, or track a video, and any of those actions can be geography-specific, so a video can be monetized in one country and blocked in another. Do not treat every notice as a strike, and do not treat a strike as a minor claim. Studio path: YouTube Studio > Content > Restrictions column. Hover over the entry for the video and read whether it says Claims, Copyright - Takedown, or another restriction. Click See details only after you have noted the label. Example: A tutorial shows "Claims" in Restrictions, plays normally for you, but earns no revenue for you. That is most likely a Content ID claim, not a strike. Common mistake: Deleting the video in a panic. Deletion removes your watch time and comments, and it does not teach you what caused the claim, so the next video can repeat it.Illustrative diagram/mock-up comparing claim types. This is NOT a real YouTube Studio screenshot. Step 2: Read the Exact Claim Details What to do: Open the claim details and write down four facts before you decide anything: the exact work named, who claimed it, what action applies, and where it applies. A claim can cover only a short segment, and different claimants can claim different segments or different countries. You may also have more than one claim on one video. If you do not know the claimant, do not assume the claim is invalid. YouTube notes that a claimant you do not recognize may be a collecting society or another authorized representative, so an unfamiliar name alone is not proof of error. Studio path: YouTube Studio > Content > Restrictions > click the claim > See details > Content used > See details. Read the Claimant, the content used, the policy, and the territory or territories shown. Example: The details name a 22-second song segment from 1:04 to 1:26, claimed by a music publisher, with a monetize policy in most countries and a block in two countries. The rest of the video is not claimed. Common mistake: Reading only the email subject or the first line in Studio. The email tells you a claim exists; only the details tell you whether a short trim will clear it or whether the whole audio track is involved.Illustrative diagram/mock-up of the five-step path to see a claim in Studio. This is NOT a real YouTube Studio screenshot. Step 3: Compare Trim, Replace, and Erase What to do: Once you know the claimed segment, compare the three Studio fixes by what they remove and what they leave behind. Trim out segment edits out just the claimed segment from your video, so both picture and sound in that part go. Replace song swaps claimed audio for other audio from the YouTube Audio Library, so the picture stays and new music plays instead. Erase song mutes the claimed audio; you can erase just the song, keeping dialogue and sound effects where possible, or mute all sound in the claimed segments. If done successfully, any of these options will automatically clear a copyright claim. Preview every edit before you save, and check that no claimed audio or picture remains, because a partial fix will not clear the claim. Studio path: YouTube Studio > Content > click the notice on the video > View details > find the relevant claim > Take Action > Trim out segment, Replace song, or Erase song. Then preview, adjust the start and end times if offered, and click Save, then confirm Trim, Save, or Mute as Studio asks. Example: A 22-second claimed song plays over a talking-head explanation. Trim would cut the explanation too, so Replace song is better: the explanation stays, with a quiet Audio Library track underneath, and the claim can clear. Common mistake: Choosing Erase song for a video where the song and the voice are mixed together, then discovering the voice is hard to hear. Preview with headphones, and use Mute all sound in the claimed segments only when losing all sound there is acceptable.Illustrative diagram/mock-up comparing Trim out segment, Replace song, and Erase song. This is NOT a real YouTube Studio screenshot. Step 4: Gather Evidence Before You Dispute What to do: A dispute is a statement that you have a right to use the material, or that the claim is wrong. Do not file one because you are annoyed, because the song is short, or because you gave credit. Credit alone does not replace permission. Gather real evidence first: your licence or written permission, with the track name, licensor, dates, and territory; proof that the work is yours, such as project files or an original recording; or a clear, specific fair-use explanation, such as commentary, criticism, or teaching that transforms the material, with timestamps showing what you added. Save screenshots and emails in one folder, and note the exact claim you are disputing. If you cannot point to ownership, a licence, or genuine fair-use grounds, do not dispute yet. Studio path: YouTube Studio > Content > Restrictions > See details > Content used > See details. Keep this page open while you check your licence file, so the work, claimant, and segment you are checking match the evidence in your hand. Example: A creator finds a licence email for a track, dated before publication, covering YouTube worldwide. That is evidence worth attaching or quoting accurately in a dispute. A screenshot of a download page with no licence terms is not. Common mistake: Disputing with "I found it on the internet" or "everyone uses it." Those are not grounds, and a weak dispute can waste time and damage your credibility with the claimant and with YouTube.Illustrative diagram/mock-up of the four questions to check before disputing a claim. This is NOT a real YouTube Studio screenshot. Step 5: Decide — Dispute, Fix, or Leave It What to do: Use a simple decision rule. Dispute only when you have genuine grounds and evidence from Step 4, and you can state them accurately. Fix in Studio when the claimed material is not essential, when a trim, replacement, or erase will leave a video you are still proud to publish, or when the claim blocks viewers you care about. Leave the claim and move on when the video stays viewable where your audience is, the revenue at stake is small, and a fix would damage the video more than the claim does. Leaving a claim is not ignoring it: note the claimant, segment, and decision, and change the music or clip source for your next video. Whatever you choose, read Studio's warning on the edit screen before saving. YouTube Help states that, starting in June 2025, once you save your edited video, you will not be able to revert the changes, and that as of June 2025 you are not able to undo changes made with the YouTube Studio Editor after saving. Keep a copy of the original video before you edit, if you may need it later. Studio path: YouTube Studio > Content > Restrictions > See details. For a fix, continue to Take Action > Trim out segment, Replace song, or Erase song > Preview > Save and confirm. For a dispute, use the dispute option shown for that claim, and enter only grounds and evidence you can support. Example: A creator with a licence disputes a song claim and keeps the video intact. The same creator leaves a different claim alone on an old video with 40 views, because replacing its music would take longer than the video is worth. Common mistake: Saving a Studio edit before previewing it, then finding the trim cut a key sentence. Preview first, because the saved edit cannot be reverted in Studio Editor.Illustrative diagram/mock-up comparing dispute, fix, and leave-it choices for a claim. This is NOT a real YouTube Studio screenshot. Step 6: Follow a Seven-Day Fix Plan What to do: Give the claim a short, dated plan so it does not drift. Day 1: record the claim type, work, claimant, segment, policy, and territory from Step 2. Day 2: check licences, permissions, and project files, and decide whether a dispute has genuine grounds. Day 3: choose dispute, fix, or leave, using Step 5, and write down why. Day 4: if fixing, preview the trim, replacement, or erase in Studio, and save a copy of the original first. Day 5: save the chosen fix, then wait for processing to finish; do not make other edits while the video is processing. Day 6: reload Studio, confirm the claim is gone or changed, and play the edited segment. Day 7: fix the cause for future videos, such as switching music libraries, shortening borrowed clips, or adding real commentary, and file your notes and licences together. Studio path: YouTube Studio > Content > Restrictions for the daily check; then Content > the video > View details > Take Action for the fix; then Content > Restrictions again on Day 6 to confirm the result. Example: On Day 4 a creator previews a replacement track, notices it starts too loudly, lowers it, previews again, and only then saves. On Day 6 the claim is gone and the explanation is intact. Common mistake: Making a second edit while the first is still processing, or judging the result before processing finishes. Wait, reload, and check the edited segment itself.Illustrative diagram/mock-up of the seven-day fix plan for a claim. This is NOT a real YouTube Studio screenshot. Checklist: Before You Save or DisputeClaim type named: Content ID claim, takedown, or another restriction. Exact work, claimant, segment times, policy, and territory written down. Fix compared: trim, replace, or erase, with the preview watched. Dispute evidence ready, or a clear decision not to dispute. Studio warning read, original video copied, and no other edit in progress. Result re-checked after processing, and the cause fixed for future videos.Frequently Asked Questions Does a copyright claim give my channel a strike? Not by itself. YouTube says copyright claims are different from copyright strikes and usually do not impact your channel or account. A strike follows a formal copyright removal request, which is a different process, so read the Restrictions label carefully. Can I use a song if I only use a few seconds? Short does not mean safe. Content ID can match a short segment, and a licence or genuine fair-use ground matters more than length. If you have no licence, replace the music or keep the segment out. Will trimming, replacing, or erasing always clear the claim? If done successfully, YouTube says any of these options will automatically clear a copyright claim. If claimed material remains, the claim will not clear, so preview the whole claimed segment and re-check after processing. Should I dispute if I gave credit to the owner? No, not on credit alone. Credit does not replace permission or a licence. Dispute only with ownership, a licence, or another genuine ground, with evidence you can show. Can I undo a Studio edit after I save it? YouTube Help states that, starting in June 2025, once you save your edited video, you will not be able to revert the changes, and you cannot undo Studio Editor changes after saving. Preview carefully and keep a copy of the original before you save. Sources — Check It Yourself These official YouTube Help pages were opened and verified live while this guide was prepared. Check the current wording in Studio and in these pages before you act, because policies and Studio screens can change.Learn about copyright claims — YouTube Help Remove copyright-claimed content from videos — YouTube HelpNo official YouTube video is embedded in this post. No exact official video URL was verified live during preparation, so none was embedded rather than guessing one. This guide is general information, not legal advice.
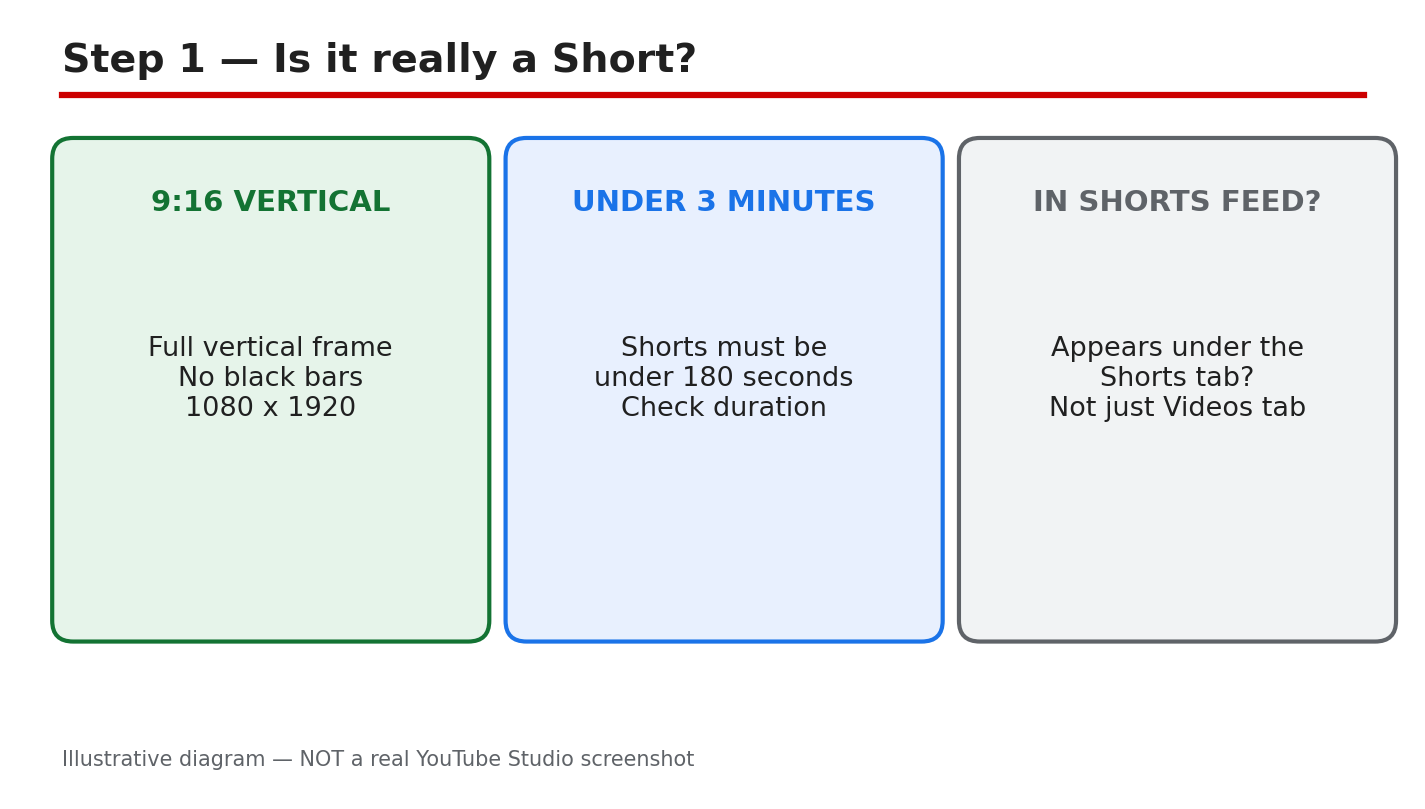
- CreatorPlaybook Team
- 28 Oct, 2026
YouTube Short Stuck at 0 Views? 6 Checks for Format, Restrictions, and Upload Spacing
A Short stuck at 0 views feels different from a long video with low views. A Short lives or dies in the vertical feed, and the first checks are not about the idea — they are about whether the file is a Short at all, whether anything is restricting it, and whether it was given a fair chance. This guide works through six checks in order, from format to restrictions to upload spacing, so you fix the real cause instead of deleting and re-uploading the same file and hoping. One thing to say plainly first: there is no Studio page that confirms a Short is being suppressed because of the October 1 original-content change. YouTube announced a recommendation change that gives more reach to original content in Shorts, but it provided no Studio indicator, threshold, or status that labels a single Short as suppressed. So do not spend your time hunting for a suppression badge that does not exist. Check what Studio actually shows — the format, the Restrictions column, the visibility — and fix what you can see. What You Will LearnHow to confirm a video is really a Short: vertical format, under 180 seconds, listed under the Shorts tab. Where to check restrictions, claims, strikes, and visibility in YouTube Studio. Why new channels should space Shorts out and judge a Short only after 24–48 hours. The four 0-view checks: format, claimed audio, duplicate clip, and age restriction or Made for Kids. Why deleting and re-uploading the identical file blindly does not help — and what to do instead.Step 1 — Confirm It Is Really a Short What to do. Open the video in YouTube Studio and check three things: the shape, the length, and where it appears. A Short must be vertical or square, up to three minutes long, and it should appear under the Shorts tab in Studio. If any of the three fails, the video is treated as a regular video, not a Short, and it will not enter the Shorts feed. Studio menu path. YouTube Studio > Content > click the video > check the format and duration shown, then Content > Shorts tab to confirm it is listed there. Example. A 45-second clip exported at 1080 x 1920 (9:16) appears under the Shorts tab. The same clip exported at 1920 x 1080 (16:9) with black bars does not — it is a regular video, however short it is. Common mistake. Uploading a landscape video with black bars top and bottom and calling it a Short. The frame must actually be vertical or square; bars do not count. Re-export the clip in 9:16 and upload it again as a new file only after the other checks below are done. Diagram 1: The three Shorts format checks — 9:16 vertical, under 180 seconds, and listed under the Shorts tab. Illustrative diagram/mock-up, NOT a real YouTube Studio screenshot.Step 2 — Check the Restrictions Column What to do. In Studio, open the Content list and look at the Restrictions column for the Short. That column flags copyright issues, and it is also where you spot whether a video has a claim or a strike. Then open the video's details and confirm the Visibility is set to Public. A Short set to Private or Unlisted cannot gather views in the feed, and a restriction can hold it at 0. Studio menu path. YouTube Studio > Content > find the Short > read the Restrictions column > click the video > Visibility: Public. Example. A Short using a popular song shows a copyright claim in the Restrictions column. The claim does not always block the video, but a claim that blocks or mutes the audio in some regions can leave the Short with no reach. Checking the column first tells you whether audio is the problem before you change anything else. Common mistake. Assuming the Short is Public because it was uploaded that way. Check it again — scheduled, unlisted, and private uploads are easy to confuse, and a Short left Unlisted after a scheduled publish will sit at 0 views with no error message. Diagram 2: The Restrictions column check — Studio, Content, Restrictions column, claim or strike, and Visibility Public. Illustrative diagram/mock-up, NOT a real YouTube Studio screenshot.Step 3 — Space Your Uploads on a New Channel What to do. If your channel is new, publish Shorts one at a time with hours between them, and judge each Short only after 24–48 hours. A brand-new channel has no watch history for YouTube to learn from, so early Shorts often start slowly. Spacing uploads gives each Short its own first day in the feed instead of making them compete with each other. Studio menu path. YouTube Studio > Content > check the publish dates and times of your recent Shorts; plan the next upload at least several hours after the last one, or the next day. Example. A new channel publishes one Short on Monday morning and one on Tuesday morning. Both get their first 24 hours alone. The same channel publishing ten Shorts in one hour on Monday sees most of them stall, because no single Short gets a clean test. Common mistake. Uploading a backlog of ten Shorts in one sitting to “catch up,” then concluding the channel is broken when none of them move. The burst, not the content, is the likely cause — spread the same videos out instead. Diagram 3: A spaced upload example — one Short per day across a week, compared with many Shorts published in one hour. Illustrative diagram/mock-up, NOT a real YouTube Studio screenshot.Step 4 — Run the four 0-view checks What to do: Work through four checks in order: (1) format — confirm Step 1 again on the uploaded file, not on the project file in your editor; (2) claimed audio — check whether the music in the Short is claimed by someone else; (3) duplicate clip — ask whether this exact clip is already posted elsewhere unchanged; (4) audience settings — check age restriction and the Made for Kids setting. Studio menu path: YouTube Studio > Content > Restrictions column, then click the video and open Details > Show more to check the Audience setting. The Restrictions column is where a copyright claim, an age restriction, or a Made for Kids setting shows up for that video. Example: A creator uploads a Short with a trending song. The Restrictions column shows a copyright claim on the audio. The fix is not to delete and re-upload the same file. It is to replace the claimed audio with original audio in a new test upload, as described in Step 5. Common mistake: Re-uploading the identical clip because “everyone posts this clip.” A clip that duplicates content already on YouTube, with nothing original added, can sit at 0 views and can also cause reused-content trouble later. Add your own recording, commentary, or edit before you test again. Diagram 4 — Illustrative diagram: the four 0-view checks. This is an illustrative diagram/mock-up, NOT a real YouTube Studio screenshot.Step 5 — Do not delete and re-upload the identical file blindly What to do: Fix the problem you found in Steps 1–4 first, then run ONE fresh test. Change the file itself: re-export in vertical format, replace claimed audio with original audio, add your own recording or commentary to a borrowed clip, or correct the audience setting. Then upload that fixed version as a new Short, spaced out as described in Step 3. Studio menu path: YouTube Studio > Content > Restrictions column on the new upload, and check Visibility: Public. Compare the new upload's Restrictions and Visibility entries with the old one, and write down the view count after 24–48 hours for each. Example: A Short with claimed audio is fixed by swapping in original audio. The creator uploads the fixed version once, the next morning, and waits 48 hours before judging it — instead of deleting and re-uploading the same claimed-audio file three times in one evening. Common mistake: Deleting a 0-view Short and re-uploading the identical file, again and again, hoping for a different result. The file has not changed, so the checks in Steps 1–4 give the same answer — and a burst of identical uploads looks like spam. Fix first, test once, then judge. Diagram 5 — Illustrative diagram: fix first, then one fresh test. This is an illustrative diagram/mock-up, NOT a real YouTube Studio screenshot. Step 6 — Follow a spaced retest plan What to do: Run one spaced test over seven days. Day 1: upload ONE fixed Short, using the fix from Step 5. Days 2–3: upload nothing new; let the first test run. Day 4: check the view count after 24–48 hours and write it down. Day 5: if the first test is still at 0, upload ONE more fixed Short with a different fix from Step 4. Day 7: compare the two tests and keep the version that moved. Studio menu path: YouTube Studio > Content, filter to Shorts and sort by date to see each test upload; then open Studio > Analytics > Content to check Shorts views for each video. Record the numbers in a notebook or a simple sheet so you compare facts, not feelings. Example: A creator uploads a fixed Short on Monday morning. On Wednesday it shows 12 views. The next Monday, a second fixed Short with original audio is uploaded the same spaced way, and by Wednesday it shows 40 views. The spaced plan made the comparison possible. Common mistake: Judging a Short after two hours and uploading five more the same day. New Shorts can take time to enter the feed, and a same-day burst hides which fix, if any, worked. Wait the full 24–48 hours before you judge each test. Diagram 6 — Illustrative diagram: the spaced retest plan. This is an illustrative diagram/mock-up, NOT a real YouTube Studio screenshot.Quick checklistConfirmed the file is vertical or square, under 180 seconds, and appears under the Shorts tab. Checked Studio > Content > Restrictions column: no claim, strike, or age restriction, and Visibility is Public. Spaced uploads: one at a time, hours apart, and judged only after 24–48 hours. Ran the four 0-view checks: format, claimed audio, duplicate clip, and Made for Kids / age restriction. Fixed the problem first, then ran one fresh test — did not delete and re-upload the identical file. Followed the 7-day spaced retest plan and wrote down the numbers.Frequently asked questions Why is my Short still at 0 views after a few hours? New Shorts can take time to enter the feed, so judge only after 24–48 hours. If it is still at 0 after that, work through the format and Restrictions checks in Steps 1, 2, and 4. Did the October 1 original-content change suppress my Short? There is no Studio page that confirms suppression by the October 1 original-content change for a specific video. Check the concrete items in this guide — format, restrictions, claims, and spacing — instead of assuming a penalty. Should I delete my Short and upload it again? Not the identical file. Fix the problem first — format, audio, duplicate clip, or audience setting — and then upload one fresh test, spaced out as described in Step 5. How long should I wait before I judge a test? Wait 24–48 hours for each test upload, and run the spaced plan in Step 6 over seven days so each fix gets a fair comparison. Sources — Check It Yourself Only official YouTube Help pages, opened and checked for this post:Create YouTube Shorts — YouTube Help Understand three-minute YouTube Shorts — YouTube Help Manage restrictions on your content — YouTube Studio Help Change video privacy settings — YouTube Help Get started with YouTube Analytics — YouTube HelpRelated reading, specific to Shorts views dropping after upload: YouTube Shorts Views Dropped? How to Check What Changed. No video is embedded in this post. No official YouTube Creators or Creator Insider video matching this exact topic was verified, so none was embedded rather than guessing at a link.
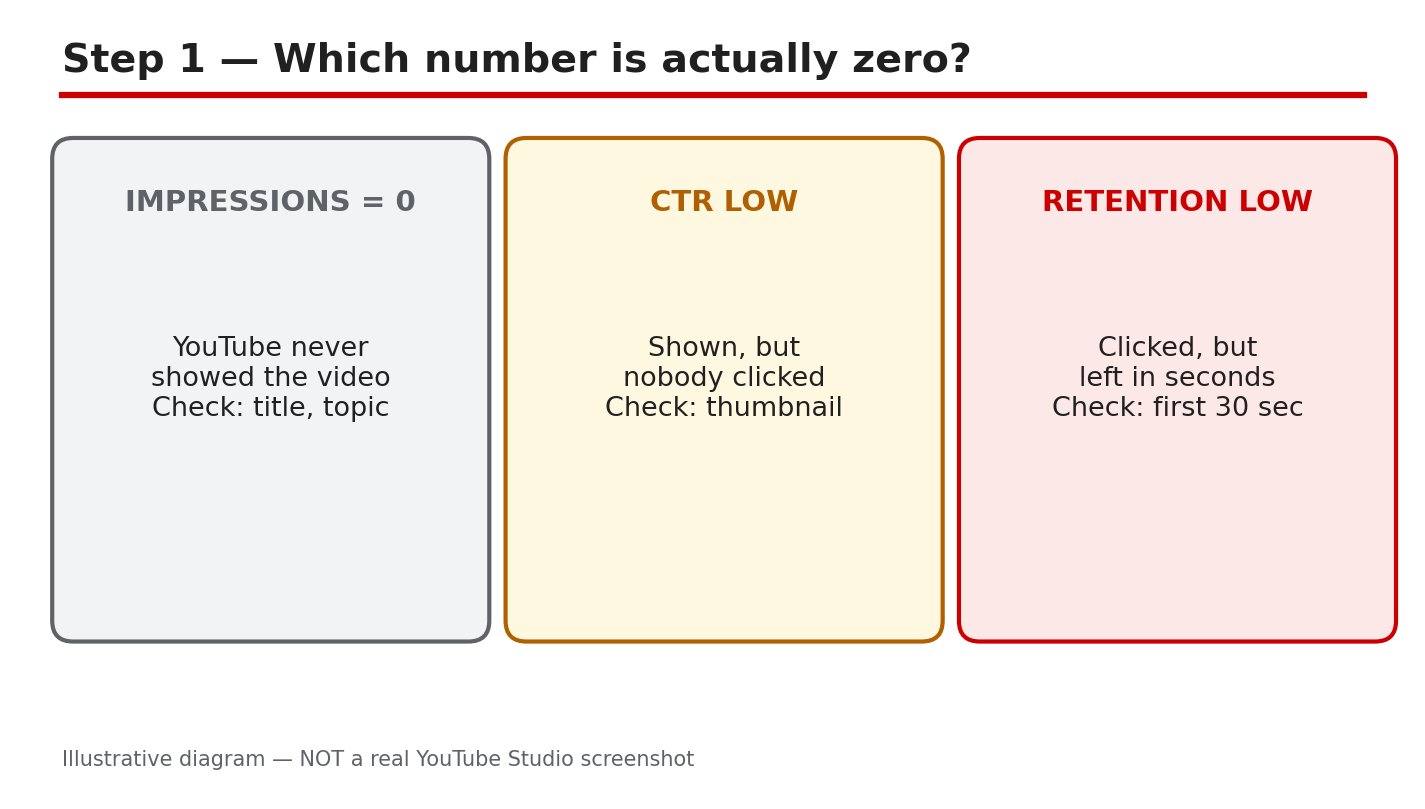
- CreatorPlaybook Team
- 28 Oct, 2026
0 Views on YouTube? How to Diagnose No Impressions, Low CTR, or Low Retention in 6 Steps
Zero views can feel like a dead end, but it is usually a clue. Views are the last number in a chain: YouTube shows your video (impressions), people click (click-through rate, or CTR), and people stay (audience retention). When the final number is zero, one of those earlier links is broken. This guide helps you find which one, fix the right thing, and test it once — instead of guessing, re-uploading the same file, or changing five things at once. The diagram above sums up the three very different problems that all look like “0 views.” Keep it in mind as you work through the steps: the fix for “YouTube never showed it” is not the fix for “people saw it and did not click.” What You Will LearnHow to tell whether your problem is impressions, CTR, or retention. Where to find each number in YouTube Studio, and how to read the three together. How to rule out the simple causes first: privacy, restrictions, claims, and a brand-new channel. How to change one thing, wait long enough to judge it, and record what happened. How to run a clean 7-day retest without deleting and re-uploading blindly.Step 1: Name Which Number Is Zero What to do: Before you touch the title, the thumbnail, or the video, write down which of the three numbers is the problem. There are three different “zero” situations, and each points to a different fix. First, is the video actually getting shown at all? Second, if it is shown, are people clicking? Third, if people click, are they staying past the opening seconds? Studio menu path: YouTube Studio > Analytics > Content > click the video > Reach tab (impressions and CTR) and Engagement tab (retention). You do not need the full Analytics tour yet — Step 2 walks the path in detail. For this step, you only need to know which screen holds which number. Example: A new creator uploads a how-to video. After two days it shows 0 impressions, 0 views, and no CTR. Nothing was clicked because nothing was shown. That is a discovery or settings problem, not a thumbnail problem. In contrast, a video with 2,000 impressions, a 1.5% CTR, and 30 views has a packaging problem: people saw it and mostly scrolled past. A third video has 3,000 impressions, a healthy 8% CTR, but viewers leave after 12 seconds. That is an opening-hook problem. Common mistake: Treating every 0-view video the same way. Changing the thumbnail when impressions are 0 cannot help, because nobody has seen the thumbnail. Likewise, re-uploading the same video when retention is the problem only restarts the same opening that viewers already left. Caption: Diagram 1 — The three different “0 views” problems: no impressions, low CTR, and low retention. Illustrative diagram and mock-up only; NOT a real YouTube Studio screenshot.Step 2: Open the Right Screen in YouTube Studio What to do: Open the video-level Analytics for the exact video, not the channel-level overview. The channel overview mixes all your videos together and hides the problem with one video. On the video’s own Reach tab you can see how many times YouTube showed that video, and what share of those showings turned into clicks. Then check the Engagement tab for how long people stayed. Studio menu path: YouTube Studio > Analytics > Content > click the video title or thumbnail > Reach tab for impressions and impressions click-through rate, and Engagement tab for average view duration and audience retention. Give the numbers a few days to settle for a new upload before you judge them. Example: A creator opens the Reach tab for a new tutorial and sees 40 impressions and 0 views. The video was shown 40 times and nobody clicked — a small sample, but the next question is whether impressions keep growing. Another creator sees 12,000 impressions, a 2% CTR, and 240 views: the video is being shown widely, but the packaging is not earning clicks. Both creators are looking at the same screen; only the numbers differ. Common mistake: Judging a video from the channel dashboard, or from the video’s public view count alone. The public count tells you the result; the Reach and Engagement tabs tell you where the chain broke. Also, do not compare a 1-day-old video with a 1-year-old video — older videos have had far more time to collect impressions. Caption: Diagram 2 — The Studio path to video-level Analytics: Studio, Analytics, Content, video, Reach tab. Illustrative diagram and mock-up only; NOT a real YouTube Studio screenshot.Step 3: Read the Three Numbers Together What to do: Put impressions, CTR, and retention side by side and match the pattern to a cause before you change anything. Each pattern has a different fix, and the diagram above shows the three most common ones. Write the three numbers down with the date, so you can compare like with like after your test in Step 5. Studio menu path: YouTube Studio > Analytics > Content > click the video > Reach tab (impressions and CTR) and Engagement tab (retention). Read both tabs for the same date range, and use the same range again when you retest. Example: Pattern one: 0 impressions. YouTube is barely showing the video at all, so the title and thumbnail cannot be the problem yet — check Step 4 first. Pattern two: 5,000 impressions, 1% CTR, 40 views. The video is shown, but almost nobody clicks: the packaging (thumbnail and title) is the likely problem. Pattern three: 4,000 impressions, 9% CTR, but average view duration of 20 seconds on a 10-minute video, with a sharp drop in the first 30 seconds. People clicked, then left: the opening hook is the likely problem. Common mistake: Fixing the thumbnail when retention is the problem, or re-editing the opening when CTR is the problem. Each fix costs time and resets your test. Name the pattern first, then fix only what matches it. Also, do not judge CTR from a tiny sample: 2 clicks from 10 impressions is not a reliable 20% CTR. Caption: Diagram 3 — Reading impressions, CTR, and retention together: low CTR points to packaging, low retention points to the opening hook, and 0 impressions points to discovery or a setting. Illustrative diagram and mock-up only; NOT a real YouTube Studio screenshot.Step 4: Rule Out the Simple Causes First What to do: Before you blame the algorithm, check the four simple causes in the diagram above. Each one can produce 0 views on its own, and each has a plain fix. Work through them in order and fix any problem you find before you judge the video’s performance. Studio menu path: YouTube Studio > Content > find the video > check the Visibility column (Public, Unlisted, or Private) and the Restrictions column. For claims and strikes, check YouTube Studio > Content > Restrictions, and read any notice or email YouTube sent about the video. For privacy, open the video’s details in Studio > Content > click the video > Visibility. Example: A creator is sure a video is “suppressed” until they open Content and see Visibility: Unlisted — the video was never public. Another creator finds a Content ID claim on the audio that limits where the video can be shown. A third creator, three days into a brand-new channel with two uploads, has 0 impressions on both: the channel has almost no history yet, so slow early discovery is expected, not proof of a penalty. Fix the setting, then judge the video. Common mistake: Changing the title and thumbnail five times while the video is still Private or Unlisted, or while a restriction is in place. No packaging change can fix a video that is not public or cannot be shown. Also, do not assume a brand-new channel is being punished: a new channel simply has little watch history for YouTube to learn from yet, so early numbers are often slow. Caption: Diagram 4 — The four simple causes to rule out first: Private or Unlisted visibility, a claim or strike or age restriction, a brand-new channel, and a title or topic with no search demand. Illustrative diagram and mock-up only; NOT a real YouTube Studio screenshot.Step 5: Change ONE Thing, Then Wait What to do: Change exactly one thing — the thumbnail OR the title, never both at once — then wait before you judge. Use the rule from the diagram above: wait 7 days or until the video reaches 5,000 impressions, whichever comes first, and record the numbers before and after. One change, one wait, one comparison: that is how you learn what worked. Studio menu path: YouTube Studio > Content > click the video > Details to edit the title, and Thumbnail to replace the thumbnail image. After the change, return to YouTube Studio > Analytics > Content > click the video > Reach tab to compare impressions and CTR with the numbers you recorded in Step 3, using the same date-range length. Example: A video has 6,000 impressions and a 1.8% CTR. The creator records those numbers, then replaces only the thumbnail with a clearer, larger-subject version and leaves the title alone. After 7 days the video has 5,400 new impressions and a 3.1% CTR. Because only the thumbnail changed, the improvement can fairly be credited to it. If the creator had changed the title, the thumbnail, and the opening all at once, nobody could say which change helped. Common mistake: Changing something every day and reading the numbers hourly. Daily edits restart the test before it has a sample, and hourly checks show noise, not a trend. Pick one change, write down the starting numbers, wait the full period, and only then compare. If impressions are still very low after the wait, the problem may be the one from Step 4, not the packaging — go back and re-check. Caption: Diagram 5 — Change ONE thing (thumbnail OR title), wait 7 days or 5,000 impressions, and record the before-and-after numbers. Illustrative diagram and mock-up only; NOT a real YouTube Studio screenshot.Step 6: Run the 7-Day Retest Plan What to do: Follow the 7-day plan from the diagram above. Day 1: make the one fix from Step 5 and write down the starting numbers. Days 2–6: publish nothing new on this video and change nothing on it — no title edits, no thumbnail swaps, no re-uploads. Day 7: compare impressions, CTR, and retention with the starting numbers, using the same date-range length, and decide: keep the change, or test the next ONE thing. If the numbers moved in the right direction, keep the winning version and move on to improving the next weakest number. If nothing moved, go back to Step 4 and re-check the settings and restrictions before blaming the packaging. Studio menu path: YouTube Studio > Analytics > Content > click the video > Reach tab (impressions and CTR) and Engagement tab (audience retention) for the Day 7 comparison. Keep the date range the same length as the starting measurement so the comparison is fair. Example: Starting numbers: 800 impressions, 2.0% CTR, 32% retention at 30 seconds. The creator changes only the title, waits 7 days, and records 5,100 impressions, 3.4% CTR, and 33% retention. CTR improved while retention stayed nearly flat, so the title helped discovery but the opening still needs work — the next single test is the hook, not another title change. Common mistake: Declaring a video dead after 48 hours and deleting it, or changing everything at once on Day 3 because the numbers have not moved yet. Small channels often need the full wait before a fair sample exists. Finish the plan, write the numbers down, and let one test teach you one lesson. Caption: Diagram 6 — The 7-day retest plan: fix the ONE weakest number, wait, compare, then decide. Illustrative diagram and mock-up only; NOT a real YouTube Studio screenshot. Quick ChecklistWrite down impressions, CTR, and retention for the same date range before you change anything. Name the weakest number: 0 impressions, low CTR, or low retention. Check Visibility, Restrictions, claims, strikes, age restriction, and Made for Kids before you edit. Change ONE thing only: thumbnail OR title. Wait 7 days or 5,000 impressions, then compare the same three numbers. Keep what worked; test the next ONE thing. Do not change everything at once.Frequently Asked Questions Is 0 views in the first few hours normal? Yes, it can be. Brand-new channels and brand-new uploads often show little or no data at first, and Analytics can lag behind real activity. Work through Step 4 to rule out a settings or restriction problem, then give the video the full 7-day window from Step 6 before calling it a failure. Does 0 impressions mean YouTube is not showing my video at all? Zero impressions means the thumbnail was not shown to viewers in the measured period. It points to discovery or a setting, not to viewers rejecting the video — nobody could click what they never saw. Check Step 4 first, then the packaging fixes in Step 5. What is a good CTR on YouTube? YouTube does not publish one good CTR for all channels, because CTR depends on the topic, the audience, and where impressions come from. Use your own numbers as the baseline: compare the CTR before and after a single change, as in Step 5, instead of chasing a universal target. Should I delete a video with 0 views and re-upload it? Not as a first step. Deleting and re-uploading the identical file teaches you nothing and loses the history. Fix the real cause first — the setting, the restriction, the thumbnail, or the title — and only then test a fresh upload if you have a clear reason to. For Shorts, see the related reading below. How long should I wait before changing the thumbnail or title? Give one change a fair test: 7 days or 5,000 impressions, as in Steps 5 and 6. Changing things daily restarts the test before it has a sample, so the numbers you read are noise. Sources — Check It Yourself These are the official YouTube Help pages used for the menu paths and definitions in this guide. Open them to confirm each step for yourself:Get started with YouTube Analytics — Studio > Analytics, Content, video-level Analytics, Reach and Engagement tabs. Check your YouTube thumbnail impressions and watch time — impressions and click-through rate. Measure key moments for audience retention — audience retention. Change video privacy settings — Public, Unlisted, and Private visibility. Manage restrictions on your content — Studio > Content > Restrictions column, copyright, age restriction, and Made for Kids.Related reading on this blog, for Shorts specifically: YouTube Shorts Views Dropped? How to Check What Changed. No official YouTube video is embedded in this post. No official YouTube Creators or Creator Insider video matching this exact diagnosis topic was verified, so none is embedded rather than guessing at a link.