Showing Posts From
Thumbnails
 CreatorPlaybook Team
- 03 Nov, 2026
YouTube Thumbnail CTR Stuck at 2-3%? Test & Compare Explained (Watch Time, Not CTR)
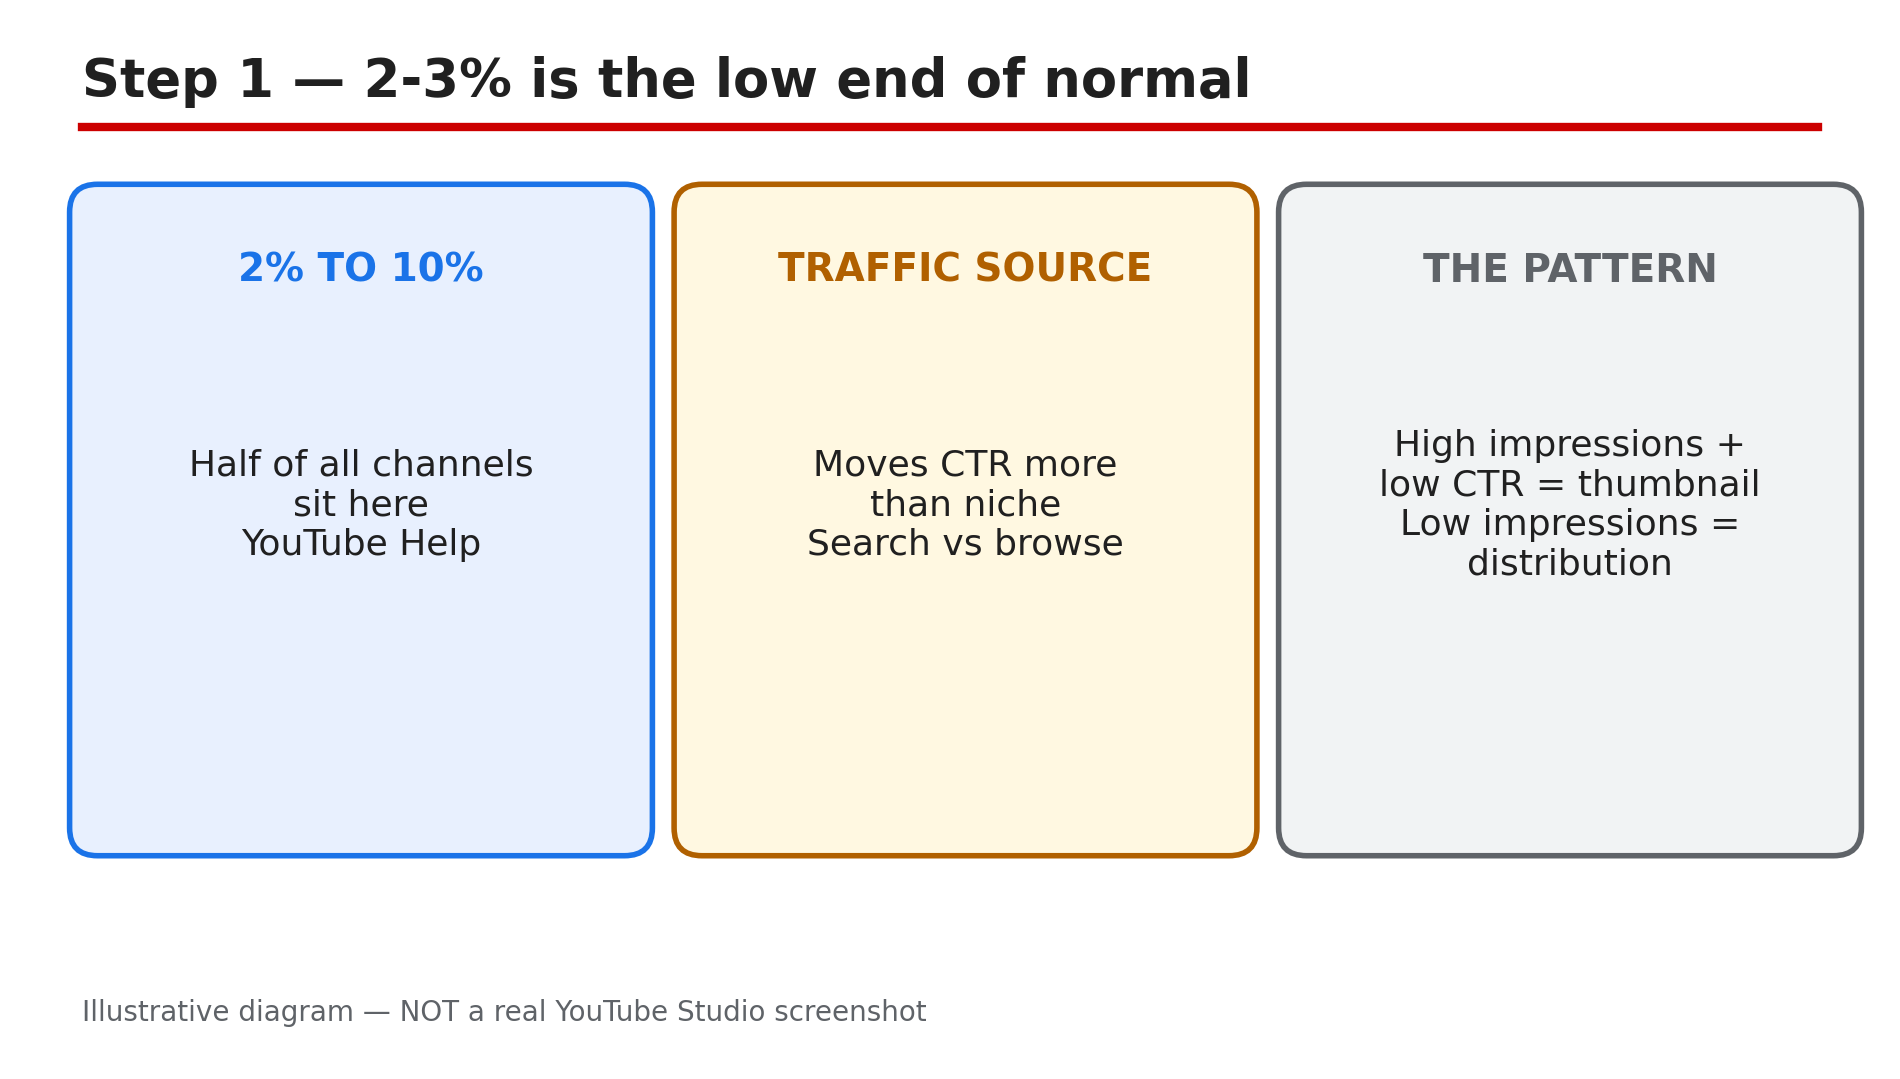
Your video has a 2.4% click-through rate, and every guide you read says that is terrible. So you change the thumbnail, the number moves to 2.6%, you change it again, and nothing really changes. The problem is not only the thumbnail — it is the way you are measuring it. A 2-3% CTR is not necessarily broken. YouTube's own Help pages say half of all channels and videos sit between 2% and 10% impressions CTR, and the number moves more with traffic source than with niche. The question is not "is 2-3% bad" but "can I prove a better thumbnail would do more?" YouTube has a built-in tool for exactly that — Test & Compare, also called A/B testing — and most creators use it wrong. What You Will LearnWhy 2-3% CTR is often normal, and when it is a real problem What Test & Compare is, and who is eligible Why the winner is chosen by watch time, not clicks How to set up a test in five steps The three results a test can give, and what each one means The mistakes that stall or invalidate a testStep 1 — Check whether 2-3% is actually a problem What to do: Compare the video against its own traffic source and your own channel, not against a number from a guide. How: Open YouTube Studio, go to Analytics, then the Reach tab, and look at the video's impressions and CTR together with its traffic sources. YouTube's Help pages say half of all channels sit between 2% and 10% impressions CTR, so 2-3% is at the low end of normal. What matters more is the pattern: a video with high impressions and low CTR has a thumbnail or title problem; a video with low impressions has a distribution problem, and no thumbnail will fix that. Example: A tutorial gets 40,000 impressions from search at 2.1% CTR and 800 views, while a similar video gets 5,000 impressions from browse at 8% CTR and 400 views. The first video is not broken — search viewers are pickier. Common mistake: Treating 2-3% as a fault on every video. A 2% CTR on 100,000 impressions is 2,000 viewers; a 9% CTR on 1,000 impressions is 90.Illustrative diagram showing why a 2-3% CTR is often normal. Step 2 — Learn what Test & Compare actually measures What to do: Understand the one rule that changes everything: the winner is chosen by watch time, not by clicks. How: YouTube's Help page "A/B test titles & thumbnails" says creators can test and compare up to three different titles and thumbnails, and at the end of the test, the title or combination with the highest watch time is shown to all viewers. That is deliberate. A thumbnail that wins clicks but loses viewers in fifteen seconds is worse than a quieter thumbnail that brings in viewers who stay — YouTube says it optimises tests for overall watch time rather than click-through rate. Example: Thumbnail A gets a 6% CTR and an average view duration of 40 seconds. Thumbnail B gets a 4% CTR and an average view duration of 3 minutes. Thumbnail B wins, because its viewers watched far longer. Common mistake: Judging the test by CTR while it runs. Studio shows impressions and CTR during the test, and it is tempting to call a winner early. Wait for the watch-time verdict.Illustrative diagram of why Test & Compare picks its winner by watch time. Step 3 — Check that you can use the tool What to do: Confirm eligibility before you plan a test, because the tool silently excludes whole categories of video. How: YouTube's Help page lists the requirements. Test & Compare is currently only available on computers through YouTube Studio — not the mobile app. You need advanced features enabled on your channel. And it does not work on Shorts, scheduled live streams, or Premiere videos — though a Premiere becomes eligible after it ends. You also cannot use it on videos that are Made for Kids, age-restricted, or private. Example: A creator opens a Short in Studio on their phone and finds no A/B Testing button. Nothing is broken — Shorts cannot be A/B tested, and the tool is desktop-only. Common mistake: Assuming the feature is broken or not rolled out to you. Check the device first — desktop Studio only — then the video type, then whether advanced features are enabled.Illustrative diagram of the eligibility checks for Test & Compare. Step 4 — Set up a test that can actually answer What to do: Test one clear idea at a time, with three genuinely different options. How: In YouTube Studio on a computer, open the video, and in the Title box or under Thumbnail, click A/B Testing. Choose one of three test types: Title only, Thumbnail only, or Title and thumbnail together. Upload up to three thumbnails or titles and click Done. YouTube runs the combinations evenly across your viewers for up to two weeks. The key discipline is to change one meaningful variable: the same image with three different text treatments — no text, two or three bold words, a short question — tells you whether words on the image matter at all. Example: A creator tests three thumbnails for a budgeting video: no text, the words "SAVE $1,000", and the question "Where does your money go?" After two weeks, the question version wins on watch time. Common mistake: Testing three thumbnails that differ only in background colour, or changing the title halfway through. YouTube says that if a video's title or thumbnail is changed during the test, the test automatically stops.Illustrative diagram of a good first thumbnail test with three different options. Step 5 — Read the result, including "no winner" What to do: Open the result in Analytics and act on whichever of the three outcomes you get. How: In Analytics, open the Reach tab, and under "How your A/B test is going" choose Manage test. YouTube reports one of three outcomes. "Winner" means one version was significantly better at driving watch time per impression, and YouTube applies it automatically. "Performed same" means all options earned a similar share of watch time — keep whichever you like. "Inconclusive" usually means the video did not get enough impressions to separate the options: a video with 2,000 impressions a week gives each variant very little data. If there is no clear winner, the first title or thumbnail you uploaded stays as the default. Example: A test on a video with 1,500 impressions a week ends inconclusive after two weeks. The creator runs the next test on a video with 20,000 impressions a week. Common mistake: Reading "inconclusive" as "my thumbnails are all bad". Inconclusive is usually a sample-size problem — run the test where the audience is.Illustrative diagram of the three results a Test & Compare test can give. Step 6 — Turn one test into a repeatable habit What to do: Keep a short log of what you tested and what won, and test your next videos the same way. How: After each test, write down three things: what you varied, which option won, and what the audience's watch time said about it. Over five or six tests a pattern appears — your audience may respond to faces, questions, or plain images — and that pattern is worth more than any single test. Test on videos that already have impressions, because a test needs data to decide. Example: After six tests, a creator's log shows question thumbnails won four times and no-text thumbnails won twice, always on watch time. They stop testing colours and start testing questions. Common mistake: Testing once, getting a winner, and never testing again. One test is one video's answer. The habit is what compounds.Illustrative diagram of turning single tests into a repeatable testing habit. Checklist — Before You Publish☐ I checked the video's traffic source before calling 2-3% a problem ☐ I know the winner is chosen by watch time, not CTR ☐ I confirmed desktop Studio, advanced features, and an eligible video type ☐ I chose one test type: title only, thumbnail only, or both ☐ I uploaded up to three genuinely different options at 1280 x 720 ☐ I did not change the title or thumbnail while the test runs ☐ I read the result in Analytics > Reach > Manage test ☐ I logged what won, so the next test starts smarterFAQs 1. Is a 2-3% CTR bad on YouTube? Not necessarily. YouTube's Help pages say half of all channels sit between 2% and 10% impressions CTR, and traffic source moves the number more than niche does. Check impressions and traffic source first. 2. Does Test & Compare pick the winner by CTR? No. YouTube's Help page says the option with the highest watch time is shown to all viewers at the end of the test. A thumbnail can win clicks and still lose, if its viewers leave quickly. 3. Can I A/B test a Shorts thumbnail? No. YouTube's Help page says you cannot A/B test Shorts, scheduled live streams, or Premiere videos until they end. It also does not work on Made for Kids, age-restricted, or private videos, and it is only available on a computer. 4. How long does a test take? Your test should be completed within two weeks. If it ends inconclusive, the video usually did not get enough impressions — the first title or thumbnail you uploaded stays as the default. 5. What happens if I change the thumbnail during a test? YouTube says the test automatically stops, and you have to restart it. Leave the title and thumbnail alone until the test ends. SourcesYouTube Help — "A/B test titles & thumbnails" (official page, opened live 3 Nov 2026): https://support.google.com/youtube/answer/16391400 CreatorPlaybook — "YouTube Custom Thumbnail Rejected or Not Showing? How to Fix It": </blog/youtube-custom-thumbnail-rejected-or> CreatorPlaybook — "YouTube CTR Suddenly Dropped After 24 Aug 2026? Engaged Views Explained": </blog/youtube-ctr-suddenly-dropped-after-24>
- CreatorPlaybook Team
- 29 Oct, 2026
YouTube Custom Thumbnail Rejected or Not Showing? How to Fix It
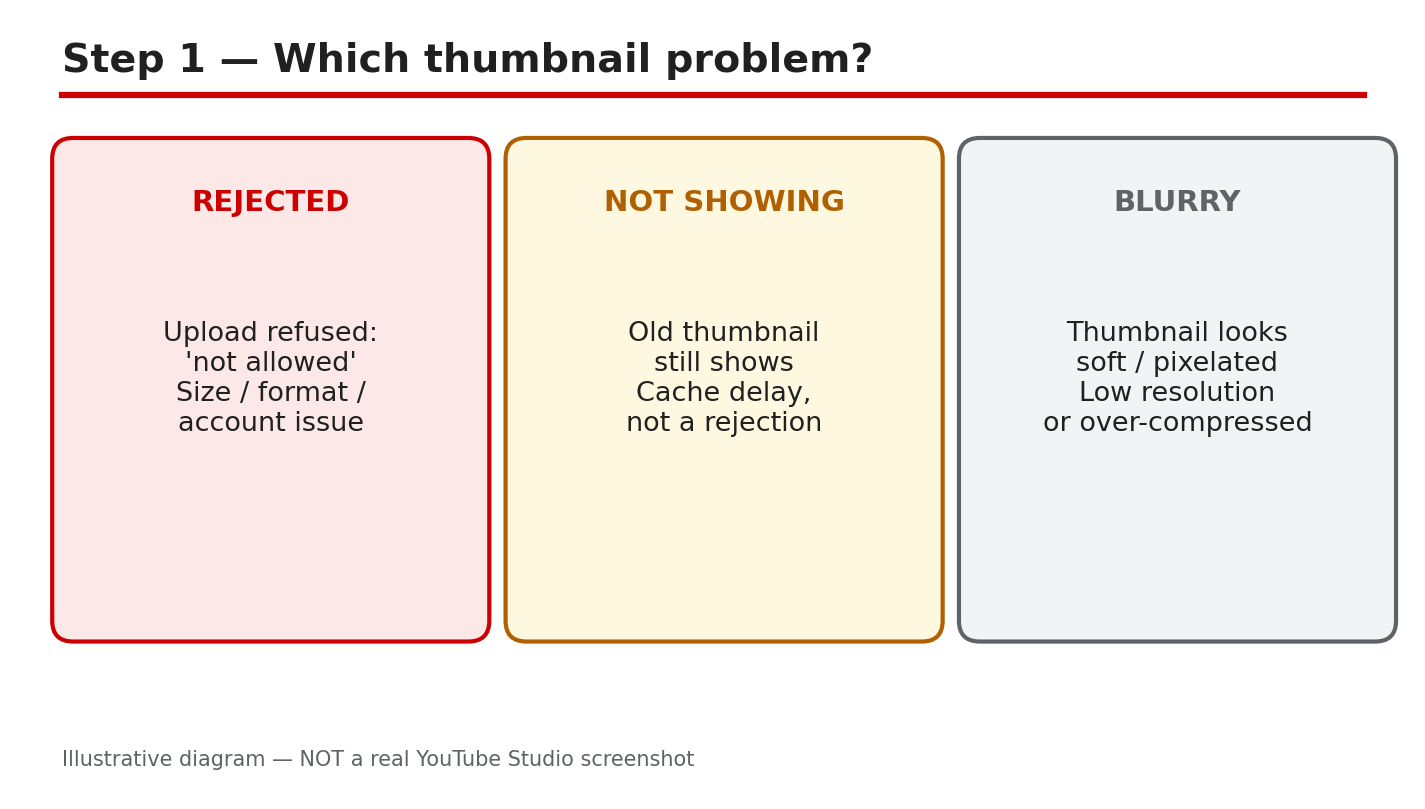
A thumbnail decides whether a viewer clicks or scrolls past. When YouTube rejects your custom thumbnail, or the new image will not show, the video loses its best chance to be seen. Most problems come from three causes: a file that breaks the size or format rules, an image that breaks a policy, or a delay before the change appears. Work in order. First, name the problem: rejected, not showing, or blurry. Next, check the file against the official rules. Then fix the image, re-upload it on the same video, and wait. Do not upload the video again, and do not keep re-uploading the same rejected image. Related reading: How to Make a YouTube Thumbnail That Gets Clicks, which explains what makes viewers click. What You Will LearnHow rejected, slow, and blurry thumbnails differ. The size, format, and ratio rules your file must meet. Which policy problems cause rejections, and how to avoid them. How to re-upload a thumbnail on the same video. What to check when the new thumbnail will not show. A simple habit for thumbnails that stay sharp and clickable.Step 1: Tell Rejected, Not Showing, and Blurry Apart What to do: Rejected means YouTube refused the upload, often with a message about the file or a policy. Not showing means the upload worked, but the old thumbnail still appears while YouTube updates every surface. Blurry means the image is low resolution or over-compressed, so text looks soft on a phone. Name the state first, because each one needs a different fix. Studio path: YouTube Studio > Content > video > Thumbnail. Look at the current thumbnail and any message shown there. Example: A creator uploads a new thumbnail and still sees the old one an hour later. The file was accepted, so this is a delay, not a rejection, and an incognito check settles it. Common mistake: Re-uploading the same rejected file again and again. If YouTube refused it once, the same file will fail again, so check the rules first.Illustrative diagram/mock-up — NOT a real YouTube Studio screenshot: rejected, not showing, and blurry thumbnails compared. Step 2: Check the Size, Format, and Verification Rules What to do: Check the file against the official Help page before you edit anything else. YouTube recommends 3840 by 2160 for videos, and 2160 by 3840 for Shorts, with a minimum width of 640 pixels, in JPG or PNG, at 16:9 for videos. Files must stay under 2 MB on mobile uploads for video thumbnails, while desktop uploads allow up to 50 MB. A 1280 by 720 export meets the minimum width and the 16:9 ratio, and staying under 2 MB is the safest size on every device. Custom thumbnails also need a verified account. Studio path: YouTube Studio > Content > video > Thumbnail > Upload file > SAVE. Check the account status in Studio before you upload. Example: A creator exports at 1280 by 720, under 2 MB, from a verified account. The thumbnail is accepted at once, because the file already meets the rules. Common mistake: Exporting a huge file, then shrinking it at very low quality. Heavy compression makes text soft, so export at the right size with readable text.Illustrative diagram/mock-up — NOT a real YouTube Studio screenshot: thumbnail size, format, ratio, and verification checks. Official YouTube video: How to Add Custom Thumbnails to Your YouTube Videos (YouTube Creators). Watch it for the Studio steps. Step 3: Fix Policy Rejections Before You Re-Upload What to do: A policy rejection means the image itself breaks a rule, not the file size. Misleading thumbnails promise something the video does not show, and YouTube treats that as deceptive. Graphic or sexual imagery, hate speech, violence, and harmful or dangerous content can also lead to rejection, and repeat offenses can remove custom-thumbnail privileges for 30 days or end the account. Keep text to three to five big words, readable on a phone, and show only what the video truly delivers. Studio path: YouTube Studio > Content > video > Thumbnail. Read any policy message, fix the image, then use Upload file > SAVE. Example: A creator uses a shocked face and a promise the video never keeps. Viewers feel tricked, and the thumbnail is rejected. A calmer image that matches the video is accepted. Common mistake: Adding more text and brighter arrows to a rejected thumbnail. Clutter is harder to read on a phone and does not fix the policy problem.Illustrative diagram/mock-up — NOT a real YouTube Studio screenshot: misleading, graphic, and unreadable thumbnail problems. Step 4: Check the Image Before You Re-Upload It What to do: Run four checks before the next upload. First, confirm the size, ratio, and format match the official rules. Second, confirm the image matches the video, with no promise the video cannot keep. Third, shrink the image to phone size and read every word. Fourth, confirm the account is verified. Fix one problem at a time, export once, and upload on the same video. Studio path: YouTube Studio > Content > video > Thumbnail > Upload file. Keep the same video open, and click SAVE after the new file loads. Example: A creator checks the file at phone size, finds the title unreadable, and shortens it to four big words. The new thumbnail stays clear on small screens. Common mistake: Re-uploading on a duplicate video instead of the original. The new video splits views and comments, while the original keeps the old thumbnail.Illustrative diagram/mock-up — NOT a real YouTube Studio screenshot: the four checks before re-uploading a thumbnail. Step 5: If the New Thumbnail Still Will Not Show What to do: Wait for the cache first. YouTube says it may take time for thumbnail changes to appear, so check the video in an incognito tab, where the old image is less likely to be stored. If the old thumbnail still shows after a reasonable wait, replace it again on the same video and save. As a temporary step, use an auto frame, so the video does not keep a broken image while you fix the custom file. Studio path: YouTube Studio > Content > video > Thumbnail > Upload file > SAVE. Then open the video in an incognito tab to check. Example: A creator replaces the thumbnail, saves, and still sees the old image. In an incognito tab the new image shows, which proves the change worked and the old view was cached. Common mistake: Deleting the video and uploading it again to force the change. A new upload loses views, comments, and watch time, and the same delay can happen again.Illustrative diagram/mock-up — NOT a real YouTube Studio screenshot: cache check, replace, and temporary auto frame. Step 6: Build a Thumbnail Habit and Track Clicks What to do: Use one repeatable habit. Make the thumbnail from a real frame that matches the video, add three to five big words, and check it at phone size before you upload. Keep one style for colors and text, so returning viewers spot your videos at once. After publishing, watch the click-through rate in Studio Analytics, and change only the thumbnail when a video underperforms. Studio path: YouTube Studio > Analytics > Content. Compare the click-through rate before and after a thumbnail change. Example: A creator keeps the same colors, tests one new thumbnail on an older video, and watches clicks rise over a week. The single change is easy to read. Common mistake: Changing the title, thumbnail, and description all at once. When clicks rise, you cannot tell which change caused it, so change one thing at a time.Illustrative diagram/mock-up — NOT a real YouTube Studio screenshot: a repeatable thumbnail habit and click tracking. ChecklistProblem named: rejected, not showing, or blurry. File checked: size, format, ratio, verification. Image matches the video, no misleading promise. Text readable at phone size, three to five words. Re-uploaded on the same video, then saved. Checked in an incognito tab after waiting. Click-through rate watched after the change.Frequently Asked Questions Why was my custom thumbnail rejected? Usually the file breaks a size or format rule, the account is not verified, or the image breaks a policy. Check the rules, fix the file or the image, and upload again on the same video. How long does a new thumbnail take to show? It can take time for the change to appear everywhere, so wait, then check in an incognito tab. If the old image still shows, replace the thumbnail again and save. What size should my thumbnail be? YouTube recommends 3840 by 2160 for videos and 2160 by 3840 for Shorts, minimum width 640 pixels, JPG or PNG, 16:9 for videos. A 1280 by 720 export under 2 MB meets the practical rules. Can I use any image as a thumbnail? No. The image must follow the Community Guidelines, match the video, and avoid misleading promises and graphic, hateful, violent, or harmful content. A rejected image must be changed, not re-uploaded as it is. Should I delete the video if the thumbnail will not change? No. Deleting loses views, comments, and watch time. Wait for the cache, check in an incognito tab, replace the thumbnail on the same video, or use an auto frame meanwhile. Fix the file, match the image to the video, and give the change time. Sources — Check It Yourself Official page opened and verified live on 29 October 2026. Check the current wording before acting.How to Make a YouTube Thumbnail That Gets Clicks — CreatorPlaybook Add custom thumbnails on YouTube — YouTube Help

- CreatorPlaybook Team
- 25 Oct, 2026
How to Make a YouTube Thumbnail That Gets Clicks
On YouTube, the thumbnail is often the first reason a viewer clicks, or scrolls past. Even a great video will struggle if its thumbnail is blurry, cluttered, or unclear at phone size, because viewers decide in seconds, among many competing videos. A good thumbnail does not need expensive design skills; it needs one clear subject, readable text, and an honest promise that matches the video. This guide explains how to make a YouTube thumbnail that gets clicks, without misleading viewers. It covers choosing the main idea, taking or selecting a clear image, adding short readable text, using colour and contrast, testing thumbnails, and avoiding clickbait. It is a focused thumbnail guide, distinct from general SEO or title guides, because it deals only with the image viewers see before they click. Related guides: YouTube SEO: Tags, Description and Hashtags, How to Make Educational Videos That Rank, and How to Read and Use the YouTube Studio App. What You Will LearnWhat makes a thumbnail clickable at phone size How to choose one clear idea per thumbnail How to write short, readable thumbnail text How to use colour, contrast, and faces honestly How to test and improve thumbnails How to avoid clickbait that harms trustStep 1: Design for Phone Size First What to do: Design for phone size first, because most viewers see thumbnails small, on a mobile feed. A thumbnail that looks detailed on a computer may look like a blur on a phone, so check it at small size before publishing. If the main subject and text are not clear when the thumbnail is small, simplify it: remove details, enlarge the subject, and shorten the text. How to do it in simple steps:Make the thumbnail at the recommended size for YouTube. Zoom out, or view it at phone size, before publishing. Check that the subject and text are clear at that size. Remove anything that is not readable at small size.Practical example: A creator's thumbnail with five objects and ten words looks busy on a phone, so they keep one object, a face, and three words. Clicks improve, because viewers understand the video instantly. Common mistake to avoid: Designing only on a large screen, with small text and many details. What looks rich on a computer often looks confusing on a phone, where most clicks happen. Illustrative image: Design for phone size first, and check it small. This is an illustrative image, not a screenshot of your channel or another creator's work. Step 2: Choose One Clear Idea Per Thumbnail What to do: Choose one clear idea per thumbnail, which is the main promise or emotion of the video. A tutorial thumbnail might show the result, a story thumbnail might show a key moment, and a comparison thumbnail might show before and after. One idea is easier to understand than three ideas competing for attention, and it pairs well with a clear title, where the title and thumbnail together tell one story, not two different stories. How to do it in simple steps:Write the video's main promise in one sentence. Choose one image that shows that promise. Remove other ideas, objects, and text that compete with it. Check that title and thumbnail together make sense.Practical example: A lighting tutorial thumbnail shows a face lit well, with the words "Better Light," while the title explains the setup. Together they promise one clear result, and viewers who want better lighting click. Common mistake to avoid: Putting the whole video into one thumbnail, with many scenes, arrows, and words. A thumbnail is an invitation, not a summary, and too much information makes viewers skip it. Illustrative image: One clear idea beats three competing ideas. This is an illustrative image, not a screenshot of your channel or another creator's work. Step 3: Write Short, Readable Thumbnail Text What to do: Write short, readable thumbnail text, of two to four words, in a large, bold font, with strong contrast against the background. Thumbnail text should add to the title, not repeat it word for word, and it should be readable at phone size. Use simple words that viewers understand instantly, and avoid long sentences, small fonts, and text over busy backgrounds. How to do it in simple steps:Choose two to four words that add emotion or result. Use a large, bold font, with a shadow or outline if needed. Place text on a plain area, not over a busy image. Check readability at phone size, in different light.Practical example: A creator changes thumbnail text from "How to Improve Your Lighting Setup at Home" to "Better Light," in large white text on a dark background. The thumbnail becomes readable instantly, and clicks rise. Common mistake to avoid: Repeating the full title in small text on the thumbnail, or using fancy fonts that are hard to read. Thumbnail text is a headline, not a paragraph. Illustrative image: Two to four large words, with strong contrast, work best. This is an illustrative image, not a screenshot of your channel or another creator's work. Step 4: Use Colour, Contrast, and Faces Honestly What to do: Use colour, contrast, and faces honestly to draw attention, without misleading viewers. Bright, contrasting colours help a thumbnail stand out in a feed, and a clear face with a natural expression can help viewers connect, especially for personal or story videos. For tutorials, a clear result or object may work better than a face. Whatever you use, it must be in the video, or closely related to it, or viewers will feel tricked when they click. How to do it in simple steps:Choose two or three colours that contrast well. Make the subject stand out from the background. Use a face only if it fits the video and looks natural. Check that the thumbnail honestly represents the video.Practical example: A creator uses a bright background, a clear product photo, and a natural expression, for a review video. The thumbnail stands out, and viewers who click find the product actually reviewed, so they stay and trust the channel. Common mistake to avoid: Using shocked faces, red arrows, and bright colours to promise something the video does not contain. Misleading thumbnails may bring clicks once, but they damage retention and trust, and can lead to strikes for misleading content. Illustrative image: Contrast draws eyes; honesty keeps viewers. This is an illustrative image, not a screenshot of your channel or another creator's work. Step 5: Test Thumbnails and Learn From Click Data What to do: Test thumbnails and learn from click data, instead of guessing which style works. Where Studio offers thumbnail testing, compare two or three honest options and keep the winner. If testing is not available, change one thumbnail at a time, wait for enough impressions, and note the click-through rate, together with retention, because a thumbnail that brings clicks but not watch time is not truly working. Keep a simple record of what worked, so your style improves over time. How to do it in simple steps:Test two or three thumbnail options for one video, where possible. Compare click-through rate and retention together. Keep the winner, and note why it won. Apply the lesson to the next video, with one change at a time.Practical example: A creator tests a cluttered thumbnail against a simple one, and the simple one wins on both clicks and retention. They adopt a simple style for the series, and overall channel clicks improve. Common mistake to avoid: Changing thumbnails every few hours, or judging a thumbnail by clicks alone. Testing needs time and enough data, and a thumbnail must also lead to satisfied viewers, not just clicks. Illustrative image: Test one change at a time, and check retention too. This is an illustrative image, not a screenshot of your channel or another creator's work. Step 6: Build a Consistent Thumbnail Style What to do: Build a consistent thumbnail style, so viewers recognise your videos in a feed. Consistency does not mean every thumbnail looks the same, but that it shares colours, fonts, layout, or framing, so subscribers can spot your videos quickly. A consistent style also saves time, because you can reuse a template and change only the subject and text for each video, while keeping quality high. How to do it in simple steps:Choose colours, fonts, and a layout you can reuse. Make a template, with space for subject and short text. Keep the style, but change the subject for each video. Review your channel page, to check that thumbnails look coherent.Practical example: A creator uses the same font, colour, and layout for a tutorial series, with a different result photo each time. Subscribers recognise the series instantly, and new viewers understand the channel's topic at a glance. Common mistake to avoid: Using a completely different style for every video, with no recognisable pattern. Inconsistent thumbnails make a channel look scattered, and viewers cannot learn to spot your videos. Illustrative image: A consistent style helps viewers recognise your videos. This is an illustrative image, not a screenshot of your channel or another creator's work. Checklist for YouTube Thumbnails That Get ClicksThumbnail checked at phone size, and readable One clear idea per thumbnail Two to four words, large and readable Strong colour and contrast, with a clear subject Thumbnail honestly represents the video Tested, with clicks and retention checked together Consistent style across the channelFrequently Asked Questions Do I need paid design software for thumbnails? No. Free tools, and even phone apps, are enough for clear thumbnails, as long as you use a clear image, large text, and strong contrast. Design skill matters more than software cost. Should thumbnails use faces? Faces can help for personal, story, and reaction videos, but they are not required for tutorials, where a clear result or object may work better. Test what fits your topic and audience. How much text should a thumbnail have? Usually two to four words, that add to the title rather than repeating it. Long thumbnail text is hard to read at phone size, and it competes with the title. Is clickbait ever okay? Curiosity is okay, misleading is not. A thumbnail can create curiosity about a real result in the video, but it should not promise something the video does not deliver. When should I change a thumbnail? When click-through is low but impressions are high, and you have a clearer, honest alternative. Change one element, wait for data, and judge by clicks and retention together. A good thumbnail is a clear, honest invitation: one idea, readable at phone size, that promises what the video actually delivers. Make that your standard, and clicks will follow, with viewers who stay.