Showing Posts From
Youtube updates
 CreatorPlaybook Team
- 29 Oct, 2026
AI Content on YouTube: EU Labelling Rules and How to Disclose It Correctly
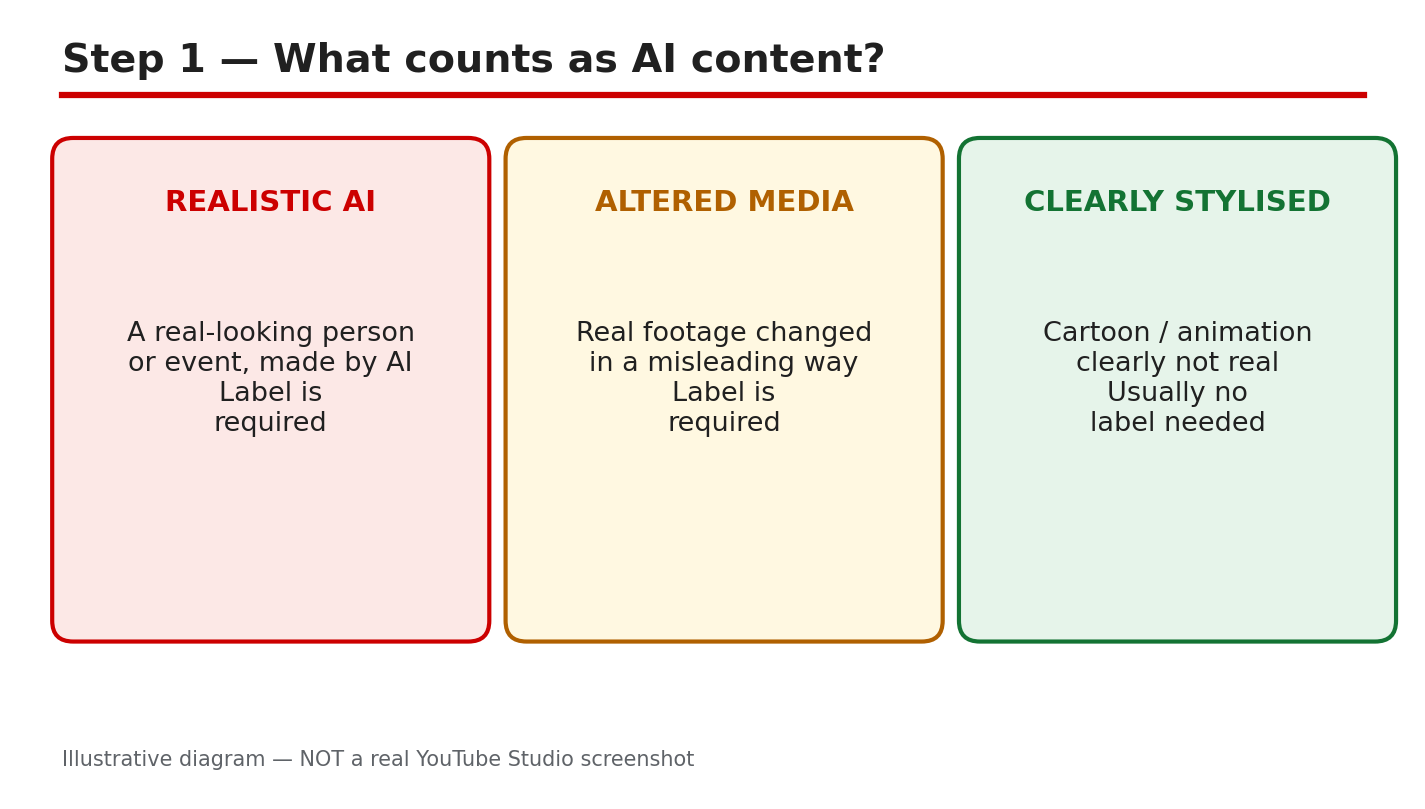
If you use AI to make a video that looks real, viewers need to know. A realistic face, voice, place, or event made or changed with AI can mislead people, even when you meant it as a creative edit. YouTube therefore asks creators to disclose realistic AI-generated or altered content, and viewers in the European Union must be able to see that label. This guide explains the rule in plain words, shows the exact place to set the label in YouTube Studio, and gives you a short habit you can repeat for every upload. The EU details below are presented only as reported. Rules and wording can change, so check the official YouTube Help page and the official EU source linked in Sources before you rely on a detail for a particular video. Do not guess a fine, a threshold, or a date that is not stated there. What You Will LearnWhat counts as realistic AI content, and what does not need a label. Where to set the disclosure in Studio, before you publish. The EU transparency and provenance points, as reported. Four quick checks to run before every upload. What happens if YouTube adds a label, or disclosure is missed.Step 1: What Counts as AI Content What to do: Decide, before editing, whether the finished video could look real to a viewer. Disclosure is for AI-generated or meaningfully altered content that seems realistic, including a real person appearing to say or do something they did not do, altered footage of a real event or place, a realistic scene that did not occur, and music that is the main focus and was made with AI. Studio path: No button yet. Make this decision in your planning notes, then use the upload step in Step 2 to record it. Example: You use AI to place a real presenter in a street scene that was never filmed. That looks real, so it needs disclosure. Common mistake: Assuming a small AI change does not count. If a viewer could believe the result is real, treat it as disclosable.Illustrative diagram/mock-up, NOT a real Studio screenshot: what counts as AI content. Step 2: Where to Disclose It in Studio What to do: During upload, answer the altered-content question honestly and set it before publishing. The label follows the viewer, not only the uploader, so EU viewers count even if you live elsewhere. Do not publish first and fix it later. Studio path: YouTube Studio > Create > Upload videos > Details > altered-content question, under Attributes / AI use. Select Yes if the content meets the disclosure rule, or No if it does not, then continue through the upload screens. Example: Your upload includes an AI-generated realistic interview. On the Details screen, you select Yes under AI use before you click Publish. Common mistake: Leaving the question on its default answer without reading it. A rushed upload is how a realistic AI video goes out with no label.Illustrative diagram/mock-up, NOT a real Studio screenshot: where to add the label. Step 3: EU Rules in Plain Words What to do: Understand the reported EU points, then check the official source for the current wording. As reported, viewers must be told when content is AI-generated or altered in a realistic way, provenance or AI markers should travel with the file so the information is not lost when it is shared, and there is a transitional period to 2 December 2026. Present no other date, fine, or threshold as a rule. Studio path: No EU switch in Studio is described here. Use the Step 2 disclosure setting for every video, and keep a note of the source you checked. Example: A clip is shared outside YouTube. If its AI marker travels with the file, a later viewer can still see that it was AI-made. Common mistake: Quoting a fine or deadline you saw in a social post. Check the official Help and EU source first, and do not invent a number.Illustrative diagram/mock-up, NOT a real Studio screenshot: EU rules in plain words. Step 4: Run the Labelling Checks What to do: Ask four questions before you publish: does it show a real person, does it show a real event or place, could a viewer believe it is real, and is disclosure set? If any answer points to realistic AI content, disclose it. When in doubt, label it. Studio path: YouTube Studio > Content > select the video > Details > check the altered-content / AI use answer, and correct it before publishing. Example: A cartoon avatar explains a topic, with no real person or place. It fails the realistic test, so no AI label is needed for that style. Common mistake: Checking only the first question. A realistic place or event can mislead even when no real person appears.Illustrative diagram/mock-up, NOT a real Studio screenshot: labelling checks before publishing. Step 5: If YouTube Labels It for You What to do: If YouTube applies a label automatically, read the Studio notification, check whether the label is correct, and correct the disclosure where Studio allows it. Do not ignore a label, and do not remove a correct label to make a video look more real. Studio path: YouTube Studio > Content > Restrictions / video details > read the AI label notification, then open Details and review the AI use answer. Example: Studio adds a label to a video made with a YouTube AI tool. You leave the correct label in place and note why it appeared. Common mistake: Treating a single missing disclosure as harmless. As reported, repeated missing disclosure risks removal or a review of Partner Program eligibility.Illustrative diagram/mock-up, NOT a real Studio screenshot: if YouTube labels it for you. Step 6: Build the Labelling Habit What to do: Make disclosure part of every upload checklist. Note the AI tools used, the realistic elements, and the answer you selected, and keep that note with the video file. Repeat the same checks for Shorts, livestream clips, and re-uploads. Studio path: YouTube Studio > Content > Details for each upload. Confirm the AI use answer, then publish, and re-check it after any re-upload. Example: Before a weekly upload, you write “AI voice, real street photo, Yes” in your notes, set Yes in Studio, and publish with the label showing. Common mistake: Disclosing once for a series and assuming later episodes are covered. Check every video separately.Illustrative diagram/mock-up, NOT a real Studio screenshot: the labelling habit. Checklist: Before You PublishReal person, event, or place? Note the answer. Could a viewer believe it is real? If yes, disclose. AI use answer set in Studio before publishing? Label checked in the video details after upload? Official source checked for the current wording?Frequently Asked Questions Do I need to disclose clearly cartoon or stylised AI content? No, disclosure is for content that seems realistic. Clearly stylised or cartoon content that no viewer would mistake for real does not need the same label, but check the official examples if you are unsure. Does the EU rule apply if I do not live in the EU? As reported, the rules apply by audience location. If EU viewers watch the video, the label matters for them, even if the creator lives elsewhere. What if YouTube labels my video automatically? Read the Studio notification, check the label, and correct the disclosure where Studio allows it. Do not remove a correct label. Does disclosing AI content limit my audience or earnings? YouTube Help states that disclosing AI content alone will not limit a video’s audience or affect its eligibility to earn money. Other policies still apply. Where can I check the current official wording? Use the official YouTube Help page linked in Sources, and check the official EU source for the current wording before you publish. A Simple Rule to Remember If a viewer could mistake your video for a real recording, disclose it. If the content is clearly invented, cartoon, or stylised, and no viewer would take it as real, disclosure is less likely to be needed, but still pause and run the four checks in Step 4. A label costs little time, while a missing label can cost trust, a removal, or a review. Keep your notes short, keep the Studio answer honest, and check the official source when a rule changes. Label early, label honestly, and keep the check in your upload routine. A clear label protects viewers, and it protects your channel too. Sources — Check It Yourself Check these sources yourself. The EU points in this guide are reported, not legal advice.YouTube Help: Disclosing use of GenAI content YouTube Help: YouTube channel monetization policies CreatorPlaybook: How to Use AI for YouTube Videos Without Breaking Monetization Policy
- CreatorPlaybook Team
- 29 Oct, 2026
YouTube Partner Program 2027 Terms: What to Accept by 31 January 2027
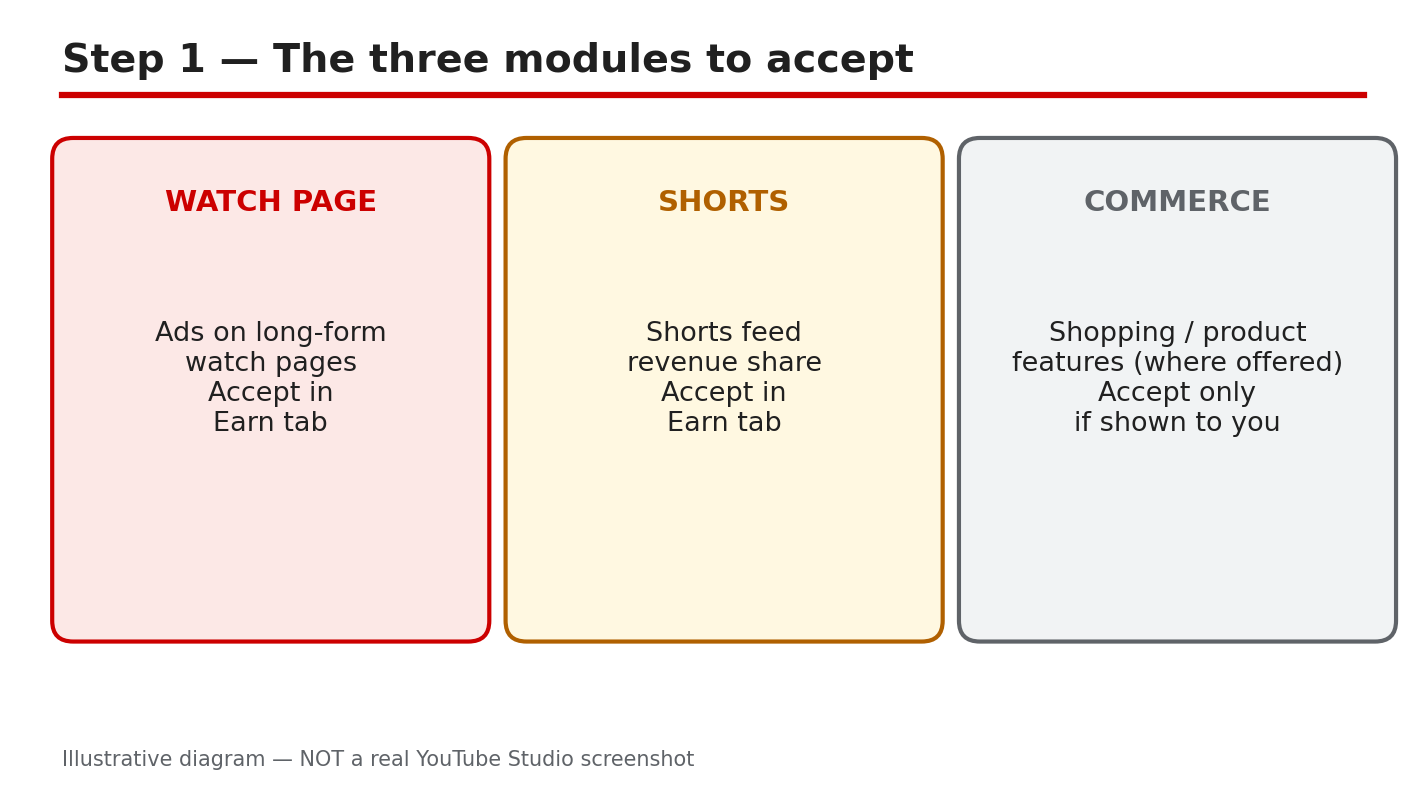
If you earn from YouTube, or plan to, a set of new Partner Program terms is coming, and the date to know is 31 January 2027. Reports say YouTube is asking creators to review and accept updated monetization terms, split into separate modules, and that earnings from any module you have not accepted could stop from 1 February 2027. This guide explains what to check in your own Earn tab, what the reported changes mean, and what to do before you tap accept. Do not rely on a screenshot or a summary alone: the deadline and the modules shown in YOUR Earn tab are the ones that apply to you. The important caution first. The new entry figures in Step 3 are reported by secondary sources, not verified from YouTube's official announcement during this guide's preparation. The official YouTube Help pages checked while preparing this guide showed a notice that Partner Program updates start on 1 February 2027, while the eligibility wording then visible still listed the older thresholds. Treat every new figure here as reported, and confirm it in your Earn tab and in the official terms before you act on it. Related reading: YouTube Monetization and the Partner Program Explained. What You Will LearnThe three monetization modules YouTube shows in Studio, and what each one covers. How to review and accept each module in the Earn tab, and where your deadline is shown. The reported new entry bar for new applicants, and why it is still unconfirmed here. What to check before you accept: terms, modules, country eligibility, and AdSense. What reports say happens if a module stays unsigned after 1 February 2027. A simple December-to-January plan for reading, accepting, and confirming.Step 1: Know the Three Modules What to do: Open YouTube Studio and look at the Earn tab as a set of separate agreements, not one switch. The official Help pages and reports describe three modules: Watch Page Monetization, which covers ads on watch pages and related revenue; Shorts Monetization, which covers Shorts feed ads and the Creator Pool revenue share; and Commerce Product, where shown, which covers shopping and product features. Not every channel sees every module, and the list you see depends on your country and your current status. Your job in this step is only to list what YOUR Earn tab shows, module by module, before you accept anything. Studio path: YouTube Studio > Earn. Read each module card or section shown. Note the module name, its status, and any date shown beside it. Example: A channel in the Partner Program sees Watch Page Monetization and Shorts Monetization as accepted, and no Commerce Product module, because that feature is not available in its country. The creator notes all three facts instead of assuming the missing module is a problem. Common mistake: Assuming one accept button covers everything. Each module is a separate agreement, so accepting one does not accept the others. Check each one.Illustrative diagram/mock-up of the three modules: Watch Page Monetization, Shorts Monetization, and Commerce Product. This is NOT a real YouTube Studio screenshot. Step 2: Review and Accept Each Module What to do: For each module shown, open its terms, read them, and accept only when you understand what you are agreeing to. The Earn tab shows the deadline that applies to your account, and that is the date that matters, not a date in a video or a post. Accept each module separately, and after each acceptance, reload the Earn tab and check that the module's status changed to accepted. Take a screenshot or write down the date and time of each acceptance, so you have your own record if a status ever looks wrong later. Studio path: YouTube Studio > Earn > click a module > review the terms > Accept. Repeat for each module shown. Then reload YouTube Studio > Earn and confirm each status. Example: A creator accepts Watch Page Monetization on 12 January, reloads the Earn tab, and sees its status change to accepted, while Shorts Monetization still shows as awaiting acceptance. The creator accepts that module too, rather than assuming the first acceptance covered both. Common mistake: Accepting in a hurry on a phone without reading, then discovering later that a module's terms changed how a revenue stream works. Read first, accept second, and confirm the status after.Illustrative diagram/mock-up of the five-step path to accept the terms in the Earn tab. This is NOT a real YouTube Studio screenshot. Step 3: Understand the Reported New Entry Bar What to do: This step is only about NEW applicants, and every figure in it is reported, not verified from the official announcement. According to secondary reports, new applicants would need 1,000 subscribers plus either 8,000 qualified watch hours in 365 days or 20 million qualified Shorts views in 90 days. That would double the older bar of 4,000 watch hours in 12 months or 10 million Shorts views in 90 days, which was the wording still visible on the official Help page checked during preparation. If you are already in the Partner Program, reports say you are grandfathered on entry, meaning you would not need to meet the new bar to stay in, but you must still accept the new terms. If you are applying for the first time, do not plan around these figures until you confirm them in your Earn tab and in the official terms. Studio path: YouTube Studio > Earn. Read the eligibility wording shown for YOUR account. Compare it with the terms text itself, not with a summary. Example: A channel with 1,000 subscribers and 5,000 watch hours reads a report saying the bar is now 8,000 hours. Instead of giving up, the creator opens the Earn tab, reads the eligibility wording shown there, and plans from that, because the reported figure is unconfirmed. Common mistake: Quoting the reported 8,000 hours or 20 million views as official fact, or telling other creators the old bar is gone. Until the terms in your Earn tab say so, call these figures reported.Illustrative diagram/mock-up of the reported new entry bar for new applicants, compared with the older bar. Figures are reported, not official. This is NOT a real YouTube Studio screenshot. Step 4: Check Four Things Before You Accept What to do: Before you accept any module, run four checks. First, read the terms themselves, including any section about revenue share, content rules, and how YouTube can change the terms. Second, check that every module shown in your Earn tab is listed, so you do not miss one. Third, confirm your country is eligible for each module you want, because availability varies by country. Fourth, confirm your AdSense account is linked and in good standing, because earnings cannot be paid without it. If any check fails, fix it before you accept, rather than accepting and hoping it sorts itself out. Studio path: YouTube Studio > Earn for the modules, the deadline, and the AdSense and payment section shown there. Read each module and the payment information on the same tab. Example: A creator reads the terms, finds the Shorts module shown but no Commerce Product module, confirms the channel's country is eligible for the first two, and checks that AdSense shows as linked. Only then does the creator accept, one module at a time. Common mistake: Accepting with an unlinked or troubled AdSense account, then wondering why earnings do not arrive. The terms and the payment link are both part of being ready.Illustrative diagram/mock-up of the four checks before you accept: read the terms, check all modules shown, confirm country eligibility, and confirm AdSense is linked. This is NOT a real YouTube Studio screenshot. Step 5: Know What Happens If You Do Not Accept What to do: Reports say the consequence of not accepting is simple and costly: from 1 February 2027, you would earn nothing from any module you have not signed. That means a channel that accepts Watch Page Monetization but not Shorts Monetization would, on the reported reading, keep watch-page earnings but earn nothing from Shorts. Reports also say Shorts Creator Pool revenue needs 10 million qualified Shorts views in the previous 90 days, which is a separate condition from accepting the module. Both points are reported, not verified from the official announcement, so confirm them in your Earn tab and in the official terms. Do not assume a grace period exists unless your own Earn tab says so. Studio path: YouTube Studio > Earn. Read the deadline and the consequence wording shown for each unsigned module. To see where you stand on Shorts views, check YouTube Studio > Analytics. Example: A creator accepts the Watch Page module in January but leaves the Shorts module unsigned, thinking it can wait. On the reported reading, Shorts earnings would stop from 1 February, even though watch-page earnings continue. The fix is to accept the Shorts module before the deadline shown in the Earn tab. Common mistake: Assuming earnings pause only briefly, or that old terms keep paying you. On the reported reading, unsigned means unpaid for that module, so treat the deadline as real.Illustrative diagram/mock-up of the reported consequences of not accepting: no earnings from unsigned modules, the Shorts Creator Pool condition, and checking the Earn tab. This is NOT a real YouTube Studio screenshot. Step 6: Follow the December-to-January Plan What to do: Use a short December-to-January plan. In December, read the terms for each module shown in your Earn tab, run the four checks from Step 4, and note the deadline shown in your Earn tab. In early January, accept each module, one at a time, and record the date of each acceptance. In late January, reload the Earn tab and confirm every module you need shows as accepted, and that your AdSense link still shows as active. If a module still shows as awaiting acceptance, do not leave it: re-open it, read any new message, and complete it before the deadline in your Earn tab. Studio path: YouTube Studio > Earn in December to read; the same tab in January to accept; and again in late January to confirm. Keep your own notes beside each check. Example: A creator reads the terms on 15 December, accepts both modules on 8 January, and checks the Earn tab on 28 January. Both show as accepted, so the creator starts February with nothing unsigned. Common mistake: Leaving acceptance to 31 January and hitting a problem, such as an AdSense check that needs days to resolve. Start in December so January has room for fixes.Illustrative diagram/mock-up of the December-to-January acceptance plan: read in December, accept in January, and confirm the accepted status. This is NOT a real YouTube Studio screenshot. Checklist: Before You AcceptEvery module shown in my Earn tab is listed, with its status noted. The deadline shown in MY Earn tab is written down. Terms read for each module I plan to accept. Country eligibility checked for each module. AdSense linked and showing as active. Each acceptance confirmed in the Earn tab after accepting.Frequently Asked Questions Do I need to accept the new terms if I am already in the Partner Program? Reports say yes. Existing partners are reported to be grandfathered on the entry bar, but they must still accept the new modules. Confirm the wording in your Earn tab. Is the new entry bar really 8,000 watch hours or 20 million Shorts views? That is the reported figure from secondary sources, not verified from YouTube's official announcement during this guide's preparation. The official Help page checked still showed the older 4,000-hour and 10-million-view wording. Confirm the current figures in your Earn tab and in the official terms. What happens if I accept one module but not another? On the reported reading, you would earn from the modules you accepted and nothing from the ones you did not, from 1 February 2027. Check the consequence wording in your Earn tab. I do not see the Commerce Product module. Is something wrong? Not necessarily. The modules shown depend on your country and status. If a module is not shown in your Earn tab, it may not be available to you. Do not try to accept a module you cannot see; work from what your Earn tab lists. Where do I confirm the real deadline? In your own Earn tab in YouTube Studio. That deadline, and the terms text shown there, override any date in a video, a post, or a report, including this one. Sources — Check It Yourself These official YouTube Help pages were opened and verified live while this guide was prepared. The Partner Program page showed a notice that updates start on 1 February 2027, while its eligibility wording then visible still listed the older thresholds, which is why new figures in this guide are presented as reported. Check the current wording in your Earn tab and in these pages before you act.YouTube channel monetization policies — YouTube Help YouTube Partner Program overview and eligibility — YouTube HelpNo official YouTube video is embedded in this post. No exact official video URL was verified live during preparation, so none was embedded rather than guessing one.
- CreatorPlaybook Team
- 28 Oct, 2026
YouTube Monetization Rejected? How to Fix Reused Content and Appeal the Right Way
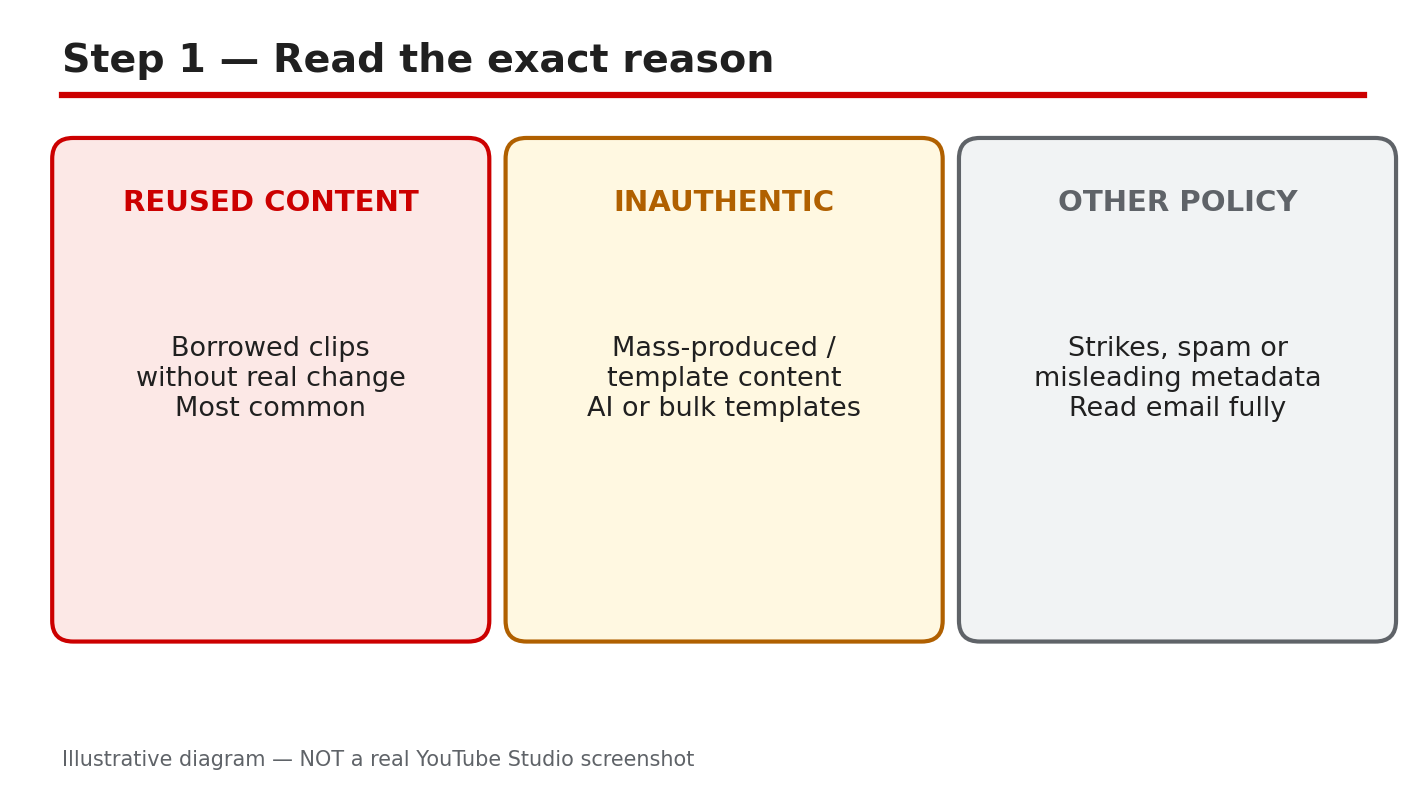
A monetization rejection feels final, but it is a decision about your channel's content measured against YouTube's monetization policies — not a ban on your channel, and not a judgment on every video you will ever make. The way back is orderly: read the exact reason, clean up the content that caused it, and then appeal or reapply the right way, with original work to show. This guide works through six steps in order. Do them in order: the reason decides what to fix, the Earn tab shows whether you can appeal and by when, and the clean-up has to happen before you appeal — not after. What You Will LearnHow to read the exact rejection reason word-for-word — reused content, inauthentic content, or another policy. Where to find your status, the appeal or reapply option, and the exact deadline in the Studio Earn tab. How to clean up before you appeal: remove or unlist template and borrowed clips, and publish original videos. How to make an appeal video that shows your original work and explains how your videos were made. Which reapply waiting window applies to your case, and how to use the wait to rebuild.Step 1 — Read the Exact Reason Word-for-Word What to do. Open the rejection email YouTube sent and the notice in YouTube Studio, and read the reason exactly as written. Copy the words down. The reason is usually “reused content” or “inauthentic content,” but it can name another policy instead — and each reason points at a different fix. Do not guess from the subject line or from what happened to another creator. Note that YouTube renamed its “repetitious content” policy to “inauthentic content” in July 2025; the reused-content policy itself did not change. Studio menu path. Your rejection email, then YouTube Studio > Earn tab > read the status and reason shown for your channel. Example. An email says the channel was rejected for “reused content.” The creator lists the videos that are re-uploaded clips with no added commentary — those are the videos to deal with in Step 3, not the original videos. Common mistake. Appealing with a general message such as “please monetize my channel” without naming the reason or fixing anything. Reviewers decide against the policy named in the rejection, so a general plea gives them nothing new to review. Diagram 1: The exact rejection reason — reused content, inauthentic content, or another policy — read word-for-word before you act. Illustrative diagram/mock-up, NOT a real YouTube Studio screenshot.Quick ChecklistRead the exact rejection reason word-for-word. Check the Earn tab: status, appeal or reapply option, and exact deadline. Clean up before appealing: remove or unlist violating videos, and publish original videos. Make an appeal video that shows your original work, explains how your videos were made, and stays calm and factual. If the appeal fails, use only your case's reapply window — 30 days after a first rejection, 90 days if it is not your first rejected application or you previously re-applied — and check the exact window in the Earn tab. Rebuild with original videos on a schedule, then reapply when the window opens.Frequently Asked Questions What does "reused content" mean? YouTube's monetization policies require content to be original and authentic. Reused content means videos taken from elsewhere with little or nothing original added. In July 2025, YouTube renamed the "repetitious content" policy to "inauthentic content"; the reused-content policy itself did not change. How long do I have to appeal? Appeal within 21 days where the Earn tab offers an appeal. Check the exact deadline shown in the Earn tab for your channel. What if my appeal fails? Use the reapply window for your case: 30 days after a first rejection, or 90 days if it is not your first rejected application or you previously re-applied. Check the exact window in the Earn tab, and use the wait to publish original videos. Should I delete all my videos? No. Remove or unlist only the videos that break the policy named in the rejection, and add original videos that show your own work. Will I be monetized again if I reapply? There is no guarantee. Reapplying after the clean-up gives YouTube new original content to review; the decision is YouTube's. Sources — Check It YourselfYouTube channel monetization policies YouTube Partner Program overview & eligibility My channel was rejected for monetization FAQs Manage restrictions on your content Get started with YouTube Analytics No official video is embedded in this post: no official YouTube Creators or Creator Insider video matching this exact monetization-appeal topic was verified, so none was embedded rather than guessing at a link. All diagrams in this post are illustrative diagrams/mock-ups, NOT real YouTube Studio screenshots. Step 6 — Follow a Rebuild-Then-Reapply Plan What to do. Work in order over several weeks. First, finish the clean-up from Step 3. Then publish original videos on a regular schedule — videos you made yourself, showing your own work. Before each video goes up, check it against the monetization policies linked in the Sources section: is it original, and does it add something of your own? When your reapply window from Step 5 opens, check the Earn tab, confirm the channel shows original work, and only then reapply. Studio menu path. YouTube Studio > Content (publish original videos on a schedule) > Earn tab (check status and reapply when the window opens). Example. A creator publishes one original video a week for a month, reviews each one against the monetization policies, checks the Earn tab when the 30-day window opens, and reapplies only when the channel clearly shows original work. Common mistake. Reapplying on the first day the window opens with the same reused clips still public, or publishing nothing new during the wait. The window alone does not change the decision — the channel's content does. Diagram 6: Rebuild-then-reapply plan — publish original videos over several weeks, then reapply when the window opens. Illustrative diagram/mock-up, NOT a real YouTube Studio screenshot. Step 5 — If the Appeal Fails, Use the Reapply Window for Your Case What to do. Do not re-appeal the same way with the same channel. Read what the Earn tab shows for your case, and use only the reapply window that applies to you. YouTube's official guidance says: if this was your first application rejected, you can re-apply after a 30-day period; if it is not your first application to be rejected, or you have previously re-applied, you can try again after a 90-day period. Check the exact window and date in the Earn tab for your channel — that date is the one that counts. Use the waiting time to publish original videos, so the next review sees new original content. Studio menu path. YouTube Studio > Earn tab > status and reapply option > the exact reapply date shown for your channel. Example. A creator whose first application was rejected sees a 30-day window, spends the wait publishing original videos, and reapplies only after that window opens. A creator on a second rejection sees a 90-day window instead — the two cases are not the same number. Common mistake. Merging the two windows into one number — for example, telling every creator to wait 30 days — or reapplying immediately with the same reused clips still public. Both waste the next review. Diagram 5: Reapply waiting rule — the 30-day and 90-day windows are separate cases; use only the window the Earn tab shows for your channel. Illustrative diagram/mock-up, NOT a real YouTube Studio screenshot. Step 4 — Make an Appeal Video That Shows Your Original Work What to do. If the Earn tab offers an appeal, record a video that shows your original work and explains how your videos are made. Show yourself on camera, show your editing process or raw files, and explain in plain words what you create and how. Answer exactly what the appeal screen asks for, and keep the tone calm and factual. Upload or link the video exactly as the appeal screen instructs. Studio menu path. YouTube Studio > Earn tab > appeal option > follow the appeal screen's instructions for the appeal video. Example. A creator records a short video showing their editing timeline, the raw clips they filmed, and themselves explaining how each video is made — then submits it through the appeal screen. Common mistake. Sending an angry video with no evidence, or a long video that never shows the work itself. Reviewers need to see the original work, not hear a complaint about the decision. Diagram 4: Appeal video checklist — show your original work, explain how your videos were made, and include evidence. Illustrative diagram/mock-up, NOT a real YouTube Studio screenshot. Step 3 — Clean Up Before You Appeal What to do. Do the clean-up before you send any appeal. Go through your channel and remove or unlist the videos that match the reason in Step 1: template compilations, re-uploaded clips with nothing original added, and any other videos that break the policy named in the rejection. Then publish new, original videos that show your own work — your own recording, commentary, editing, or teaching. Appeal only after the channel itself shows the fix, because reviewers look at the channel as it is when they review it. Studio menu path. YouTube Studio > Content > select the videos > Visibility: Unlisted, or remove the video; then Content > Upload to publish original videos. Example. A channel rejected for reused content unlists five template compilation videos and publishes three original videos — the creator on camera, explaining each topic in their own words — before appealing. Common mistake. Appealing first and promising to clean up later, or leaving the violating videos public while appealing. The review is based on what the channel shows at review time, so an unchanged channel gives the reviewer the same answer. Diagram 3: Clean up before appealing — remove or unlist template and borrowed clips, and publish original videos first. The counts in the diagram are illustrative examples, not a required number. Illustrative diagram/mock-up, NOT a real YouTube Studio screenshot. Step 2 — Check the Earn Tab: Status, Appeal Option, and Deadline What to do. Open YouTube Studio and go to the Earn tab. Read three things: the monetization status shown for your channel, whether an appeal or reapply option is offered, and the exact deadline shown. Write the deadline down with the date. If an appeal is offered, you can normally appeal within 21 days of the decision — but the date shown in the Earn tab for your channel is the one that counts, so follow that date, not a date you read elsewhere. Studio menu path. YouTube Studio > Earn tab > monetization status > appeal or reapply option and the deadline shown. Example. The Earn tab shows the channel as not approved, with an appeal button and a deadline 21 days out. The creator notes the date, finishes the clean-up in Step 3, and appeals with five days to spare. Common mistake. Missing the deadline because the appeal was left until later, or hunting for an appeal form when the Earn tab offers no appeal. If no appeal is offered, use the reapply route in Step 5 instead of looking for a hidden appeal form. Diagram 2: The Earn tab — status, appeal or reapply option, and the exact deadline shown. Appeal within 21 days where the Earn tab offers an appeal. Illustrative diagram/mock-up, NOT a real YouTube Studio screenshot.
- CreatorPlaybook Team
- 28 Oct, 2026
YouTube Shorts Views Dropped? How to Check If the October 1, 2026 Original Content Update Affected Your Channel
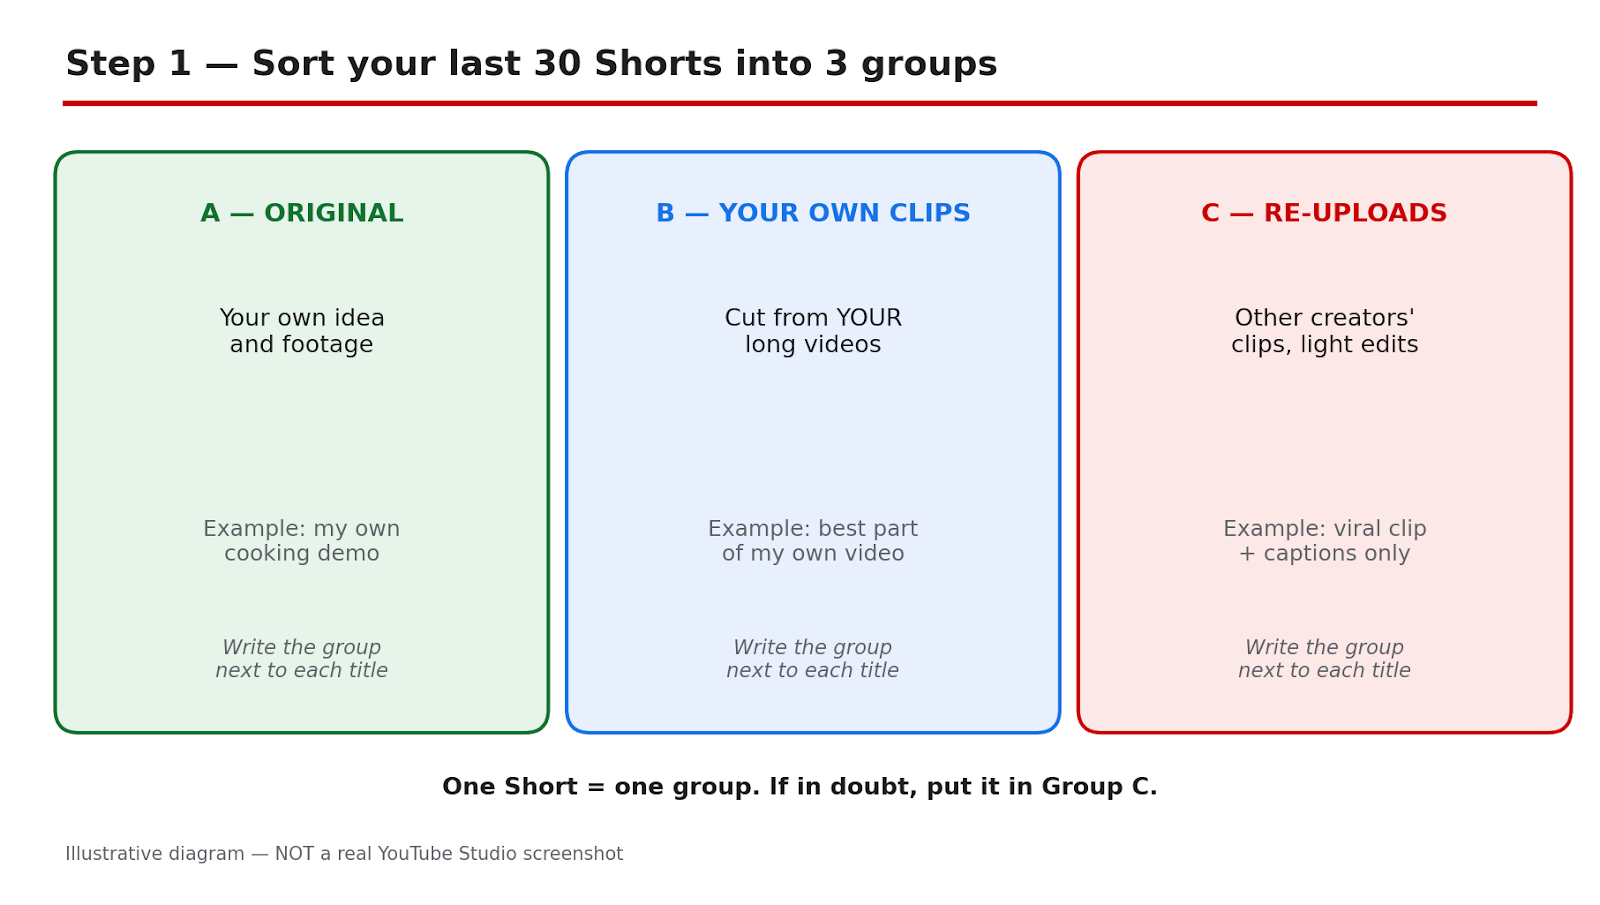
Your Shorts views have fallen. Did something happen to your channel, or only to one kind of video? A channel-wide fall and a fall in only re-uploaded Shorts are not the same problem. This diagnosis tutorial separates the two with numbers from YouTube Studio, rules out other causes, and tests a change without guessing or deleting videos. On 1 October 2026, YouTube Creator Liaison Rene Ritchie announced in a Creator Insider video that Shorts recommendations would further prioritise original content and reduce the reach of channels that primarily aggregate or re-upload other creators' videos without significant changes. That is a recommendation change, not a ban and not a new monetisation rule. Monetisation still follows the separate reused-content policy. For what changed, read the background explainer first, then work through the checks in order. YouTube gave no start date, no threshold for how much original work is enough, no Studio indicator for reduced reach, and no re-evaluation timeline. This guide states those gaps plainly and invents no date, percentage, or recovery period. What You Will LearnWhat the 1 October 2026 announcement changed, and what counts as original. How to classify your last 30 Shorts and compare median Shorts feed views by group. How to rule out claims, strikes, restrictions, posting changes, and seasonality. How to keep reach, monetisation, and copyright separate. How to fix the mix, test six original Shorts, and re-evaluate.Step 1: Classify Your Last 30 Shorts Into Groups What to do: Before you open Analytics, classify your last 30 Shorts. You need the mix first: the announcement was about channels that primarily aggregate or re-upload without significant changes, not one borrowed clip in an otherwise original channel. How to do it in YouTube Studio: Open YouTube Studio and go to Content, then filter to Shorts. Work from the most recent 30. In a spreadsheet, record title, date, group, and Shorts feed views: A, fully original; B, clips from your own long videos; C, re-uploads or other creators' clips with light changes; D, template or AI-narrated borrowed clips. Example: A cooking channel finds 8 in A, 6 in B, 11 in C, and 5 in D. Sixteen of 30 Shorts were borrowed clips or templates. Common mistake: Do not classify by intention. A Short you spent an hour captioning is still group C if the picture and idea came from another creator.Illustrative diagram made to explain Step 1. This is a mock-up, NOT a real screenshot of YouTube Studio or any creator's channel. Step 2: Compare Equal Windows With the Median, Not the Average What to do: Compare two equal windows around 1 October, using median Shorts feed views per Short and engaged views, not the average or the public count. One viral Short can lift an average and hide a fall in the typical Short. How to do it in YouTube Studio: In YouTube Studio, go to Analytics, then Content. Filter to Shorts and open Advanced mode. Use the 28 days before 1 October and the 28 days from 1 October, keeping them exactly equal. Record the median, the number of Shorts, and the dates. Example: An average falls from 9,400 to 6,100, but one Short with 92,000 views pulls up the first window. The median falls from 3,800 to 3,100. Common mistake: Do not compare a 28-day window with a 7-day window, or use the public count, which mixes traffic sources. Isolate Shorts feed views.Illustrative diagram made to explain Step 2. This is a mock-up, NOT a real screenshot of YouTube Studio or any creator's channel. Step 3: Compare Each Group Separately What to do: Repeat the comparison for each group separately. A channel-wide drop alone proves nothing. The pattern pointing toward this update is: group C (and D) falls, while A and B hold steady. If all groups fall similarly, the cause is more likely channel-wide. How to do it in YouTube Studio: In YouTube Studio, go to Analytics, then Content, filter to Shorts, and use Advanced mode, as in Step 2. Calculate the median for each group in each window. Keep the groups fixed from Step 1. Example: Group A moves from 4,200 to 4,050 and B from 3,900 to 3,850. Group C moves from 3,600 to 1,900 and D from 2,800 to 1,400. That split fits the announcement, but does not prove the cause alone. Common mistake: Do not move a Short to another group after seeing its views. If you reclassify, recalculate both windows.Illustrative diagram made to explain Step 3. This is a mock-up, NOT a real screenshot of YouTube Studio or any creator's channel. Step 4: Rule Out Other Causes Before Blaming the Update What to do: Rule out other causes before blaming the update. A claim, a strike, an age restriction, a posting change, a title or thumbnail change, or a cooling topic can cause the same fall. How to do it in YouTube Studio: In YouTube Studio, go to Content, then Restrictions, and check the affected videos one by one for a claim or strike. Check age restriction, visibility, and title or thumbnail changes. Then compare posting frequency and spacing, and check seasonality for the topic. Example: A travel channel finds three borrowed clips received claims and posting stopped for 11 days. It fixes the claims, restores posting, and repeats the comparison. Common mistake: Do not check only the channel total in Restrictions, or only one video. Claims act on individual videos.Illustrative diagram made to explain Step 4. This is a mock-up, NOT a real screenshot of YouTube Studio or any creator's channel. Step 5: Keep Reach, Monetisation, and Copyright Separate What to do: Keep reach, monetisation, and copyright separate. Fewer feed views with no notice is reach. A monetisation status change is the reused-content policy. A named claim or strike is copyright. How to do it in YouTube Studio: In YouTube Studio, go to Analytics, then Content, and confirm the fall is in Shorts feed views, with no notice. Check monetisation status separately and read the reason for any change. Then check Content, then Restrictions, for a named claim or strike. Example: A channel has fewer views on borrowed Shorts, one compilation marked as reused content, and one claim. It keeps three separate notes and actions. Common mistake: Do not call it a ban, demonetisation, or shadowban from views alone, with no notice. Those are different actions.Illustrative diagram made to explain Step 5. This is a mock-up, NOT a real screenshot of YouTube Studio or any creator's channel. Step 6: Fix the Mix Slowly, Test Original Shorts, and Re-Evaluate What to do: Change the mix slowly over four weeks. Stop bulk templates. Replace description voice-overs with a point of view: why the clip matters, what most people miss, or what you would do differently. Description-only voice-overs, minor edits, and one template on many clips do not count. Add commentary to any borrowed clip you keep, and share other videos through the Posts tab. How to do it in YouTube Studio: Write the point of view in one sentence before recording. In weeks two to four, move one in three new Shorts from group C to group A each week. Publish six original Shorts on one topic, on your normal schedule. In Analytics, then Content, filter to Shorts, use Advanced mode, and record the median after 7 and 28 days. Re-evaluate: If original Shorts recover and re-uploads stay low, keep the new mix. If all groups stay low, return to Step 4. Do NOT delete your back catalogue on a guess: deleting cannot be undone, and YouTube gave no re-evaluation timeline. Example: A fitness channel stops its template, films original demonstrations, and shifts one in three Shorts each week. After 28 days, its test median is close to its old group A median. Common mistake: Do not replace a descriptive voice-over with a longer one. If the clip were removed, would your Short still teach, warn, or entertain on its own?Illustrative diagram made to explain Step 6. This is a mock-up, NOT a real screenshot of YouTube Studio or any creator's channel. Checklist Before You Change AnythingLast 30 Shorts classified into A, B, C, and D, with title, date, group, and Shorts feed views. Two equal 28-day windows compared, using median Shorts feed views and engaged views. Group medians compared side by side, with the number of Shorts in each group. Restrictions, age restriction, posting, titles, thumbnails, and seasonality checked, video by video. Reach, monetisation, and copyright named separately, with any notice recorded. Six original test Shorts planned, with 7-day and 28-day checks booked. No deletion planned.Frequently Asked Questions 1. Did YouTube ban re-uploads on 1 October 2026? No. It was a recommendation change, not a ban or a new monetisation rule. Channels that primarily aggregate or re-upload without significant changes were described as likely to see less Shorts feed reach. 2. Does a voice-over make a borrowed clip original? Not on its own. A voice-over that only describes what is on screen does not count. Commentary, analysis, storytelling, unique editing, or a clear point of view do. 3. How much original work is enough? YouTube did not state a threshold, and this guide does not invent one. Ask: if the clip were removed, would your Short still teach, warn, or entertain on its own? 4. Can I check in YouTube Studio whether this update affected my channel? No. YouTube gave no Studio indicator for reduced reach. Compare medians by group over equal windows and rule out other causes; that can point toward the update, but cannot prove a hidden label. 5. Should I delete my old re-uploaded Shorts? Do not delete your back catalogue on a guess. Deleting cannot be undone, and YouTube has not said old re-uploads count against a channel after it changes. No re-evaluation timeline was given, and no recovery is guaranteed. Sources — Check It YourselfYouTube channel monetization policies — YouTube Help. This page was opened and checked live. It states that content should be original and authentic, and that borrowed content must be changed significantly to make it your own.No official TeamYouTube Help Community post or official Creator Insider video dated 1 October 2026 could be verified live, so none is linked here. No official embed was verified, so no video is embedded.

- CreatorPlaybook Team
- 27 Oct, 2026
Made on YouTube 2026: Video A/B Testing, Dynamic Thumbnails, and Draft Feedback Announced
Announced — prepare now, Studio me dhoondhne mat jao abhi. That is the key to Made on YouTube 2026. YouTube announced three tools that will change how creators test and improve videos: Video A/B testing, Dynamic Thumbnails, and Get Feedback, also called Draft Feedback. They are announcements, not releases. None of them should be treated as live in Studio today. Do not waste an afternoon clicking through Studio looking for buttons that have not arrived yet. Use this time to prepare the material those tools will need, so you are ready on day one. The dates matter, and so does the honesty about them. Shorts video A/B testing was reported for 2027. Get Feedback and dynamic thumbnails have no firm date in the framing for this guide. That does not make the announcements unimportant. It means the right work now is preparation: different hooks, different thumbnails, and a clear checklist for feedback on a draft, before you publish. Related guides: How to Make a YouTube Thumbnail That Gets Clicks and How to Use New YouTube Studio Features. For how recommendations treat videos, see How the YouTube Algorithm Works in 2026. What You Will LearnWhat was announced at Made on YouTube 2026, and what was not released How Video A/B testing will work, with up to three cuts How Dynamic Thumbnails differ from one A/B winner How Get Feedback and Draft Feedback will work on unpublished drafts How to prepare two to three different hooks for every video now How to prepare three distinct thumbnails, and keep a draft-feedback checklistStep 1: Treat the Announcements as Announcements, Not as Live Tools What to do: Separate what was announced from what you can use today. Video A/B testing, Dynamic Thumbnails, and Get Feedback were announced at Made on YouTube 2026. Shorts video A/B testing was reported for 2027. The other two tools have no firm date in this guide. If a tutorial claims to show you the exact Studio buttons today, be careful, because the tools may not be in your Studio yet. How to do it in simple steps:Write down the three tool names, and mark each one as "announced, not live." Note the only date in this guide: Shorts video A/B testing reported for 2027. Do not change your publishing plan to wait for a tool with no firm date. Check Studio and official help pages again only when an official rollout is confirmed.Practical example: A creator hears about Video A/B testing and delays a video for two weeks, hoping the tool will appear. The video is never published, and the delay teaches nothing. A better creator publishes the video, saves two other hook versions, and keeps a note: "Test these hooks when A/B testing arrives." The second creator learns from real viewers and is ready for the tool. Common mistake to avoid: Claiming a tool is live in Studio today, or inventing a release date for Get Feedback or dynamic thumbnails. Both mistakes lead viewers to search for something that is not there. Another mistake is doing nothing until the tools arrive; the preparation in this guide is the work that makes the tools useful. Illustrative image: Note what was announced, and do not treat an announcement as a live Studio tool. This is an illustrative image, not a screenshot of a channel or another creator's work. Step 2: Prepare Two to Three Different Hooks for Every Video What to do: Prepare two to three different hooks for every video, even though Video A/B testing is not live yet. A hook is the opening that tells a viewer why to stay. Different hooks can test different promises: a question, a result, or a mistake to avoid. When A/B testing arrives, you will already have real alternatives to test, instead of one opening and a guess. How to do it in simple steps:Write the main promise of the video in one sentence. Write three openings from that promise: one question, one result, and one common mistake. Keep each hook short, under fifteen seconds, and record it in the same style as the video. Save the hooks with clear names, so you can compare them later without confusion.Practical example: For a video about beginner lighting, Hook 1 asks, "Why does your face look dark on camera?" Hook 2 says, "Fix your lighting with one window and no new equipment." Hook 3 says, "Stop putting the light behind you." Each hook promises the same topic, but each one speaks to a different viewer. When testing is possible, the creator can learn which promise keeps viewers watching. Common mistake to avoid: Making three hooks that are almost the same, with only one word changed. A test needs real differences to teach you anything. Also avoid hooks that promise something the video does not deliver; a strong hook that misleads will hurt retention, even if it gets a click. Illustrative image: Record two or three truly different hooks, not three versions of the same line. This is an illustrative image, not a screenshot of a channel or another creator's work. Step 3: Prepare Three Distinct Thumbnails for Every Video What to do: Prepare three distinct thumbnails for every video, so you are ready for both A/B testing and dynamic thumbnails. Three thumbnails should not be three crops of the same image. They should test different ideas: a close face with emotion, a clear object or result, and a simple text-led design. Distinct thumbnails give a future test a real choice, instead of a false choice. How to do it in simple steps:Choose three different thumbnail ideas, and write each one in a short sentence. Keep the same title words in mind, but change the main image and the short thumbnail words. Check all three at phone size, and make sure each one is clear on its own. Save the three files with clear names, such as face, result, and text-led, so you can find them later.Practical example: For a thumbnail guide, Thumbnail 1 shows a surprised face beside a bright thumbnail. Thumbnail 2 shows a before-and-after result with no face. Thumbnail 3 uses a simple design with three short words. The creator learns which idea viewers notice first, instead of learning only which shade of blue works best. Common mistake to avoid: Using the same image with a different filter, or adding more text to a crowded design. Both mistakes look like testing, but they do not test a new idea. Also avoid thumbnails that mislead; a thumbnail that promises a result the video does not show will lose trust, even if it wins a click test. Illustrative image: Make three thumbnails that test different ideas, not three copies of one design. This is an illustrative image, not a screenshot of a channel or another creator's work. Step 4: Understand Video A/B Testing and Plan Your First Test What to do: Understand Video A/B testing as it was announced: up to three cuts of a video, with a watch-time and retention breakdown. That means you will be able to compare different versions of the same video, and see which version keeps viewers watching longer. Plan your first test now, on paper, so you do not test everything at once and learn nothing. How to do it in simple steps:Choose one video idea, and decide the single question you want to answer, such as which hook keeps viewers longer. Plan up to three cuts that differ in that one area only, such as the opening, not the whole video. Write down what you will measure: watch time and retention, as announced, not only clicks. Keep the rest of the video the same, so the result points to the opening, not to ten changes at once.Practical example: A creator plans three cuts of a Shorts tutorial. Cut 1 starts with a question, Cut 2 starts with the result, and Cut 3 starts with a mistake. The middle and ending are the same in all three cuts. When the test runs, the watch-time and retention breakdown will show which opening holds viewers, and the creator will know what to repeat next time. Common mistake to avoid: Testing three completely different videos and calling it one A/B test. If the topic, length, editing, and opening all change, you cannot know which change caused the result. Another mistake is judging a test only by clicks; the announced breakdown is about watch time and retention, so use those measures. Illustrative image: Plan one clear question for a test, and keep everything else the same across cuts. This is an illustrative image, not a screenshot of a channel or another creator's work. Step 5: Understand Dynamic Thumbnails Versus One A/B Winner What to do: Understand the difference between Dynamic Thumbnails and a single A/B winner. In a simple A/B test, one thumbnail wins for everyone. Dynamic thumbnails were announced as showing different thumbnails to different audiences. That means the same video could show one thumbnail to one group of viewers and a different thumbnail to another group, based on what each group is more likely to click. How to do it in simple steps:Write the difference in one line: A/B picks one winner; dynamic thumbnails can match thumbnails to audiences. Make your three thumbnails for different audiences, not only for one imagined viewer. For each thumbnail, write who it is for, such as beginners, phone creators, or returning viewers. Do not promise viewers that dynamic thumbnails are live today; treat them as announced, with no firm date.Practical example: A video about editing on a phone could show a phone close-up to viewers who watch mobile tutorials, and a result-focused thumbnail to viewers who watch editing results. A single A/B winner would force one choice for both groups. Dynamic thumbnails, as announced, would let each group see the thumbnail that speaks to them. That is the idea to prepare for, even though the tool is not live yet. Common mistake to avoid: Treating dynamic thumbnails as the same as A/B testing, or making three thumbnails for the same narrow audience. If all three thumbnails speak to the same viewer in the same way, the dynamic idea has nothing to work with. Also avoid claiming dynamic thumbnails are available in Studio today; they are announced, with no firm date in this guide. Illustrative image: Different audiences may respond to different thumbnails, which is the idea behind dynamic thumbnails. This is an illustrative image, not a screenshot of a channel or another creator's work. Step 6: Keep a Draft-Feedback Checklist for Get Feedback What to do: Keep a draft-feedback checklist for Get Feedback, also called Draft Feedback, which was announced as feedback on unpublished drafts. The idea is simple: get feedback before you publish, while you can still fix the video. Until the tool arrives, use a simple checklist with a trusted viewer, and keep the same questions ready for the day the tool is available. How to do it in simple steps:Save every video as a draft first, and do not publish on the same day you finish editing, if you can avoid it. Ask one trusted viewer three questions: what is the video about, where did you want to stop, and what was unclear? Write down the exact time where the viewer lost interest, and fix that section before you publish. Check the title, thumbnail, and first ten seconds together, because feedback on a draft should cover the whole entry point.Practical example: A creator shares a draft with a friend. The friend says the topic is clear, but the middle repeats the same point for forty seconds. The creator cuts that section, and the final video is shorter and clearer. That is the habit Get Feedback is meant to support: feedback on a draft, before the public sees it, not after. Common mistake to avoid: Asking only, "Did you like it?" That question gives praise, but no fixable detail. Ask for the moment, the unclear line, and the missing step. Another mistake is sharing a draft with too many people and changing everything; one or two clear notes are enough to improve a draft without losing your own voice. Illustrative image: Ask for specific feedback on a draft, while you can still fix the video before publishing. This is an illustrative image, not a screenshot of a channel or another creator's work. Checklist Before the New Tools ArriveI know all three tools are announced, not live in Studio today I know Shorts video A/B testing was reported for 2027, and the other tools have no firm date here Every video has two to three different hooks saved with clear names Every video has three distinct thumbnails that test different ideas My first A/B test has one question, up to three cuts, and a watch-time and retention check I understand dynamic thumbnails as different thumbnails for different audiences I have a draft-feedback checklist, and I ask for specific moments, not only praiseFrequently Asked Questions Are Video A/B testing, Dynamic Thumbnails, and Get Feedback live in Studio today? No. They were announced at Made on YouTube 2026, and this guide treats them as announcements, not releases. Studio me dhoondhne mat jao abhi. Prepare the hooks, thumbnails, and feedback checklist now, and check official pages when a rollout is confirmed. When will Shorts video A/B testing arrive? It was reported for 2027 in the framing for this guide. No firm date for Get Feedback or dynamic thumbnails is given here. Do not invent a date, and do not delay publishing while you wait. What is Video A/B testing? As announced, it lets creators compare up to three cuts of a video, with a watch-time and retention breakdown. Plan one question per test, change one area only, and judge the result by watch time and retention, not only by clicks. How are Dynamic Thumbnails different from A/B testing? A/B testing picks one winner for everyone. Dynamic thumbnails, as announced, show different thumbnails to different audiences. Make thumbnails for different audiences, not only different crops of the same design. What is Get Feedback or Draft Feedback? It was announced as feedback on unpublished drafts. Until it arrives, use a draft-feedback checklist with a trusted viewer, ask for the exact moment where interest drops, and fix the draft before you publish. Announcements are useful only if they change what you do before the tools arrive. Prepare different hooks, distinct thumbnails, and a clear draft checklist now, and the new tools will have real material to test when they finally appear.
- CreatorPlaybook Team
- 27 Oct, 2026
YouTube Prompt-Built Home Feeds Explained: US Only for Now, Not in India Yet
US me live, India me abhi nahi. That is the most important sentence in this guide. YouTube's prompt-built Home feeds, rolled out on 22 October 2026, let a viewer type a prompt and get a custom Home feed built around that idea. But the rollout is limited: US only, signed-in viewers aged 13 and older, English only, and watch and search history must be on. This is not a how-to-use-it-now guide for India, because Indian viewers cannot use it yet. It is a preparation guide, so your videos are ready if and when prompt feeds arrive in India. The limits are specific, and they should shape your expectations. Viewers get three custom feeds free, and eight with Premium. Subscriptions was renamed "Subs" and moved to the Home top bar. Custom feeds expire after 30 days of inactivity. And prompt feeds are not on tablets, according to the Help page. Do not promise Indian viewers a feature they cannot open, and do not waste time searching Studio for a prompt-feed button that is meant for viewers, not for creators. Related guides: How to Make Educational Videos That Rank and How the YouTube Algorithm Works in 2026. For keyword thinking, see How to Earn Money on YouTube only for its planning habits, not for prompt feeds. What You Will LearnExactly who can use prompt-built Home feeds today, and who cannot What the 3-feed, 8-feed, Subs, and 30-day limits mean in plain language How to find the literal prompt words a viewer might type How to put those exact words into titles honestly How to put those exact words into descriptions and opening lines How to keep watch and search history signals clean and consistentStep 1: Understand the Limits Before You Promise Anything What to do: Learn the limits first, and repeat them to your audience in the same words. Prompt-built Home feeds are for signed-in US viewers aged 13 and older, in English, with watch and search history on. They are not available in India, and they are not on tablets. If you tell Indian viewers to "try it now," they will search for a button that is not there, and they will lose trust in your next update. How to do it in simple steps:Write the limits in one short note: US only, 13+, English, history on, not on tablets. Check your own audience location in Studio before you assume most viewers are in the US. Do not make a tutorial video that shows clicks or screens you cannot show from India. Use the words "US me live, India me abhi nahi" when you explain it to Hindi-speaking viewers.Practical example: A Hindi creator with mostly Indian viewers records a video titled "YouTube's New Prompt Feeds - Try It Now." Viewers comment that they cannot find the feature, and the creator spends a week answering the same question. A better video is titled "Prompt Feeds Explained: US Only, Not in India Yet," and it teaches preparation instead. The second video keeps trust, even though the feature is not available. Common mistake to avoid: Presenting a US-only rollout as a worldwide launch, or guessing an India date. No India date was given in the limits in this guide. Do not invent one. Also avoid claiming the feature works on tablets; the Help page position in this guide is that it does not. Illustrative image: Check who can actually use a new feature before you promise it to all viewers. This is an illustrative image, not a screenshot of a channel or another creator's work. Step 2: Find the Literal Prompt Words Viewers Might Type What to do: Find the literal words a viewer might type as a prompt, in the viewer's own language. A prompt feed is built from a prompt, so the exact topic phrase matters. Do not guess a clever phrase. Look at the words viewers already use in search, comments, and questions, and write down the simplest, most direct version of each idea. How to do it in simple steps:List ten questions your viewers ask most, in their exact words where you can. Shorten each question to a topic phrase, such as "beginner lighting setup" or "how to start a Hindi channel." Check YouTube search suggestions for each phrase, and note the wording that appears most often. Keep a short list of five to ten prompt phrases, and use the same wording across videos on that topic.Practical example: A creator teaches phone editing. Viewers ask, "How do I edit videos on my phone for free?" The literal prompt phrase for planning is "edit videos on phone for free." The creator uses that phrase in the title and description, instead of a vague title like "My Editing Secrets." The video is still honest, but its topic is now written in the words a viewer might type. Common mistake to avoid: Using only broad words like "motivation" or "viral" as your prompt phrase. Broad words can match almost anything, so they do not help a viewer who wants a specific answer. Another mistake is changing the phrase in every video, so no clear pattern forms around your best topics. Illustrative image: Write down the literal topic phrases viewers use, in their own words. This is an illustrative image, not a screenshot of a channel or another creator's work. Step 3: Put the Exact Prompt Phrase in Your Title What to do: Put the exact prompt phrase in your title, in a natural way, when the video truly answers it. The title is the clearest signal of what a video is about. If a viewer might type "how to make thumbnails that get clicks," a title that contains those words is easier to match than a title that only hints at the idea. Keep the title honest and readable; do not stuff it with extra phrases. How to do it in simple steps:Choose one prompt phrase per video, from your list in Step 2. Put that phrase near the start of the title, in the same words a viewer would type. Add one clear result or audience word, such as "for beginners" or "on a phone." Read the title aloud, and remove any word that does not help the viewer decide to watch.Practical example: A creator changes a title from "This Changed My Channel" to "How to Make Thumbnails That Get Clicks for Beginners." The first title is mysterious, but it does not name the topic. The second title uses the literal phrase, names the audience, and still promises a clear result. If a prompt feed later looks for thumbnail videos, the second title is ready. Common mistake to avoid: Putting a prompt phrase in a title for a video that does not deliver it. If the video is about something else, the mismatch will hurt watch time and trust. Also avoid repeating the same phrase three times in one title; one clear use is enough, and the rest of the title should add meaning. Illustrative image: One exact topic phrase, near the start of the title, is clearer than a vague promise. This is an illustrative image, not a screenshot of a channel or another creator's work. Step 4: Put the Same Words in Your Description and Opening Lines What to do: Repeat the same prompt words in your description and in your opening lines, so the video's topic is consistent from start to finish. A title alone can be a hint, but a description that restates the topic in the first two lines, and a spoken opening that names the topic, leaves less room for confusion. Keep the wording natural, and make sure the video actually covers what you wrote. How to do it in simple steps:Write the prompt phrase in the first two lines of the description, in a full sentence. List the steps or questions the video answers, using the same topic words. Say the topic aloud in the first ten seconds, in the same plain words. Check that the description, the title, and the spoken opening all name the same topic.Practical example: A video titled "How to Start YouTube With Only a Mobile Phone" opens with, "In this video, you will learn how to start YouTube with only a mobile phone, from filming to uploading." The description begins with the same sentence, then lists filming, editing, and uploading. A viewer who typed that phrase, and a system that reads the title and description, both get the same clear topic. Common mistake to avoid: Writing a description full of unrelated keywords, or starting the video with a long story before naming the topic. Viewers and systems both need the topic early. Another mistake is using a different phrase in every place, so the title, description, and opening sound like three different videos. Illustrative image: Keep the title, description, and opening lines naming the same topic. This is an illustrative image, not a screenshot of a channel or another creator's work. Step 5: Keep Watch and Search History Signals Clean and Consistent What to do: Keep your channel's topic signals clean and consistent. Prompt feeds depend on watch and search history being on for the viewer, which means a viewer's past viewing helps shape what they are shown. As a creator, you cannot control a viewer's history, and you should not try to manipulate it. What you can control is consistency: publish videos that clearly belong to a topic, use honest titles, and avoid mixing unrelated topics in one video. How to do it in simple steps:Group your videos by topic, and keep each video focused on one clear topic. Use the same topic words for videos in the same group, instead of a new phrase every time. Avoid misleading titles that bring viewers who leave quickly, because that weakens the topic signal. Do not ask viewers to search or watch in a fake pattern; let real interest build the signal.Practical example: A creator publishes six videos about beginner lighting, all with clear lighting titles and descriptions. A viewer who watches two of them builds a clear lighting history, and future lighting videos are easier to surface. If the same creator mixes lighting, gaming, cooking, and finance in one week with vague titles, no clear topic pattern forms, and no prompt phrase can fix that confusion. Common mistake to avoid: Trying to game history signals with click exchanges, fake traffic, or misleading titles. That is not preparation; it is spam, and it harms trust. Also avoid changing your niche every week. Clean signals come from steady, honest topic focus, not from tricks. Illustrative image: A steady topic focus gives viewers and systems a clear pattern to follow. This is an illustrative image, not a screenshot of a channel or another creator's work. Step 6: Plan for Subs, Expiry, and the Day Prompt Feeds Arrive What to do: Plan for the other changes that came with the rollout, and for the day prompt feeds might arrive in India. Subscriptions was renamed "Subs" and moved to the Home top bar, so viewers may look for subscriptions in a new place. Custom feeds expire after 30 days of inactivity, so a feed is not permanent. Keep a simple plan: remind viewers to subscribe, keep publishing on a steady schedule, and re-check official help pages before you announce any India launch. How to do it in simple steps:Tell viewers where to find "Subs" in the Home top bar, using the new name. Keep a steady publishing schedule, so your topic stays active and visible. Revisit your prompt-phrase list every month, and update titles only when a video truly needs it. Before you announce an India rollout, open YouTube's official help or announcement pages and confirm it yourself.Practical example: A creator ends videos with, "If this helped, tap Subs at the top of Home to see more." That short line uses the new name and the new place. The creator also keeps a monthly note: "Prompt feeds: still US only, checked on 27 October 2026." When the status changes, the creator can update viewers with evidence, instead of guessing. Common mistake to avoid: Telling viewers that a custom feed will stay forever, or that three feeds are enough for every interest. Remember the limits: three custom feeds free, eight for Premium, and expiry after 30 days of inactivity. Also avoid renaming subscriptions in your own words in a confusing way; use the name viewers will see, "Subs." Illustrative image: Keep a steady schedule and re-check official pages before announcing a new rollout. This is an illustrative image, not a screenshot of a channel or another creator's work. Checklist for Prompt-Ready Videos in IndiaI explain the limits honestly: US me live, India me abhi nahi I know the rules: US only, 13+, English, history on, not on tablets I have a short list of literal prompt phrases in viewers' own words Each title uses one exact prompt phrase, honestly, near the start Descriptions and opening lines repeat the same topic in plain words My videos stay focused on one topic, with clean and consistent signals I use the name "Subs" and the Home top bar when I talk about subscriptionsFrequently Asked Questions Can I use prompt-built Home feeds in India today? No, based on the rollout limits in this guide. Prompt-built Home feeds are US only, for signed-in viewers aged 13 and older, in English, with watch and search history on. US me live, India me abhi nahi. Do not present this guide as a how-to-use-it-now guide for India. How many custom feeds can a viewer make? Three custom feeds free, and eight for Premium, according to the rollout limits in this guide. Custom feeds expire after 30 days of inactivity, so they need to be used to stay active. Do prompt feeds work on tablets? No, according to the Help page position in this guide, prompt feeds are not on tablets. Check the official Help page if you need to confirm the current device list before you tell viewers where to look. What changed about Subscriptions? Subscriptions was renamed "Subs" and moved to the Home top bar. Use the name "Subs" when you guide viewers, so they can find the same label they see on screen. What should I do now if I am in India? Prepare, do not pretend. Build a list of literal prompt phrases, put the exact words in honest titles and descriptions, keep your topic focus steady, and keep checking official pages for any India rollout. When prompt feeds arrive, videos that already name their topic clearly will be ready. Prompt feeds reward clarity. A viewer who can type a plain topic phrase should be able to find a video that plainly answers it. That is work you can do today, even while the feature itself is still US only.

- CreatorPlaybook Team
- 27 Oct, 2026
How to Make a YouTube Shorts Series: Seasons, Episodes, and Custom Thumbnails Explained
Many Shorts work alone, but some ideas only work in order. A recipe, a story, a challenge, or a lesson can lose its meaning when a viewer sees part three first. On 23 September 2026, at its Made on YouTube event, YouTube announced Shorts Series, a way to organize Shorts into TV-style seasons and episodes, with custom thumbnails and sequential playback. TechCrunch reported that the feature was rolling out to creators in the YouTube Partner Program across web, mobile, and connected TVs. That rollout detail matters: do not assume every creator can see it in Studio today. A Shorts Series is not the same as a playlist. A playlist is a collection you can add videos to in any order, and viewers often arrive in the middle. A Series is built for order. It presents a show with seasons and episodes, a clear starting point, and episodes that play one after another. This guide explains how a Series differs from a playlist, how to plan one, and how to check whether the feature is available to you yet. Related guides: How to Make a YouTube Thumbnail That Gets Clicks and YouTube Shorts Monetization and RPM Explained. For how recommendations treat Shorts, see How the YouTube Algorithm Works in 2026. What You Will LearnWhat a YouTube Shorts Series is, and how it was announced How a Series differs from a playlist in structure and viewing How to choose a series idea that truly needs episodes in order How to plan a season and episode arc that keeps viewers watching How to name episodes clearly and make custom thumbnails How to set episode order and promote episode one and the next episodeStep 1: Choose a Series Idea That Needs Episodes in Order What to do: Choose a series idea that needs episodes in order, not a set of unrelated Shorts. A good Series has a promise that grows over time. The viewer should feel that missing an episode means missing a step, a clue, or a result. If any episode works just as well alone and in any order, the idea may be better as a playlist or as separate Shorts. How to do it in simple steps:Write the full result or ending of the series in one sentence. List the steps, clues, or events that must happen before that ending. Check that each step depends on the one before it, not only on the same topic. Reject ideas that are only a theme, such as random tips with no order or progress.Practical example: A creator plans a five-part series called "My First 30 Days Learning to Edit." Episode one is the setup, episode two is the first project, episode three is the mistake, episode four is the fix, and episode five is the finished video. A viewer who starts at episode four will miss the mistake that makes the fix meaningful, so the order matters. Common mistake to avoid: Turning a loose collection of tips into a Series just because the feature is new. Viewers expect a story or a sequence, and a random order will disappoint them. A playlist is often the better home for tips that stand alone, because viewers can dip in and out without losing the thread. Illustrative image: Choose an idea where the order itself is part of the value. This is an illustrative image, not a screenshot of a channel or another creator's work. Step 2: Plan the Season and Episode Arc What to do: Plan the season and episode arc before you film episode one. A season is a complete run with a beginning, a middle, and an ending. An episode is one short step in that run. Plan the arc on one page, so each episode has a job: introduce, complicate, teach, test, or resolve. A clear arc stops you from repeating the same Short five times. How to do it in simple steps:Decide how many episodes the first season will have, and keep it small, such as four to six. Give each episode one job and one clear outcome for the viewer. Write the last line of each episode, so the next episode has a reason to start. Leave room for a second season only if the first season ends cleanly.Practical example: A cooking creator plans a season called "Five Breakfasts, One Pan." Episode one teaches the pan and the base recipe. Episode two adds a new ingredient and a timing rule. Episode three fixes a common burning mistake. Episode four shows a faster version. Episode five is a viewer-style challenge with the same pan. Each episode builds skill, and the final episode proves it. Common mistake to avoid: Planning only episode one and hoping the rest will appear. Without an arc, episode three often repeats episode one, and viewers stop following. Another mistake is planning too many episodes before you know if viewers want a second one. Finish a short season well, then decide. Illustrative image: Plan the whole season arc before you film the first episode. This is an illustrative image, not a screenshot of a channel or another creator's work. Step 3: Name Episodes Clearly So Viewers Know the Order What to do: Name episodes clearly, so viewers know where they are and what comes next. Episode titles should carry the series name, the episode number, and the specific step or event. A viewer scrolling quickly should be able to tell episode two from episode four without opening the video. Clear names also help you, because they force you to keep each episode focused. How to do it in simple steps:Use one series name for every episode, written the same way each time. Add the episode number at the start or end of the title, in the same place every time. Add the specific step, such as the skill, the place, or the result for that episode. Check the full season list together, and remove any title that could fit two episodes.Practical example: Instead of five titles like "Amazing Tip," "You Must See This," and "Part 3," a creator uses "Learn to Edit: Ep 1 - Set Up Your Project," "Learn to Edit: Ep 2 - Your First Cut," and "Learn to Edit: Ep 3 - Fix the Jump Cut." A new viewer can see the order, the topic, and the next step in seconds. Common mistake to avoid: Using only "Part 1," "Part 2," and "Part 3" with no other information. Parts tell viewers the order, but not the reason to watch. Another mistake is changing the series name halfway through, which breaks the sense that the episodes belong together. Illustrative image: Clear episode names show the order and the step at a glance. This is an illustrative image, not a screenshot of a channel or another creator's work. Step 4: Make Custom Thumbnails for the Series and Each Episode What to do: Make custom thumbnails that work as a set and as single episodes. Shorts Series was announced with custom thumbnails, which help viewers recognize a show and choose the right episode. Your series artwork should stay consistent, while each episode thumbnail should show what is different about that episode. Think of a book cover and chapter headings: the family resemblance matters, and so does the difference. How to do it in simple steps:Choose one layout, one font, and two or three colors for the whole series. Keep the series name or a short series mark in the same place on every thumbnail. Change the main image and the short episode words for each episode, to show its step. Check all thumbnails together at phone size, and make sure episode order is easy to follow.Practical example: A travel creator uses the same bold frame and series name on every episode, but episode one shows a map, episode two shows a train, and episode three shows a mountain view. The thumbnails look like one show, and each one still promises a different place. A viewer can spot the series in a feed and pick the episode they missed. Common mistake to avoid: Using the same thumbnail for every episode, or using completely different styles with no link between them. Identical thumbnails hide the order, and unrelated thumbnails hide the series. Also avoid small text that cannot be read on a phone; use two to four large words, as in the thumbnail guide linked above. Illustrative image: Keep the series look consistent, and change the image and words for each episode. This is an illustrative image, not a screenshot of a channel or another creator's work. Step 5: Set the Episode Order and Check Sequential Playback What to do: Set the episode order carefully, and check how the series plays from start to finish. Sequential playback is the main benefit of a Series: viewers can watch a selection of Shorts as a continuous story, rather than scrolling from one stand-alone clip to the next, as TechCrunch described the announcement. If the order is wrong, that benefit becomes confusion. Check the order before you promote the series. How to do it in simple steps:List the episodes in story order, from the first step to the final result. Watch the first ten seconds of each episode in that order, and check that each one follows the last. Fix any episode that repeats the previous ending or assumes knowledge from a later episode. Check the series on a phone and, if you can, on a larger screen, because Series were announced for web, mobile, and TV.Practical example: A creator sets a four-episode series in order, then watches it as a viewer would. Episode two starts with "As I said in the last video" but the previous episode ended with a different point, so the creator re-records the opening line. That small fix makes the sequence feel planned, instead of four separate Shorts placed in a list. Common mistake to avoid: Adding episodes in upload order without checking story order, or adding a later episode first because it got more views. Views do not show order. Another mistake is leaving a gap: if episode three is missing or private, viewers hit a dead end and may leave the series entirely. Illustrative image: Check the episode order as a viewer would, from episode one to the end. This is an illustrative image, not a screenshot of a channel or another creator's work. Step 6: Promote Episode One and Build Next-Episode Hooks What to do: Promote episode one as the entry point, and build next-episode hooks into every episode. A Series grows when new viewers start at the beginning and existing viewers keep going. Episode one should promise the whole season in a few seconds. Every other episode should end with a clear reason to watch the next one, not a vague "stay tuned." How to do it in simple steps:Share episode one first, with the series name and the final result in the caption or title. End each episode with the next step in one sentence, such as the problem the next episode solves. Add the series name and episode number to community posts, descriptions, and end screens where you can. After the season ends, share a short recap that links back to episode one for new viewers.Practical example: A fitness creator ends episode two with, "Next, we fix the one mistake that makes this move hurt your back." Viewers who care about that problem have a reason to continue, and viewers who do not can stop without confusion. The creator also pins a comment on episode one that lists the full season, so late viewers can find the start. Common mistake to avoid: Promoting only the newest episode, which may be episode four, to a new audience. New viewers arrive in the middle and leave because they missed the setup. Also avoid hooks that promise a surprise with no topic; a hook should name the next step, so the right viewers stay. Illustrative image: Promote episode one, and end each episode with a clear reason to watch the next. This is an illustrative image, not a screenshot of a channel or another creator's work. Checklist for a YouTube Shorts SeriesThe idea needs order: each episode depends on the one before it The season arc is planned, with a beginning, middle, and ending Episode titles show the series name, number, and specific step Custom thumbnails look like one series, with a different image per episode Episode order is checked by watching the sequence in order Episode one is promoted as the starting point Each episode ends with a clear next-episode hookFrequently Asked Questions What is a YouTube Shorts Series? It is a way to organize Shorts into TV-style seasons and episodes, with custom thumbnails and sequential playback. It was announced at Made on YouTube on 23 September 2026, and reported as rolling out to creators in the YouTube Partner Program across web, mobile, and connected TVs. How is a Series different from a playlist? A playlist is a collection that viewers can enter at any point, and the order is often flexible. A Series is built for order, with a season arc, episode numbers, and episodes that play as a continuous story. Use a playlist for stand-alone videos on a theme, and a Series for a story or sequence that loses meaning out of order. Is Shorts Series available to all creators today? Do not assume so. The announcement coverage described a rollout to creators in the YouTube Partner Program. If you do not see the Series option in Studio, check Studio on desktop and in the app, look for a series or seasons option when you upload or organize Shorts, and check YouTube's official help pages for current eligibility. Plan the series now, and set it up when the option appears for your account. Do I need custom thumbnails for a Series? Custom thumbnails were part of the announcement, and they help viewers recognize the series and choose episodes. Keep the series design consistent, and change the image and short words for each episode. Even if you cannot set a Series thumbnail yet, the same design habit will help your Shorts look like a planned show. Can a Series work on TV as well as on a phone? Yes, according to the announcement coverage, Series were described for web, mobile, and connected TVs. That is why thumbnails and episode titles should be clear at both phone size and TV size. Test the series list on a larger screen if you can, and avoid tiny text that only works on one device. A Shorts Series is a promise of order. If you plan the arc, name the episodes clearly, and make the sequence easy to follow, you give viewers a reason to watch the next episode instead of scrolling away.

- CreatorPlaybook Team
- 27 Oct, 2026
YouTube Shorts Original Content Update: What Changed on 1 October 2026 and What Creators Should Do
On 1 October 2026, YouTube updated its Shorts recommendation system to give more reach to original content and less reach to channels that mainly aggregate or re-upload other creators' work without significant changes. This was a recommendation change, not a new ban and not a new monetization rule. Re-sharing and remixing were not banned. The change affects how Shorts are recommended, so creators who add real value have a better chance to grow, while channels built mainly on other people's clips are more likely to see less distribution in the Shorts feed. That distinction matters for beginners. You do not need expensive equipment or a large team to meet this standard. You need your own voice, your own structure, and your own reason for the viewer to watch your version. A small change to someone else's clip, a ready-made template, or simply describing what is already on screen does not count as a significant change. Original commentary, unique editing, educational value, and storytelling do. This guide explains the update in plain language and gives you a practical audit you can finish today. Related guide: How to Protect Your Channel from Strikes, Copyright and Reused Content. For the wider recommendation system, see also How the YouTube Algorithm Works in 2026. Official source: YouTube channel monetization policies What You Will LearnWhat YouTube said on 1 October 2026, in its own recommendation terms What counts as real value, and what does not count as a significant change How to audit your existing Shorts quickly and honestly How to add original commentary on camera or with a voiceover How to rebuild edits with your own structure and story How to keep proof of your original work for the futureStep 1: Understand What Changed, and What Did Not Change What to do: Learn the update as a recommendation change, not as a ban. YouTube said it was updating its recommendation systems to further prioritize original content and reduce the reach of content re-uploaded from other creators without adding anything of your own. Social Media Today reported that wording on 1 October 2026, linking to YouTube's support pages. Channels identified as primarily aggregating or re-uploading other creators' videos without significant changes will likely see less distribution within the Shorts feed. How to do it in simple steps:Read the update as being about distribution in the Shorts feed, not about deleting your channel. Note the key phrase: primarily aggregating or re-uploading without significant changes. Separate this update from monetization rules and copyright strikes, which are different systems. Tell yourself the test clearly: would this Short still be useful if the original clip were removed?Practical example: A creator posts ten Shorts a week, each one a short clip from another channel with a new caption and a filter. After the update, those Shorts may reach fewer new viewers, because the main value came from the other creator. The same creator could keep the topic, film a 40-second reaction with their own opinion, and add a clear lesson. That version has a stronger claim to original value. Common mistake to avoid: Calling every change a ban, or telling viewers that re-uploading is now illegal. That creates fear and confusion. The reported wording is about recommendation and distribution, and re-sharing and quoting can still add to a discussion when you add your own voice. Illustrative image: Start by understanding the recommendation change before you change your workflow. This is an illustrative image, not a screenshot of a channel or another creator's work. Step 2: Audit Your Existing Shorts Honestly What to do: Audit your existing Shorts before you post more. Open your last 20 Shorts and score each one for original value. You are looking for a pattern, not one bad video. If most of your Shorts depend on other people's footage, music, or ideas with only small changes, that pattern is the risk. A short, honest audit now is cheaper than weeks of low reach later. How to do it in simple steps:List your last 20 Shorts in a simple sheet, with the title and the main source of the material. Mark each one as original, mixed, or mainly re-uploaded, using the definitions in Step 1. Note what you added: commentary, teaching, a new edit, a story, or nothing new. Decide for each mixed or re-uploaded Short whether to keep it, remake it, or leave it and move on.Practical example: A beginner finds that 14 of 20 Shorts are clips from other videos with captions added. Only six include the creator's face, voice, or a clear lesson. The creator does not delete everything at once. They keep the six strong Shorts as models, remake the best four topics in their own voice, and plan only original-first Shorts for the next two weeks. Common mistake to avoid: Auditing only views and likes. A re-uploaded clip can get views for a short time and still be weak on original value. Judge the work you added, not only the result. Also avoid deleting old Shorts in a panic; focus on what you publish next and remake only what is worth remaking. Illustrative image: Review your last Shorts and score the original value you added. This is an illustrative image, not a screenshot of a channel or another creator's work. Step 3: Add Original Commentary on Camera or With a Voiceover What to do: Add original commentary that only you can give. Commentary means your judgment, your experience, or your explanation, not a summary of what the viewer can already see. Speak on camera if you can, or record a clear voiceover if you prefer not to show your face. Your voice should change what the viewer understands, not only fill silence. How to do it in simple steps:Write one clear point before you record, in one sentence, such as the mistake to avoid or the result to expect. Record your commentary in your own words, with one example from your own experience. Put the commentary at the start, so the viewer hears your value in the first three seconds. Remove any section where you only describe the clip, and replace it with a reason, a warning, or a next step.Practical example: A creator uses a 10-second clip of a cooking mistake. Instead of saying, "Look, the pan is hot," they say, "I made this same mistake last month, and the fix is to dry the pan first, because water makes the oil spit." The clip is the same, but the commentary adds experience, a cause, and a fix that the viewer could not get from the clip alone. Common mistake to avoid: Adding commentary that only narrates the screen, such as "Here he runs, then he jumps." That is describing, not adding value. Also avoid reading a generic script that could fit any video. If your words would work over a completely different clip, they are probably not specific enough. Illustrative image: Your commentary should add judgment and experience, not just describe the picture. This is an illustrative image, not a screenshot of a channel or another creator's work. Step 4: Rebuild the Edit With Your Own Structure What to do: Rebuild the edit so the structure is yours. Unique editing is one of the examples YouTube gave for adding value, along with original commentary and educational value. A unique edit is not a new filter or a faster cut of the same sequence. It is a new order, a new focus, and a new reason for each cut. Start from your point, not from the original clip's order. How to do it in simple steps:Write your hook, your main point, and your ending before you open the editor. Choose only the clips that prove your point, and cut everything that does not serve it. Add your own text, graphics, or examples to mark the steps, in your own order. Watch the Short without sound and without the original context, and check that it still makes sense.Practical example: A creator finds a popular 60-second tutorial. Instead of reposting it with captions, they rebuild it as three clear steps: the wrong way, the fix, and the result. They film their own hands doing the fix, add on-screen labels in their own words, and end with a one-line checklist. The topic is similar, but the structure, examples, and evidence are theirs. Common mistake to avoid: Relying on a template, a trending effect, or a speed change as your main change. Templates can help with presentation, but they do not by themselves add commentary, teaching, or storytelling. If you remove the template and nothing original remains, the edit is not yet a significant change. Illustrative image: Build the edit around your own hook, steps, and ending. This is an illustrative image, not a screenshot of a channel or another creator's work. Step 5: Add Context and a Story Only You Can Give What to do: Add context and a story only you can give. Storytelling was named in the reported YouTube wording as a way to add real value when you use clips from another creator. Context answers the questions the clip alone does not answer: why does this matter, what happened before, what should the viewer do next, and what did you learn? A short story can do that work in 20 seconds if it is specific. How to do it in simple steps:Choose one specific detail from your own experience, such as a time, a place, a cost, or a result. Explain the situation in one sentence, the decision in one sentence, and the result in one sentence. Connect the story to the clip, so the clip illustrates your point instead of replacing it. End with a clear takeaway the viewer can use, even if they never see the original video.Practical example: A creator shares a clip about a small business mistake. They add: "I spent 200 rupees on the wrong cable last year, returned it twice, and now I check the connector photo before I buy." That short story gives the clip a personal cost, a lesson, and a check the viewer can copy. Without the story, the clip is only someone else's anecdote. Common mistake to avoid: Adding a vague personal claim, such as "This happened to me too," with no detail, no decision, and no lesson. Vague stories do not add value, because any creator could say them. Also avoid making the story longer than the lesson; the story should serve the point, not replace it. Illustrative image: A specific story with a decision and a result adds value a clip alone cannot give. This is an illustrative image, not a screenshot of a channel or another creator's work. Step 6: Keep Proof of Your Original Work and Publish Original First What to do: Keep proof of your original work, and make original-first Shorts your default. Proof does not guarantee reach, but it helps you learn, reuse, and defend your work. Keep your scripts, your raw recordings, your project files, and your notes in one folder for each Short. Then publish a simple rule for yourself: if a Short has no original commentary, teaching, edit, or story, do not publish it until you add one. How to do it in simple steps:Create one folder per Short, with the script, raw clips, project file, and final export. Save the source and permission details for any clip you did not film, in the same folder. Write a one-line note for each Short: what original value did I add? Review that note before publishing, and add the missing value before you post.Practical example: A creator keeps a folder called "Short 42 - cable check" with a phone recording, a short script, and the edited project. Weeks later, when a viewer asks how the tip was tested, the creator can answer from the script and re-film a follow-up in minutes. The folder also makes it easy to turn the Short into a longer video, a community post, or a new episode. Common mistake to avoid: Keeping only the final exported file and no notes. If you cannot show what you added, you cannot repeat what worked. Another mistake is publishing first and planning to add value later. In a feed that rewards original content, the first version is the version most viewers will judge. Illustrative image: Keep scripts, raw clips, and notes so your original work can be reused and checked. This is an illustrative image, not a screenshot of a channel or another creator's work. Checklist for Original Shorts After the October 2026 UpdateThe Short is built around my own commentary, teaching, edit, or story The first three seconds show my value, not only someone else's clip Minor edits, templates, and screen description alone are not the main change Any borrowed clip has a clear purpose and adds to my point The story or example is specific, with a decision and a result Script, raw clips, and notes are saved in one folder The Short still makes sense without the original videoFrequently Asked Questions Is re-uploading now banned on YouTube Shorts? No, based on the reported wording. The 1 October 2026 update was described as a change to recommendation systems. Re-sharing and quoting were still described as relevant formats, but creators were told to add their own voice or a distinct point of view instead of only re-sharing other people's work. Does this update change Shorts monetization? Do not treat this as a new monetization rule. The reported update was about recommendation and distribution in the Shorts feed. Monetization, copyright, and strikes are separate topics, and the related guide linked at the top of this post covers strikes, copyright, and reused content in more detail. What counts as a significant change? YouTube's reported examples were original commentary, educational value, unique editing, and storytelling. A significant change should add something the viewer could not get from the original clip alone. A filter, a template, a speed change, or describing what is on screen, on its own, does not meet that test in this guide. Can I still use clips from other creators? You can use clips as part of a larger original piece, but the clip should not be the whole value. Add your own commentary, teaching, or story, and make sure you also respect copyright and permission rules. If the clip is the main attraction and you added almost nothing, remake the idea in your own words and footage. Should I delete my old re-uploaded Shorts? Do not delete in a panic. Audit first, as in Step 2. Keep strong original Shorts, remake the topics that are worth remaking, and focus your next Shorts on original-first work. Deleting everything at once can remove useful data about what your audience liked, without fixing the pattern in future posts. The safest habit after this update is simple: start with your own point, prove it with your own voice or your own footage, and use other clips only to support that point. Original value is not about being perfect. It is about being the reason the viewer watches your version.