Showing Posts From
Analytics
 CreatorPlaybook Team
- 31 Oct, 2026
YouTube Channel Not Growing? Diagnose the 4-Stage Analytics Bottleneck in Order
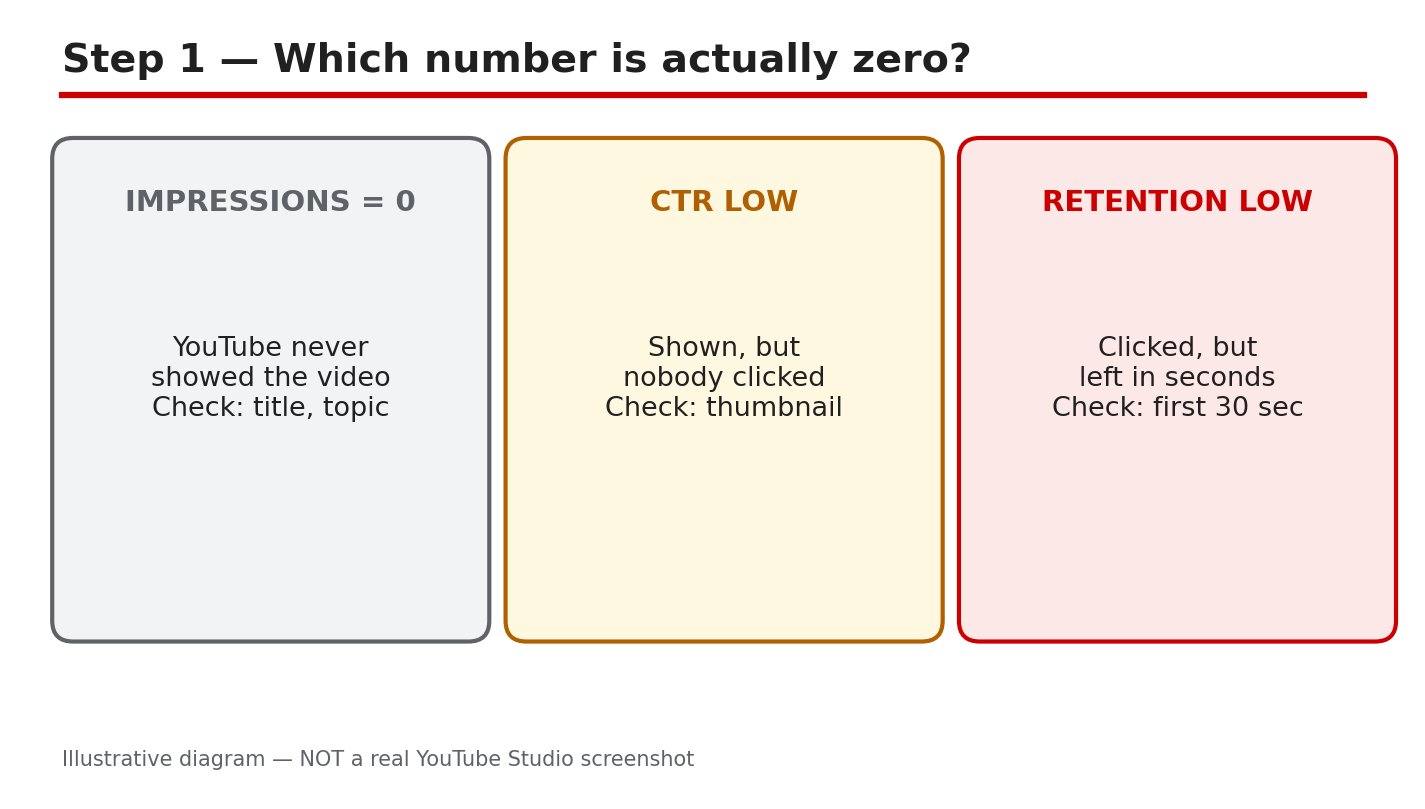
Your channel is not growing, but the views graph does not tell you why. A channel can stall at four different stages, and each stage needs a different fix. YouTube Analytics shows the chain in order: impressions, click-through rate, retention, then subscribers. If nobody sees your video, the thumbnail is not the problem. If people see it but do not click, the title and thumbnail are. If they click but leave in ten seconds, the opening is. If they watch but never subscribe, the channel is giving them no reason to return. This guide walks the chain in order, so you fix the stage that is actually broken. What You Will Learn In this guide you will learn how to find the stage where your channel stalls, how to read impressions, click-through rate, retention, and subscriber data in Analytics, and how to fix one stage at a time and measure the result over seven days. Step 1 - Check Impressions First What to do: Open YouTube Studio, go to Analytics, open the Reach tab, and look at impressions for your last five videos. Compare them with your best recent video, not with a large channel. How: Impressions count how often YouTube shows your thumbnail to viewers. As reported, YouTube Help describes impressions as the number of times a thumbnail is shown, so a low number means YouTube is showing the video to few people. Compare impressions per video, not the channel total. For more, see how to read YouTube Analytics. Example: A creator's new video had only 300 impressions in a week while her older videos had 4,000 each. She checked the topic and found almost nobody was searching for it, so she remade the idea around a question people ask. Common mistake: Blaming the thumbnail when impressions are near zero. A thumbnail cannot earn clicks YouTube never shows. Fix the topic and the search demand first.Illustrative diagram (mock-up, not a real YouTube Studio screenshot): the four-stage bottleneck chain in order. Step 2 - Fix the Click-Through Rate What to do: Pick the video with high impressions and low clicks, then test a new thumbnail and title on a fresh upload. Change one thing at a time so you know what worked. How: Click-through rate is the share of impressions that turn into clicks. As reported, YouTube Help explains that it shows how often viewers watched a video after seeing its thumbnail. A rate below your channel average means the thumbnail is not promising the video well. Make the thumbnail readable at small size, with a title that promises the benefit. For more, see this guide to how to improve your click-through rate. Example: A creator had 20,000 impressions and a 2% click-through rate. She rewrote the title to promise the benefit, and the rate rose to 4% on the next video about the same topic. Common mistake: Changing the thumbnail and the title and the topic all at once. You will never know which change fixed the clicks.Illustrative diagram (mock-up, not a real YouTube Studio screenshot): a clear title and thumbnail earn the click. Step 3 - Hold Viewers Past the First 30 Seconds What to do: Open the retention graph for your last three videos and find where most viewers leave. Rewrite the opening so the promise of the video lands in the first ten seconds. How: Retention is the share of a video your viewers actually watch, shown moment by moment in Analytics. As reported, YouTube counts a view the moment a video starts to play, so the early seconds decide everything. Start with the outcome, cut the long intro, and promise the result in one sentence. Example: A creator lost 60% of viewers in the first thirty seconds. She cut a 40-second channel intro, started with the result, and her average view duration doubled on the next video. Common mistake: Asking for likes and subscriptions before the video has delivered anything. Earn the first minute, then ask.Illustrative diagram (mock-up, not a real YouTube Studio screenshot): most viewers decide in the first thirty seconds. Step 4 - Turn Watchers into Subscribers What to do: Check which videos bring subscribers in Analytics, then compare them with videos that get views but no subscribers. Make more of the first kind and give viewers a clear next video to watch. How: Subscribers come from viewers who expect more of the same value, not from one viral video. Viewers subscribe when the channel has a clear topic, a regular pattern, and a next video they already want. Add an end screen that points to a related video, and say at the end of the video what the next one covers. Example: A creator got 50,000 views on a viral video but only 40 subscribers, because the video had nothing to do with the rest of the channel. Her next series on one topic brought 400 subscribers from 8,000 views. Common mistake: Chasing viral topics that do not match the channel. Random viewers leave, and the subscribers you gain do not watch the next video.Illustrative diagram (mock-up, not a real YouTube Studio screenshot): subscribers come from viewers who want the next video. Step 5 - Fix One Stage at a Time What to do: Write down which stage is broken, change only the part that controls it, and publish the next video with that one change. Do not redesign the channel while you are testing. How: The chain runs in order, so a fix at the wrong stage wastes the effort. If impressions are low, a better thumbnail changes nothing. If retention is low, more impressions only bring more people who leave early. Work the bottleneck first, and keep a note of what you changed so you can trace any change in the numbers back to it. Example: A creator changed her thumbnail, title, opening, and upload time in the same week. Views rose, but she had no idea which change did it, so she could not repeat it. Common mistake: Fixing the stage you enjoy fixing, not the stage the numbers show is broken. Check the chain before you choose.Illustrative diagram (mock-up, not a real YouTube Studio screenshot): fix one stage at a time, then check the next stage. Step 6 - Measure for Seven Days, Then Repeat What to do: Wait seven days after the change, then compare the stage number with the same number from before the change. Use the same video length and topic type for a fair comparison. How: Seven days is enough for YouTube to show the video to its usual audience. Compare the same stage on the same kind of video, not a new video against a viral one. If the stage number moved the right way, keep the change and move to the next stage. If it did not move, change one thing again. Example: A creator rewrote only her titles and waited a week. Click-through rate rose from 3% to 5%, so she kept the new title style and moved on to fixing retention. Common mistake: Judging a change after one day, when YouTube has barely shown the video. Wait the full seven days before you decide.Illustrative diagram (mock-up, not a real YouTube Studio screenshot): measure seven days, then repeat the check. Your Channel Growth ChecklistBottleneck stage found in Analytics, in order: impressions, CTR, retention, subscribers. Only the broken stage was changed, one thing at a time. Click-through rate checked against the channel average. Opening rewritten so the promise lands in ten seconds. Seven days waited before judging the fix.Frequently Asked Questions Why is my channel not growing even though I upload every week? Uploading more does not fix a broken stage. Check the chain in order — impressions, click-through rate, retention, subscribers — and fix the first stage that is weak. What is a good click-through rate on YouTube? It depends on the channel and the topic, so compare a video with your own average, not with another channel. If the rate is below your average, the thumbnail or title is the stage to fix. How long should I wait before judging a change? Seven days, as this guide recommends. YouTube needs time to show the video to its usual audience, and one day of data is too noisy to trust. Should I fix impressions or retention first? Fix whichever comes first in the chain. Impressions come before clicks, and clicks come before retention, so work the earliest weak stage first. SourcesYouTube Help, How to understand your video reach: support.google.com/youtube/answer/9314355 (verified live 31 October 2026). CreatorPlaybook, Understanding YouTube Analytics: creatorplaybook.blogspot.com/2026/10/understanding-youtube-analytics.html CreatorPlaybook, How to Improve Click-Through Rate: creatorplaybook.blogspot.com/2026/10/how-to-improve-click-through-rate.html
- CreatorPlaybook Team
- 31 Oct, 2026
Bought YouTube Views or Subscribers? How Invalid Traffic Triggers Demonetization and How to Fix It
Your views jumped overnight. A video that usually gets 200 views suddenly has 12,000, your subscriber count climbed by 500 in a day, and for a moment it feels like the channel finally broke through. Then the numbers start falling back on their own, your estimated revenue drops, and an email arrives saying your monetization is limited or your AdSense for YouTube account is under review. If you ever bought views, subscribers, watch time, or likes, or paid a growth service that promised fast results, this is very likely what happened: YouTube's systems flagged the activity as invalid traffic. Invalid traffic is any activity that does not come from a real user with genuine interest, and YouTube says it can include fraudulent, artificial, or even unintentional ways of boosting ad revenue. The good news is that the situation is usually fixable if you stop the cause, clean up your account, and follow the proper appeal path. This guide walks you through exactly that, step by step. What You Will Learn In this guide you will learn what invalid traffic is and why bought views and subscribers trigger it, how to spot the warning signs in YouTube Analytics traffic sources, how to stop the damage by cutting off the source and securing your account, what YouTube says happens to your earnings, and how to appeal if you believe the decision was wrong. You will also get a cleanup checklist you can finish today. Step 1 - Learn What Counts as Invalid Traffic What to do: Read YouTube's own definition of invalid traffic before changing anything, so you fix the real cause instead of guessing. How: YouTube Help says invalid traffic is any activity on your channel that does not come from a real user or a user with genuine interest, and it can include fraudulent, artificial, or even unintentional ways to boost ad revenue. Named examples include automated or incentivized traffic from third parties, including so-called traffic boosting services, and telling viewers to watch or click ads on certain videos to inflate revenue. Example: A creator pays a seller for 5,000 views. The views arrive from bots and click farms in a few hours. YouTube's systems detect the pattern, filter the views out, and may temporarily limit ads on the channel. Common mistake: Assuming the problem is the video or the thumbnail. If the spike came from a paid service, no amount of editing will fix it until the paid traffic stops.Illustrative diagram (mock-up, not a real YouTube Studio screenshot): paid traffic being flagged as invalid traffic. Step 2 - Spot the Warning Signs in Analytics Traffic Sources What to do: Open YouTube Studio, go to Analytics, and check where the suspicious views came from. How: Open Analytics, then the Reach tab, then the traffic source types report. Compare the last 28 days with the previous period. Look for a sudden spike from External or unknown sources, a single video jumping far above your normal range, or views rising while watch time, likes, and comments stay flat. As reported by creators, a views spike with almost no average view duration is a classic sign of artificial traffic, so confirm what you see in Studio before acting. Our guide on how YouTube counts views in 2026 explains which views YouTube treats as real. Example: A cooking channel normally gets 80 percent of traffic from Browse and Search. One week a new video gets 70 percent from an unknown external site and average view duration drops to nine seconds. That is the pattern to investigate. Common mistake: Only watching the headline view count. The traffic source breakdown tells you what happened; the total only tells you that something happened.Illustrative diagram (mock-up, not a real YouTube Studio screenshot): a traffic sources report with an unusual spike. Step 3 - Stop Buying Views and Cut Off the Source Immediately What to do: Cancel every paid promotion that sends artificial views, subscribers, or engagement, and stop asking viewers to click ads. How: Log in to every panel, seller, or freelancer you used, cancel the order, and remove any auto-renew. Stop all view boosting and subscriber services, Never tell viewers to click ads or to watch a video on repeat to boost revenue. YouTube's invalid-traffic page lists both practices as examples of invalid traffic. Example: A creator had two active orders from a growth site. Cancelling both stopped new artificial views within a day, and the channel's daily views returned to their normal range. Common mistake: Pausing the service instead of cancelling it. An order that restarts by itself can undo a whole week of cleanup.Illustrative diagram (mock-up, not a real YouTube Studio screenshot): cancelling paid view and subscriber services. Step 4 - Revoke Shady Third-Party Apps and Secure the Account What to do: Remove any third-party app or service that has access to your Google account or YouTube channel, then lock the account down. How: Open your Google Account security settings, review third-party access, and revoke anything you do not recognize or no longer trust, especially tools that promised views or subscribers. Change your password, turn on two-step verification, and check that no unknown recovery email or phone number was added. Then open YouTube Studio and check the channel's permissions for extra managers you did not add. Example: A creator found an old free subscriber tool still connected to the channel a year after using it once. Revoking it stopped background activity the creator did not know was happening. Common mistake: Changing the password but leaving the app connected. A connected app can keep acting on the channel even after a password change.Illustrative diagram (mock-up, not a real YouTube Studio screenshot): securing the account and revoking app access. Step 5 - Understand What Happens to Earnings and Keep Every Notice What to do: Expect adjustments, not instant recovery, and keep every message YouTube sends about the issue. How: YouTube Help says that when invalid traffic is detected, advertisers are not charged, and earnings tied to invalid activity can be adjusted out. Ad serving may be limited for a while until the systems see the risk has reduced, and significant violations can lead to suspension of the linked AdSense for YouTube account or demonetization under the channel monetization policies. Payments may also be delayed while traffic is investigated. Save every email and Earn-tab notice, including dates, because the appeal window is tied to them. Example: A channel's estimated revenue dropped for two weeks after the invalid views were removed, even though public views looked normal again. Common mistake: Spending the estimated revenue before it is finalized. Estimated earnings are not a promise, and invalid-traffic adjustments can reduce them.Illustrative diagram (mock-up, not a real YouTube Studio screenshot): earnings adjustments after invalid traffic. Step 6 - Appeal If the Decision Was Wrong, Then Rebuild With Real Traffic What to do: If your account was disabled for invalid traffic and you believe that was an error, submit an invalid activity appeal through the official route, and keep the channel clean while you wait. How: YouTube Help says that if your account was disabled for invalid traffic but you feel the decision was made in error, you can submit an invalid activity appeal. Follow the link in the notice or email, explain briefly what you stopped and what you changed, and include the cancellation dates if you have them. Rebuild with real sources such as search and suggested videos, and confirm in Studio that traffic sources look normal again. If your subscriber count also fell, read our guide on why subscribers drop or get stuck before assuming the worst. Example: A creator appealed after cancelling a growth service and revoking app access, and included the cancellation dates. The appeal was reviewed, and the channel was later able to apply for monetization again once eligible in YouTube Studio. Common mistake: Appealing before cleaning up. If the service is still running, the same signal that caused the problem is still present when the appeal is reviewed.Illustrative diagram (mock-up, not a real YouTube Studio screenshot): appealing and rebuilding with real traffic. Your Invalid Traffic Cleanup ChecklistAll paid view, subscriber, and engagement orders cancelled, not just paused. Nobody has been asked to click ads or loop videos for revenue. Third-party access reviewed, and unknown or shady apps revoked. Password changed and two-step verification turned on. Suspicious traffic sources checked in the Analytics Reach tab. Every YouTube email and Earn-tab notice saved with its date. Appeal submitted only through the official link, once, with the cleanup dates included.Frequently Asked Questions Will YouTube remove the bought views? As reported, YouTube's systems filter out invalid views, so the views may drop in Analytics and earnings tied to them can be adjusted out. The channel itself can also face limits on ads. Can I get monetization back after invalid traffic? YouTube Help says significant violations may lead to demonetization, and if a violation is overturned you can apply for monetization once eligible in Studio. Confirm your exact status in the Earn tab. Does embedding a video or using the Promotions tab cause invalid traffic? YouTube's FAQ says embedding and legitimate promotion do not by themselves cause invalid traffic. Check the official FAQ for the full list of cases. Will my videos still be recommended? YouTube's FAQ addresses recommendations after invalid traffic, so check the article for the current wording. Real watch time and audience signals still matter, so keep publishing normally and read the Reach tab. How long do invalid-traffic reviews take? YouTube Help says payments may be delayed up to 90 days while traffic is investigated. Keep the channel clean and watch the Earn tab for updates. SourcesYouTube Help, Invalid traffic on your videos: support.google.com/youtube/answer/10285842 (verified live 31 October 2026). CreatorPlaybook, How YouTube Counts Views in 2026: creatorplaybook.blogspot.com/2026/10/how-youtube-counts-views-in-2026-public.html CreatorPlaybook, YouTube Subscribers Dropping or Stuck?: creatorplaybook.blogspot.com/2026/10/youtube-subscribers-dropping-or-stuck.html
- CreatorPlaybook Team
- 30 Oct, 2026
YouTube Subscribers Dropping or Stuck? Why Your Count Falls and How to Stop It
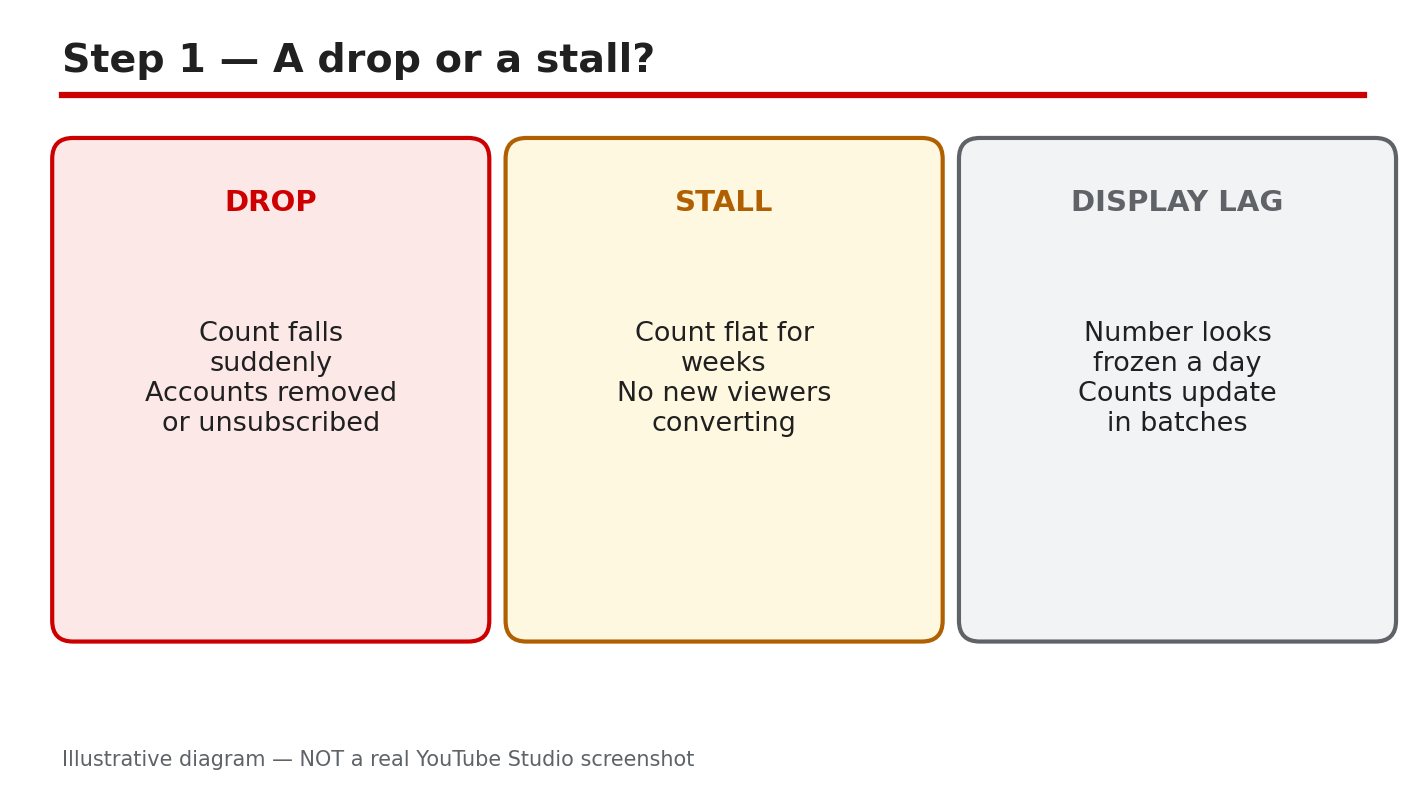
Your subscriber count falls by ten overnight, then stalls for a week. No video was deleted, no settings changed, and the comments look normal. Before you panic, know this: small drops are normal on YouTube, and a flat count often means slow growth, not lost fans. This guide helps you tell a drop, a stall, and a display lag apart. Then you will find where the number lives, learn why counts fall, audit the videos that lost subscribers, and follow a 30-day plan to stop the leak. Work in order, and do not buy subscribers. This post uses YouTube's own help pages as its source. What You Will LearnTell a real drop, a stall, and a display lag apart. Find subscribers gained and lost in YouTube Analytics. Learn why closed and spam accounts are removed from counts. Audit which videos lost subscribers and why. Stop the leak with on-topic videos, early hooks, and one subscribe ask.Step 1: Drop, Stall, or Display Lag? Three patterns look alike but need different fixes. A drop means the number fell after YouTube removed closed or spam accounts, or after viewers unsubscribed. A stall means the count is flat because new subscribers roughly match the people leaving. A display lag means the public count is rounded and updates in steps, so it can look frozen while the real count moves. Check Studio before you react, because each pattern points to a different fix. Path: YouTube Studio > Dashboard, then check the real-time subscriber card. Example: a channel showed 1,240 subscribers for three days, then jumped to 1,260. The public count updates in steps, so the stall was only a display lag. Common mistake: announcing a 'subscriber crisis' to your audience after one bad day, which only pushes more people to unsubscribe.Diagram: drop vs stall vs display lag — three patterns, three different fixes. Illustrative diagram, not a real Studio screenshot. Step 2: Find Where the Number Lives Open YouTube Studio, go to Analytics, then the Audience tab. There you will see subscribers gained and lost, and which videos gained or lost them. Compare that line with your views trend. If views are steady but subscribers fall, the problem is who the videos reach, not how many watch. If views also fall, reach is the first problem to fix. Check the last 28 days, not a single day, so one viral video does not hide the trend. Path: YouTube Studio > Analytics > Audience > Subscribers gained and lost, by video. Example: one tutorial gained 90 subscribers while a reaction video lost 40. The channel kept the tutorials and dropped the reactions. Common mistake: reading only the public count on your channel page, which is rounded and hides small daily changes.Diagram: Studio, Analytics, Audience — where subscribers gained and lost live. Illustrative diagram, not a real Studio screenshot. Step 3: Why Counts Fall Counts fall for three usual reasons. First, YouTube removes closed accounts and spam subscribers in regular checks. YouTube reports that it verifies the legitimacy of accounts and actions on your channel, and removes subscribers gained through artificial means, such as buying them. Second, viewers unsubscribe after a video that breaks your promise. A sudden topic change, a misleading title, or a long break can all push loyal viewers away. Third, bought subscribers vanish in the same clean-ups. Buying subscribers breaks YouTube's rules and the numbers never stay, so never buy subscribers or views. The public count also hides small moves because YouTube shortens it: a channel with 1,234 subscribers shows 1.23K, and the display only moves after ten new subscribers. Path: YouTube Studio > Analytics > Audience, then sort videos by subscribers lost. Example: a channel changed from cooking to gaming overnight and lost subscribers for a month. Returning to cooking stopped the loss within two weeks. Common mistake: blaming every drop on YouTube while ignoring the video that caused the unsubscribes.Diagram: three reasons counts fall — removed accounts, viewers leaving, bought subscribers removed. Illustrative diagram, not a real Studio screenshot. Step 4: Run a Subscriber Audit List your last ten videos and write down subscribers gained and lost for each one. Mark the worst three and watch their first minute. Ask four questions. Which video lost the most subscribers? Are bell subscribers still getting notified? Were recent videos off-topic for your audience? Did anyone buy subscribers or views for the channel? Answer honestly, because a fix aimed at the wrong cause wastes weeks. Keep the audit to one page so you can repeat it every month. Path: YouTube Studio > Analytics > Audience > See more, then sort by subscribers lost. Example: an audit showed one rant video lost 60 subscribers while every tutorial gained some. The channel stopped making rants. Common mistake: auditing totals instead of videos, which hides the one video doing the damage.Diagram: the subscriber audit — worst videos, bell notices, topic fit, bought subs. Illustrative diagram, not a real Studio screenshot. Step 5: Stop the Leak Three habits keep subscribers. First, stay on-topic. Keep one niche per video cluster, so a new subscriber knows what the next video will be. Second, hook early. Say the value of the video in the first 30 seconds, before the viewer decides to leave. Third, make one clear subscribe ask per video, near the moment you deliver value. Never beg for subscribers in every minute, and never buy them. A clean channel that keeps its promise grows slower at first, then holds its audience. Path: YouTube Studio > Content > video > Details, then check the title and first line match the video's topic. Example: a channel added one subscribe ask right after its best tip. Subscribers gained per video rose without changing anything else. Common mistake: asking viewers to subscribe in the first five seconds, before you have given them a reason.Diagram: stop the leak — one niche, an early hook, one subscribe ask. Illustrative diagram, not a real Studio screenshot. Step 6: Follow the 30-Day Subscriber Plan Week 1: run the audit and list your three worst videos. Week 2: publish two on-topic videos with a hook in the first 30 seconds. Week 3: reply to comments daily and pin a question that invites viewers back. Week 4: compare subscribers gained and lost with Week 1, and keep the format that gained the most. Repeat the cycle with one change at a time, so you learn what works. Expect slow, steady growth, not a sudden jump, and check the count weekly instead of hourly. Write down one lesson each week so the next cycle starts smarter. Path: YouTube Studio > Analytics > Audience > Subscribers, reviewed on Day 30. Example: a small channel followed this plan for a month. Losses fell by half, and two tutorial formats gained subscribers every week. Common mistake: copying a big channel's upload schedule instead of fixing the leak in your own videos.Diagram: the 30-day subscriber plan — audit, publish, engage, compare, repeat. Illustrative diagram, not a real Studio screenshot. Quick ChecklistDrop, stall, or lag named before any fix is tried. Audience tab checked over the last 28 days. Worst three videos listed with subscribers lost. No bought subscribers or views on the channel. Videos on-topic, hook in the first 30 seconds. One subscribe ask per video, after value is delivered.Frequently Asked Questions Is a small subscriber drop normal? Yes. YouTube regularly removes closed and spam accounts, so small drops happen on healthy channels too. Why does my public count look frozen for days? The public count is shortened and updates in steps, so it can look flat while your real-time count in Studio keeps moving. A video made people unsubscribe. Should I delete it? Usually not. Learn from it, keep it unlisted only if it truly misleads viewers, and make the next video on-topic. Can buying subscribers fix a falling count? No. Bought subscribers are removed in YouTube's checks, and buying them breaks the rules. Earn subscribers with on-topic videos instead. How often should I check my subscriber count? Weekly. Daily checks show noise, while a weekly audit shows whether the 30-day plan is working. Sources — Check It Yourself Check the facts in this guide against YouTube's own help pages.Check your YouTube subscriber count — YouTube Help How to Get Your First 1,000 Subscribers
- CreatorPlaybook Team
- 29 Oct, 2026
YouTube Watch Hours Dropping? Why Your 4,000 Hours Keep Falling
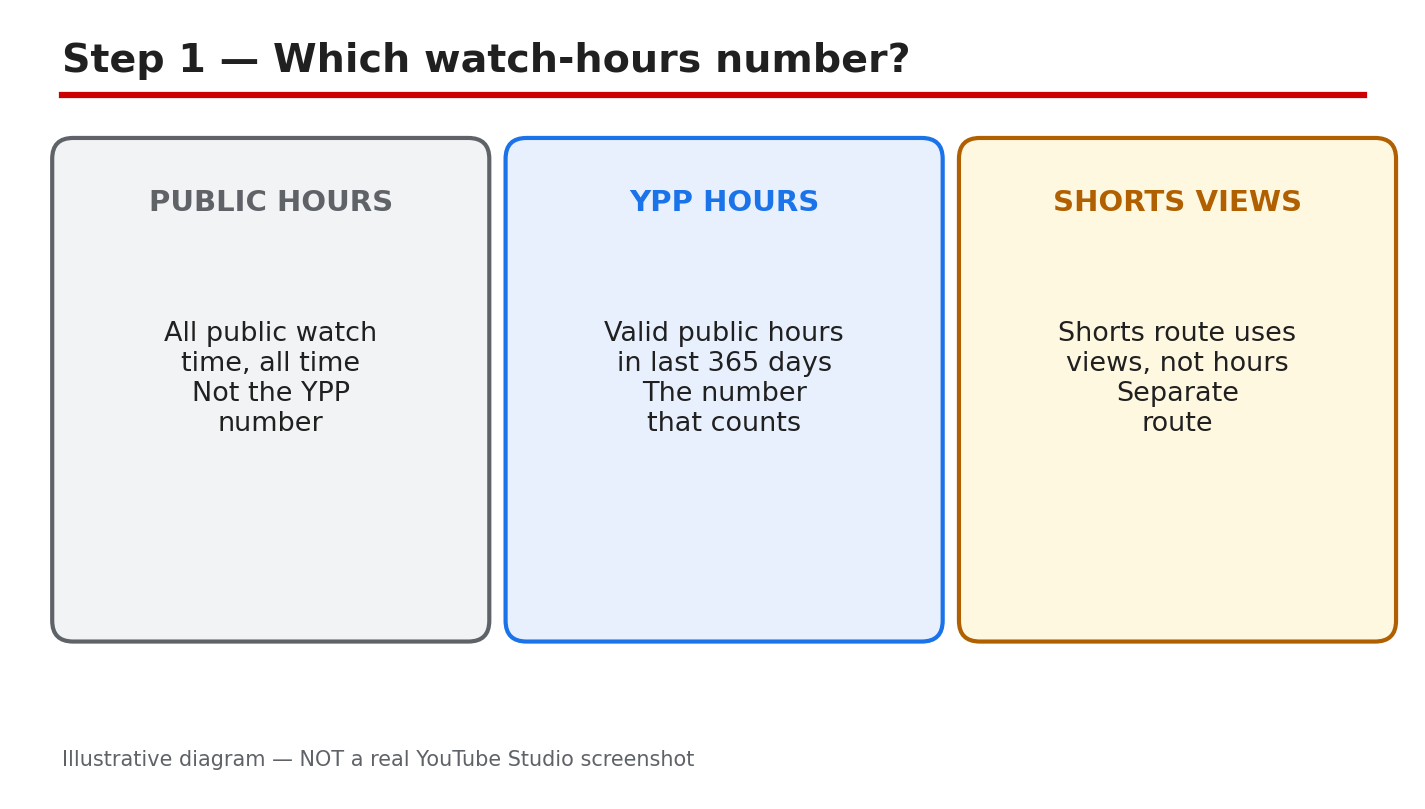
Watch hours can fall even when you keep uploading. The number in Studio moves down, the goal feels further away, and it is easy to blame the algorithm. This guide slows that moment down. You will learn which watch-hours number matters for the YouTube Partner Program, where to check it, why it falls, and how to grow hours that actually count. No figure in this post is taken from any individual channel. For the wider picture, read Understanding YouTube Analytics first. It explains views, watch time, and audience retention in Studio. This post focuses only on one number: valid public watch hours in the last 365 days, and why that number keeps moving. What You Will LearnWhich watch-hours number counts for the Partner Program. Where to find it in Studio, in the same 365-day window. Why hours fall, even without a penalty. A simple hours audit you can run in one sitting. How to grow hours that count, without buying them. A 30-day plan to rebuild the number steadily.Step 1: Which Number Are You Looking At? What to do: Do not compare different numbers. Public watch time counts all time, for all time, and it rarely falls. Valid public watch hours in the last 365 days are the Partner Program number, and they move every day. The Shorts route is different again: it uses views, not hours, so Shorts watch time does not add to this number. Know which number you are reading before you judge it. Studio path: YouTube Studio > Earn. Read the eligibility numbers there before you open Analytics. Example: A channel shows a large all-time watch time, but only part of it falls in the last 365 days. The Partner Program number is the smaller, rolling figure, not the all-time total. Common mistake: Panicking over the all-time number, or adding Shorts watch time to it. Use only the 365-day valid public hours for the Partner Program check.Illustrative diagram/mock-up, NOT a real YouTube Studio screenshot: which watch-hours number counts. Step 2: See It in Studio, in the Same Window What to do: Check the same window in two places. In the Earn tab, read the eligibility numbers for subscribers and watch hours or Shorts views. In Analytics, open Watch time and set the same last-365-days period. If the two views use different dates, they will not match, and the gap will look like a sudden fall. Compare like with like, on the same day. Studio path: YouTube Studio > Earn, then YouTube Studio > Analytics > Watch time. Set both to the last 365 days. Example: A creator checks Earn on Monday and Analytics on Friday, with different date ranges, and sees two different numbers. Checking both on the same day, in the same window, removes the false gap. Common mistake: Comparing a 28-day Analytics view with the 365-day eligibility number. The short view will almost always look smaller, and it is not the Partner Program number.Illustrative diagram/mock-up, NOT a real YouTube Studio screenshot: where to see the number. Step 3: Why the Number Falls What to do: Three normal causes explain most falls. First, hours age out: the window rolls forward every day, so strong days from a year ago leave the count. Second, hours leave with the video: making a video private or deleting it removes its hours from the valid total. Third, the mix changes: more Shorts views and fewer long-form views mean fewer hours, even when views rise. None of these needs a penalty to happen. Studio path: YouTube Studio > Analytics > Watch time. Look for the shape of the fall: steady, sudden, or tied to one video. Example: A video that earned many hours last spring passes its 365th day, and the total drops overnight. Nothing broke: the hours simply aged out of the rolling window. Common mistake: Assuming a fall means a strike, a restriction, or a shadowban. Check ageing, privacy, and mix first, before you look for a penalty.Illustrative diagram/mock-up, NOT a real YouTube Studio screenshot: why the number falls. Step 4: Run a Simple Hours Audit What to do: Work through four checks in one sitting. First, confirm the window: last 365 days, in both Earn and Analytics. Second, list videos made private or deleted recently, and note their hours. Third, check that your top videos are still public and still earning watch time. Fourth, check retention past 30 seconds: viewers who leave in the first seconds add almost no hours, however many clicks the video gets. Studio path: YouTube Studio > Content to check privacy, and Analytics > Watch time to check top videos and retention. Example: A creator finds two older videos made private last month. Their hours left the total on the day they were hidden, which explains most of the fall. Common mistake: Auditing views instead of hours. A video can gain views and still add few hours if viewers leave within seconds.Illustrative diagram/mock-up, NOT a real YouTube Studio screenshot: hours audit checks. Step 5: Grow Hours That Count What to do: Make hours easy to earn. Publish 8- to 12-minute videos with a strong hook in the first 30 seconds. Build series and playlists, and add end screens that lead to the next video. Edit for retention first: cut dead air in the first minute. Never buy watch hours: bought hours do not build a real audience, and they put the channel at risk. Studio path: YouTube Studio > Analytics > Audience retention. Find where viewers leave, and fix that moment first. Example: A creator cuts a slow 40-second introduction to 10 seconds. Viewers stay longer, average view duration rises, and the same number of views earns more hours. Common mistake: Making videos longer without making them stronger. Extra minutes only add hours if viewers watch them; dead minutes add nothing.Illustrative diagram/mock-up, NOT a real YouTube Studio screenshot: growing hours that count. Step 6: A 30-Day Hours Plan What to do: Week one: run the audit, restore any video hidden by mistake, and note the starting 365-day number. Week two: publish two 8- to 12-minute videos with strong hooks, and link them in a playlist. Week three: check retention, cut the weakest opening, and add end screens to the top videos. Week four: compare the same 365-day window again, and keep the habits that raised retention. Expect steady rebuilding, not an overnight jump. Studio path: YouTube Studio > Earn each Monday, and Analytics > Watch time each Monday, in the same 365-day window. Example: A creator publishes two longer videos in week two and fixes one weak opening in week three. By week four, retention is higher, and hours stop falling as fast. Common mistake: Checking the number daily and changing the plan each time. The rolling window moves slowly, so judge the plan after four weeks, not four days.Illustrative diagram/mock-up, NOT a real YouTube Studio screenshot: 30-day hours plan. Checklist: Audit in OrderWindow checked: last 365 days, in Earn and Analytics. No top video hidden or deleted by mistake. Top videos still public and earning watch time. Retention past 30 seconds checked for top videos. Next videos planned at 8 to 12 minutes, with hooks. Series, playlists, and end screens in place. No watch hours bought, and no shortcuts used.Frequently Asked Questions Why do my watch hours fall every day? The window rolls forward daily, so hours from 365 days ago leave the count. A small daily fall is normal when no new hours replace the old ones. Do Shorts views count toward 4,000 hours? No. Shorts Feed watch hours do not count toward the watch-hours route. Shorts can qualify through the separate views route: 10 million qualified Shorts views in the last 90 days, with 1,000 subscribers. Do private or deleted videos lose their hours? Yes, for the valid total. Hours from a video that is private or deleted do not count in the last 365 days. Restoring a video to public can return its hours to the count. Can I buy watch hours to reach 4,000? No. Never buy watch hours. Bought hours do not build a real audience, and they put the channel at risk. Grow hours with longer videos, strong hooks, and playlists instead. How long until my hours recover? There is no fixed time. Hours rebuild as new viewing enters the 365-day window and old hours age out. Judge a plan over four weeks, in the same window, before changing it. Sources: Check It Yourself Official pages opened and verified live on 29 October 2026. Check the current wording before acting, because Studio options and Help wording can change.YouTube Partner Program overview and eligibility (YouTube Help) YouTube channel monetization policies (YouTube Help)No official YouTube video is embedded here. No exact official video URL was verified live in this run.
- CreatorPlaybook Team
- 29 Oct, 2026
How YouTube Counts Views in 2026: Public Views vs Engaged Views Explained
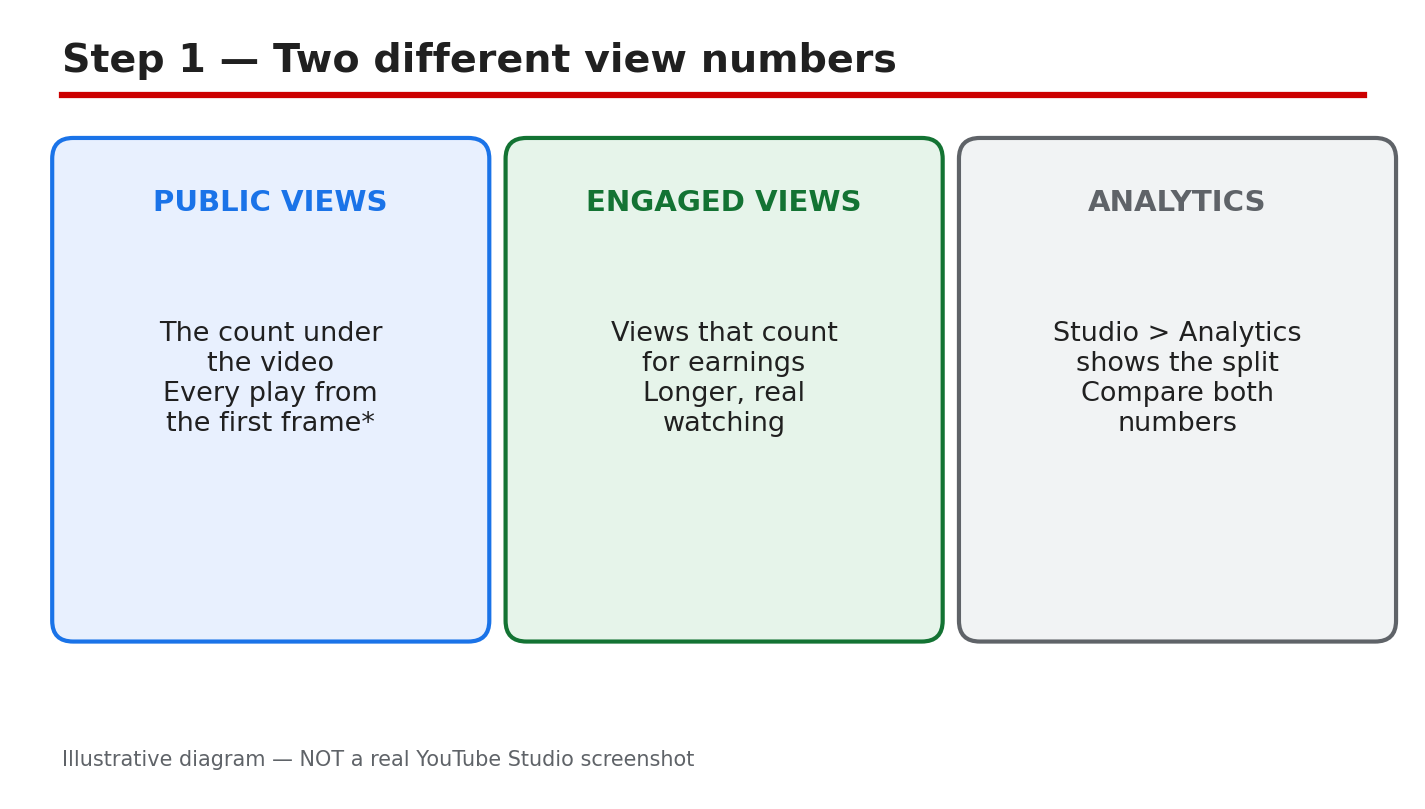
Two videos can show the same view count and earn very different amounts. That gap confuses many creators, because YouTube shows more than one kind of view. The number under a video and the number that counts for earnings are not always the same, and treating them as one number leads to wrong conclusions. This guide separates the two numbers, shows where to find each one in YouTube Studio, and explains the reported change to how views are counted. It also gives you a short weekly check, so you can read your numbers without guessing. Where a date or a change is reported, this guide says so, and points you to the official Help page for the current definition. What You Will LearnThe difference between public views and engaged views. Where to see the split in YouTube Studio Analytics. The reported view-counting change, and what to check officially. How to read traffic source, retention, and date ranges correctly. Why views and earnings differ, and what a 7-day check looks like.Related reading: Understanding YouTube AnalyticsDiagram: public views, the count under a video, compared with engaged views, the count used for earnings. This is an illustrative diagram and mock-up, not a real YouTube Studio screenshot. Step 1: Learn the Two View Numbers Public views are the count shown under a video, on its watch page and in search results. Engaged views are the views that count for earnings, after YouTube applies its checks. A play can add to the public count without adding to the engaged count, for example when it is very short or when it is filtered out as invalid. That is why a video can look popular and still earn little. Example: a Short shows 10,000 public views, but only 6,000 engaged views. The gap does not mean views were deleted; it means the two counts measure different things. Common mistake: judging a video only by the public count. A high public count with low engagement can look like success while earnings stay low.Diagram: the Studio path to the view split, from Analytics to a single video. This is an illustrative diagram and mock-up, not a real YouTube Studio screenshot. Step 2: Find the Split in YouTube Studio Open YouTube Studio and go to Analytics in the left menu. Open the Content tab, then open a single video. Look at the Reach tab for how viewers found the video, and the Engagement tab for how long they stayed. Compare the public view count on the video page with the figures shown in Analytics, and note the date range at the top, because different ranges give different totals. Exact path: YouTube Studio > Analytics > Content > video > Reach / Engagement. Example: for one Short, Reach shows most viewers came from the Shorts feed, while Engagement shows many swiped away quickly. The two tabs together explain why public views are high and watch time is low. Common mistake: comparing a 28-day Analytics total with a lifetime public count. Always set the same date range before you compare two numbers.Diagram: the reported change, with views counted from the first frame. This is an illustrative diagram and mock-up, not a real YouTube Studio screenshot. Step 3: Understand the Reported Counting Change As reported, YouTube changed how views are counted. From 24 August 2026, a view is counted the moment a video starts to play, across all formats. For Shorts, the same first-frame approach was reported from 31 March 2025. Treat both dates as reported: this guide does not invent a threshold, such as a number of seconds, and you should check the official Help page for the current definition before you quote it. The reported change affects the public count. As reported, it does not change how earnings are worked out, and it does not change Partner Program eligibility. That is the point most summaries miss: a higher public count does not by itself mean higher earnings. Example: after the reported change, a long video shows more public views in its first week, but its earnings stay in line with engaged views. You would misread the video if you only watched the public count rise. Common mistake: quoting a seconds threshold you read in a comment or a blog post. No threshold is stated in this guide, because none was verified here. Check the official page instead.Diagram: reading numbers correctly, with traffic source, viewed versus swiped away, and retention. This is an illustrative diagram and mock-up, not a real YouTube Studio screenshot. Step 4: Read the Numbers Correctly Read four things together, not one number alone. First, traffic source: where did viewers come from, and did that source bring engaged viewers? Second, viewed versus swiped away: for Shorts, how many viewers stayed and how many swiped past? Third, retention: how long did viewers stay, on average, and where did they leave? Fourth, date range: are all the numbers from the same period? Example: two Shorts each show 5,000 public views. One keeps viewers for most of its length; the other loses most viewers in the first second. The first Short is the stronger video, even though the public counts match. Common mistake: comparing retention across videos of very different lengths. A 15-second Short and a 10-minute video will not hold viewers in the same way, so compare like with like.Diagram: why views and earnings differ, including short plays, replays, and filtered plays. This is an illustrative diagram and mock-up, not a real YouTube Studio screenshot. Step 5: Why Views and Earnings Differ Earnings follow engaged views, not every public view. Very short plays may count publicly but add little or nothing for earnings. Replays can add to the public count in ways that do not match earnings. Invalid or spam plays are filtered out, so they do not count for earnings even if a public total moved first. None of this means views were stolen; it means the two counts were never the same measure. Example: a video gets shared in a group chat and many people open it for a second and leave. Public views rise, but engaged views and earnings barely move, because those plays were too short to count as engaged. Common mistake: assuming every public view should pay the same. Earnings depend on engaged views, ad demand, and other factors, so the same view count can pay differently on different videos.Diagram: the 7-day view check, run once a week on the same day. This is an illustrative diagram and mock-up, not a real YouTube Studio screenshot. Step 6: Run a 7-Day View Check Once a week, on the same day, open Analytics and set the date range to the last 7 days. Write down four numbers for your newest video: public views, the Reach figure, the Engagement figure, and the traffic source that brought the most viewers. Compare them with the previous week, using the same date range and the same video. A single week will not tell you everything, but a repeated check shows whether a change is a trend or a one-off. Example: every Monday, you check last week's Short. Public views fell, but viewed-versus-swiped-away improved. The video is not failing; fewer people found it, but more of those who did stayed. Common mistake: changing the date range each week and then comparing the totals. Keep the range, the video, and the day the same, or the comparison means nothing. Quick ChecklistPublic views and engaged views kept separate. Studio split checked: Analytics > Content > video. Same date range used for every comparison. Traffic source, viewed versus swiped away, and retention read together. No seconds threshold quoted without an official source. Reported dates treated as reported, and checked officially. Short plays, replays, and filtered plays allowed for in the gap. 7-day check written down, same day each week.Frequently Asked Questions What is the difference between public views and engaged views? Public views are the count shown under a video. Engaged views are the views that count for earnings, after YouTube's checks. A play can add to one count without adding to the other. Did YouTube change how views are counted in 2026? As reported, from 24 August 2026 a view is counted the moment a video starts to play, across all formats, and Shorts were reported to use the same approach from 31 March 2025. Check the official Help page for the current definition, because this guide reports the change and does not set a threshold. Why do my views rise but my earnings stay flat? Earnings follow engaged views, not public views. Short plays, replays, and filtered plays can move the public count without moving earnings. Read the Studio split before you judge a video. How often should I check my view numbers? Once a week is enough for most creators. Use the 7-day check in Step 6, keep the date range and the day the same, and look for a trend over several weeks rather than reacting to one day. Sources — Check It Yourself Check the official pages below for the current definition, and re-check them before you quote a date or a rule. No official YouTube video was embedded in this post: no exact official video was verified live in this run, so none is shown here. YouTube Help: How engagement metrics are counted YouTube Help: Get started with YouTube Analytics
- CreatorPlaybook Team
- 28 Oct, 2026
0 Views on YouTube? How to Diagnose No Impressions, Low CTR, or Low Retention in 6 Steps
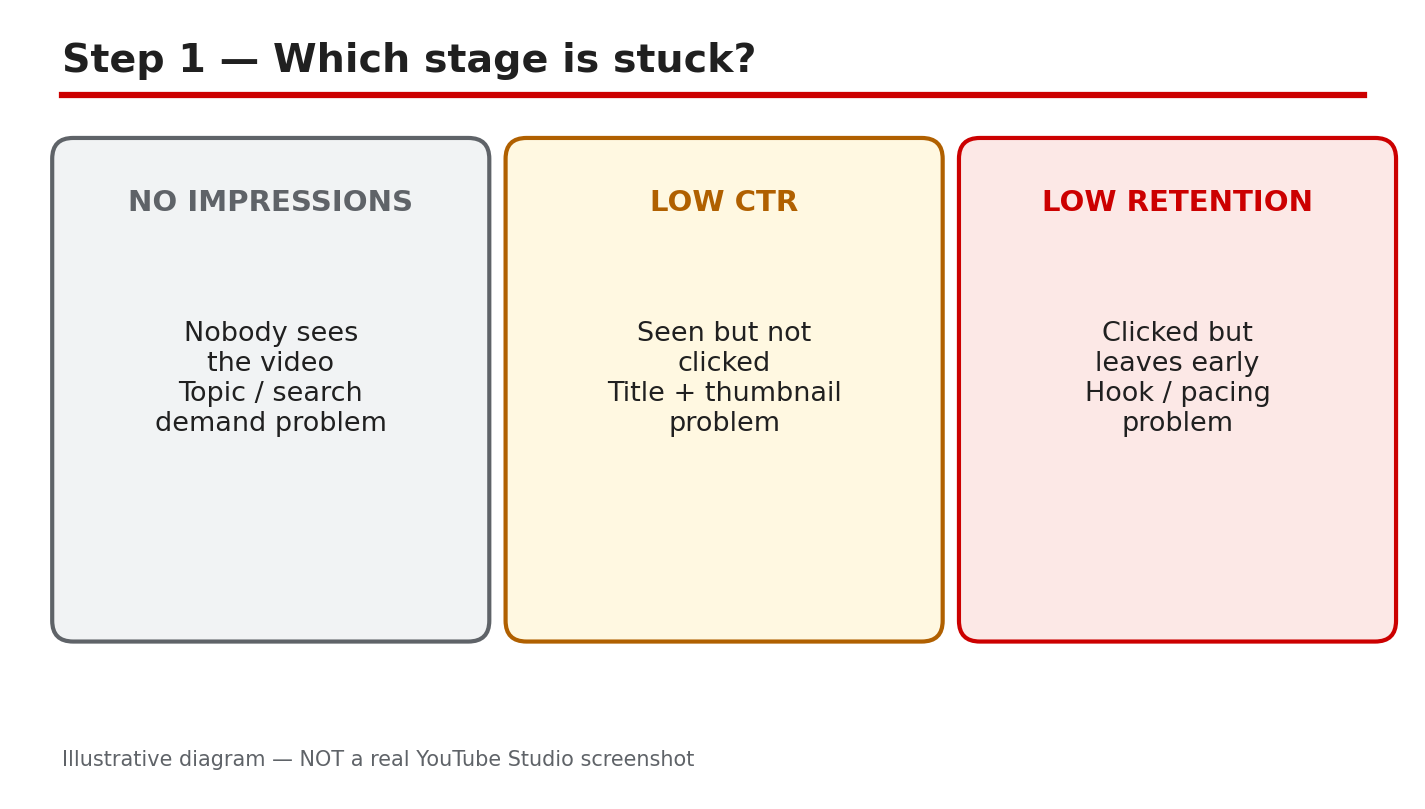
Zero views can feel like a dead end, but it is usually a clue. Views are the last number in a chain: YouTube shows your video (impressions), people click (click-through rate, or CTR), and people stay (audience retention). When the final number is zero, one of those earlier links is broken. This guide helps you find which one, fix the right thing, and test it once — instead of guessing, re-uploading the same file, or changing five things at once. The diagram above sums up the three very different problems that all look like “0 views.” Keep it in mind as you work through the steps: the fix for “YouTube never showed it” is not the fix for “people saw it and did not click.” What You Will LearnHow to tell whether your problem is impressions, CTR, or retention. Where to find each number in YouTube Studio, and how to read the three together. How to rule out the simple causes first: privacy, restrictions, claims, and a brand-new channel. How to change one thing, wait long enough to judge it, and record what happened. How to run a clean 7-day retest without deleting and re-uploading blindly.Step 1: Name Which Number Is Zero What to do: Before you touch the title, the thumbnail, or the video, write down which of the three numbers is the problem. There are three different “zero” situations, and each points to a different fix. First, is the video actually getting shown at all? Second, if it is shown, are people clicking? Third, if people click, are they staying past the opening seconds? Studio menu path: YouTube Studio > Analytics > Content > click the video > Reach tab (impressions and CTR) and Engagement tab (retention). You do not need the full Analytics tour yet — Step 2 walks the path in detail. For this step, you only need to know which screen holds which number. Example: A new creator uploads a how-to video. After two days it shows 0 impressions, 0 views, and no CTR. Nothing was clicked because nothing was shown. That is a discovery or settings problem, not a thumbnail problem. In contrast, a video with 2,000 impressions, a 1.5% CTR, and 30 views has a packaging problem: people saw it and mostly scrolled past. A third video has 3,000 impressions, a healthy 8% CTR, but viewers leave after 12 seconds. That is an opening-hook problem. Common mistake: Treating every 0-view video the same way. Changing the thumbnail when impressions are 0 cannot help, because nobody has seen the thumbnail. Likewise, re-uploading the same video when retention is the problem only restarts the same opening that viewers already left. Caption: Diagram 1 — The three different “0 views” problems: no impressions, low CTR, and low retention. Illustrative diagram and mock-up only; NOT a real YouTube Studio screenshot.Step 2: Open the Right Screen in YouTube Studio What to do: Open the video-level Analytics for the exact video, not the channel-level overview. The channel overview mixes all your videos together and hides the problem with one video. On the video’s own Reach tab you can see how many times YouTube showed that video, and what share of those showings turned into clicks. Then check the Engagement tab for how long people stayed. Studio menu path: YouTube Studio > Analytics > Content > click the video title or thumbnail > Reach tab for impressions and impressions click-through rate, and Engagement tab for average view duration and audience retention. Give the numbers a few days to settle for a new upload before you judge them. Example: A creator opens the Reach tab for a new tutorial and sees 40 impressions and 0 views. The video was shown 40 times and nobody clicked — a small sample, but the next question is whether impressions keep growing. Another creator sees 12,000 impressions, a 2% CTR, and 240 views: the video is being shown widely, but the packaging is not earning clicks. Both creators are looking at the same screen; only the numbers differ. Common mistake: Judging a video from the channel dashboard, or from the video’s public view count alone. The public count tells you the result; the Reach and Engagement tabs tell you where the chain broke. Also, do not compare a 1-day-old video with a 1-year-old video — older videos have had far more time to collect impressions. Caption: Diagram 2 — The Studio path to video-level Analytics: Studio, Analytics, Content, video, Reach tab. Illustrative diagram and mock-up only; NOT a real YouTube Studio screenshot.Step 3: Read the Three Numbers Together What to do: Put impressions, CTR, and retention side by side and match the pattern to a cause before you change anything. Each pattern has a different fix, and the diagram above shows the three most common ones. Write the three numbers down with the date, so you can compare like with like after your test in Step 5. Studio menu path: YouTube Studio > Analytics > Content > click the video > Reach tab (impressions and CTR) and Engagement tab (retention). Read both tabs for the same date range, and use the same range again when you retest. Example: Pattern one: 0 impressions. YouTube is barely showing the video at all, so the title and thumbnail cannot be the problem yet — check Step 4 first. Pattern two: 5,000 impressions, 1% CTR, 40 views. The video is shown, but almost nobody clicks: the packaging (thumbnail and title) is the likely problem. Pattern three: 4,000 impressions, 9% CTR, but average view duration of 20 seconds on a 10-minute video, with a sharp drop in the first 30 seconds. People clicked, then left: the opening hook is the likely problem. Common mistake: Fixing the thumbnail when retention is the problem, or re-editing the opening when CTR is the problem. Each fix costs time and resets your test. Name the pattern first, then fix only what matches it. Also, do not judge CTR from a tiny sample: 2 clicks from 10 impressions is not a reliable 20% CTR. Caption: Diagram 3 — Reading impressions, CTR, and retention together: low CTR points to packaging, low retention points to the opening hook, and 0 impressions points to discovery or a setting. Illustrative diagram and mock-up only; NOT a real YouTube Studio screenshot.Step 4: Rule Out the Simple Causes First What to do: Before you blame the algorithm, check the four simple causes in the diagram above. Each one can produce 0 views on its own, and each has a plain fix. Work through them in order and fix any problem you find before you judge the video’s performance. Studio menu path: YouTube Studio > Content > find the video > check the Visibility column (Public, Unlisted, or Private) and the Restrictions column. For claims and strikes, check YouTube Studio > Content > Restrictions, and read any notice or email YouTube sent about the video. For privacy, open the video’s details in Studio > Content > click the video > Visibility. Example: A creator is sure a video is “suppressed” until they open Content and see Visibility: Unlisted — the video was never public. Another creator finds a Content ID claim on the audio that limits where the video can be shown. A third creator, three days into a brand-new channel with two uploads, has 0 impressions on both: the channel has almost no history yet, so slow early discovery is expected, not proof of a penalty. Fix the setting, then judge the video. Common mistake: Changing the title and thumbnail five times while the video is still Private or Unlisted, or while a restriction is in place. No packaging change can fix a video that is not public or cannot be shown. Also, do not assume a brand-new channel is being punished: a new channel simply has little watch history for YouTube to learn from yet, so early numbers are often slow. Caption: Diagram 4 — The four simple causes to rule out first: Private or Unlisted visibility, a claim or strike or age restriction, a brand-new channel, and a title or topic with no search demand. Illustrative diagram and mock-up only; NOT a real YouTube Studio screenshot.Step 5: Change ONE Thing, Then Wait What to do: Change exactly one thing — the thumbnail OR the title, never both at once — then wait before you judge. Use the rule from the diagram above: wait 7 days or until the video reaches 5,000 impressions, whichever comes first, and record the numbers before and after. One change, one wait, one comparison: that is how you learn what worked. Studio menu path: YouTube Studio > Content > click the video > Details to edit the title, and Thumbnail to replace the thumbnail image. After the change, return to YouTube Studio > Analytics > Content > click the video > Reach tab to compare impressions and CTR with the numbers you recorded in Step 3, using the same date-range length. Example: A video has 6,000 impressions and a 1.8% CTR. The creator records those numbers, then replaces only the thumbnail with a clearer, larger-subject version and leaves the title alone. After 7 days the video has 5,400 new impressions and a 3.1% CTR. Because only the thumbnail changed, the improvement can fairly be credited to it. If the creator had changed the title, the thumbnail, and the opening all at once, nobody could say which change helped. Common mistake: Changing something every day and reading the numbers hourly. Daily edits restart the test before it has a sample, and hourly checks show noise, not a trend. Pick one change, write down the starting numbers, wait the full period, and only then compare. If impressions are still very low after the wait, the problem may be the one from Step 4, not the packaging — go back and re-check. Caption: Diagram 5 — Change ONE thing (thumbnail OR title), wait 7 days or 5,000 impressions, and record the before-and-after numbers. Illustrative diagram and mock-up only; NOT a real YouTube Studio screenshot.Step 6: Run the 7-Day Retest Plan What to do: Follow the 7-day plan from the diagram above. Day 1: make the one fix from Step 5 and write down the starting numbers. Days 2–6: publish nothing new on this video and change nothing on it — no title edits, no thumbnail swaps, no re-uploads. Day 7: compare impressions, CTR, and retention with the starting numbers, using the same date-range length, and decide: keep the change, or test the next ONE thing. If the numbers moved in the right direction, keep the winning version and move on to improving the next weakest number. If nothing moved, go back to Step 4 and re-check the settings and restrictions before blaming the packaging. Studio menu path: YouTube Studio > Analytics > Content > click the video > Reach tab (impressions and CTR) and Engagement tab (audience retention) for the Day 7 comparison. Keep the date range the same length as the starting measurement so the comparison is fair. Example: Starting numbers: 800 impressions, 2.0% CTR, 32% retention at 30 seconds. The creator changes only the title, waits 7 days, and records 5,100 impressions, 3.4% CTR, and 33% retention. CTR improved while retention stayed nearly flat, so the title helped discovery but the opening still needs work — the next single test is the hook, not another title change. Common mistake: Declaring a video dead after 48 hours and deleting it, or changing everything at once on Day 3 because the numbers have not moved yet. Small channels often need the full wait before a fair sample exists. Finish the plan, write the numbers down, and let one test teach you one lesson. Caption: Diagram 6 — The 7-day retest plan: fix the ONE weakest number, wait, compare, then decide. Illustrative diagram and mock-up only; NOT a real YouTube Studio screenshot. Quick ChecklistWrite down impressions, CTR, and retention for the same date range before you change anything. Name the weakest number: 0 impressions, low CTR, or low retention. Check Visibility, Restrictions, claims, strikes, age restriction, and Made for Kids before you edit. Change ONE thing only: thumbnail OR title. Wait 7 days or 5,000 impressions, then compare the same three numbers. Keep what worked; test the next ONE thing. Do not change everything at once.Frequently Asked Questions Is 0 views in the first few hours normal? Yes, it can be. Brand-new channels and brand-new uploads often show little or no data at first, and Analytics can lag behind real activity. Work through Step 4 to rule out a settings or restriction problem, then give the video the full 7-day window from Step 6 before calling it a failure. Does 0 impressions mean YouTube is not showing my video at all? Zero impressions means the thumbnail was not shown to viewers in the measured period. It points to discovery or a setting, not to viewers rejecting the video — nobody could click what they never saw. Check Step 4 first, then the packaging fixes in Step 5. What is a good CTR on YouTube? YouTube does not publish one good CTR for all channels, because CTR depends on the topic, the audience, and where impressions come from. Use your own numbers as the baseline: compare the CTR before and after a single change, as in Step 5, instead of chasing a universal target. Should I delete a video with 0 views and re-upload it? Not as a first step. Deleting and re-uploading the identical file teaches you nothing and loses the history. Fix the real cause first — the setting, the restriction, the thumbnail, or the title — and only then test a fresh upload if you have a clear reason to. For Shorts, see the related reading below. How long should I wait before changing the thumbnail or title? Give one change a fair test: 7 days or 5,000 impressions, as in Steps 5 and 6. Changing things daily restarts the test before it has a sample, so the numbers you read are noise. Sources — Check It Yourself These are the official YouTube Help pages used for the menu paths and definitions in this guide. Open them to confirm each step for yourself:Get started with YouTube Analytics — Studio > Analytics, Content, video-level Analytics, Reach and Engagement tabs. Check your YouTube thumbnail impressions and watch time — impressions and click-through rate. Measure key moments for audience retention — audience retention. Change video privacy settings — Public, Unlisted, and Private visibility. Manage restrictions on your content — Studio > Content > Restrictions column, copyright, age restriction, and Made for Kids.Related reading on this blog, for Shorts specifically: YouTube Shorts Views Dropped? How to Check What Changed. No official YouTube video is embedded in this post. No official YouTube Creators or Creator Insider video matching this exact diagnosis topic was verified, so none is embedded rather than guessing at a link.

- CreatorPlaybook Team
- 27 Oct, 2026
Made on YouTube 2026: Video A/B Testing, Dynamic Thumbnails, and Draft Feedback Announced
Announced — prepare now, Studio me dhoondhne mat jao abhi. That is the key to Made on YouTube 2026. YouTube announced three tools that will change how creators test and improve videos: Video A/B testing, Dynamic Thumbnails, and Get Feedback, also called Draft Feedback. They are announcements, not releases. None of them should be treated as live in Studio today. Do not waste an afternoon clicking through Studio looking for buttons that have not arrived yet. Use this time to prepare the material those tools will need, so you are ready on day one. The dates matter, and so does the honesty about them. Shorts video A/B testing was reported for 2027. Get Feedback and dynamic thumbnails have no firm date in the framing for this guide. That does not make the announcements unimportant. It means the right work now is preparation: different hooks, different thumbnails, and a clear checklist for feedback on a draft, before you publish. Related guides: How to Make a YouTube Thumbnail That Gets Clicks and How to Use New YouTube Studio Features. For how recommendations treat videos, see How the YouTube Algorithm Works in 2026. What You Will LearnWhat was announced at Made on YouTube 2026, and what was not released How Video A/B testing will work, with up to three cuts How Dynamic Thumbnails differ from one A/B winner How Get Feedback and Draft Feedback will work on unpublished drafts How to prepare two to three different hooks for every video now How to prepare three distinct thumbnails, and keep a draft-feedback checklistStep 1: Treat the Announcements as Announcements, Not as Live Tools What to do: Separate what was announced from what you can use today. Video A/B testing, Dynamic Thumbnails, and Get Feedback were announced at Made on YouTube 2026. Shorts video A/B testing was reported for 2027. The other two tools have no firm date in this guide. If a tutorial claims to show you the exact Studio buttons today, be careful, because the tools may not be in your Studio yet. How to do it in simple steps:Write down the three tool names, and mark each one as "announced, not live." Note the only date in this guide: Shorts video A/B testing reported for 2027. Do not change your publishing plan to wait for a tool with no firm date. Check Studio and official help pages again only when an official rollout is confirmed.Practical example: A creator hears about Video A/B testing and delays a video for two weeks, hoping the tool will appear. The video is never published, and the delay teaches nothing. A better creator publishes the video, saves two other hook versions, and keeps a note: "Test these hooks when A/B testing arrives." The second creator learns from real viewers and is ready for the tool. Common mistake to avoid: Claiming a tool is live in Studio today, or inventing a release date for Get Feedback or dynamic thumbnails. Both mistakes lead viewers to search for something that is not there. Another mistake is doing nothing until the tools arrive; the preparation in this guide is the work that makes the tools useful. Illustrative image: Note what was announced, and do not treat an announcement as a live Studio tool. This is an illustrative image, not a screenshot of a channel or another creator's work. Step 2: Prepare Two to Three Different Hooks for Every Video What to do: Prepare two to three different hooks for every video, even though Video A/B testing is not live yet. A hook is the opening that tells a viewer why to stay. Different hooks can test different promises: a question, a result, or a mistake to avoid. When A/B testing arrives, you will already have real alternatives to test, instead of one opening and a guess. How to do it in simple steps:Write the main promise of the video in one sentence. Write three openings from that promise: one question, one result, and one common mistake. Keep each hook short, under fifteen seconds, and record it in the same style as the video. Save the hooks with clear names, so you can compare them later without confusion.Practical example: For a video about beginner lighting, Hook 1 asks, "Why does your face look dark on camera?" Hook 2 says, "Fix your lighting with one window and no new equipment." Hook 3 says, "Stop putting the light behind you." Each hook promises the same topic, but each one speaks to a different viewer. When testing is possible, the creator can learn which promise keeps viewers watching. Common mistake to avoid: Making three hooks that are almost the same, with only one word changed. A test needs real differences to teach you anything. Also avoid hooks that promise something the video does not deliver; a strong hook that misleads will hurt retention, even if it gets a click. Illustrative image: Record two or three truly different hooks, not three versions of the same line. This is an illustrative image, not a screenshot of a channel or another creator's work. Step 3: Prepare Three Distinct Thumbnails for Every Video What to do: Prepare three distinct thumbnails for every video, so you are ready for both A/B testing and dynamic thumbnails. Three thumbnails should not be three crops of the same image. They should test different ideas: a close face with emotion, a clear object or result, and a simple text-led design. Distinct thumbnails give a future test a real choice, instead of a false choice. How to do it in simple steps:Choose three different thumbnail ideas, and write each one in a short sentence. Keep the same title words in mind, but change the main image and the short thumbnail words. Check all three at phone size, and make sure each one is clear on its own. Save the three files with clear names, such as face, result, and text-led, so you can find them later.Practical example: For a thumbnail guide, Thumbnail 1 shows a surprised face beside a bright thumbnail. Thumbnail 2 shows a before-and-after result with no face. Thumbnail 3 uses a simple design with three short words. The creator learns which idea viewers notice first, instead of learning only which shade of blue works best. Common mistake to avoid: Using the same image with a different filter, or adding more text to a crowded design. Both mistakes look like testing, but they do not test a new idea. Also avoid thumbnails that mislead; a thumbnail that promises a result the video does not show will lose trust, even if it wins a click test. Illustrative image: Make three thumbnails that test different ideas, not three copies of one design. This is an illustrative image, not a screenshot of a channel or another creator's work. Step 4: Understand Video A/B Testing and Plan Your First Test What to do: Understand Video A/B testing as it was announced: up to three cuts of a video, with a watch-time and retention breakdown. That means you will be able to compare different versions of the same video, and see which version keeps viewers watching longer. Plan your first test now, on paper, so you do not test everything at once and learn nothing. How to do it in simple steps:Choose one video idea, and decide the single question you want to answer, such as which hook keeps viewers longer. Plan up to three cuts that differ in that one area only, such as the opening, not the whole video. Write down what you will measure: watch time and retention, as announced, not only clicks. Keep the rest of the video the same, so the result points to the opening, not to ten changes at once.Practical example: A creator plans three cuts of a Shorts tutorial. Cut 1 starts with a question, Cut 2 starts with the result, and Cut 3 starts with a mistake. The middle and ending are the same in all three cuts. When the test runs, the watch-time and retention breakdown will show which opening holds viewers, and the creator will know what to repeat next time. Common mistake to avoid: Testing three completely different videos and calling it one A/B test. If the topic, length, editing, and opening all change, you cannot know which change caused the result. Another mistake is judging a test only by clicks; the announced breakdown is about watch time and retention, so use those measures. Illustrative image: Plan one clear question for a test, and keep everything else the same across cuts. This is an illustrative image, not a screenshot of a channel or another creator's work. Step 5: Understand Dynamic Thumbnails Versus One A/B Winner What to do: Understand the difference between Dynamic Thumbnails and a single A/B winner. In a simple A/B test, one thumbnail wins for everyone. Dynamic thumbnails were announced as showing different thumbnails to different audiences. That means the same video could show one thumbnail to one group of viewers and a different thumbnail to another group, based on what each group is more likely to click. How to do it in simple steps:Write the difference in one line: A/B picks one winner; dynamic thumbnails can match thumbnails to audiences. Make your three thumbnails for different audiences, not only for one imagined viewer. For each thumbnail, write who it is for, such as beginners, phone creators, or returning viewers. Do not promise viewers that dynamic thumbnails are live today; treat them as announced, with no firm date.Practical example: A video about editing on a phone could show a phone close-up to viewers who watch mobile tutorials, and a result-focused thumbnail to viewers who watch editing results. A single A/B winner would force one choice for both groups. Dynamic thumbnails, as announced, would let each group see the thumbnail that speaks to them. That is the idea to prepare for, even though the tool is not live yet. Common mistake to avoid: Treating dynamic thumbnails as the same as A/B testing, or making three thumbnails for the same narrow audience. If all three thumbnails speak to the same viewer in the same way, the dynamic idea has nothing to work with. Also avoid claiming dynamic thumbnails are available in Studio today; they are announced, with no firm date in this guide. Illustrative image: Different audiences may respond to different thumbnails, which is the idea behind dynamic thumbnails. This is an illustrative image, not a screenshot of a channel or another creator's work. Step 6: Keep a Draft-Feedback Checklist for Get Feedback What to do: Keep a draft-feedback checklist for Get Feedback, also called Draft Feedback, which was announced as feedback on unpublished drafts. The idea is simple: get feedback before you publish, while you can still fix the video. Until the tool arrives, use a simple checklist with a trusted viewer, and keep the same questions ready for the day the tool is available. How to do it in simple steps:Save every video as a draft first, and do not publish on the same day you finish editing, if you can avoid it. Ask one trusted viewer three questions: what is the video about, where did you want to stop, and what was unclear? Write down the exact time where the viewer lost interest, and fix that section before you publish. Check the title, thumbnail, and first ten seconds together, because feedback on a draft should cover the whole entry point.Practical example: A creator shares a draft with a friend. The friend says the topic is clear, but the middle repeats the same point for forty seconds. The creator cuts that section, and the final video is shorter and clearer. That is the habit Get Feedback is meant to support: feedback on a draft, before the public sees it, not after. Common mistake to avoid: Asking only, "Did you like it?" That question gives praise, but no fixable detail. Ask for the moment, the unclear line, and the missing step. Another mistake is sharing a draft with too many people and changing everything; one or two clear notes are enough to improve a draft without losing your own voice. Illustrative image: Ask for specific feedback on a draft, while you can still fix the video before publishing. This is an illustrative image, not a screenshot of a channel or another creator's work. Checklist Before the New Tools ArriveI know all three tools are announced, not live in Studio today I know Shorts video A/B testing was reported for 2027, and the other tools have no firm date here Every video has two to three different hooks saved with clear names Every video has three distinct thumbnails that test different ideas My first A/B test has one question, up to three cuts, and a watch-time and retention check I understand dynamic thumbnails as different thumbnails for different audiences I have a draft-feedback checklist, and I ask for specific moments, not only praiseFrequently Asked Questions Are Video A/B testing, Dynamic Thumbnails, and Get Feedback live in Studio today? No. They were announced at Made on YouTube 2026, and this guide treats them as announcements, not releases. Studio me dhoondhne mat jao abhi. Prepare the hooks, thumbnails, and feedback checklist now, and check official pages when a rollout is confirmed. When will Shorts video A/B testing arrive? It was reported for 2027 in the framing for this guide. No firm date for Get Feedback or dynamic thumbnails is given here. Do not invent a date, and do not delay publishing while you wait. What is Video A/B testing? As announced, it lets creators compare up to three cuts of a video, with a watch-time and retention breakdown. Plan one question per test, change one area only, and judge the result by watch time and retention, not only by clicks. How are Dynamic Thumbnails different from A/B testing? A/B testing picks one winner for everyone. Dynamic thumbnails, as announced, show different thumbnails to different audiences. Make thumbnails for different audiences, not only different crops of the same design. What is Get Feedback or Draft Feedback? It was announced as feedback on unpublished drafts. Until it arrives, use a draft-feedback checklist with a trusted viewer, ask for the exact moment where interest drops, and fix the draft before you publish. Announcements are useful only if they change what you do before the tools arrive. Prepare different hooks, distinct thumbnails, and a clear draft checklist now, and the new tools will have real material to test when they finally appear.

- CreatorPlaybook Team
- 25 Oct, 2026
How to Use New YouTube Studio Features
YouTube Studio changes often, and new features can be easy to miss, especially when you are busy making videos. Yet Studio is where you learn what viewers want, where you improve titles and thumbnails, and where you manage your channel safely. Knowing how to use its newer features, from deeper analytics to better editing tools, can save time and help you make better decisions, without needing extra software. This guide explains how to use new YouTube Studio features in a practical way. It covers the dashboard, analytics, audience insights, content tools, and mobile app, with a focus on features that help small and growing creators. Features change over time, so this guide teaches you how to find, test, and use new tools, and how to check YouTube's official help pages for the latest details, rather than promising that every button will look the same forever. Related guides: How to Read and Use the YouTube Studio App, How to Review Your Channel Every Month and Improve, and How to Make Educational Videos That Rank. What You Will LearnHow to navigate Studio without getting lost How to use newer analytics and audience insights How to test titles, thumbnails, and ideas How to use editing, chapters, and end-screen tools How to use the Studio mobile app effectively How to adopt new features safely, without breaking what worksStep 1: Start With the Dashboard and the Right Questions What to do: Start with the dashboard, but use it to ask questions, not just to check numbers. The dashboard shows recent performance, top videos, and news from YouTube, but its real value is in helping you decide what to do next: which video to improve, which topic to repeat, and which audience to serve. Before opening analytics, decide what you want to learn, such as "Which of my last five videos kept viewers longest?" How to do it in simple steps:Open the dashboard and note your top recent videos. Write down one question you want analytics to answer. Open analytics for that question only, to avoid overload. Write down one action based on what you find.Practical example: A creator asks why one tutorial outperformed others, checks its traffic sources, and finds it came from search. They make a follow-up tutorial on a related search question, and it also performs well. Common mistake to avoid: Opening Studio, scrolling through every number, and closing it without a decision. Analytics without an action is entertainment, not learning. Illustrative image: Start Studio with a question, not just a number check. This is an illustrative image, not a screenshot of your channel or another creator's work. Step 2: Use Deeper Analytics to Understand Your Audience What to do: Use deeper analytics to understand who watches, where they come from, and what they watch next. Newer analytics features often show audience segments, returning versus new viewers, and which videos bring subscribers. These insights help you decide whether to make more tutorials, more stories, or more Shorts, and whether your audience is growing or just changing. Compare similar videos, not different formats, for fair comparisons. How to do it in simple steps:Compare new versus returning viewers for your channel. Check traffic sources for your top five videos. Note which videos bring subscribers, not only views. Use audience insights to plan your next series.Practical example: A creator finds that tutorials bring subscribers, while entertainment videos bring views but few subscribers. They keep both, but make tutorials the core series, and entertainment the occasional extra. Common mistake to avoid: Judging a video only by views, without checking subscribers, retention, or audience. A video with fewer views but more subscribers and better retention can be more valuable for growth. Illustrative image: Deeper analytics show who returns, who subscribes, and why. This is an illustrative image, not a screenshot of your channel or another creator's work. Step 3: Test Titles, Thumbnails, and Ideas Before You Commit What to do: Use Studio's testing tools, where available, to test titles and thumbnails, instead of guessing. Testing lets you compare two or three options with real viewers, and learn which one earns more clicks without misleading viewers. If a formal test tool is not available for your channel, you can still test by changing one element at a time, waiting for enough data, and noting the result. The key is to test one thing, with a clear question, and to give it time. How to do it in simple steps:Choose one video and one element to test: title or thumbnail. Create two or three clear, honest options. Run the test, or change one element, and wait for data. Keep the winner, and note why it won for future videos.Practical example: A creator tests two thumbnails: one cluttered, one simple with a clear before-and-after. The simple thumbnail earns more clicks, and the creator uses that style for the whole series. Common mistake to avoid: Changing titles, thumbnails, and topics all at once, and then not knowing what caused a change. Test one thing at a time, or you learn nothing. Illustrative image: Test one title or thumbnail at a time, with real viewers. This is an illustrative image, not a screenshot of your channel or another creator's work. Step 4: Use Content Tools for Chapters, Cards, and End Screens What to do: Use Studio's content tools to help viewers navigate and stay: chapters for long tutorials, cards for related videos, and end screens for the next video. Chapters help viewers jump to the part they need, which improves satisfaction and retention for long videos. End screens help viewers continue to another video, which builds watch time and subscribers. These tools are small, but they make a channel feel professional and easy to follow. How to do it in simple steps:Add chapters to long tutorials, with clear time stamps. Add end screens that link to the next video in a series. Use cards sparingly, for truly related videos. Check that links work, before and after publishing.Practical example: A creator adds chapters to a 20-minute tutorial, and viewers comment that they could find the section they needed quickly. Retention improves, because viewers do not leave when they cannot find a step. Common mistake to avoid: Adding too many cards, end screens, and links, which distract viewers. One clear next step is better than five competing links. Illustrative image: Chapters and end screens help viewers stay and continue. This is an illustrative image, not a screenshot of your channel or another creator's work. Step 5: Use the Studio Mobile App for Quick Checks, Not Deep Work What to do: Use the Studio mobile app for quick checks and replies, such as checking a new video's early performance, replying to comments, and reading notifications, while saving deep analytics and editing for a computer. The mobile app is convenient, but its small screen makes it easy to misread data or make rushed changes. Use it to stay in touch, not to make big decisions in a hurry. How to do it in simple steps:Use the app for comments, notifications, and quick performance checks. Save title, thumbnail, and analytics decisions for a computer. Set notification limits, so Studio does not distract you all day. Review weekly on a computer, with a notebook for actions.Practical example: A creator replies to comments on the app during a break, but waits until evening on a computer to change a thumbnail, after checking retention properly. The decision is better, because it was not rushed. Common mistake to avoid: Checking the app every hour, changing thumbnails from a phone, or panicking over early numbers. Mobile checks should inform, not control, your day. Illustrative image: Use the mobile app for quick checks, and a computer for deep decisions. This is an illustrative image, not a screenshot of your channel or another creator's work. Step 6: Adopt New Features Safely, One at a Time What to do: When Studio adds a new feature, adopt it safely, one at a time: learn what it does, test it on one video, measure the result, and only then use it widely. New features are not automatically better for every channel, and some may not fit your format or audience. A careful test protects what already works, while letting you benefit from genuine improvements, such as better analytics, easier editing, or new ways to reach viewers. How to do it in simple steps:Read YouTube's official description of the new feature. Test it on one video, with a clear goal. Compare the result with similar videos without the feature. Keep it only if it helps, and note how to use it for future videos.Practical example: A creator tests a new analytics view that shows which videos bring subscribers, finds it useful for planning series, and adds it to their monthly review. Another new feature, for a format they do not use, is ignored without guilt. Common mistake to avoid: Turning on every new feature at once, or ignoring all new features because they feel unfamiliar. Test one, keep what helps, and ignore the rest. Illustrative image: Test new features one at a time, and keep only what helps. This is an illustrative image, not a screenshot of your channel or another creator's work. Checklist for New YouTube Studio FeaturesDashboard question written before opening analytics New versus returning viewers checked Traffic sources and subscriber videos noted Title or thumbnail test run, one element at a time Chapters and end screens added to long videos Mobile app used for quick checks, not rushed decisions New feature tested on one video, with a clear resultFrequently Asked Questions Why does my Studio look different from a tutorial? Studio changes over time, and features roll out at different times to different channels. Use tutorials for concepts, and check YouTube's official help pages for the current layout in your account. Should I use every new Studio feature? No. Use features that help your format and audience, and ignore those that do not. A feature is useful only if it improves a decision, a video, or a workflow for you. How often should I check Studio? Daily for comments and quick checks, weekly for performance, and monthly for deeper decisions. More frequent deep checks create stress without enough data to act on. Can Studio tell me what video to make next? It can suggest topics, based on what your audience watches, but it cannot replace your judgment. Use Studio to inform ideas, then choose topics you can teach well and sustain. What if a new feature disappears? That happens, as features are tested and changed. Keep notes on what you learned, not only on the button you clicked, so your knowledge survives layout changes. YouTube Studio is not a scoreboard, but a workshop. Use it to ask better questions, test honestly, and make one improvement at a time, and new features will help you, instead of distracting you.

- CreatorPlaybook Team
- 25 Oct, 2026
How to Review Your Channel Every Month and Improve
A monthly channel review is the difference between uploading and improving. Without a review, creators repeat the same mistakes, chase the same ideas, and wonder why growth stalls. With a simple monthly review, you can see what worked, what did not, and what to change next month, in less than an hour. Related guides: How to Script a YouTube Video, Lighting Setup on a Budget for YouTube Videos, and How to Repurpose One Video into Shorts, Reels and Posts. What You Will LearnHow to run a monthly review in under an hour Which numbers to check, and which to ignore How to find your best and weakest videos How to review titles, thumbnails, and hooks How to set three clear improvements for next month How to track progress over several monthsStep 1: Set a Fixed Monthly Review Time What to do: Choose one day each month, such as the first Saturday, for a 45-minute review. A fixed time turns review into a habit, instead of a task you postpone. How to do it in simple steps:Pick a day and time, and add it to your calendar. Gather YouTube Studio, your content plan, and a notebook. Review the last month only, not your whole channel history. Write your findings down, so next month's review can compare them.Practical example: A creator reviews on the first of each month, with coffee and a simple template. After three months, they can see a clear pattern: tutorials outperform vlogs, and shorter intros retain better. Common mistake to avoid: Reviewing only when growth feels bad. Reviews are most useful when done regularly, including in good months, so you learn what to repeat. Illustrative image: A fixed monthly review turns guesswork into a habit. This is an illustrative image, not a screenshot of your channel or another creator's work. Step 2: Check Growth, Watch Time, and Subscribers Together What to do: Look at views, watch time, and subscribers gained together, for the last 28 days. One number alone can mislead; together, they show whether your channel is growing healthily. How to do it in simple steps:Note views, watch time, and subscribers for the last 28 days. Compare each with the previous 28 days. Ask which changed most, and why. Note whether growth came from new videos, old videos, or Shorts.Practical example: Views are up, but subscribers are flat. That suggests videos attract clicks but do not convince viewers to stay, so the next month's focus is stronger calls to subscribe and follow-up videos. Common mistake to avoid: Celebrating a single viral video while ignoring falling watch time. A healthy channel grows steadily, not only in spikes. Illustrative image: Views, watch time, and subscribers together show real growth. This is an illustrative image, not a screenshot of your channel or another creator's work. Step 3: Identify Your Best and Weakest Videos What to do: List your top three and bottom three videos from the month, by views and by watch time. Patterns in these lists reveal what your audience wants more of, and less of. How to do it in simple steps:Sort videos by views, then by watch time, for the month. Note the topic, format, and length of each top video. Do the same for the weakest videos. Look for a pattern: topic, title style, thumbnail, or length.Practical example: A creator's top videos are all step-by-step tutorials under 10 minutes, while longer opinion videos perform worst. Next month, they plan three tutorials and one opinion video, instead of the reverse. Common mistake to avoid: Judging videos only by views on day one. Some videos grow slowly through search, so check 28-day performance, not first-day spikes. Illustrative image: Top and bottom videos reveal patterns worth repeating or dropping. This is an illustrative image, not a screenshot of your channel or another creator's work. Step 4: Review Titles, Thumbnails, and Hooks What to do: Review how viewers first meet your videos: title, thumbnail, and first 30 seconds. Small changes here often improve performance more than re-editing a whole video. How to do it in simple steps:Check click-through rate for each video, in context of its traffic source. Look at retention in the first 30 seconds for top and weak videos. Note which titles and thumbnails promised clearly, and which were vague. Choose one title or thumbnail habit to improve next month.Practical example: A creator finds thumbnails with a clear before-and-after image outperform text-heavy thumbnails. Next month, all thumbnails use one clear image and few words. Common mistake to avoid: Changing titles and thumbnails every day based on tiny changes. Test one clear change, wait a week, then judge it. Illustrative image: Titles, thumbnails, and hooks are often the fastest improvements. This is an illustrative image, not a screenshot of your channel or another creator's work. Step 5: Review Your Schedule and Energy, Not Just Numbers What to do: Ask whether your upload schedule was realistic, and whether you enjoyed making the videos. A review that ignores energy leads to burnout, even when numbers look good. How to do it in simple steps:Note how many videos you planned versus published. Note which videos were enjoyable to make, and which felt like a chore. Check whether batching, breaks, or simpler formats would help. Adjust next month's schedule to fit real life, not ideal life.Practical example: A creator planned eight videos but published five, and felt exhausted. Next month, they plan five, publish all five, and enjoy the process again. Consistency returns, and so does growth. Common mistake to avoid: Setting next month's plan based only on numbers, with no regard for time or energy. A plan you cannot keep helps no one. Illustrative image: A good review checks your energy, not only your numbers. This is an illustrative image, not a screenshot of your channel or another creator's work. Step 6: Choose Three Improvements for Next Month What to do: End the review with exactly three improvements: one about content, one about presentation, and one about process. Three is enough to act on, and few enough to remember. How to do it in simple steps:Content: choose a topic or format to make more of, based on your best videos. Presentation: choose one title, thumbnail, or hook habit to improve. Process: choose one workflow change, such as batching or a buffer video. Write them where you will see them when planning next month's videos.Practical example: A creator's three improvements are: more beginner tutorials, clearer thumbnails, and filming two videos per session. Next month's review checks whether all three happened, and what changed. Common mistake to avoid: Listing ten improvements and achieving none. Three focused changes, repeated monthly, compound into major growth. Illustrative image: Three clear improvements beat a long list you never act on. This is an illustrative image, not a screenshot of your channel or another creator's work. Checklist for a Monthly Channel ReviewFixed review day and 45-minute slot set Views, watch time, and subscribers compared over 28 days Top three and bottom three videos identified Titles, thumbnails, and hooks reviewed Schedule and energy honestly assessed Three improvements written for next monthFrequently Asked Questions How long should a monthly review take? About 45 minutes is enough for most small channels. Longer reviews often become procrastination, not insight. Should I review every video, or only the month's videos? Focus on the month's videos, plus any older video that suddenly grew. Reviewing everything every month wastes time. What if my numbers fell? Look for a cause: fewer uploads, a topic change, or a weaker hook. One bad month is data, not a verdict on your channel. Should I share my review with viewers? You can, briefly, if it helps them understand your direction. Most reviews, however, are for you, not for content. How do I track progress over time? Keep a one-page note each month: numbers, best videos, and three improvements. Comparing notes over three months shows real trends. Review monthly, act on three improvements, and repeat. That simple loop is how small channels learn faster than channels that only upload.

- CreatorPlaybook Team
- 25 Oct, 2026
How to Read and Use the YouTube Studio App
The YouTube Studio app puts your channel's most important numbers in your pocket, but numbers alone do not grow a channel. Learning to read the YouTube Studio app means knowing which numbers matter, what they actually mean, and what small change to make next. This guide turns a confusing dashboard into a simple weekly routine. Related guides: How to Script a YouTube Video, Lighting Setup on a Budget for YouTube Videos, and How to Repurpose One Video into Shorts, Reels and Posts. What You Will LearnHow to find views, watch time, and subscribers in the app How to read audience retention without overreacting How to use traffic sources to find new viewers How to check which videos bring subscribers How to read Shorts analytics differently from long videos How to turn one weekly check into a clear next stepStep 1: Start on the Dashboard, Not in Every Chart What to do: Open the dashboard first and look at the last 28 days. The dashboard gives a summary of views, watch time, and subscribers, which is enough to spot whether your channel is growing, flat, or falling. How to do it in simple steps:Open YouTube Studio and check the overview for the last 28 days. Compare views and watch time with the previous 28 days. Note your top three videos in that period. Write down one observation before opening any other chart.Practical example: A creator sees views are down but watch time is steady. That suggests fewer people are finding videos, rather than viewers leaving early, so the next step is improving titles and search, not re-editing videos. Common mistake to avoid: Checking the app every hour and reacting to daily ups and downs. Daily numbers bounce naturally; weekly and monthly trends tell the real story. Illustrative image: Start with the 28-day overview before digging into charts. This is an illustrative image, not a screenshot of your channel or another creator's work. Step 2: Read Retention as a Story, Not a Score What to do: Open a video's retention graph and look for where viewers leave. A sharp drop means something in the video lost them; a gradual fall is normal for most videos. How to do it in simple steps:Open a video and look at its retention curve. Find the biggest drop and watch that exact moment. Ask what happened there: a slow intro, a tangent, or a confusing section? Note one fix for the next video, such as a tighter opening.Practical example: A tutorial loses many viewers at 40 seconds, right when the creator spends a minute explaining background. Cutting that section and starting with the result keeps more viewers to the end. Common mistake to avoid: Judging a video only by its average percentage. A 40 percent retention on a 20-minute video means eight minutes watched, which is very different from 40 percent of a two-minute video. Illustrative image: A sharp drop in retention points to a specific moment to fix. This is an illustrative image, not a screenshot of your channel or another creator's work. Step 3: Use Traffic Sources to Find Your Audience What to do: Check where viewers come from: search, browse, suggested videos, Shorts feed, or external links. Each source tells you which part of your strategy is working. How to do it in simple steps:Open the reach or traffic source section for a video or for the channel. Note the top two sources for your best videos. For search traffic, note the exact search terms that brought viewers. For suggested traffic, note which videos yours appear next to.Practical example: A creator finds most views come from search for "budget lighting." That tells them to make more searchable how-to videos, rather than only chasing browse traffic with broad topics. Common mistake to avoid: Trying to grow every traffic source at once. Focus on the source that already works, and make one or two videos designed for it. Illustrative image: Traffic sources show which strategy is already working. This is an illustrative image, not a screenshot of your channel or another creator's work. Step 4: Find the Videos That Earn Subscribers What to do: Look for videos that bring subscribers, not just views. A video with fewer views but many subscribers is doing something right: it attracts the right people and convinces them to stay. How to do it in simple steps:Sort videos by subscribers gained in the analytics section. Watch the top subscriber-earning video again. Note its topic, hook, and call to subscribe, if any. Plan a follow-up video on a similar topic or problem.Practical example: A small channel finds a beginner lighting video brings most subscribers, even though a vlog got more views. Making a second beginner guide grows the channel faster than another vlog. Common mistake to avoid: Chasing a viral video that brings views but no subscribers. Views without subscribers rarely build a lasting audience. Illustrative image: Subscriber-earning videos reveal your channel's strongest topics. This is an illustrative image, not a screenshot of your channel or another creator's work. Step 5: Read Shorts Analytics With Different Expectations What to do: Judge Shorts by views, swipe-away rate, and whether viewers stay past the first seconds. Shorts behave differently from long videos, so the same benchmarks do not apply. How to do it in simple steps:Open a Short and check how many viewers watched versus swiped away. Look at the first three seconds: is the benefit or question clear immediately? Compare Shorts on the same topic, not Shorts with long videos. Note which hooks kept viewers watching longest.Practical example: A Short that opens with a question keeps viewers longer than one that opens with "Hey guys, welcome back." The creator removes long greetings from all future Shorts. Common mistake to avoid: Deleting a Short after a slow first day. Shorts can be shown over days or weeks, so give them time before judging them. Illustrative image: Shorts need their own benchmarks, not long-video ones. This is an illustrative image, not a screenshot of your channel or another creator's work. Step 6: Make One Weekly Decision From the Numbers What to do: Once a week, turn your check into a single decision: what to make, fix, or repeat next. Analytics should lead to action, not just worry. How to do it in simple steps:Set a fixed weekly time, such as 20 minutes on the same day. Write down your best video, your weakest point, and one trend. Choose one action: a new video topic, a better hook, or a repeat of a winner. Ignore every other number until next week's check.Practical example: A creator's weekly note reads: best video, lighting guide; weakest point, slow intros; action, start next video with the result. That one change improves retention across the next three videos. Common mistake to avoid: Collecting data without deciding anything. A dashboard you only stare at is a distraction; a dashboard you act on is a tool. Illustrative image: End each check with one clear action for the next video. This is an illustrative image, not a screenshot of your channel or another creator's work. Checklist for Using the YouTube Studio App28-day overview checked, not hourly numbers Retention drops watched at the exact moment viewers leave Top two traffic sources and search terms noted Subscriber-earning videos identified Shorts judged by swipe-away and first seconds One weekly decision written down and acted onFrequently Asked Questions How often should I check analytics? Once a week is enough for most small creators. Daily checks create stress without giving enough data to act on. Which number matters most? It depends on your goal. For growth, watch time and subscribers gained matter most; for discovery, traffic sources and search terms matter most. Why do my views drop suddenly? A single day can drop for many reasons, including a video ageing out of suggestions. Look at 28-day trends before changing your strategy. Can I see analytics in the mobile app? Yes. The YouTube Studio app shows overview, video, and audience data, though the desktop version has deeper detail for some charts. Should I worry about a low click-through rate? Only in context. A low rate on a video shown to a broad audience is normal; a low rate on a search video may mean the title or thumbnail needs work. Use the app as a compass, not a scoreboard. Check weekly, find one clear signal, and let it guide your next video.

- CreatorPlaybook Team
- 25 Oct, 2026
How to Improve Click-Through Rate
Click-through rate, or CTR, is the percentage of people who click your video after seeing its thumbnail and title. If 100 people see your video and 5 click, your CTR is 5 percent. It is one of the clearest signals of whether your packaging, the thumbnail and title together, is doing its job. A low CTR does not always mean a bad video. It often means the right viewers did not understand, in two seconds, why they should click. This guide shows you how to diagnose low CTR, improve thumbnails and titles honestly, and test changes without resorting to clickbait. Related guides: How to Design Clickable Thumbnails, Thumbnail A/B Testing Guide, and How to Write Titles That Get Clicks Without Clickbait. What You Will LearnWhat CTR is, and what a good CTR depends on How to find low-CTR videos in YouTube Analytics How to make thumbnails clearer at small sizes How to write titles that create curiosity without misleading viewers How to match thumbnail, title, and video so clicks turn into watch time How to test CTR changes and track improvement over timeStep 1: Understand What CTR Really Measures What to do: CTR measures how appealing your thumbnail and title are to the people who see them. It does not measure video quality on its own, because a great video with a confusing thumbnail can have a low CTR, and a weak video with a sensational thumbnail can have a high CTR but poor retention. How to do it in simple steps:In Analytics, look at impressions and CTR together, not CTR alone. Compare CTR across videos in the same niche and traffic source, not across all videos. Note that browse and search traffic often have different CTR patterns. Judge CTR together with average view duration, to see if clicks lead to real viewing.Practical example: A video with 10,000 impressions and a 3 percent CTR earned 300 clicks. A video with 1,000 impressions and an 8 percent CTR earned only 80 clicks. The second video has a better CTR, but the first reached more people. Both numbers matter, and neither tells the whole story alone. Common mistake to avoid: Chasing a single “good” CTR number you read online. CTR varies by niche, audience, traffic source, and video age, so a healthy CTR for a news channel may look very different from a healthy CTR for a tutorial channel. Illustrative image: CTR shows how often impressions become clicks. This is an illustrative image, not a screenshot of your channel or another creator's work. Step 2: Find the Videos That Need Help First What to do: In Analytics, sort videos by impressions and CTR, and look for videos with many impressions but low CTR. Those videos are already being shown to people, so improving their packaging can bring more clicks without needing new traffic. How to do it in simple steps:Open Analytics and look at content performance by video. Sort by impressions, and note videos with high impressions and below-average CTR. Check whether those videos have a clear topic, a clear thumbnail, and a clear title. Start with one or two such videos, not your entire back catalogue at once.Practical example: A creator finds a gardening video with 20,000 impressions but a 2 percent CTR, while similar videos average 5 percent. The video is being shown, but viewers are not clicking, so a new thumbnail and title are worth testing before making a new video on the same topic. Common mistake to avoid: Changing thumbnails on videos with very few impressions. If almost no one sees a video, a new thumbnail will not help much. Fix discovery first, such as topic and search, or focus on videos that already get impressions. Illustrative image: High impressions with low CTR point to packaging problems. This is an illustrative image, not a screenshot of your channel or another creator's work. Step 3: Make Thumbnails Clear at Small Sizes What to do: Most viewers see thumbnails small, on phones, in a feed full of other videos. A thumbnail that is clear at that size, with one subject, strong contrast, and readable text, will outperform a busy thumbnail that only looks good full-screen. How to do it in simple steps:Use one main subject, large in the frame, with a clean background. Use high contrast between subject and background. Keep text to four words or fewer, large and readable. Test the thumbnail at phone size before publishing, by shrinking it on screen.Practical example: A cooking thumbnail with a close-up bowl, a plain background, and the words “20-Minute Dinner” is clear at small size. The same video with a wide kitchen shot, five ingredients, and a paragraph of text is unreadable in a feed, and viewers scroll past it. Common mistake to avoid: Filling a thumbnail with many small details, logos, and long sentences. Detail that looks impressive on a computer monitor becomes noise on a phone, and viewers cannot tell what the video is about in two seconds. Illustrative image: One subject and few words read clearly on a phone. This is an illustrative image, not a screenshot of your channel or another creator's work. Step 4: Write Titles That Create Honest Curiosity What to do: A good title tells viewers the topic and the benefit, and leaves one question unanswered, so they click to learn the answer. It should promise what the video actually delivers, in words viewers would search for or understand instantly. How to do it in simple steps:Write the topic and benefit first: what will viewers learn or be able to do? Add one specific detail, such as a time, a number, or a common mistake. Remove vague words, such as “amazing” or “best ever,” unless you can prove them. Read the title aloud, and ask whether a stranger would know what the video is about.Practical example: “How to Take Better Photos” is vague. “Why Your Indoor Photos Look Yellow, and How to Fix It” is specific, names a problem viewers recognise, and promises a fix. The second title gives viewers a reason to click, without exaggerating. Common mistake to avoid: Writing a title that promises something the video does not deliver, such as “You Won't Believe This!” Viewers who click and feel misled leave quickly, and the channel loses trust, even if CTR rises for one video. Illustrative image: A specific promise beats a vague superlative. This is an illustrative image, not a screenshot of your channel or another creator's work. Step 5: Match Thumbnail, Title, and Video Content What to do: Thumbnail, title, and the first 30 seconds of the video should tell the same story. When they match, viewers who click feel they arrived at the right video, stay longer, and are more likely to watch the next one. How to do it in simple steps:Write down the one promise your thumbnail and title make together. Check that the video delivers that promise in the first minute. Remove thumbnail or title elements that suggest a different topic. If the video covers several topics, choose the strongest one for packaging, and mention the rest inside.Practical example: A thumbnail shows a finished loaf and the title promises “Your First Sourdough Loaf.” The video opens with the finished loaf, then shows the steps. Viewers who clicked for sourdough get sourdough immediately, and retention stays strong. Common mistake to avoid: Using a dramatic thumbnail image that appears only briefly, or not at all, in the video. Viewers notice the mismatch, leave early, and may avoid your future videos, even if CTR looked good at first. Illustrative image: Packaging and content should tell the same story. This is an illustrative image, not a screenshot of your channel or another creator's work. Step 6: Test One Change and Track CTR Over Time What to do: Change one element at a time, such as the thumbnail image or the title wording, and compare CTR before and after, over a similar period. Keep a simple log, so you learn what works for your audience instead of guessing each time. How to do it in simple steps:Record the current CTR and impressions for the video you will change. Change only the thumbnail, or only the title, not both at once. Wait at least one to two weeks, and compare CTR over a similar number of impressions. Keep the winner, record the lesson, and apply it to the next video's packaging.Practical example: A creator changes only the thumbnail for a low-CTR video, from a wide shot to a close-up. After two weeks, CTR rises from 2 percent to 4 percent, with similar watch time. The creator learns that close-ups work for this channel, and uses them for new videos. Common mistake to avoid: Changing thumbnails every day and checking CTR every hour. Constant changes and tiny samples create noise, not learning. One change, enough time, and a clear comparison teach you far more. Illustrative image: One change and enough time reveal what really works. This is an illustrative image, not a screenshot of your channel or another creator's work. Checklist for Improving Click-Through RateCTR understood as impressions to clicks, judged with watch time High-impression, low-CTR videos identified in Analytics Thumbnails simplified: one subject, high contrast, four words or fewer Titles specific, with topic, benefit, and one honest curiosity gap Thumbnail, title, and first minute of video telling the same story One change tested at a time, with results logged for future videosFrequently Asked Questions What is a good CTR? There is no single good number, because CTR varies by niche, traffic source, and audience. Compare your videos with each other, and with similar videos in your niche, rather than chasing a universal target. Should I change thumbnails on old videos? Yes, if an old video still gets impressions but has a low CTR. A new thumbnail can revive a good video. If an old video gets almost no impressions, a new thumbnail alone is unlikely to help much. Does CTR matter more than watch time? Both matter. CTR brings viewers in, and watch time keeps them there. A video with high CTR but very low watch time will struggle, because viewers leave quickly. Aim for packaging that attracts the right viewers, not just any viewers. How quickly should CTR improve after a change? Give a change at least one to two weeks, with enough impressions to compare fairly. Daily CTR swings with small numbers, so a few days of data can mislead you. Is it clickbait to use a surprising thumbnail? Not if the video delivers what the thumbnail promises. Surprise, curiosity, and strong visuals are fair tools. Clickbait is when the packaging promises something the video does not contain, or exaggerates beyond what viewers will actually see. Improving CTR is not about tricking viewers into clicking. It is about making the value of a good video obvious in two seconds: one clear subject, one specific promise, and a video that delivers it. When packaging and content match, clicks turn into watch time, subscribers, and a channel viewers trust.
- CreatorPlaybook Team
- 25 Oct, 2026
Thumbnail A/B Testing Guide
Guessing which thumbnail works best is a gamble. A/B testing removes the guesswork: you show different thumbnails to different viewers, compare how often each one gets clicked, and keep the winner. Done carefully, it can lift clicks without changing your video at all. This guide explains thumbnail A/B testing in plain language. You will learn how to design two thumbnails that test one idea, how to run a fair test in YouTube Studio, how to read the results without being fooled by small numbers, and how to apply what you learn to future thumbnails. Related guides: How to Design Clickable Thumbnails, How to Improve Click-Through Rate, and Understanding YouTube Analytics. What You Will LearnWhat thumbnail A/B testing is, and what it can and cannot prove How to design two thumbnails that test one clear variable How to set up a test in YouTube Studio How long to run a test, and how much data you need How to read results and choose a winner with confidence How to turn test results into rules for future thumbnailsStep 1: Understand What A/B Testing Actually Tests What to do: A/B testing compares two versions of a thumbnail, shown to similar audiences, to see which gets more clicks. It tests the thumbnail, not the video, the title, or the audience. Keep everything else the same, so any difference comes from the thumbnail. How to do it in simple steps:Choose one video to test, ideally one that still gets regular impressions. Keep the title, description, and video exactly the same during the test. Change only the thumbnail, and only one element of it if possible. Compare click-through rate, not just total views, because views also depend on impressions.Practical example: A creator tests two thumbnails for a soup video: one shows the finished bowl, the other shows ingredients. The title stays the same. If the bowl version earns a higher click-through rate, the creator learns that finished food beats ingredients for this audience. Common mistake to avoid: Changing the title and thumbnail at the same time, then crediting the result to the thumbnail. If two things change, you cannot know which one caused the difference, and the test teaches you nothing reliable. Illustrative image: Test one thumbnail change at a time. This is an illustrative image, not a screenshot of your channel or another creator's work. Step 2: Design Two Thumbnails That Test One Variable What to do: Make two thumbnails that differ in one clear way: the main image, the text, the colour, or the expression. If the thumbnails differ in everything, a win tells you nothing about what worked. How to do it in simple steps:Start with your current thumbnail as version A. Create version B by changing one thing: for example, remove the text, change the background colour, or use a closer photo. Keep the size, style, and branding consistent between both versions. Check both thumbnails at small size, because most viewers see them on phones.Practical example: Version A has the text “5-Minute Dinner” over a photo. Version B uses the same photo with no text. If B wins, the creator learns that, for this video, the photo alone is clearer than photo plus text. Common mistake to avoid: Testing two completely different thumbnails, one with a face and text, the other with a landscape and no text. If one wins, you will not know whether the face, the text, or the image caused the win, and you cannot repeat it. Illustrative image: One clear difference makes the result useful. This is an illustrative image, not a screenshot of your channel or another creator's work. Step 3: Set Up the Test in YouTube Studio What to do: In YouTube Studio, use the thumbnail test feature for the video, upload your alternative thumbnails, and let YouTube show them to different viewers. Follow YouTube's current test options, because the feature and its settings can change. How to do it in simple steps:Open the video in YouTube Studio and find the thumbnail test option. Upload version B, and a version C if you want to test a second variable separately. Start the test, and note the start date in your own records. Do not change the title, thumbnail manually, or promotion during the test.Practical example: A creator starts a test on Monday for a video that gets about 500 impressions a day. They leave the test alone for two weeks, resisting the urge to check every hour, so the data has time to build up. Common mistake to avoid: Stopping a test after a few hours because one version is ahead. Early results swing wildly with small numbers, and a version that leads on day one can lose by day ten. Patience is part of a fair test. Illustrative image: Let the test run long enough to gather real data. This is an illustrative image, not a screenshot of your channel or another creator's work. Step 4: Run the Test Long Enough to Trust It What to do: A test needs enough impressions to be meaningful. Small channels need more time, because they get fewer impressions per day. A difference based on 50 impressions is not evidence; a difference based on thousands is much stronger. How to do it in simple steps:Check daily impressions for the video before starting, to estimate how long the test needs. Run the test for at least one to two weeks, or until each version has a large number of impressions. Ignore daily swings, and look at the overall trend instead. If impressions are very low, test on a more popular video first, where data builds faster.Practical example: A video with 200 impressions a day needs about two weeks to give each thumbnail version a few thousand impressions. A video with 20 impressions a day would need months, so it is a poor choice for a first test. Common mistake to avoid: Declaring a winner from a tiny sample, such as 10 clicks versus 8 clicks. That difference could easily be chance, and acting on it can make your thumbnails worse, not better. Illustrative image: Small samples mislead; larger samples reveal real winners. This is an illustrative image, not a screenshot of your channel or another creator's work. Step 5: Read the Results and Pick a Winner Carefully What to do: Compare click-through rates and watch time for each version. A thumbnail that gets clicks but loses viewers quickly may be misleading, so check whether the winning thumbnail also keeps viewers watching. How to do it in simple steps:Compare click-through rate for each thumbnail version over the full test period. Check average view duration for viewers who clicked each version. Choose the version with the best balance of clicks and watch time, not clicks alone. Record the result and the variable you tested, so you can learn from it later.Practical example: Version B earns more clicks, but viewers leave after 30 seconds, while version A earns fewer clicks but longer viewing. The creator keeps A, or tests a new version that combines B's clarity with A's honest promise, because misleading clicks hurt the channel long term. Common mistake to avoid: Choosing a thumbnail purely because it got the most clicks, even if it promises something the video does not deliver. Clickbait thumbnails may win a test and lose subscribers, which is a bad trade. Illustrative image: Balance clicks with watch time when choosing a winner. This is an illustrative image, not a screenshot of your channel or another creator's work. Step 6: Turn Results into Rules for Future Thumbnails What to do: After several tests, look for patterns. Do faces win? Does less text win? Do bright backgrounds win? Turn repeated results into simple rules for your channel, and test new ideas against those rules. How to do it in simple steps:Keep a simple log: video, variable tested, winner, and click-through rates. After three or four tests, look for a pattern across different videos. Write one or two rules, such as “use one clear subject, no more than four words.” Apply the rules to new thumbnails, and test exceptions when you have a reason to.Practical example: After four tests, a creator finds that close-up photos beat wide shots every time, and that text longer than four words loses. Their new rule is simple: one close-up subject, four words or fewer. Future thumbnails start from that rule, not from scratch. Common mistake to avoid: Treating one test result as a universal law. A result for one video, audience, and topic may not apply to every video. Patterns across several tests are far more reliable than a single win. Illustrative image: Patterns across tests become reliable thumbnail rules. This is an illustrative image, not a screenshot of your channel or another creator's work. Checklist for Thumbnail A/B TestingOne video chosen, with title and video kept unchanged during the test Two thumbnails differing in one clear variable, checked at small size Test set up in YouTube Studio, with start date recorded Test run for at least one to two weeks, with enough impressions per version Winner chosen on click-through rate and watch time, not clicks alone Result logged, with patterns turned into rules after several testsFrequently Asked Questions Can small channels A/B test thumbnails? Yes, but tests take longer, because fewer impressions arrive each day. Start with your most-viewed videos, run tests longer, and focus on large, clear differences, which are easier to detect with smaller samples. Should I test titles too? You can test titles separately, but do not test a title and a thumbnail at the same time. Change one thing, learn from it, then test the next thing. Otherwise you cannot tell which change caused the result. What if the test shows no clear winner? That is still useful information: it means both thumbnails work similarly for that video. Keep either one, and test a larger difference next time, such as a different image instead of a different colour. Do I need a third-party tool? YouTube Studio's built-in test feature is enough for most creators. Third-party tools can add options, but they also add cost and complexity. Start with the built-in feature, and only consider other tools if you need a feature it does not offer. Can A/B testing hurt my channel? A fair test should not hurt a channel, because each version is shown to only part of the audience. A misleading winning thumbnail can hurt retention, which is why you should check watch time, not just clicks, before keeping a winner. Thumbnail A/B testing turns opinion into evidence. Test one variable, run the test long enough, read clicks together with watch time, and build rules from patterns, not single wins. Over time, your thumbnails will get clearer, more clickable, and more honest, and your videos will get the audience they deserve.
- CreatorPlaybook Team
- 25 Oct, 2026
End Screens and Cards: Complete Guide
Related guides: How to Use Playlists to Increase Watch Time, How to Improve Click-Through Rate, and Audience Retention: How to Keep Viewers Watching. End screens and cards are two small features that can quietly change how long viewers stay on your channel. An end screen appears in the last 5 to 20 seconds of a video and points viewers to another video, a playlist, or a subscribe button. A card appears during a video, as a small notice in the corner, and can point to a related video, playlist, or channel. Used well, these tools guide viewers to the next useful video instead of leaving them to YouTube's recommendations alone. Used badly, they distract viewers, interrupt the video, or point to content that has nothing to do with what was just watched. This guide explains both tools step by step, so you can use them deliberately in every video. What You Will LearnWhat end screens and cards are, and when each one works best How to plan an end screen that matches the video's topic How to add and time cards so they help, not interrupt How to choose the right next video, playlist, or subscribe prompt How to record a simple closing that makes end screens feel natural How to check end screen and card clicks and improve weak onesStep 1: Understand the Difference Between End Screens and Cards What to do: End screens appear only at the end of a video and can include several elements at once, such as a video, a playlist, and a subscribe button. Cards appear during a video, one at a time, as a small teaser that viewers can tap to expand. Think of end screens as a closing menu, and cards as helpful signposts during the journey. How to do it in simple steps:Use an end screen to suggest the single most relevant next step after the video ends. Use a card when a viewer might want more detail on a point you mention mid-video. Keep end screens for the final seconds, after the main content is finished. Limit cards to moments when they add value, not every minute of the video.Practical example: In a video about making soup, a card at the moment you mention stock could link to a video on homemade stock. At the end, an end screen could link to the full “Healthy Dinners” playlist and a subscribe button. The card helps during the video; the end screen guides the next session. Common mistake to avoid: Treating cards and end screens as the same thing, or adding both everywhere. Too many cards annoy viewers and pull them away mid-video, while an end screen that appears before the content ends can feel like the video stopped early. Illustrative image: End screens guide the next step; cards help during the video. This is an illustrative image, not a screenshot of your channel or another creator's work. Step 2: Plan the End Screen Before You Record What to do: Decide what the end screen will promote before you film, so you can leave 20 seconds of clean, uncluttered video at the end for it. If the ending is busy, fast-moving, or full of text, end screen elements will be hard to see and tap. How to do it in simple steps:Choose one next video and one playlist that match the video's topic. Plan a simple closing shot, such as you speaking to the camera with a plain background. Leave the last 20 seconds free of important text, faces, or fast movement where elements will sit. Write one closing sentence that names the next video, such as “Next, watch part two.”Practical example: A creator ends a guitar lesson standing with the guitar, saying, “Next, try the chord changes video linked here.” The screen stays calm for 20 seconds, so viewers can see and click the video element without the picture changing underneath it. Common mistake to avoid: Adding an end screen to a video that ends abruptly, with credits rolling or a fast montage. Elements placed over busy footage are hard to read, and viewers leave before they notice the next video. Illustrative image: A calm, planned ending gives end screens room to work. This is an illustrative image, not a screenshot of your channel or another creator's work. Step 3: Add End Screen Elements in YouTube Studio What to do: In YouTube Studio, open the video editor, choose End screen, and add elements for a video, a playlist, and a subscribe button. Place them where they do not cover faces or important visuals, and check them on both desktop and mobile previews. How to do it in simple steps:Open YouTube Studio, select the video, and open the editor's End screen section. Add a video element for the most relevant next video, or a playlist element for a series. Add a subscribe element in a corner where it is visible but not in the way. Set the timing so elements appear in the last 20 seconds, not earlier. Save, then watch the ending on a phone and a computer to check placement.Practical example: A beginner photography video might use a video element on the left for “Composition Basics,” a playlist element on the right for “Phone Photography Basics,” and a small subscribe circle in the corner. A viewer has two clear next steps, not five competing choices. Common mistake to avoid: Filling the end screen with four or five elements that all compete for attention. When everything is promoted, nothing stands out. Two or three well-chosen elements outperform a crowded screen. Illustrative image: Two or three clear elements beat a crowded end screen. This is an illustrative image, not a screenshot of your channel or another creator's work. Step 4: Time Cards to Moments When Viewers Want More What to do: Add cards at moments when a viewer is likely to want more detail, such as when you mention a related technique, a product, or a previous video. Say the card out loud, briefly, so viewers know to look for it. How to do it in simple steps:Watch your edited video and note two or three moments where a related video would help. In YouTube Studio, add a card at each moment, linking to the most relevant video or playlist. Mention the card in your voiceover, such as “I have a full video on this linked in the corner.” Avoid cards in the first 30 seconds, when viewers are still deciding whether to stay.Practical example: A travel video mentions packing light. At that moment, a card links to a full packing video. Viewers who care can click; viewers who do not can ignore the small notice and keep watching. The card helps without forcing anyone away. Common mistake to avoid: Adding a card every minute, or linking cards to unrelated videos just to get clicks. Frequent, irrelevant cards feel like interruptions, and viewers learn to ignore them, or leave the video entirely. Illustrative image: A well-timed card appears when viewers want more detail. This is an illustrative image, not a screenshot of your channel or another creator's work. Step 5: Choose the Right Next Video, Not Just Your Latest Video What to do: The next video you promote should be the one most likely to keep this viewer watching. That is usually the next video in a series, or a video on the same problem, not simply your most recent upload. How to do it in simple steps:Ask: after watching this video, what question is the viewer most likely to ask next? Promote the video that answers that question, even if it is older. If the video is part of a series, promote the next part, not a random video. Use a playlist element when several videos together answer the next question.Practical example: A viewer finishes a video on sourdough starter. The best next video is “Your First Sourdough Loaf,” not the creator's latest video about a different bread. Relevance keeps the session going; novelty alone does not. Common mistake to avoid: Always promoting your latest video in every end screen. Viewers who just watched a beginner tutorial may not care about your latest advanced video, and will leave instead of clicking. Illustrative image: The right next video answers the viewer's next question. This is an illustrative image, not a screenshot of your channel or another creator's work. Step 6: Check Clicks and Improve Weak End Screens What to do: In YouTube Analytics, check end screen element clicks and card clicks. If few viewers click, the problem may be the choice of video, the placement, or a closing that does not invite a click. How to do it in simple steps:Open Analytics for a video and look at end screen and card click rates. Compare videos: which end screens earn clicks, and which earn almost none? For weak ones, change one thing: the promoted video, the placement, or the closing sentence. Re-check after a few weeks, and keep the changes that improve clicks.Practical example: A creator finds that an end screen promoting a playlist earns more clicks than one promoting a single unrelated video. They switch future end screens to playlists for series videos, and single videos only when one video is the obvious next step. Common mistake to avoid: Adding end screens once and never checking them. A broken link, an outdated video, or a poorly placed element can sit for months, quietly losing viewers who would have kept watching. Illustrative image: Click data shows which end screens actually guide viewers onward. This is an illustrative image, not a screenshot of your channel or another creator's work. Checklist for End Screens and CardsEnd screen planned before recording, with 20 seconds of calm footage at the end Two or three elements only: a relevant video or playlist, plus subscribe Elements placed where they do not cover faces or key visuals, checked on mobile Cards timed to moments when viewers want more detail, not in the first 30 seconds Next video chosen by relevance and viewer need, not by recency Click rates checked, with one improvement per video where clicks are lowFrequently Asked Questions How long should an end screen last? End screens can last up to 20 seconds, and most creators use the full final 20 seconds. Shorter end screens give viewers less time to notice and click, so use the full window when you can. Can I add end screens to Shorts? End screens are a feature for long-form videos. Shorts use a different system, with related video links and channel links, so plan Shorts endings separately and do not expect the same elements to appear. How many cards should I use in one video? Two or three well-timed cards are usually enough for a 10-minute video. More than that risks distracting viewers, especially if the cards are not closely related to the moment they appear. Do cards and end screens work on mobile? Yes, both work on mobile, but placement matters more on a small screen. Always preview on a phone, because an element that looks fine on desktop may cover a face or text on mobile. What if my video is too short for an end screen? Videos need to be long enough to include an end screen in the final seconds. If a video is very short, focus on a strong description and a clear verbal suggestion of the next video, and save end screens for longer videos. End screens and cards are not tricks. They are signposts. When they point to the right next video, at the right moment, and in a clear, uncluttered way, viewers stay longer, learn more, and come back for the next video in the series.

- CreatorPlaybook Team
- 25 Oct, 2026
How to Use Playlists to Increase Watch Time
Related guides: End Screens and Cards: Complete Guide, How to Make a Channel Trailer, and Audience Retention: How to Keep Viewers Watching. A playlist is a simple tool with a powerful effect: it turns one view into a viewing session. When a viewer finishes a video, YouTube can automatically play the next video in a playlist, instead of sending the viewer elsewhere. That extra video, and the one after it, adds watch time, helps viewers learn a topic in order, and gives new subscribers a clear path through your channel. This guide shows you how to use playlists deliberately, not just as a folder for old videos. You will learn how to group videos by topic and journey, how to order them for beginners, how to name and describe them for search, and how to promote them in videos, end screens, and on your channel page. What You Will LearnWhy playlists increase watch time and session length How to group videos into series that viewers can follow in order How to write playlist titles and descriptions that help search and browsing How to order videos so beginners are not lost and advanced viewers are not bored How to feature playlists on your channel page and in videos How to review playlist performance and improve weak playlistsStep 1: Group Videos by One Topic and One Journey What to do: A good playlist has one clear topic and one clear journey, such as beginner to advanced, or a complete project from start to finish. Viewers should know, from the title alone, what they will learn by watching the whole playlist. How to do it in simple steps:List your videos and group them by the problem they solve. Choose groups that contain at least four or five related videos. Give each group one topic, such as “Phone Photography Basics” or “Beginner Guitar Chords.” Remove videos that do not fit, even if they are popular, because they break the journey.Practical example: A cooking channel might create “Healthy Dinners in 20 Minutes” with ten related recipes, instead of one giant playlist called “All Videos.” A viewer who enjoys one dinner recipe can watch the next one without searching, and the channel earns extra watch time from the same visit. Common mistake to avoid: Creating one playlist for everything, or dozens of playlists with only one video each. A giant playlist has no focus, and a one-video playlist has no next step. Aim for focused playlists with enough videos to make a session worthwhile. Illustrative image: One topic and one journey make a playlist easy to follow. This is an illustrative image, not a screenshot of your channel or another creator's work. Step 2: Order Videos So Beginners Can Follow Along What to do: Order playlist videos from easiest to hardest, or in the order a viewer needs them to complete a project. The first video should be welcoming and useful on its own, so new viewers are not confused by advanced terms. How to do it in simple steps:Put the most beginner-friendly, broadly useful video first. Arrange the rest in learning order, not in upload order. Check that each video refers to the next one, or at least does not assume knowledge from a later video. Update the order when you publish a new video that belongs in the middle of a series.Practical example: A photography playlist might run: light, composition, focus, editing, portraits, and landscapes. A viewer who starts at light can follow the whole journey. If the playlist started with advanced editing, beginners would leave after one video. Common mistake to avoid: Leaving playlists in default upload order, with newest first. Newest first often puts advanced follow-ups before the beginner videos they depend on, which confuses new viewers and shortens sessions. Illustrative image: Learning order beats upload order for a helpful playlist. This is an illustrative image, not a screenshot of your channel or another creator's work. Step 3: Write Clear Playlist Titles and Descriptions What to do: Write playlist titles that include the topic and the benefit, and descriptions that explain who the playlist is for and what viewers will learn. Playlists can appear in search, so clear wording helps new viewers find them. How to do it in simple steps:Write a title with the topic plus a benefit, such as “Beginner Phone Photography: Light, Composition, and Editing.” Write a two- or three-sentence description: who it is for, what it covers, and in what order. Use natural keywords from the topic, without stuffing the description with repeated phrases. Add a note at the end of the description pointing to a related playlist, if you have one.Practical example: A vague title, “My Videos 1,” tells viewers nothing. A clear title, “How to Start a Garden in Small Spaces,” tells a new viewer exactly what to expect, and a description that lists the steps — soil, seeds, watering, and harvesting — helps them decide to watch the whole series. Common mistake to avoid: Using playlist titles that only make sense to you, such as “Stuff” or “2025.” Searchers and new viewers cannot guess what those playlists contain, so they will not click, even if the videos inside are excellent. Illustrative image: A clear playlist title tells viewers what they will learn. This is an illustrative image, not a screenshot of your channel or another creator's work. Step 4: Link Playlists Inside Videos and End Screens What to do: A playlist only increases watch time if viewers know it exists. Mention it at the end of related videos, add it to end screens where possible, and link it in descriptions and pinned comments. How to do it in simple steps:At the end of a video, name the playlist and the next video in it, in one sentence. Use an end screen element that points to the playlist or to the next video in the series. Add the playlist link to the video description, near the top, with a short label. When a viewer asks a question covered by a playlist, reply with that playlist link.Practical example: A creator ends a video with, “This was part one of Phone Photography Basics. Part two is about composition, and the full playlist is linked below.” A viewer who enjoyed part one now has one clear click to continue, instead of having to search for part two. Common mistake to avoid: Creating playlists and never mentioning them. Playlists hidden only on your channel page will help some viewers, but most viewers will never find them unless you point to them inside videos and descriptions. Illustrative image: Mentioning a playlist at the end turns one view into a session. This is an illustrative image, not a screenshot of your channel or another creator's work. Step 5: Feature Playlists on Your Channel Page What to do: Arrange your channel page so new visitors see your best playlists first. A well-organised channel page acts like a shop window: it shows visitors what you offer and where to start. How to do it in simple steps:Choose two or three playlists that best represent your channel. Feature them as sections on your channel home page, in order of importance. Put a beginner playlist first, so new visitors are not overwhelmed. Update the featured playlists when you publish a stronger series.Practical example: A fitness channel might feature “Beginner Workouts at Home” first, then “Healthy Meals in 20 Minutes,” then “Beginner Strength Training.” A new visitor can immediately see the channel's main topics and start with the easiest series. Common mistake to avoid: Leaving your channel page on default settings, with random uploads in no order. New visitors who cannot quickly understand what you offer are less likely to subscribe, even if individual videos are good. Illustrative image: Featured playlists help new visitors know where to start. This is an illustrative image, not a screenshot of your channel or another creator's work. Step 6: Review Playlist Performance and Improve Weak Ones What to do: In YouTube Analytics, check which playlists earn views and watch time, and which ones viewers abandon quickly. A playlist with low completion may need better ordering, a clearer title, or a stronger first video. How to do it in simple steps:Open Analytics and look at playlist views, watch time, and average view duration. Note which playlists keep viewers for several videos, and which lose them after one. For weak playlists, check the first video: is it clear, welcoming, and representative? Improve one thing at a time: reorder, retitle, or replace the first video, then re-check after a month.Practical example: A playlist loses most viewers after video one, because video one is a long, advanced tutorial. Moving a shorter, beginner-friendly video to the front, and retitling the playlist to match it, can improve completion without filming anything new. Common mistake to avoid: Judging a playlist only by total views. A playlist with many views but short sessions may be less valuable than a smaller playlist that keeps viewers watching for several videos. Watch time and session length matter more than clicks alone. Illustrative image: Playlist data shows which series keep viewers watching. This is an illustrative image, not a screenshot of your channel or another creator's work. Checklist for Playlists That Increase Watch TimeOne clear topic and journey per playlist, with at least four videos Videos ordered from easiest to hardest, not newest first Clear title and description, with topic and benefit stated Playlist mentioned at the end of related videos and in descriptions Best playlists featured on the channel page, beginner series first Playlist performance reviewed, with one improvement per monthFrequently Asked Questions How many playlists should a small channel have? Start with three to five focused playlists, covering your main topics. That is enough to organise your library without overwhelming viewers. Add new playlists only when you have a genuine series to put in them. Can a video belong to more than one playlist? Yes. A video can appear in several playlists if it genuinely fits each one. For example, a video on natural light could belong to both “Phone Photography Basics” and “Video Lighting on a Budget,” if it helps viewers in both journeys. Do playlists help with search? Playlists can appear in search results, especially when their titles and descriptions are clear and match what viewers search for. They are not a replacement for good video titles, but they give your content another way to be found. Should I use autoplay? Playlists can play automatically to the next video, which helps watch time, but viewers can also turn autoplay off. Focus on making the next video genuinely relevant, so viewers choose to continue even without autoplay. What if I only have a few videos? Start with one playlist for your main topic, even with three or four videos, and add to it as you publish. A small, focused playlist is still useful, and it grows into a stronger series over time. Playlists work because they remove friction. When the next video is obvious, relevant, and easy to play, viewers stay longer, learn more, and are more likely to subscribe. Group your videos by journey, order them for beginners, name them clearly, and point viewers to them in every related video.