Showing Posts From
Youtube studio
 CreatorPlaybook Team
- 14 Nov, 2026
YouTube Analytics Traffic Sources — Where Your Views Actually Come From
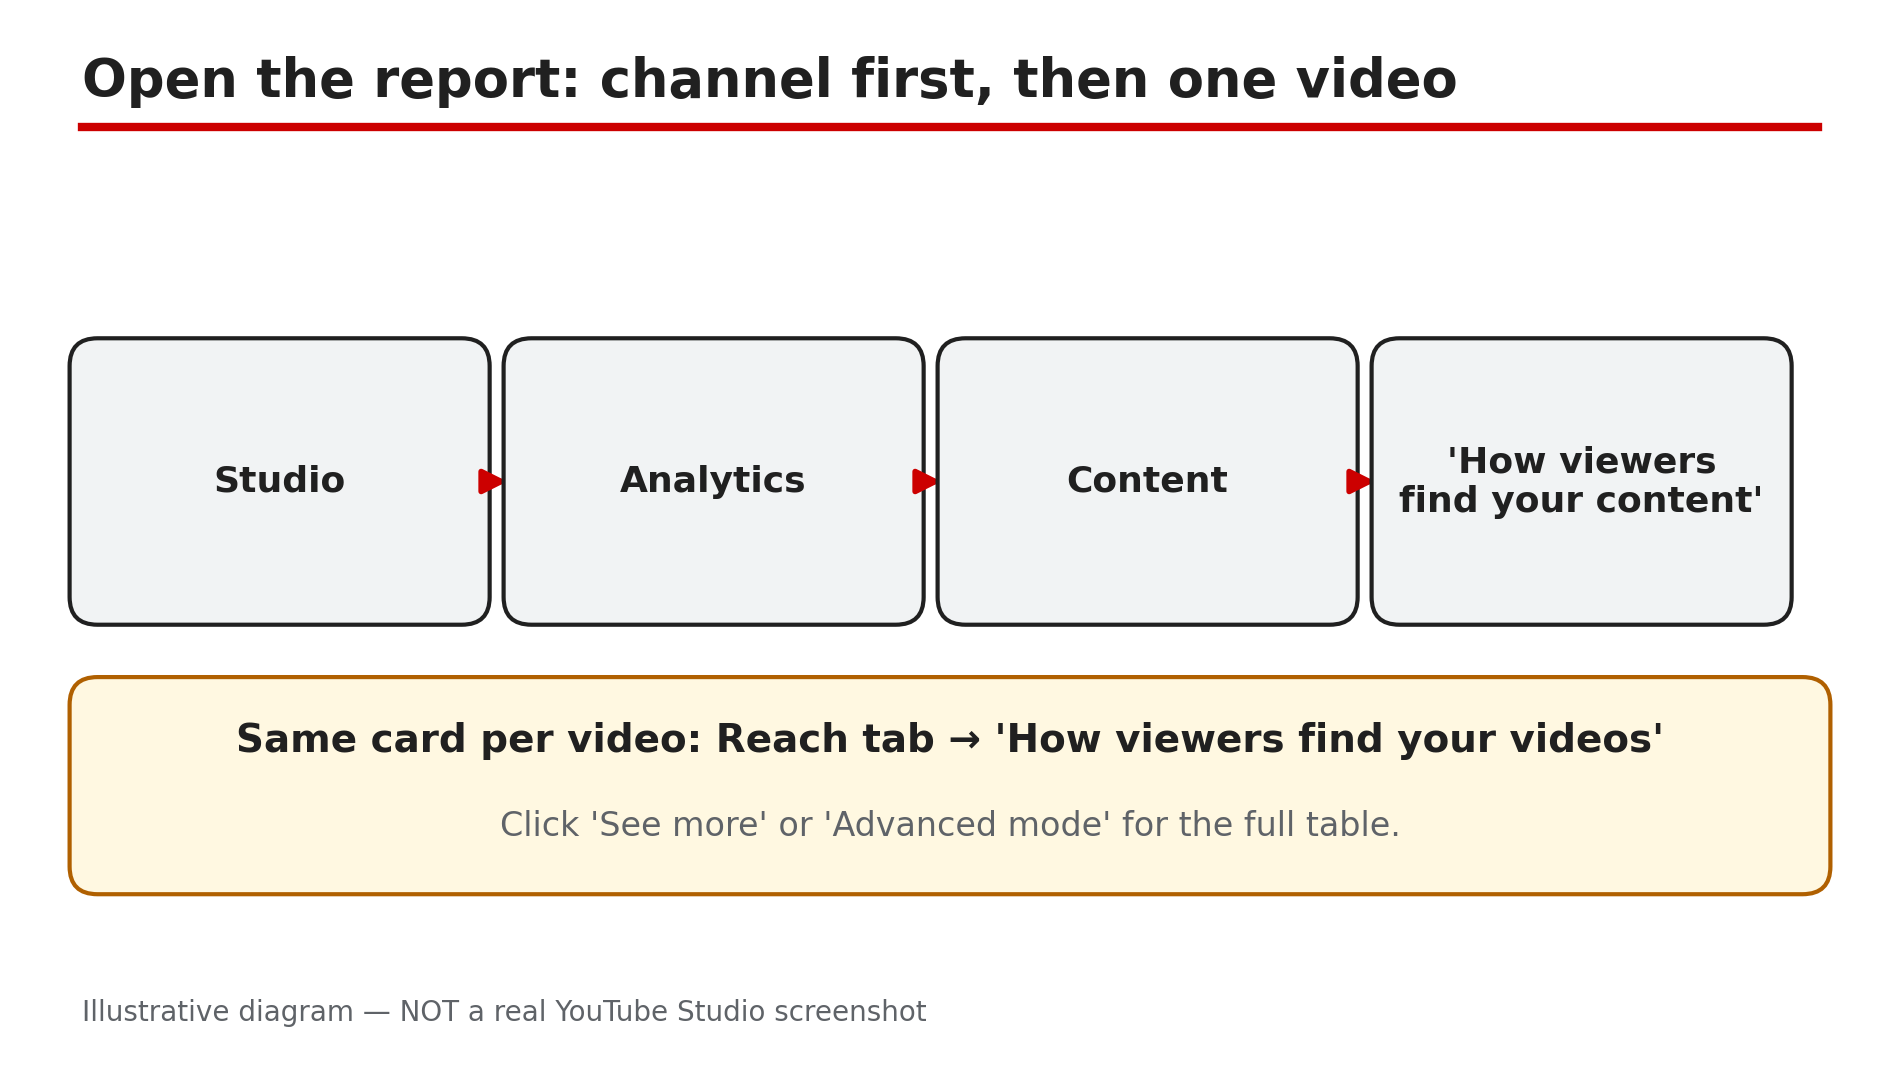
Intro Your view count tells you how many people watched — never how they found you, and that decides what to fix next. The traffic-source report splits every view into the place it came from: Browse features, Suggested videos, YouTube search, the Shorts feed, External sites, Playlists, Channel pages, and more. Read it as a diagnosis, not a definition list: strong Search with near-zero Browse differs from a video riding Suggested. This guide shows where the report lives, what each source means, and what to change when a source is missing or dominant. Views vs unique viewers is a separate post. What You Will LearnWhere the report lives, at channel level and per video What Browse, Suggested and Search mean — and what each diagnoses What the smaller sources tell you: Shorts, External, Playlists, Channel pages, Notifications How to compare two videos or two periods to find what changed What to fix when a source is missing or dominates The checks that stop you blaming a working reportStep 1 — Open the right report: channel first, then one video What to do: Open the report twice: once for the whole channel, once for a single video. How: In YouTube Studio, open Analytics, then Content. The Help page opened live for this post says the Content tab "gives you an overview of how your audience finds your content" — channel level only. Scroll to "How viewers find your content". For one video, use the Reach tab card "How viewers find your videos". Click "See more" or "Advanced mode" for the full table. Example: A creator sees Browse at 45% channel-wide, but her newest video shows 4% — the average hid a video the home feed never picked up. Common mistake: Judging a video from the channel report alone — the channel mix is an average, and one video's problem disappears inside it.Illustrative diagram: the path to the traffic-source report in YouTube Studio, channel level first, then one video. Step 2 — Read the big three: Browse, Suggested and Search What to do: Read Browse, Suggested and Search first — for most channels these three carry the bulk of views, and each points at a different fix. How: YouTube's Help page defines them plainly, as read live on 14 November 2026. Browse features is "traffic from the Home, subscriptions, Watch Later, Trending/Explore and other browsing features" — YouTube itself choosing to show your video. Suggested videos is "traffic from suggestions that appear next to or after other videos" — viewers arriving from another video's audience. YouTube search is "traffic from YouTube search results"; the exact search terms sit on the "Traffic source: YouTube Search" card. Example: Two videos, 10,000 views each: one got 7,000 from Search, the other 7,000 from Browse. Common mistake: Treating all views as equal — a Search-heavy video and a Browse-heavy video need opposite fixes.Illustrative diagram: the big three traffic sources — Browse features, Suggested videos and YouTube search — and what each one means. Step 3 — Read the smaller sources What to do: Scroll past the big three — a small source that suddenly grows is often the most useful line. How: The Help page lists them all. Shorts is "traffic from the Shorts vertical viewing experience" — the swipe feed, which swings wildly. External is "traffic from websites and apps that have your YouTube video embedded or linked to" — the sites sit on the "Traffic source: External" card. Playlists is "traffic from any playlist that included one of your videos" — yours, another creator's, or a viewer's Liked videos. Channel pages is traffic from channel pages, Notifications from subscriber notifications, Direct or unknown is "traffic from direct URL entry, bookmarks, signed out viewers, and unidentified apps". A source at 2% is background noise; at 20% it is a story. Example: A tutorial jumps from 200 to 3,000 views a day, and External is suddenly 60%. One blog embedded the video — one embed, not a channel-wide breakthrough. Common mistake: Ignoring the small rows. The cause of a spike or slump is usually sitting in a row you never scrolled to.Illustrative diagram: six smaller traffic sources — Shorts feed, External, Playlists, Channel pages, Notifications and Direct or unknown. Step 4 — Compare two videos or two periods What to do: Never read one report in isolation — compare the video with another video, or with its own earlier period, in Advanced mode. How: In Advanced mode, compare with a second video, or the same video over a previous 28 days. Look for the source that moved, not the total. If views fell but Search stayed flat while Browse dropped by half, the video stopped being pushed on the home feed while searchers kept finding it. Pair this with the retention graph: strong Suggested traffic with viewers leaving in the first 30 seconds will stop being suggested, as our retention-graph guide explains. Traffic tells you where viewers came from; retention tells you whether they stayed. Example: Two videos with 8,000 views each: one is 70% Suggested, the other 70% Search. The first depends on other videos' audiences; the second on a question people keep typing. Common mistake: Comparing view totals instead of source mixes — two videos with identical totals can have opposite problems.Illustrative diagram: two videos with the same views but different traffic sources — one 70% Suggested, one 70% Search. Step 5 — Fix the missing or dominant source What to do: Turn the diagnosis into one fix per source — change what that source depends on. How: Browse near zero with strong Search: the thumbnail and title are not winning the home feed — test a clearer thumbnail and a sharper title. Strong Suggested: the video rides other videos' audiences — make the next video on a closely related topic. Weak Search: the title and description do not match the words people type — check the exact terms on the "Traffic source: YouTube Search" card. External spike? Open the External card and find the one site or share behind it — a single embed can vanish as fast as it appeared. If the Shorts feed dominates a Short, judge by the pattern across several uploads, not one video. Example: A channel's how-to videos get 60% of views from Search. The creator titles the next five videos around the exact questions in her Search terms report — and Search grows further. Common mistake: Fixing the wrong source. Rewriting titles will not help a Browse problem, and a new thumbnail will not help a video nobody searches for.Illustrative diagram: one source, one fix — Browse near zero, Search strong, or an External spike. Step 6 — Rule out the false alarm first What to do: If a traffic source is missing or the report looks empty, check the video itself before concluding Analytics is broken. How: First, check visibility in Studio: a private or unlisted video is not publicly discoverable, so as reported it collects no Browse, Suggested or Search traffic — viewers arrive only via the direct link. YouTube's limited-data Help page, checked during research, says private or unlisted videos show no demographics or geography data, and one-off search terms may not appear on the traffic-source report. Second, confirm the video has finished processing and has no age restriction — as reported, either limits where it is shown. Third, Analytics data can be delayed: wait and re-check — see our post on Analytics missing or delayed for the full checks. Only then treat a missing source as a real problem. Example: A creator panics over zero Suggested traffic — then finds the video is still unlisted, shared with a friend for a preview. Once Public, Browse and Suggested appear over the next day. Common mistake: Re-uploading over an empty report — a private, unlisted, restricted or still-processing video explains it more often than any Analytics fault.Illustrative diagram: four false alarms to check before blaming the report — private or unlisted, still processing, age-restricted, delayed data. Checklist — Read traffic sources like a diagnosis☐ Channel report: Studio → Analytics → Content → "How viewers find your content" ☐ Same report for one video: Reach tab → "How viewers find your videos" ☐ Read Browse, Suggested, Search; noted which carries the video ☐ Checked the smaller sources — Shorts, External, Playlists, Channel pages, Notifications, Direct/unknown ☐ Compared with another video or earlier period in Advanced mode ☐ Fix matched to the source: Browse → thumbnail/title, Search → terms, Suggested → related topics, External → one embed ☐ Checked visibility, processing, restrictions before blaming the report ☐ Paired traffic source with retention graph before concludingFAQs 1. Where do I find traffic sources in YouTube Analytics? In YouTube Studio, open Analytics, then Content, and look for "How viewers find your content". For one video, use the Reach tab card "How viewers find your videos". 2. What is the difference between Browse features and Suggested videos? Browse features is traffic from the Home page, subscriptions, Watch Later and other browsing features. Suggested videos is traffic from suggestions next to or after other videos — both definitions from the Help page opened live for this post. 3. Why is my Browse traffic near zero when Search is strong? As reported, it usually means the video is findable but not winning the home feed: searchers click it, Home scrollers pass it by. Test a clearer thumbnail and a more specific title. 4. Why did my External traffic suddenly spike? Open the "Traffic source: External" card — as reported, a spike usually traces to one site that embedded or linked the video. Find it before treating the spike as growth. 5. Why is a traffic source missing from my video's report? Check the video first: as reported, a private or unlisted video gets no Browse, Suggested or Search traffic, and a video still processing or age-restricted may show limited data. Analytics can also be delayed. SourcesYouTube Help — "Understand your YouTube content performance" (official Help page, opened live 14 Nov 2026): https://support.google.com/youtube/answer/12220281?hl=en CreatorPlaybook — "Views vs Unique Viewers vs Impressions on YouTube — What Each Number Really Means" (internal link): </blog/views-vs-unique-viewers-vs-impressions> CreatorPlaybook — "YouTube Studio Analytics Missing or Delayed? What to Check First" (internal link): </blog/youtube-studio-analytics-missing-or>
- CreatorPlaybook Team
- 14 Nov, 2026
How to Delete or Hide Your YouTube Channel — and What You Actually Lose
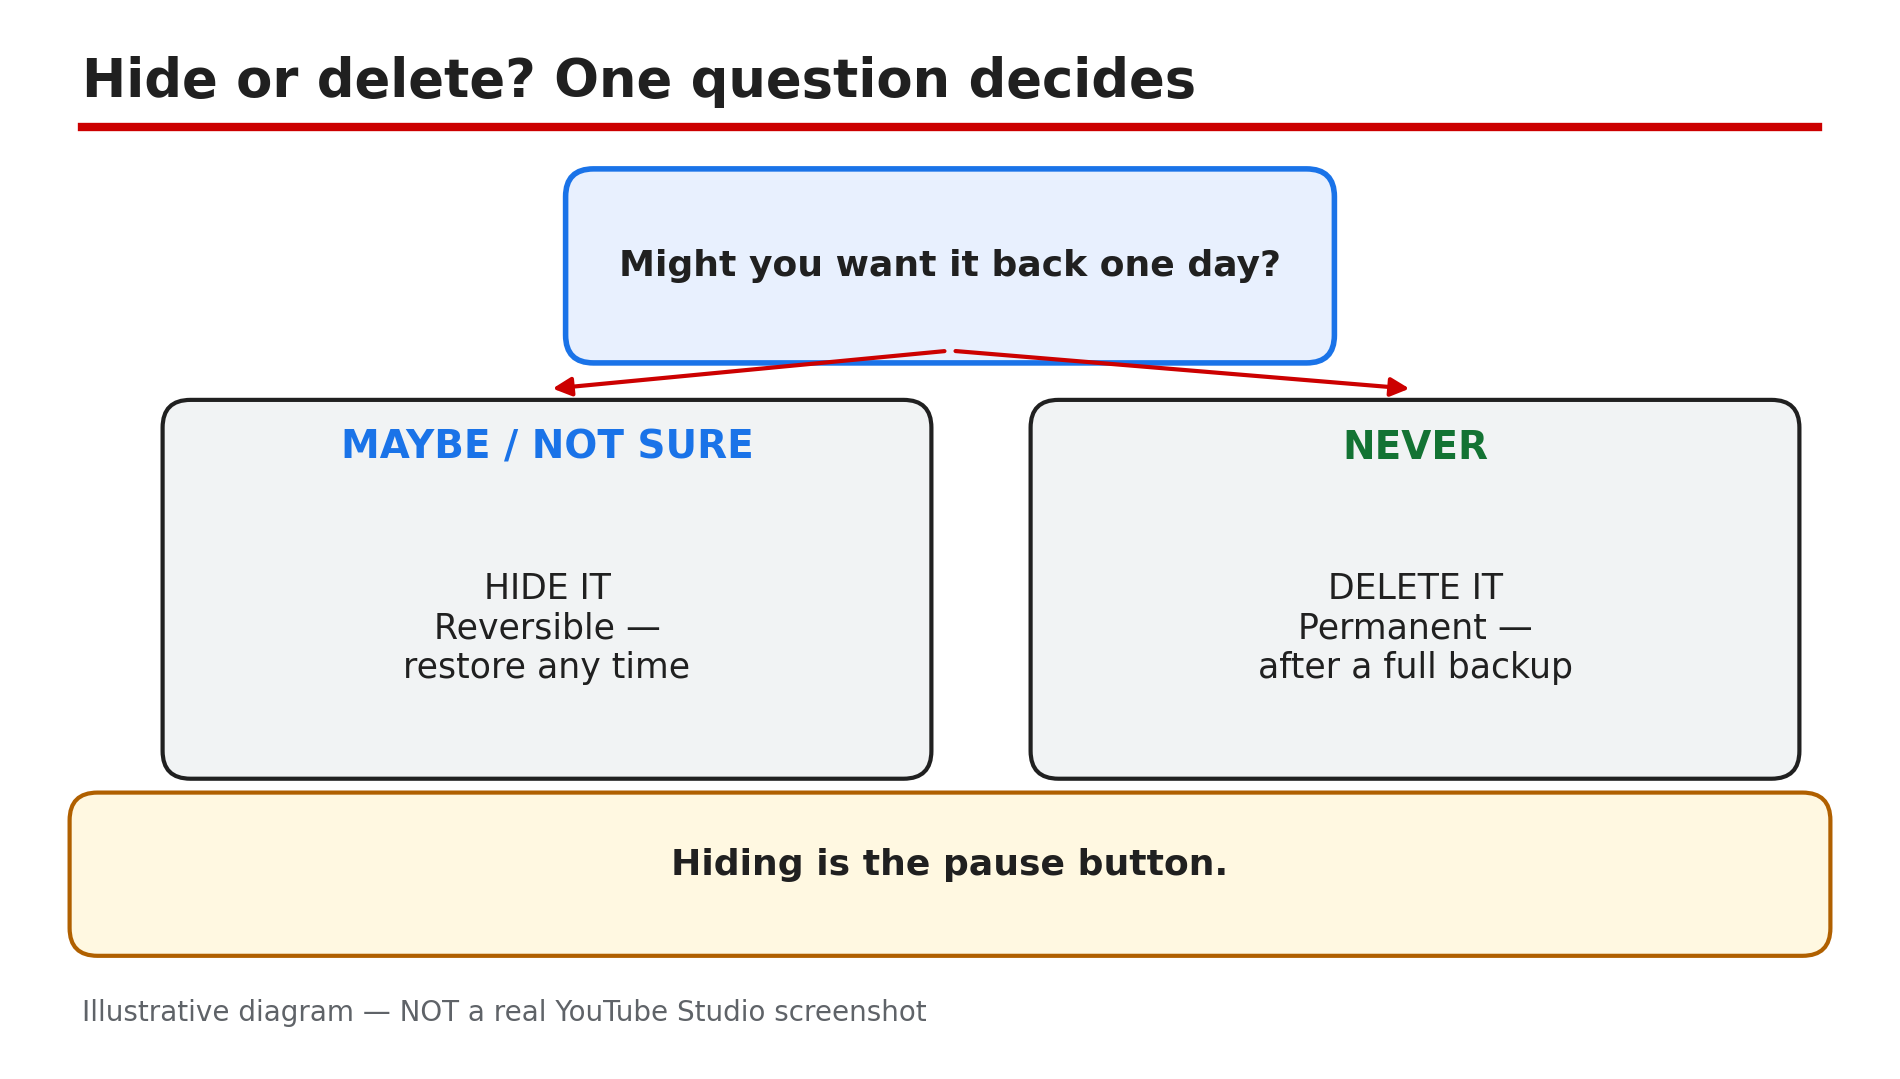
Deleting a YouTube channel is closer to demolishing a house than closing a door: every video, comment, subscriber and playlist tied to it goes too, and a deleted channel cannot simply be brought back. Hiding is the opposite — your channel steps out of public view, everything stays intact, and you can bring it back. Most creators here are burnt out and want a break, started on the wrong Google account, or clicked something by accident. The right move differs in each case, and the wrong move is permanent. One warning: the menu paths have moved between Studio redesigns, so the steps below follow YouTube's Help pages as they read on 14 November 2026. What You Will LearnThe one question that decides hide versus delete How to back up a channel before you touch a setting How to hide a channel the reversible way How to delete a channel permanently Exactly what disappears — and what survives How to restore a hidden channel, and why a deleted one has no way backStep 1 — Decide first: hide or delete — the one question that matters What to do: Answer one question before you open any settings page: might you ever want this channel back? How: If the answer is "maybe" or "I don't know yet", hide the channel. Hiding is temporary by design — YouTube's Help page says you can hide your channel and restore it at any time, and that hiding will not delete it. Your channel, videos, playlists and community posts disappear from search and other users, but nothing is destroyed. If the answer is a firm "never", delete it — but only after Step 2. A hidden channel costs nothing to keep; a deleted one costs everything you built. Example: A burnt-out creator with 40,000 subscribers hides her channel instead. Six months later she restores it — her videos are still there. Common mistake: Deleting to "take a break". Deletion is not a pause button — hiding is.Illustrative diagram: the one question that decides hide versus delete Step 2 — Back up everything before you touch a setting What to do: Download a full copy of the channel first — after deletion there is nothing left to download. How: Start with Google Takeout: choose YouTube, export your videos, and keep the archive safe. Then save what Takeout does not protect well — original video files, descriptions and titles, thumbnails, and a list of video URLs. Screenshot your Studio dashboard too: subscribers, watch time, top videos. Do this even if you only plan to hide, because a hidden channel you later delete still needs its backup made first. Example: A creator deletes a channel with 200 videos, then realises his only copy of his first fifty was the upload itself. Takeout after deletion exports nothing. Common mistake: Assuming YouTube keeps a copy you can ask for later. Once deleted, the Help page says YouTube may have a harder time recovering your account — and no documented restore exists.Illustrative diagram: the five things to back up before you touch a setting Step 3 — Hide your channel the reversible way What to do: Hide the channel from YouTube's settings, on the Help page's current path. How: Sign in to YouTube, open Settings from the left sidebar, click Advanced Settings, then click Hide your channel and select Hide to confirm. That is the Help page's path today — it starts on YouTube itself, not in Studio, with no Channel step. Older guides send you through Studio, then Settings, then Channel, then Advanced settings; follow the labels you actually see. While hidden, your channel, videos, playlists and community posts are hidden from search and other users; your name, handle and picture stay visible only to you. You can still watch, like and subscribe privately. Example: A creator hides his channel during a three-month break. His videos vanish from search, but his watch history and subscriptions keep working, because hiding does not touch his Google account. Common mistake: Forgetting delegated access: anyone with access loses it while the channel is hidden, and Brand Account delegates must be re-added after restore, as the Help page notes.Illustrative diagram: the current path to hide a channel, starting on YouTube itself Step 4 — Delete your channel permanently — the exact Studio path What to do: Delete the channel from YouTube Studio — reading every confirmation box first. How: Sign in to YouTube Studio. From the left sidebar, select Settings, then Channel, then Advanced Settings. At the bottom, select Remove YouTube Content — you may be asked to sign in again to verify your identity. Select "I want to permanently delete my content", tick the boxes, and select Delete my content — the Help page path, checked live on 14 November 2026. Two things to know: you cannot currently delete a channel on a mobile device, as the Help page states, so use a computer; and deletion may take some time, during which thumbnails can still show briefly. Example: A creator with two channels deletes the wrong one — both are signed into the same browser. The confirmations show the channel name: reading them is the last chance to catch it. Common mistake: Rushing the confirmation boxes. They list what will be deleted — read them slowly and check the name and picture match the channel you mean to delete.Illustrative diagram: the Studio path to delete a channel permanently Step 5 — What actually disappears — and what survives What to do: Know the full price of each choice before you pay it. How: Deleting removes your videos, comments, messages, playlists and history, as the Help page states. Embedded videos on your website or blog will break, as reported — the video they point to no longer exists. Monetisation ends with the channel too: Partner Program membership and AdSense linkage are tied to it, as reported — confirm in Studio's Earn tab first. Hiding costs far less: everything becomes private and invisible, but nothing is destroyed. One catch: after restoring, previously public videos come back private — make them public again in Studio. Deleting the channel is not deleting the Google Account: the Help page states these steps delete only your YouTube channel, so Gmail, Drive and Photos stay untouched. As reported, deleting a Brand Account channel removes only that channel. Example: A creator deletes a channel and then finds her website full of dead embeds and her AdSense link gone. It was all listed in the Help page before she clicked. Common mistake: Thinking "delete my channel" deletes your Google Account — or deleting the Google Account to remove a channel. The second, as the Help page warns, deletes the channel with everything else in it.Illustrative diagram: three things you lose when you delete a channel Step 6 — After the click: restore a hidden channel, or live with a deletion What to do: If you hid it, restore it when ready. If you deleted it, rebuild from your backup. How: To restore, sign in to YouTube, open Settings, click Advanced Settings, then click Restore your channel and select Restore — the hiding path in reverse. Your channel, name, handle and picture become visible again, and your playlists return too. But your previously public videos return set to private, so open Studio, go to Content, and set them back to public. If you deleted the channel, there is no documented restore path: the Help page only says YouTube may have a harder time recovering your account, and YouTube's own support forum says a deleted channel cannot be restored. No recovery workaround is documented — do not trust any video or tool promising one. Re-upload from your Step 2 backup, fix broken embeds, and re-check monetisation in Studio. Example: A creator restores a hidden channel after a year away and finds all 80 videos set to private. One afternoon in Studio sets them public again in bulk — her subscribers and playlists are still there. Common mistake: Restoring a hidden channel and assuming the videos are public again. They come back private — until you change them, subscribers see an empty channel.Illustrative diagram: what happens after the click — restore a hidden channel or rebuild a deleted one Checklist — Before you hide or delete a channel☐ Answered the Step 1 question honestly — hide if there is any doubt ☐ Downloaded a full Takeout backup and saved original video files ☐ Saved titles, descriptions, thumbnails and video URLs ☐ Checked the selected channel — right name and picture on screen ☐ Deletion needs a computer, not a mobile device ☐ Read every confirmation box before clicking Delete ☐ Accepted embeds break and monetisation ends with a deleted channel ☐ After restoring, set videos back to public in StudioFAQs 1. Can I get a deleted YouTube channel back? No — there is no documented way to restore a channel you deleted yourself. The Help page only says YouTube may have a harder time recovering your account, and YouTube's own support forum says a deleted channel cannot be restored. Your only safety net is the Step 2 backup. 2. If I hide my channel, do I lose my subscribers? Hiding makes your channel name, videos, likes, subscriptions and subscribers private, as reported, but nothing is deleted. On restore, previously public videos return set to private — set them public again in Studio. 3. Does deleting my channel delete my Google Account or Gmail? No. The Help page states these steps delete only your YouTube channel, not the Google Account you sign in with, so Gmail, Drive and Photos stay untouched. But deleting that Google Account deletes the channel too. 4. Can I delete my YouTube channel from my phone? Not currently. The Help page states you cannot delete a channel on mobile devices, so use a computer and YouTube Studio. 5. What happens to my verification badge if I delete or hide my channel? The badge belongs to the channel, so deleting the channel removes it — a fresh channel must earn verification again. If your badge disappeared while the channel is alive, that is a different problem: see "YouTube Verification Badge Lost or Removed? What to Do Next" on CreatorPlaybook. SourcesYouTube Help — "Hide or restore your YouTube channel" (official Help page, opened live 14 Nov 2026): https://support.google.com/youtube/answer/55759?hl=en YouTube Help — "Delete your YouTube channel" (official Help page, opened live 14 Nov 2026): https://support.google.com/youtube/answer/18261435?hl=en CreatorPlaybook — "YouTube Verification Badge Lost or Removed? What to Do Next" (internal link, URL given in the task): </blog/youtube-verification-badge-lost-or>
- CreatorPlaybook Team
- 14 Nov, 2026
Ads Not Showing on a Monetized Video — Green Icon, No Revenue
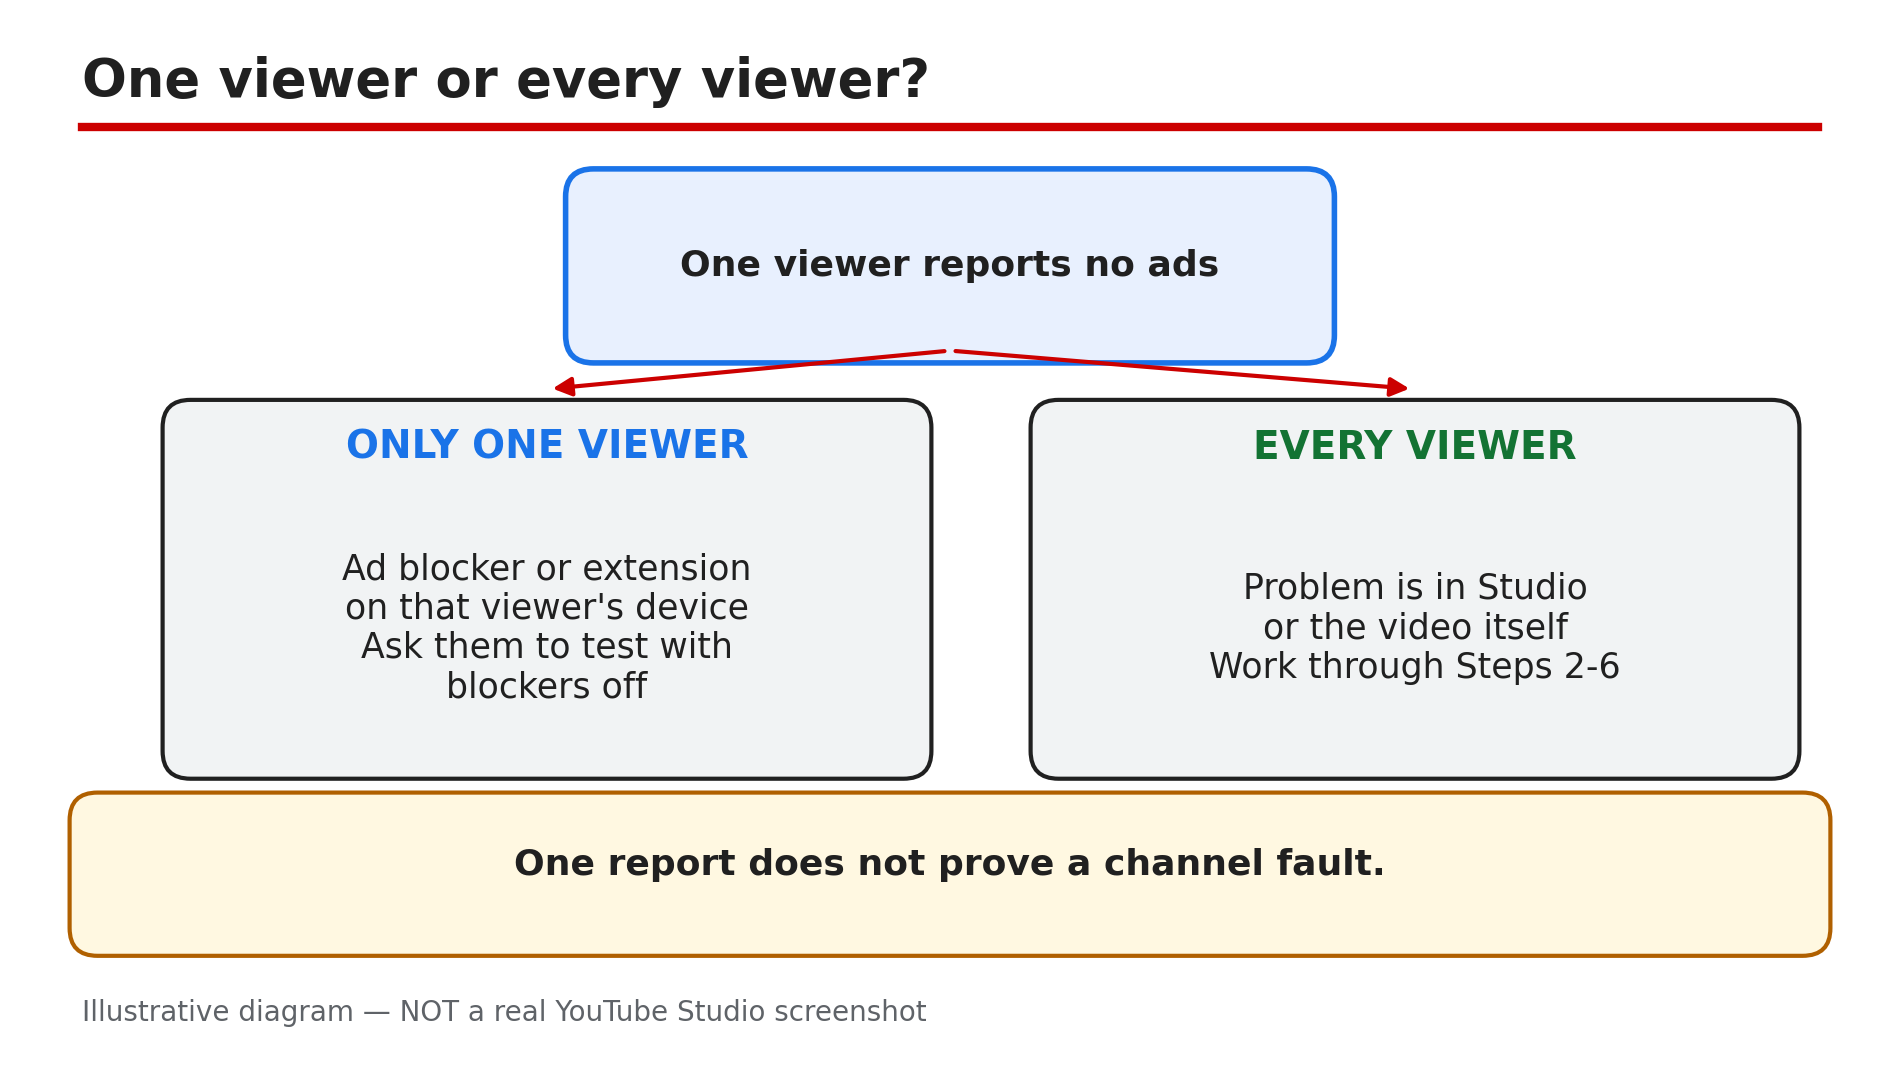
Your video is monetized, the icon in YouTube Studio is green — and yet no ads appear, and no revenue lands in Analytics. Know this first: turning monetization on is permission for ads to be considered, not a promise that an ad fills every slot. YouTube's own guidance puts it plainly, as reported: "Ad slots are not guaranteed to serve ads." Some videos show no ad because a real fault blocks them — monetization off, a yellow icon, a claim, a wrong setting. Others show no ad because no advertiser bid on that view — and nothing is wrong. This guide separates the two cases, in order. What You Will LearnOne viewer or every viewer: the test that splits the problem What the green, yellow and grey icons mean The five switches that must all be on What turns an icon yellow, and how to fix it How mid-rolls and embeds quietly kill ads When "no ads" is normal — and how Analytics proves itStep 1 — Ask one viewer or every viewer What to do: Before touching Studio, find out how widespread the missing ads are — ask two or three people on different devices whether they see an ad. How: Open the video yourself in another browser, signed out, extensions off. YouTube's Help page says ad-blocking software or browser add-ons can stop you seeing ads on your own video — so your own screen is the least reliable test. If one viewer sees no ads but others do, the fault is on that viewer's device. If nobody sees an ad anywhere, the problem is in Studio or in the video. Example: A creator panics after one comment saying "no ads on this video". Three other viewers saw a pre-roll ad. The commenter was running an ad blocker. Common mistake: Treating one viewer's report as proof the whole channel lost ads.Illustrative diagram: the one-viewer-or-every-viewer test that splits a no-ads problem in half. Step 2 — Open Studio and read the icon What to do: Open YouTube Studio, go to Earn, then to Content and look at the Monetization column. Click the icon to read what it says. How: A green icon means the video meets the advertiser-friendly guidelines and can earn most ads, as reported. A yellow icon means limited or no ads — a reduced pool of advertisers will bid. A grey or off icon means monetization is off for that video, or the video is ineligible. Also check Earn: if monetization is paused at channel level, the cause is usually a missing or unapproved AdSense for YouTube account, as reported — see our guide on monetization paused vs disabled. The icon is per video, and it can change after publishing. Example: A creator checks Earn, sees the channel is fine, then finds the video's icon is yellow, not green. The video was never broken — it was limited from the start. Common mistake: Checking only the channel switch, never the icon on the video.Illustrative diagram: what the green, yellow and grey monetization icons mean. Step 3 — Check the video's own switches What to do: Open the video in Studio and confirm five things — every one must be right, or ads will not serve. How: First, monetization must be on for this specific video, not just the channel. Second, the video must be public — YouTube lists private videos as ineligible for ads. Third, the ad formats must be turned on. Fourth, ads must not be turned off for your channel in account settings — YouTube says that switch stops ads on every video you own. Fifth, check for a third-party claim — YouTube lists such videos as ineligible to monetize with ads. Example: A creator uploads a video as private to test it, then makes it public and wonders why the first viewers saw no ads. It had been private when those views happened — and private videos cannot show ads. Common mistake: Assuming channel monetization on means every video is on automatically.Illustrative diagram: the five switches that must all be on for ads to serve. Step 4 — If the icon is yellow: find the trigger, edit, review What to do: Click the yellow icon and read the reason YouTube gives. Fix that part, then request a human review. How: The common triggers, as reported: swearing or shocking content in the first 30 seconds, violent or shocking imagery, a sensitive topic, and a sensational thumbnail. Edit out the trigger — bleep the language, swap the thumbnail — then request a human review. Reviews are reported to take up to 7 days, with one appeal per video — so fix the video first. One yellow icon mostly hurts that one video, but a pattern of yellows can raise the channel's risk in review, as reported. Example: A creator's challenge video turns yellow the day after upload — the first 20 seconds contain loud swearing after a spicy-food bite. She bleeps it, swaps the thumbnail, requests a review, and the icon turns green within a few days, as reported. Common mistake: Requesting a review before editing — the same trigger is still in the video.Illustrative diagram: the three common triggers that turn a monetization icon yellow. Step 5 — Check mid-rolls and where the video is playing What to do: Check how mid-roll ads are controlled, and where viewers are actually watching — the watch page, or an embedded player. How: For live streams, confirm Monetization is On in Live Control Room. YouTube documents three mid-roll modes, as reported: automatic (YouTube picks the breaks), scheduled (you choose an interval), and manual (you insert each break yourself). YouTube recommends automatic mid-rolls; scheduled or manual choices may earn less, as reported. A delay setting can postpone automatic mid-rolls by 10 minutes. Finally, check the player: ads are turned off for a live stream when its player is embedded on an external site with autoplay, as reported — compare it on the YouTube watch page first. Example: A 24/7 stream shows no ads on the channel's website, but ads appear on the watch page. The website embed uses autoplay, which switches ads off for live streams, as reported. Common mistake: Inserting manual mid-roll breaks and expecting every one to fill. A break is an opportunity, not a guaranteed ad.Illustrative diagram: automatic mid-rolls compared with scheduled or manual mid-rolls. Step 6 — When everything is on and still no ad What to do: Open YouTube Analytics and look at what the video actually earned. If the switches are all on and the icon is green, the rest is usually normal. How: YouTube's Help page says ads may not be displayed on each video view — check your earnings to see whether ads have been displayed on specific videos. So check ad revenue in Analytics, not one playback. A green video can still earn nothing on some views — no advertiser bid, or no ad was available. Also give a new upload time: once you turn monetization on, it may take some time for ads to show up, as reported, and status generally settles within about a day, as reported. Re-uploading does not change the auction — it only throws away your views and comments. Example: A creator watches her own new video three times, sees no ad, and re-uploads. Analytics later shows the original had already earned ad revenue — the re-upload cost its watch time for nothing. Common mistake: Re-uploading a green video to "fix" ads that were never broken. Check Analytics first.Illustrative diagram: an ad slot is created, an auction runs, and the ad may not fill. Checklist — Ads not showing on a monetized video☐ Asked several viewers on different devices if they see ads ☐ Tested signed out, in another browser, extensions off ☐ Checked Studio > Earn ☐ Read the video's icon — green, yellow or off ☐ Confirmed monetization on, video public, ad formats on ☐ Confirmed channel ads are not turned off ☐ Checked for a third-party claim ☐ If yellow: edited the trigger, requested a human review ☐ Checked mid-roll mode, any autoplay embed ☐ Checked the video's ad revenue in Analytics firstFAQs 1. My video is monetized and the icon is green, but I never see an ad. Is something broken? Not necessarily — a green icon means the video can earn ads, not that every view gets one. YouTube says ad slots are not guaranteed to serve ads, as reported, and ads may not be displayed on each video view. Check ad revenue in Analytics — if other viewers' plays earned, nothing is broken. 2. Why do I see ads on my video but my friend does not? Your friend's device is the likely cause. Ad-blocking software and browser extensions can hide ads, as YouTube's Help page says. Ask them to turn the blocker off or try a different browser. 3. How long after turning monetization on should I wait before worrying? Give it time. Once you turn monetization on, it may take some time for ads to show up, as reported, and status generally settles within about 24 hours, as reported. If the icon is still green and Analytics shows no revenue after a day or two of real views, work through the checks above. 4. Can an embedded video show ads? For live streams, ads are turned off when the player is embedded on an external site with autoplay, as reported — compare on the watch page. 5. Will one yellow icon hurt my whole channel's earnings? One yellow icon mainly hurts that one video. But a pattern of yellows can raise how YouTube's systems assess your whole channel, as reported — so fix repeated yellows at the source: first 30 seconds, thumbnail, topic. SourcesYouTube Help — "Ads aren't being shown on my video" (official Help page, opened live 14 Nov 2026): https://support.google.com/youtube/answer/117739?hl=en-GB CreatorPlaybook — "YouTube Monetization Paused vs Disabled: What's the Difference and How to Fix Each" (internal link, URL as given in the task): </blog/youtube-monetization-paused-vs-disabled> CreatorPlaybook — "YouTube Premium Revenue Explained: How Much You Earn Per View" (internal link, URL as given in the task): </blog/youtube-premium-revenue-explained-how>
- CreatorPlaybook Team
- 14 Nov, 2026
YouTube Audio Out of Sync — Lips Don't Match the Sound (Viewer + Creator Fix)
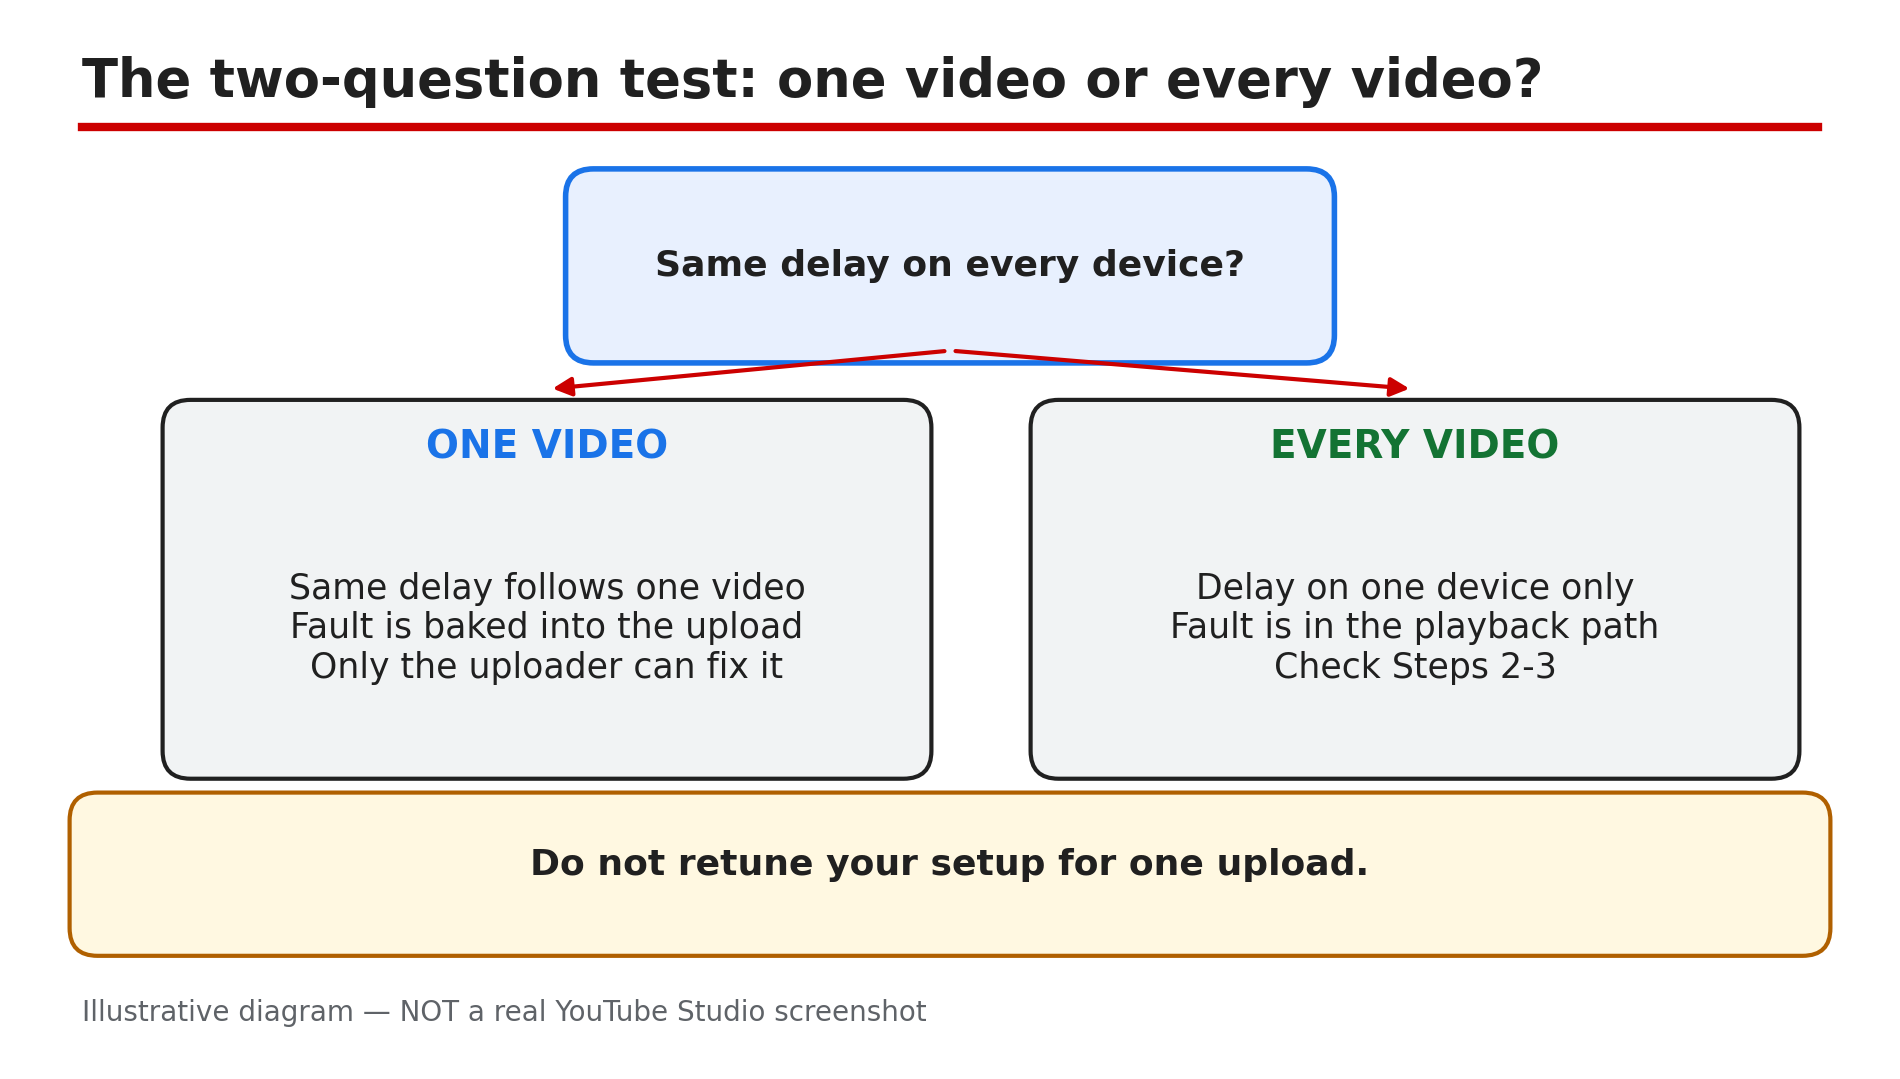
The speaker's lips move, and the words arrive a beat later — or a beat earlier. The sound is there, so this is not a video with no sound at all: the timing is wrong. One quick test tells you whether the fault is baked into the video or sitting in your own playback path, and each answer has a different fix. This guide works through both sides — what viewers can try, and what creators must fix in the file itself. What You Will LearnThe two-question test that splits a video fault from a device fault The viewer fixes to try first: reload, restart, device speakers Why Bluetooth and 5.1 surround delay the sound What YouTube Help says creators must fix How variable frame rate drifts the sound — and the re-encode fix How to fix a fixed offset in a live stream with OBSStep 1 — The two-question test: one video or every video? What to do: Play the same video on another device, and play a different video on the same device. How: If the same delay follows one video across every device — phone, laptop, TV — the fault is baked into that upload, and only the uploader can fix it, as reported. Leave a polite comment saying what is wrong and when it starts. If every video is out of sync on one device while others play fine, the fault is in the playback path — Bluetooth, 5.1 surround, or a soundbar — see Steps 2 and 3. Do not retune your whole setup for one upload. If a video has no sound at all, the checks are different — see our guide to a video with no sound. Example: A lagging tutorial shows the same lag on the viewer's phone. The upload is at fault, not his laptop. Common mistake: Changing TV settings or buying new headphones over one video.Illustrative diagram: the two-question test that splits a sync problem into one video or every video. Step 2 — Viewer fixes first: reload, restart, switch speakers What to do: Reload the video, restart the app or browser, and test with the device's own speakers. How: Reload the page first — as reported, this forces the player to re-sync the streams. On a phone, close YouTube, reopen it, update the app, and restart the phone. Try the same video in another browser: in sync there means the first browser is the suspect — check extensions and clear cached files, as reported. The decisive test is the speakers: switch from Bluetooth to the device's built-in speakers or wired headphones. Bluetooth adds a delay that looks like a sync fault and follows you from video to video, as reported. If playback also stalls, lower the quality — see our guide to a video stuck at low quality. Example: Bluetooth earbuds lag every video slightly; the phone's own speaker lines the lips and words up again. Common mistake: Applying a permanent audio delay to the whole device before checking other videos.Illustrative diagram: the five viewer fixes to try first. Step 3 — On a TV or soundbar: turn off 5.1 surround What to do: Compare the TV's own speakers with your soundbar or receiver, and test with 5.1 surround off. How: Restart the YouTube app first, then play the same video through the TV's own speakers: if only the external audio is delayed, check that device's lip-sync controls — TV sets are slower with the picture than the sound, as reported. In the regular YouTube app, turn off 5.1 surround in the player controls as a test — YouTube says it appears only for supported videos and devices, as reported. On YouTube TV: account avatar, then Settings, then 5.1 audio, and switch it off — Google's documented test for a 5.1 setup, as reported. Example: Through a soundbar, every voice lags; the TV speakers fix it, and a small lip-sync delay on the soundbar finishes the job. Common mistake: Retuning every device to suit one out-of-sync broadcast — report that broadcast instead.Illustrative diagram: comparing TV speakers with a soundbar, and testing 5.1 surround off. Step 4 — Creators: match the track lengths What to do: Open your raw video in your editor and check the tracks are the same length. How: YouTube Help treats this as an upload-side fault: "Make sure that the durations of your audio and video tracks are the same. If your audio track is shorter or longer than your video, your audio and video may not sync correctly." Open the original recording in your editor — not a YouTube download — and compare the track lengths. If one is shorter, stretch or trim it so both end together. Check from start to finish: in sync at the start but not the end means one track is a different length, as reported. No re-timing is possible on a published video, as reported — the fix is a new upload. Example: A 20-minute tutorial drifts near the end — its audio track is three seconds short. Matching the lengths and re-uploading fixes it. Common mistake: Editing the published video in Studio and expecting the drift to go away — Studio cannot re-time baked-in audio.Illustrative diagram: audio and video tracks of the same length stay in sync; a shorter audio track drifts apart. Step 5 — Creators: re-encode to a constant frame rate What to do: Re-encode the file to a constant frame rate, then upload it again. How: Phones and screen recorders write a variable frame rate to save space, as reported, and drift follows when it changes between camera and upload. In your editor, set a constant frame rate — YouTube prefers 24, 25, 30, 48, 50 or 60 frames per second — and export again. Match the audio settings too: AAC-LC, 128–256 kbps, 44100 or 48000. Watch the exported file from the start, jump to the middle, then watch the last minute — drift often shows only late. Upload the new file as a new video, and point viewers to it from the old description. Example: A creator records on a phone and every upload drifts worse toward the end; re-encoding to a constant 30 frames per second ends the drift. Common mistake: Re-uploading the same variable-frame-rate file and hoping the transcode fixes it — it cannot invent timing that was never in the upload.Illustrative diagram: variable frame rate drifts apart, constant frame rate stays in sync. Step 6 — Live streams: clap test, then fix the offset in OBS What to do: Make a short clap-test recording, then correct the offset in your encoder. How: Clap in front of the camera, speak a sentence, and watch it through wired headphones, so Bluetooth does not confuse the test, as reported. If the recording is already out of sync, fix the source timing first. If it looks right, test an unlisted stream. In OBS, open the Audio Mixer, right-click the audio source, choose Advanced Audio Properties, and find Sync Offset: if the clap is heard before the hands meet, the audio is early, and a positive Sync Offset delays it — 100 milliseconds early needs roughly 100 milliseconds of delay, as reported. If the sound comes after the hands meet, the audio is late — check for an existing offset first, and delay the video with a Render Delay filter, as reported. A delay setting only fixes a fixed offset: a growing gap means a source or clock problem — check encoder overload and driver updates, as reported. Latency is different: a stream can run seconds behind real life with correct lip sync, as reported. Example: A streamer hears her clap 150 milliseconds before her hands meet; that Sync Offset lines the stream up. Common mistake: Adding more audio delay when the sound is already late — that makes the problem worse.Illustrative diagram: the clap-test flow — find the offset, set it in OBS, then re-test. Checklist — Fix YouTube audio out of sync☐ Same video on another device; a different video on this device ☐ Reloaded the video and restarted the app or browser ☐ Tested the device's built-in speakers, not Bluetooth ☐ On a TV, compared TV speakers with the soundbar; tested 5.1 off ☐ Creators: audio and video track lengths match in the editor ☐ Creators: re-encoded to a constant frame rate ☐ Creators: uploaded the fixed file as a new video ☐ Streamers: clap test done; OBS Sync Offset setFAQs 1. Why is YouTube audio out of sync only on my TV? TV sets take longer over the picture than the sound, as reported, and Bluetooth or 5.1 surround adds delay. Test the TV's own speakers first, then turn 5.1 off where the option appears. 2. Can I fix out-of-sync audio on a video someone else uploaded? No. If the delay follows one video across every device, it is baked into the upload and only the uploader can fix it, as reported. Leave a comment saying what is wrong and when. 3. My video drifts more toward the end. Why? A variable frame rate, or audio and video tracks of different lengths, as reported. Re-encode to a constant frame rate, match the lengths, and upload the new file. 4. Why does the sound lag only on Bluetooth headphones? Bluetooth adds a delay that looks like a sync fault and follows you from video to video, as reported. Test with built-in speakers or wired headphones to confirm. 5. My live stream starts in sync, then drifts. Will a delay fix it? No. A fixed offset is fixed with an OBS Sync Offset; a growing gap means a source or clock problem, as reported. SourcesYouTube Help — "Troubleshoot audio or video issues with uploads on YouTube" (official source, opened live 14 Nov 2026): http://support.google.com/youtube/answer/58134?hl=en-GB CreatorPlaybook — "YouTube Video Has No Sound? Fix Audio That Disappears (Viewer + Creator Guide)" (topic 108): </blog/youtube-video-no-sound-audio-disappears> CreatorPlaybook — "YouTube Video Stuck at Low Quality? Why 1080p or 4K Is Missing and How to Fix It" (topic 72): </blog/youtube-video-stuck-at-low-quality-why>
- CreatorPlaybook Team
- 14 Nov, 2026
Your Vertical Video Uploaded as a Short (or Won't Upload as a Short) — the 3-Minute Rule
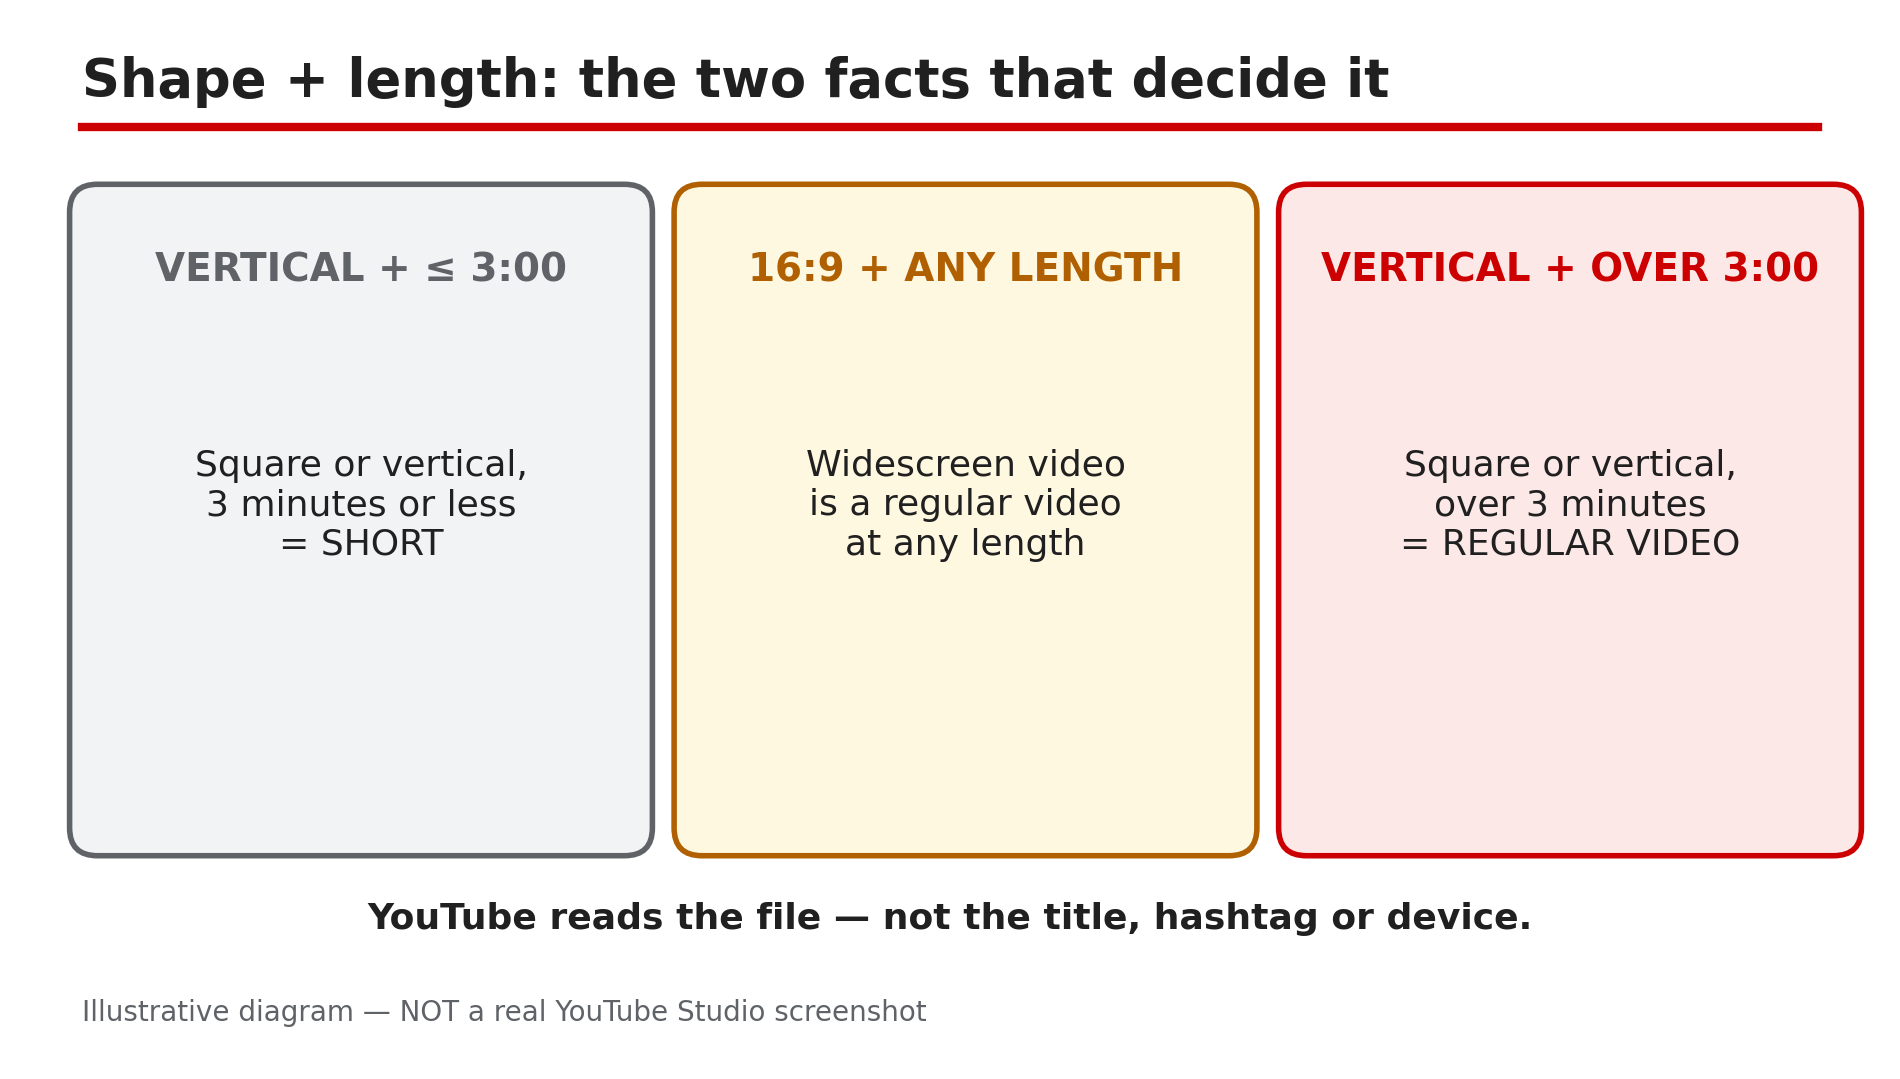
You filmed a two-minute vertical tutorial, expecting a regular video — and YouTube filed it as a Short. Or the opposite: you cut a vertical clip for the Shorts feed, and it shows up as a long-form video. The upload page never asked. YouTube never asks whether an upload is a Short. It decides from the file alone — its shape and its length — as reported on YouTube's Help pages. A square or vertical video of three minutes or less, uploaded on or after 15 October 2024, is a Short. Everything else is a regular video. No hashtag or Studio toggle changes that. What You Will LearnThe exact rule that decides whether an upload is a Short Why a PC upload still becomes a Short How to keep a short vertical video long-form: the 16:9 frame When making it longer than three minutes is the right fix Why a video that should be a Short stays long-form Why older vertical videos stay long-form, and the claim trap over 1 minuteStep 1 — Check the file's shape and length: the two facts that decide everything What to do: Check two facts about your exported file: its aspect ratio and its exact duration. How: YouTube's Help page on three-minute Shorts states the rule, as reported: videos uploaded on or after 15 October 2024 "with a square or vertical aspect ratio up to three minutes in length will be categorized as Shorts on YouTube." Shape: square or vertical counts; 16:9 does not. Length: three minutes or less counts; over does not. Check the file's properties, not the editor preview. Example: A creator exports a 2:45 vertical explainer at 1080x1920 and uploads it. It lands in the Shorts feed — the file matched both conditions. Common mistake: Assuming the upload device matters. The classification runs on the file, not the device, as reported.Illustrative diagram: the two facts — shape and length — that decide whether an upload is a Short. Step 2 — If you wanted long-form, put the vertical clip in a 16:9 frame What to do: To keep a short vertical video out of Shorts, export it inside a 16:9 frame. How: YouTube's own advice is direct, as reported: "If you don't want your content to be classified as Shorts, use a wider aspect ratio such as 16:9 for long-form videos." Create a 1920x1080 project, drop the vertical clip in, and fill the sides — black bars work, or a blurred copy of the clip behind it. Export the 16:9 file and upload that. Check on-screen text is still readable: your subject now fills only the middle third of a TV. Example: A creator's 2:20 vertical cooking tutorial keeps landing in the Shorts feed. She re-exports it in a 1920x1080 sequence with a blurred background — it appears as a regular video. Common mistake: Adding or removing "#Shorts" and expecting a change. The hashtag decides nothing, as reported.Illustrative diagram: the same clip as a vertical file becomes a Short, but inside a 16:9 frame it stays a regular video. Step 3 — If you wanted long-form, make the video longer than three minutes — only if there is real content to add What to do: If the content genuinely runs longer, extend it past three minutes. How: A vertical or square video over three minutes is a regular video under the rule, whatever its shape. If your tutorial has a cut step or section, add it back and let the video run to 3:15 or 3:30. Only do this with real content: padding a 2:50 clip with ten seconds of nothing gives viewers a reason to leave. The 16:9 frame from Step 2 is usually better for a searchable tutorial. Confirm in Studio that the upload appears as a regular video. Example: A creator's vertical repair guide runs 2:55 and lands as a Short. He restores the section he cut, the video becomes 3:25, and the re-upload is a regular video. Common mistake: Looping the ending to push past three minutes. Add real content, or use the 16:9 frame.Illustrative diagram: a 2:50 vertical video is a Short, while a 3:25 vertical video is a regular video — the 3:00 line decides it. Step 4 — Your vertical video won't become a Short: check the length, the export dimensions, and the black bars What to do: If you wanted a Short and YouTube treated it as a regular video, check the same three conditions — length, shape, and the real export dimensions. How: First, length: three minutes or under — editors often add a fraction of a second, so a 3:04 export is over the line. Aim for 2:55 or under. Second, shape: it must be square or vertical. Third, check the export dimensions, not the preview: a vertical clip exported from a 16:9 project with black bars is a 16:9 file to YouTube. Confirm the width is smaller than the height: 1080x1920, not 1920x1080. Example: A creator cuts a vertical clip in a 16:9 project and uploads it — it appears as a regular video. The file is 1920x1080. Re-exporting from a 9:16 sequence fixes it. Common mistake: Judging the shape from the editor preview. YouTube reads the file, not the picture.Illustrative diagram: three checks when a vertical video won't become a Short — length, export dimensions, and black bars. Step 5 — Check the upload date: videos uploaded before 15 October 2024 stay long-form What to do: If an older vertical video never became a Short, check its upload date — the rule is not retroactive. How: YouTube's Help page says videos uploaded before 15 October 2024 "will remain the same, as a long-form video on YouTube," as reported. A vertical video posted in 2023 is still a regular video; the same file uploaded today becomes a Short. For Official Artist Channels the switch came later: uploads on or after 8 December 2025 are Shorts, earlier ones stay long-form, as reported. No detail edit can reclassify an old upload. To put that content in the Shorts feed, upload it again — but a re-upload starts with zero views. Example: A vertical 2:10 video from 2023 sits in a creator's long-form list. It was uploaded before 15 October 2024, so it stays long-form, as reported. Common mistake: Editing the title or tags of an old video and expecting it to flip into a Short.Illustrative diagram: timeline of the 3-minute rule — before 15 Oct 2024, 15 Oct 2024, and 8 Dec 2025 for Official Artist Channels. Step 6 — Watch the claim trap: a Short over one minute with an active claim is blocked worldwide, as reported What to do: Before building a Short over one minute on claimed music, check the claim rules — and the Copyright tab in Studio after uploading. How: YouTube's Help page states, as reported, that any Short over one minute with an active copyright claim of any type, "will be blocked globally on YouTube. The video will not be playable or recommended on YouTube, and will not be eligible for monetization." There are no penalties to your channel, as reported, and once the claim is resolved the Short becomes viewable again. Remove the claimed content or dispute the claim — confirm the options in Studio. A third-party guide reports a possible September 2026 change; it could not be confirmed on the official Help page in this run, so treat the block as the rule. This trap only bites over one minute: as reported, Shorts under one minute are unaffected, so keeping a Short built on claimed music to 60 seconds or under avoids the block. Example: A creator posts a 2:30 Short using a popular song, and it shows zero views. The Copyright tab shows an active claim — the Short is blocked worldwide, as reported. Common mistake: Assuming a claim only takes the revenue. Over one minute, it can block the video entirely.Illustrative diagram: a Short with an active copyright claim — under 1 minute it stays up, over 1 minute it is blocked worldwide. Checklist — Fix a vertical video that uploaded as a Short (or won't upload as one)☐ Checked the file's dimensions and duration, not the editor preview ☐ Confirmed the rule: square/vertical, 3:00 or under, on/after 15 Oct 2024 = Short ☐ To stay long-form: re-exported in a 1920x1080 frame, sides filled ☐ Or extended it past 3:00 with real content ☐ Checked the upload date — pre-15 Oct 2024 stays long-form ☐ Checked the Copyright tab if a Short over 1 minute has no views ☐ Confirmed in Studio the re-upload is in the right placeFAQs 1. Is there a setting in YouTube Studio to upload a vertical video as a regular video? No, as reported: YouTube Help lists only the aspect ratio and the length, and the upload page has no toggle. 2. Why did my video upload as a Short when I uploaded it from my PC? Because YouTube classifies the file, not the device, as reported. Any square or vertical video up to three minutes long becomes a Short. 3. Why is my vertical video not being treated as a Short? Check that the exported file is three minutes or under and its dimensions are actually square or vertical, as reported. A vertical picture exported with black bars is a 16:9 file. Shorts upload at a maximum of 1080p, as reported. 4. Will my older vertical videos turn into Shorts now? No, as reported. Videos uploaded before 15 October 2024 remain long-form; for Official Artist Channels the cut-off is 8 December 2025. 5. Can a copyright claim block my Short completely? Yes, as reported: a Short over one minute with an active copyright claim is blocked globally — not playable, not recommended, not eligible for monetization. Shorts under one minute are not affected. Remove the claimed content or dispute it, and confirm the wording in Studio. SourcesYouTube Help — "Understand three-minute YouTube Shorts" (official source, opened live 14 Nov 2026): https://support.google.com/youtube/answer/15424877 CreatorPlaybook — "YouTube Shorts Music Disappeared or Muted? Why It Happens and How to Fix It" (internal link, URL supplied in the task brief): </blog/youtube-shorts-music-disappeared-or> CreatorPlaybook — "YouTube Shorts Custom Thumbnail Not Showing? How to Fix It" (internal link, URL supplied in the task brief): </blog/youtube-shorts-custom-thumbnail-not>
- CreatorPlaybook Team
- 13 Nov, 2026
YouTube Video Has No Sound? Fix Audio That Disappears (Viewer + Creator Guide)
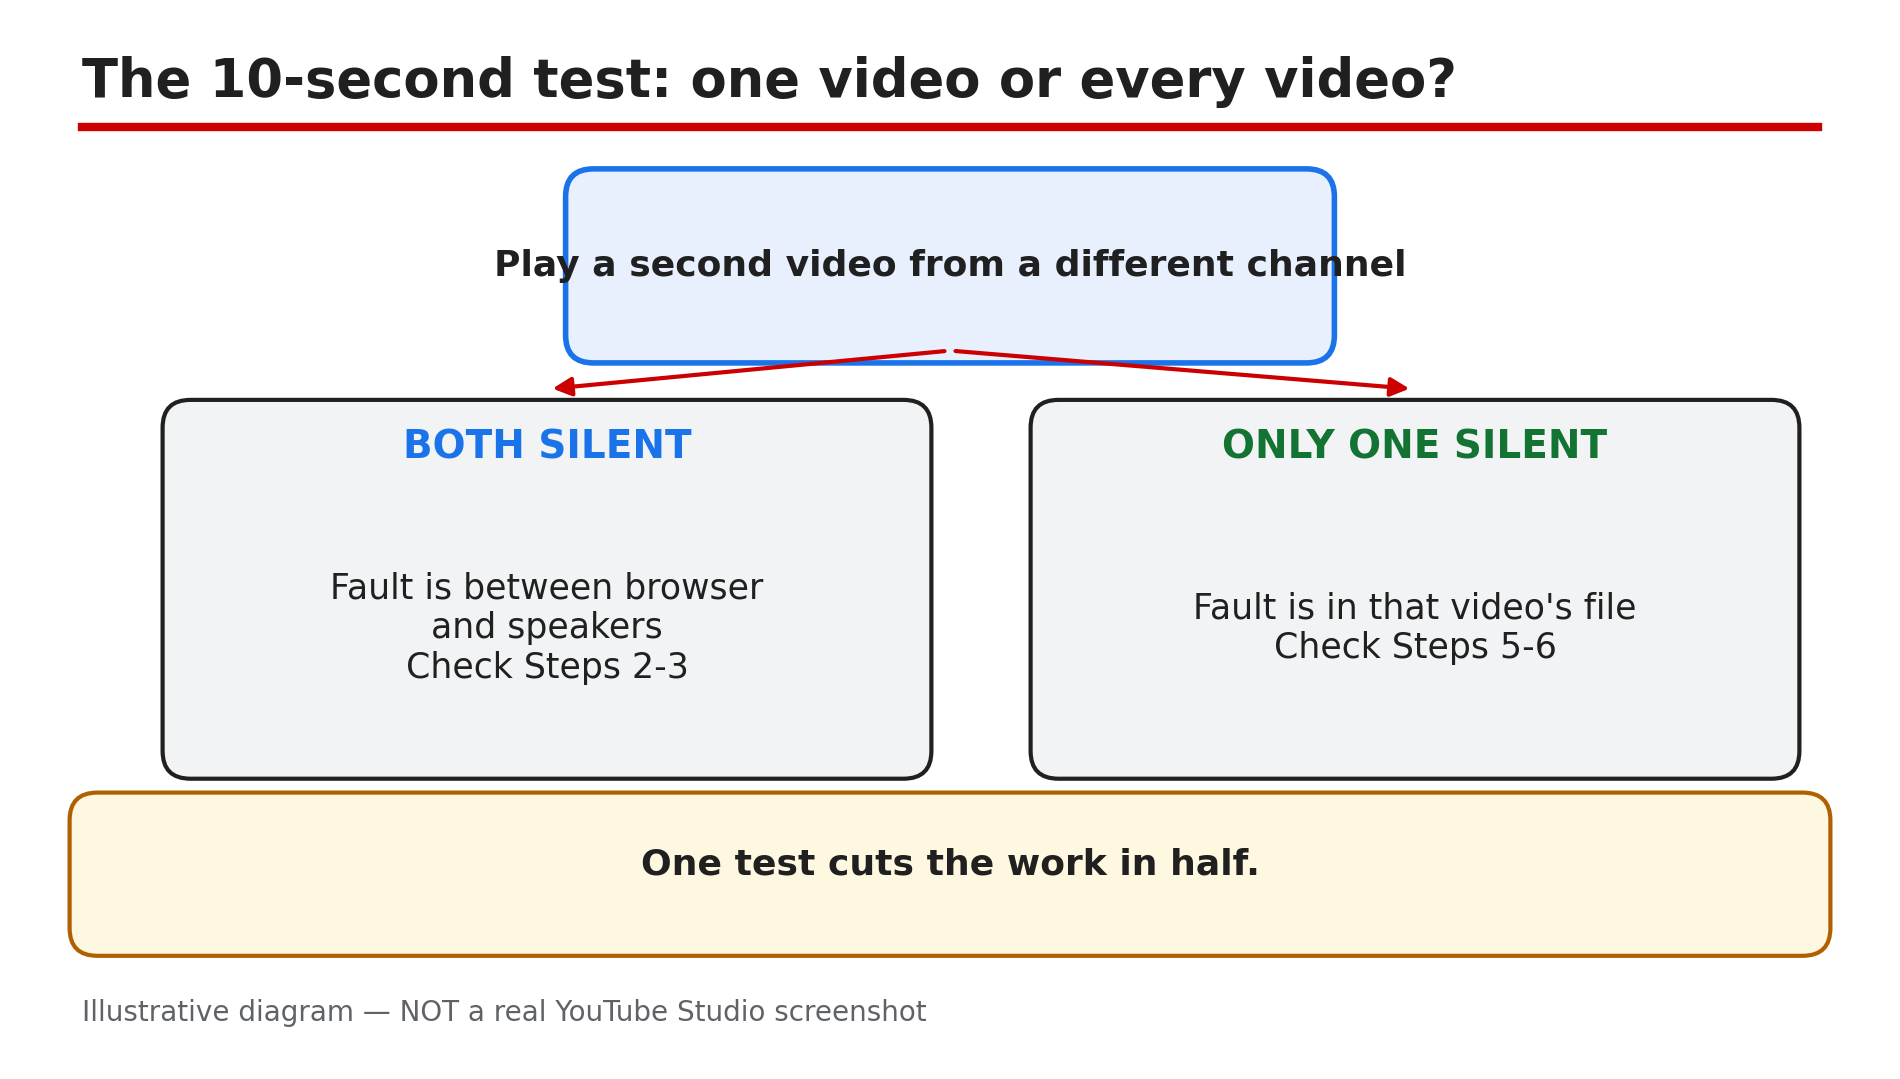
You press play, the picture moves, the lips move — and there is no sound. The cause can sit anywhere between the video file and your speakers: a muted player, a muted tab, an extension, a bad export, a copyright claim, or — since October 2026 — a reported app bug that kills the audio when the player drops out of full-screen. This guide works through them in order. What You Will LearnThe 10-second test that splits the problem in half The five device settings that silence every video How to test whether an extension is in the audio path The reported October 2026 mini-player bug — and the app fixes to try first Why an upload can arrive with picture and no sound What to do when a copyright claim muted the trackStep 1 — Play a second video from a different channel: the test that splits the problem in half What to do: Before you change a single setting, open a second video from a different channel and play it. How: If both are silent, neither file is at fault — the problem sits between the browser and your speakers, so work through Steps 2 and 3. If the second video plays with sound, the first file is the suspect — see Steps 5 and 6. Ask someone else to open the same link too: silent for them as well means the fault is in the video. One test cuts the work in half — people reinstall drivers for an hour over a video silent for every viewer on earth, as the Tribute guide puts it. Example: A viewer restarts his laptop over a silent tutorial, then opens a music video from another channel — it plays fine. The tutorial's track was the problem. Common mistake: Reinstalling drivers or resetting the browser before testing a second video.Illustrative diagram: the 10-second test that splits a no-sound problem in half. Step 2 — Check the five device settings: player, tab, output, app mixer, extension What to do: Work through the five settings on your own device, in order. How: 1. Player volume — hover the speaker icon in the player; it remembers a muted state between sessions. 2. Browser tab — each browser mutes one tab at a time, and the tab keeps that state after a reload. 3. Output device — a laptop paired with a speaker in another room plays the sound where you cannot hear it. 4. App mixer — Windows holds a level per application, so the browser can sit at zero. 5. Extension — ad blockers and volume boosters sit in the audio path; Step 3. Example: A viewer hears nothing on YouTube but Spotify plays loudly — in the Volume Mixer her browser is at zero. One slider fixes it. Common mistake: Turning the system volume up and assuming the player is fine — the player, the tab and the app each have their own volume.Illustrative diagram: the five device settings that can silence every YouTube video. Step 3 — Test in a private window with extensions off: the extension in the audio path What to do: Open the same video in a private (incognito) window with extensions off. How: Ad blockers and volume boosters sit in the audio path and can silence a video. A private window usually runs with extensions disabled, so if the sound returns there, an extension is the cause. Re-enable them one at a time to find the culprit. Still silent? Try another browser: sound in Safari but silence in Chrome points at the browser. Example: A viewer has no sound on any YouTube video in Chrome, but in a private window the sound is back. Disabling his volume-booster extension brings it back. Common mistake: Clearing all cookies and cache first — that wipes your sign-ins. The private-window test is faster.Illustrative diagram: testing a silent video in a private window with extensions off. Step 4 — If the app kicks you out of full-screen and the sound dies: the reported October 2026 bug What to do: If you are on the YouTube app and the video kicks you out of full-screen into the floating mini player — and the sound dies with it — try the app fixes first. How: Android Headlines reported on 2 Nov 2026 that this bug has been around since early October 2026 and affects the app on both Android and iPhone. Viewers report being thrown out of full-screen into the mini player, with the audio killed — and expanding the mini player back does not bring the sound back. First, close the video and play it again — that restores sound for some, not all. If that fails, force-stop and restart the app — that has worked for others. Google had still not responded publicly as of 1 Nov 2026, and no fix had been reported as of 13 Nov 2026 — there is no official Help page for this bug. Example: A viewer on Android sees the player drop to the mini player and the sound stop — she closes the video, reopens it, and the sound is back. Common mistake: Assuming your phone's speakers or headphones broke. If the sound died the moment the player dropped out of full-screen, it is the reported bug, not your hardware.Illustrative diagram: timeline of the reported October 2026 mini-player bug that kills audio. Step 5 — Creators: check the file before you blame the player What to do: If the video is silent for everyone, the fault is in the file — check the export before you blame YouTube. How: YouTube publishes AAC-LC audio at 48 kHz, stereo 384 kbps, as reported — a file with an unusual audio codec can arrive with picture and nothing else. Re-export from your editor, and confirm the file plays with sound on your own machine. Second, check your screen recorder: it offers microphone and system sound, and switches one of them on — a recording that caught the microphone only has no video audio. Third, check mono compatibility: a single lapel mic into a two-channel recorder puts everything on the left channel, and on a phone speaker that reads as silence. Export a centred stereo mix and test it on a phone before uploading. Example: A creator uploads a tutorial and every viewer reports silence, though it sounds fine on her computer — her recorder had captured the microphone only. Common mistake: Re-uploading the same file and hoping YouTube fixes it — the transcode cannot invent audio that was never in the upload.Illustrative diagram: three upload faults that leave a video with picture and no sound. Step 6 — Check the Copyright tab: a claim can mute the whole track What to do: Open YouTube Studio and check the Copyright tab before you blame the export. How: When a claim lands, YouTube offers Erase song, Trim out segment and Replace song — and Erase song mutes either the claimed track or every sound in the video, as reported. If your video went silent after a claim, check the Copyright tab in Studio: the claim appears there with the claimed stretch and the options. Dispute it, replace the song, or trim the segment — and if you use Erase song, confirm in Studio it removed only the claimed audio. Audio is baked into the uploaded file, so a repaired version has to go up as a new upload. The one thing you can add after publishing is an Audio Library track in the Studio editor (Content > video > Editor > Audio) — but the video must be shorter than six hours, as reported. Example: A creator's vlog goes silent overnight — the Copyright tab shows a claim on the background song, and Erase song had muted the entire audio, dialogue included. Common mistake: Using Erase song without checking what it muted — confirm the result in Studio first.Illustrative diagram: the three claim options in YouTube Studio and what Erase song can mute. Checklist — Fix a YouTube video with no sound☐ Played a second video from a different channel first ☐ Checked the player's volume — it remembers a muted state ☐ Checked the browser tab is not muted ☐ Checked the output device and the app volume mixer ☐ Tested in a private window with extensions off ☐ If the app dropped out of full-screen, reopened the video, then restarted it ☐ Creators: confirmed the file plays with sound on your own machine ☐ Checked the Copyright tab in Studio before re-uploadingFAQs 1. Why do YouTube videos have no sound in Chrome but sound fine in Safari? A muted tab or an extension in the audio path explains almost every case, as reported. Open the same link in a private window with extensions off — if the sound returns, the browser was the problem. 2. My uploaded video is silent. Can I fix it without losing the views? No. Audio is baked into the uploaded file, so a repaired version has to go up as a new upload, as reported. The only change after publishing is an Audio Library track in the Studio editor. 3. How do I tell whether a claim muted my video? Open YouTube Studio, then the Copyright tab. A claim appears there with the claimed stretch and the options — dispute it, replace the song, or trim the segment. 4. Why is the sound gone only on my phone, but fine on my computer? Check mono compatibility first: audio on one channel only can read as silence on a phone speaker while playing on a computer, as reported. Also check Bluetooth — a paired speaker in another room can look like a video fault. 5. Is the October 2026 mini-player bug fixed yet? As reported, no. Reports as of 1 Nov 2026 said the bug was still affecting users on Android and iPhone, and Google had still not responded publicly. Reopening the video or restarting the app works for some, not all. SourcesAndroid Headlines — "YouTube's Latest Bug Silences Videos and Dumps You Into the Mini Player" (primary source for the bug report, opened live 13 Nov 2026): https://www.androidheadlines.com/2026/11/youtubes-latest-bug-silences-videos-and-dumps-you-into-the-mini-player.html CreatorPlaybook — "YouTube Shorts Music Disappeared or Muted? Why It Happens and How to Fix It" (internal link, URL copied from the plan file): </blog/youtube-shorts-music-disappeared-or> CreatorPlaybook — "YouTube Video Unavailable? What Each Playback Error Means and How to Fix It" (internal link, URL copied from the plan file): </blog/youtube-video-unavailable-what-each>
- CreatorPlaybook Team
- 13 Nov, 2026
YouTube Branding Watermark Not Showing? Fix It and Stop Chasing the Hover Subscribe Button
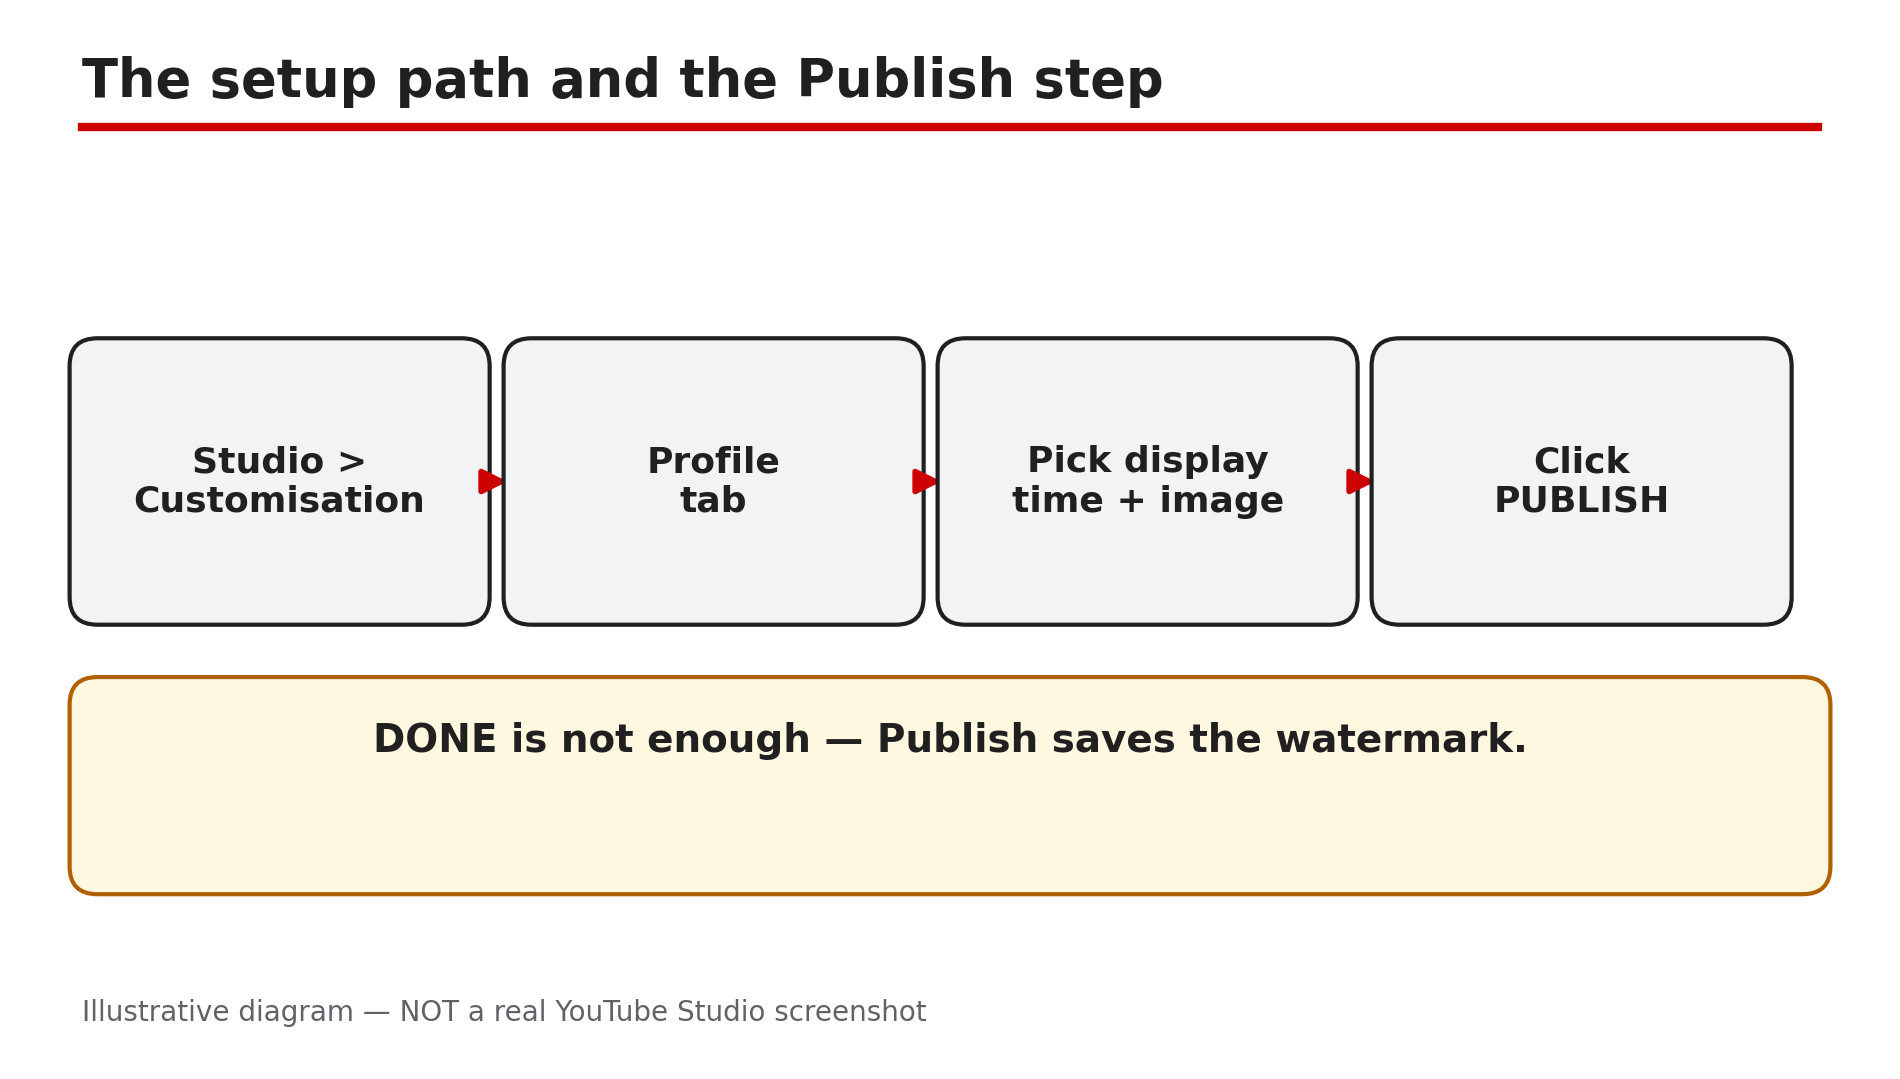
You set a branding watermark — the small channel logo in the corner of your videos — and then you watch your own video and it is not there. Or you hover over the corner expecting a Subscribe button to pop up, and nothing happens. Most watermark problems have a small set of causes — and one is not a problem at all: YouTube removed the desktop hover-to-subscribe button in 2025. What You Will LearnWhere the watermark setting lives, and the Publish step people skip The image rules: square, at least 150 x 150 pixels, under 1 MB How long to wait before deciding the watermark is broken Why Made for Kids videos never show a watermark Where it does and does not appear: mobile, embeds, chromeless players What YouTube removed in September 2025 — and what to use insteadStep 1 — Check the watermark is set up — and that you clicked Publish What to do: Open the watermark setting in Studio and confirm the image is there, a display time is chosen, and you clicked Publish. How: YouTube's Help page gives the path: sign in to YouTube Studio, select Customisation, then Profile, choose a display time — end of video (last 15 seconds), a custom start time, or the entire video — click CHANGE, pick your image, click DONE, then click PUBLISH. That last click is the one people miss: changing the image and closing the page does not save it. Example: A creator uploads a new logo, picks "Entire video", closes the tab, and checks a video — no watermark. She re-uploads it, clicks Publish, and the watermark appears. Common mistake: Looking for the watermark under video settings or in the YouTube app. It is channel-wide, under Customisation, set in Studio on a computer.Illustrative mock-up: the four steps to set a video watermark in YouTube Studio. Step 2 — Check the image: square, at least 150 x 150 pixels, under 1 MB What to do: Confirm your image meets YouTube's watermark rules before blaming anything else. How: YouTube's Help page lists the rules plainly: the watermark must be a square image, at least 150 x 150 pixels, and less than 1 MB in size. A rectangular logo will not work as uploaded — crop it to a square first, or put it on a square transparent background. A file over 1 MB will not save. Keep the design simple: a watermark sits small in a video corner, so fine detail and thin text turn into a smudge. Example: A gaming channel uploads a wide banner-style logo as its watermark and nothing shows — the image is 1200 x 300 pixels, not square. She crops it to a 500 x 500 pixel square PNG under 1 MB, uploads it, clicks Publish, and it appears. Common mistake: Uploading the channel banner as the watermark. The banner is 16:9 and the watermark must be square — different images for different jobs.Illustrative diagram: the three image rules for a YouTube video watermark. Step 3 — Wait: allow up to 12 to 24 hours for the watermark to appear What to do: After a correct setup and Publish, wait before changing anything again. How: A new or changed watermark does not always appear instantly on every video. As reported by creator guides, allow up to 12 to 24 hours for the change to propagate across YouTube. If you keep re-uploading the image every ten minutes, you restart the wait each time and never learn whether the first upload worked. Make one correct change, click Publish once, and leave it alone for a day. Example: A creator sets a watermark at noon, checks a video at 12:15 and sees nothing, then deletes it and uploads a different file. By evening, neither image shows reliably. She sets it once more, clicks Publish, and by morning it is on every video. Common mistake: Treating a watermark that has not appeared yet as one that will never appear. Ten minutes is not a test — a day is.Illustrative diagram: how long a new watermark can take to appear everywhere. Step 4 — Check the video: Made for Kids videos never show a watermark What to do: Open the video in Studio and check its Audience setting — if it is Made for Kids, the watermark is switched off by design. How: YouTube's Help page states it directly: video watermarks are not available on videos set as Made for Kids, and if a video that previously showed a watermark is later set as Made for Kids, viewers will not see it. This is not a bug and no setting overrides it. To check, open the video's Details in Studio and look at Audience. If the setting is wrong — a video for adults marked as Made for Kids by mistake — change it to "No, it's not made for kids" and save. Example: A creator notices the watermark on all her videos except one, which YouTube's classifier marked Made for Kids. She corrects the Audience setting, and the watermark comes back. Common mistake: Re-uploading the watermark or the video when one video is affected. One video missing a watermark while the rest show it points at that video's settings, not the channel-wide watermark.Illustrative diagram: how the Made for Kids setting affects the video watermark. Step 5 — Check where you are looking: mobile, embeds and chromeless players hide it What to do: Test the watermark on a desktop browser in landscape, and compare with where you first noticed it missing. How: YouTube's Help page says the channel watermark is available in landscape view on computers and mobile devices, and that it is not clickable on mobile. It also says channel watermarks do not show on custom chromeless players or Adobe Flash. So if you watch on a phone held upright, in a small embedded player, or inside an app using a chromeless player, the watermark may be invisible or unclickable — expected behaviour, not a fault. Example: A creator checks his video on his phone in portrait mode and sees no watermark. On his laptop the watermark sits in the corner of the same video. Nothing is broken — the portrait player simply does not show it the way the desktop player does. Common mistake: Testing on one device in one orientation and concluding the watermark is gone everywhere. Confirm on desktop before changing the setting.Illustrative diagram: where the channel watermark appears and where it does not. Step 6 — Stop waiting for the hover-to-subscribe button: YouTube removed it in September 2025 What to do: Accept that hovering over the watermark on desktop no longer shows a Subscribe button — and move your subscribe ask to places that still work. How: In an announcement dated 24 September 2025, YouTube said it was removing the Subscribe button that appears when you hover your cursor over a video's branded watermark on desktop. A Subscribe button already sits directly below the video player, so the extra button was removed to simplify the viewing experience, and less than 0.05% of all channel subscriptions came from the hover-to-subscribe feature. The announcement also said clearly: you can still add both end screens and watermarks to videos — the watermark itself is not removed, only the hover button is. Example: A creator hovers over the watermark, sees no Subscribe button, and spends an hour re-uploading the watermark and changing browsers. Then she reads the September 2025 announcement: the button is gone for everyone. Common mistake: Treating the missing hover button as proof the watermark is broken. The watermark's job now is branding — a small logo in the corner. Use an end screen, a pinned comment, or a spoken call to action instead.Illustrative diagram: the hover-to-subscribe button was removed in September 2025, but the watermark itself remains. Checklist — Fix a branding watermark that is not showing☐ Watermark set in Studio > Customisation > Profile, with a display time chosen ☐ Clicked Publish — not just DONE ☐ Image is square, at least 150 x 150 pixels, under 1 MB ☐ Waited up to 12 to 24 hours after publishing before changing it again ☐ Checked the video is not set as Made for Kids ☐ Tested on a desktop browser in landscape, not only on a phone ☐ Checked the video is not playing in a chromeless embedded player ☐ No longer expecting the hover-to-subscribe buttonFAQs 1. I set the watermark and clicked Publish, but it is still not showing. What now? Wait up to 12 to 24 hours, as reported, and test on a desktop browser. If it is still missing after a day, re-open Customisation > Profile — if the field is empty, the setting never saved, so set it again and click Publish. 2. Does the watermark show on every video? It shows channel-wide, with one big exception: videos set as Made for Kids never show it. It also may not appear in chromeless embedded players, and it is not clickable on mobile. 3. Can viewers still subscribe by clicking the watermark? No — not since September 2025. YouTube removed the desktop hover-to-subscribe button. Viewers subscribe using the Subscribe button below the player, or through an end screen. The watermark itself remains as branding. 4. Why does the watermark show on my laptop but not on my phone? YouTube says the watermark is available in landscape view on computers and mobile devices and is not clickable on mobile. In portrait on a phone, or inside some embedded players, it may not appear at all. 5. Is my watermark too small or too big? YouTube requires a square image of at least 150 x 150 pixels and under 1 MB — a 500 x 500 pixel PNG is a safe choice. Keep the design simple. SourcesYouTube Help — "Manage your channel branding" (official page, opened live 13 Nov 2026): https://support.google.com/youtube/answer/10456525?hl=en-GB YouTube Community announcement — "New 'Hide' End Screens Button & Changes to Desktop Hover-to-Subscribe Button", 24 Sep 2025 (official announcement thread, opened live 13 Nov 2026; the thread page itself rendered only its title, so the quoted wording is from the search result of the same thread, confirmed by multiple reports): https://support.google.com/youtube/thread/375578802?hl=en&msgid=439836592 CreatorPlaybook — "YouTube Banner or Profile Picture Not Updating After Change" (internal link, URL copied from the plan file): </blog/youtube-banner-or-profile-picture-not>
- CreatorPlaybook Team
- 12 Nov, 2026
YouTube Studio Mobile App Missing Features? Desktop-Only Tasks and the Workaround
You open the YouTube Studio app on your phone, look for the end screen button, the bulk edit option or the channel customisation page — and none of them is there. Before you reinstall the app or assume your account is broken, stop: the Studio mobile app is a condensed version of desktop Studio by design, and several jobs simply do not exist in it. This guide lists the desktop-only tasks, shows how to tell a missing feature from a real fault, and gives the workaround for full Studio on a phone. What You Will LearnTelling a missing feature from a broken app Desktop-only tasks: bulk editing, detailed analytics, monetisation controls Why customisation, end screens and cards are not in the app Why Shorts thumbnails need a computer How to open full desktop Studio on a phone What the app is actually good forStep 1 — Confirm it is a missing feature, not a fault: right app, right account, updated version What to do: Before concluding a feature is missing, confirm you are in the Studio app, on the right channel, updated. How: The regular YouTube app and the YouTube Studio app are two different apps — the one you watch videos on cannot manage a channel at all, so make sure you opened YouTube Studio. Then check the channel: tap your profile picture and confirm the channel name — a feature can look missing on the wrong account or a different Brand Account channel. Finally, update the app — YouTube rolls features out gradually, and an old version can lack a newer control. If it is still absent after those three checks, it is almost certainly a desktop-only task, not a fault. Example: A creator cannot find the end screen button and reinstalls the app twice. The app was fine — end screens are not in the mobile app. Common mistake: Clearing app data or factory-resetting the phone to "fix" a missing feature. A desktop-only task does not appear after a reset, and clearing data signs you out of every account on the phone.Illustrative diagram: the YouTube app and the YouTube Studio app are two different apps. Step 2 — Bulk editing: changing many videos at once needs a computer What to do: To change the title, tags, description, visibility or end screens of many videos at once, use desktop Studio — the app edits one video at a time. How: Desktop Studio lets you select several videos in Content and edit them together: change the category, tags, visibility or audience setting across twenty uploads in one action. The mobile app has no multi-select and no bulk editor — each video must be opened and edited individually. As reported, this is one of the most commonly missed features, and no setting in the app unlocks it. If you only need to fix one video, the app is fine; if you need to fix fifty, use a computer. Example: A creator rebrands and needs to add the same tag to 60 old videos — 60 separate edits in the app, one bulk edit in desktop Studio. Common mistake: Editing videos one by one in the app and giving up halfway, leaving half the channel with the old tags. Batch the job in desktop Studio instead.Illustrative diagram: what the Studio app can do compared with what it cannot do. Step 3 — Detailed analytics: retention curves and traffic-source reports are desktop-only What to do: For the deep reports — retention curves, traffic sources and revenue breakdowns — use desktop Studio; the app shows summaries, not the full picture. How: The app's Analytics tab gives a useful overview: views, watch time and subscribers over the last few days, and a simple per-video summary. What it does not give you is the detailed retention curve with its key moments — Intro, Top moments, Spikes and Dips — or the full traffic-source breakdown, or the detailed revenue reports. Those live in desktop Studio under Analytics > Engagement and Analytics > Revenue. The app is fine for a morning check of yesterday's numbers. Example: A creator's video has 50,000 views but low watch time. The app shows the low number but not the curve. In desktop Studio the retention graph shows a cliff at 30 seconds — the hook broke the title's promise. Common mistake: Judging a video by the app's headline numbers alone. The summary hides where viewers leave.Illustrative diagram: bulk editing in desktop Studio compared with one-by-one editing in the app. Step 4 — Monetisation controls and channel customisation: full settings live on desktop What to do: For ad placements, mid-roll positions, channel layout, featured sections, the trailer and the watermark, use desktop Studio — the app only shows basic monetisation figures. How: The app shows revenue and RPM figures, but as reported, detailed monetisation management needs the desktop version: choosing where ads appear, setting mid-roll positions, and the full set of Earn-tab controls. The same applies to channel customisation. YouTube's Help page on customising your channel layout describes the workflow in Studio: Customization > Home tab, add sections, set a trailer and a featured video, then Publish. The app lets you update individual video details and reply to comments, but not channel-level layout and branding. Example: A creator wants to add a featured section for a new playlist series. In the app there is no Customization menu. In desktop Studio it is Customization > Home tab > Add section, then Publish. Common mistake: Assuming the channel layout is broken because the Home tab looks empty on a phone. The Home tab only shows the sections you set up, and setting them up is a desktop job.Illustrative diagram: the app's analytics summary compared with desktop Studio's detailed reports. Step 5 — End screens, cards and custom Shorts thumbnails: computer-only, by design What to do: Add end screens and cards, and upload custom Shorts thumbnails, in desktop Studio — the app does not offer them. How: YouTube's Help page on end screens describes the workflow in Studio: Content, click the video, then Editor, then End screen — an Editor that exists in desktop Studio, not in the mobile app. The page also notes end screens are not available on mobile web, except on iPad. Cards follow the same rule: they are placed in the desktop Editor, not the app. Custom Shorts thumbnails are the same — computer-only, verified account required, and the mobile route only picks a frame from the video. None of this is a bug; the tools were built for a desktop screen. Example: A creator records a Short on her phone, opens the Studio app to add a custom thumbnail, and finds only the frame picker. She opens studio.youtube.com in her phone's browser in desktop mode and uploads the thumbnail there. Common mistake: Uploading the Short from the app and assuming the thumbnail cannot be changed afterwards. It can — in desktop Studio, by editing the video and choosing a custom thumbnail.Illustrative diagram: end screens, cards and custom Shorts thumbnails need a computer. Step 6 — The workaround: open full desktop Studio in your phone's browser What to do: When a job needs desktop Studio, open studio.youtube.com in your phone's browser and request the desktop site. How: As reported by third-party guides, the reliable route is: open your phone's browser (Chrome on Android, Safari on iPhone), go to studio.youtube.com, sign in to the right Google account, and use the browser menu to request the desktop site — on Chrome it is "Desktop site", on Safari it is "Request Desktop Website". YouTube may show a banner saying "Get the app" — do not tap it, or you will be sent back to the condensed app. Tap "Continue to Studio" instead, and the full desktop Studio loads in the browser. It is fiddly on a small screen — zoom and scroll carefully, and use landscape orientation for the Editor. Do not install third-party "desktop mode" tools; they are not official, and they ask for your Google sign-in. Example: A creator on a train needs to add an end screen before a video goes live. She opens studio.youtube.com in Chrome, taps "Desktop site", taps "Continue to Studio", and adds the end screen — all from her phone. Common mistake: Tapping "Get the app" and then wondering why the feature is still missing. The app is the condensed version; the desktop site in the browser is the full version.Illustrative mock-up: the four steps to open full desktop Studio on a phone. Checklist — Get a desktop-only task done from your phone☐ Confirmed I opened YouTube Studio, not the YouTube app ☐ Confirmed the right Google account and channel ☐ Updated the Studio app ☐ Identified the task as desktop-only ☐ Opened studio.youtube.com in the phone browser ☐ Requested the desktop site in the browser ☐ Tapped "Continue to Studio", not "Get the app" ☐ Did not install any third-party desktop-mode toolFAQs 1. Why can't I add end screens in the Studio app? Because end screens are a desktop-only feature. YouTube's Help page describes adding them through the Editor in Studio on a computer. Use desktop Studio in your phone's browser instead. 2. Can I bulk-edit videos in the Studio app? No. The app has no multi-select or bulk editor — each video must be edited one at a time. Desktop Studio lets you select several videos and change them together. 3. Is the Studio app broken if the Customization menu is missing? No. Channel customisation lives in desktop Studio's Customization menu, which the app does not include. It is a missing feature, not a fault. 4. How do I get desktop Studio on my phone? Open studio.youtube.com in your phone's browser, request the desktop site from the browser menu, and tap "Continue to Studio" instead of "Get the app". 5. Are third-party apps that unlock Studio features safe? No — do not use them. They are not official, and they ask for your Google sign-in. Use the desktop site in your own browser instead. SourcesYouTube Help — "Add end screens to videos" (official page, opened live 12 Nov 2026): https://support.google.com/youtube/answer/6388789?hl=en CreatorPlaybook — "YouTube Studio Not Loading, Blank or 'Something Went Wrong'? How to Fix It" (internal link, URL copied from the plan file): </blog/youtube-studio-not-loading-blank-or> CreatorPlaybook — "YouTube Shorts Custom Thumbnail Not Showing? What to Check" (internal link, URL copied from the plan file): </blog/youtube-shorts-custom-thumbnail-not>
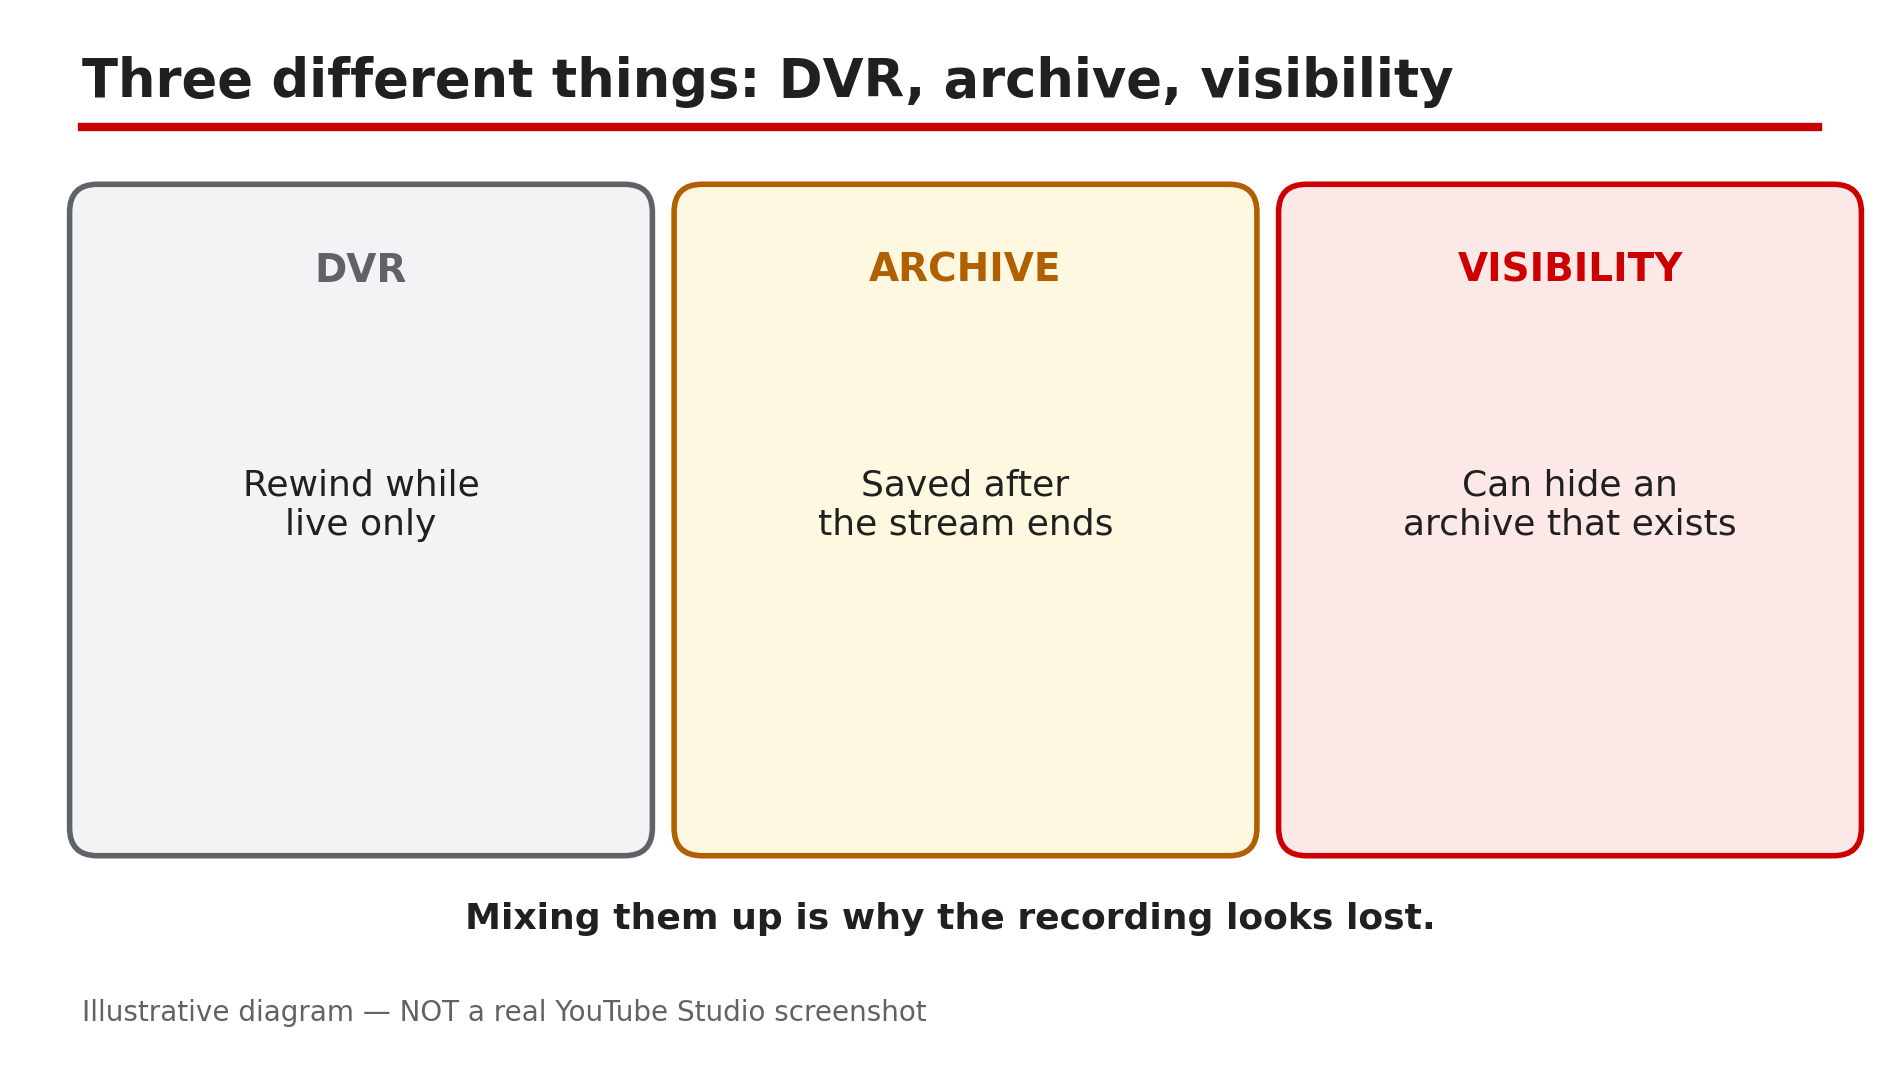
- CreatorPlaybook Team
- 12 Nov, 2026
Live Stream Recording Missing After Your Stream Ends? Why the VOD Disappears
You finish a two-hour livestream, go to your channel to share the recording — and it is not there. No replay, no video on demand, nothing in the Videos tab. Before you assume YouTube deleted it, stop: a missing recording usually has one of a few specific causes, each with a different fix. The key distinction is between three things people mix up: DVR, which only works while you are live; the archive, which YouTube saves after you end; and the visibility setting, which can hide an archive that does exist. What You Will LearnWhere to look first: the Live tab in Studio Why a private or unlisted setting can hide an existing recording The 12-hour archive limit — what it does and does not mean Why DVR saves nothing after the stream ends How long VOD conversion takes How to protect your next stream with a local recordingStep 1 — Check whether the archive exists at all: Studio > Content > Live tab What to do: Open Studio > Content > Live and look for the ended stream. How: YouTube's Help page on archiving live streams says the archive lives under Content > Live in Studio. Sign in to the right account and channel first — a Brand Account stream will not appear under your personal channel. If it is listed, the archive exists — the problem is visibility or processing (Steps 2 and 5). If it is not listed, YouTube did not capture an archive — usually the 12-hour limit in Step 3. Example: A gaming creator ends a four-hour stream and cannot find the replay. In Studio > Content > Live, the stream is listed as Private — the archive exists, it was just never made public. Common mistake: Searching the channel page or YouTube search for the replay. Search indexing is separate and can take days, and the channel page only shows public videos — Studio's Live tab is the only place that tells you whether the archive exists.Illustrative diagram: DVR, the archive and visibility are three different things. Step 2 — Check visibility: the replay may exist but be private or unlisted What to do: Read the archive's visibility — a private or unlisted replay is invisible to viewers. How: In Studio > Content > Live, click the details of the ended stream and select Visibility. A replay set to Private can only be seen by you and people you chose; set to Unlisted, anyone with the link can watch it, but it never appears in the Videos tab. Also check whether the stream was set to "Make unlisted after broadcast" — as reported, that option flips the archive to Unlisted automatically when the stream ends, which is why a public stream can vanish the moment it ends. Example: A creator runs a members-only stream, then wonders why the replay is not on the channel page. The stream settings had "Make unlisted after broadcast" on, so the archive went Unlisted at the end. Common mistake: Assuming the archive was deleted because it is not on the channel page. A private or unlisted archive is still there and still fixable with one setting change.Illustrative mock-up: the four steps to find a live stream archive in YouTube Studio. Step 3 — Check the 12-hour rule: a stream over 12 hours may not be captured at all What to do: Check how long the stream ran — YouTube only promises automatic archiving under 12 hours. How: YouTube's Help page is explicit: "If your live stream is less than 12 hours, YouTube can automatically archive it for you", and "If your stream exceeds 12 hours, it may not be captured at all." Note the wording — "may not be captured" is an archive risk, not proof that YouTube ends a broadcast at 12 hours. No rule says a healthy stream is forcibly stopped at 12 hours — the limit is about what YouTube preserves afterwards. So a 14-hour stream ending with no archive is the documented outcome — restart every 11 hours next time so each part gets its own archive. Example: A creator runs a 24-hour charity stream. Viewers watch live all day, but when it ends there is no replay — the stream ran far past 12 hours. The local recording from Step 6 is the only copy left. Common mistake: Treating 12 hours as a hard cutoff for going live. The broadcast can keep running; it is the archive that is at risk.Illustrative diagram: streams under 12 hours can be archived, longer ones may not be captured. Step 4 — Understand DVR: rewinding while live does not save anything after the end What to do: Stop relying on DVR as a recording — it only exists while the stream is live. How: DVR is the pause and rewind bar viewers see during a live stream — it lets them rewind while the broadcast is still running. It is not a recording — when the stream ends, the DVR window closes with it. YouTube also warns DVR may be limited or unavailable for streams longer than 12 hours, so viewers may not be able to rewind to the start. If viewers say they "rewound it yesterday", they were rewinding the live DVR — there is no DVR left to recover once the archive is missing. Example: A viewer watches the first hour of a stream, pauses it, and comes back after it ends expecting to resume. The stream is over, the DVR is gone, and without an archive there is nothing to resume. Common mistake: Telling viewers "you can rewind it later". You cannot — DVR is live-only. Only the archive, or a local recording you upload yourself, survives the end of the stream.Illustrative diagram: DVR works only while the stream is live. Step 5 — Wait for conversion: a new replay takes minutes to hours, and appears at 144p first What to do: Give the archive time to convert before concluding it is missing. How: After a stream ends, YouTube converts the recording into a video on demand, and as reported that conversion takes minutes to hours depending on the length of the stream. A new broadcast can take 1 to 5 minutes to appear to visitors, as reported. The replay usually appears first at 144p while higher resolutions are still processing. If the stream is listed in Studio > Content > Live but not yet on the channel page, wait, then reload the channel page incognito. Example: A two-hour livestream ends at 9 pm. At 9:05 the replay is nowhere on the channel. By 10:30 it appears, first at 144p, then in HD — the conversion just took time. Common mistake: Deleting the archive and re-uploading because it did not appear in five minutes. The archive was still converting, and the re-upload loses the watch link, the live chat replay and the view count.Illustrative diagram: a live stream replay converts after the stream ends, appearing at low quality first. Step 6 — Protect the next stream: end before 12 hours and keep a local recording What to do: Change the workflow — record locally and plan the stream length around the archive limit. How: YouTube's Help page recommends recording a local archive as a backup — the only reliable protection: set your encoder to record to your own computer while you stream, so you hold a copy whatever YouTube does. A local recording does not force YouTube to create an archive — if no archive was captured, there is no documented way to make YouTube generate one afterwards. With a local file you can upload the recording as a normal video. Also end sessions before 12 hours and check the replay exists before the next stream. Example: A creator who lost a 13-hour stream's archive now records locally on every broadcast and restarts every 10 hours. The next 12-hour event ends with three archives, plus a local file for each part. Common mistake: Assuming a local recording is unnecessary because "YouTube always saves it". YouTube can archive streams under 12 hours — "can" is not a guarantee — and over 12 hours it may not capture anything at all.Illustrative diagram: three habits that protect your next live stream recording. Checklist — Find a missing live stream recording☐ Checked Studio > Content > Live on the right account and channel ☐ Read the archive's visibility — Private or Unlisted hides it ☐ Checked whether "Make unlisted after broadcast" was on ☐ Checked the stream length against the 12-hour limit ☐ Remembered DVR is live-only and saves nothing after the stream ☐ Waited for conversion — minutes to hours, first at 144p ☐ Reloaded the channel page incognito before concluding it is gone ☐ Set up local encoder recording for the next streamFAQs 1. My stream ended an hour ago and there is no replay — is it gone? Not necessarily. Check Studio > Content > Live first: if the stream is listed, the archive exists and the problem is visibility or conversion time. If it is not listed, YouTube did not capture it. 2. Can I recover a stream that ran over 12 hours? There is no documented recovery if YouTube did not capture the archive — a stream over 12 hours "may not be captured at all". Your only copy is a local encoder recording, if you made one. 3. Why did my replay disappear from the channel page right after the stream ended? The stream was probably set to "Make unlisted after broadcast", which flips the archive to Unlisted when the stream ends. Change it to Public in Studio > Content > Live. 4. Viewers could rewind during the stream — why can't they rewind now? That was DVR, which only works while the stream is live. When the stream ends, the DVR window closes — only the archive, or a recording you upload yourself, survives. 5. How long does a replay take to appear after a stream ends? As reported, conversion takes minutes to hours depending on length. The replay usually shows at 144p first. SourcesYouTube Help — "Archive live streams" (official page, opened live 12 Nov 2026): https://support.google.com/youtube/answer/6247592?hl=en CreatorPlaybook — "New YouTube Video Not Showing on Your Channel Page? 6 Checks That Fix It" (internal link, URL copied from the plan file): </blog/new-youtube-video-not-showing-on-your> CreatorPlaybook — "YouTube Live Stream Latency: Normal vs Low vs Ultra-Low — Which One Should You Pick?" (internal link, URL copied from the plan file): </blog/youtube-live-stream-latency-normal-vs>
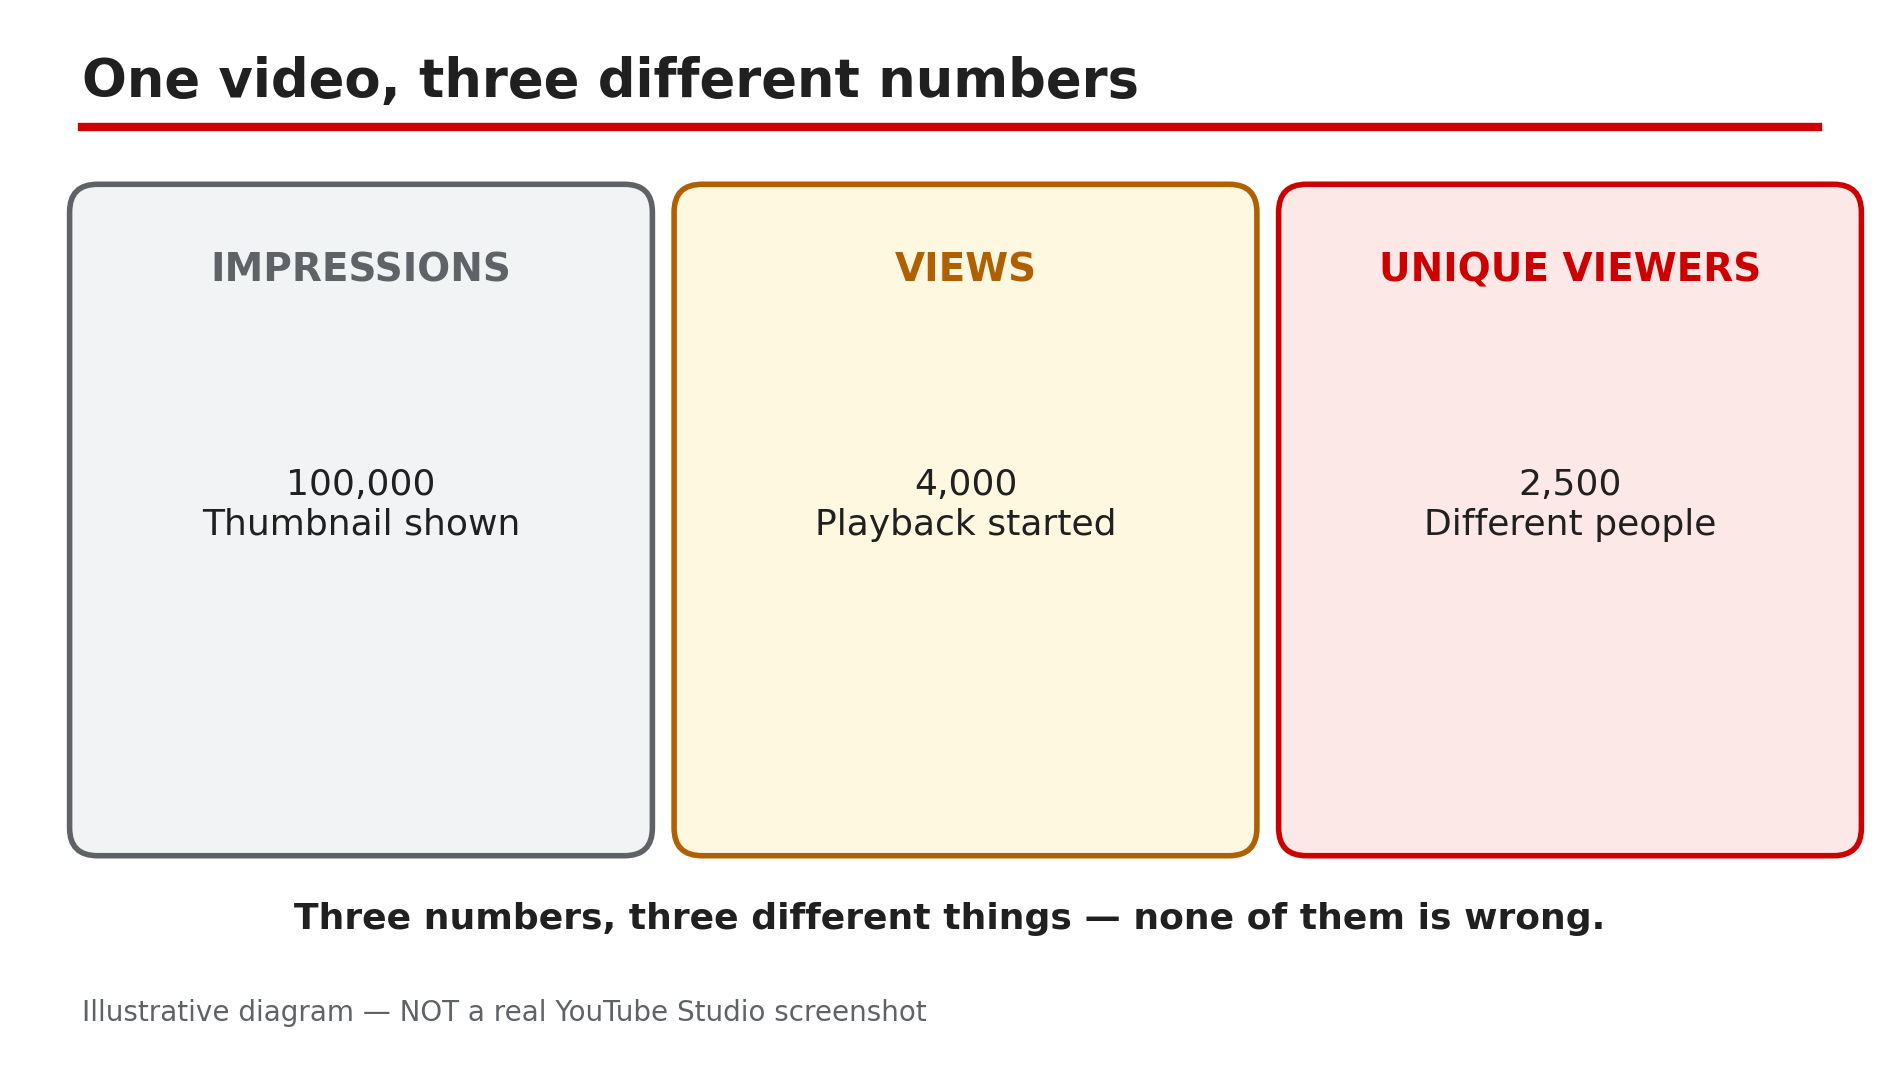
- CreatorPlaybook Team
- 12 Nov, 2026
Views vs Unique Viewers vs Impressions on YouTube: What Each Number Really Means
Open YouTube Analytics and you will see three numbers that look like they should agree — and do not. A video can have 100,000 impressions, 4,000 views and only 2,500 unique viewers — and none of those numbers is wrong. They measure three different things: how many times the thumbnail was shown, how many times playback started, and how many different people watched. Confusing them leads to wrong fixes. This guide defines each number the way YouTube does, then shows how to read them together. What You Will LearnWhat an impression is What impressions click-through rate measures How YouTube counts a view since the 24 August 2026 change What unique viewers counts, and why it is always lower than views What unique reach adds, including co-viewing on one TV How to diagnose a video from the three numbersStep 1 — Impressions: how many times your thumbnail was shown What to do: Read impressions as "chances to be clicked", not as viewers. How: YouTube's Help page defines impressions as the number of times your thumbnail was shown to viewers on YouTube. Every appearance on Home, in search, in Suggested videos or in the Shorts feed is one impression — whether the viewer noticed it or not. One person can generate many impressions by scrolling past the same thumbnail again and again. A video that is never surfaced anywhere gets almost no impressions — a video with zero impressions has a distribution problem, not a thumbnail problem. Example: A new video shows 40,000 impressions in its first week. That does not mean 40,000 people saw it — the thumbnail appeared 40,000 times, many of them the same people scrolling past it on Home. Common mistake: Calling 100,000 impressions "100,000 people reached". Reach is a different number — Step 5 — and impressions alone say nothing about how many people noticed it.Illustrative diagram: one video's impressions, views and unique viewers side by side. Step 2 — Impressions click-through rate: of the people who saw it, how many clicked What to do: Use impressions CTR to judge the thumbnail and title together. How: Impressions click-through rate is how often viewers watched a video after seeing its thumbnail. It is a ratio, not a count: 4,000 views from 100,000 impressions is a 4% CTR. YouTube's Help page says half of all channels and videos sit between 2% and 10% impressions CTR, so a 2–3% CTR is not automatically broken — traffic source moves the number more than niche does. Compare against your own recent videos of similar length, which Analytics shows as typical CTR, not against a stranger's screenshot. Example: Two videos each get 50,000 impressions. One gets 1,500 views (3% CTR), the other 5,000 views (10% CTR) — the second thumbnail earned three times as many clicks from the same chances. Common mistake: Judging a video by CTR alone. A 10% CTR on 1,000 impressions is 100 views; a 3% CTR on 1,000,000 impressions is 30,000 views.Illustrative diagram: an impression is a thumbnail shown, a view is playback started. Step 3 — Views: playback started, counted from the first moment since 24 August 2026 What to do: Read views as "playbacks started" — the rule changed on 24 August 2026. How: YouTube's Help page states that since 24 August 2026, views are counted the moment a video starts to play, across all formats. Before that, a Short counted as a view only after a few seconds of watching; now the count starts at playback. That is why Shorts view counts jumped after the change while watch time did not. YouTube also validates playbacks while counting, so the public counter can slow down, freeze or fall while low-quality playbacks are discarded — replaying your own video on two phones is YouTube's own example. Example: A Short published in July 2026 showed 800 views after a day; the same Short republished after the change shows 1,400 views in a day with the same watch time. The audience did not change — the rule did. Common mistake: Comparing a video's views across the 24 August 2026 change as if the rule stayed the same. Views before and after that date were counted differently — a jump or drop across that line is a measurement change, not a performance change.Illustrative diagram: how YouTube's view-counting rule changed on 24 August 2026. Step 4 — Unique viewers: how many different people watched What to do: Read unique viewers as your audience size — one person watching five times is five views but one unique viewer. How: YouTube defines unique viewers as the estimated number of viewers who watched your content within the selected date range. The key word is estimated: YouTube deduplicates by signed-in accounts and device signals, and it cannot perfectly identify every person. The gap tells you about repeat watching — a tutorial with 10,000 views and 9,000 unique viewers was mostly watched once each, while a music video with 10,000 views and 3,000 unique viewers was rewatched heavily. Example: A 10-minute how-to has 5,000 views and 4,800 unique viewers — almost everyone watched once. A 30-second Short has 50,000 views and 12,000 unique viewers — the same people looped it several times each. Common mistake: Treating unique viewers as a smaller, worse version of views. It is the audience size; views are the audience size multiplied by how often they came back.Illustrative diagram: the same view count can mean one repeat viewer or five different people. Step 5 — Unique reach: the people who saw it, including co-viewing on one TV What to do: Use unique reach for how many people the video actually reached, including people watching together. How: Unique reach is the estimated total number of individual people who saw your video or channel, accounting for shared viewing on devices like YouTube TV and the main YouTube app on TV. The Help page gives the example directly: if three people watch your video together on one TV, it counts as one view but the video's unique reach increases by three. The related metric, Views (Co-viewed), does the same — a family of three watching twice counts as six co-viewed views. On a channel whose audience watches on TV, views understate the real audience, and unique reach corrects for it. Example: A family channel's video shows 20,000 views and 32,000 unique reach. The gap is not an error — households watching together on the living-room TV, where one playback reaches three or four people. Common mistake: Comparing unique reach with unique viewers as if they were the same thing. Unique viewers counts people who watched; unique reach counts people who saw the video or channel, including co-viewers who never pressed play.Illustrative diagram: three people watching on one TV count as one view but three in unique reach. Step 6 — Read the three numbers together: the diagnosis is in the combination What to do: Put the three numbers side by side before deciding what to fix — each pattern points at a different problem. How: High impressions with low views means the thumbnail and title are not earning clicks — a packaging problem, and our guide on thumbnail CTR stuck at 2–3% shows how to test your way up. High impressions with low unique viewers means the same small pool keeps seeing the thumbnail — a distribution problem. High views with low unique viewers means heavy rewatching: the video holds its audience but is not reaching new people, so the fix is distribution and topic choice. Low impressions with high CTR means the packaging works but YouTube is not surfacing the video — check the topic and title keywords. Example: One video has 200,000 impressions, 3,000 views and 2,800 unique viewers — CTR is 1.5%, so the thumbnail is the problem. Another has 200,000 impressions, 12,000 views and 3,000 unique viewers — CTR is fine, but the same 3,000 people watched four times each, so the problem is reach. Common mistake: Fixing the thumbnail when the problem is distribution, or re-editing the video when the problem is the thumbnail. The three numbers together tell you which to fix — changing the wrong thing wastes a week.Illustrative diagram: three number patterns and the problem each one points to. Checklist — Read your Analytics numbers correctly☐ Checked impressions in the Reach tab, not just the headline count ☐ Compared impressions CTR with my own recent videos, not a stranger's ☐ Remembered views count from playback start since 24 Aug 2026 ☐ Read unique viewers as audience size, not a smaller view count ☐ Checked unique reach for co-viewing on TV ☐ Compared views with unique viewers to spot rewatching ☐ Diagnosed from the combination, not from one number alone ☐ Did not compare views across the 24 August 2026 counting changeFAQs 1. Why are my views higher than my unique viewers? Views count playbacks; unique viewers count people. One person watching five times is five views and one unique viewer — a big gap usually means heavy rewatching. 2. Why do my impressions keep rising but my views stay flat? Your thumbnail is being shown but not clicked — a thumbnail and title problem. Check the packaging before touching the video itself. 3. Are impressions the same as reach? No. Impressions count how many times the thumbnail was shown, including repeats to the same person. Unique reach counts individual people who saw the video or channel, including people watching together on one TV. 4. Did the 24 August 2026 change make my Shorts views go up? Very likely. Since that date a view counts the moment playback starts, so Shorts views rose while watch time stayed the same. It is a counting change, not an audience change — and it does not change YPP earnings, which still use engaged views. 5. My views froze for a day — is something broken? Usually not. YouTube validates playbacks while counting, so the public counter can slow down, freeze or fall while low-quality playbacks are discarded. A count stuck at zero with no impressions at all is a distribution problem instead. SourcesYouTube Help — "Understand your YouTube content performance" (official page, opened live 12 Nov 2026): https://support.google.com/youtube/answer/12220281?hl=en CreatorPlaybook — "YouTube CTR Suddenly Dropped After the 24 August 2026 View-Counting Change? What Really Happened" (internal link, URL copied from the plan file): </blog/youtube-ctr-suddenly-dropped-after-24> CreatorPlaybook — "How to Read Your YouTube Retention Graph: Dips, Spikes and What to Fix" (internal link, URL copied from the plan file): </blog/how-to-read-your-youtube-retention>
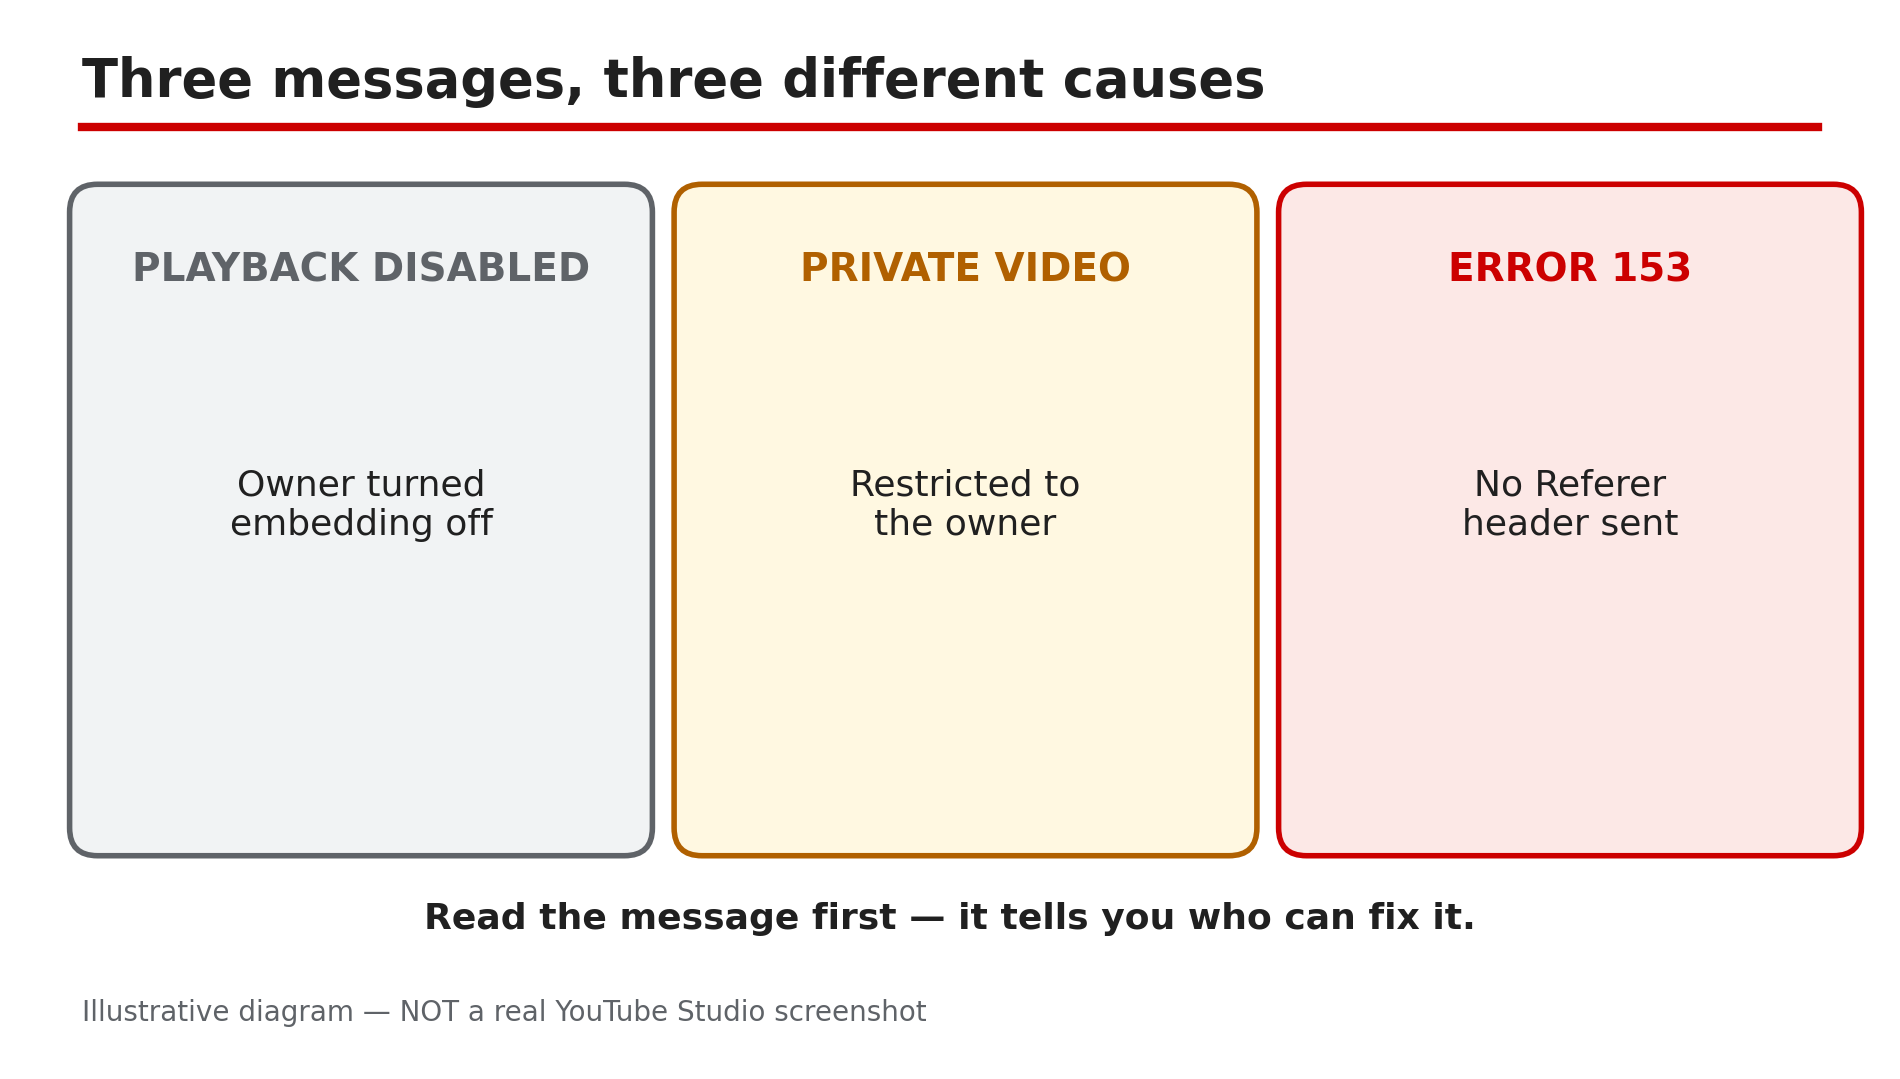
- CreatorPlaybook Team
- 12 Nov, 2026
Embedded YouTube Video Not Playing? "Playback on Other Websites Disabled" Fix
You paste a YouTube video into your website or blog, and instead of the player your visitors see: "Playback on other websites has been disabled by the video owner." The video plays fine on YouTube itself — the owner has switched off embedding, or something else blocks playback outside YouTube. This guide works through the causes in order. What You Will LearnWhat the "Playback on other websites disabled" message actually means Where the owner's embedding setting lives in YouTube Studio Why private videos can never be embedded, but unlisted videos can How age restrictions, region blocks and copyright claims break embeds Why newer channels may have embedding restricted until Advanced Features are unlocked What website owners should check in their own embed codeStep 1 — Read the exact message first: not every failed embed has the same cause What to do: Match the fix to the exact words on screen — three messages mean three different problems. How: If the player says "Playback on other websites has been disabled by the video owner", the owner turned embedding off — only the owner can change it. If it says the video is private, it is restricted to the owner and invited viewers. If it says the video is unavailable in your country, the rights holder has blocked it in your region. If it shows "error 153", YouTube's Help page says the embed request arrived without an HTTP Referer header — a website problem, covered in Step 6. Example: A blogger embeds a tutorial and sees the "disabled by the video owner" message. She emails the owner, who switches the setting on — the same embed code works that day. Common mistake: Rebuilding the embed code before reading the message. The words on the player already tell you who can fix it.Illustrative diagram: three embed error messages and what each one means. Step 2 — Check the owner's embed setting: Studio > Content > Details > Show More > Allow embedding What to do: If you own the video, confirm "Allow embedding" is ticked — the most common cause of this error. How: YouTube's Help page gives the exact path: in YouTube Studio, open Content, click Details next to the video, select Show More at the bottom, then tick "Allow embedding" under Distribution and click Save. The setting is per video, not channel-wide, so a video you uploaded last year can have embedding off while a new one has it on. If you are not the owner, you cannot change this — ask the owner, or pick a different video that allows embedding. Example: A creator embeds his own older video on his course website and it refuses to play. In Details he finds "Allow embedding" unticked on that one video — his upload defaults had changed since he made it. He ticks it, saves, and the embed works. Common mistake: Looking for the setting under Channel settings or in the YouTube app. It lives on each video's Details page under Show More — use a computer browser.Illustrative mock-up: the four steps to find the Allow embedding setting in YouTube Studio. Step 3 — Check privacy: a private video can never be embedded, an unlisted one can What to do: Confirm the video is Public or Unlisted, because Private is a hard stop for embeds. How: A private video can only be watched by the owner and the people the owner chose, and it cannot be embedded on any website. An unlisted video can be embedded as long as embedding is switched on in Step 2: anyone with the link or the embed can watch it, even though it never appears in search or on the channel page. So if your embed shows a private-video message, change the video to Unlisted or Public in Studio — do not touch the website. Example: A teacher embeds a lesson video on a class page and it shows as private — she had uploaded it as Private for review and forgotten to change it. Switching it to Unlisted makes the class page work. Common mistake: Assuming Unlisted means "not embeddable". It only hides the video from search and the channel page; with embedding on, it plays on any site.Illustrative diagram: how a video's privacy setting decides whether it can be embedded. Step 4 — Check restrictions: age limits, region blocks and copyright claims also break embeds What to do: Open the video in Studio and read the Restrictions column — several restrictions block playback outside YouTube even with embedding on. How: YouTube's Help page says age-restricted videos cannot be watched on most third-party websites — they redirect viewers back to YouTube, where they must sign in and confirm their age. A territorial copyright block does the same for viewers in the blocked country: the embed loads, then refuses to play. A copyright claim can also restrict where a video plays. In Studio, read the Restrictions column in Content; if it shows an age restriction or a copyright claim, that is your answer. Example: A creator embeds a music video on his blog; it plays for him but not for readers in another country. The Restrictions column shows a territorial block — the rights holder never licensed that song there, so no embed setting can fix it. Common mistake: Telling every visitor to "just click Watch on YouTube". That is a workaround, not a fix — signed-out visitors still cannot watch an age-restricted video there either.Illustrative diagram: three restrictions that stop an embedded video from playing. Step 5 — Check Advanced Features: newer channels may have embedding restricted until verified What to do: If embedding is on, the video is public, and there is no restriction — but the embed still fails — check whether the channel has unlocked Advanced Features. How: As reported by third-party support guides, embedding can be restricted on newer channels until Advanced Features are unlocked — the channel has verified its phone number and built up channel history, or completed ID or video verification. This is not confirmed on YouTube's public Help pages, so treat it as a reported cause to check: go to Studio > Settings > Channel > Feature eligibility and see whether Advanced Features shows as enabled. If it is off, complete the verification steps there, then test the embed again. Example: A new channel embeds its own trailer on its website and gets the disabled message on every video, even though "Allow embedding" is ticked. The channel had never verified a phone number — after phone verification, embedding started working. Common mistake: Creating a second channel to "start fresh". A new channel has even less history — fix the verification on the channel that owns the video.Illustrative diagram: Advanced Features may gate embedding on newer channels. Step 6 — Website owners: use the /embed/ URL, and send a proper Referer header What to do: If the video's settings are all correct, fix your own embed code — use the /embed/ address and make sure your site sends a Referer. How: The correct embed code uses youtube.com/embed/VIDEO_ID, not youtube.com/watch?v=VIDEO_ID — the Share > Embed button gives you this code, so copy it from there instead of hand-writing it. YouTube's Help page also says its Terms of Service require embedders to provide an HTTP Referer header, and that without one viewers see "error 153" and a blocked player. A missing Referer usually means the video is being opened directly in a browser address bar, or a privacy tool is stripping it — test the embed inside a normal page. Example: A developer tests an embed by pasting the embed URL into the browser address bar and sees error 153. The same code works inside an actual page, because the page supplies the Referer the address bar cannot. Common mistake: Blaming YouTube for error 153. It means the request arrived with no context about where it came from — a site-side problem the video owner cannot fix.Illustrative diagram: the correct embed URL compared with the watch page URL. Checklist — Fix an embedded video that will not play☐ Read the exact message on the player before changing anything ☐ Confirmed "Allow embedding" is ticked in Studio > Content > Details > Show More ☐ Confirmed the video is Public or Unlisted, not Private ☐ Checked the Restrictions column for age restriction, region block or claim ☐ Checked Advanced Features is enabled on the channel (as reported) ☐ Used the /embed/ URL, not the /watch/ URL ☐ Tested the embed inside a real page, not the address bar ☐ Checked the site sends a Referer header for error 153FAQs 1. The video plays on YouTube but not on my website — is my website broken? Probably not. The most common cause is the owner's "Allow embedding" setting, which only the owner can change. Check the exact message first — it tells you whether the problem is the setting, the privacy, a restriction, or your embed code. 2. Can I embed a private video on my own website? No. Private videos cannot be embedded anywhere. Change the video to Unlisted to make it playable on a site without it appearing in search or on the channel page. 3. Can I embed an unlisted video? Yes, as long as embedding is switched on for that video. Unlisted only hides it from search and the channel page — anyone with the link or embed code can watch it. 4. Why does the embed work for me but not for visitors in another country? A territorial copyright block. The rights holder has blocked the video in their country, so the embed refuses to play there. No embed code can override a region block. 5. What is error 153 on an embedded video? YouTube says the embed request arrived without an HTTP Referer header, which its Terms require. It usually appears when the embed URL is opened directly in a browser, or when a site strips the referrer. SourcesYouTube Help — "Embed videos & playlists" (official page, opened live 12 Nov 2026): https://support.google.com/youtube/answer/171780?hl=en CreatorPlaybook — "YouTube Video Unavailable? What Each Playback Error Means and How to Fix It" (internal link, URL copied from the plan file): </blog/youtube-video-unavailable-what-each> CreatorPlaybook — "YouTube Restricted Mode: Why Your Video Is Hidden and How to Fix It" (internal link, URL copied from the plan file): </blog/youtube-restricted-mode-why-your-video>
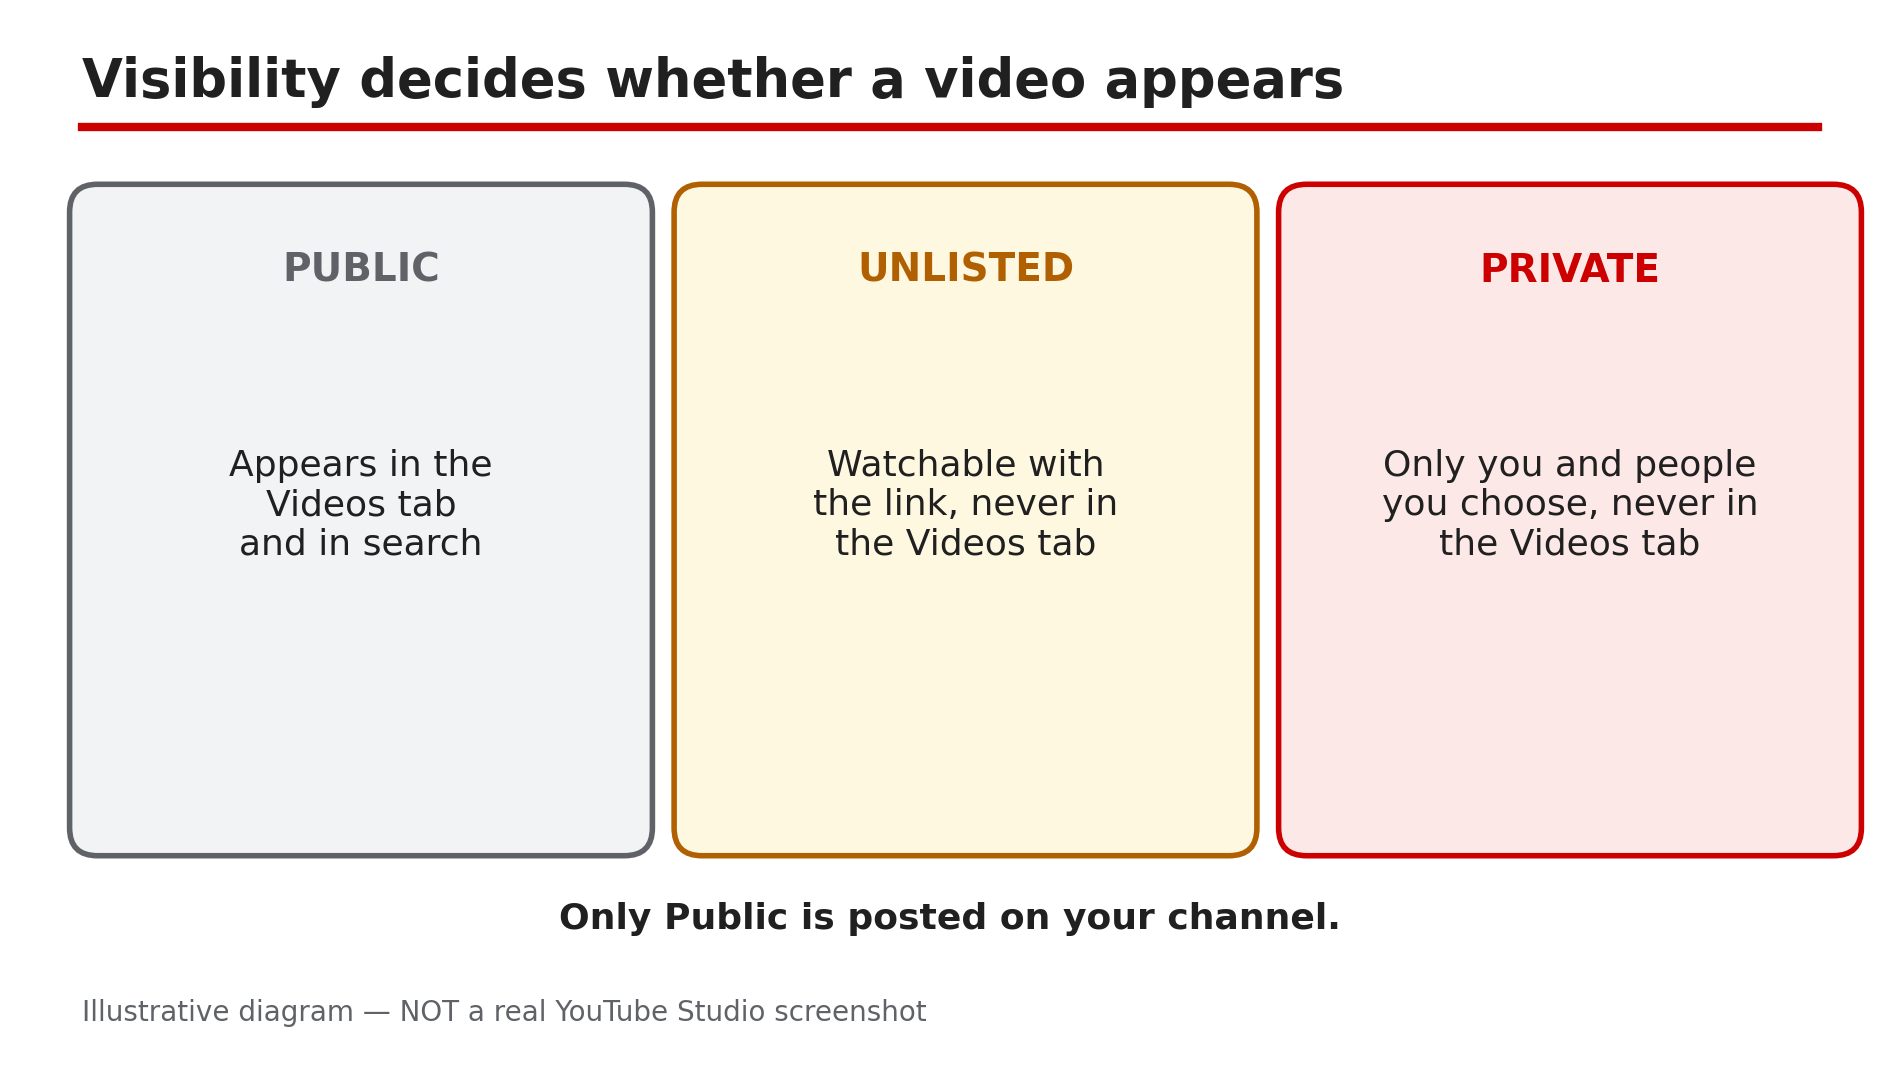
- CreatorPlaybook Team
- 11 Nov, 2026
New YouTube Video Not Showing on Your Channel Page? 6 Checks That Fix It
You uploaded a video, it plays fine from the direct link — but when you open your own channel page, it is not there. Before you re-upload it or assume YouTube deleted it, stop: in most cases the video exists and is fine, and the reason it is missing is one of a short list of settings. This guide works through those checks in order. What You Will LearnWhy private and unlisted videos never appear in the Videos tab How long processing takes, and why a new video shows at 144p first The difference between your Home tab and your Videos tab How to check the video's real status in YouTube Studio Why a strike or a Premiere problem can keep a video hidden Why search indexing is separate — and not the same as a missing listingStep 1 — Check visibility first: private and unlisted videos never appear What to do: Confirm the video is actually Public, because the other two settings hide it by design. How: YouTube's Help page on privacy settings is explicit: private videos will not appear in the Videos tab of your channel homepage, and neither will unlisted videos. Only public videos are posted on your channel. In Studio, go to Content and look at the Visibility column. If it says Private, only you and the people you chose can see it. If it says Unlisted, anyone with the link can watch it, but it still will not appear in the Videos tab or in search. Change it to Public and click Save. Example: A creator uploads a video, shares the link in a WhatsApp group, and gets views — then panics because the video is missing from the channel. The upload default was Unlisted. One click to Public fixes it. Common mistake: Assuming "Unlisted" means hidden from search but visible on your channel. It means hidden from both — the link is the only way in.Illustrative diagram: how a video's visibility setting decides whether it appears on your channel page. Step 2 — Wait for processing: a new video appears slowly, and at 144p first What to do: Give YouTube time to finish processing, especially for livestream replays and long videos. How: YouTube processes the file after it arrives, and the low resolutions appear first — a new video often plays at 144p while the HD versions are still being made. A livestream replay is slower still: after a stream ends, the recording converts into a video on demand, which can take minutes to hours depending on length, and a new broadcast can take 1 to 5 minutes to appear to visitors, as reported. During that window the video may be missing from the channel page even though Studio shows it — wait, then reload in an incognito window. Example: A two-hour livestream ends at 9 pm. At 9:05 the replay is nowhere on the channel. By 10:30 it appears, first at 144p, then in HD. Nothing was broken — the conversion just took time. Common mistake: Deleting the video and re-uploading it because it did not appear in five minutes — the re-upload starts processing from zero.Illustrative diagram: a new video appears at low quality first while higher resolutions are still processing. Step 3 — Check the right tab: Home shows sections, Videos shows everything What to do: Look in the Videos tab, not the Home tab, because the two tabs show different things. How: Your Home tab shows only the sections you set up in Studio — a trailer, popular uploads, playlists. If you never set up a section, or the new video does not fit any of them, Home will not show it. The Videos tab is the full list of your public videos, newest first. So open your channel, click Videos, and scroll. If the video is there, your channel is fine — Home just was not built to show it. To add it, create a section in Studio under Customization and click Publish — see our guide on channel trailers and featured sections. Example: A creator's new video is missing from Home but sits at the top of the Videos tab. The channel had only one section — Popular uploads — and a brand-new video with no views did not qualify for it yet. Common mistake: Judging the channel by the Home tab alone. Home is a curated shop window; Videos is the warehouse.Illustrative diagram: the Home tab shows only the sections you set up, while the Videos tab shows every public video. Step 4 — Check the video's real status in YouTube Studio What to do: Open Studio and read what YouTube actually says about the video, instead of guessing from the channel page. How: In Studio, go to Content and find the video — for a livestream replay, check the Live tab. Read three things: Visibility, Restrictions, and the processing status. A video with a copyright claim or an age restriction will show it in the Restrictions column, and an age-restricted video is hidden from many viewers. Also check you are signed into the right Google account and the right channel. Finally, open the video's direct watch-page link while signed out: if it plays, the video exists and the problem is listing, not the video itself. Example: A creator could not find a video on the channel page, but the watch link played fine. In Studio, the Restrictions column showed an age restriction. Common mistake: Checking on the uploading account and concluding "it is there for me, so it is there for everyone". Creators see their own private and unlisted videos; visitors do not.Illustrative mock-up: the four checks to run in YouTube Studio when a video is missing. Step 5 — Check for a strike or a Premiere problem What to do: Rule out the two cases where YouTube itself holds a video back: a penalty, or a scheduled Premiere that never fired. How: A Community Guidelines strike freezes publishing for a week, and YouTube says a scheduled video will not publish during the penalty period — it is set to private instead, and you must reschedule it after the freeze ends. Separately, if the missing video was a Premiere, check that it is still scheduled as a Premiere and has not slipped to private or unlisted — and confirm the date and timezone, because the watch page uses Pacific time. Our guide on scheduled videos and Premieres covers the full diagnosis. Example: A creator scheduled a Premiere for Saturday and got a strike on Friday. Saturday came and the video never appeared — YouTube had set it to private during the penalty, and it needed rescheduling. Common mistake: Assuming a Premiere failed because the channel page is empty. Open the watch-page link first: a public watch page can exist before the Premiere starts even when the listing is missing.Illustrative diagram: a strike or a Premiere problem can keep a video off the channel page. Step 6 — Do not confuse the channel listing with search indexing What to do: Treat "not on my channel page" and "not in search results" as two different problems with two different timelines. How: Search indexing is separate from the channel listing and can take days. YouTube says a recently uploaded or changed video may take a few days to appear in search results, and recommends searching by the exact video ID to check. So if the video is in the Videos tab but missing from search, that is an indexing delay, not a listing fault — wait, and do not change the title or re-upload, because that restarts the clock. Our guide on videos not showing in search covers that diagnosis in full. If the video is missing from the Videos tab itself, the cause is one of Steps 1 to 5, not indexing. Example: A video tops the Videos tab an hour after upload, but searching its exact title finds nothing for two days. The listing was fine; search just had not caught up. Common mistake: Re-uploading a video to "fix" search.Illustrative diagram: the channel listing and search indexing are two different systems with different timelines. Checklist — Find a missing video☐ Confirmed the video is Public in Studio, not Private or Unlisted ☐ Waited for processing to finish, especially for livestream replays ☐ Checked the Videos tab, not just the Home tab ☐ Checked Restrictions and processing status in Studio Content ☐ Confirmed the right Google account and the right channel ☐ Opened the direct watch link while signed out ☐ Ruled out an active strike or a Premiere scheduling problem ☐ Separated the channel listing from search indexingFAQs 1. My video is public but still not on my channel page — why? Check processing first: it may still be converting after a livestream. Then check the Videos tab rather than Home, and open the direct watch link while signed out to confirm the video itself plays. 2. Do unlisted videos appear on the channel page? No. YouTube's Help page says unlisted videos will not appear in the Videos tab, and they will not show up in search either — only people with the link can watch them. 3. How long does a livestream replay take to appear? As reported, conversion takes minutes to hours, and a new broadcast can take 1 to 5 minutes to appear. A long stream takes longer; the video usually appears first at 144p. 4. Will changing the title help the video appear in search? No — and it can hurt. Search indexing can take days, and editing the title restarts that wait. If the video is in the Videos tab, the listing is fine; give search time. 5. I got a strike — where did my scheduled video go? YouTube says a scheduled video will not publish during a penalty and is set to private. Check Studio for the strike, wait for the freeze to end, then reschedule. SourcesYouTube Help — "Change video privacy settings" (official page, opened live 11 Nov 2026): https://support.google.com/youtube/answer/157177?hl=en CreatorPlaybook — "YouTube Channel Not Showing in Search? Why It Happens and How to Fix It" (internal link, live-verified in the blog sitemap 11 Nov 2026): </blog/youtube-channel-not-showing-in-search> CreatorPlaybook — "YouTube Scheduled Video or Premiere Not Publishing on Time? What to Check" (internal link, live-verified in the blog sitemap 11 Nov 2026): </blog/youtube-scheduled-video-or-premiere-not> CreatorPlaybook — "Channel Trailer and Featured Sections Not Showing? How to Set Up Your Homepage" (internal link, live-verified in the blog sitemap 11 Nov 2026): </blog/channel-trailer-featured-sections-not>
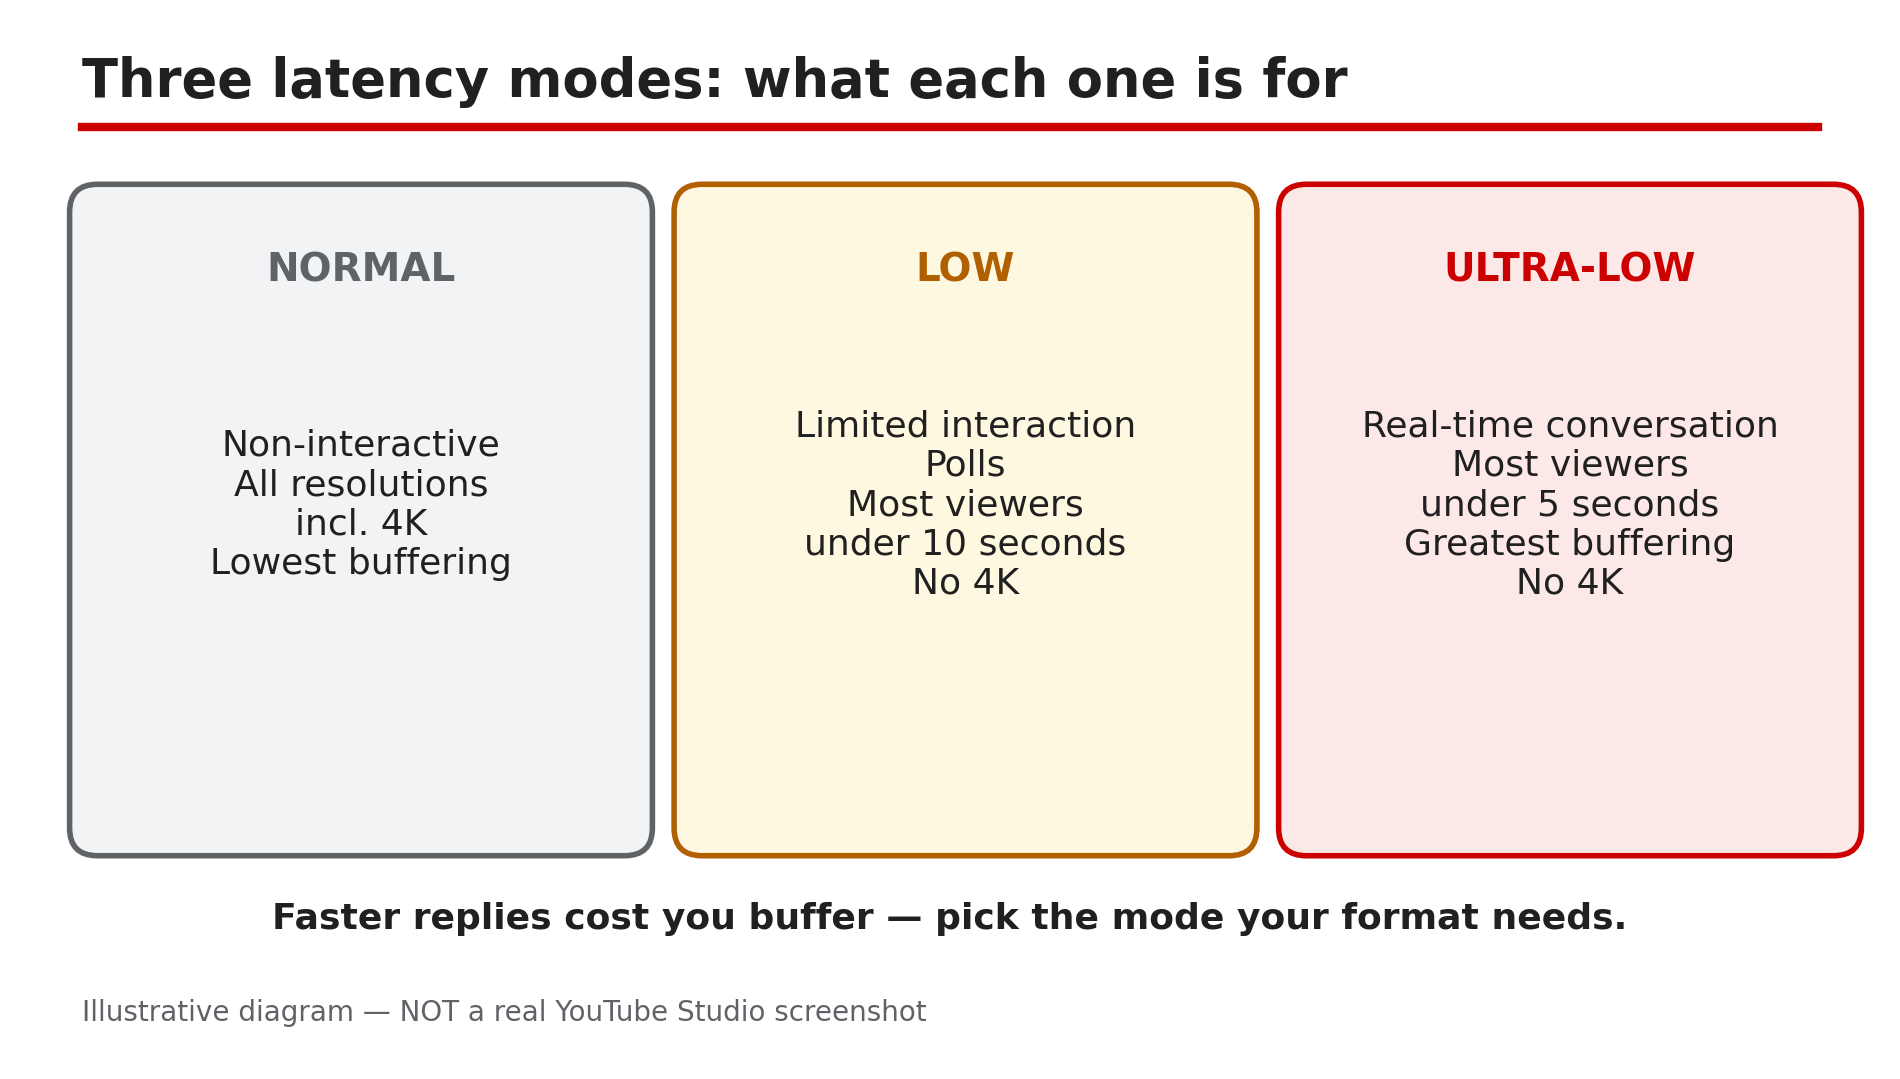
- CreatorPlaybook Team
- 11 Nov, 2026
YouTube Live Stream Latency: Normal vs Low vs Ultra-Low — Which One to Pick
You are answering chat messages, but the viewers replying are watching something you said half a minute ago. That gap is stream latency — the delay between your camera capturing an event and that event appearing on a viewer's screen — and on YouTube it is controlled by one setting you choose before you go live. What You Will LearnWhat stream latency is, and why "30 seconds behind" is not a fixed number The three modes — Normal, Low, Ultra-low — and their trade-offs Why Low and Ultra-low cannot do 4K, and why HLS cannot do Ultra-low Where to set latency, and when you cannot change it Why webcam and mobile streams give you no latency choice How to test your choice before a real audience depends on itStep 1 — Understand what latency is before you blame your internet What to do: Learn the definition YouTube itself uses, so you stop chasing the wrong fix. How: YouTube Help defines stream latency as the delay between your camera capturing an event and the event being displayed to viewers. It is not your upload speed, your encoder bitrate, or your viewers' internet. Think of it as a buffer: YouTube holds a few seconds of video in reserve so a small hiccup in your connection does not freeze the stream for everyone. A bigger reserve means a smoother stream and a longer delay; a smaller reserve means faster replies and more buffering risk. Example: Two creators stream from the same street on the same fibre connection. One uses Normal latency and viewers see everything late but never buffer. The other uses Ultra-low and viewers see it in under five seconds — but every Wi-Fi wobble freezes the picture. Common mistake: Upgrading your internet plan to fix delay. A faster connection improves stability, but it does not shrink the buffer YouTube holds — only the latency mode does.Illustrative diagram: YouTube's three live stream latency modes and what each one is for. Step 2 — Normal latency: the quality-first default for non-interactive streams What to do: Use Normal latency when your viewers do not need to talk back to you in real time. How: Normal latency is YouTube's quality-first mode. It supports all resolutions, including 4K, and all live features, and YouTube says it gives viewers the lowest amount of buffering. It suits concerts, church services, conferences, sports matches, and pre-recorded playlist broadcasts — anything where playback quality matters more than immediate replies. YouTube gives no fixed delay figure for Normal latency: guides saying it is always 15, 20, or 30 seconds are informal estimates. Example: A music channel streams a two-hour concert in 4K on Normal latency. Chat is slow and nobody minds — the audience came to watch, not to talk. And if you stream in 4K, Normal is the only choice: Low and Ultra-low do not support 4K. Common mistake: Picking Ultra-low for a concert because "faster is better". Your viewers get a jittery picture and gain nothing, because a concert does not need real-time chat.Illustrative diagram: the trade-off between latency and buffering in live streams. Step 3 — Low latency: the middle ground for polls and occasional chat What to do: Switch to Low latency when you interact with viewers, but only a little — a poll here, a shout-out there. How: Low latency is the middle setting. YouTube says most viewers of a Low-latency stream experience a delay of less than 10 seconds — fast enough to run a poll, acknowledge a comment, or take a quick question without the conversation falling apart. The price is that Low latency does not support 4K, and viewers are more likely to see buffering than on Normal. Set it in Live Control Room under Stream settings before you go live. It suits presentations, launches, and study streams where chat matters but nobody is waiting on your next sentence. Example: A teacher runs a live revision session with a poll every ten minutes. On Low latency, students vote and see the result while the question is still fresh. Common mistake: Expecting every viewer to be under 10 seconds. YouTube's figure is "most viewers" — a viewer on a slow connection can still lag further behind.Illustrative mock-up: the steps to choose a latency mode in Live Control Room. Step 4 — Ultra-low latency: real-time conversation, with real buffering risk What to do: Use Ultra-low only when your format depends on instant back-and-forth — a live Q&A, an auction, a coaching call, a game with chat. How: Ultra-low latency is YouTube's fastest mode. YouTube says most viewers experience a delay of less than five seconds, close enough to real conversation that you can react to chat as it arrives. The trade-off is the steepest: the player holds almost no reserve, so any wobble between your encoder and the viewer shows up as buffering, and the mode does not support 4K. It also does not work with HLS ingestion — HLS sends video in segments, so its latency is higher by design and Ultra-low is unavailable. Example: A creator runs a live auction where bids arrive in chat. On Ultra-low, a bid placed now is answered now, and nobody loses an item to a delay they could not see. Common mistake: Using Ultra-low as your default for every stream. If your viewers do not need to reply in seconds, you are paying for speed with buffering and getting nothing back.Illustrative diagram: encoder streams let you choose latency, webcam and mobile streams do not. Step 5 — Set it before you go live, and know when the setting is locked What to do: Choose the mode in Live Control Room before the stream starts, and check the three things that can lock you out of the choice. How: In YouTube Studio, go to Create, then Go live, enter your stream details, and open the stream dashboard. Click Stream or Manage, then Stream Settings, and choose under Stream latency. Set it before you go live — per encoder guides, you cannot change the latency mode mid-stream, so a wrong choice means ending the stream and starting again. Three things can remove the choice. First, webcam and mobile streams are always set up for interactivity, so YouTube gives you no manual latency control for them. Second, a 4K stream is always Normal latency. Third, HLS ingestion disables Ultra-low, so use RTMP or RTMPS if you need the fastest mode. Example: A creator plans a 4K Q&A on Ultra-low, then finds the latency menu greyed out. Drop the encoder to 1080p first — only then does the Ultra-low option appear. Common mistake: Trying to change latency after going live and assuming the menu will work. It will not — the running stream keeps its original setting.Illustrative diagram: 4K resolution and HLS ingestion both limit which latency modes you can pick. Step 6 — Test the mode, then watch the numbers that tell the truth What to do: Run a short test stream in your chosen mode and check the right signals before the event. How: Before an important stream, go live privately for five minutes in the mode you plan to use, with a friend watching on a phone and another on a computer. Ask them to type a message in chat and time how long it takes to appear, and whether the picture buffers. In Live Control Room, watch Stream Health: a healthy stream stays green, and if it turns yellow or red, the problem is usually your connection or encoder, not the latency mode. Example: A creator tests Ultra-low privately and sees chat arrive in four seconds with no buffering. On the real stream, one viewer still reports a 20-second delay — the delay is that viewer's connection, not the stream. Common mistake: Judging latency from your own preview. The Live Control Room preview is your encoder feed, not the viewer feed — measure from a real viewer device.Illustrative diagram: a simple decision tree for choosing a live stream latency mode. Checklist — Pick the right latency mode☐ Decided how much interaction the stream needs: none, some, or real-time ☐ Chose Normal for concerts and 4K; Low for polls and light chat; Ultra-low for real conversation ☐ Confirmed the stream is an encoder stream, not webcam or mobile ☐ Dropped to 1080p or lower if you need Low or Ultra-low ☐ Checked ingestion is RTMP/RTMPS, not HLS, for Ultra-low ☐ Set the mode in Live Control Room before going live ☐ Tested privately for five minutes and timed chat from a viewer device ☐ Checked Stream Health is green before the audience arrivesFAQs 1. How much delay does Normal latency have? YouTube gives no fixed figure for Normal latency. Guides often quote 15 to 30 seconds as an informal estimate, but the real delay varies, so treat any single number as a rough guide, not a promise. 2. Can I change the latency mode while streaming? No, as reported — the mode is set before you go live and cannot be changed mid-stream. If you picked wrong, end the stream and start a new one. 3. Why is the latency setting greyed out? Usually because you are on a webcam or mobile stream, which YouTube sets up for interactivity with no manual choice; because the stream is 4K, which only supports Normal; or because you ingest with HLS, which disables Ultra-low. 4. Does Ultra-low latency give viewers worse quality? Not directly — but the smaller buffer means any connection wobble is more likely to cause buffering, and the mode does not support 4K. For a non-interactive stream, Normal is smoothest. 5. My stream keeps disconnecting — is that a latency problem? Usually not. Disconnects and red stream health are connection or encoder problems. See our guide on live stream disconnects for the encoder and stream key checks. SourcesYouTube Help — "Understand live streaming latency" (official page, opened live 11 Nov 2026): https://support.google.com/youtube/answer/7444635 CreatorPlaybook — "YouTube Live Stream Keeps Disconnecting? Encoder, Bitrate and Stream Key Fixes" (internal link, live-verified in the blog sitemap 11 Nov 2026): </blog/youtube-live-stream-keeps-disconnecting>
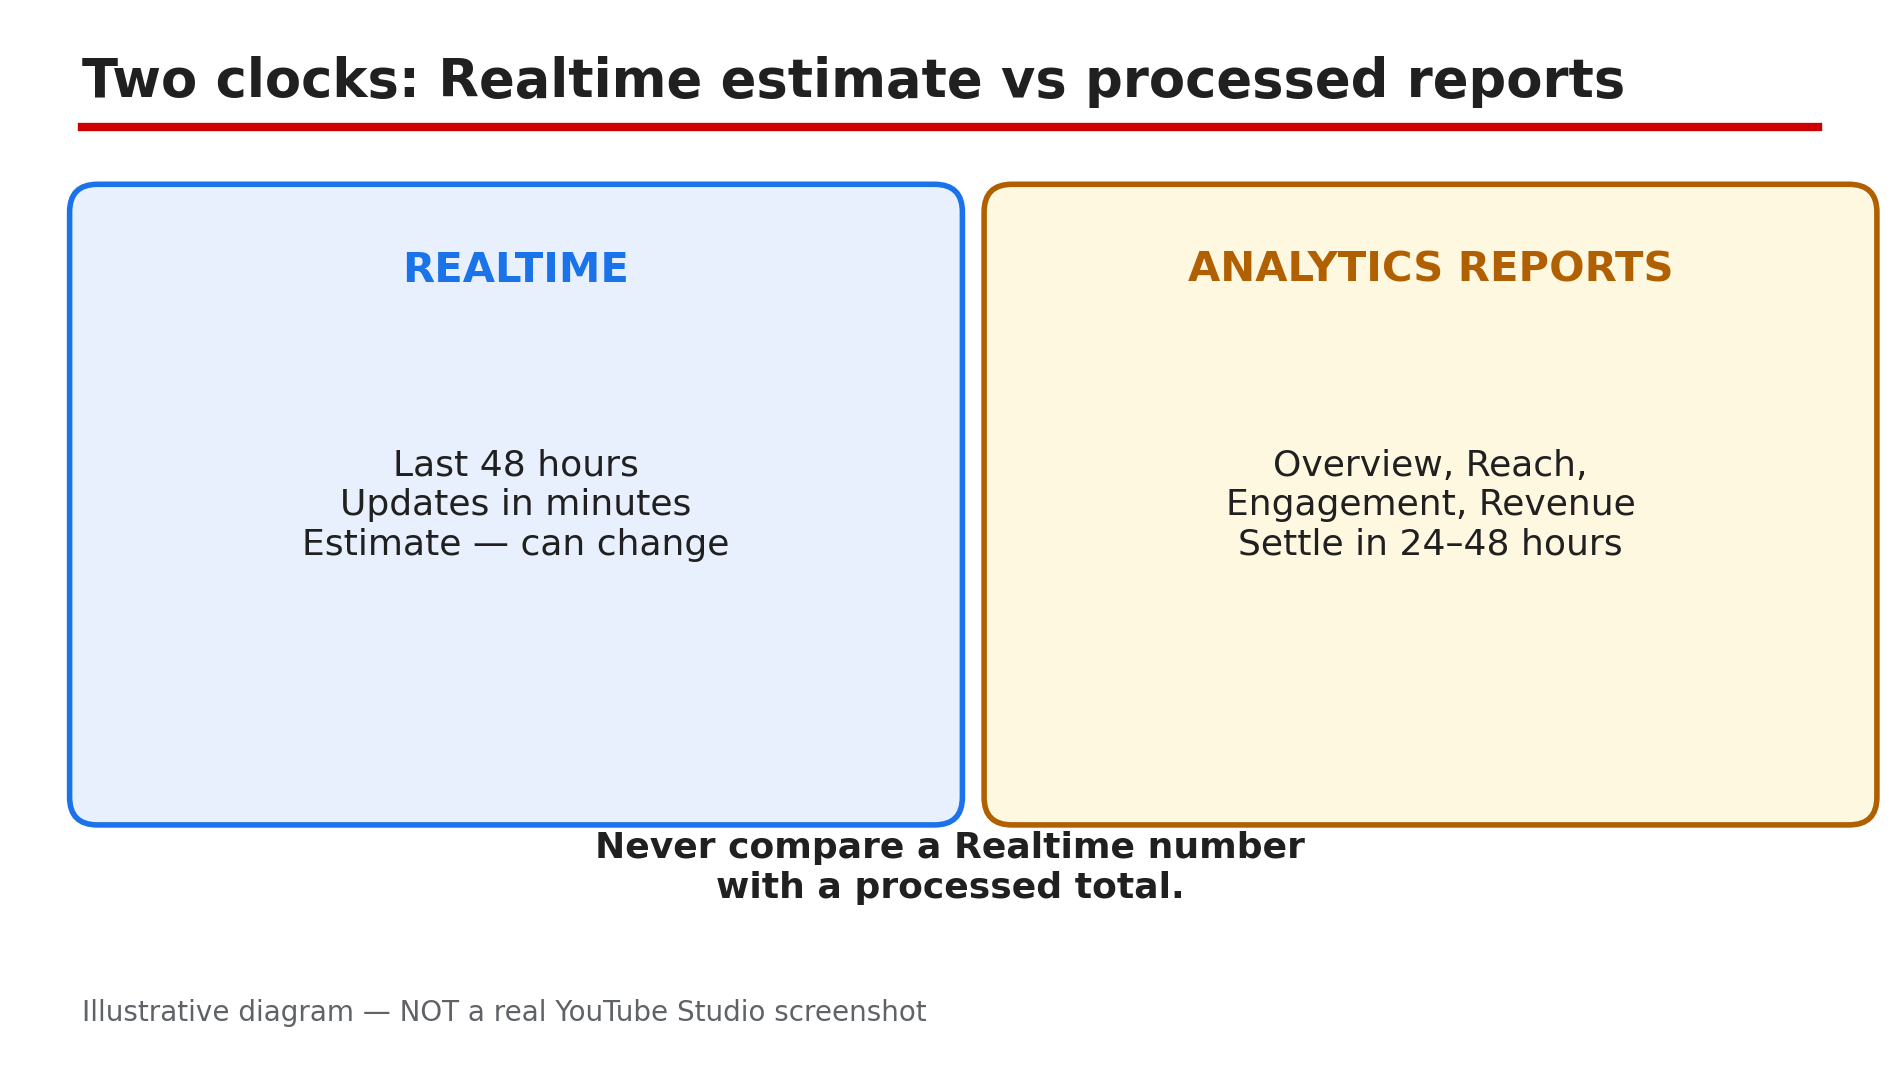
- CreatorPlaybook Team
- 10 Nov, 2026
YouTube Studio Analytics Missing or Delayed? What the Lag Really Means
You uploaded a video two days ago, the views are clearly coming in, and Studio Analytics still shows nothing — or a number that has not moved since yesterday. In most cases nothing is broken: YouTube Studio runs on two different clocks, and confusing them is the most common reason creators think their data is missing. The Realtime report is a live estimate of roughly the last 48 hours, while the full Analytics reports take time to process — most metrics settle within 24 to 48 hours, as reported, and YouTube's Help pages confirm a delay of about two days for estimated earnings data. What You Will LearnWhy Realtime and Analytics reports show different numbers — and both can be right How long each report normally takes to fill in Why revenue and membership figures look missing when they are only unfinished The two-minute checks: date range, channel, and report type When to wait, and when a gap means something is actually wrongStep 1 — Learn the two clocks: Realtime estimate vs Analytics reports What to do: Before judging any number, find out which clock you are looking at — Realtime or a processed report. How: Open YouTube Studio and go to Analytics. The Realtime card shows activity from roughly the last 48 hours and updates within minutes — but it is an estimate, not a final count. The Overview, Reach, Engagement, Audience, and Revenue tabs are processed reports that take time to settle: most metrics land within 24 to 48 hours, some stretching to 72 hours. So a video with 500 views in Realtime and zero in Reach is not broken — the processed report has not caught up yet. Compare numbers only within the same report. Example: A creator sees 1,200 views in Realtime on day one and nothing in Reach. On day three Reach shows 1,180 — the 20-view difference is invalid playbacks removed during validation. Common mistake: Refreshing Analytics every hour and concluding the data is stuck — the reports update on YouTube's timetable, not yours.Illustrative diagram: YouTube Studio's two clocks — the fast Realtime estimate and the slower processed reports. Step 2 — Check the date range and the right channel first What to do: Rule out the two most embarrassing causes — the wrong date range and the wrong channel — before assuming data is missing. How: In Analytics, look at the date range at the top of the page. If it ends yesterday, today's views are not in it — extend the range, or switch to Realtime. Then check the channel: tap your profile picture in Studio and confirm you are on the right channel, especially if you manage a Brand Account with several channels. Analytics is per channel, so data for one channel never appears on another. Example: A creator with two channels panics that a new video has zero views, then realises he is looking at his second channel's Analytics. Common mistake: Comparing Realtime views with a channel-level report for a different date range — the numbers will never match.Illustrative mock-up: the two checks that take two minutes and explain most 'missing' Analytics. Step 3 — Understand the revenue clock: estimated vs finalised What to do: If the Revenue tab looks empty or wrong, check whether you are looking at an estimate or a finalised figure — they arrive weeks apart. How: YouTube's Help pages state Analytics has a data delay of about two days for estimated earnings, and estimates do not reflect invalid-activity adjustments in real time — so revenue for the last two days is often blank or low. Finalised earnings are different again: they appear once your payments are added to AdSense for YouTube, typically between the 7th and 12th of the following month. A January figure that looks small on 3 February is not missing — it is not finalised yet. Example: A creator checks her January revenue on 5 February and finds it far below her estimate. By 12 February the finalised figure appears — the gap was invalid traffic removed during finalisation. Common mistake: Treating an estimated revenue figure as money owed — only the finalised number pays out.Illustrative diagram: the revenue timeline from estimated earnings to finalised earnings. Step 4 — Give retention and key moments time to process What to do: If the retention graph is blank or the key moments are missing, check the video's age, length, and view count before calling it a fault. How: Retention data typically takes one to two days to process, as reported, so a graph for a video uploaded this morning is often empty. Key moments — the Intro, Top moments, Spikes, and Dips labels — need a video at least 60 seconds long with at least 100 views, as reported. A 40-second Short or a video with 30 views will never show key moments, and that is by design. Check the Engagement tab after 48 hours. Example: A creator uploads a 90-second video, gets 80 views on day one, and finds no key moments. On day three, past 100 views, the labels appear. Common mistake: Re-editing a video to "fix" a retention graph that only needed another day — the re-upload resets the clock.Illustrative diagram: the three conditions a video must meet before its retention graph and key moments appear. Step 5 — Check membership earnings the right way What to do: If membership earnings look missing from the Revenue tab, check the date range and whether you are comparing an estimate with a finalised figure. How: Membership earnings are reported to go missing most often for two boring reasons. First, the date range is wrong: revenue is counted in the month the member was charged, not the month they joined. Second, creators compare the Revenue tab's estimate with finalised AdSense earnings — two different numbers for different dates. Open the Revenue tab, set the date range to the full month, and look at the memberships row. If members are still being charged and the row is empty after a full month, check that memberships is still switched on in Studio under Earn — a paused feature stops new charges, as reported. Example: A creator sees zero membership earnings for January, then realises her members were charged on 1 February — the figure belonged to February. Common mistake: Assuming a memberships outage because the Revenue tab is empty for the current month — the month is never complete until it ends.Illustrative diagram: membership earnings count in the month the member is charged, not the month they joined. Step 6 — Know when to wait and when to act What to do: Apply a simple rule: under 48 hours, wait; over a week with no movement, act. How: If a number has not moved in under 48 hours, that is normal processing lag, as reported — wait two full days. If nothing has moved for more than a week while your videos are clearly getting views, check YouTube's Known Issues page and try Analytics on a desktop browser, since some reports are not available on mobile. If the gap persists past a week on desktop, with the right channel and date range, use Studio's Send feedback to report it. Example: A channel's views freeze for three days across every video. On day four the numbers jump back — a platform-wide delay, not a channel problem. Common mistake: Deleting and re-uploading a video because its Analytics look empty on day one — you lose the original's history and restart the clock.Illustrative diagram: a decision tree for deciding whether missing Analytics data needs waiting or action. Checklist — Fix YouTube Studio Analytics missing or delayed data☐ Identified whether the number is Realtime or a processed report ☐ Waited 48 hours before judging a new video's reports ☐ Checked the date range includes the days in question ☐ Confirmed the right channel and the right report level ☐ Understood estimated revenue lags about two days ☐ Waited until the 7th to 12th of the next month for finalised earnings ☐ Gave retention one to two days, and key moments 60 seconds plus 100 views ☐ Checked membership earnings against the charging month, not the join month ☐ Tried Analytics on a desktop browser if mobile shows nothing ☐ Checked YouTube's Known Issues page if nothing moves for a weekFAQs 1. How long does YouTube Analytics normally take to update? Realtime updates within minutes as an estimate of the last 48 hours. Most processed metrics settle within 24 to 48 hours, as reported, with some stretching to 72 hours. Estimated earnings carry a delay of about two days, according to YouTube's Help pages. 2. Why does Realtime show views but my Reach tab shows zero? Because they are different clocks. Realtime is a fast estimate; the Reach tab is a processed report that has not caught up yet. Compare numbers only within the same report, and wait 48 hours before worrying. 3. Why did my view count go down in Analytics? Because YouTube validates playbacks while counting and removes invalid ones, as reported. A count that drops slightly is the system working correctly — see our guide on Realtime views stuck. 4. My revenue for this month is blank. Is monetisation off? Probably not. Estimated earnings lag about two days, and finalised earnings appear only between the 7th and 12th of the following month, according to YouTube's Help page. 5. My retention graph is empty two days after uploading. What should I do? First check the video is at least 60 seconds long with 100 or more views, as reported — key moments need both. If it is longer and well past 100 views after 48 hours, try a desktop browser. SourcesYouTube Help — "Get started with YouTube Analytics" (official page, opened live 10 Nov 2026): https://support.google.com/youtubecreatorstudio/answer/9002587?hl=en&co=GENIE.Platform%3DiOS CreatorPlaybook — "YouTube Realtime Views Stuck? Why the Count Freezes and When to Wait" (internal link, live-verified published post): </blog/youtube-realtime-views-stuck-why> CreatorPlaybook — "How to Read Your YouTube Retention Graph and Fix Drop-Offs" (internal link, live-verified published post): </blog/how-to-read-your-youtube-retention>
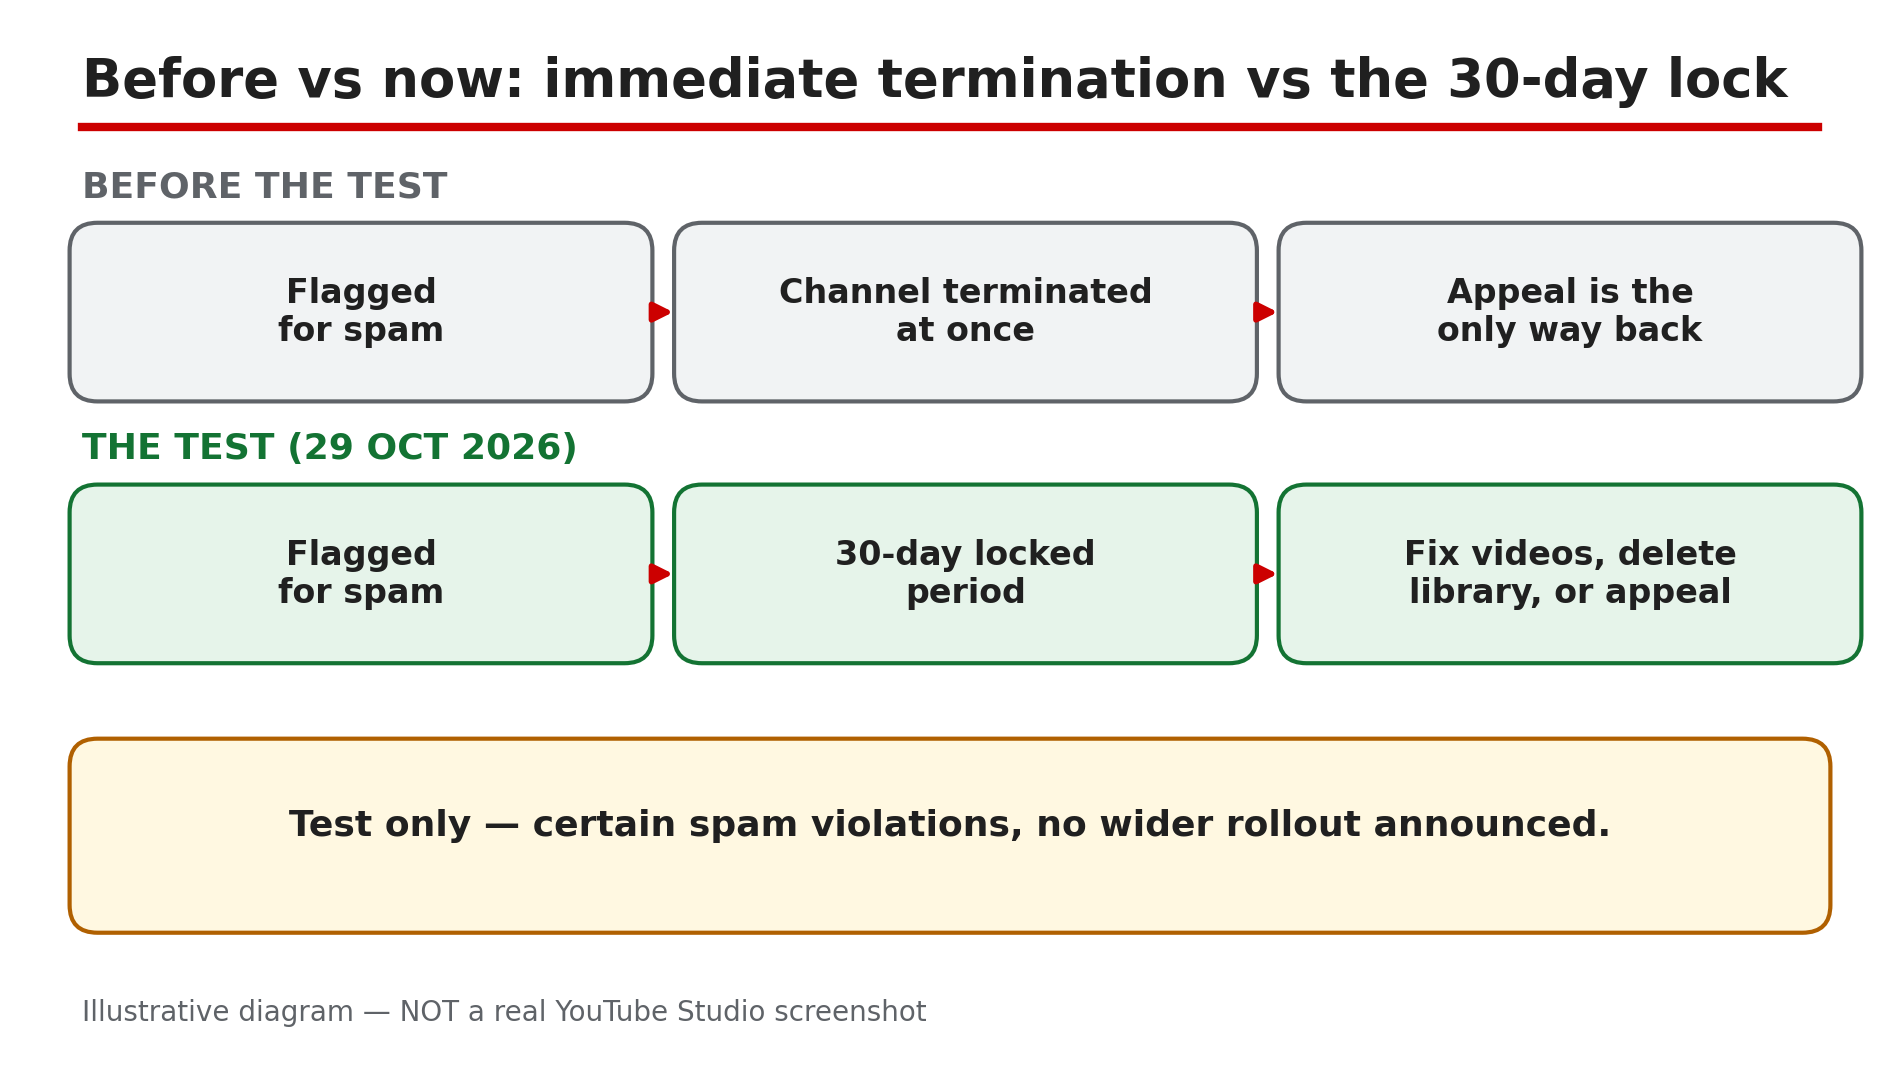
- CreatorPlaybook Team
- 07 Nov, 2026
YouTube Spam-Termination Cleanup: The New 30-Day Grace Period to Save Your Channel (Announced 29 Oct 2026)
Until now, a channel that crossed YouTube's spam-termination line had almost nothing left to do: the channel was removed, and the only way back was an appeal — win it, or start again from zero. On 29 October 2026, TeamYouTube announced a test that changes that. As reported by Dexerto and Social Media Today, eligible channels facing immediate termination over certain spam-policy violations will instead enter a 30-day locked period, with three ways out: fix the flagged videos, delete the whole video library, or appeal. This is a test, not a new rule for everyone: as checked on 7 November 2026, no wider rollout has been announced, and the test covers certain spam violations only. This guide explains the three routes, and how to choose before the deadline runs out. What You Will LearnWhat the 30-day cleanup test is, and who it covers How to find the notice and the exact deadline What stays locked during the 30 days The three routes out: fix videos, delete the library, or appeal What happens if a cleanup review is rejected What doing nothing costsStep 1 — Understand what changed: termination is paused, not cancelled What to do: Learn the new sequence before you act, so you do not mistake a 30-day window for a pardon. How: Before this test, a channel facing immediate termination over spam was removed at once, and the appeal was the only route back. Under the test, as reported by Dexerto, an eligible channel enters a 30-day locked period. YouTube says the owner "will be notified via email and in YouTube Studio on desktop," as quoted by Social Media Today. Announced on 29 October 2026 by TeamYouTube; no wider rollout has been announced. Example: A channel with 40,000 subscribers is flagged for spam and would previously have vanished overnight. Under the test, the owner gets 30 locked days to clean up. Common mistake: Telling others "YouTube now gives everyone 30 days before termination." It does not — the test covers certain spam-policy violations only, and YouTube has not said which ones qualify.Illustrative diagram: the test replaces immediate termination with a 30-day locked period for eligible channels. Step 2 — Find the notice and mark the exact deadline What to do: Find the official notice, confirm your channel is in the test, and write down the exact day the window closes. How: As reported, YouTube notifies eligible owners by email and in YouTube Studio on desktop. Check the inbox of the Google Account that owns the channel, including spam, then open YouTube Studio — the notice is there, not only on a phone. Confirm the deadline in your own Studio and email, not a forwarded screenshot. The 30 days run from YouTube's notice, not from the day you read it. Example: A creator finds the email three days after it arrived, then opens Studio and sees the remaining days. She writes the closing date on a wall calendar and sets a reminder a week before it. Common mistake: Assuming the 30 days start when you open the email. They do not — the window starts when YouTube locks the channel, so days may already be gone.Illustrative diagram: the 30-day locked period, what is blocked during it, and the day 30 deadline. Step 3 — Know what is locked: no uploads, no comments What to do: Accept the limits of the locked period, and plan your cleanup inside them instead of fighting them. How: While the channel is locked, certain actions are not available. As reported, owners cannot upload new videos or post comments during the 30-day period. That is a hard limit — the restriction applies to the channel, so switching to a manager's login will not lift it. Nothing in the announcement, as reported, says existing videos stop being watchable. Example: A gaming creator in the locked period wants to post a community update, but comments and uploads are blocked. She does the cleanup first and plans the update for after the unlock. Common mistake: Creating a second channel to keep uploading while the first is locked. That does not save the first channel — a new channel to get around a termination is itself against the rules.Illustrative diagram: the three reported routes out of the 30-day locked period. Step 4 — Route 1: fix the flagged videos, then pass YouTube's review What to do: Review the flagged videos one by one, and edit or delete the ones that break the spam policy. How: As reported, use YouTube Studio tools, including the video editor, to edit or delete violating videos. Check the flagged videos, then the rest of the channel, against the nine spam categories on the official Spam policy page — our deep-dive covers all nine. This route does not unlock the channel by itself: as reported, the cleanup must pass YouTube's review before the channel is unlocked. Example: A creator finds six flagged videos: four near-identical AI-scripted uploads, and two with misleading thumbnails. She deletes the four, fixes the two thumbnails, and submits the cleanup for review. Common mistake: Editing one video and assuming the channel unlocks at once. Cleanup only works after YouTube's review approves it — confirm in Studio if your submission is still under review.Illustrative mock-up: how the individual-video cleanup route works, ending in a YouTube review. Step 5 — Route 2: delete the whole video library and unlock immediately What to do: Weigh a fresh start against the videos you would keep, and choose this route only with your eyes open. How: As reported, deleting every video unlocks the channel immediately — no review wait. The channel keeps its subscribers, handle, and YouTube Partner Programme (YPP) status — an audience, but zero videos. The cost is heavy: every video goes too. This route fits a library that is mostly the problem, not one with only two or three flagged videos. Example: A channel with 300 uploads finds 280 are the same re-uploaded clips, sped up. The owner deletes the whole library, keeps 12,000 subscribers and the handle, and starts again with original videos. Common mistake: Deleting the whole library in a panic on day one, before checking whether fixing a few videos could have saved the rest. The delete is instant and irreversible — try Route 1 first.Illustrative diagram: deleting the whole library unlocks the channel at once but removes every video for good. Step 6 — Route 3: appeal if flagged wrongly — and what to do if review rejects you What to do: Appeal only if the channel genuinely complies, and keep the fallback in mind if your cleanup is rejected. How: As reported, if the channel was flagged incorrectly, you can appeal. Our deep-dive covers the short, factual appeal: state the policy, explain what happened, and point to proof the content is original. A rejected cleanup is not the end: as reported, you can still delete all your videos inside the 30-day window. A failed Route 1 leaves Route 2 open while days remain — act early. Example: A creator whose videos are original commentary appeals: the flagged uploads are her own analysis. Her appeal is rejected, but with 12 days left she deletes the flagged videos, and the channel is unlocked. Common mistake: Appealing when the content clearly violates the policy, or filing on day 29 — a weak appeal wastes the window, and a late one leaves no time to switch routes.Illustrative diagram: what to do if a cleanup review is rejected, and what happens if nothing is done in 30 days. Checklist — Your Channel Is in the 30-Day Spam Cleanup Window☐ I found the notice in email and in Studio on desktop ☐ I wrote down the exact closing date ☐ I know uploads and comments are blocked while locked ☐ I checked the flagged videos against the nine spam categories ☐ I chose one route: fix videos, delete the whole library, or appeal ☐ If I fixed videos, I submitted the cleanup for review ☐ If review was rejected, I still have days left for the full-library delete ☐ I did not create a second channel to work around the lockFAQs 1. Does every terminated channel now get 30 days to fix the problem? No. As reported, this is a test announced on 29 October 2026, limited to eligible channels facing immediate termination over certain spam-policy violations. No wider rollout has been announced. 2. Can I upload new videos or post comments during the 30 days? No. As reported, uploading new videos and posting comments are not available while the channel is locked. 3. If I delete my whole video library, do I lose my subscribers and monetisation? As reported, no. Deleting every video unlocks the channel immediately, and it keeps its subscribers, handle, and YouTube Partner Programme status. The videos are gone for good. 4. What happens if YouTube rejects my manual cleanup? As reported, you can still delete all your videos while inside the original 30-day window. Submit cleanups early enough to leave days for the fallback. 5. What happens if I do nothing for 30 days? As reported by YouTube, failing to address the issues within 30 days, or taking no action, leads to channel termination — permanent once the window closes. SourcesYouTube Help — "Spam policy" (official page, opened live 7 Nov 2026): https://support.google.com/youtube/answer/2801973 CreatorPlaybook — "YouTube Spam Termination Explained: Why Channels Get Removed and How to Appeal" (internal link, verified live 7 Nov 2026): </blog/youtube-spam-termination-explained-why> CreatorPlaybook — "YouTube Temporary Feature Pause for Hacked Accounts: What It Means and How Long It Lasts" (internal link, verified live 7 Nov 2026): </blog/youtube-temporary-feature-pause-for>
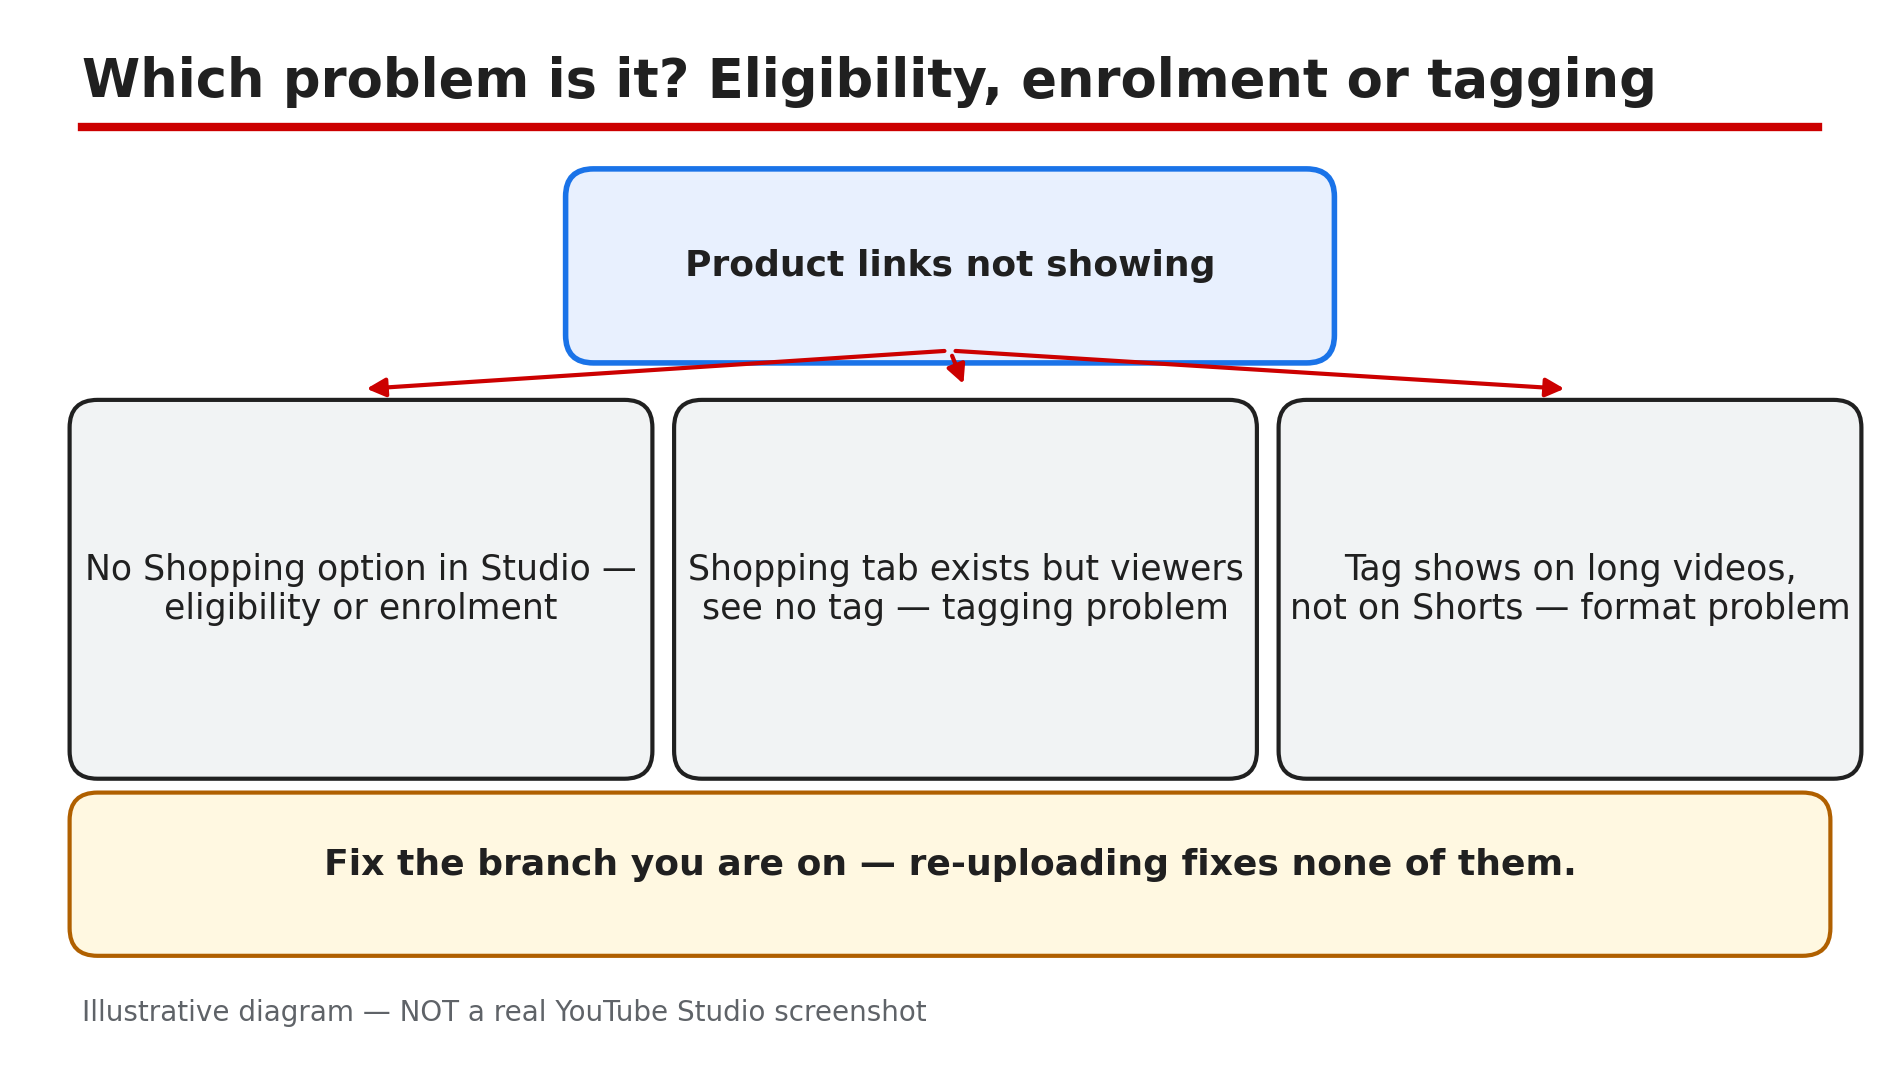
- CreatorPlaybook Team
- 07 Nov, 2026
YouTube Shopping / Affiliate Product Links Not Showing — How to Fix It
You tag a product in your video, publish it, and nothing appears — no shopping shelf under the video, no product sticker on the Short, nothing your viewers can tap. Or the tagging option is missing from Studio altogether. In most cases the video is fine: something earlier in the chain is missing — eligibility, enrolment, tagging, or the video format. A Shopping tag is not an ordinary description link: YouTube switches it on only for channels that qualify. As reported by several October 2026 sources, YouTube lowered the Shopping affiliate threshold on 25 March 2026 from 1,000 to 500 subscribers — do not trust any guide that still quotes 10,000. Confirm every figure in Studio. What You Will LearnWhy Shopping and affiliate product links disappear The current reported eligibility rules, and where to check your channel How to join the program and tag products correctly Why Shorts description links never work, and what to use instead How to disclose affiliate links and keep your tagsStep 1 — Work out which problem you actually have What to do: Decide whether the problem is eligibility, enrolment or tagging. Each one has a different fix. How: Open YouTube Studio and go to Earn. If there is no Shopping tab or no option to join the affiliate program, the problem is eligibility or enrolment — go to Step 2. If the Shopping tab is there but viewers see no tags, the problem is tagging or format. Example: A creator with 800 subscribers cannot find any Shopping option. Her channel is not yet in the Partner Program — she needs to qualify first. Common mistake: Re-uploading the video. If eligibility is the cause, a fresh upload changes nothing.Illustrative diagram: three different causes for missing product links, each with a different fix. Step 2 — Check your eligibility in Studio, not in an old guide What to do: Check every rule against your own channel in Studio. How: YouTube's Help page on Shopping affiliate eligibility, opened live for this post, lists these requirements: your channel is in the YouTube Partner Program and meets its subscriber threshold; you are based in an eligible country; your channel is not a music channel or Official Artist Channel; and your audience is not set as Made for Kids. The page lists 18 eligible countries, including India. As reported, the bar is now 500, not 10,000 — the Help page only says "meet the subscriber threshold for YPP". As reported, the lower tier also asks for 3 uploads in 90 days, plus watch hours or Shorts views. Example: A creator in India has 600 subscribers but short watch hours. Common mistake: Trusting a guide that says 10,000 and giving up at 2,000 — or assuming 500 subscribers alone qualify you.Illustrative diagram: the five eligibility checks for the YouTube Shopping affiliate program. Step 3 — Join the program and accept the terms What to do: If you are eligible but the tags still do not appear, enrol and accept the terms — eligibility alone does not switch tagging on. How: YouTube's Help page gives the route, opened live for this post: in Studio, select Earn, and under Programs click Join Now, then accept the Shopping Affiliate Program Terms of Service. The seller list differs by country. If a content owner manages your channel, the content owner must accept the agreement for you. Example: A creator sees the Shopping tab but never clicked Join Now. Her videos show no tags until she completes the sign-up. Common mistake: Assuming the Shopping tab means you are enrolled. Seeing the tab and joining are two different steps.Illustrative diagram: the three steps to join the YouTube Shopping affiliate program in Studio. Step 4 — Tag the product the right way, or the tag will not show What to do: Tag only products clearly shown or mentioned in the video, and check the tag on the finished video. How: In Studio, use the product picker to tag products from participating sellers. As reported, a tag should pass four tests: the product is clearly shown and named, it relates to the video, a viewer could reasonably want to buy it, and it is used as intended. Mention the product on screen, in the title, or in the description. On a Short, the first tagged product appears as a sticker — check its position before you publish. YouTube removes tags that break its guidelines; spam tagging is a common reason tags disappear. Example: A creator tags a tripod shown for ten seconds and named in the voiceover, and the tag shows. In the next video she tags five gadgets that never appear, and those tags vanish. Common mistake: Tagging a product you only mention to say you would not buy it. The tag must match what the video shows.Illustrative mock-up: tag only products the video actually shows and names. Step 5 — Stop fighting Shorts description links — use tags and profile links instead What to do: Accept that Shorts description links are non-clickable by design, and use the places that work instead. How: On 31 August 2023, YouTube made Shorts description links, comment links and vertical live feed links non-clickable, to reduce spam and scams. No setting changes that. Shopping affiliate links are the clickable exception on Shorts — that is what the product sticker is for. The other working routes are the Related Video link, and channel profile links, up to 14 of them. In a Short, tell viewers to tap the product sticker or the Related Video. Example: A creator pastes the store link in every Shorts description, but nobody can click it. She tags the product with a Shopping sticker instead — and clicks start coming from it. Common mistake: Pasting the link in the description, then in a pinned comment, then in the title. All three are non-clickable by design.Illustrative diagram: description links do not work on Shorts, but product stickers, Related Videos and profile links do. Step 6 — Disclose the affiliate link and keep your tags alive What to do: Add a clear affiliate disclosure in the video and description, or your tags can be taken away. How: A Shopping tag alone does not satisfy the disclosure rule. As reported in FTC guidance, a commission is a material connection — disclose in the video itself, spoken and on screen, and near the link in the description. If you tag Amazon products, Amazon also requires its own disclosure, as reported: "As an Amazon Associate I earn from qualifying purchases." Do not share Shopping affiliate links outside YouTube — the Help page says this can suspend your affiliate features. Example: A creator's old review still earns from a product whose price doubled, so she updates the description. Common mistake: Hiding the disclosure at the bottom of a long description, below a block of hashtags. The FTC guidance, as reported, is that the connection should be hard to miss.Illustrative diagram: four habits for disclosing affiliate links and keeping product tags alive. Checklist — Get your Shopping / affiliate links showing☐ I know which problem I have ☐ My channel is in the Partner Program (Studio > Earn) ☐ My country is on the current eligible list on the live Help page ☐ My channel is not a music channel, Official Artist Channel or Made for Kids ☐ I joined the program and accepted the terms ☐ I tagged only products shown and named in the video ☐ I checked the tag on the finished video ☐ On Shorts I use a sticker or Related Video ☐ I disclosed the affiliate link in the video and descriptionFAQs 1. Why is there no Shopping option in my YouTube Studio at all? The option only appears for qualifying channels: in the Partner Program, based in an eligible country, and not a music channel or Made for Kids. Check Studio > Earn. 2. I have 500 subscribers. Why can I still not tag products? As reported, 500 subscribers is the lower Partner Program tier, not the whole requirement. That tier also asks for 3 uploads in 90 days plus watch hours or Shorts views, and you must join the program. 3. Why does my product link work on a long video but not on a Short? Shorts description and comment links have been non-clickable by design since 31 August 2023. On a Short, use a Shopping product tag, or a Related Video link to a long-form video. 4. Can I tag Amazon products on YouTube Shopping from India? Amazon joined the program on 27 August 2026. At launch it was reported as US only, but the Amazon Help page opened live on 7 November 2026 now lists India. Check the live page and your own Studio — you also need an active Amazon Influencer or Associates account linked to your channel. 5. Do I still need to disclose affiliate links if YouTube already shows a Shopping tag? Yes. A Shopping tag alone does not satisfy the disclosure rule. Disclose it in the video itself and near the link in the description, and add Amazon's required disclosure for Amazon tags. SourcesYouTube Help — "YouTube Shopping affiliate program overview & eligibility" (opened live 7 Nov 2026): https://support.google.com/youtube/answer/13376398?hl=en CreatorPlaybook — "YouTube Description Links Not Working?" (verified live 7 Nov 2026): </blog/youtube-description-links-not-working> CreatorPlaybook — "Made for Kids on YouTube: Revenue Limits and Disabled Features" (verified live 7 Nov 2026): </blog/made-for-kids-on-youtube-revenue-limits>
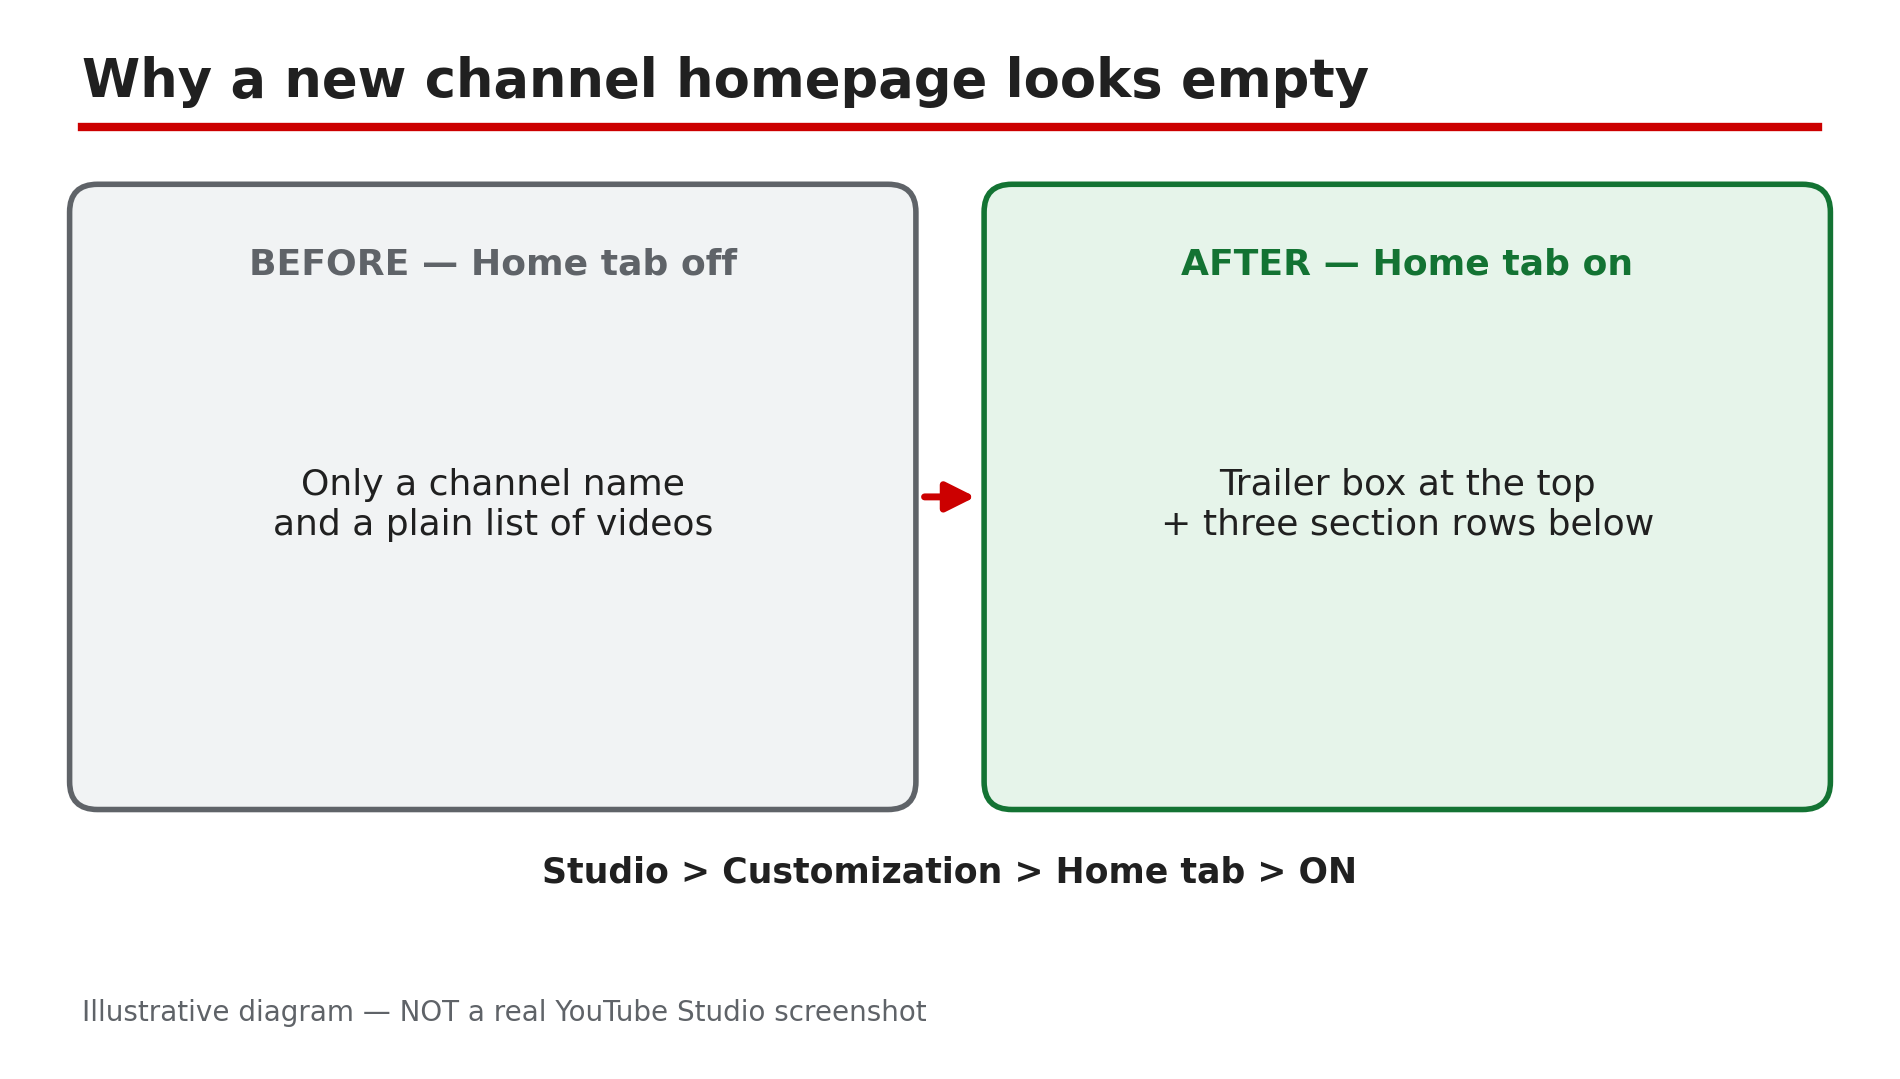
- CreatorPlaybook Team
- 07 Nov, 2026
Channel Trailer / Featured Sections Not Showing on Your YouTube Channel Homepage — How to Fix It
You set up your channel trailer and featured sections, then opened your channel page — and there is nothing there. No trailer, no playlists, no Shorts row, just a bare page with your videos in a plain list. It feels like YouTube ignored everything you did. In most cases nothing is broken. YouTube does not build a channel homepage automatically, and a new channel starts with almost nothing on it. The trailer, the featured video and the sections all live behind one setting — the Home tab in Studio's Customization area — and until that tab is on and your changes are published, visitors see a blank page. This guide goes through the settings in order. What You Will LearnWhy a new channel homepage looks empty, and the one switch that builds it The difference between a channel trailer and a featured video — and who sees each one How to add, edit and reorder up to 12 featured sections Why a video can be assigned but still not appear in a section How to test your homepage as a real visitor sees itStep 1 — Turn the Home tab on first What to do: Check whether the Home tab is on in YouTube Studio — without it there is no homepage layout at all. How: Sign in to YouTube Studio on a computer, open Customization in the left menu, then open the Home tab. YouTube's Help page, "Customize your YouTube channel layout", says this tab is where you organize your trailer, featured video and sections. If the Home tab is off, turn it on. As reported in creator guides, YouTube does not build a homepage automatically. Example: A creator uploads ten videos, then wonders why her channel page shows only a plain list. She opens Customization, finds the Home tab is off, and turns it on. Common mistake: Adding videos to playlists and expecting them to appear on the homepage on their own. Playlists only show up once they are added as a section.Illustrative diagram: turning on the Home tab is what builds the channel homepage layout. Step 2 — Set the channel trailer for people who have not subscribed What to do: Add a channel trailer, the video new visitors see at the top of your homepage before they subscribe. How: In Studio, go to Customization , then the Home tab. Under Layout , click ADD section , then Channel trailer , choose a video, and click Publish. YouTube's Help page explains that the trailer is a preview of your channel so viewers can learn more and subscribe. Pick a short video that says what your channel is about — as reported in creator guides, a trailer under a minute long usually works best. Example: A cooking channel picks a 45-second video that shows three dishes and says "new recipes every Tuesday". Common mistake: Choosing your longest, most popular video as the trailer. A long video asks a stranger for too much time.Illustrative diagram: the trailer is for new visitors and the featured video is for returning subscribers. Step 3 — Set the featured video for returning subscribers What to do: Add a featured video — also called the Spotlight video — which is what subscribers see at the top of your homepage instead of the trailer. How: On the same Home tab , under Layout , click ADD section , then Spotlight , choose a video, and click Publish. YouTube's Help page says you can highlight your video, or any video on YouTube, for returning subscribers to watch when they go to your channel Home tab. Choose something a subscriber has not seen yet — your newest video or the next part of a series. Example: A tech channel sets its latest phone review as the featured video. A subscriber sees the new review at the top; a new visitor sees the trailer instead. Common mistake: Setting the same video as both the trailer and the featured video. The two slots exist for two different audiences.Illustrative diagram: the four steps to add a featured section to your channel homepage. Step 4 — Add your featured sections, one by one What to do: Build the rows of your homepage by adding sections for your videos, Shorts, playlists and channels. How: On the Home tab , under Layout , click ADD section and choose the kind of content you want to show — For you , Videos , Playlists , Memberships , Channels , Top community clips , Effects or Posts. You can add up to 12 custom sections; the layout defaults to four: Short videos, Uploads, Created playlists, and public Subscriptions. Add the sections one at a time, and click Publish after each change — as reported in creator guides, unpublished changes do not appear on your channel. Example: A travel channel adds four sections in order: a "For you" row, a Popular uploads row, a Shorts row, and a playlists row for each country it has covered. Common mistake: Adding twelve sections at once and never publishing. The page still shows the old layout, and the creator assumes the feature is broken.Illustrative diagram: featured sections stack as rows on the homepage, in the order you set. Step 5 — Check why an assigned video still does not appear What to do: If a section is set up but a video is missing, check the video's own status before changing the layout. How: Open Studio, go to Content , and look at the video's visibility. Private and unlisted videos do not appear in sections, and neither do videos that are still processing or scheduled for later — only public, finished videos show up. The same applies to playlists: one made of private videos will look empty on the homepage. Also check that the video is actually in the playlist you think it is in — it is easy to add a video to the wrong playlist. Example: A creator adds a "Best tutorials" section, but her newest tutorial is missing. She checks Content and finds the video is still scheduled for tomorrow. Common mistake: Rebuilding the whole homepage layout when one video is missing. The layout is usually fine.Illustrative diagram: only public, fully processed videos appear in featured sections. Step 6 — Test like a visitor, and check mobile and TV What to do: Check your homepage the way a real visitor sees it — signed out, and on more than one device. How: YouTube's Help page states that once a viewer watches your channel trailer or featured video, it will not be shown to that viewer again. So your own account is the worst way to test: you have already watched the trailer, so YouTube hides it from you. Open your channel in a signed-out browser window or with a fresh account — as reported in creator guides, that is the only reliable test. Then check the page on a phone and, if you can, on a TV: the full setup needs Studio on a desktop computer, not the mobile app, and as reported, the layout differs on mobile and TV. Example: A creator checks her channel on her own account and sees no trailer, so she re-adds it three times. A friend opens the same channel signed out and sees the trailer immediately. Common mistake: Testing only on your own signed-in account, then "fixing" a homepage that was never broken.Illustrative diagram: test your homepage signed out, because your own account hides a trailer you have already watched. Checklist — Get Your Channel Trailer and Featured Sections Showing☐ Home tab is turned ON in Studio > Customization ☐ Channel trailer assigned for people who have not subscribed ☐ Featured video (Spotlight) assigned for returning subscribers ☐ Sections added one by one, up to 12, in the order you want ☐ Publish clicked after every change ☐ Every video in a section is public and fully processed ☐ Homepage checked in a signed-out browser or a fresh account ☐ Layout checked on mobile as well as desktopFAQs 1. Why is my channel homepage blank even though I have videos? Because YouTube does not build a homepage automatically. Turn on the Home tab in Studio > Customization, add a trailer and sections, and click Publish. 2. Why can I see my trailer but my friend cannot — or the other way round? The trailer is only for people who have not subscribed, and YouTube will not show it to a viewer who has already watched it. Test with a fresh or signed-out account. 3. I added sections but nothing changed. What did I miss? You probably did not click Publish. Unpublished changes do not appear on your channel. Go back to Studio > Customization > Home tab and click Publish. 4. Why is one video missing from a section? Check its visibility in Studio > Content. Private, unlisted, processing or scheduled videos do not appear in sections — only public, finished videos show up. 5. Can I set all this up from the YouTube mobile app? The full setup needs Studio on a desktop computer. As reported in creator guides, the Studio app lets you turn the Home tab on or off, but choosing videos and building sections is documented for Studio on the web. SourcesYouTube Help — "Customize your YouTube channel layout" (official page, opened live 7 Nov 2026): https://support.google.com/youtube/answer/3219384 CreatorPlaybook — "YouTube Channel Name Change: What Happens to Search, URL and Verification" (internal link, verified live 7 Nov 2026): </blog/youtube-channel-name-change-what> CreatorPlaybook — "YouTube Channel Not Growing? Diagnose the 4-Stage Analytics Bottleneck in Order" (internal link, verified live 7 Nov 2026): </blog/youtube-channel-not-growing-diagnose-4>
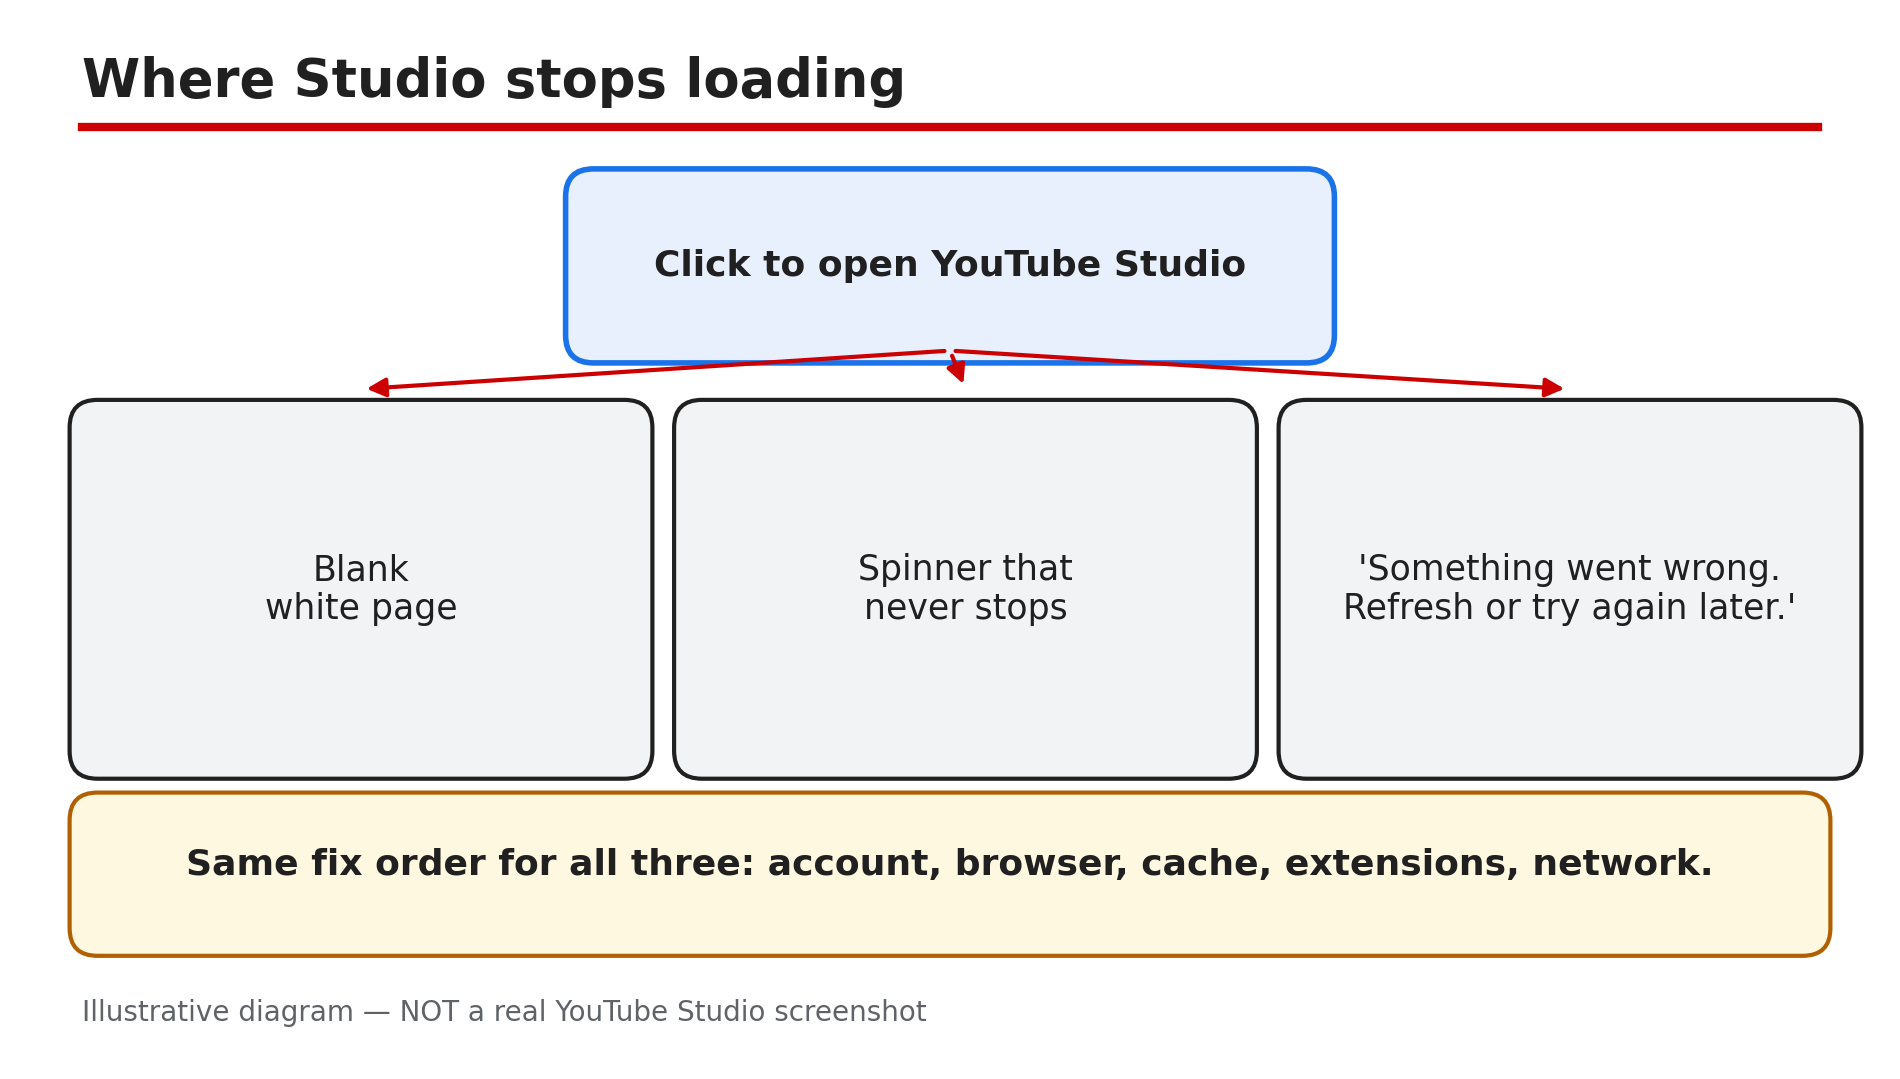
- CreatorPlaybook Team
- 07 Nov, 2026
YouTube Studio Not Loading, Blank, or "Something Went Wrong"? How to Fix It
You click to open YouTube Studio and nothing happens. The page stays blank, the spinner turns forever, or a message says "Something went wrong. Refresh or try again later." Your videos are due, and your channel's control room is locked shut. In most cases this is not a strike or a deleted account. It is usually a browser or sign-in problem: the wrong account, an outdated browser, a corrupted cache, a blocking extension, or a changed DNS setting. There is no dedicated Help page called "Studio not loading", so this guide uses YouTube's video-errors causes, which apply to Studio in the same browser. Work through the steps in order, testing Studio after each change. What You Will LearnHow to read the symptom: blank page, spinner, or error How to check your account and channel How to restart, update, and clean your browser How to find a blocking extension Which Studio features are desktop-only, not a bugStep 1 — Refresh and read the exact symptom What to do: Refresh and note exactly what you see — a blank page, a spinner, or "Something went wrong" — before changing anything. How: Press refresh once and wait a minute. If the error message appears, click the Reload option in it, as YouTube's Help page suggests. Then open youtube.com in a new tab: if ordinary videos play but Studio does not, the fault is with Studio, not your connection. If nothing loads, check your connection and whether other creators report an outage. Example: A creator's Studio shows a blank screen every morning, but the watch page plays normally — so the fault is specific to Studio, pointing her to Steps 3 to 5, not her router. Common mistake: Assuming the channel was deleted or hacked — a blank page almost never means that.Illustrative diagram: the three ways Studio fails to load, and the shared fix order. Step 2 — Confirm the right account and channel What to do: Check you are signed in to the Google account that owns the channel, and the switcher shows the right channel. How: Click your profile picture at the top right and read the account name. If you have more than one channel or a brand account, open the channel switcher and pick the right channel — Studio shows the selected channel's data, so the wrong one can look like missing videos or an empty dashboard. If you are signed out, sign in again with the account that owns the channel. Example: A creator with two channels opens Studio and sees no videos. She is signed in to her personal account, not the brand account that owns the channel. One switch brings all her videos back. Common mistake: Creating a new channel by accident while signing in — check the switcher first.Illustrative mock-up: checking the signed-in account and the channel switcher before any browser fix. Step 3 — Restart your browser and device, then update the browser What to do: Close the browser completely, restart your device, and update to the latest version of a compatible browser. How: Close every browser window, then reopen it and try Studio again. If that fails, restart your computer or phone; YouTube's Help page lists restarting the device as a fix. Then check for a browser update: YouTube recommends the latest version of Chrome, Firefox, or Safari. If you use the Studio app, update the app and your device's software too. Example: A creator's Studio stops loading after a browser update is left half-installed. He restarts his laptop, the update finishes, and Studio opens normally. Common mistake: Updating the YouTube app while the real problem is the outdated desktop browser you use for Studio.Illustrative diagram: the order for browser fixes — restart first, update second, clear cache and cookies third. Step 4 — Clear the cache and cookies, then sign in again What to do: Clear your browser's cache and cookies for YouTube, then sign in to Studio again. How: YouTube's Help page lists clearing the cache and cookies as a fix for "Something went wrong", because corrupted cache or cookies can stop pages loading. In your browser settings, clear cached images and files and cookies for youtube.com and studio.youtube.com only. Then reopen the browser and sign in again. Before clearing cookies, make sure you know your Google password: clearing cookies signs you out of many sites. Example: A creator sees "Something went wrong" on Studio every day for a week. She clears the cache and cookies, signs in again, and Studio loads in seconds. Common mistake: Clearing only the cache, or clearing everything without knowing your password first.Illustrative diagram: comparing Studio in a normal window and an incognito window to find a blocking extension. Step 5 — Test in incognito with extensions off, and check ad blockers and DNS What to do: Open Studio in an incognito window with all extensions disabled. If it works there, an extension — often an ad blocker — is the problem. How: Open an incognito window with extensions switched off, sign in, and open Studio — the exact test YouTube's Help page suggests for ad-blocking extensions. If Studio loads, turn extensions on one at a time in your normal window until Studio breaks again — that is the culprit. Add Studio to that extension's allowed list, or turn off ad blocking for youtube.com. Also check your DNS settings: YouTube says to confirm you are using your preferred DNS servers and no third-party app has changed them. If you installed a VPN or privacy app recently, turn it off briefly and refresh Studio. Example: A creator installs a new ad blocker and Studio goes blank the same evening. In an incognito window with extensions off, Studio works. She whitelists studio.youtube.com, and Studio works in her normal window again. Common mistake: Turning the ad blocker off everywhere instead of allowing just YouTube.Illustrative diagram: three tests that show whether the fault is local or with your channel. Step 6 — Try another browser or network — and know what is NOT a bug What to do: Try Studio in a different browser, network, or device. If it works elsewhere, the fault is with the first one — not your channel. How: Open Studio in a second browser, such as Firefox if you normally use Chrome, or try your phone's hotspot instead of home Wi-Fi. If Studio still fails everywhere, use the Help icon on any YouTube page to search the Help Center. One thing is not a bug at all: some Studio features only work on a computer. As reported in YouTube's Help pages, custom Shorts thumbnails can only be added in YouTube Studio on a computer, and your account must be verified. End screens, cards, and bulk editing are desktop-only too. If an option is missing on the mobile app, switch to a computer first. Example: A creator cannot find the custom thumbnail option for a Short on her phone. On her laptop the same afternoon, the option is there — the phone app does not offer it, by design. Common mistake: Reinstalling browsers before trying a second browser — a two-minute test that would have shown the fault was local. And reporting a missing mobile feature as a bug, when it is desktop-only.Illustrative diagram: Studio features that only work on a computer, so a missing option on mobile is not a fault. Checklist — Fix YouTube Studio not loading☐ Refreshed; symptom noted (blank, spinner, error) ☐ Ordinary videos play, or connection fault noted ☐ Right account and channel ☐ Browser closed, device restarted, updated ☐ Cache and cookies cleared; signed in again ☐ Incognito test done; Studio whitelisted ☐ DNS checked; VPN tested off ☐ Second browser, network, or device tried ☐ Desktop-only features checked on computerFAQs 1. Is Studio not loading a strike or a problem with my channel? No, not usually. A blank page or "Something went wrong" is most often a browser or sign-in problem — the wrong account, an outdated browser, corrupted cache, or a blocking extension. Check the steps above, and confirm in Studio once it opens. 2. Studio works on my phone but not on my computer. Why? Because the fault is in the computer's browser, not your channel. Work through Steps 3 to 5 on the computer: restart, update, clear cache and cookies, and test in incognito. 3. I cleared my cookies and now I am signed out of everything. Is that normal? Yes. Clearing cookies signs you out of many sites — which is why this guide says to know your password first. Sign back in, then open Studio again. 4. Why can't I add a custom Shorts thumbnail on my phone? Because it is desktop-only by design, as reported in YouTube's Help pages: custom Shorts thumbnails can only be added in YouTube Studio on a computer, and your account must be verified. 5. How is this different from a video stuck on uploading or processing? A stuck upload means Studio opens fine but a video will not finish uploading or converting. Here Studio itself will not open, so you cannot reach the upload page. Fix Studio first. SourcesYouTube Help — "Troubleshoot YouTube video errors" (official page, opened live 7 Nov 2026): https://support.google.com/youtube/answer/3037019?hl=en CreatorPlaybook — "YouTube Video Stuck on Uploading or Processing? How to Fix It" (internal link, opened live 7 Nov 2026): </blog/youtube-video-stuck-uploading-or> CreatorPlaybook — "YouTube 'Processing Abandoned'? Why the Video Could Not Be Processed and How to Fix It" (internal link, opened live 7 Nov 2026): </blog/youtube-processing-abandoned-why-video>
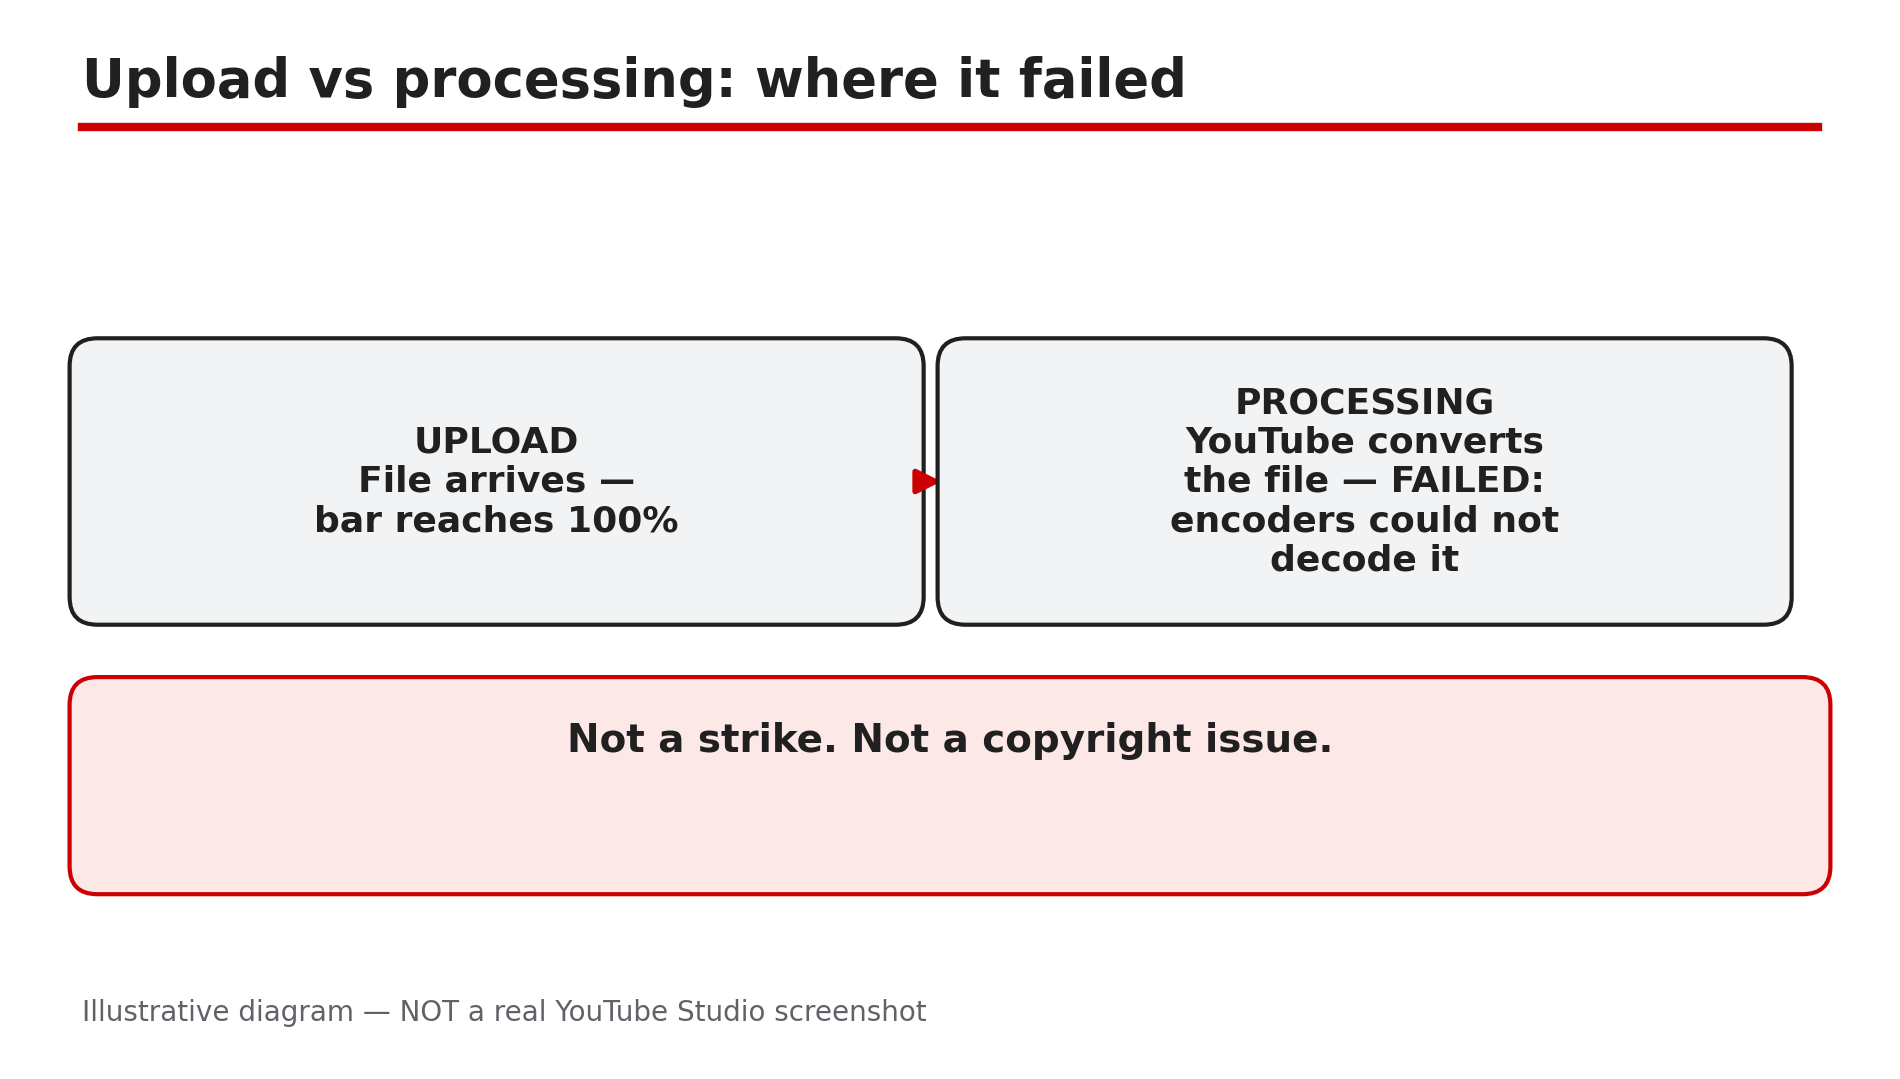
- CreatorPlaybook Team
- 06 Nov, 2026
YouTube 'Processing Abandoned'? Why the Video Could Not Be Processed and How to Fix It
You upload a video, the bar reaches 100%, and then instead of a finished video you see "Processing abandoned: the video could not be processed". The error is almost always a problem with the video file itself, not your channel — not a strike, not a copyright issue, and not a sign your account is in trouble. The upload arrived on YouTube's servers, but its encoders could not read it. Something in it is shortened, incomplete, or in a form the encoder cannot decode — which is why uploading the same file again usually produces the same error. Check the file first, re-export if needed, then upload a clean copy. What You Will LearnWhat "Processing abandoned" means — a file problem, not a channel penalty How to test your file for damage before uploading again How to re-export with H.264 and AAC When to delete the abandoned entry and upload fresh How interrupted recordings damage a file, and how to avoid itStep 1 — Confirm what the error really means What to do: Check whether the upload reached 100% before it failed — that tells you the file arrived and processing broke. How: In YouTube Studio, open Content and find the video. If it shows "Processing abandoned" after the bar completed, the file arrived but could not be decoded. YouTube's Help page says: "Processing abandoned: This error message may occur if the uploaded file is shortened or invalid. It can also occur on reduced upload speeds. Try playing your video back on your device and make sure that you're using a supported file type, then upload again. If the problem remains, try uploading your video from a different platform." Example: A creator's 12-minute tutorial hits 100%, then shows "Processing abandoned" — the recording stopped early when the laptop battery died. Common mistake: Treating this like a strike and checking channel standing for hours — it has nothing to do with strikes.Illustrative diagram: the upload finished, but processing could not decode the file. Step 2 — Play the file to the end on your own device What to do: Play the exported video from start to finish in a desktop player, watching for freezes, black screens, missing audio, or a player that stops early. How: Open the file in VLC or another desktop player. Do not just scrub through it — a file can look fine at the start and break near the end. Let it play to the final frame and confirm the duration matches your editor — if it stops early or the audio drops out, the file is damaged. Example: A gaming creator's 20-minute recording plays normally for 14 minutes, then the picture freezes while the audio keeps going — the recording software had crashed, so the file must be re-exported from the original project. Common mistake: Skipping this test and re-uploading the same file again and again. A damaged file almost always fails the same way.Illustrative diagram: how to test a video file by playing it fully before uploading again. Step 3 — Check the format and re-export with standard settings What to do: Confirm the file uses a supported format, then re-export with H.264 video, AAC audio, and a constant frame rate. How: In your export settings, choose MP4, H.264 video, and AAC audio. Set a constant frame rate, such as 30 frames per second, rather than a variable frame rate. For game capture recordings, mix the audio down to a single stereo track — multiple tracks and variable frame rates are reported to cause processing failures. Example: A creator records gameplay with variable frame rate and two audio tracks. After re-exporting at a constant 30 fps with one mixed audio track, the video processes in a few minutes. Common mistake: Exporting to an unusual format, such as a raw camera codec, then blaming YouTube when the encoder cannot read it.Illustrative diagram: standard export settings for a file YouTube can process. Step 4 — Fix a file damaged by an interrupted recording What to do: If the recording or export was interrupted, rebuild the file from the original project — a file with a missing index cannot be decoded. How: Did it stop after a crash, a full disk, a dead battery, or a removed memory card? As reported in a FixMP4 engineering guide dated 27 October 2026, a common form of damage is a missing moov atom index — the part of an MP4 file that tells a player where each section lives. When a recording is interrupted, that index may never be written, so re-export from the original project. Example: A creator records a vlog on a phone that runs out of storage halfway through, so the file plays for a few seconds, then stops. After freeing storage and re-exporting, the new file uploads without trouble. Common mistake: Trying to "fix" the file by renaming it or changing its extension from .mov to .mp4 — renaming changes nothing inside the file.Illustrative mock-up: an interrupted recording can leave the file index missing, so the file cannot be decoded. Step 5 — Delete the abandoned entry and upload as a fresh video What to do: Delete the abandoned video from YouTube Studio, then upload the repaired file as a new video — YouTube does not let you replace the file of an existing video. How: In YouTube Studio, open Content, select the video showing "Processing abandoned", and delete it. Then upload the new file as a fresh video, re-entering the title, description, thumbnail, and settings — so keep those details saved before you delete. There is no "replace file" button on YouTube. Example: A creator's tutorial fails processing twice. After re-exporting, she deletes the abandoned entry, uploads the new file with the saved title and description, and the video processes fully within fifteen minutes. Common mistake: Leaving the abandoned entry in place and uploading the fixed file as a second video, leaving a broken video in your content list.Illustrative diagram: delete the abandoned entry first, then upload the fixed file as a fresh video. Step 6 — Upload on a stable connection and wait for processing What to do: Upload the new file on a stable connection, keep the tab open until 100%, and wait for processing to finish. How: Use a wired connection or strong Wi-Fi, and avoid large downloads while uploading. YouTube's Help page notes this error can also occur on reduced upload speeds, and as reported by creators, a VPN dropping out mid-upload can break the file. Keep the tab open until the bar shows 100%, then check the video plays in Studio before sharing it. Example: A creator uploads a 4K video over weak hotel Wi-Fi, and the upload stalls and restarts. The video fails with "Processing abandoned". The next day, on a stable home connection, the same file uploads and processes without a problem. Common mistake: Closing the laptop lid or the browser tab the moment the bar hits 100%, before processing has run.Illustrative diagram: five checks for a stable upload that reaches processing cleanly. Checklist — Fix a "Processing Abandoned" error☐ Error appeared after 100%, not a stuck upload ☐ Played the file to the end; it plays cleanly ☐ File is MP4 with H.264 video and AAC audio ☐ Re-exported at constant frame rate, one audio track ☐ Rebuilt the file if the recording or export was interrupted ☐ Deleted the abandoned entry before uploading again ☐ Uploaded the new file as a fresh video ☐ Stable connection; tab kept open until processing finishedFAQs 1. Is "Processing abandoned" a strike or a penalty on my channel? No. YouTube received your file but its encoders could not decode it, usually because it is shortened, incomplete, or unsupported. It is not a copyright issue or a strike. 2. Can I just upload the same file again and hope it works? You can try once, but a damaged file usually fails the same way. Play the file to the end first. If it freezes or stops early, only a re-export or a repair will change the result. 3. Can I replace the file on the video that failed? No. YouTube does not let you replace the video file of an existing upload. Delete the abandoned entry, upload the repaired file as a new video, and re-enter the title, description, thumbnail, and settings. 4. How is this different from a video stuck while uploading? A stuck upload never reaches 100%, so the file has not fully arrived — the usual fix is to resume it within 24 hours from the upload page. "Processing abandoned" appears after the upload completes. 5. My file plays fine on my computer but still fails. What should I try? Re-export it with standard settings: MP4, H.264 video, AAC audio, constant frame rate, and one mixed audio track. Game capture files with variable frame rate or several audio tracks are a common cause. If it still fails, YouTube's Help page suggests trying a different platform. SourcesYouTube Help — "Common uploading errors" (official page, opened live 6 Nov 2026): https://support.google.com/youtube/answer/10383400?hl=en CreatorPlaybook — "YouTube Video Stuck on Uploading or Processing? How to Fix It" (internal link, verified from the blog sitemap): </blog/youtube-video-stuck-uploading-or> CreatorPlaybook — "YouTube Pre-Publish Checks: Copyright, Thumbnail & Title Checklist Before You Hit Publish" (internal link, verified from the blog sitemap): </blog/youtube-pre-publish-checks-copyright>
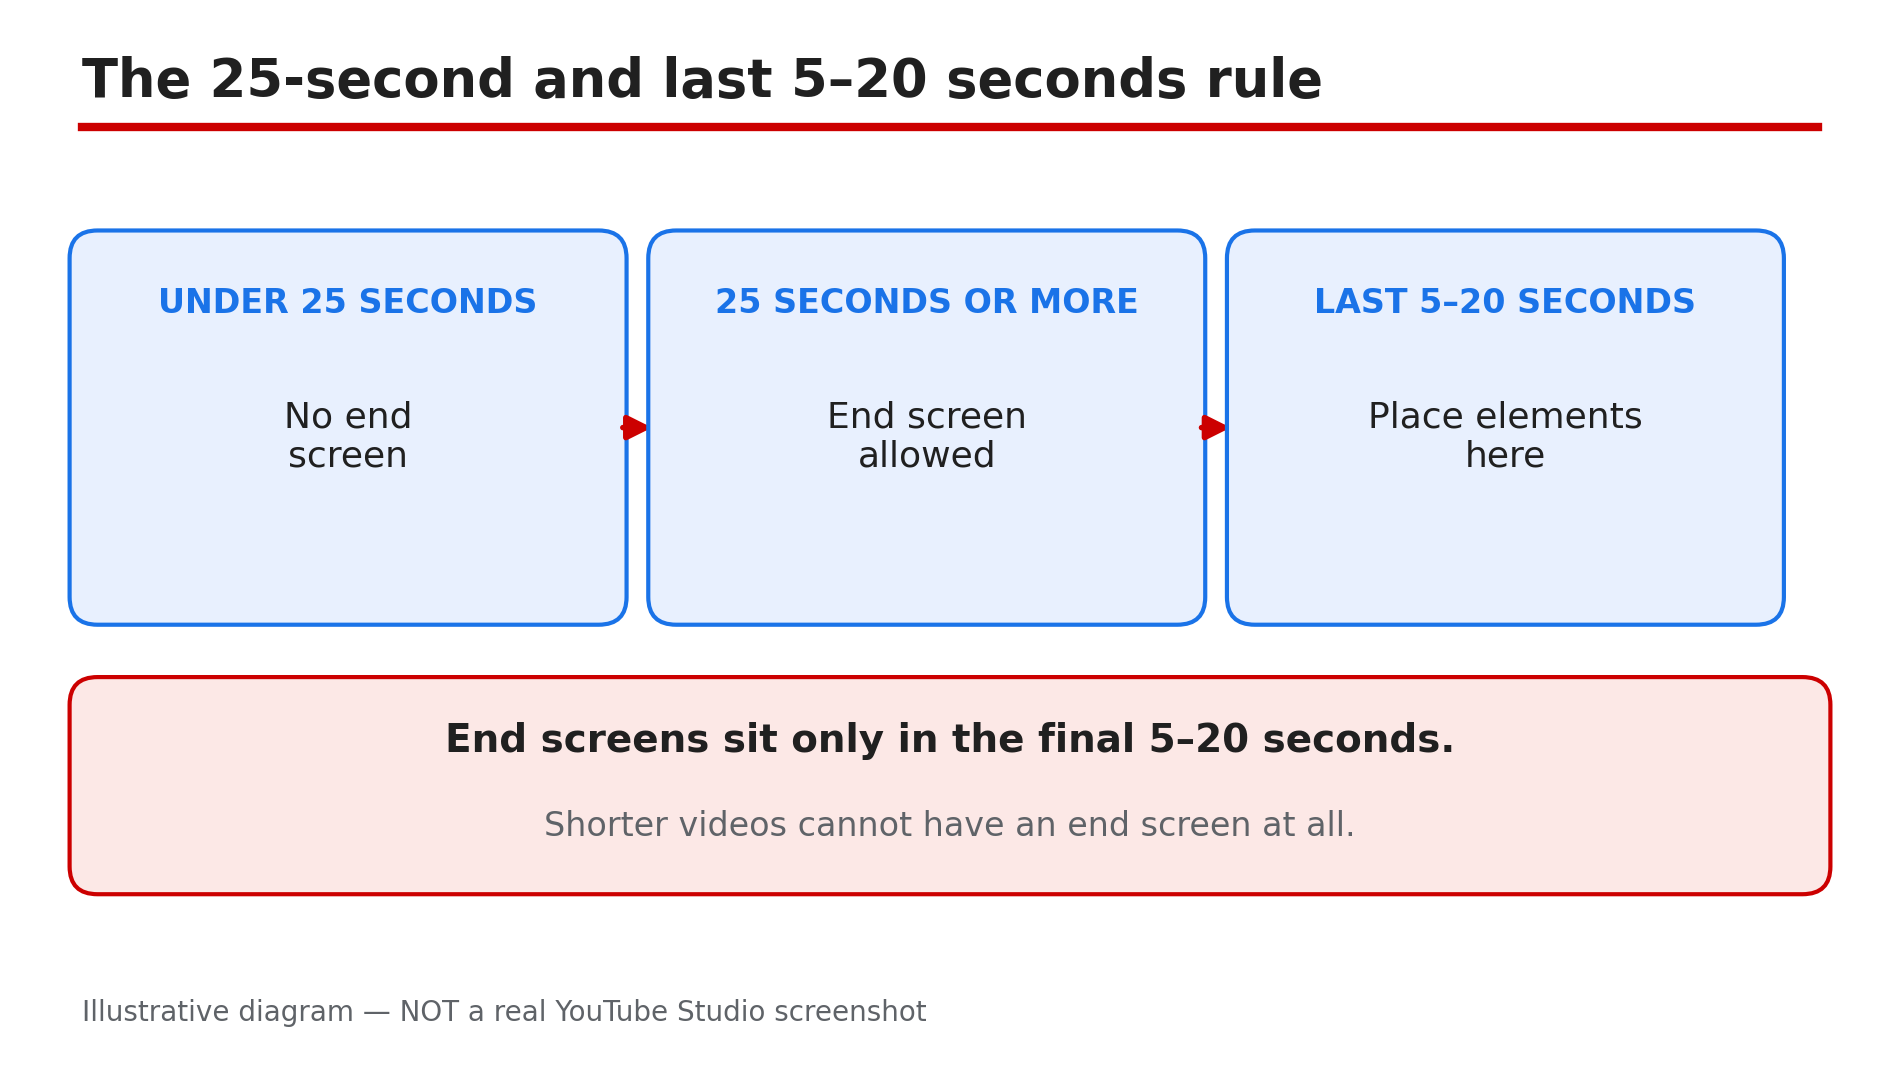
- CreatorPlaybook Team
- 06 Nov, 2026
YouTube End Screens and Cards Not Showing? The Rules, the Limits and the Fixes
You added an end screen in YouTube Studio, saved it, and watched your video to the end. Nothing appeared. Or you added a card mid-video and its teaser never popped up. It feels like a bug, but usually a rule has been crossed without you knowing it. End screens and cards have strict limits. An end screen can sit only in the last 5 to 20 seconds, and the video must be at least 25 seconds long. Some videos cannot have them at all. Even when you do everything right, YouTube says your end screen may not always show, or may show differently than designed. What You Will LearnThe 25-second rule and the last 5 to 20 seconds Which videos and places never show them Element and card limits, and the Link rule Why a card in the final 20 seconds shows no teaser How to add and save an end screen in Studio How to check end screen clicksStep 1 — Check the 25-second rule and the last 5–20 seconds What to do: Check the video length first, then where the end screen starts and ends. How: Open the video in Studio and check its duration. Shorter than 25 seconds, and you cannot add an end screen. At 25 seconds or longer, place it only inside the last 5 to 20 seconds: no earlier than 20 seconds before the end, and no shorter than 5 seconds. Move it fully inside that window, then save. Example: A 10-minute video ends at 10:00, so the end screen can start at 9:40 at the earliest. A 20-second video cannot have one. Common mistake: Putting an end screen in the middle of a video, or across the last 30 seconds.Illustrative diagram: end screens need a video of at least 25 seconds and sit only in the last 5 to 20 seconds. Step 2 — Check the blocks that stop end screens completely What to do: Check whether your video, its format, or where it is watched is on the list where end screens are not available. How: Check the audience setting first. End screens are not available for videos set as Made for Kids, so changing the timing will not fix that. They are also not available in the YouTube Music app, on mobile web except iPad mobile web, in 360 videos, and in Flash videos. They never show on Shorts — use the Related Video feature instead, which needs Advanced features. Example: You add an end screen to a 360 video and watch it on your phone browser. Nothing appears, because the format and viewing place are both on the list. Common mistake: Re-adding the same end screen on a Made for Kids video or a Short and assuming Studio failed to save it.Illustrative diagram: the videos and viewing places where end screens are not available. Step 3 — Check how many elements you added and who can use a Link What to do: Count your end screen elements and check the type of each one, especially any Link element. How: On a 16:9 video you can add up to 4 elements; other aspect ratios may allow fewer, so a vertical or square video may not accept 4. The types are Video, Playlist, Subscribe, Channel, and Link. The Link element is for Partner Program members only, and the linked site must comply with policies. If you are not in the program, or the site does not comply, that Link will not work. Example: You add Video, Playlist, Subscribe, Channel, and a website Link — five elements on a 16:9 video. That is one too many. Remove one. Common mistake: Adding 4 elements to a non-16:9 video and expecting all 4 to show, or adding a Link without Partner Program membership.Illustrative diagram: the end screen element limit and the Link element rule. Step 4 — Fix card timing, Content ID blocks and the final 20 seconds What to do: Check where each card sits, and whether anything else is blocking cards. How: You can add up to 5 cards per video, at a time you choose. Do not place one in the final 20 seconds if you want its teaser seen: while an end screen shows, card teasers and the video watermark are suppressed. Cards are not available on Made for Kids videos. They will not show if the video has a Content ID claim and the content owner set up a campaign. External-link cards need YouTube Partner Program membership. Example: You add a card at 9:50 in a 10-minute video, where your end screen starts. The viewer never sees its teaser. Move it to 5:00, where the point is first mentioned. Common mistake: Putting the most important card at the very end, next to the end screen.Illustrative diagram: a card in the final 20 seconds never shows its teaser while the end screen is showing. Step 5 — Add and save the end screen correctly in Studio What to do: Add the end screen in the Editor in Studio, save it, and then watch the video through to the end. How: Go to Studio, then Content, open the video, then Editor, then End screen. Choose the element, place it inside the last 5 to 20 seconds, and click SAVE. You can also add one while uploading. Then play the published video to the end where end screens are available. Viewers can hide end screens while watching, so a hidden end screen on one viewing does not prove it was never added. YouTube also says your end screen may not always show, or may show differently than designed, because it improves end screens based on performance, viewer behaviour, device and context. Example: You add Subscribe and Video elements in the last 10 seconds, click SAVE, then watch on desktop and see both. That live check matters more than the Editor preview. Common mistake: Closing the Editor without clicking SAVE, or never watching the live video to the end.Illustrative diagram: the steps to add and save an end screen in YouTube Studio. Step 6 — Measure clicks in Analytics and change what is not working What to do: Look at the end screen numbers in Analytics instead of guessing from one viewing. How: Open Analytics for the video, go to the Engagement tab, and look at "End screen element click rate" — how often viewers clicked an element when shown. For the whole channel, look at "Top end screen element types" and "Top videos by end screen". If one type gets clicks and another gets almost none, change the weak element, its position, or its timing. If the rate is low everywhere, viewers may be leaving before the final seconds. Example: The Video element gets clicks on most videos, but Playlist almost never does. Keep Video, replace Playlist with Subscribe next time, and compare again. Test one change at a time. Common mistake: Changing the end screen after every view, or judging it from a video with very few views.Illustrative diagram: where to check end screen clicks in YouTube Analytics. Checklist — End screens and cards not showing☐ Video at least 25 seconds long ☐ End screen only in the last 5 to 20 seconds ☐ Video is not Made for Kids ☐ Not a Short, 360 video, or blocked viewing place ☐ No more than 4 elements on 16:9 video ☐ Link only with Partner Program membership ☐ No more than 5 cards; no teaser in final 20 seconds ☐ Saved in Studio, checked on live videoFAQs 1. Why is my end screen not showing even though I added it in Studio? Check length, timing, and blocks first. The video must be at least 25 seconds long, the end screen in the last 5 to 20 seconds, and the video not Made for Kids. Check you clicked SAVE and are watching where end screens are available. YouTube also says it may not always show, or may show differently than designed. 2. Can I add an end screen to a Short? No. End screens never show on Shorts. Use the Related Video feature instead, which needs Advanced features. That format does not support end screens. 3. How many end screen elements and cards can I add? Up to 4 elements on a 16:9 video; other aspect ratios may allow fewer. Types are Video, Playlist, Subscribe, Channel, and Link. Up to 5 cards per video, at a time you choose. The Link element and external-link cards need Partner Program membership. 4. Why did my card teaser not appear at the end of the video? While an end screen shows, card teasers and the video watermark are suppressed. A card in the final 20 seconds never shows its teaser, even if added correctly. Move it earlier, to where the viewer needs it. 5. Why do my cards not show at all on a video? Cards are not available on Made for Kids videos. They will also not show if the video has a Content ID claim and the content owner set up a campaign. An external-link card needs Partner Program membership. Check the audience setting and any Content ID claim first, then timing and the limit of 5. SourcesYouTube Help — "Add end screens to videos" (official page, opened live 6 Nov 2026): https://support.google.com/youtube/answer/6388789?hl=en CreatorPlaybook — "Made for Kids on YouTube: Revenue, Limits and What Creators Should Do": </blog/made-for-kids-on-youtube-revenue-limits> CreatorPlaybook — "YouTube Description Links Not Working? The Rules, the Limits and the Fixes": </blog/youtube-description-links-not-working>
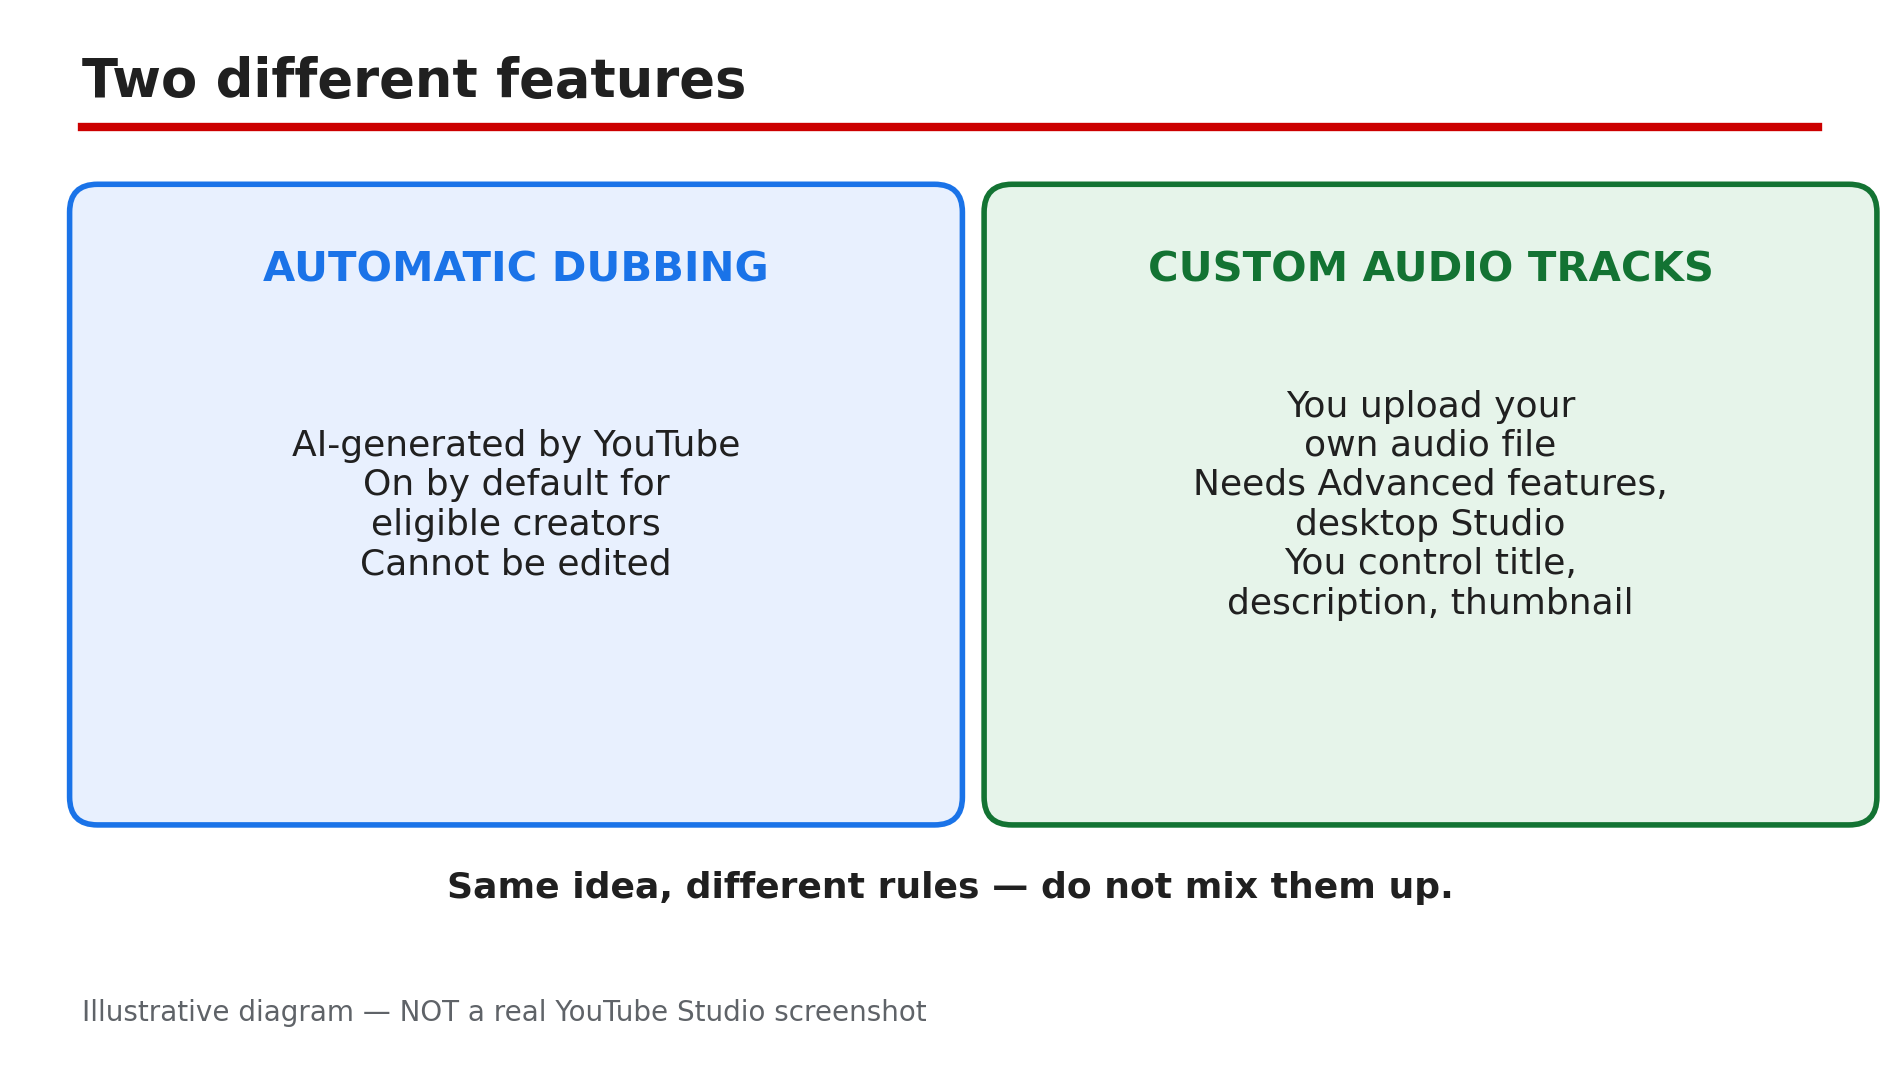
- CreatorPlaybook Team
- 06 Nov, 2026
YouTube Multi-Language Audio Tracks Not Showing? How Dubs and Translated Titles Work
You switched on multi-language audio and nothing changed. Viewers abroad still hear the original language, the translated title never appears, and the extra audio track is simply not there. It feels broken — but most of the time it is working exactly as YouTube designed it. The confusion comes from two different features sharing the idea of "translations". Automatic dubbing uses AI to generate a dubbed version of your video in other languages, and it is on by default for eligible creators. Custom multi-language audio tracks are dubs you upload yourself. They look similar to viewers but have different rules, limits and fixes. What You Will LearnThe difference between automatic dubbing and custom multi-language audio tracks Why automatic dubs are on by default and what you can and cannot change When a video is not eligible for automatic dubbing How to upload your own audio track, and the rule on deleting an automatic dub first Why translated titles and descriptions only appear for some viewers How viewers switch audio tracks on the playerStep 1 — Work out which feature you are looking at What to do: Before changing any setting, find out whether your video has an automatic dub, a custom track, or neither. How: In YouTube Studio on a computer, go to Content, open the video, and check the Languages section. Automatic dubs appear in the per-video language list, and videos with an AI-generated dub are marked "auto-dubbed" in the description. Example: Seeing "Spanish (auto-dubbed)" means YouTube generated that audio. Plain "Spanish" means a human uploaded the track. Common mistake: Assuming every dubbed version is one you control. Automatic dubs cannot be edited — you can only preview, publish or unpublish, or delete them.Automatic dubbing and custom audio tracks are two separate features with different rules. Step 2 — Check whether your video is eligible for automatic dubbing What to do: Automatic dubbing is on by default for eligible creators, but not every video qualifies — check the rules before assuming a missing dub is a bug. How: A video is ineligible if it is longer than 120 minutes, has little or no speech, is music only, is in an unsupported original language, has an undetectable source language, has speech that is too fast, or has a copyright or Content ID claim. If any of these apply, no dub is generated. Example: A 150-minute podcast gets no automatic dub — it is over the 120-minute limit. A shorter cut would qualify. Common mistake: Treating a copyright claim as a small warning. A claimed video is ineligible — sort out the claim first, then check for a dub.Six eligibility checks decide whether YouTube creates an automatic dub for your video. Step 3 — Decide whether to keep, unpublish or delete an automatic dub What to do: Automatic dubs are AI-generated, so they can contain errors — wrong pronunciation, misread names, awkward idioms or jargon. Listen before deciding. How: Preview the dub in the Languages section. If the quality is acceptable, leave it published. If it is poor, unpublish it — you can republish it later. Only delete it if you are sure: a deleted dub cannot be republished. Automatic dubbing does not translate your title or description. Example: A creator hears a product name mispronounced throughout the Hindi auto-dub, so they unpublish it while recording their own version. Common mistake: Deleting a dub to "start fresh" and expecting a new one. Deletion is permanent — unpublish instead.Three choices for an automatic dub — unpublish if you might want it back. Step 4 — Upload your own audio track the right way What to do: For a professional-quality dub, or a language YouTube has not generated automatically, upload your own audio track — this custom feature is separate from automatic dubbing. How: You need Advanced features access, and you must use Studio on a desktop computer — the upload flow is not in the mobile app. Go to Content, open the video, then Languages — or the Languages menu, then Add language. Next to Dub, click Add, and upload an audio-only file about the same length as the video. As reported, this feature has been rolling out gradually since September 2025. Example: A creator records a Spanish voiceover for a 10-minute tutorial, exports one audio file of about 10 minutes, and uploads it via Languages, Add language, Dub, Add. Common mistake: Uploading your own track in a language where YouTube already made an automatic dub, without deleting it first. This is a hard rule: delete the automatic dub before uploading your own track in that language.Five steps to upload your own audio track in YouTube Studio on desktop. Step 5 — Understand why translated titles and descriptions appear for some viewers and not others What to do: Translated titles and descriptions belong to the custom multi-language feature, not automatic dubbing. With only an automatic dub, your title and description stay in the original language. How: When you add a language in the Languages section, add a translated title and description. Viewers see them when the translation matches their Google-account language, browser language or location. Creator-provided translations are prioritised. YouTube search also reads translated titles and descriptions. Example: A creator adds a Spanish track, title and description. A viewer with a Spanish account language sees the Spanish title; an English viewer sees the original. Common mistake: Expecting a translated title to appear for everyone. If no translation matches a viewer's language, they see the original title.Translated titles appear only when they match the viewer's language. Step 6 — Check what the viewer actually sees and hears What to do: Before declaring the feature broken, check the viewer side. Tracks default to the viewer's preferred language — the Help page says watch history determines it — and viewers can switch manually in player settings. How: Open the video signed out, or in a browser set to another language, and click the settings gear on the player to find the audio track option. If your track is listed, it works — the viewer just needs to switch, or their preferred language needs to match. Captions are different from dubs: captions are text on screen, dubs are spoken audio. Example: A German viewer reports hearing English. The creator checks player settings and finds the German track listed — the viewer simply had not switched, and their preferred language was still English. Common mistake: Confusing missing captions with missing audio tracks. If subtitles are present but the audio is still in the original language, the dub is the missing piece — fix the audio track, not the subtitle file. Live auto-dubbing is not available now: YouTube announced a pilot starting early 2027 only, as reported.How a viewer switches audio tracks from the player settings. Checklist — Multi-Language Audio Tracks☐ Checked the video's Languages section in desktop Studio ☐ Identified each language as an automatic dub or uploaded track ☐ Checked eligibility: under 120 minutes, has speech, no claim ☐ Previewed any automatic dub; chose keep, unpublish or delete ☐ Deleted any automatic dub before uploading my own track there ☐ Uploaded an audio-only file about the same length as the video ☐ Added translated title and description for each custom-track language ☐ Tested as a viewer: checked the audio track in player settingsFAQs 1. Why is there no automatic dub on my video? Your video may not be eligible. Automatic dubbing does not work on videos longer than 120 minutes, videos with little or no speech, music-only videos, videos in an unsupported original language, videos with an undetectable source language or speech that is too fast, or videos with a copyright or Content ID claim. As reported, automatic dubbing opened to all creators in February 2026. 2. Can I edit an automatic dub to fix a wrong word? No. Automatic dubs cannot be edited — you can only preview, publish or unpublish, or delete them, and a deleted dub cannot be republished. If the errors bother you, unpublish the automatic dub and upload your own recorded track instead, remembering to delete the automatic dub first. 3. I uploaded my own audio track but it does not show. What went wrong? Check whether YouTube already made an automatic dub in that language. If it did, you must delete it before uploading your own track — this is a hard rule. Also confirm you uploaded from desktop Studio with Advanced features access, the file is audio-only, and its length roughly matches the video. 4. Why does my translated title not show for everyone? Translated titles and descriptions show only when they match the viewer's account language, browser language or location. A viewer whose language does not match any translation you provided sees the original title. Automatic dubbing alone does not translate titles or descriptions. 5. Are captions and audio dubs the same thing? No. Captions and subtitles are text shown on screen; audio dubs are spoken audio in another language. A video can have captions without a dub, or a dub without captions. They are managed separately. SourcesYouTube Help — "Use automatic dubbing" (official page, opened live 6 Nov 2026): https://support.google.com/youtube/answer/15569972?hl=en-GB YouTube Help — "Add Multi-language features to your videos" (official page, opened live 6 Nov 2026): https://support.google.com/youtube/answer/13338784?hl=en CreatorPlaybook — "YouTube Captions Not Showing or Wrong? How to Fix Subtitles" (internal link, verified from the blog sitemap): </blog/youtube-captions-not-showing-or-wrong>
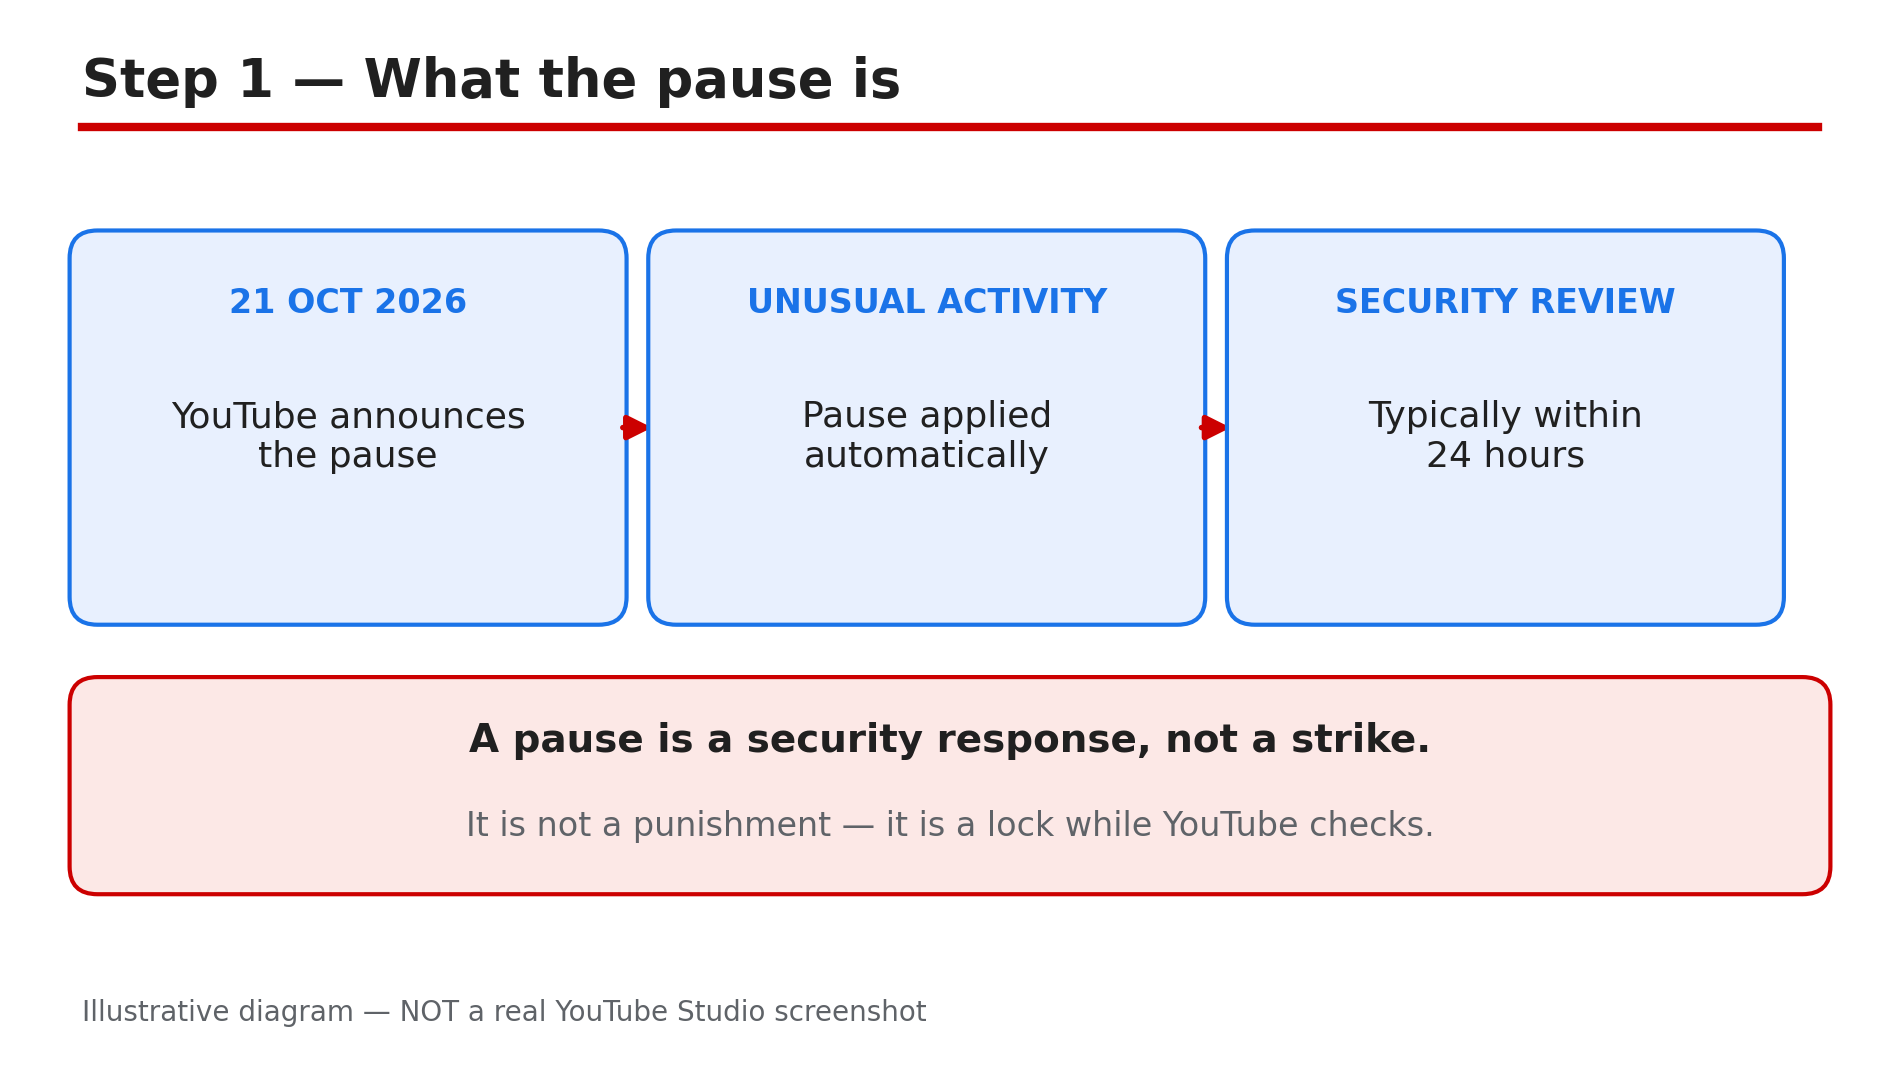
- CreatorPlaybook Team
- 05 Nov, 2026
YouTube Temporary Feature Pause for Hacked Accounts: What It Means and How Long It Lasts
You open YouTube Studio to upload a video and find a banner saying your account has been temporarily restricted for security — uploads, livestreams and thumbnails locked, and you did nothing wrong. This is YouTube's temporary feature pause, announced on 21 October 2026. When YouTube detects unusual or unauthorised activity, it automatically freezes the actions a hijacker would use, while its security teams check whether the channel was really hacked. This guide explains what freezes, what keeps working, how long the review takes, and what to do. What You Will LearnWhat the temporary feature pause is and why YouTube added it The five actions that freeze during a security review What viewers still see, and why monetisation is not affected How long the review typically takes, and the two outcomes What to do while the pause is in place What YouTube has not explained — including one disputed detail How recovery works if a hijack is confirmed, and how to prevent the next oneStep 1 — What the pause is, and why it exists What to do: Understand that a pause is a security response, not a strike or a punishment. How: On 21 October 2026, TeamYouTube announced the temporary feature pause in the YouTube Help Community. When YouTube notices unusual activity on a channel which might be unauthorised, it may automatically pause certain features while it works out what happened. The reason is speed: when a channel is hijacked, hackers look to quickly lock the owner out and upload unwanted videos or live streams. Hijacked channels are often used to push scam videos and fake live streams, which can lead to strikes or termination. The pause stops that damage before it happens. It is not a strike of any kind, and it does not mean your channel is terminated. Example: A creator with 80,000 subscribers logs in to find uploads locked. No strike email arrived — the banner simply says the account is temporarily restricted for security. Common mistake: Treating the banner as a strike and filing a strike appeal — a strike appeal goes nowhere.Illustrative diagram of how the temporary feature pause begins. Step 2 — The five actions that freeze, and what keeps working What to do: Check which buttons are locked, and reassure yourself about what is not. How: While the pause is in place, no one can perform five actions on the channel — and "no one" means the real owner and any channel managers too, not just the suspected intruder. The five are: uploading or updating videos and Shorts; starting a live stream; creating playlists or adding videos to them; uploading custom thumbnails; and switching videos from Private to Unlisted or Public. What does not freeze matters just as much: according to the announcement, viewers can continue watching your existing videos and interacting with your channel, and your monetisation status will not be impacted. Example: A cooking channel in a pause still gets comments and views on old videos, but cannot upload the new recipe video or change last week's thumbnail. Common mistake: Assuming the whole channel is gone because uploads are blocked.Illustrative diagram of the five actions frozen during a temporary feature pause. Step 3 — How long it lasts, and the two outcomes What to do: Read the time estimate in the banner, and understand that "typically" is not a promise. How: YouTube's announcement says its security teams will review the channel's status typically within 24 hours, and the Studio banner gives an estimate of the review time. The word to notice is "typically": YouTube states no maximum. There are two outcomes. If your account security is verified, full access is immediately restored. If unauthorised activity is confirmed, YouTube reaches out with next steps. As reported from the companion Help article, in a confirmed hijack the limits stay until the owner re-secures the Google Account, cleans up the unauthorised changes, and contacts YouTube support. That second stage has no published time frame. Example: A channel paused on Tuesday morning is back to normal by Tuesday evening. A confirmed hijacked channel stays locked for days. Common mistake: Treating "typically within 24 hours" as a guaranteed deadline.Illustrative diagram comparing what keeps working with what freezes during a pause. Step 4 — What to do while the pause is in place What to do: Read the banner, check your email, and wait — then secure the account. How: The Studio banner confirms the pause and, according to the announcement, YouTube provides an explanation of what happened, an estimate of the review time, and steps to secure your account and review any unauthorised changes. Updates go to the channel owner's email, so check that inbox, including spam. As reported from the Help article, you do not need to take immediate action while the review is in progress. That does not mean doing nothing: while you wait, secure the Google Account behind the channel — turn on 2-Step Verification, use a strong unique password, and review recovery details, devices and third-party access. Do not try to work around the pause with another channel or a manager's login — the restriction applies to the channel, not to one login. Example: A creator reads the banner, finds YouTube's email, and turns on 2-Step Verification while the review runs. Common mistake: Trying to upload from a manager's account, or creating a second channel — the pause is channel-wide.Illustrative diagram of the review timeline and its two outcomes. Step 5 — What YouTube has not explained What to do: Know the gaps, so you do not act on rumours about the pause. How: YouTube has not said what counts as "unusual or unauthorised activity" — no trigger is named, and no false-positive rate has been published. A legitimate login from a new phone or a new team member could, as reported, trigger a pause at a bad time, and there is no published way to appeal one. One detail is genuinely unsettled: some secondary reports say the companion Help article adds that YouTube may set some of your recent videos to private during the review, while the announcement itself says nothing about it. Do not treat it as settled — the announcement says viewers can keep watching your existing videos. If a recent video does go private during a review, you cannot switch it back until the pause ends. Example: A creator reads a news article claiming recent videos go private, checks the announcement, and finds no such statement. Common mistake: Repeating the private-videos claim as fact.Illustrative diagram of what to do while a feature pause is in place. Step 6 — If a hijack is confirmed, recover in the right order What to do: Follow YouTube's recovery path step by step, and lock the account down for the future. How: If the review confirms your channel was hijacked, the limits stay until you have re-secured the account and contacted support. The order matters — it matches the guided recovery tool YouTube introduced in July 2025 for hacked channels. First, secure the Google Account: change the password, turn on 2-Step Verification, remove unfamiliar devices and sessions, and check the recovery details have not been changed by the intruder. Second, clean up the channel: delete anything the hijacker added, restore thumbnails and descriptions they changed, and review channel managers and permissions. Our guide on hacked and terminated channels walks through the full recovery and appeal process. Third, contact YouTube support to ask for the restrictions to be lifted. To prevent a repeat, use 2-Step Verification and strong passwords — the two measures YouTube names. Be wary of sponsorship offers that ask you to download software — as reported, fake offers carrying cookie-stealing malware were behind a major hijacking campaign. Example: A gaming channel confirmed hijacked: the owner changes the password, removes the intruder's session, deletes three scam live streams, then contacts support. Common mistake: Contacting support first, before securing the account.Illustrative diagram of the recovery order after a confirmed hijack. Checklist — If Your Channel Gets a Temporary Feature Pause☐ I read the Studio banner and its review-time estimate ☐ I checked the channel owner's email, including spam, for updates ☐ I know the five frozen actions, and that viewers can still watch ☐ I did not file a strike appeal — this is not a strike ☐ I turned on 2-Step Verification and checked recovery details ☐ I reviewed signed-in devices and third-party access ☐ I did not try to work around the pause with another login ☐ If a hijack is confirmed, I will secure the account, clean up, then contact supportFAQs 1. What is YouTube's temporary feature pause? A security measure announced on 21 October 2026. When YouTube detects unusual or unauthorised activity, it pauses five publishing actions while its security teams review whether the channel was hacked. 2. How long does the temporary feature pause last? YouTube says the review typically takes within 24 hours, but states no maximum. If the account is verified safe, access is restored immediately; a confirmed hijack keeps the limits until the owner re-secures it. 3. Can viewers still watch my videos during a pause? Yes — according to the announcement, viewers can keep watching your existing videos, and your monetisation status will not be impacted. 4. Does the pause mean my channel got a strike? No. The pause is not a Community Guidelines strike or a copyright strike, and it does not mean the channel is terminated. It is a temporary security review. 5. Will YouTube set my recent videos to private during the review? That detail is not settled. Some secondary reports say the companion Help article mentions it, but the announcement says nothing about it. Do not treat it as confirmed. SourcesYouTube Help Community (TeamYouTube) — "Introducing temporary feature pause for hacked accounts", 21 Oct 2026 (official announcement, confirmed in search results 5 Nov 2026): https://support.google.com/youtube/blog/473851650/introducing-temporary-feature-pause-for-hacked-accounts?hl=en CreatorPlaybook — "YouTube Channel Hacked or Terminated? How to Recover and Appeal": </blog/youtube-channel-hacked-or-terminated> CreatorPlaybook — "Community Guidelines Strike vs Copyright Strike: The Difference and How to Appeal": </blog/community-guidelines-strike-vs>
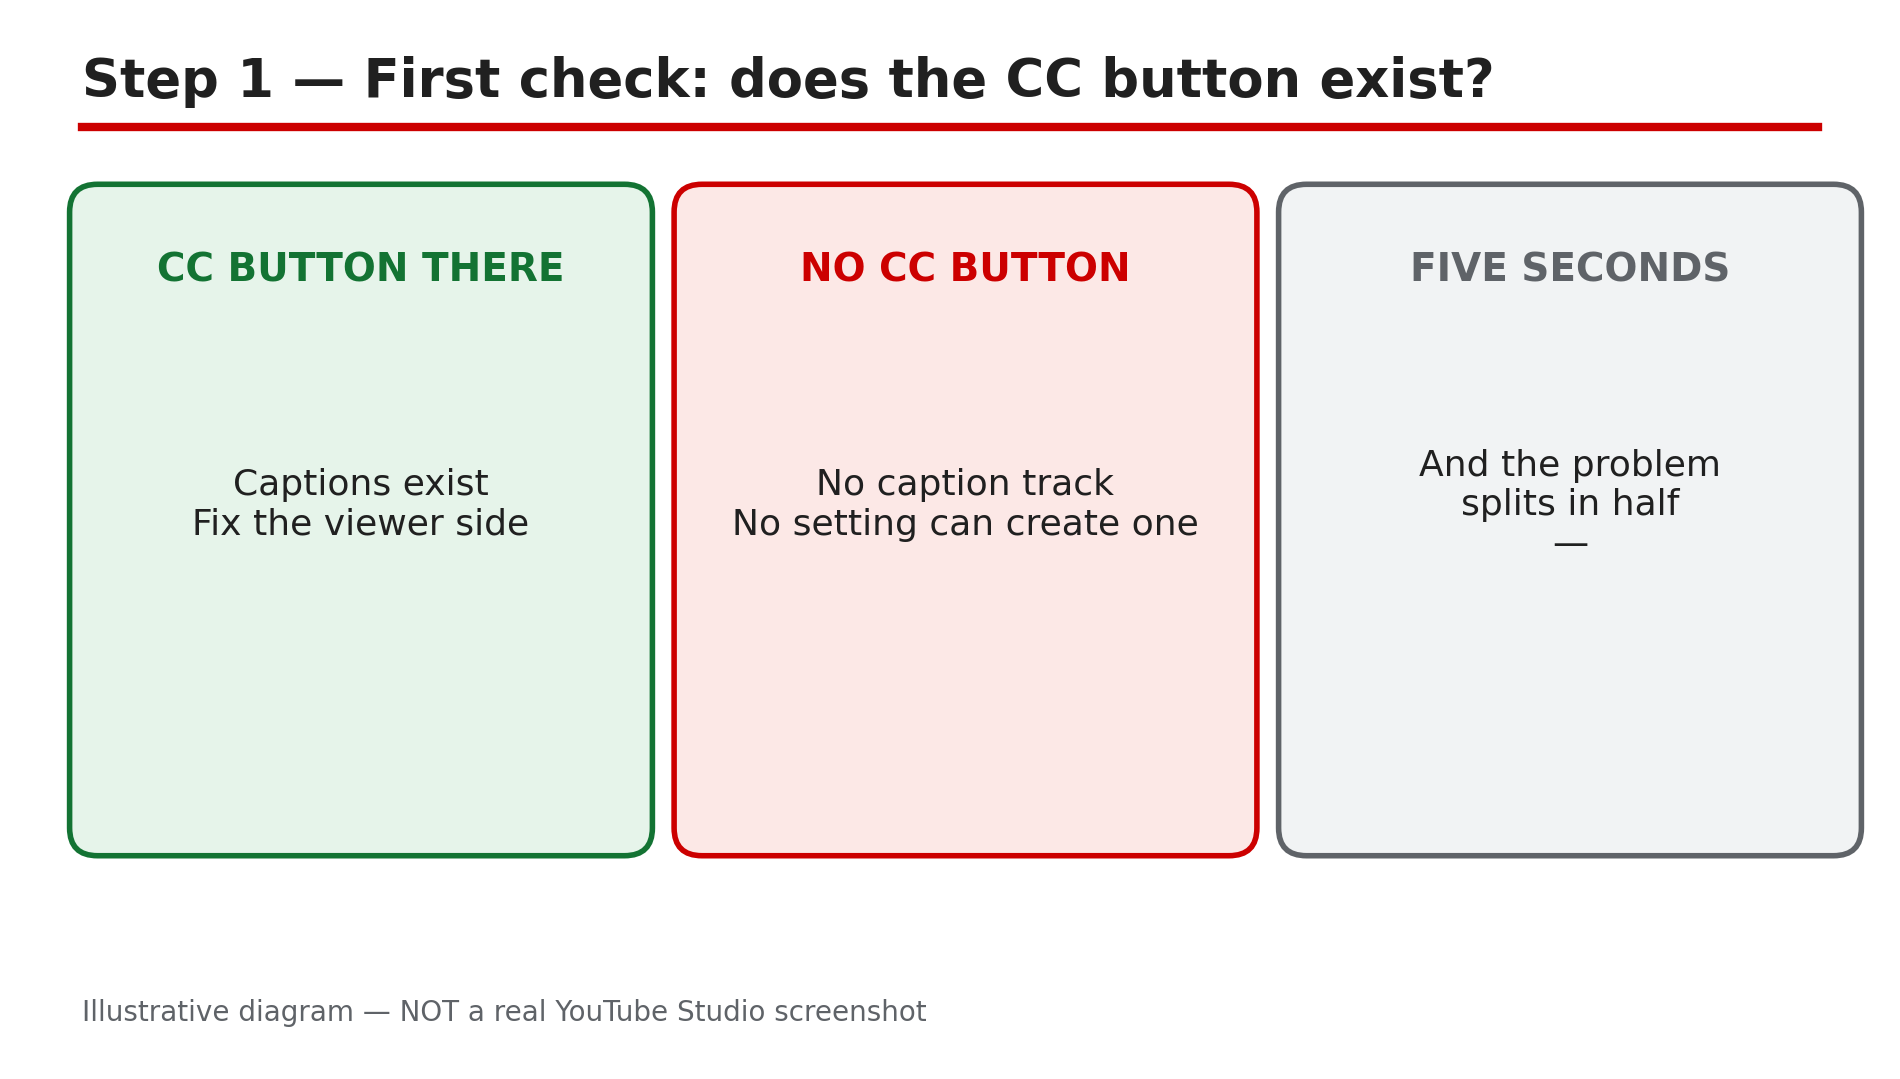
- CreatorPlaybook Team
- 03 Nov, 2026
YouTube Captions Not Showing or Wrong? How to Fix Subtitles on Any Video
You open a video, look for the CC button, and it is not there. Or it is there, you turn captions on, and the words are wrong — names misheard, sentences garbled, whole lines missing. Either way, the video is harder to watch than it should be — and for viewers who are deaf, hard of hearing, or watching on mute, it may be unwatchable. Captions fail for a small set of reasons, and they split into two groups: viewer-side problems, where the captions exist but are switched off or in the wrong language, and creator-side problems, where no caption track was ever made. The most common mistake is trying a viewer fix on a creator problem — no setting on your phone can conjure a caption track that does not exist. What You Will LearnThe first check: does this video have captions at all Viewer-side fixes: the CC button, language, and Auto-translate Why automatic captions never appear on some videos Why automatic captions get words wrong How to fix a track in Studio, or upload your own The video-language setting behind most caption failuresStep 1 — Check whether the video has captions at all What to do: Look for the CC button before you change any setting, because no setting can create a track that does not exist. How: On a computer, the CC button sits at the bottom right of the player; on a phone, tap the video once, then look for the CC icon. If there is no CC button, YouTube says captions are not available for that video — no caption file was uploaded and no automatic captions were generated. If the CC button is there, captions exist and the problem is on your side: they are switched off, or in the wrong language. Example: A viewer complains that a tutorial has no subtitles. The creator opens the video and finds no CC button — the video language was never set. Common mistake: Telling a viewer to "turn on captions in settings" when the video has no caption track. Settings can only show a track that exists.Illustrative diagram of the first captions check: whether the CC button exists. Step 2 — Fix the viewer side: turn them on and pick a language What to do: If the CC button is there, turn captions on, choose the right language, and check Auto-translate only if your language is missing. How: On a computer, click CC, then the Settings gear, then Subtitles/CC, and choose a language. On a phone, tap the video, then the CC button, then the menu, then Captions, and pick a language. If your language is not in the list, choose Auto-translate and pick it there — but understand what it does: Auto-translate translates from a caption track that already exists. Auto-translate can also persist across videos, so if subtitles suddenly appear in the wrong language on every video, check that it was not left on. Example: A Hindi-speaking viewer opens an English tutorial and sees only "English (auto-generated)". They choose Auto-translate, then Hindi — rough, but readable. On the next video the subtitles are still in Hindi, because Auto-translate stayed on. Common mistake: Assuming Auto-translate creates captions. It is a translation layer, not a transcription layer. When the menu is missing entirely, the video has no caption track to translate.Illustrative diagram of the viewer-side caption fixes. Step 3 — Learn why automatic captions never appear What to do: Match the missing track to one of the six reasons YouTube itself lists, instead of re-uploading the video and hoping. How: YouTube's Help page "Use automatic captioning" lists the reasons automatic captions may not be generated: the captions are not available yet because the audio is still being processed; the language is not supported; the video is too long; the sound quality is poor or YouTube does not recognise the speech; there is a long silence at the beginning; or multiple speakers talk over each other. The processing point matters most for new uploads: automatic captions are generated after the video itself finishes processing, not alongside it. Example: A creator uploads a 45-minute panel discussion with three people talking over each other. No captions appear after a day — the cause is overlapping speech, one of YouTube's listed reasons. Common mistake: Re-uploading the same video to "fix" captions. Re-uploading the same audio gives YouTube the same problem to solve — while the original video loses its URL and views.Illustrative diagram of the six reasons YouTube lists for missing automatic captions. How: YouTube's Help page is direct: automatic captions are generated by machine-learning algorithms, so the quality may vary, and they might misrepresent speech due to mispronunciations, accents, dialects or background noise. Names and technical terms are the usual casualties — the recogniser guesses the most common similar-sounding word. Third-party estimates put automatic captions around 70–90% accurate, as reported. There is also one deliberate replacement: YouTube replaces potentially inappropriate words with "[ __ ]" in automatic captions by default. That is a setting, not an error — switch it off in Studio under Settings, then Channel, then Advanced settings. Example: A creator's video about a place called "Kasauli" is captioned as "casually" throughout. The creator edits the track once, and the error is gone. Common mistake: Leaving automatic captions unreviewed on a video that matters. YouTube says creators should always review automatic captions and edit any parts that have not been transcribed properly.Illustrative diagram of why automatic captions mishear words. Step 5 — Fix the track in Studio, or upload your own What to do: Edit the automatic track, or replace it with a clean file you made yourself — the permanent fix. How: Sign in to YouTube Studio, go to Subtitles, and click the video. Under Subtitles, click More next to the automatic captions and choose to review and edit them. Editing an automatic track creates a new track with your revisions. Or add your own: click Add, choose a language, then Upload file, Auto-sync, or Type manually. Uploading a file is the permanent fix. And check that you published the track: a draft in the Subtitles section will not appear for viewers until it is saved and published. Example: A creator's most-watched tutorial has automatic captions full of misheard technical terms. They correct the terms and upload the file. The video now has clean captions. Common mistake: Editing the automatic track and forgetting to publish it, or editing it on one video and assuming the same errors are fixed on the others. Each video has its own track — fix the ones that matter.Illustrative diagram of fixing a caption track in Studio or uploading your own file. Step 6 — Set the video language, so future videos get captions at all What to do: Set the video language on every upload, and set the default once, so the root cause never comes back. How: YouTube will not generate automatic captions without an explicit video language set on that video — a blank language field is the most common cause. On each upload, open Details, then Show more, and set Video language. Then set it permanently: Studio, then Settings, then Upload defaults, so every future browser upload inherits it — our guide on upload defaults explains the whole screen. Defaults apply only to future uploads; they do not fix existing videos, so fix each old video in Studio and save. Example: A creator sets the default language to English, then checks an old video and finds its language field blank. They set it to English, and captions appear within a few hours. Common mistake: Setting the language on the channel and assuming old videos are fixed. Defaults help the next upload only.Illustrative diagram of the video-language setting behind most caption failures. Checklist — Before You Publish☐ I checked whether the video has a CC button at all ☐ I turned captions on and picked the right language, or used Auto-translate ☐ I waited a few hours for processing before calling captions broken ☐ I matched a missing track to one of YouTube's six reasons ☐ I reviewed the automatic track and fixed misheard names and terms ☐ I uploaded my own caption file on the videos that matter most ☐ I published the track — a draft does not show to viewers ☐ I set the video language, and the default language for future uploadsFAQs 1. Why is there no CC button on a YouTube video? Because no caption track exists for that video — none was uploaded and none was generated. No viewer setting can make the button appear. 2. Why are my YouTube captions wrong? Automatic captions are made by speech recognition, and YouTube says they can misrepresent speech because of mispronunciations, accents, dialects or background noise. Edit the track in Studio, or upload your own caption file. 3. How long do automatic captions take to appear? They are generated after the video finishes processing, not alongside it. Give it a few hours before treating it as broken. 4. What does "[ __ ]" mean in YouTube captions? It is YouTube replacing a potentially inappropriate word in automatic captions, by default. It is a setting, not an error: switch it off in Studio under Settings, then Channel, then Advanced settings. 5. Can I upload my own subtitles to YouTube? Yes. In YouTube Studio, go to Subtitles, select the video, add a language, then choose Upload file, Auto-sync or Type manually. SourcesYouTube Help — "Use automatic captioning" (official page, opened live 3 Nov 2026): https://support.google.com/youtube/answer/6373554?hl=en-GB CreatorPlaybook — "YouTube Upload Defaults: Save Time and Avoid Mistakes on Every Upload": </blog/youtube-upload-defaults-save-time-and>
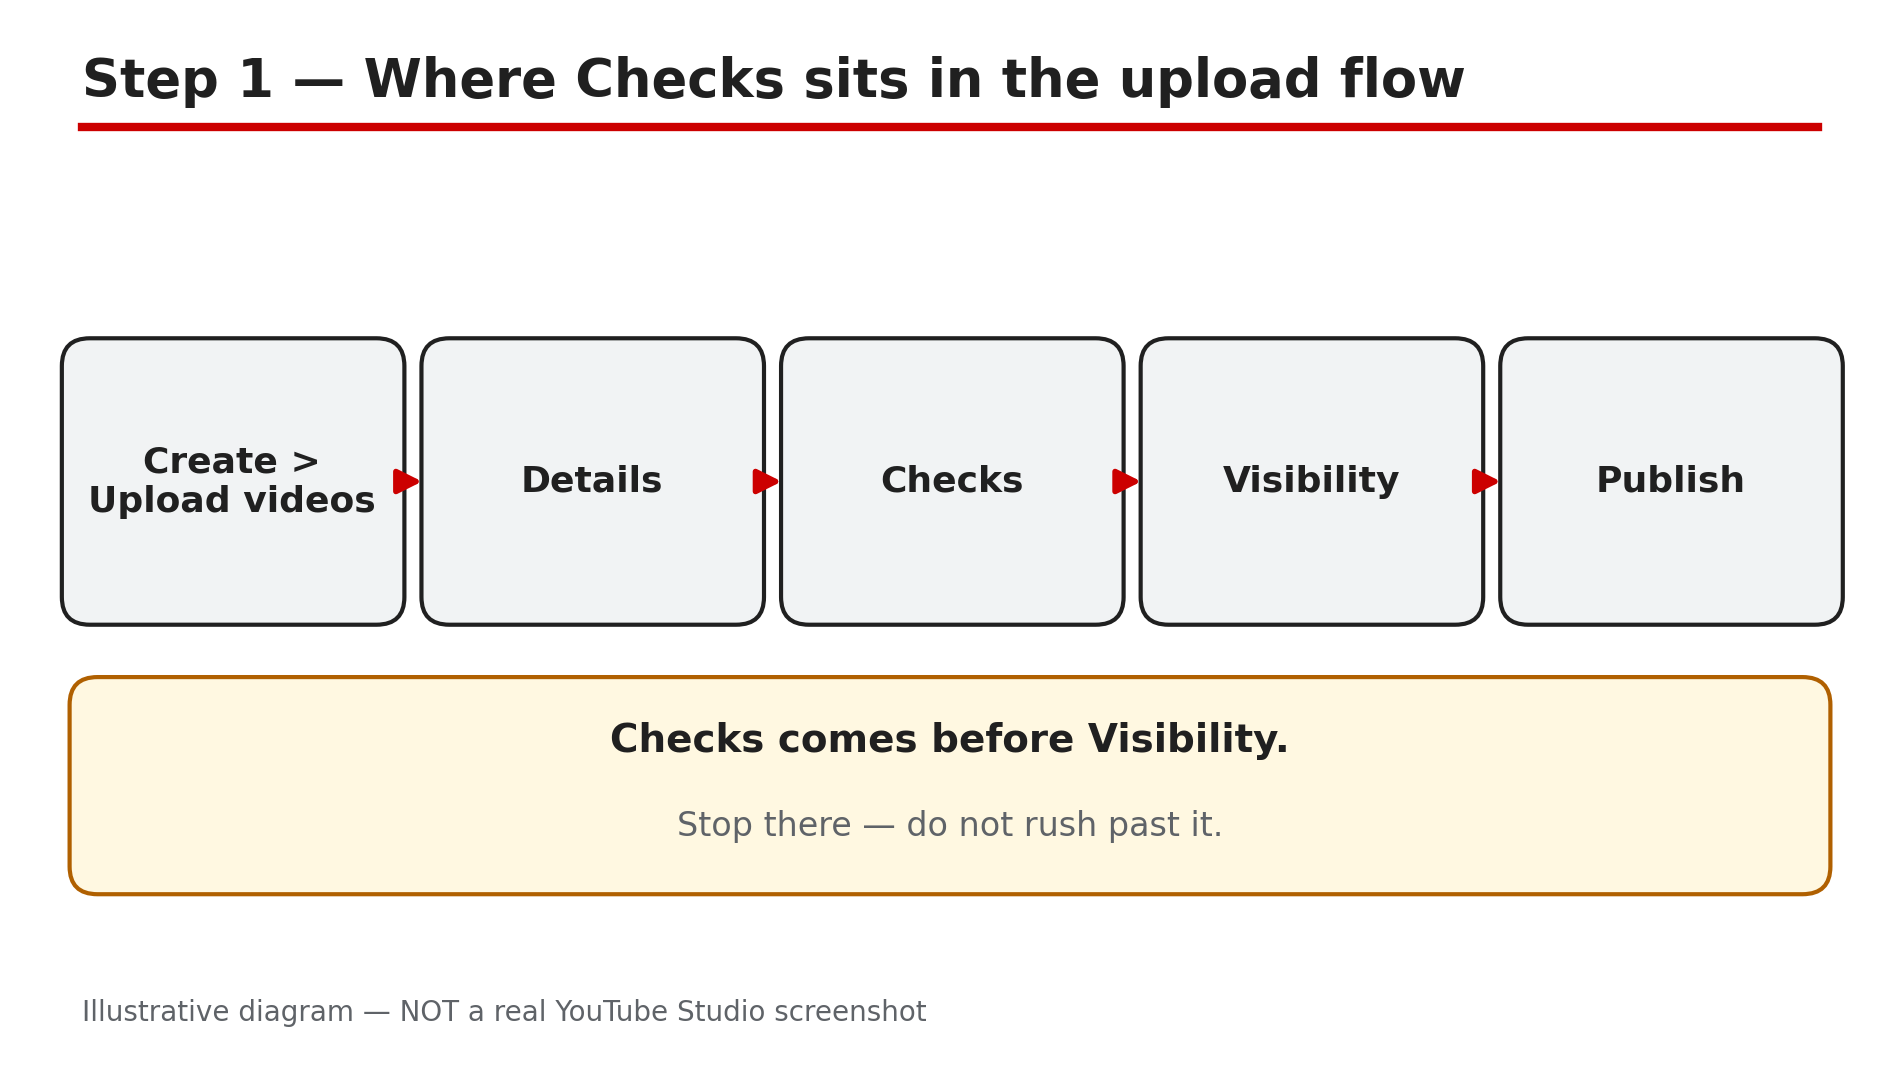
- CreatorPlaybook Team
- 03 Nov, 2026
YouTube Pre-Publish Checks: Copyright Check Failing? What to Do Before You Publish
You upload a video, and before you can publish it, YouTube Studio shows a step called Checks. Two lines appear: Copyright and Ad suitability. One of them says "See details" instead of a green tick, and suddenly a video you thought was finished is not finished at all. Checks is YouTube's own pre-publish screen. It scans your upload for copyrighted material and ad-suitability problems, so you can fix them before the video goes public instead of after your audience has already seen it. This guide explains what each result means and what to do when something is flagged. What You Will LearnWhat the Checks step scans, and what it does not How long each check takes, and whether to wait What "See details" means on the copyright check The three ways to fix a claimed song or clip When to dispute a claim, and when disputing makes things worse Why a clean Checks result is not a guaranteeStep 1 — Find the Checks step in the upload flow What to do: Upload on a computer and stop at the Checks step instead of rushing to Visibility. How: Sign in to YouTube Studio on a computer, click Create, then Upload videos, and select your file. Work through Details as usual — title, description, thumbnail, audience — and keep going until the progress bar shows Checks. YouTube's Help page "Upload YouTube videos" describes it plainly: "Use the Checks page to screen your video for copyright issues. Checks help you fix issues before your video is published." Monetised channels also get an ad-suitability check on the same page. Example: A creator uploads a 12-minute tutorial and reaches Checks. The copyright line shows a spinning icon, so they leave the tab open while it finishes. Common mistake: Uploading from the phone app and assuming the same screen appears. Checks is also in the Studio mobile app, as YouTube reported, but the full flow is clearest on desktop.Illustrative diagram of where the Checks step sits in the YouTube upload flow. Step 2 — Wait for both checks to finish What to do: Let the copyright check and the ad-suitability check complete before you publish, whenever you can. How: The copyright check searches your video for copyrighted content and usually finishes within about three minutes, per YouTube's announcement of the feature; the ad-suitability check can take a couple of minutes longer. Checks run in the background, so you can leave and come back. YouTube's Help page says you can publish while checks are still running and fix issues later — but that is a fallback: publishing early means the screening is unfinished, and a claim found afterwards can still affect visibility or monetisation. Example: A creator publishes while Checks is still spinning. At midnight a claim appears, the video is blocked in some countries, and the first night of views is lost. Common mistake: Treating the spinning icon as a formality. If the copyright check is still running, YouTube has not finished comparing your audio and video against its reference database.Illustrative diagram of the two checks YouTube runs before publishing. Step 3 — Read a "See details" result properly What to do: When a check flags something, open See details and read exactly what was matched before you touch anything. How: A green tick means no issue was found. "See details" means something was matched. Click it. For a copyright result, YouTube shows the claimed content, the timecode, who claimed it, and what the claim does — whether the video is blocked, monetised by the claimant, or restricted in some countries. For ad suitability, the page shows which guideline is involved, and monetised videos get a "Request review" option. Example: A creator sees "See details" on a vlog and finds a 12-second music clip at 4:31 claimed by a record label. The rest of the video is clean, so the fix is small and specific. Common mistake: Clicking Dispute the moment a claim appears. A dispute states the claim is wrong. If the match is real, a dispute can escalate it into a removal request and a strike.Illustrative diagram of the three things to read in a claim's details. Step 4 — Fix a claimed song or clip in the Studio Editor What to do: Use the Editor to remove or replace the claimed part, instead of deleting the whole video. How: From the claim details, open the video in the Studio Editor. YouTube gives you three practical options for claimed audio: trim out the claimed segment, replace the song with a track from the Audio Library, or mute the song in that segment. After the edit, the claim is usually released. If the claim covers the video itself — a clip of someone else's footage — trimming the segment out is the usual fix. Our separate guide on copyright claims walks through each option in detail. Example: A creator's 20-minute video has a 30-second claimed song in the middle. They choose "Replace song", pick a similar Audio Library track, and the claim is released without re-uploading. Common mistake: Deleting the video and re-uploading a fixed copy. Deleting throws away the URL, the watch history and the comments, and a strike on the original is not removed by deleting the video.Illustrative diagram of the three ways to fix a claimed song or clip. Step 5 — Dispute only when the claim is wrong What to do: Dispute a claim only if you have a real basis — you own the content, you have a licence, or the use qualifies as fair use. How: A Content ID claim is not a strike — it is a match against a rights holder's reference file, and the claimant chooses what happens: block, monetise, or track. If the match is wrong, dispute it from the claim details and explain why, briefly and factually. While a dispute is ongoing, any revenue is held until it is resolved, as reported by creator guides. A disputed claim the claimant pursues can become a formal removal request — a copyright strike. Example: A creator's own song is claimed by a distributor that does not own it. They dispute — "This is my own composition" — and the claim is released. Common mistake: Disputing a claim on a song you knowingly used without a licence, or because you think a short clip is automatically fair use. Short does not mean fair use — a failed dispute can turn a claim into a strike.Illustrative diagram comparing a Content ID claim with a copyright strike. Step 6 — Treat a clean result as a screen, not a guarantee What to do: Publish with confidence when Checks is green, but keep the habits that protect you after publishing. How: A clean Checks result means YouTube found no match at the time of the upload. It does not mean the video can never be claimed. YouTube's own announcement is explicit: a clean result "does not protect your videos from other potential issues after publishing (like manual claims, Content ID claims created from new reference files, copyright strikes, and/or restrictions as a result of edits to your video settings)." A rights holder can upload a new reference file tomorrow, and a manual claim can arrive at any time. During Checks, YouTube also runs Likeness detection — a background scan for enrolled creators' faces that may have been altered or AI-generated. Example: A creator publishes with two green ticks, then gets a manual claim three weeks later when a label adds a new reference file. Because they kept the licence receipt, they dispute with the receipt attached and the claim is released. Common mistake: Telling yourself "Checks was green, so I am safe forever" and deleting the licence, the project file and the original audio. The green tick is a snapshot, not a shield.Illustrative diagram showing why a clean Checks result does not guarantee a claim-free future. Checklist — Before You Publish☐ I uploaded on a computer and reached the Checks step ☐ I waited for both checks to finish ☐ I opened See details on any flagged result and read what was matched ☐ I fixed claimed audio with trim, replace or mute in the Editor ☐ I disputed only claims I have a real basis to challenge ☐ I did not delete the video to escape a claim ☐ I kept my licences and source files for later claims ☐ I know a clean Checks result is a screen, not a guaranteeFAQs 1. How long does the YouTube Checks step take? YouTube's announcement said the copyright check usually finishes within about three minutes, and the ad-suitability check can take a couple of minutes longer. Checks run in the background, so you can leave and come back. 2. Can I publish while Checks is still running? Yes — YouTube's Help page says you can publish while checks are running and fix issues later. But the screening is then unfinished. Wait when you can. 3. Is a Content ID claim the same as a copyright strike? No. A claim is a match against a rights holder's reference file; the claimant chooses to block, monetise or track the video. A strike comes from a formal legal removal request. 4. What should I do if the copyright check flags my own music? Dispute it, briefly and factually: state that it is your own composition or recording and that no distributor owns it. Keep the licence receipt — a claim released with proof is much faster than one argued from memory. 5. Why did my video get claimed after Checks was green? Because Checks is a snapshot. A rights holder can add a new reference file after you publish, or file a manual claim. SourcesYouTube Help — "Upload YouTube videos" (official page, opened live 3 Nov 2026): https://support.google.com/youtubecreatorstudio/answer/57407?hl=en-GB&co=GENIE.Platform%3DDesktop CreatorPlaybook — "YouTube Copyright Claim: How to Trim, Replace or Dispute It": </blog/youtube-copyright-claim-how-to-trim> CreatorPlaybook — "YouTube Strike Appeal: How to Appeal a Community Guidelines Strike": </blog/youtube-strike-appeal-how-to-appeal>
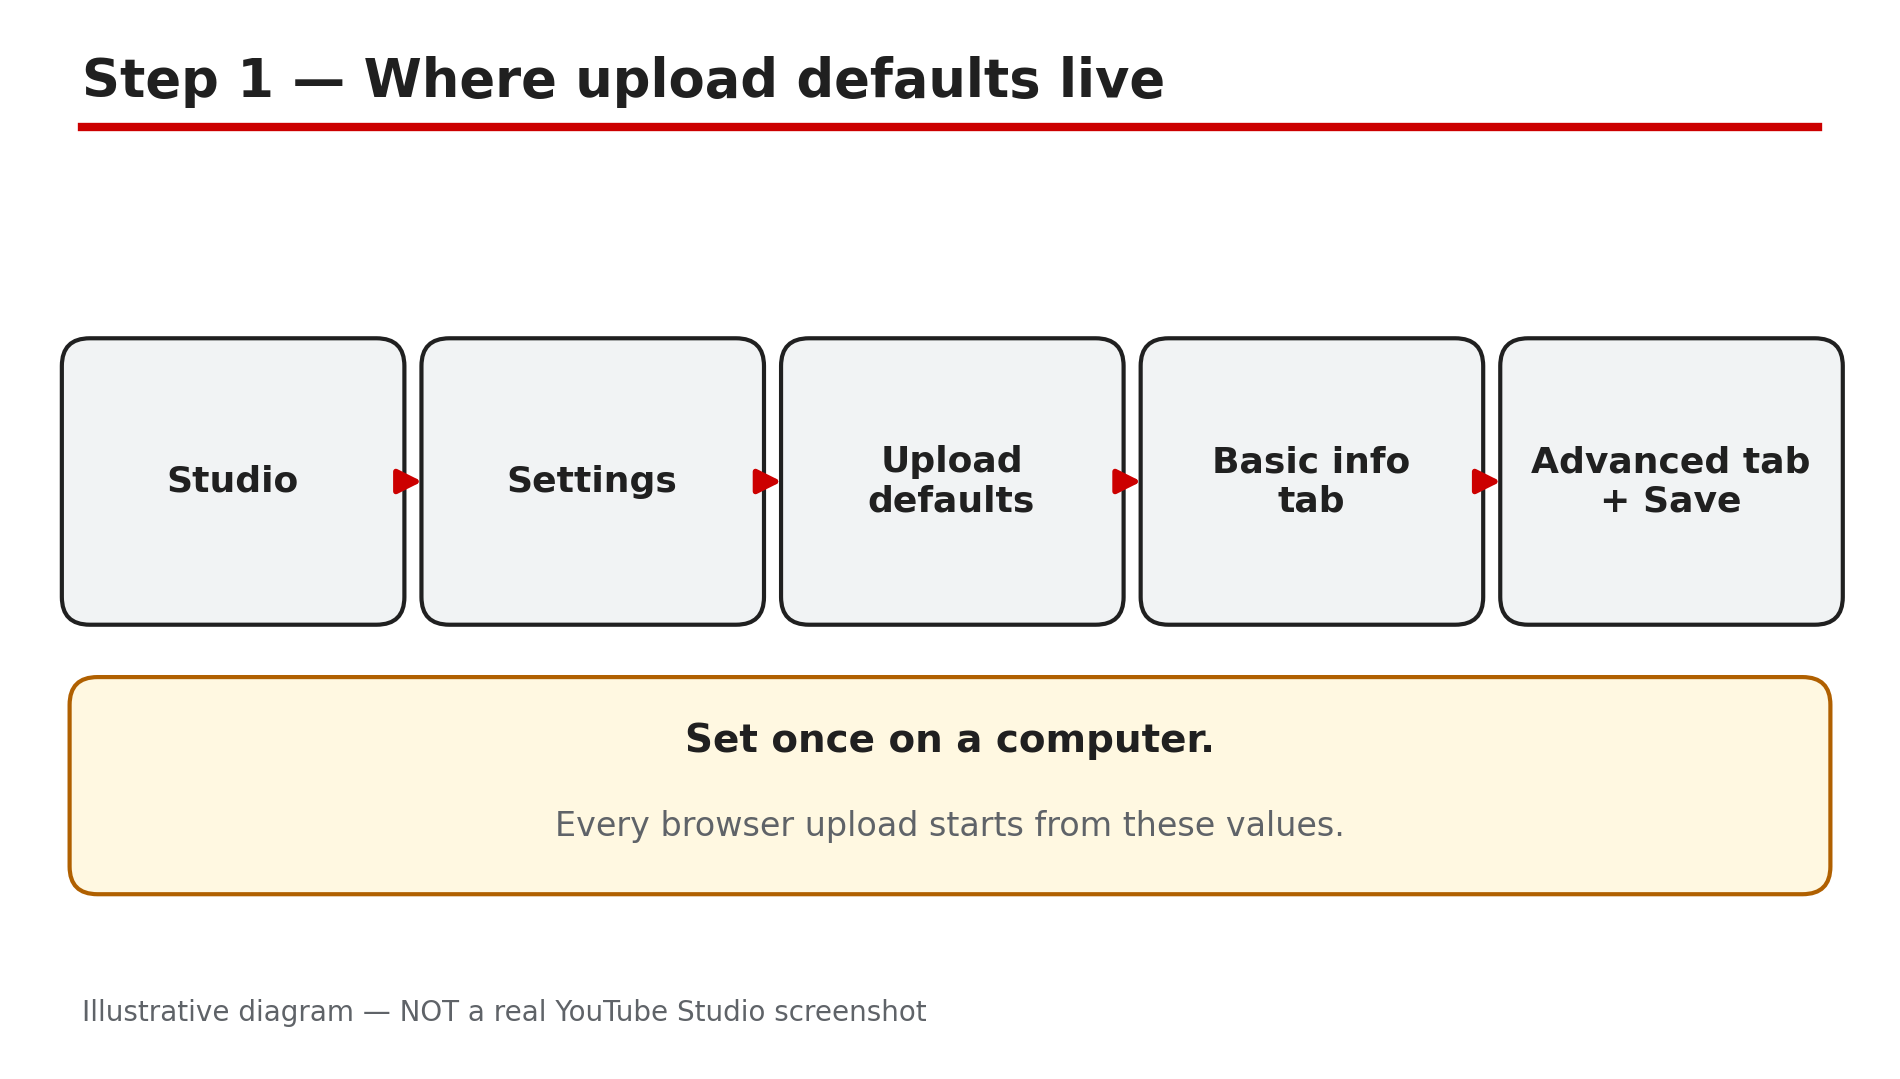
- CreatorPlaybook Team
- 02 Nov, 2026
YouTube Upload Defaults: Save Time and Avoid Mistakes on Every Upload
Every upload asks the same questions: title, description, tags, category, language, licence, visibility, comments. Answering them from scratch each time is slow, and a tired answer is how a video goes public before it is ready, or ships with the wrong language and no captions. YouTube has a built-in answer: upload defaults. Set them once in Studio and every browser upload starts with your choices already filled in. But there is a trap that catches many creators: defaults only work on uploads made through the browser. Upload from your phone or a video editor and nothing you set will apply. This guide shows what to set, what to leave alone, and how to avoid the mistakes that make defaults feel broken. What You Will LearnWhat upload defaults are and where to set them The one limit that makes defaults feel broken: browser uploads only Which defaults are worth setting, and which to leave blank How defaults relate to the Made for Kids audience setting Why defaults never fix videos you already uploaded A safe routine that stops unfinished videos going publicStep 1 — Set your upload defaults once, in Studio What to do: Open the upload defaults screen and fill in the choices you want on every video. How: YouTube's Help page "Set default upload settings" gives the route. Sign in to YouTube Studio on a computer. From the left menu, select Settings, then select Upload defaults. You will see two tabs: Basic info and Advanced settings. In Basic info you can set a default title, description, tags and more. In Advanced settings you can set the default licence, category, video language, caption certification, comments, and whether to show the video to subscribers in their feed. Choose your settings and click Save. Example: A creator who always uploads tutorials sets the default category to Education, the default language to English, and a default description with the channel's links. Common mistake: Setting defaults and never clicking Save, or setting them in the Studio mobile app and assuming they stuck. Use a computer and confirm the values are there.Illustrative diagram of where to find upload defaults in YouTube Studio. Step 2 — Learn the one limit: browser uploads only What to do: Understand that defaults apply only to videos uploaded through the browser at youtube.com/upload. How: YouTube's Help page states the limit plainly: "Default upload settings only affect videos uploaded through your browser on youtube.com/upload. If you upload videos through mobile or video editor, they won't respect your default settings." This is the most common reason creators say defaults "don't work". Nothing is broken — the upload simply did not come through the browser. Example: A creator sets a default description with affiliate links, then uploads three Shorts from the phone app and finds no links in any description. Common mistake: Re-setting the defaults again and again, or concluding the feature is broken, instead of changing where you upload from. Upload from the browser.Illustrative diagram showing that upload defaults work only on browser uploads. Step 3 — Choose the defaults that actually help What to do: Set the handful of defaults that save real time, and leave the rest blank. How: Start with the video language. Setting the default language helps YouTube generate automatic captions correctly, and it is the setting most creators forget per video. Next, set the default category that matches most of your videos. Set a default description only for the parts that never change, such as your channel links — never a full description, because a copied description on every video looks like duplicate text. Set the default visibility to Unlisted as a safety net. Example: A tech channel's defaults are: language English, category Science and Technology, visibility Unlisted, and a description ending with the same three links. Common mistake: Putting your full description, tags and title template into the defaults. Every video then ships with identical text. Defaults are a starting point, not a finished upload.Illustrative diagram of the three defaults worth setting on every channel. Step 4 — Keep the audience setting separate What to do: Do not confuse upload defaults with the channel audience setting — they live in different places and do different jobs. How: The audience setting — Made for Kids or not — is set separately. YouTube's upload defaults Help page points to it directly: "Learn how to set your channel's default audience setting". That setting lives in Studio, then Settings, then Channel, then the Advanced settings tab, under Audience. It decides the audience for future and existing videos at channel level, unless you override it per video. Upload defaults do not include the audience choice. Example: A family channel sets upload defaults for language and category, and separately sets the channel audience to Made for Kids. A video for parents is set to "not Made for Kids" on its own upload screen. Common mistake: Assuming a video is correctly marked because the defaults are set. The audience question is asked on every upload screen for a reason — answer it every time.Illustrative diagram separating upload defaults from the audience setting. Step 5 — Remember that defaults never fix old videos What to do: Use defaults for the future only, and fix existing videos one by one. How: Upload defaults apply to videos you upload after you set them. They do not change anything you already uploaded. YouTube's Help page says you can still change settings after you upload a video, on the Videos page — but that is a manual edit per video. If you have fifty old videos with the wrong language, there is no defaults trick that fixes them: open Content, select the videos, use Edit to change the settings in bulk, and save. Example: A creator changes the default language to Hindi, then checks an old video and finds it still says English. The default only helps the next upload. Common mistake: Setting a new default and assuming the whole channel is fixed. Check the result on the next upload, and separately audit the old videos that matter.Illustrative diagram showing that defaults never fix videos already uploaded. Step 6 — Build a safe upload routine around your defaults What to do: Turn defaults into a short routine that stops the two classic accidents: publishing unfinished videos and uploading with the wrong settings. How: First, set the default visibility to Unlisted, as in Step 3, so nothing goes public by accident. Second, upload from the browser whenever you can, so the defaults actually apply. Third, keep a five-point check before you press Publish: title and thumbnail match the video, description has the right links, language is set, audience is set, and the Checks step has run. Fourth, review the defaults themselves once a quarter. Example: A creator uploads from the browser, defaults fill in language, category and links, and changes visibility to Public only after the Checks step is green. Common mistake: Treating defaults as a substitute for checking. Defaults save typing; they do not save thinking. A default from an old niche is worse than no default at all.Illustrative diagram of a safe upload routine built around defaults. Checklist — Before You Publish☐ I set upload defaults in Studio on a computer and clicked Save ☐ I upload from the browser, so my defaults actually apply ☐ My default language is set, so captions generate correctly ☐ My default visibility is Unlisted, as a safety net ☐ My default description has only the parts that never change ☐ I set the audience separately, on every upload ☐ I know defaults do not fix videos I already uploaded ☐ I checked title, description, language, audience and Checks before publishingFAQs 1. Where are YouTube upload defaults? In YouTube Studio on a computer: Settings, then Upload defaults. There are two tabs, Basic info and Advanced settings. Choose your defaults and click Save. The Help page describes this route, and it is the only place to set them. 2. Why are my upload defaults not working? The most common reason is that you uploaded from mobile or a video editor. YouTube's Help page says defaults only affect videos uploaded through the browser at youtube.com/upload. Uploads from the YouTube app or an editing app do not respect them. 3. Do upload defaults change my old videos? No. Defaults apply only to videos you upload after setting them. To fix old videos, open Content in Studio, select the videos, and use Edit to change settings in bulk — or open a single video's Details page. 4. Can I set a default audience in upload defaults? No. The audience setting — Made for Kids or not — is separate. Set it in Studio, then Settings, then Channel, then the Advanced settings tab, under Audience. You can also set it per video on the upload screen, which overrides the channel setting. 5. What is the safest default visibility? Unlisted. With Unlisted as the default, a video can never go public before you have checked it. Change it to Public only after the title, description, language, audience and the Checks step are all confirmed. SourcesYouTube Help — "Set default upload settings" (official page, opened live 2 Nov 2026): https://support.google.com/youtube/answer/2660027?hl=en-GB&ref_topic=9257782 CreatorPlaybook — "YouTube Upload Stuck, Comments Disabled or Made for Kids? How to Fix It": </blog/youtube-upload-stuck-comments-disabled> CreatorPlaybook — "YouTube Video Stuck Uploading or Processing? How to Fix It": </blog/youtube-video-stuck-uploading-or>
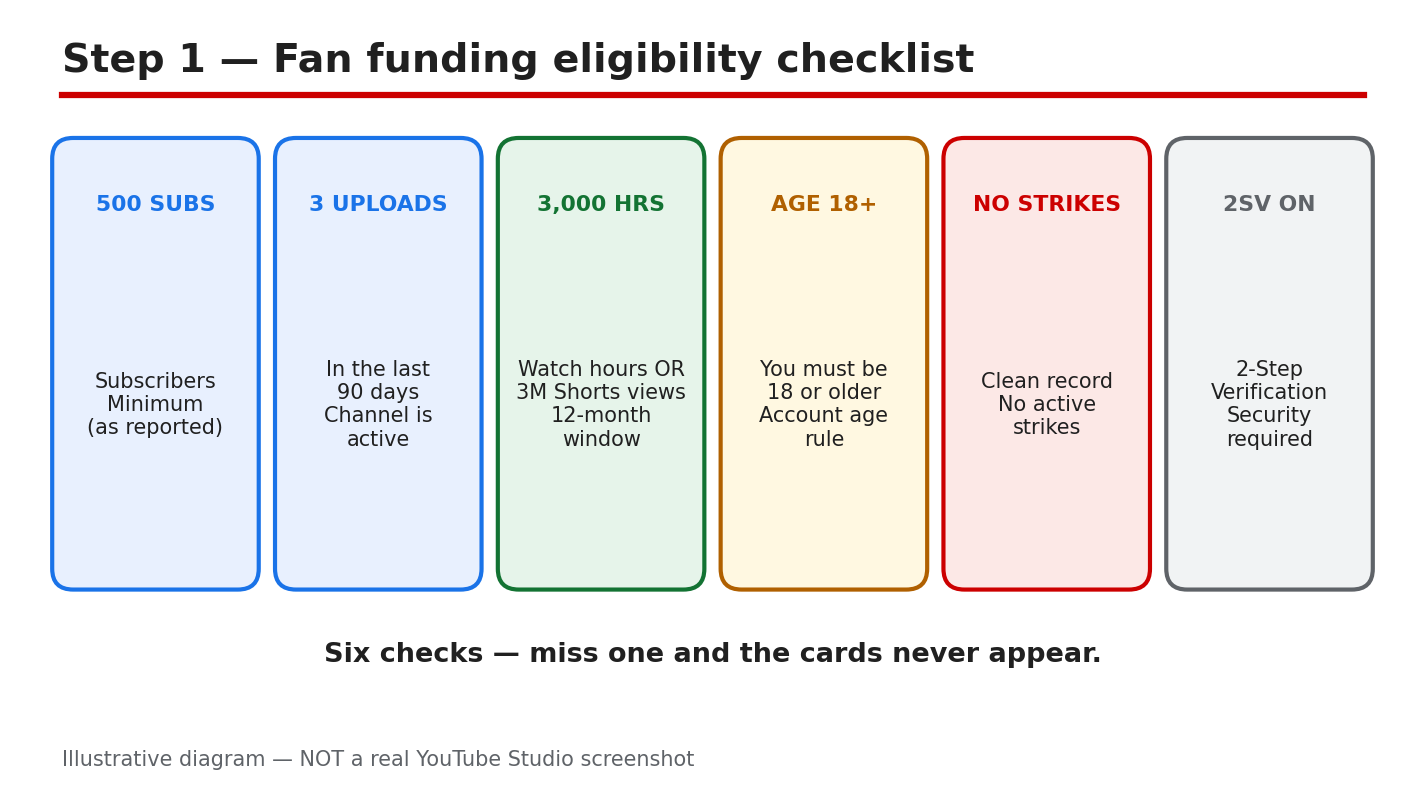
- CreatorPlaybook Team
- 31 Oct, 2026
Fan Funding on YouTube: How to Set Up Super Chat, Super Thanks and Memberships
Fan funding is money your viewers send you directly. Super Chat and Super Stickers highlight a fan's message during a live stream, Super Thanks lets a viewer tip on an uploaded video or Short, and memberships turn loyal viewers into monthly supporters with badges and perks. As reported, creators keep 70% of the net revenue, and these features unlock earlier than ad revenue — at 500 subscribers under the expanded YouTube Partner Program. Each feature has its own setup. This guide walks through it in order. What you will learnWhat each fan funding feature does, and where viewers see it The eligibility numbers and rules to check first How to accept the Commerce Product Module and turn features on How to set up membership tiers, prices, and perks Why a feature may not show, and the fixStep 1: Check you meet the eligibility numbers What to do: Check the reported fan funding thresholds first. How to do it: As reported, fan funding opens at 500 subscribers, 3 valid public uploads in the last 90 days, and either 3,000 qualified watch hours in 12 months or 3 million qualified Shorts views in 90 days. You must also be 18 or older, have no active strikes, have two-step verification on, and have a linked AdSense account. Confirm each number on your own Earn tab. YouTube has announced Partner Program updates from 1 February 2027 — confirm in Studio/Earn tab. Example: A cooking channel has 620 subscribers and 3,400 watch hours but only 2 uploads in 90 days. One more public video clears the gap. Common mistake: Comparing your channel with a friend's. Eligibility is per channel and per country.Illustrative diagram (mock-up) of the eligibility checks — not a real YouTube Studio screenshot. Step 2: Accept the Commerce Product Module What to do: Accept the Commerce Product Module in the Earn tab. It covers all fan funding features. How to do it: Sign in to YouTube Studio on a computer and select Earn in the left menu. Click Get started for the Commerce Product Module and read the terms before accepting. Creators who signed the older Addendum before 2023 are reported not to need the new module. Once accepted, the Supers and Memberships cards should appear. Example: A gaming creator joined the Partner Program but skipped the module step. Her Earn tab showed no Supers card until she accepted it. Common mistake: Accepting the Watch Page ads module and assuming fan funding is covered. Each module is separate.Illustrative diagram (mock-up) of the Commerce Product Module path — not a real YouTube Studio screenshot. Step 3: Turn on Super Chat and Super Stickers What to do: Turn on Super Chat and Super Stickers for live streams and Premieres. How to do it: In YouTube Studio, go to Earn > Supers and toggle on Super Chat and Super Stickers individually. As reported, viewers choose preset amounts from $1 to $500, with local equivalents. Super Chat only works during live streams and Premieres, and only when live chat is enabled on that stream, so check the chat setting first. Example: A music teacher goes live every Friday and toggles Super Chat on once. A viewer's paid message stays pinned at the top of the chat. Common mistake: Expecting Super Chat on an uploaded video. It is a live-stream feature only.Illustrative diagram (mock-up) of Super Chat in live chat — not a real YouTube Studio screenshot. Step 4: Turn on Super Thanks What to do: Turn on Super Thanks for uploaded videos and Shorts. How to do it: In YouTube Studio, go to Earn > Supers and toggle on Super Thanks. As reported, once enabled it is on by default across eligible uploaded videos, and viewers can buy a one-time animation plus a highlighted comment. Tip amounts are reported as fixed at $2, $5, $10, or $50. Super Thanks is not available on made-for-kids channels or videos, or, as reported, on music channels under an SRAV contract — confirm in Studio/Earn tab. Example: A creator turns on Super Thanks and checks her top tutorial. The Thanks button appears, and a viewer leaves a $5 tip. Common mistake: Turning Super Thanks on and never checking a video. If the button does not appear, an audience setting may be blocking it.Illustrative diagram (mock-up) showing where viewers find Super Thanks — not a real YouTube Studio screenshot. Step 5: Set up channel memberships What to do: Create membership tiers with prices and perks, then submit them for review. How to do it: In YouTube Studio, go to Earn > Memberships and click Get started. As reported, you can create several tiers, each with its own price and perks such as loyalty badges, custom emoji, members-only posts, and members-only videos or live streams. Start with one simple tier — a low price with a badge and an emoji — and add more only when the first one works. YouTube reviews membership offers before they go live, so wait for approval before announcing them. As reported, memberships are not available on channels set as made for kids, or on channels with many ineligible videos. Example: A travel creator offers one tier with a badge, emoji set, and a members-only monthly Q&A. She announces it only after approval. Common mistake: Creating five tiers with complicated perks on day one. Viewers cannot tell them apart, and you must deliver every perk monthly.Illustrative diagram (mock-up) of membership tier structure — not a real YouTube Studio screenshot. Step 6: Test what viewers see and fix "not showing" What to do: Check each feature as a viewer would, then work through why it may not appear. How to do it: Open your channel and one of your videos while signed out, and look for the Join button, the Thanks button, and — during a live stream — the Super Chat option. If one is missing, check in order: your country is not on that feature's availability list (as reported, each feature has its own list of around 99–100 locations); the channel or video is set as made for kids; live chat is off on the stream; the setup is unfinished, such as a membership tier still awaiting review; or a strike is blocking it. Changing your channel's country setting does not make you eligible, as reported. Example: A creator in a country not on the Super Chat list could not see it, while a friend in India could. Common mistake: Announcing a feature in a video before testing it. Viewers look for a button that is not there, and trust drops. Test first, announce second.Illustrative diagram (mock-up) of the not-showing diagnosis flow — not a real YouTube Studio screenshot. Checklist☐ Eligibility checked: 500 subscribers, 3 uploads, watch hours/Shorts views, 18+ ☐ Commerce Product Module accepted in the Earn tab ☐ Super Chat and Super Stickers toggled on in Earn > Supers ☐ Super Thanks toggled on and checked on one video ☐ Membership tiers created and submitted for review ☐ Each feature tested as a viewer would see itFrequently asked questions Do I need 1,000 subscribers for Super Chat, Super Thanks, or memberships? No, as reported. Fan funding opens at the 500-subscriber tier, while ad revenue needs 1,000 subscribers. How much do creators keep from fan funding? As reported, creators keep 70% of the net revenue from all four features. Payments go through your linked AdSense account. Why can my viewers not see Super Chat during my live stream? Check three things: Super Chat is on in Earn > Supers, live chat is enabled on that stream, and your country is on the availability list. It works only on live streams and Premieres. Why is the Thanks button missing on my videos? As reported, Super Thanks does not appear on videos set as made for kids or on certain music channels, and it needs its own toggle in Earn > Supers. Check the toggle and the video's audience setting. SourcesYouTube Help, Choose how you want to monetize: https://support.google.com/youtube/answer/94522?hl=en (verified live 31 Oct 2026). CreatorPlaybook, YouTube Monetization Paused vs Disabled vs Rejected: </blog/youtube-monetization-paused-vs-disabled> (verified live 31 Oct 2026). CreatorPlaybook, Earn Tab Features Missing? Super Thanks, Memberships and Shopping: </blog/earn-tab-features-missing-super-thanks> (verified live 31 Oct 2026).No official YouTube video is embedded here — none was verified live.
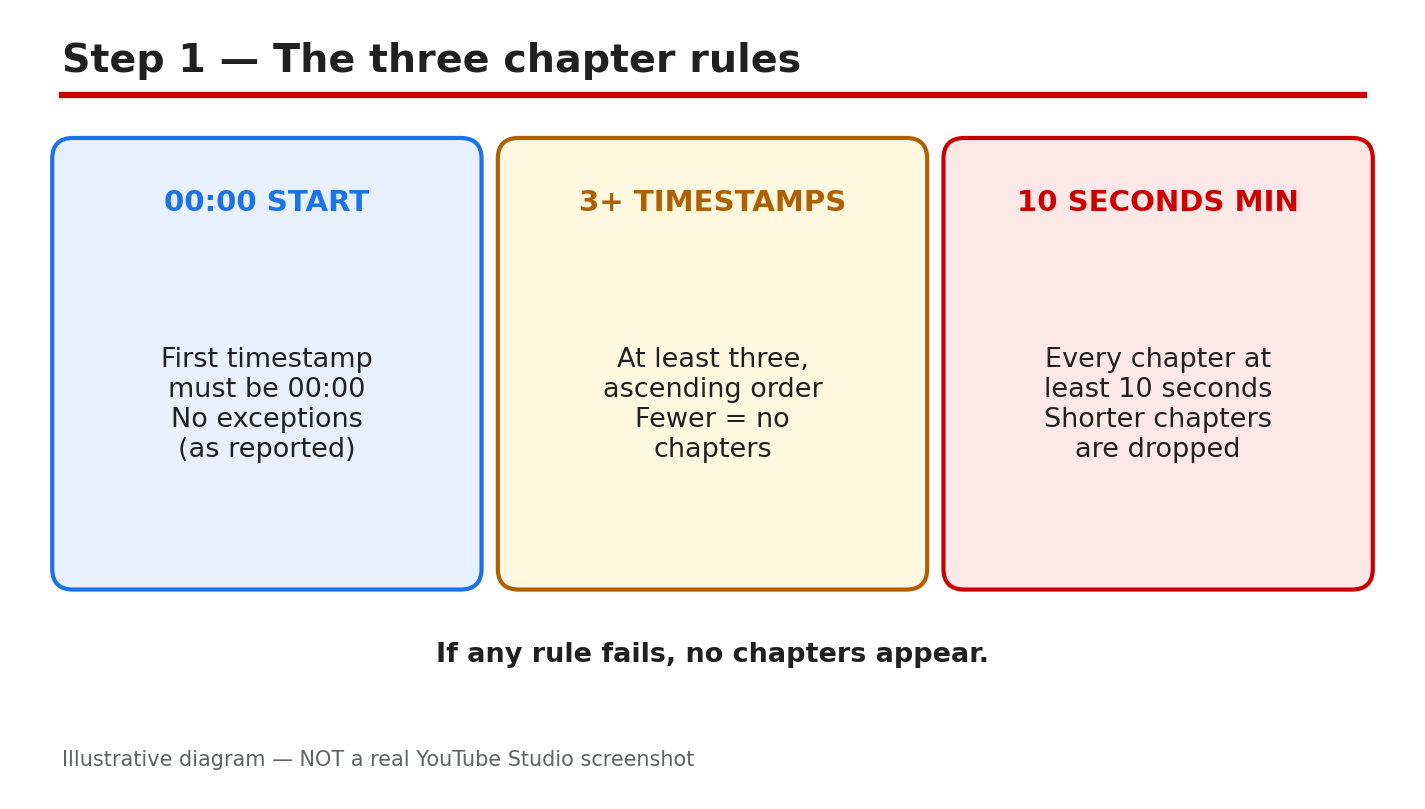
- CreatorPlaybook Team
- 31 Oct, 2026
YouTube Video Chapters Not Showing? How to Fix Timestamps That Don't Work
You added timestamps to your video description, saved the changes, and waited — but the progress bar is still one solid line with no chapter segments. Chapters help viewers find the part they need, and when they do not appear, the cause is usually a small formatting mistake or a missed setting. This guide covers the rules YouTube reports for chapters, how to add them correctly, and how to fix the most common problems. What you will learnThe timestamp rules YouTube reports for video chapters How to add chapters correctly in your video description How to check automatic chapters and channel settings How to fix the most common chapter mistakes without re-uploadingStep 1: Check the three timestamp rules first What to do: Check your list against YouTube's three reported rules: first timestamp 00:00, at least three timestamps in ascending order, and every chapter at least 10 seconds long. How to do it: Open the video in YouTube Studio and read its saved description. If the first line starts at 00:15, YouTube will not treat it as chapters. Count the timestamps: two sections are not enough. Check every gap — a chapter under 10 seconds breaks the rule. Example: A tutorial lists "00:00 Intro, 00:08 Tools, 03:00 Main steps". The 00:08 chapter lasts only eight seconds, so no chapters appear. Changing it to "00:45 Tools" fixes it. Common mistake: Assuming a clickable timestamp is also a valid chapter. A link can work even when the list fails the chapter rules.Illustrative diagram (mock-up) — not a real YouTube Studio screenshot. Step 2: Write the chapter list in the right format What to do: Rewrite your chapter list as one clean line per chapter: a timestamp, then a short title for that section. How to do it: In the video description in YouTube Studio, put each chapter on its own line, such as "00:00 Introduction" and "02:30 Setting up". Use minutes and seconds separated by a colon, or hours, minutes, and seconds for videos over an hour. Give every chapter a real title, not just "Part 1". Keep the list in one block, and save, then reopen the description to confirm it saved as typed. Example: A cooking video uses "00:00 Introduction, 01:20 Ingredients, 03:40 Cooking, 07:10 Plating, 09:00 Final tips" — one timestamp and one clear title per line, in order, every section over 10 seconds. Common mistake: Putting the title before the time, such as "Introduction — 00:00", or mixing timestamps into sentences.Illustrative diagram (mock-up) — not a real YouTube Studio screenshot. Step 3: Check the last chapter and the video length What to do: Check the final chapter, which most creators forget: it runs to the end of the video and also needs at least 10 seconds. How to do it: Subtract the last timestamp from the total video length. If your video is 5 minutes 30 seconds long and the last chapter starts at 05:25, that final chapter is only five seconds long, so the whole list fails. Move that last timestamp earlier or merge the final two sections. Example: A 6-minute video ends with "05:50 Outro" — 10 seconds exactly. One second of trimming would break it, so moving it to "05:40 Outro" gives a safer margin. Common mistake: Checking only the gaps between timestamps, and never the final chapter against the end of the video.Illustrative diagram (mock-up) — not a real YouTube Studio screenshot. Step 4: Check automatic chapters and your channel's feature access What to do: If your manual list is correct but chapters still do not appear, check the automatic chapters setting and your channel's feature access. How to do it: In YouTube Studio, open the video, click Show More, and find the Automatic Chapters setting. As reported, this box is checked by default, and allowing automatic chapters lets YouTube generate chapters for eligible videos — but not every eligible video gets them. A manual list overrides automatic chapters. Then check feature access in Studio under Settings, then Channel, then Feature eligibility. Example: A creator fixes the timestamp list three times with no result, then finds the channel's advanced features were never verified. After verification, the same list starts working. Common mistake: Rewriting a correct list over and over while the real problem is feature access or an active strike.Illustrative diagram (mock-up) — not a real YouTube Studio screenshot. Step 5: Check the video itself — audience setting and content What to do: Check the video-level settings that can block chapters, especially the audience setting. How to do it: In YouTube Studio, open the video details and check the audience. As reported, videos set to "Made for Kids" do not get chapters, so if your video is marked for kids, chapters will not appear no matter how perfect the list is. Change the setting only if it is genuinely wrong — never mislabel a kids' video to unlock a feature. YouTube also reports that videos with active strikes, or content that may be inappropriate to some viewers, may not be eligible. Example: A creator adds chapters to a video marked "Made for Kids" and sees nothing. The timestamps are correct, but the audience setting is the blocker. Common mistake: Assuming the problem is the timestamp format when the audience setting is the real reason.Illustrative diagram (mock-up) — not a real YouTube Studio screenshot. Step 6: Save, wait, and verify on the public watch page What to do: Save your fixed list, then verify chapters on the public watch page — not just in the Studio editor. How to do it: After editing the description, click Save, then reopen it to confirm the text saved. Open the public video page: chapters appear as segments along the progress bar, and the chapter title shows as you hover over it. If chapters still do not appear, work through Steps 1 to 5 again instead of deleting and re-uploading — re-uploading would lose all views, comments, and ranking history. Example: A creator fixes a seven-second chapter, saves, and checks the watch page. The progress bar now shows clear segments, and clicking a chapter title jumps to the right moment. Common mistake: Checking only the Studio editor and concluding the fix failed, when the public watch page already shows them.Illustrative diagram (mock-up) — not a real YouTube Studio screenshot. Checklist☐ First timestamp starts at 00:00 ☐ At least three timestamps, in ascending order, each chapter 10 seconds or longer ☐ One clean line per chapter: timestamp first, then a clear title ☐ Last chapter checked against the end of the video ☐ Automatic chapters setting and feature eligibility checked in Studio ☐ Audience setting checked, then verified on the public watch pageFrequently asked questions Why are my YouTube chapters not showing even though the timestamps are clickable? They are not the same thing. A timestamp can work as a link even when the list breaks a chapter rule — starting after 00:00, fewer than three entries, or a chapter under 10 seconds. Can I add chapters to a Short or a very short video? Chapters suit longer videos with clear sections. A video needs room for three chapters of 10 seconds each, so very short videos are a poor fit. Eligibility and feature access also matter, as reported. Do manual chapters or automatic chapters win? Your manual list wins. YouTube's Help page states that your own chapters override automatic video chapters, so viewers should see your list — if it passes the rules. How long do chapters take to appear after I save? YouTube does not publish a guaranteed time, as reported by independent guides. Save the description, then check the public watch page — a correct list usually appears after the page updates. Why do chapters show on one video but not another? Eligibility differs per video. Check the second video's timestamp list, its audience setting, and any strikes on the channel. One rule, such as a short final chapter, can make the same list fail. SourcesVideo Chapters — YouTube Help YouTube SEO Basics for Beginners How to Write Titles That Get Clicks Without ClickbaitChapter rules follow YouTube's Help page on Video Chapters, verified live during this run. Other details are reported by independent guides.
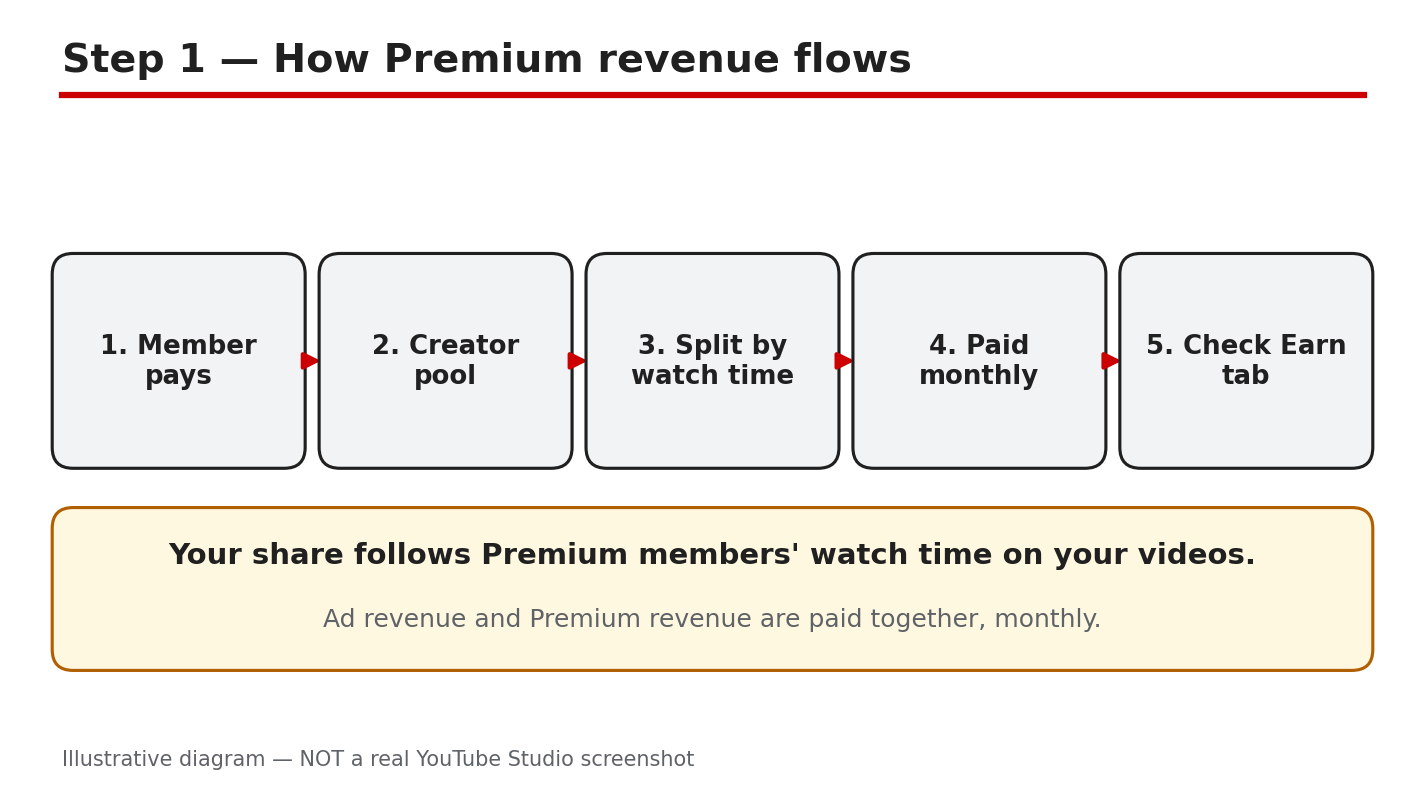
- CreatorPlaybook Team
- 31 Oct, 2026
YouTube Premium Revenue Explained: How You Earn From Premium Viewers
When a YouTube Premium member watches your video, you still earn money — even though no ad is shown. Many new creators assume ad-free viewing means free viewing — it does not. YouTube shares part of every Premium subscription with the creators those members watch, based on member watch time. For a Partner Program channel, this is a second income stream next to ad revenue. This guide explains how it works, where to see it in Studio, and how to grow it. What you will learnHow Premium revenue is calculated from member watch time Whether your channel is eligible to earn Premium revenue Where to find your Premium earnings in Studio and Analytics How Premium revenue differs from ad revenue and how to grow itStep 1: Understand how Premium revenue works What to do: Learn the basic mechanism first: Premium pays you for watch time, not for ads. How to do it: YouTube puts a share of subscription fees into a creator pool, split by how much Premium members watched each creator's content. Your share depends on your slice of total Premium watch time, not on views or subscribers. YouTube Help confirms fees are distributed by member watch time, with the majority going to partners. As reported, from 2027 the pools are 30% of net Premium and 60% of net Premium Lite revenue, paying 55% for long-form and 45% for Shorts. Example: Two channels each get 10,000 views. Channel A gets 8,000 minutes of Premium watch time; Channel B gets 2,000. A earns the bigger share. Common mistake: Treating Premium revenue like a fixed payment per Premium view. There is no fixed per-view rate.Illustrative diagram (mock-up) of how Premium revenue reaches creators — not a real Studio screenshot. Step 2: Check that your channel is eligible What to do: Confirm your channel can receive Premium revenue — not every monetized-looking channel can. How to do it: Premium revenue is a Partner Program benefit. YouTube Help states that for long-form videos you must accept the Watch Page Module and turn on Watch Page ads. For Shorts you must accept the Shorts Feed Module. In Studio, check the Earn tab for your accepted modules and whether Watch Page ads are on. If a module is not accepted, those Premium views earn you nothing. As reported, from 1 February 2027 new creators need 8,000 watch hours or 20 million Shorts views, plus 1,000 subscribers. Example: A creator accepted the Watch Page module but never turned on Watch Page ads, so her Premium earnings stayed at zero. Common mistake: Assuming that joining the Partner Program turns on every earning feature. Each module must be accepted separately.Illustrative diagram (mock-up) of the eligibility checks for Premium revenue — not a real Studio screenshot. Step 3: Find your Premium earnings in Studio What to do: Locate the exact numbers so you can see what Premium is worth to your channel. How to do it: In Studio, open the Earn tab for an overview of estimated revenue by source. Then open Analytics, go to Revenue, and check the breakdown by revenue type. YouTube Help reports that Watch Page and Shorts Feed ad revenue both include Premium, so Premium sits inside those rows, not as a separate headline number. As reported, revenue takes about two days to show, and Premium payments arrive at the start of each month, with ad revenue. Example: One 15-minute guide brings a creator more Premium revenue than her five most-viewed Shorts combined. Common mistake: Checking the Earn tab the day after a big video and concluding Premium pays nothing. Revenue data lags — check after a few days.Illustrative diagram (mock-up) showing where to find Premium earnings in Studio — not a real Studio screenshot. Step 4: Compare Premium earnings with ad earnings What to do: Understand why Premium money behaves differently from ad money. How to do it: Ad revenue depends on advertisers and CPMs, which change by topic, country, and season. Premium revenue depends only on how much members watch you, so it is steadier and unaffected by ad blockers or seasonal demand. As reported, YouTube says partners on average earn more from a Premium subscriber than from the same user watching ads. Check your Revenue breakdown over three months: if Premium grows while ads stay flat, your audience is shifting toward members. Example: A finance channel earns a high CPM but has few Premium viewers, so Premium is a small slice. A music-learning channel has many Premium members, so it is a large slice. Common mistake: Comparing your Premium earnings with another creator's. The split depends on your audience, not your effort alone.Illustrative diagram (mock-up) comparing Premium revenue with ad revenue — not a real Studio screenshot. Step 5: Grow your Premium watch time What to do: Increase the one thing Premium pays for — minutes watched by Premium members. How to do it: Focus on retention first. In Analytics, find your highest average view duration videos from members, and make more like them. Build series and playlists so one view becomes a session of three or four. Keep intros short and answer early — a member who leaves in 30 seconds adds almost nothing. YouTube Help confirms downloaded watch time and background play both count. So long videos that work as audio can keep earning while a member does something else. Example: A creator turns one 10-minute tutorial into a three-part series. Members who watched one video now watch all three, and her Premium watch time nearly doubles. Common mistake: Making videos longer just to chase watch time. Padding drives viewers away — YouTube Help says the key factor is enjoyable videos.Illustrative diagram (mock-up) of the ways to grow Premium watch time — not a real Studio screenshot. Step 6: Protect and plan your Premium income What to do: Treat Premium revenue as a real income line: review it monthly and never chase shortcuts. How to do it: Each month, check the Earn tab and Revenue report and note your Premium earnings, watch time, and top videos. Watch for Partner Program updates — as reported, the 2027 update changes entry thresholds and Shorts pool rules, so accept the updated modules in Studio to keep earning. Never buy views or watch time: fake watch time is invalid traffic, it can get monetization paused, and it cannot increase your share of the pool. Example: A creator notices one old tutorial earns more Premium revenue than her new uploads. She makes an updated version and links it in the old video's description. Common mistake: Ignoring Premium revenue because it looks small at first. For many channels it grows into a meaningful, stable part of monthly income.Illustrative diagram (mock-up) of the monthly Premium income routine — not a real Studio screenshot. Checklist☐ Premium pays for watch time, not per view ☐ Partner Program membership and modules confirmed ☐ Watch Page ads on for long-form videos ☐ Premium earnings found in Earn tab ☐ Premium vs ad earnings compared ☐ Videos planned to keep members watchingFrequently asked questions Do creators earn money when a Premium member watches their video? Yes. Premium members see no ads, but YouTube shares part of the subscription fee with creators based on member watch time. It is a second revenue stream alongside ads. How much do creators earn per Premium view? There is no fixed per-view rate. Earnings depend on your share of Premium member watch time, so a long video watched to the end earns far more than a short one viewers abandon. Do downloaded videos and background play count? Yes, as reported in YouTube Help. Downloaded watch time is recorded when the member next signs in online, and background play counts too. Do I need the YouTube Partner Program to earn Premium revenue? Yes. You also need the Watch Page Module with Watch Page ads on, or the Shorts Feed Module for Shorts. Confirm the requirements in Studio. Will Premium revenue replace my ad revenue? No. Premium is an extra stream for subscribers, paid in the same monthly payment as ad revenue. SourcesYouTube Help, Your content & YouTube Premium: https://support.google.com/youtube/answer/6306276 (verified live 31 Oct 2026) CreatorPlaybook, Monetization Paused vs Disabled vs Rejected: </blog/youtube-monetization-paused-vs-disabled> (verified live 31 Oct 2026) CreatorPlaybook, How to Earn Money on YouTube: </blog/how-to-earn-money-on-youtube> (verified live 31 Oct 2026)
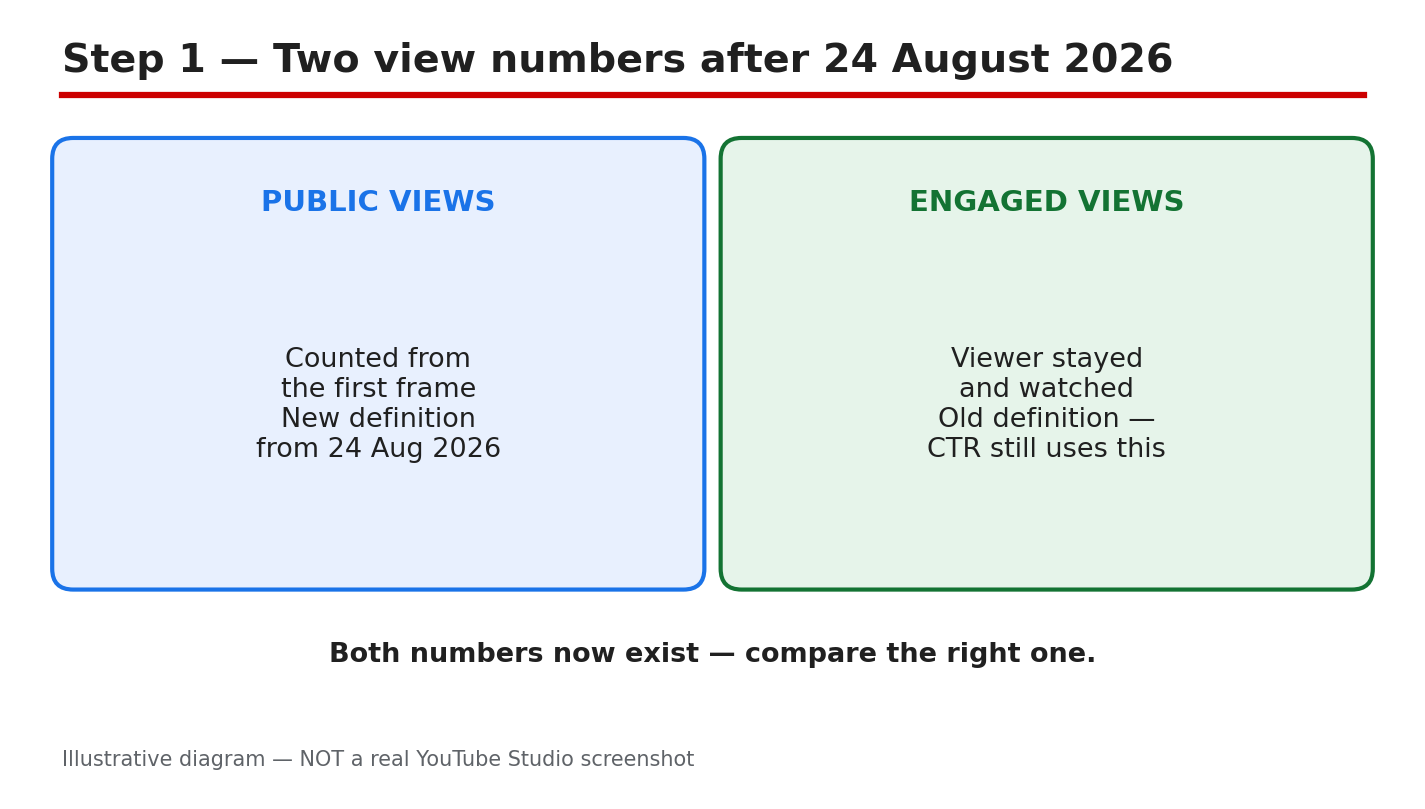
- CreatorPlaybook Team
- 31 Oct, 2026
YouTube CTR Suddenly Dropped After the 24 August 2026 View-Counting Change: What Happened and How to Fix It
Your CTR looked fine in July, then fell sharply in late August 2026 — and you changed nothing. Before you blame your thumbnails, check the calendar. As reported, YouTube changed how it counts public views from 24 August 2026: a view now counts the moment a video starts to play, across long-form, live, and podcasts. The old, stricter definition did not disappear — it lives on in Studio as “engaged views”. That switch can make ratios that use views fall overnight, even when your channel did nothing wrong. This guide explains what changed, and how to fix the real problems. What you will learnWhat the reported 24 August 2026 change changed, and what it did not How to check in Studio whether your CTR really fell How to split a CTR drop by traffic source How to fix a real CTR problem with packaging and openingsStep 1: Understand what actually changed on 24 August 2026 What to do: Learn the two view numbers before you read any chart. How to do it: As reported, from 24 August 2026 a public view counts the moment a video starts to play, on every format. Before that, a long-form view was reported to need a viewer who chose to keep watching. The old rule was renamed “engaged views” and kept in Analytics. As reported, CTR, average view duration, and retention still use engaged views. Example: A tutorial shows 10,000 public views but only 6,000 engaged views — “playback started” versus “the viewer stayed”. Common mistake: Quoting a seconds threshold as fact because a blog said so — check the Help page instead.Illustrative diagram (mock-up) comparing the two view counts — not a real YouTube Studio screenshot. Step 2: Check whether your CTR really fell, in Studio What to do: Compare the same metric over equal periods on both sides of 24 August 2026. How to do it: In Studio, open Analytics, pick a video, and open the Reach tab. Look at impressions, click-through rate, and views together — never CTR alone. Compare equal periods, such as the 28 days before 24 August with the 28 days after it, using engaged views instead of public views. If your Studio CTR is steady, the drop is measurement, not performance. Example: A creator’s Studio CTR holds at 4.5%, but likes per public view fall by a third. The channel is fine. Common mistake: Comparing a 28-day Analytics total with a lifetime public count. Different ranges produce a false drop.Illustrative diagram (mock-up) — not a real YouTube Studio screenshot. Step 3: Split the fall by traffic source What to do: Break the CTR drop down by where viewers found the video. How to do it: In the Reach tab, open the traffic source report and look at CTR separately for Search, Browse, Suggested videos, and the Shorts feed. Search usually has the highest CTR; Browse usually has the lowest. As reported, feed surfaces produce many public views but far fewer engaged views, because autoplay can start a public view without a real choice to watch. If the fall sits in Browse while Search CTR is steady, blame the wider, lower-intent audience. Example: A how-to video keeps 7% CTR from Search but drops from 5% to 3% from Browse as impressions double — expanding reach, not failure. Common mistake: Averaging all traffic sources into one number and fixing the wrong thing.Illustrative diagram (mock-up) — not a real YouTube Studio screenshot. Step 4: Fix the packaging if the CTR problem is real What to do: If Studio CTR fell within one traffic source, fix the thumbnail and title first. How to do it: Pick the video with the most impressions and the lowest CTR in its source, and test one change at a time. Make the thumbnail readable at phone size: one main subject, strong contrast, four words or fewer. Make the title specific — topic, benefit, one honest detail — with the main keyword near the start. Then use Test & Compare in Studio, where available, and wait one to two weeks. Example: A creator changes only the thumbnail on a 2%-CTR video; after two weeks, CTR rises to 4%. Common mistake: Changing the thumbnail, title, description, and tags all on the same day.Illustrative diagram (mock-up) — not a real YouTube Studio screenshot. Step 5: Fix the first seconds so clicks become engaged views What to do: Make sure viewers who click stay past the first few seconds. How to do it: Open the Engagement tab and look at the retention curve for the first 30 seconds. If many viewers leave in the first seconds, the opening is the problem, not the thumbnail. State the promise of the title in the first five seconds, show the result early, and cut any long greeting or intro. Match the opening to the thumbnail exactly: if it shows a finished result, open with that result on screen. Example: A tutorial opens with 20 seconds of greeting and loses half its viewers in 10 seconds; moving the result to the first frame fixes it. Common mistake: Treating a CTR fix as complete when clicks rise but retention falls.Illustrative diagram (mock-up) — not a real YouTube Studio screenshot. Step 6: Set a fair baseline and track the recovery What to do: Build a fresh baseline from engaged views. How to do it: Write down, for your last five uploads, the engaged views, Studio CTR by traffic source, and average view duration, all from the same 28-day window after 24 August. That is your new normal. Check it weekly, on the same day, and judge a video against your own recent uploads, not a universal “good CTR” number. If engaged views and CTR hold steady on the new baseline, the August fall was measurement. Example: A creator’s baseline is 4% CTR from Search. A new video gets 3.8% — no alarm; another gets 1.5% — new thumbnail time. Common mistake: Panicking over one slow day and rewriting every thumbnail. One day of data is noise.Illustrative diagram (mock-up) — not a real YouTube Studio screenshot. Checklist☐ Know public views vs engaged views after 24 August 2026 ☐ Compared Studio CTR and engaged views over equal periods either side of the change ☐ Split the CTR drop by traffic source before fixing anything ☐ Tested one packaging change at a time on the lowest-CTR video ☐ Fixed the opening so clicks become engaged views; checked “stayed to watch” ☐ Recorded a new post-change baseline; check it weeklyFrequently asked questions Did YouTube change how views are counted on 24 August 2026? As reported, yes: from 24 August 2026 a public view is counted the moment a video starts to play, across long-form, live, and podcasts. The old definition continues as “engaged views” in Studio. Why did my CTR drop if the algorithm did not change? As reported, CTR in Analytics is still calculated on engaged views, and recommendations were reported as unchanged. What often falls is a ratio you calculate yourself using public views — the denominator grew overnight, so the ratio falls even if clicks stayed the same. Check the Studio CTR, not a home-made ratio. Does the view-counting change affect my earnings or Partner Program eligibility? As reported, no: earnings and eligibility are still based on engaged views and engaged watch hours, not the public count. What is a good CTR after the change? There is no single good number. As reported, half of all channels and videos sit between 2% and 10% CTR. Compare your videos with your own recent uploads, within the same traffic source. Should I change all my thumbnails because CTR dropped? No. First check whether the Studio CTR actually fell within one traffic source. If it did, test one new thumbnail on the highest-impression, lowest-CTR video and measure it over one to two weeks. SourcesYouTube Help: Decoding CTR & impressions in your Analytics How YouTube Counts Views in 2026: Public Views vs Engaged Views Explained How to Improve Click-Through RateNo official YouTube video is embedded here: none was verified live in this run. Change dates and figures are reported claims — confirm them in Studio.
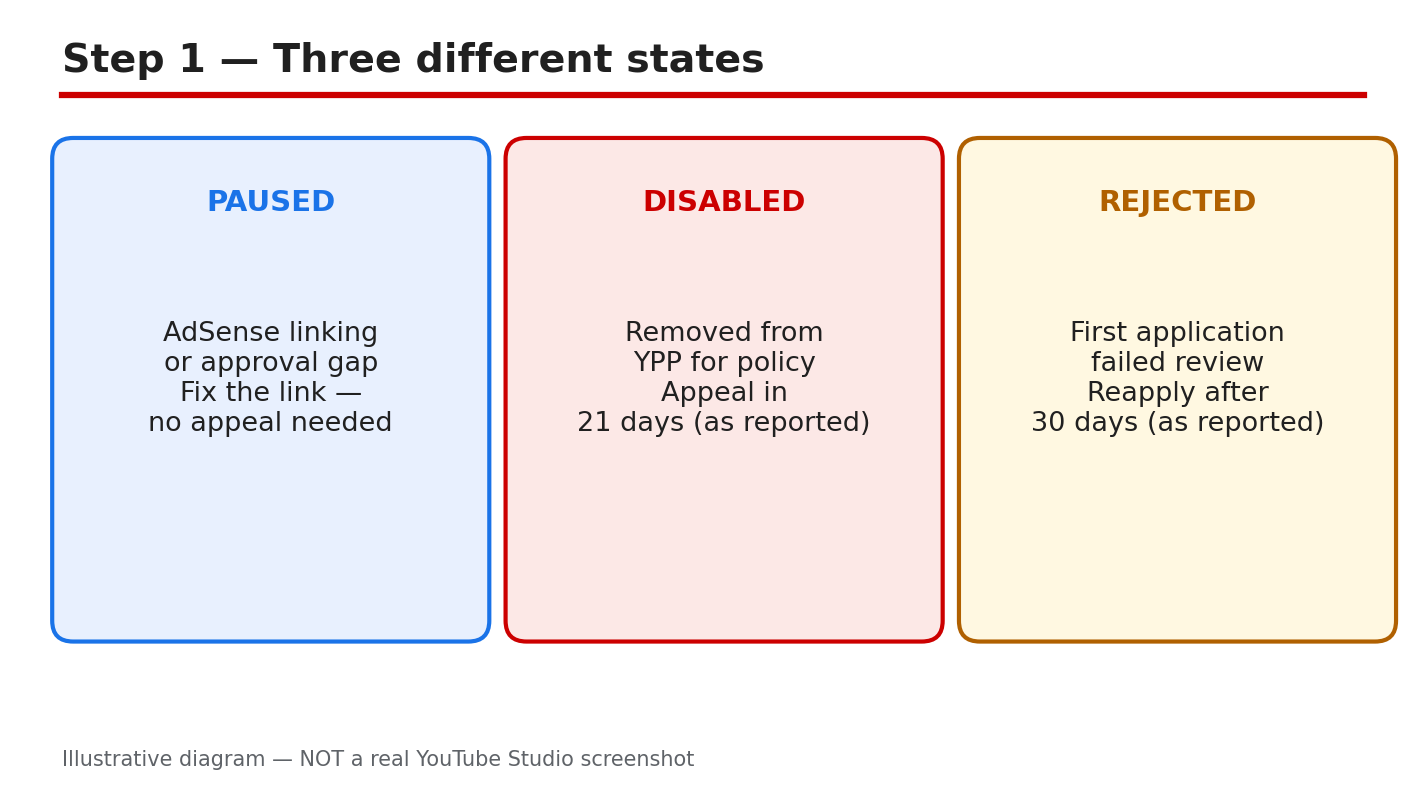
- CreatorPlaybook Team
- 31 Oct, 2026
YouTube Monetization Paused vs Disabled vs Rejected: What Each Means and What to Do
One morning you open YouTube Studio and the Earn tab says something changed. Your monetization is paused, disabled, or your application was rejected. Three different words, three different problems, and treating them as the same thing wastes weeks. As reported, the exact wording in the Earn tab governs what happens next: a pause can often be fixed quickly, a suspension has an appeal window, and a rejection has a waiting period before you can apply again. This guide explains each state, the timelines as reported, and the exact steps to fix the cause and get back to earning. What You Will Learn In this guide you will learn how to tell paused, disabled, and rejected apart, what each state means for your channel, the appeal and reapplication windows as reported, how to fix the most common causes, and how to keep your monetization from stopping again. Step 1 - Read the Exact Wording in the Earn Tab What to do: Open YouTube Studio, go to the Earn tab, and read the exact message before you do anything else. How: The Earn tab shows your current status in plain words: paused, suspended, or an application decision. Screenshot or copy the message, and check the email YouTube sent you, because it names the reason and the deadline. Do not rely on what a creator forum says your state means. As reported, the wording on your own account governs: the same word can mean different things on different channels, and the instructions in your email are the ones that apply to you. Example: A creator saw 'monetization paused' and assumed she was suspended. The Earn tab said her payment details were incomplete, and updating them fixed it the same day. Common mistake: Guessing your status from a thumbnail or a video title. Read the Earn tab and your email, not a stranger's post.Illustrative diagram (mock-up, not a real YouTube Studio screenshot): paused, disabled, and rejected are three different states. Step 2 - Paused: What It Means and How to Fix It What to do: If monetization is paused, look for the reason listed in the Earn tab and fix that one thing first. How: A pause is usually temporary. As reported, common reasons include a pending identity or payment verification, a temporary hold while YouTube reviews your account, or a setting that needs your attention. The Earn tab usually tells you what is missing. Complete the verification, update the payment details, or confirm the setting, then check the tab again. If nothing is listed, check your email for a message from YouTube that names the next step. Example: A creator's monetization paused during a payment review. She updated her tax information, and monetization resumed within a few days. Common mistake: Waiting for the pause to lift on its own. A pause usually needs an action from you, and it will not clear until you take it.Illustrative diagram (mock-up, not a real YouTube Studio screenshot): a pause usually has a fix you can complete. Step 3 - Disabled: Suspension and the 21-Day Appeal What to do: If your channel is suspended from the Partner Program, appeal within 21 days of the suspension. How: As reported, YouTube Help says you can appeal a suspension within 21 days, and you should receive a response within 14 days. Open the appeal form linked in the Earn tab or your email, explain what happened, and show what you changed. If the suspension was scheduled in advance, as reported, you can appeal within 7 days before the scheduled date. Do not wait: after the window closes, the appeal option is gone. If your appeal succeeds, as reported, you may be re-approved or re-admitted within 30 days. Example: A channel was suspended for reused content. The creator appealed within a week, showed the new original videos, and the appeal was accepted. Common mistake: Appealing with no changes. An appeal needs evidence that the cause is fixed, not just a request to be reinstated.Illustrative diagram (mock-up, not a real YouTube Studio screenshot): appeal a suspension within 21 days, as reported. Step 4 - Rejected: The Application Was Turned Down What to do: If your first application is rejected, check whether to appeal within 21 days or reapply after 30 days, as reported. How: As reported, a first unsuccessful application can be appealed within 21 days, or you can re-apply after a 30-day period. If the rejection is not your first, or you have already reapplied once, as reported, the waiting period is 90 days. Do not apply again before the period ends, because an early application can be rejected again. Use the wait to fix the reason named in the decision, usually reused or inauthentic content, and rebuild the channel with original videos. Example: A creator was rejected for reused content on her first application. She replaced the reused clips with her own recorded segments, waited 30 days, and was accepted on her next application. Common mistake: Reapplying the next day with nothing changed. The same videos will get the same result, and the wait starts over.Illustrative diagram (mock-up, not a real YouTube Studio screenshot): first rejection means 30 days, a repeat means 90, as reported. Step 5 - Fix the Cause Before You Appeal or Reapply What to do: Find the reason named in your message, and fix it in the channel before you send an appeal or a new application. How: The most common reasons are reused content, inauthentic or mass-produced content, and invalid traffic. Delete or re-record videos that reuse other creators' work without your own value added, and stop using content that is copied or mass-produced. Check your traffic sources for bought views, revoke access for shady third-party apps, and secure your account. Our guide on how to fix a rejected monetization application walks through the reused-content fixes step by step. Example: A creator's channel was full of clips taken from other videos. He deleted the clips, recorded his own commentary, and published five original videos before reapplying. Common mistake: Fixing one video and leaving ten others the same. Reviewers look at the whole channel, so every video that breaks the rules counts.Illustrative diagram (mock-up, not a real YouTube Studio screenshot): fix the cause in every video, not just one. Step 6 - Reapply and Keep Monetization Safe What to do: When the waiting period ends, reapply with a clean channel, then keep it that way with a monthly check. How: Apply only when the cause is fixed and you have published original videos that show it. After you are accepted, keep your channel safe: publish original work, do not buy views or subscribers, and check the Earn tab and your email every month. Our guide on how to get monetized on YouTube explains the eligibility steps and what reviewers look for. Example: A creator reapplied after fixing her reused-content videos, was accepted, and now reviews her Earn tab on the first day of every month. Common mistake: Going back to the same habits after acceptance. Monetization can be paused or disabled again, and a second suspension has a longer path back.Illustrative diagram (mock-up, not a real YouTube Studio screenshot): reapply clean, then protect your monetization every month. Your Monetization Status ChecklistEarn tab message and email read before acting. State identified: paused, disabled, or rejected. Appeal sent within 21 days, if a suspension. Waiting period respected: 30 days first, 90 days repeat, as reported. Cause fixed across the whole channel.Frequently Asked Questions What does it mean when YouTube monetization is paused? It usually means YouTube needs something from you, such as a verification or updated payment details. Check the Earn tab for the exact reason. How long do I have to appeal a suspension? As reported, you have 21 days from the suspension, and you should receive a response within 14 days. How long must I wait after a rejected application? As reported, 30 days after a first rejection, and 90 days after a suspension or a repeat rejection. Check the exact window in the Earn tab or your email. Can I appeal if my suspension was announced in advance? As reported, you can appeal within 7 days before the scheduled suspension date. Check the exact window in the Earn tab or your email. SourcesYouTube Help, Appeal a YouTube Partner Program suspension or rejection: support.google.com/youtube/answer/9564590 (verified live 31 October 2026). CreatorPlaybook, YouTube Monetization Rejected? How to Fix Reused Content and Appeal the Right Way: creatorplaybook.blogspot.com/2026/10/youtube-monetization-rejected-how-to.html CreatorPlaybook, How to Get Monetized on YouTube in India: Approval Steps That Actually Work: creatorplaybook.blogspot.com/2026/10/how-to-get-monetized-on-youtube-in.html
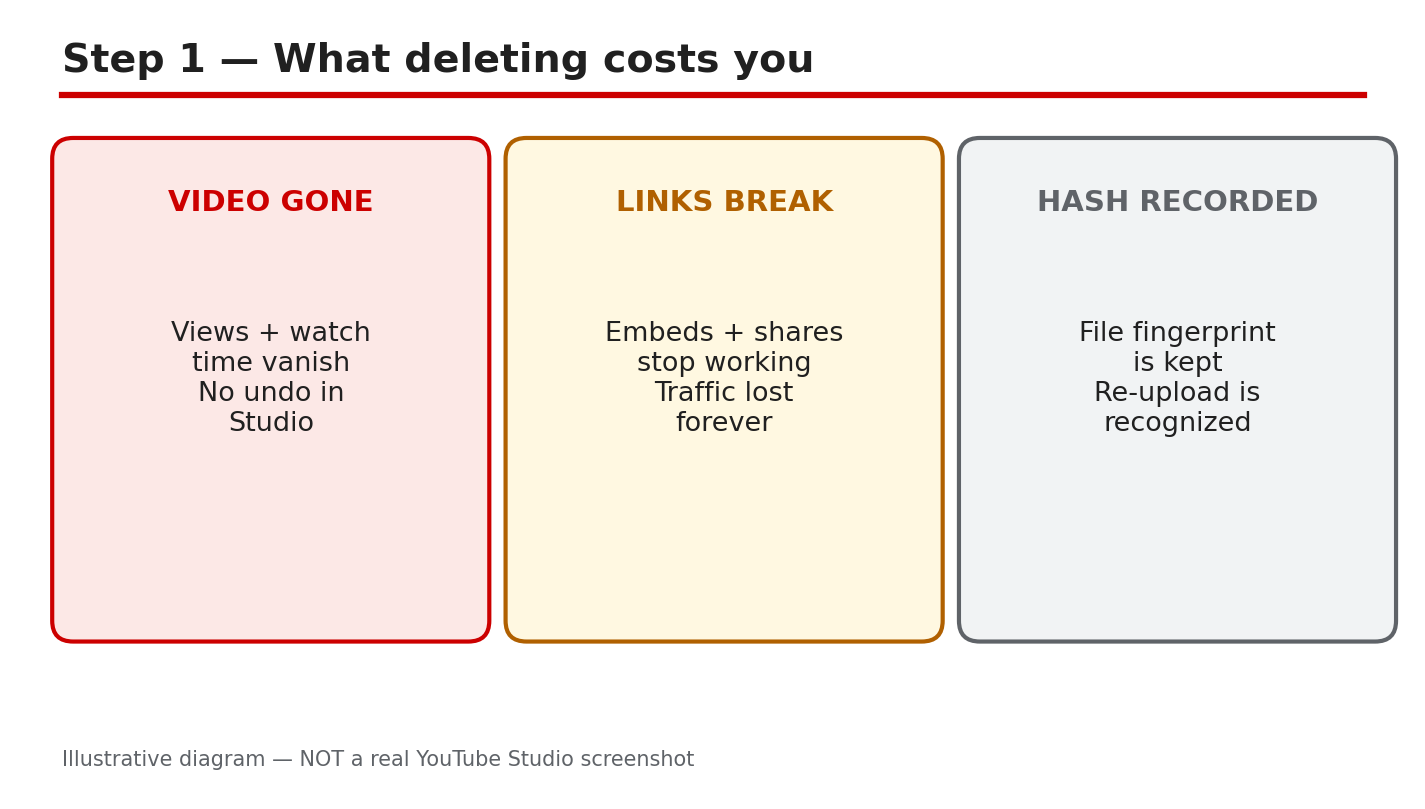
- CreatorPlaybook Team
- 31 Oct, 2026
Delete and Re-Upload a YouTube Video? Why It Hurts and What to Do Instead
Your video has a mistake. A wrong date in the first ten seconds, a clip you no longer have the rights to, or a typo in the title. Deleting the video and uploading it again feels like the obvious fix. It is not. As reported, a re-upload is treated as a brand-new video, and the original's watch time, comments, ranking, and links do not move with it. YouTube Help is clear on one point: you cannot replace a video, because any new upload gets a new URL. Worse, as reported, deleting and re-uploading the same file can trigger spam signals, because the system may recognize the file it already saw. This guide explains what deleting really costs, what to do instead, and the rare cases where a fresh upload is the right call. What You Will Learn In this guide you will learn what you lose when you delete a video, why re-uploading the same file can look like spam as reported, how to unlist a video instead, how to trim and fix a video in the YouTube Studio Editor, when a new version is worth making, and how to re-upload correctly with real changes. Step 1 - Learn What Deleting a Video Actually Costs What to do: Before you delete anything, write down what the video has earned: watch time, comments, search ranking, and every link pointing to it. How: Open YouTube Studio, check the video's Analytics, and note its watch time, traffic sources, and search terms. Then check where the video is linked: your blog, your other videos' cards and end screens, playlists, and social posts. Deleting the video removes it from all of those places at once. YouTube Help says that after a video is deleted, its URL and title are no longer visible or searchable in YouTube Analytics. The watch time it earned is gone from your channel's totals, and the comments disappear too. Example: A creator deleted a tutorial with 40,000 views over one wrong date. The replacement started from zero, and the blog post linking to it broke. Common mistake: Deleting first and checking the cost later. Once a video is deleted, there is no undo. Check the numbers before you touch the delete button, not after.Illustrative diagram (mock-up, not a real YouTube Studio screenshot): deleting a video removes its watch time, comments, ranking, and links. Step 2 - Understand Why the Same File Can Look Like Spam What to do: Assume YouTube can recognize a file it has seen before, and treat a re-upload of the same file as a risk, not a fresh start. How: As reported, YouTube checks uploaded files against content it has already processed, using file hashes and fingerprints that identify a video even when its title or description changes. A creator who deletes a video and uploads the identical file again is, as reported, sending the system a file it may already know, which can read as an attempt to dodge a removal or reset a bad metric. The safe rule is simple: if the file is unchanged, do not delete and re-upload it. Example: A channel deleted a video with a copyright claim on its audio, then re-uploaded the same file with only the title changed. The claim returned within hours. Common mistake: Changing the title and description and expecting a different result. As reported, the system matches the file, not the words around it.Illustrative diagram (mock-up, not a real YouTube Studio screenshot): a re-uploaded file can be matched to the original by its hash. Step 3 - Unlist the Video Instead of Deleting It What to do: If a video has a problem but is not harmful, change its visibility to Unlisted. It stops appearing in search and recommendations, but keeps its watch time, comments, and links. How: In YouTube Studio, open the video, click Visibility, and choose Unlisted. The video leaves public search and your channel page, but anyone with the link can still watch it, and its record in Analytics stays intact. If the video contains something that violates YouTube's policies or could harm viewers, deleting is the right choice, because an unlisted video still exists on your channel. Example: A creator found an outdated price in a tutorial. She unlisted the video, recorded a corrected version, and later set the old one back to public with a pinned comment pointing to the update. Common mistake: Deleting a video that only needed to be hidden for a week. Unlisted is reversible. Deletion is not.Illustrative diagram (mock-up, not a real YouTube Studio screenshot): unlisting hides a video while keeping its watch time and links. Step 4 - Trim and Fix the Video in the Studio Editor What to do: Fix small mistakes with YouTube Studio's Editor instead of re-uploading. You can trim the start, end, and middle, and blur or replace audio. How: Open the video in YouTube Studio, click Editor, and use Trim to cut out the mistake. You can also blur faces or objects, and, if the problem is music, replace or erase the song. YouTube Help says you can edit a video's title and description, make enhancements, and add a card, and the video keeps its URL, its watch time, and its comments. Keep the edit small: trimming a few seconds is safe. Our guide on how to trim a video after a copyright claim walks through the exact steps. Example: A creator's video opened with a wrong logo for three seconds. She trimmed those three seconds in the Editor, kept the video's 12,000 views, Common mistake: Trimming after the video has a warning or strike and assuming the problem is gone. Trimming removes the segment, but any notice you received still stands. Check the email and the Earn tab.Illustrative diagram (mock-up, not a real YouTube Studio screenshot): trimming a mistake in the Studio Editor keeps the video's URL. Step 5 - Decide When a New Version Is Actually Worth Making What to do: Re-upload only when the video genuinely needs to be a different video: a major re-edit, a new structure, or new information throughout. How: Ask whether an unlisted fix or an Editor trim can solve it. If the answer is no, plan the new version as a new video: rewrite the script, re-record the core sections, and give it a title and description that fit the new content. Then unlist the old video rather than deleting it, and link the new one from the old video's description and a pinned comment. Example: A creator's 2024 guide was fully outdated. She recorded a fresh 2026 version, unlisted the old one, and added a card pointing to the new upload. Common mistake: Re-uploading a slightly different version and keeping the old one public too. Two near-identical videos split the audience and can confuse search. Unlist the old one.Illustrative diagram (mock-up, not a real YouTube Studio screenshot): a new version is worth it only when the video truly changes. Step 6 - Re-Upload Properly and Keep the Old Links Working What to do: If you re-upload, treat it as a new video: new title, new description, new thumbnail, and a plan for the old links. How: Upload the new file with a title and description that describe the new version, and add a thumbnail that shows the change. In the old video's description and pinned comment, link to the new video. Update the links on your blog and in your cards and end screens. Remember that a new upload gets a new URL, so every old link needs updating, or it will break. Our guide on why a video is not showing in search explains why a fresh upload takes time to rank again. Example: A creator re-uploaded a course video with a new structure and updated every link in the course page the same day. Nobody complained about a broken link. Common mistake: Re-uploading and forgetting the old links. A new URL means every card, end screen, playlist, blog post, and social post that pointed to the old video now points nowhere.Illustrative diagram (mock-up, not a real YouTube Studio screenshot): a re-upload gets a new URL, so old links must be updated. Your Delete and Re-Upload ChecklistWatch time, ranking, and links checked before any delete. Harmful content deleted; fixable videos unlisted instead. Small mistakes fixed in the Studio Editor. Old video unlisted, not deleted, when a new version is made. New video linked from the old video's description and comments.Frequently Asked Questions Can I delete a video and re-upload it? You can, but you lose the original's watch time, ranking, comments, and links, and the same file may be flagged again as reported. Does unlisting a video keep its watch time? Yes. An unlisted video keeps its watch time and comments, and it stops appearing in search and recommendations. Can I replace a video without changing its URL? No. YouTube Help says you cannot replace a video, because any new upload gets a new URL. What should I do about a copyright claim on my audio? Try trimming the claimed audio or replacing the song in the Studio Editor before you consider deleting the video. SourcesYouTube Help, Replace or delete your video: support.google.com/youtube/answer/55770 (verified live 31 October 2026). CreatorPlaybook, YouTube Copyright Claim? How to Trim, Replace or Erase the Song: creatorplaybook.blogspot.com/2026/10/youtube-copyright-claim-how-to-trim.html CreatorPlaybook, YouTube Video Not Showing in Search Results: How to Fix It: creatorplaybook.blogspot.com/2026/10/youtube-video-not-showing-in-search.html
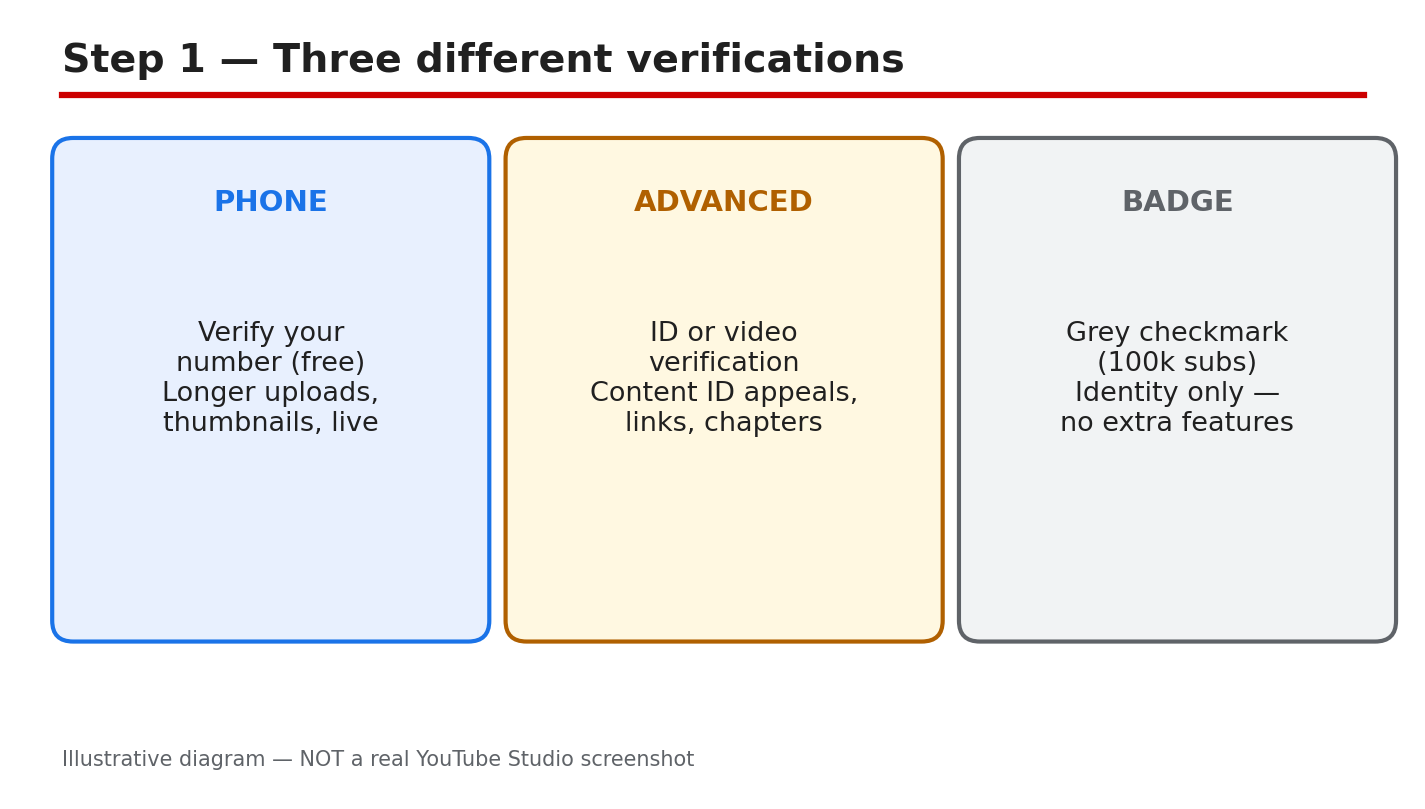
- CreatorPlaybook Team
- 30 Oct, 2026
YouTube Verification Explained: Phone Verification, Advanced Features, and the Grey Badge
Three different things on YouTube all use the word verification, and mixing them up wastes hours. Phone verification unlocks longer uploads, custom thumbnails, and live streaming. Advanced features unlock Content ID appeals, links in descriptions, and chapters. The grey badge only proves a channel is the real one, and it needs 100,000 subscribers. This guide separates the three, shows you exactly where to check each one in YouTube Studio, and walks you through the steps to apply, recover lost access, and avoid the scams that charge for a free badge. What You Will LearnHow phone verification, advanced features, and the grey badge differ. Where to check your status in Studio in under a minute. The exact rules for the grey badge, as YouTube Help states them. What to fix before you apply, so you are not rejected. How to recover advanced features if you lose them. Why no one can sell you a badge, and what to do instead.Step 1: Learn the Three Different Verifications Phone verification is free and proves you are a real person. You enter a phone number, YouTube sends a code by text or voice call, and you enter it back. Once verified, you can upload videos longer than 15 minutes, add custom thumbnails, live stream, and appeal copyright claims. Advanced features are the next level: after phone verification, you unlock them by verifying with an ID or a video, or by building up channel history. They add Content ID appeals, links in video descriptions, and chapters. The grey badge is different again: it is a check mark next to your channel name that proves you are the real creator, and it gives you no extra features at all. Example: a new creator phone-verifies on day one and can live stream the same week, but the grey badge stays out of reach until 100,000 subscribers. Common mistake: paying a stranger who promises a grey badge. Applications are free inside YouTube Studio, and no one outside YouTube can grant one. Figure 1: Illustrative diagram comparing the three verifications: phone, advanced features, and the grey badge. This is a mock-up, not a real YouTube Studio screenshot. Step 2: Check Your Status in YouTube Studio Sign in to YouTube Studio on your computer, then go to Settings, then Channel, then Feature eligibility. That page shows three groups: standard features, intermediate features, and advanced features, with your current status for each. For the grey badge, the path is different: go to Settings, then Channel, then Verified badge, and you will see Apply only if you are eligible. If the Verified badge tab does not appear, YouTube says you are not yet eligible to apply. Example: you open Feature eligibility and see advanced features marked as not available, with a button to verify with an ID or a video. Common mistake: asking a manager or editor to complete phone verification for you. YouTube Help says that for a channel without a brand account, only the channel owner can phone-verify it, so the owner must do this step personally. Figure 2: Illustrative diagram of the Studio path: Settings, Channel, Feature eligibility, and the Verified badge tab. This is a mock-up, not a real YouTube Studio screenshot. Step 3: Know the Grey Badge Rules YouTube Help lists three requirements to submit a request for channel verification. You must have 100,000 subscribers. Your Google account must have 2-step verification turned on. And you must have a complete profile, including a banner image, profile picture, description, and at least one public video. Only the channel owners or the managers of a channel can submit the application. There is no workaround at the standard tier: a smaller channel cannot buy, request, or unlock the badge early, although YouTube says it sometimes proactively verifies well-known channels with fewer than 100,000 subscribers. Example: a channel with 120,000 subscribers but no 2-step verification will see a prompt to turn it on instead of an Apply button. Common mistake: changing your channel name after getting verified. YouTube says a verified channel stays verified unless you change your channel name, which removes the badge. Changing your handle, on the other hand, does not remove it. Figure 3: Illustrative diagram of the grey badge rules: 100,000 subscribers, 2-step verification, and a complete profile. This is a mock-up, not a real YouTube Studio screenshot. Step 4: Get Ready Before You Apply Work through four checks before you open the application. First, confirm your subscriber count is at or above 100,000, and remember that YouTube's systems can take a few days to update after you pass the mark. Second, turn on 2-step verification on the Google account that owns the channel. Third, complete your profile: banner image, profile picture, description, and at least one public video. Fourth, check for active strikes, because YouTube reserves the right to revoke verification from channels that violate its Community Guidelines or Terms of Service. Example: you reach 100,000 subscribers on Monday, turn on 2-step verification on Tuesday, and the Apply button appears later that week. Common mistake: applying with an incomplete profile and getting stuck, then assuming the system is broken. Fix the missing piece first, then apply, and keep your record clean while you wait. Figure 4: Illustrative diagram of the pre-application checks: subscribers, 2-step verification, profile, and strikes. This is a mock-up, not a real YouTube Studio screenshot. Step 5: Recover Advanced Features You Lost If advanced features stop working, start with the simplest fix: verify your phone number again in Studio under Settings, then Channel, then Feature eligibility. If that does not restore access, YouTube offers two routes to advanced features: verification using an ID or a video, or building up sufficient channel history. Reported guidance puts ID or video verification review at about 24 hours, and channel history at about two months of clean activity. Treat both figures as reported estimates, not promises, and keep uploading normally while you wait. Example: a channel loses advanced features after a long break, re-verifies its phone number, and the features return the same day. Common mistake: paying a service that claims it can restore advanced access overnight. No service can do that for you, and sharing your account details with one can put the whole channel at risk. Figure 5: Illustrative diagram of the recovery routes: re-verify by phone, ID or video check, or channel history. This is a mock-up, not a real YouTube Studio screenshot. Step 6: Follow a Simple Verification Plan Do the steps in this order. Phone-verify your channel first, because every other step needs it. Then unlock advanced features with an ID or video check, or by building channel history. Grow your channel with regular uploads until you pass 100,000 subscribers, keep 2-step verification on, and keep your profile complete. When the Apply button appears under Settings, then Channel, then Verified badge, apply from inside Studio. The application is free, and anyone asking you to pay for a badge is running a scam. Example: a creator phone-verifies in week one, unlocks advanced features in month two, and applies for the badge the week the channel passes 100,000 subscribers. Common mistake: treating the grey badge as a goal that unlocks features. It does not. Phone verification and advanced features are what change what your channel can do. Figure 6: Illustrative diagram of the verification plan: phone first, advanced next, badge last. This is a mock-up, not a real YouTube Studio screenshot. Quick ChecklistPhone-verified the channel with the owner's phone number. Checked Feature eligibility in Studio for all three feature levels. Know which of the three verifications you still need. Turned on 2-step verification on the channel owner's Google account. Completed the profile: banner, picture, description, and one public video. Never paid anyone for a badge or for advanced access.Frequently Asked Questions Is phone verification the same as the grey badge? No. Phone verification is a free code check that unlocks longer uploads, thumbnails, live streaming, and copyright appeals. The grey badge only proves a channel is the real one, and it needs 100,000 subscribers. Who can phone-verify a channel? YouTube Help says that for a channel without a brand account, only the channel owner can phone-verify it. For a brand account channel, the owner and managers can do it. Does the grey badge give me extra features? No. YouTube Help states that verified channels do not get extra features on YouTube. The badge is about identity, not about unlocking tools. How long does advanced verification take? Reported guidance puts ID or video verification review at about 24 hours. Building channel history instead takes about two months of clean activity, as reported. Treat both as estimates, not guarantees. Can I buy a verification badge? No. Applications are free inside YouTube Studio, and no seller can grant a badge. Anyone asking for payment is running a scam, so report them and never share your password. Sources — Check It YourselfYouTube Help: Verify your YouTube account YouTube Help: Verification badges on channels Related on CreatorPlaybook: YouTube Handle Taken or Channel Name Wrong? How to Change Your Name and Handle
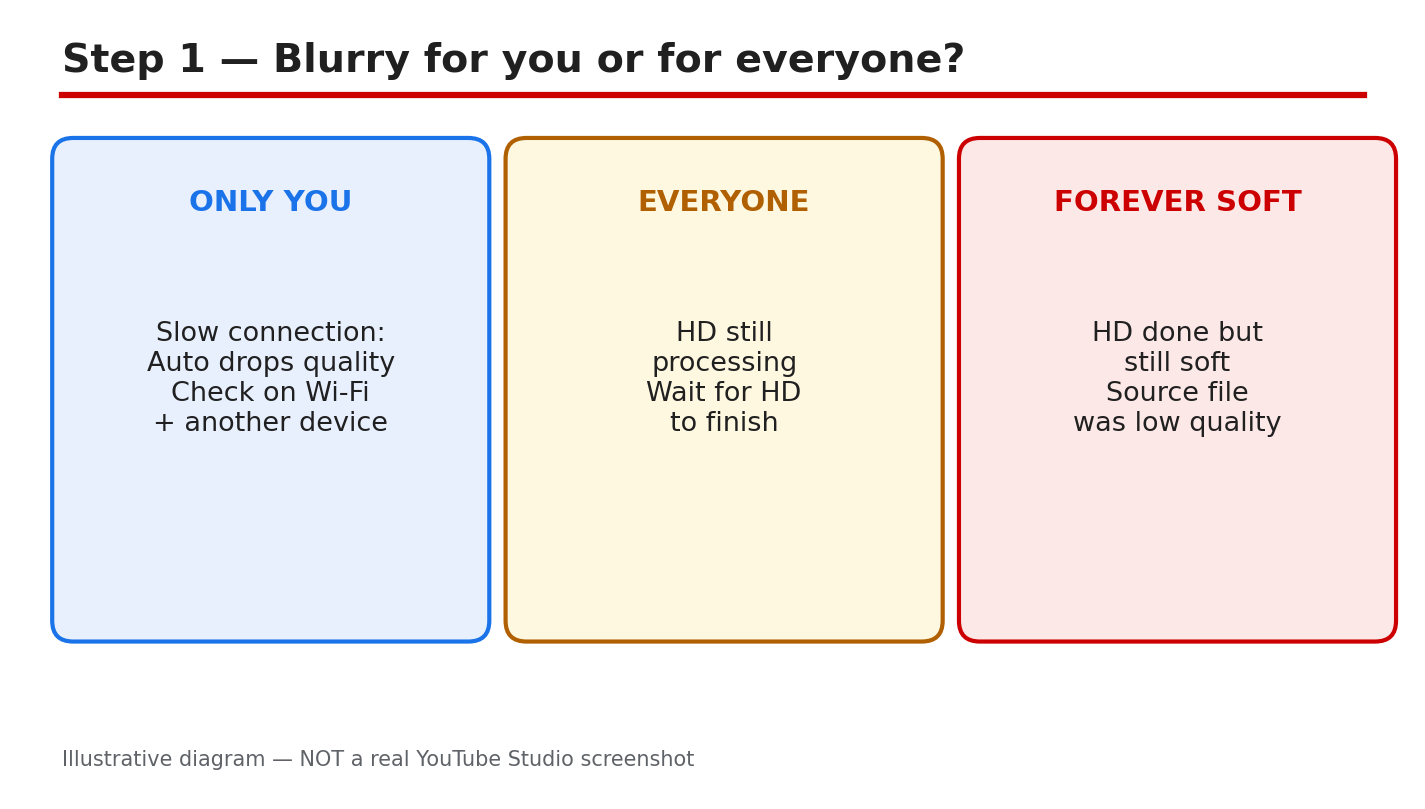
- CreatorPlaybook Team
- 30 Oct, 2026
YouTube Video Blurry After Upload? Why HD Is Stuck at 360p and How to Fix It
Your video looked sharp on your phone, but on YouTube it looks soft, blocky, and stuck at 360p. Before you delete it and upload it again, stop. In most cases, the video is not broken. YouTube publishes a low-quality version first and adds the high-definition versions later, while your own connection can also force the player down to 360p. This guide shows you how to tell which of the three causes is behind your blurry video, how to check the real processing status in YouTube Studio, and how to fix a video that stays soft after processing has finished. Follow the six steps in order. What You Will LearnHow to tell a connection problem, a processing delay, and a low-quality source file apart. Where to check HD processing status in YouTube Studio and on the watch page. Why 4K and 1080p videos take hours to finish processing. How to audit your original file, export settings, and bitrate. When to wait, when to re-export, and when to re-upload. A sharp-upload routine you can repeat for every new video.Step 1: Find Out Who Sees the Blur Open your video on fast Wi-Fi, then open it again on mobile data and on a second device, such as a laptop or a friend's phone. If the video looks sharp on one connection and blurry on another, the problem is your connection, not your upload. YouTube's Auto quality setting drops the resolution when the connection is slow, so a video can look like 360p on weak Wi-Fi and 1080p on a strong connection. Example: your edit looks crisp on your laptop at home, but blurry on your phone on the bus. That is a connection problem, and re-uploading will not fix it. Common mistake: deleting the video and uploading it again before checking another device. If everyone sees the same soft picture on fast connections, the cause is different: either HD is still processing, or your source file was already low quality. Ask two people to check. Figure 1: Illustrative diagram showing how to tell a blurry-for-you problem from a blurry-for-everyone problem. This is a mock-up, not a real YouTube Studio screenshot. Step 2: Check Whether HD Has Finished Processing In YouTube Studio, go to Content, find your video, and look at the row for it. Studio shows the processing status, and you can also open the video's watch page, click Settings, then Quality. If 1080p or 4K is missing from that menu, HD is still processing. YouTube processes the low-quality version first so the video can go live quickly, then adds the higher qualities in the background. Example: you publish at 6 p.m. and the quality menu tops out at 360p. By 10 p.m., 1080p appears without you touching anything. Common mistake: judging the video in the first hour and telling viewers it is broken. Give processing time to finish, and check the quality menu again after a few hours before you take any other step. Figure 2: Illustrative diagram of the Studio Content row and the watch-page Quality menu used to check HD processing. This is a mock-up, not a real YouTube Studio screenshot. Step 3: Understand Why HD Takes So Long Processing time depends on the video format, length, frame rate, quality, and traffic, according to YouTube Help. Higher-quality videos take longer to upload and to process. YouTube reports that a 4K video is four times larger than a 1080p video, so it can take four times longer for 4K quality to become available after the upload finishes. A 60-minute 4K video at 30fps can take up to 4 hours to finish high-resolution processing, and a 60fps 4K video will take longer. Example: a 45-minute 4K tutorial uploaded at noon may still show only 360p at 3 p.m. That is normal processing, not a failed upload. Common mistake: re-uploading the same file because the HD version is slow, which only restarts the whole queue. Upload long 4K videos early, and never promise viewers a sharp premiere in the first hours. Figure 3: Illustrative diagram of the factors that slow HD processing: length, 4K resolution, 60fps, and busy traffic. This is a mock-up, not a real YouTube Studio screenshot. Step 4: Audit Your Original File and Export Open the original file on your computer and check its resolution. If it is 720p or lower, YouTube cannot invent detail that was never there, and the video will stay soft even after processing finishes. A video sent through WhatsApp as a normal chat message is compressed to 720p or lower, so always ask the sender to send the original as a Document instead. Finally, check your export: use 1080p or higher, a high bitrate, and the same frame rate as your recording. Example: a friend sends you a clip on WhatsApp, you upload it, and it never goes past 720p. The fix is the original file, sent as a Document. Common mistake: raising the export resolution to 4K from a 720p source and expecting a sharper picture. Upscaling a soft file only makes a bigger soft file, so start from the sharpest original you have. Figure 4: Illustrative diagram of a quality audit: original resolution, WhatsApp compression, and export bitrate. This is a mock-up, not a real YouTube Studio screenshot. Step 5: Fix a Video That Stays Soft Wait until the quality menu shows that HD has finished before you decide the video is broken. If HD is done and the picture is still soft, the source is the problem, and no setting inside YouTube will sharpen it. Re-export the video at 1080p with a high bitrate from the sharpest original file, then upload the new version as Private first. Check the new upload on the watch page, and only replace the live video once the new one looks sharp. Example: a tutorial stays soft at 720p after a full day, so you re-export it at 1080p from the original project and upload it as Private. Once HD finishes, you swap it in. Common mistake: deleting the live video before the replacement is ready, which loses its views and watch time. Keep the live video up until the new one is ready to publish. Figure 5: Illustrative diagram of the fix: wait for HD, re-export at 1080p, upload as Private, then replace. This is a mock-up, not a real YouTube Studio screenshot. Step 6: Use a Sharp-Upload Routine Every Time Make every upload follow the same routine. Export at 1080p or higher with a high bitrate, then upload the video as Private or Unlisted. Wait until the quality menu shows 1080p or 4K, then switch the video to Public or let your scheduled time run. This removes the most common reason viewers see a blurry first impression. Example: you upload Friday's video as Private on Thursday night, confirm 1080p on Friday morning, then make it Public. Common mistake: publishing a 4K video the minute the upload bar hits 100 percent and sharing the link everywhere while it is still 360p. First impressions stick, so let HD finish before anyone watches. Figure 6: Illustrative diagram of the sharp-upload routine: export, upload Private, wait for HD, then publish. This is a mock-up, not a real YouTube Studio screenshot. Quick ChecklistChecked the video on Wi-Fi and on a second device. Opened the watch-page Quality menu to confirm HD is finished. Waited several hours for a long 4K upload to process. Confirmed the original file is 1080p or higher. Asked for the original file as a Document, not a WhatsApp chat video. Re-uploaded as Private first, and kept the live video until ready.Frequently Asked Questions Why is my YouTube video stuck at 360p? YouTube publishes the low-quality version first and adds HD later. A 60-minute 4K video at 30fps can take up to 4 hours to finish high-resolution processing, according to YouTube Help. Why does my video look blurry only on my phone? Your connection is the likely cause. YouTube's Auto setting lowers quality on slow connections, so test the same video on fast Wi-Fi and on another device before changing anything. Can I make a 720p video look like 1080p? No. YouTube cannot add detail that was never in the source file, so re-export from the sharpest original you have, at 1080p or higher with a high bitrate. Should I delete a blurry video and upload it again? Not right away. Wait for HD to finish, and if the video is still soft, upload the fixed version as Private first. Delete the live video only after the replacement is ready. Does verifying my account speed up processing? YouTube Help says verifying your account gives the best processing time, so it is worth doing. It does not turn a low-quality source file into HD, but it removes one avoidable delay. Sources — Check It YourselfYouTube Help: Low video quality after upload YouTube Help: Upload videos longer than 15 minutes Related on CreatorPlaybook: YouTube Video Stuck Uploading or Processing? How to Fix It Without Losing the Video
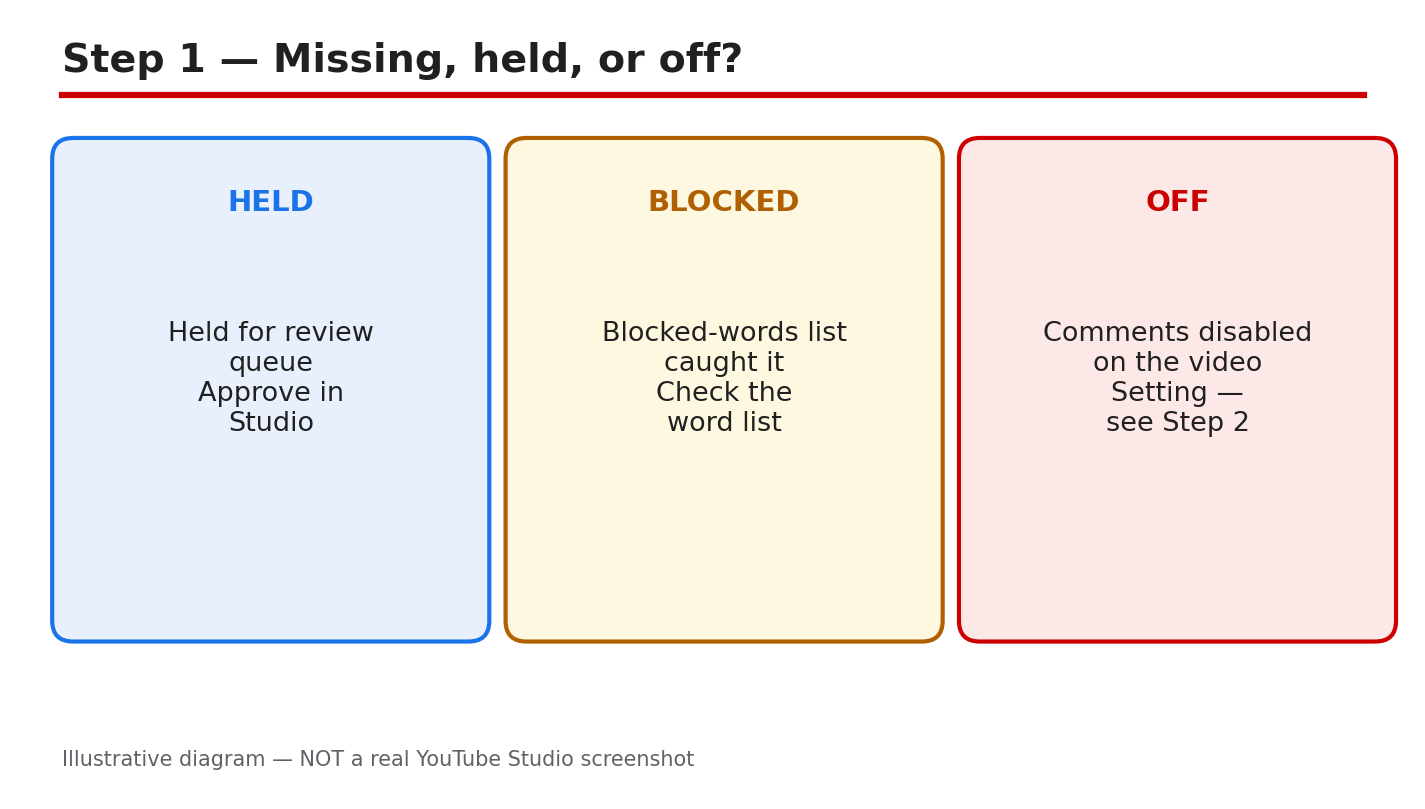
- CreatorPlaybook Team
- 30 Oct, 2026
YouTube Comments Not Showing? Held for Review, Spam Filter, or Disabled — Fix It
A viewer writes a thoughtful comment, and it never appears under your video. Another comment with a link vanishes too. Before you blame viewers, check your own settings: most missing comments are held for review, caught by a filter, or switched off by a setting you did not mean to change. This guide shows you how to tell the three cases apart, find the setting, fix the cause, and build a comments habit that keeps real discussion visible. Work in order, and test with a comment from a second account you control. What You Will LearnTell held, blocked, and disabled comments apart. Find comment settings for one video and the whole channel. Spot spam filters, blocked words, and a wrong Made for Kids label. Approve real comments and reply fast in the first hours. Build a daily and weekly comments habit.Step 1: Missing, Held, or Off? Three states look the same to a viewer but need different fixes. Held for review means the comment waits in a queue until you approve it. A blocked-words catch means your own word list stopped the comment. Comments disabled means the video or channel setting has comments off, so nobody can comment at all. Check the queue first, then the word list, then the switch itself. Guessing the cause and changing everything at once only hides the real one. Path: YouTube Studio > Community > Held for review, then Likely spam. Example: a creator found 40 kind comments held for review after switching on 'Hold all comments'. Changing it to 'Hold potentially inappropriate comments' let real comments through. Common mistake: turning comments off and on again, hoping old comments return, instead of checking the held queue first.Diagram: missing, held, or off — three states, three different fixes. Illustrative diagram, not a real Studio screenshot. Step 2: Find the Comment Setting There are two places to check. For one video, open YouTube Studio, go to Content, click the video, open Details, and scroll to Comments visibility. There you can allow all comments, hold some for review, or turn comments off. For the whole channel, go to Settings, then Community, then Defaults, and set the same choice for new uploads. The held queue lives under Community in the left menu, with tabs for Published, Held for review, and Likely spam. Path: YouTube Studio > Content > video > Details > Comments visibility, and Settings > Community > Defaults. Example: comments were on for old videos but off for new ones, because the channel default was set to Off. Changing Defaults fixed every future upload. Common mistake: fixing one video and forgetting the channel default, so the next upload has the same problem.Diagram: find the setting — video Details, channel Defaults, and the held queue. Illustrative diagram, not a real Studio screenshot. Step 3: Why Comments Vanish Three filters hide most comments. First, the spam filter catches comments with links, repeated text, or patterns that look automated. Second, your blocked-words list stops any comment that holds one of your words, even when the rest of the comment is friendly. A single broad word, like 'free', can hide hundreds of good comments. Third, a wrong Made for Kids label turns comments off by design. Videos set as Made for Kids do not allow comments, so an adult video with the wrong label loses every comment. Check the audience label before you blame the filter. Path: YouTube Studio > Content > video > Details > Audience, then check 'Made for Kids' is correct. Example: a gaming channel blocked the word 'link', and every comment asking for a game link vanished. Removing that one word restored the discussion. Common mistake: adding dozens of blocked words after one bad comment, which silences ordinary viewers too.Diagram: why comments vanish — spam filter, blocked words, wrong Made for Kids label. Illustrative diagram, not a real Studio screenshot. Step 4: Run the Comments Checks Work through four checks in order. First, open the video's Comments visibility and confirm it is set to allow comments. Second, open the held queue and count how many real comments wait there. Third, open Details, then Audience, and confirm the Made for Kids label matches the video. Fourth, open Settings, then Community, and read your blocked-words list line by line. Remove any word that is too broad. Finish by posting a test comment from a second account to confirm comments show. Path: YouTube Studio > Community > Held for review, then Published, to compare the two lists. Example: a check found 60 held comments, 12 blocked by one broad word, and a correct audience label. Approving the 60 fixed the video in ten minutes. Common mistake: approving spam along with real comments, which teaches the filter nothing and fills the thread with junk.Diagram: the comments checks — setting, held queue, audience label, blocked words. Illustrative diagram, not a real Studio screenshot. Step 5: Fix and Reply Approve the real comments first, starting with the oldest, then remove or report the spam. If one blocked word caused the problem, delete that word from the list and save. Then reply fast. Comments answered in the first hours draw more replies, and a lively thread signals YouTube that viewers care about the video. Ask a simple question at the end of your reply so the viewer has a reason to come back. Pin the best question to the top of the comments so new viewers see it first. Path: YouTube Studio > Community > Held for review > Approve, then reply from the Published tab. Example: a creator approved 30 held comments and replied to each one. The video gained 12 new comments the same day. Common mistake: replying only to praise and ignoring questions, which ends the conversation instead of growing it.Diagram: fix and reply — approve real comments, remove the blocking word, reply fast. Illustrative diagram, not a real Studio screenshot. Step 6: Build the Comments Habit Daily, open the held queue each morning and approve or remove every comment the same day. Weekly, read your blocked-words list and remove words that are too broad. Before you publish, set comments to the choice you want while the video is still unlisted, and pin a question that invites the first comment. Reply to the first ten comments on every new video yourself. A channel that answers becomes a place people return to, and returning viewers are the ones who comment again. Path: YouTube Studio > Settings > Community > Defaults, set before publishing, then Community > Held for review daily. Example: a channel cleared its queue every morning for a month. Comments per video doubled, and the community began answering new viewers first. Common mistake: clearing the queue once and never returning, so the same comments pile up again within a week.Diagram: the comments habit — daily queue, weekly block-list review, set before Public, pin a question. Illustrative diagram, not a real Studio screenshot. Quick ChecklistComments visibility set to allow comments on the video. Held queue empty, with real comments approved. Audience label correct for the video. Blocked-words list free of broad words. Channel default set before the video goes Public. First ten comments answered, best question pinned.Frequently Asked Questions Why did my comment disappear right after I posted it? It was likely held for review or caught by the spam filter. Check the Held for review tab in YouTube Studio > Community. Can viewers comment on Made for Kids videos? No. Comments are turned off on Made for Kids videos by design, so check the audience label if comments are missing. I turned comments off and on. Will old comments return? Check the held queue first — approvals there are the surest way to bring real comments back, and changing the on-off switch rarely helps. Should I use 'Hold all comments for review'? Only for a short time, such as after a sensitive video. For daily use, 'Hold potentially inappropriate comments' keeps real discussion visible with less work. How do I handle rude comments once they appear? Approve the fair ones, hide or report the abusive ones, and reply calmly to honest criticism. Our guide to negative comments explains the reply step in detail. Sources — Check It Yourself Check the facts in this guide against YouTube's own help pages.Learn about comment settings — YouTube Help How to Handle Negative Comments on YouTube
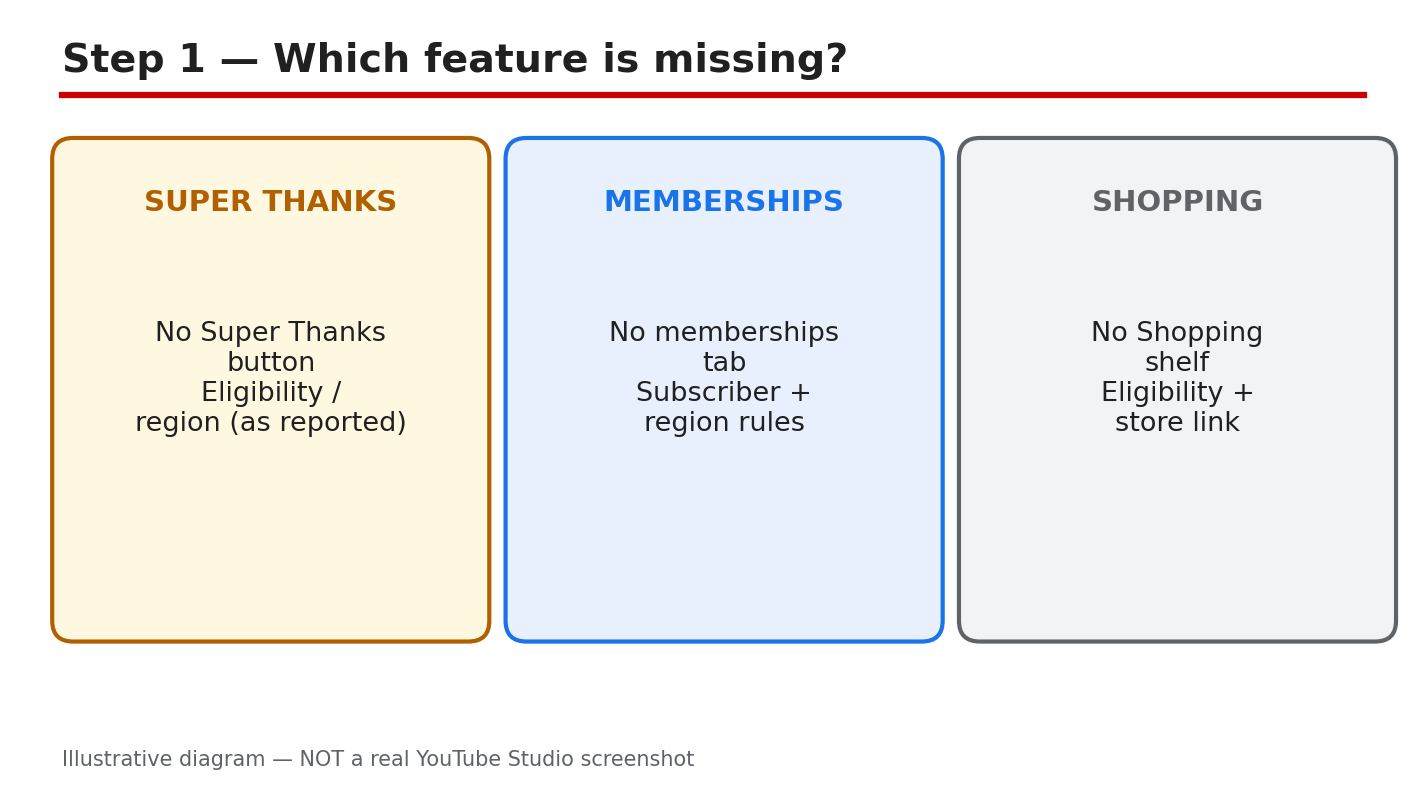
- CreatorPlaybook Team
- 29 Oct, 2026
Earn Tab Features Missing? Super Thanks, Memberships and Shopping Not Showing
A missing feature can feel like a broken promise. You open the Earn tab, look for Super Thanks, memberships, or the Shopping shelf, and the card is not there, or it says you are not eligible. The reason is often simple: a requirement is not met, the feature is not live where you live, or the card needs one more setup step. This guide helps you name the missing feature, find the exact reason on its Earn tab card, and check the requirements against the official Help page and your own channel. Write down the exact reason the card shows, work through the checks in order, and do not promise a feature in a video before it appears on your channel. What You Will Learn By the end, you will be able to:Name the feature that is missing. Find its card and read the eligibility reason. Check the subscriber, watch-hour, and view requirements. Check whether the feature is available where you live. Turn a feature on and test it on your own video. Plan a rollout without promising a feature too early.Step 1: Name the feature that is missing What to do: Name one feature, not all of them. Super Thanks, memberships, and Shopping each have a separate card and separate requirements, so a fix for one does not unlock another. Check only that card first, and finish its checks before you move to the next feature. Studio path: YouTube Studio > Earn. Look at the feature cards on the page and note which card is present, which card is missing, and what each card says. Example: Ana wants memberships but keeps checking the Super Thanks card. Once she looks at the memberships card, she sees the reason that applies to memberships only. Common mistake: Treating every missing card as the same problem. A Shopping problem is not a Super Thanks problem.Illustrative diagram, not a real screenshot: Super Thanks, memberships, and Shopping compared. Step 2: Find the card and read its reason What to do: Open the Earn tab and read the card for your feature word by word. The card lists the requirements and, when you are not eligible, the reason it is hidden. Do not guess from a friend's channel: the card on your own channel is the only reason that counts for you. Write the reason down exactly. If the card shows no reason, check again after signing in with only the channel account. Studio path: YouTube Studio > Earn. Find the card for Super Thanks, memberships, or Shopping, and read the requirements and the eligibility message on that card. Example: Ben's memberships card says he needs more subscribers. He stops searching for a hidden setting and starts working on the number the card actually names. Common mistake: Skipping the card and changing settings at random. If you do not read the reason, you can change the wrong thing and still see no card.Illustrative diagram, not a real screenshot: Earn tab feature cards and eligibility reasons. Step 3: Why features stay hidden What to do: Compare your channel with the requirements the Help page reports, and check the same numbers on your Earn tab card. The Help page reports that channel memberships need 500 subscribers, 3 public uploads in the last 90 days, and either 3,000 qualified watch hours in the last 365 days or 3 million qualified Shorts views in the last 90 days. Super Thanks needs age 18 or older and availability in your country or region. Shopping has its own subscriber rule and is not for Made for Kids content. Availability differs by country or region, so check the Help page and your card. Studio path: YouTube Studio > Earn for your card, and the Help page in Sources for the full, current requirements. Example: Carla has 420 subscribers and wants memberships. The reported 500-subscriber requirement explains why her card is hidden. Common mistake: Copying a threshold from an old video. Check the current Help page and your own card instead.Illustrative diagram, not a real screenshot: thresholds, countries, and availability compared. Step 4: Run the eligibility checks What to do: Check four things: Partner Program membership in good standing, the feature available in your country or region, the numbers on the card met, and no active strike blocking the feature. If one check fails, that check is your next task. Note which one failed. Studio path: YouTube Studio > Earn for the card, and YouTube Studio > Content for any strike or restriction notice on your videos. Example: Dev meets the subscriber number, but his card still hides memberships. A strike notice in Content explains the block, so he fixes that first. Common mistake: Checking only subscribers. A strike, a country limit, or a Partner Program problem can hide a card even when the numbers look right.Illustrative diagram, not a real screenshot: four eligibility checks in order. Step 5: Turn the feature on What to do: On the feature card, accept the module or terms for that feature, then finish its setup. For Shopping, link your store; for memberships, set prices and perks. The feature should appear after setup is complete. Then test it yourself: open one of your own videos and check that the feature shows where viewers will see it. If the feature still does not show, re-open the card and check for an unfinished step. Studio path: YouTube Studio > Earn > the feature card. Accept the module or terms, finish setup, then check one of your videos as a viewer would. Example: Lina accepts the memberships module, sets one perk and a price, and then checks her own video. The Join button appears only after setup is finished. Common mistake: Accepting the terms but skipping setup. An unfinished store link, price, or perk can leave the feature hidden even after you accept.Illustrative diagram, not a real screenshot: accept terms, finish setup, test the feature. Step 6: Roll the feature out slowly What to do: Announce the feature only after it is live on your channel and tested on your own video. Start with one video, tell viewers exactly what the feature does, and watch for questions before you mention it in every video. If a viewer says they cannot see it, ask which country they are in and which device they use. Keep the first announcement short and clear. Studio path: YouTube Studio > Earn to confirm the card is live, then one published video to test what viewers see. Example: Omar tests memberships on one video, answers three viewer questions, and only then adds the Join mention to his next video. Common mistake: Promising Super Thanks or memberships in a video before the feature is live. Viewers look for it, cannot find it, and trust drops.Illustrative diagram, not a real screenshot: test one video, then tell viewers. Checklist: Before you announce a feature Tick each item before you tell viewers a feature is coming.I have named the one missing feature. I have read the reason on its Earn tab card. I have checked the Help page requirements for that feature. I have checked country availability and my numbers. I have finished setup and tested the feature myself. I have not promised the feature before it is live.Frequently Asked Questions Why is Super Thanks missing when my channel is monetized? Monetization and Super Thanks are separate features. Super Thanks needs its own eligibility, including age 18 or older, availability in your country or region, and the Commerce Product Module, so check its own card and the Help page. Can I turn on memberships with fewer than 500 subscribers? No, not on the reported requirements. The Help page reports 500 subscribers, 3 public uploads in the last 90 days, and the watch-hour or Shorts-view requirement. Grow to those numbers, then check the card again. Why can a friend see Shopping but I cannot? Shopping availability and requirements differ by channel and country or region. Check your own Earn tab card and the Help page instead of comparing channels, and finish any setup the card asks for. I accepted the terms. Why is the feature still hidden? Accepting terms is only one step. Finish the setup the card asks for, such as linking a store or setting prices and perks, then test the feature on your own video. Should I tell viewers a feature is coming soon? No. Wait until the feature is live on your channel and tested on your own video. Promising it early sends viewers looking for something they cannot find yet. Sources — Check It Yourself Check the official page below, and re-read your own Earn tab card before you act. Requirements can change, so check the page again if your card changes. No official YouTube video is embedded in this post, because no exact official video was verified live in this run.How to Earn Money on YouTube: the blog's earn-money guide How to earn money on YouTube
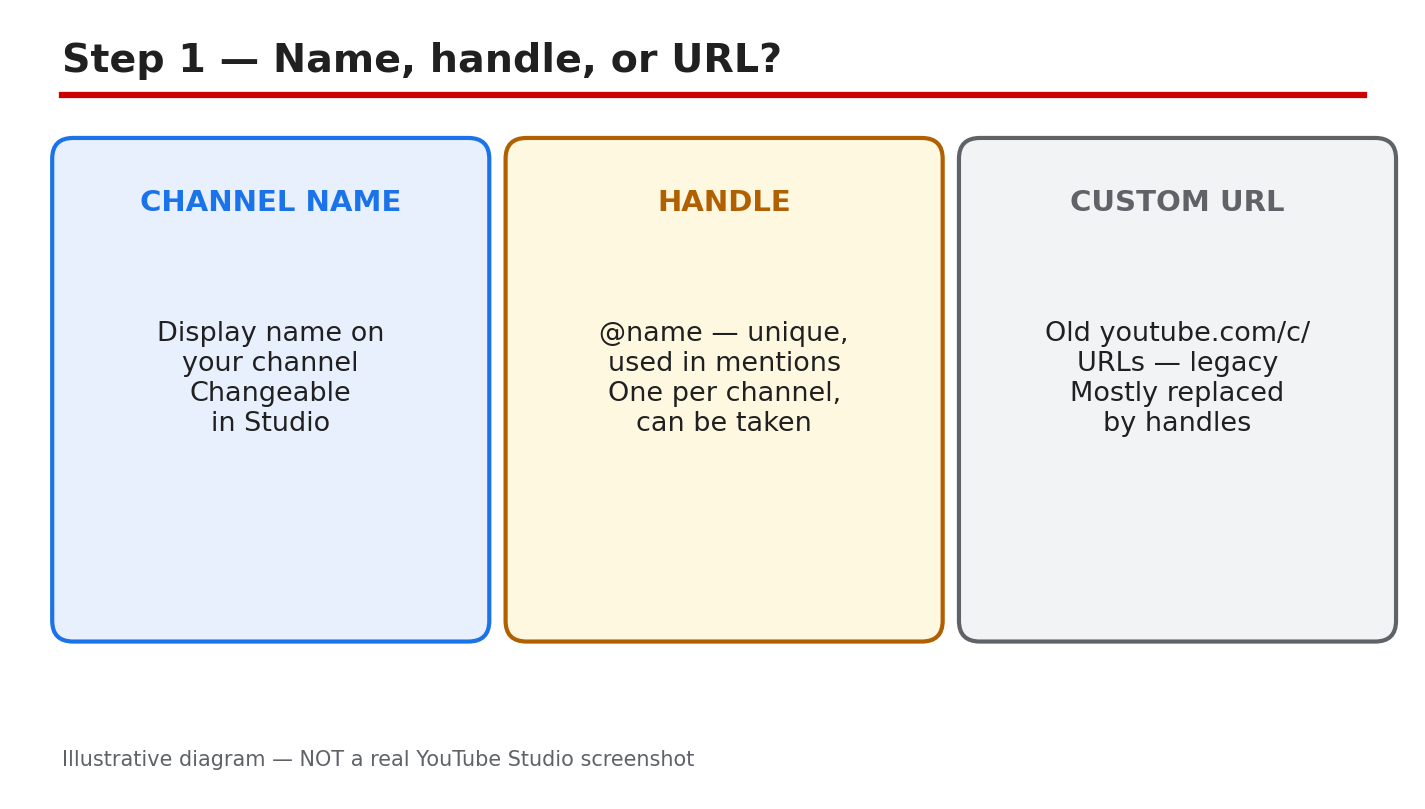
- CreatorPlaybook Team
- 29 Oct, 2026
YouTube Handle Taken or Channel Name Wrong? How to Change Your Name and Handle
Your channel name is what viewers read, and your handle is the @name they use to mention and find you. When the name feels wrong or the handle you want is taken, changing both again and again causes confusion: old mentions stop matching and viewers cannot find you. Learn what each label does, change it in the right place in Studio, and tell your viewers once, clearly. Work in order. First, tell the name, the handle, and any old custom URL apart. Next, check the rules and whether the handle is free. Then make one change, save it, and check the channel page. Do not copy a known creator. Related reading: How to Choose a Good YouTube Channel Name, which helps you pick a name worth keeping. What You Will LearnHow the channel name, handle, and old custom URL differ. Where to change them in Studio, and how to save. The handle rules, including length, characters, and change limits. What to check before you rename a channel. What to do when the handle you want is taken. How to roll out a rename so viewers still find you.Step 1: Tell the Channel Name, Handle, and Custom URL Apart What to do: The channel name is the display name viewers see on your videos, channel page, and comments. The handle is the short @name that identifies your channel in mentions and tags, and it must be unique. A legacy custom URL is an older personalized address, such as youtube.com/c/YourName, that some channels received years ago. The three can match, but they do not have to, and changing the name does not give you the matching handle. Studio path: YouTube Studio > Customization > Profile. Read the current name and handle shown there before you change anything. Example: A creator called “Maya Cooks” uses @maya-cooks-27 because @mayacooks was taken. Viewers find her by the handle, while the name stays readable. Common mistake: Telling viewers to use your old custom URL after a rename. Old links may still work, but viewers need the new name and handle.Illustrative diagram/mock-up — NOT a real YouTube Studio screenshot: channel name, handle, and custom URL compared. Step 2: Change the Name and Handle in the Right Place What to do: Open YouTube Studio, go to Customization, then Profile, and edit the name and handle fields. Type the new name, check the handle, and click PUBLISH to save. Do not look for them under Basic info: the name and handle live under Customization, then Profile, and PUBLISH saves them. After publishing, open your channel page and check the new name and handle. A new name can take a few days to appear everywhere. Studio path: YouTube Studio > Customization > Profile > enter new channel name and handle > PUBLISH. Check the channel page after saving. Example: A creator shortens “Maya Cooks Daily” to “Maya Cooks” under Customization > Profile, clicks PUBLISH, and sees the new name on her channel page. Common mistake: Editing the name under Basic info and clicking Save, then wondering why nothing changed. Use Customization > Profile, then PUBLISH.Illustrative diagram/mock-up — NOT a real YouTube Studio screenshot: Customization, Profile, and the PUBLISH button. Step 3: Check the Handle Rules Before You Choose What to do: A handle must be 3 to 30 characters long, and it can use letters, numbers, underscores, hyphens, periods, and Latin middle dots. Handles are not case-sensitive, so @MayaCooks and @mayacooks count as the same handle, and a handle cannot look like a web address or a phone number. It must not already be in use, and it must follow the Community Guidelines. YouTube can change, reclaim, or remove a handle that breaks the rules. You can change your handle twice within a 14-day period, and changing your channel name can remove a verification badge, so do not spend both changes on a guess. Studio path: YouTube Studio > Customization > Profile > Handle. Studio shows whether the handle is available before you publish. Example: A creator wants @mayacooks, finds it taken, and tries @maya.cooks, which Studio accepts. The periods keep the name readable. Common mistake: Adding a long string of numbers to a taken handle, such as @mayacooks847291. Nobody can remember it or say it aloud.Illustrative diagram/mock-up — NOT a real YouTube Studio screenshot: handle length, allowed characters, and availability checks. Step 4: Check Four Things Before You Rename What to do: First, say the name aloud and spell it. If a viewer cannot spell it after hearing it once, it will be hard to search. Second, check the same name on the other platforms you use, so viewers find one identity everywhere. Third, check the handle is free in Studio before you promise it anywhere. Fourth, check old links and mentions, and plan what still points to the old name. Rename once, with a name you can keep. Studio path: YouTube Studio > Customization > Profile. Type the new handle and watch for the availability message before you click PUBLISH. Example: A creator picks “Maya Cooks,” checks @maya.cooks is free in Studio, and only then tells viewers. The rename takes one change, not three. Common mistake: Announcing the new handle in a video before checking it in Studio. If it is taken, viewers reach someone else.Illustrative diagram/mock-up — NOT a real YouTube Studio screenshot: the four checks before renaming a channel. Step 5: If the Handle You Want Is Taken What to do: Add a readable variation, not a random one. A topic word, a city, or the word “official” keeps the handle clear: @mayacooks becomes @maya.cooks, @mayacooksrecipes, or @mayacooks.official. YouTube also suggests trying periods, numbers, or underscores when the exact handle is taken. Never copy a known creator's name or handle to ride on their audience: impersonation can lead to a strike, and viewers who arrive by mistake will leave. There is no waitlist for a taken handle, so keep creating and check again later. Studio path: YouTube Studio > Customization > Profile > Handle. Try each variation in the Handle field and read the availability message before publishing. Example: A creator finds @mayacooks taken and chooses @maya.cooks. The handle still reads as her name, and viewers can say it without spelling out numbers. Common mistake: Using a famous creator's name with one letter changed. Viewers feel tricked, and YouTube may treat it as impersonation.Illustrative diagram/mock-up — NOT a real YouTube Studio screenshot: readable handle variations when the first choice is taken. Step 6: Roll Out the Rename So Viewers Still Find You What to do: Change the name and handle in Studio first, then update the banner, the About text, and the links that point to the channel. Announce the change once: a short Community post and one mention in a video are enough. Say the old name, the new name, and the new handle, so viewers who search the old name still understand. Keep the old handle in the About text for a while, so old mentions still make sense. Give viewers time to learn the new name before you judge the change. Studio path: YouTube Studio > Customization > Profile > PUBLISH. Update the banner, About text, and links afterwards, from the same Customization area. Example: A creator posts: “Maya Cooks Daily is now Maya Cooks, @maya.cooks.” Viewers who search the old name still find her. Common mistake: Renaming the channel and saying nothing. Viewers think the channel vanished, and old mentions lead nowhere.Illustrative diagram/mock-up — NOT a real YouTube Studio screenshot: the rename rollout checklist for banner, About, and links. ChecklistName, handle, and old custom URL told apart. Change made under Customization > Profile, saved with PUBLISH. Handle checked: length, characters, and availability in Studio. Name easy to say, spell, and search. Same name checked on other platforms. Variation readable, not copied from a known creator. Banner, About, and links updated; change announced once.Frequently Asked Questions Can I change my handle more than once? Yes, but only twice within a 14-day period. Use each change carefully, and check the handle in Studio before you publish it. Why did my verification badge disappear after a rename? Changing your channel name removes the verification badge. Check the current rules before you rename, and do not rename for a small reason. What characters can a handle use? Letters, numbers, underscores, hyphens, periods, and Latin middle dots, 3 to 30 characters. Handles are not case-sensitive, and cannot look like a web address or a phone number. Is there a waitlist for a taken handle? No. A taken handle cannot be reserved or requested. Use a readable variation, keep creating, and check again later. Do old custom URLs still work after a rename? Legacy personalized URLs can keep working, but viewers need the new name and handle to find you reliably. Update your banner, About text, and links, and announce the change once. Change once, in the right place, and tell viewers where to find you. Sources — Check It Yourself Official pages opened and verified live on 29 October 2026. Check the current wording before acting. No official YouTube video is embedded here. No exact official video URL was verified live in this run.How to Choose a Good YouTube Channel Name — CreatorPlaybook Manage your YouTube channel's profile — YouTube Help Change, view, or hide your handle — YouTube Help
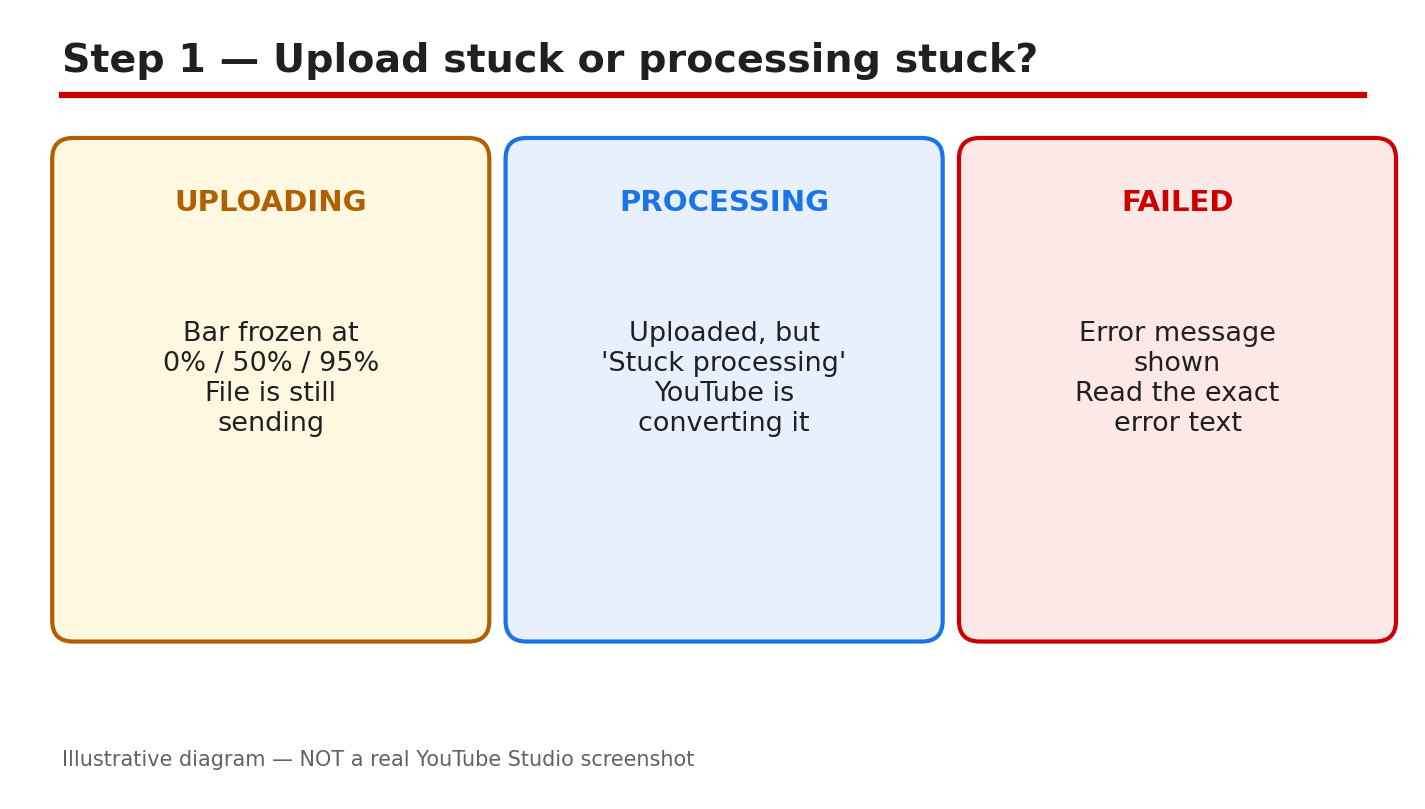
- CreatorPlaybook Team
- 29 Oct, 2026
YouTube Video Stuck Uploading or Processing? How to Fix It Without Losing the Video
A stuck upload feels urgent. The bar stops moving, the video will not play, and the work you edited seems lost. Most stuck uploads are not lost. They are paused, converting, or waiting for a check. This guide helps you tell those states apart, check the right place in Studio, and fix the problem without deleting the file you need. If the bar moves slowly, that is still progress. If nothing changes for a long time, the status row, not the bar alone, tells you what to do next. You will work in order. First, name the state. Next, check the status in Studio. Then fix the connection or the file. After that, check processing limits and claims. Only re-upload when the guide says it is safe. Keep the original file and the draft until the replacement is live and playing. Related reading: YouTube Upload Stuck, Comments Disabled, or Wrong Made for Kids Label? Fix All Three, which explains the Studio layout used below. What You Will LearnHow uploading, processing, and a failed upload differ. Where to check the true status in Studio. How to fix a stalled upload safely. Which file and processing checks matter most. When re-uploading helps, and when it harms. A calm upload-day plan you can repeat.Step 1: Tell Uploading, Processing, and Failed Apart What to do: Uploading means the file is still moving from your computer to YouTube. The progress bar may stop, but the transfer has not finished. Processing means the upload finished and YouTube is converting the file into versions viewers can play. Failed means YouTube stopped and showed an error. Each state needs a different fix, so do not treat every stuck video the same way. Studio path: YouTube Studio > Content. Read the video row first. Do not open the upload window again until you know the state. Example: A creator sees 95 percent for an hour and fears the video is lost. The row says Processing, so the file arrived safely and is converting. Common mistake: Deleting the draft because the bar looks frozen. Deleting removes your place in the queue and can lose details you already entered.Illustrative diagram/mock-up — NOT a real YouTube Studio screenshot: uploading, processing, and failed states compared. Step 2: Check the Status First in Studio What to do: Check status before you change anything. In Studio, the Content page shows each video with a status. Uploading and processing look similar on a phone, but they are different problems. An uploading video still needs your connection and browser. A processing video needs time, not another upload. Write down what the row says, including any restriction or error words, before you act. Studio path: YouTube Studio > Content > video row. Look at Status, Visibility, and Restrictions together. Example: A creator opens Content and sees Processing, not Uploading. They leave the tab open, wait, and the HD version appears later. Common mistake: Starting a second upload while the first is processing. Duplicates compete, confuse viewers, and waste your connection.Illustrative diagram/mock-up — NOT a real YouTube Studio screenshot: checking the video status row. Step 3: Fix a Stalled Upload Safely What to do: Fix the connection and the browser first. Use a stable connection, preferably wired or strong Wi-Fi, and avoid large downloads during the upload. Keep the browser tab open and the computer awake. For a retry, export at 1080p, which is smaller and easier to send than 4K. Do not close the tab, sleep the computer, or switch networks mid-upload. Studio path: YouTube Studio > Create > Upload videos. Watch the progress bar and the processing estimate in the upload window. Example: A creator uploads over weak hotel Wi-Fi and stalls at 60 percent. At home, on a stable connection, the same 1080p file finishes. Common mistake: Closing the tab to check the channel page. Closing can interrupt the transfer, so wait until the upload window confirms completion.Illustrative diagram/mock-up — NOT a real YouTube Studio screenshot: stable connection, 1080p retry, and awake tab. Step 4: Check Processing, File Format, and Limits What to do: Check the file before you blame the connection. YouTube recommends MP4 with H.264 video and AAC audio. Check the length and size against the reported limits: under 12 hours and 256 GB, whichever is less, as reported on the official Help page. HD and 4K versions take extra time, even after the standard version plays. A claim can also hold processing, so check Restrictions in Studio and read the claim before re-uploading. Check the file name and the export settings too. A damaged export can fail the same way twice, so export again from the original project if the file will not play. Studio path: YouTube Studio > Content > video > Details > Checks. Read the claim and restriction notes there. Example: A creator uploads a 4K file and sees only standard quality at first. The HD version appears later, without a second upload. Common mistake: Re-exporting at a higher resolution to speed processing. A larger file usually takes longer, not shorter.Illustrative diagram/mock-up — NOT a real YouTube Studio screenshot: MP4, H.264, AAC, size, and HD checks. Step 5: When to Re-Upload, and When to Wait What to do: Wait before you re-upload. For processing, wait up to 24 hours as reported, and check the status again in Studio. Re-upload only if the upload failed, Studio showed an error, or the file is corrupt and will not play. Keep the original file and the draft until the new version is live. Do not delete the first version until you have watched the replacement play. Studio path: YouTube Studio > Content. Confirm the failed or corrupt status, then use Create > Upload videos for the retry. Example: A creator waits overnight for processing, then finds the video live. No duplicate was needed, and the original details stayed intact. Common mistake: Deleting the draft and the original file after a failed upload. Without the original, a clean retry is much harder.Illustrative diagram/mock-up — NOT a real YouTube Studio screenshot: wait, check, then re-upload only if failed. Step 6: Follow a Simple Upload-Day Plan What to do: Use one plan on upload day. Export the file, check the format, and test the connection before you start. Upload early, keep the tab open, and note the time you started. Check status once after upload, once after processing, and once before you share the link. If a step fails, fix one thing, note it, and try again calmly. Studio path: YouTube Studio > Content for checks, and Create > Upload videos for the upload itself. Example: A creator uploads at 9 a.m., checks at noon, and shares at 6 p.m. after the HD version appears. The calm plan avoids duplicates. Common mistake: Sharing the link before checking playback. A shared link to a processing video frustrates viewers and earns no watch time.Illustrative diagram/mock-up — NOT a real YouTube Studio screenshot: export, upload, check, then share. ChecklistState named: uploading, processing, or failed. Status checked in Studio Content. Connection stable, tab open, computer awake. File checked: MP4, H.264, AAC, size, length. Claims and restrictions checked in Studio. Re-upload only after failure or corruption. Original file and draft kept until live.Frequently Asked Questions Why is my upload stuck at a percentage? Usually the connection dropped, or the file is still moving. Check the connection, keep the tab open, and check the status in Studio Content before retrying. How long should processing take? It varies by length, resolution, and format. Standard quality often appears first, while HD takes longer. Wait up to 24 hours as reported, then check Studio again. Should I delete and re-upload a stuck video? Not yet. Check the status first. Re-upload only if the upload failed or the file is corrupt, and keep the original file and draft until the new version plays. What file format works best for uploads? Use MP4 with H.264 video and AAC audio, as recommended in Help. Export at 1080p for a retry, and check the official Help page for current limits before uploading. Can a claim hold up processing? A claim can affect a video, so check Restrictions and Checks in Studio. Read the claim, follow the steps shown there, and do not re-upload the same file to avoid it. Fix one state at a time, and let processing finish before you judge the result. Sources — Check It Yourself Official pages opened and verified live on 29 October 2026. Check the current wording before acting, because limits and wording can change.Upload YouTube videos — YouTube Help Upload videos longer than 15 minutes — YouTube HelpNo official YouTube video is embedded here. No exact official video URL was verified live in this run.
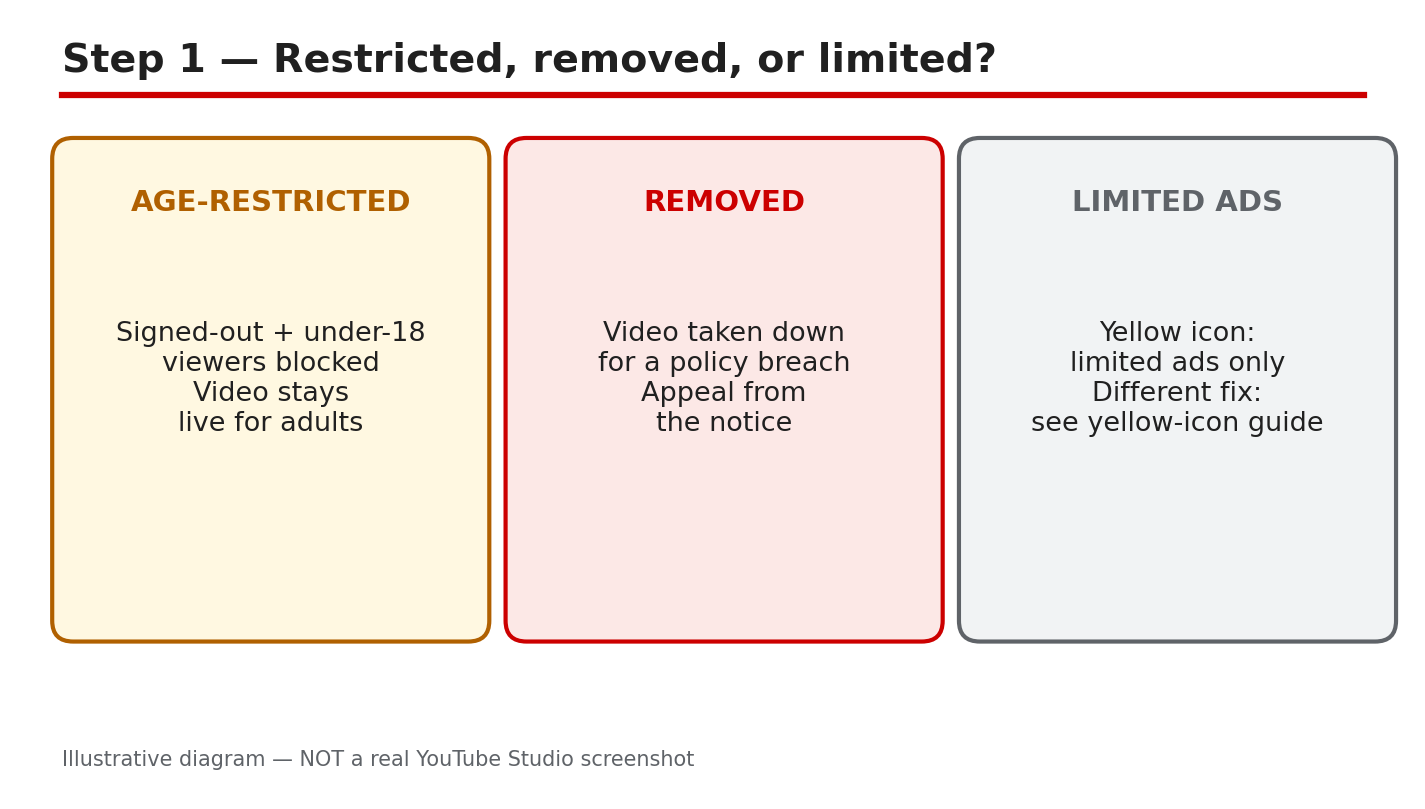
- CreatorPlaybook Team
- 29 Oct, 2026
YouTube Video Age-Restricted or Removed? How to Appeal and Fix It
A notice on one video can change how the whole channel feels. The video is still there for some viewers, or it is gone, and the message in Studio is short. This guide slows that moment down. You will learn how to tell an age restriction, a removal, and a limited-ads rating apart, read the exact notice YouTube sent, and choose the right next step: edit, appeal, or accept the rating and plan better videos. For a different money problem, read YouTube Yellow Dollar Icon? How to Fix Limited Ads and Request a Review first. It explains the yellow dollar icon and how to request a review. This post covers only age restrictions and removals, and it never advises re-uploading the same video as a new upload to get around a decision. What You Will LearnAge-restricted, removed, and limited ads: what each label means. Where to read the reason and the policy named in Studio. The guideline categories that commonly trigger an age gate. What to check and fix before you appeal. When to edit, when to appeal, and when to accept a rating. A seven-day plan to fix the video and the next ones.Step 1: Tell Age-Restricted, Removed, and Limited Ads Apart What to do: Do not act on the first feeling the notice gives you. An age-restricted video is still live, but signed-out viewers and viewers under 18 cannot watch it. A removed video is taken down and cannot be watched at all. Limited ads is different: the video stays up, but ads are limited. Studio path: YouTube Studio > Content > Restrictions. Read the label on the video before you guess the reason. Example: A travel video is age-restricted, so adults can watch it but signed-out viewers cannot. A second video is removed for a policy breach, so nobody can watch it. The fix for each one is different. Common mistake: Treating a limited-ads rating as a removal, or appealing an age restriction as if the video had been removed. Match the response to the label.Illustrative diagram/mock-up, NOT a real YouTube Studio screenshot: age-restricted, removed, and limited-ads compared. Step 2: Read the Notice First, Before You Guess What to do: Open the notice and read it slowly. Note the video, the reason given, and the policy named. Look for the option Studio shows: appeal, edit, or accept. Do not guess the reason from comments or from what happened to another channel. Your notice is the only record that matters for this video. Studio path: YouTube Studio > Content > Restrictions > click the restriction. Read the reason, the policy named, and the appeal or edit option shown. Example: Studio says a video is age-restricted for violent or graphic content. The creator watches the flagged section, sees a close injury shot, and knows exactly what to blur before deciding anything else. Common mistake: Skipping the notice and rewriting the title instead. A new title does not change the flagged content, and it wastes the one appeal you may get.Illustrative diagram/mock-up, NOT a real YouTube Studio screenshot: reading the restriction notice first. Step 3: Know the Common Age-Gate Triggers What to do: Check your video against the guideline categories YouTube Help lists for age-restricted content. They include child safety, harmful or dangerous activities including drug use, nudity and sexually suggestive content, violent or graphic content, and vulgar language. These are categories, not a checklist that guarantees a rating: context, purpose, and how closely the content is shown all matter. Use them to find the likely trigger in your video, then confirm it in your own notice. Studio path: YouTube Studio > Content > Restrictions > click the restriction. Compare the policy named there with the category you found. Example: A documentary shows a close injury during a rescue. The context is news and education, but the close shot still triggers a restriction. Blurring the closest seconds keeps the story and lowers the risk. Common mistake: Saying the content is educational and stopping there. Purpose helps, but it does not remove a close graphic shot. Fix the shot, or explain the context clearly in an appeal.Illustrative diagram/mock-up, NOT a real YouTube Studio screenshot: common age-gate triggers. Step 4: Before You Appeal, Watch and Fix What to do: Watch the exact flagged part, not the whole video from memory. Pause at the seconds Studio names, if it names them, and decide whether the fix is obvious: blur, cut, or mute. Check the title and thumbnail too: they must describe the video honestly and must not promise something the video does not show. Note what you changed, and keep the evidence ready. Studio path: YouTube Studio > Content > click the video > Editor. Trim or blur the flagged part on the same video, and save before you appeal. Example: A creator blurs a three-second injury shot, keeps the rescue story, and checks that the thumbnail no longer shows the injury. The appeal, if needed, can then point to the exact edit. Common mistake: Appealing first and editing later. If the content is clearly the problem, an appeal without a fix asks a reviewer to approve the same flagged content.Illustrative diagram/mock-up, NOT a real YouTube Studio screenshot: checks before you appeal. Step 5: Decide: Edit, Appeal, or Accept What to do: Choose one path and follow it cleanly. Edit in the Studio Editor on the same video when the fix is clear. Appeal only when you believe the decision is wrong for this video, with one clear, factual appeal. Accept a fair rating when the flagged content is really there: plan the next videos differently. Never re-upload the same video as a new upload to avoid a restriction or removal. Studio path: YouTube Studio > Content > Restrictions > click the restriction > appeal or edit, as shown. Use the option Studio shows for your case. Example: A creator edits a graphic shot, then appeals with the edit noted, because the restriction named a policy the edited video no longer breaks. Another creator accepts a fair rating and changes how the next video is filmed. Common mistake: Sending several appeals, or re-uploading the video with a new title. Repeated appeals do not add evidence, and a re-upload can create a second problem for the same content.Illustrative diagram/mock-up, NOT a real YouTube Studio screenshot: edit or appeal decision. Step 6: A Seven-Day Fix Plan What to do: Day one: read the notice and watch the flagged part. Day two: edit or blur the same video, and fix the title and thumbnail. Day three: send one clear appeal, only if the decision is wrong for this video. Days four and five: check email and Studio for the result. Days six and seven: review your other videos for the same trigger, and write a short rule for future videos. Studio path: YouTube Studio > Content > Restrictions to track the result, and Content to review similar videos one by one. Example: A creator fixes one video on day two, checks Studio on day four, and spends day six removing the same close shot from two older videos. Common mistake: Fixing one video and filming the next one the same way. The plan only works if the rule changes how you film, edit, and title videos.Illustrative diagram/mock-up, NOT a real YouTube Studio screenshot: seven-day fix plan. Checklist: Fix It in OrderLabel named: age-restricted, removed, or limited ads. Reason and policy copied from the Studio notice. Flagged part watched, and the exact seconds noted. Edit made on the same video, where the fix was clear. Title and thumbnail checked for honest description. One clear appeal sent, only if the decision was wrong. Same video not re-uploaded as a new upload.Frequently Asked Questions Can I appeal an age restriction more than once? YouTube Help says you can only appeal the age restriction on a video one time, so make the first appeal complete and factual. How long does an age-restriction appeal take? YouTube does not promise a fixed time in the pages checked for this post. Check email and Studio, and do not send repeated appeals while you wait. Should I delete the video and upload it again? No. Do not re-upload the same video as a new upload to avoid a restriction or removal. Edit the same video, appeal if the decision is wrong, or accept a fair rating. What if the video is educational or news? Context and purpose matter, but they do not always remove a restriction for close graphic or sexual content. Fix the closest shots, or explain the context clearly in one appeal. Will an age restriction hurt my whole channel? An age restriction limits who can watch that video. It is not the same as a removal or a strike, but repeated restrictions are a sign to change how you film and edit. Sources: Check It Yourself Official pages opened and verified live on 29 October 2026. Check the current wording before acting, because Studio options and Help wording can change.Age-restricted content (YouTube Help) Appeal the age restriction on your video (YouTube Help)No official YouTube video is embedded here. No exact official video URL was verified live in this run.
- CreatorPlaybook Team
- 29 Oct, 2026
YouTube Upload Stuck, Comments Disabled, or Wrong Made for Kids Label? Fix All Three
Three YouTube problems look alike at first: a video that never finishes uploading, comments that vanish, and a Made for Kids label that seems wrong. Each has a different cause and a different fix. Most are settings, not bugs, and most can be fixed in one sitting. This guide helps you name the problem, find the setting, and fix it without deleting work you need. Related reading: How to Read and Use the YouTube Studio App. That guide explains the Studio layout used below, so open it if a menu name looks unfamiliar. Below, each step gives what to do, the exact Studio path, a short example, and a common mistake. Work in order, and check only the section that matches your problem if you are short on time. What You Will LearnWhich of the three problems you have. Where each setting lives in Studio. How to unstick an upload safely. How to restore missing comments. How to fix a wrong Made for Kids label. A 24-hour plan to check everything.Step 1: Name the Exact Problem First What to do: Name the problem in one sentence first. An upload problem shows as processing that never finishes. A comments problem shows as comments missing or held where you cannot see them. A Made for Kids problem shows as a label on a video that is not made for children, with comments turned off. Studio path: YouTube Studio > Content. Look at the video row first: check its visibility, its restrictions, and whether comments are shown. The row tells you which of the three problems you are dealing with. Example: A creator sees an upload stuck at 95 percent and assumes comments are broken too. The row shows the upload is still processing, so comments are not the problem yet. Common mistake: Fixing all three problems at once. Changing the label, the comments setting, and the file in the same hour makes it impossible to know which change helped.Illustrative diagram/mock-up — NOT a real YouTube Studio screenshot: which problem is it. Step 2: Find the Setting in Studio What to do: Open the video and go to its Details page. Two controls cause most of these problems: the Audience setting and the comments visibility setting. Both live on the same Details page. Check them in a computer browser, because every option is visible there. Studio path: YouTube Studio > Content > click the video > Details. Scroll to Audience for the Made for Kids label, and find Show more, then Comments, for comment visibility. Note what each setting says before you change it. Example: A creator opens Details and finds Audience set to Yes, it is made for kids, on a video about fixing a bike. That one setting explains why comments are off. Common mistake: Hunting for one fix-all switch in Studio. There is none. Audience, comments, and upload state are separate controls, so check each in turn.Illustrative diagram/mock-up — NOT a real YouTube Studio screenshot: find the setting. Step 3: Fix a Stuck Upload What to do: Check the connection and the file, not the video page. A weak or dropping connection is the most common cause of a stuck upload. Use an H.264 MP4 file, within the size limits on the official upload page. Keep the upload tab open and the computer awake while it processes. Do not delete the stuck upload until you have checked the file and the connection. Studio path: YouTube Studio > Content > Create > Upload videos. During upload, watch the progress bar and the processing notice. After upload, check Content for the video row and its processing state before you edit titles or settings. Example: A creator uploads a video over hotel Wi-Fi, and it stalls at 60 percent. At home, on a stable connection, the same file uploads in twenty minutes. The file was fine; the connection was the problem. Common mistake: Uploading the same file again while the first copy is still processing. Duplicates compete for the same connection and can leave two half-finished copies. Retry once from a stable network instead.Illustrative diagram/mock-up — NOT a real YouTube Studio screenshot: upload stuck checks. Step 4: Fix Comments That Are Disabled or Missing What to do: Check the comments setting first, then the held queue. Set comments to Allow all comments if you want every comment to show. Held comments are not deleted; they wait in Held for review until you approve or remove them. Also check the blocked-words list, because one blocked word can hold a comment. Studio path: YouTube Studio > Content > video > Details > Show more > Comments. For held comments, go to Studio > Content > Comments > Held for review. Approve, hide, or delete from there, and keep a note of what you changed. Example: A creator sees no comments on a new video and assumes viewers stayed silent. The Details page shows comments set to Disable comments from an earlier edit. Switching it back brings the missing comments into view at once. Common mistake: Assuming held comments are lost forever. They sit in the Held for review queue until you act. Deleting the video destroys its watch time for a problem that one approval would have solved.Illustrative diagram/mock-up — NOT a real YouTube Studio screenshot: comments checks. Step 5: Fix a Wrong Made for Kids Label What to do: Change the Audience setting only if the label is wrong. If the video is made for children, keep the label, because comments stay off by design. If the video is for a general audience, set Audience to No, it is not made for kids. If Studio applied the label automatically and it is wrong, use the appeal route in Studio. Studio path: YouTube Studio > Content > video > Details > Audience. Choose Yes or No for made for kids, save, and check that comments follow the label. For an automatic label you disagree with, follow the appeal steps shown in Studio. Example: A creator posts a woodworking tutorial, and Studio labels it made for kids because the thumbnail shows bright colours. Setting Audience to No restores comments, and the video keeps its views. Common mistake: Setting every video to Not made for kids to keep comments on. A video truly made for children must carry the label, and mislabelling it can bring a policy problem. Label by the real audience.Illustrative diagram/mock-up — NOT a real YouTube Studio screenshot: Made for Kids fix. Step 6: Follow the 24-Hour Fix Plan What to do: Work the plan in order, and give each fix time to take effect. Hour one: name the problem and check the Details page. Hours two to six: fix the upload, comments, or label, and note the change. By the next day: re-check the video row, the comments, and the label. Studio path: YouTube Studio > Content for the daily re-check, Details for the Audience and comments settings, and Comments > Held for review for approvals. Use the same three places each time, so the check takes minutes, not hours. Example: A creator fixes the Audience label at noon, but comments are still off at 1 p.m. By the next morning, after a check in Studio, comments are back. The fix had worked; the display needed time. Common mistake: Repeating the same fix every hour. Changing the setting, saving, changing it back, and saving again can leave the video worse off than one careful change. Make the change once, note it, and check again the next day.Illustrative diagram/mock-up — NOT a real YouTube Studio screenshot: 24-hour fix plan. ChecklistProblem named in one sentence. Details page checked: Audience and comments. Connection and file checked before retrying. Held comments reviewed, not assumed lost. Audience label matches the real audience. One change made and noted. Re-checked the next day in Studio.Frequently Asked Questions Why is my upload stuck at a percentage? Usually the connection dropped, or the file is still processing. Check the connection, keep the tab open, and give processing time before retrying. Do not delete the upload. Why did my comments disappear? Check the comments setting in Details, the Held for review queue, and the Made for Kids label. One of the three usually explains it, and held comments are not deleted. Can I keep comments on a video made for kids? No. Comments stay off by design on videos labelled made for kids. Do not mislabel the video to turn comments on; label it by its real audience. Should I delete and re-upload a stuck video? No. Check the connection and the file format, and retry once from a stable network. Deleting loses the processing already done and can leave duplicates. How do I appeal a wrong Made for Kids label? Use the appeal steps shown in Studio for that video, and give the reason the label is wrong. Keep the label while the appeal is pending, and check Studio for the outcome. Sources — Check It Yourself Official pages opened and verified live on 29 October 2026. Check current wording before acting.Upload YouTube videos — YouTube Help Set your channel or video's audience — YouTube Help Learn about comment settings — YouTube Help (verified live, not linked). Determining if your content is 'made for kids' — YouTube Help (verified live, not linked).No official YouTube video is embedded here. No exact official video URL was verified live.